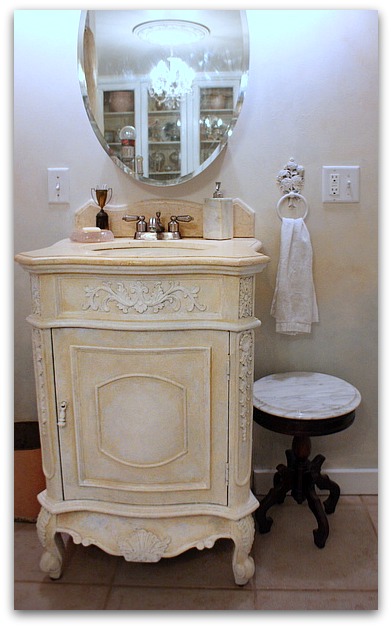
This vanity started out dark, and is a new piece from Lowes. I bought it about 6 years ago for only $368 and it came with the marble top, sink, and the faucet already installed.
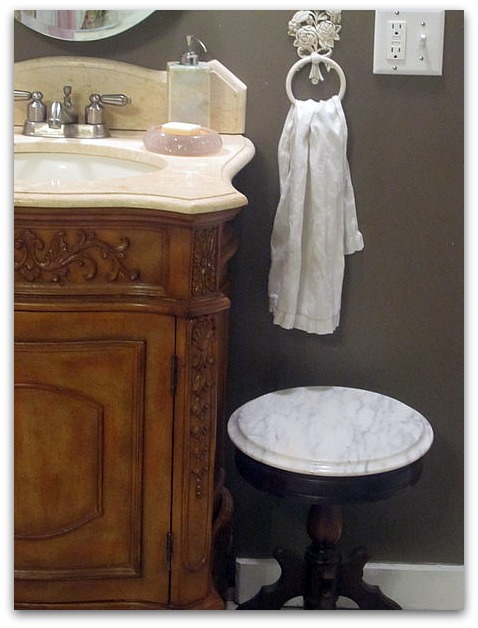
This is how it began. But the time came to lighten up, and this is how I did it:
I DO NOT SAND. I never do, and I've painted my little heart out for years.
The key is the primer. The label of the can must say "BONDING" or "WILL ADHERE TO GLOSSY SURFACES" Never, ever use dry wall primer. Its not the same thing at all, and your paint will just scratch off.
The last few years, I've been very happy with Glidden's Gripper. In this case, I bought the gray tinted Gripper primer.
You can see, I don't put it on perfectly. Notice the little skips here and there in the gray where the dark wood peeks out? Not big ones, just little misses.
The key to being a good faux finisher is to be a bad painter. Yep, you gotta be a little messy and non-perfectionistic.
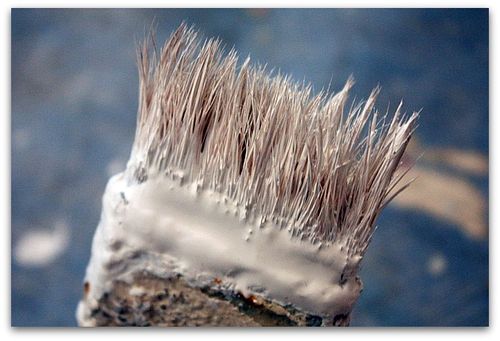
And to use a crappy brush. You can't get much worse than this. I love these little cheapo, 99 cent brushes from Walmart. They give the paint job character with their uneven bristles.
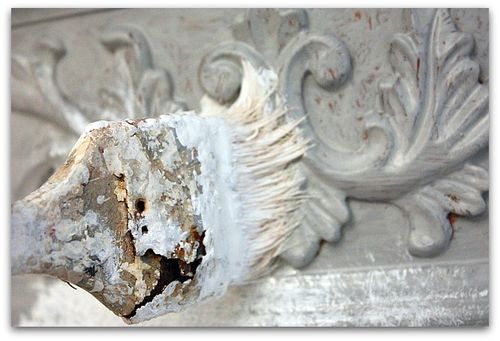
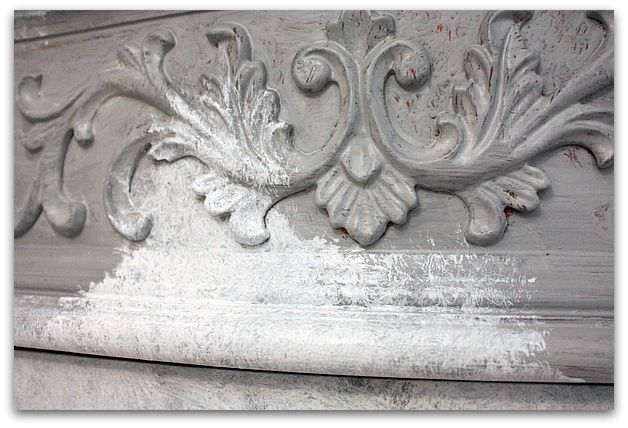
After the primer dries, I pounce the paint (I used Behr glossy white) on with the old brush.
Its a constant dab, dab, dabbing with the brush. First you dip the brush in paint, then dab it off onto a rag, then pounce it onto the piece, over and over and over.
I tell ya, its a lot easier to do a small piece of furniture or a lamp this way than to do a whole wall. If you are doing something big, try a larger brush and take some advil.

This is the look you want. With some of the gray primer peeking through, as well as a bit of the underlying wood.
The paint goes on heavier in some spots than others, but please make sure you don't have blobs and repetitive patterns of brush marks.
To avoid that, turn your brush as you pounce. And go over the same areas more than once to blend as you dab.
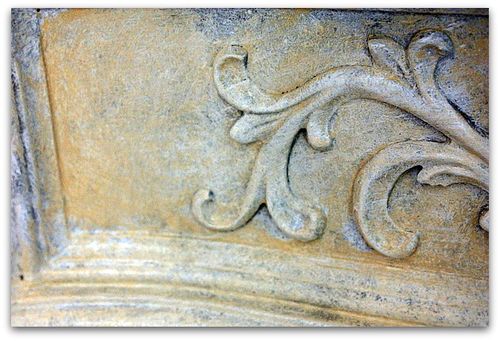 After the white dried, I did the same thing, with the same brush, using a coffee with heavy cream colored paint, mixed half and half with glaze to thin it down and make it more translucent as it dries.
With this step, I pounced the creamy color over the white, layering it heavier in corners, and slightly wiping it off on the high points of the embellishments and trim.
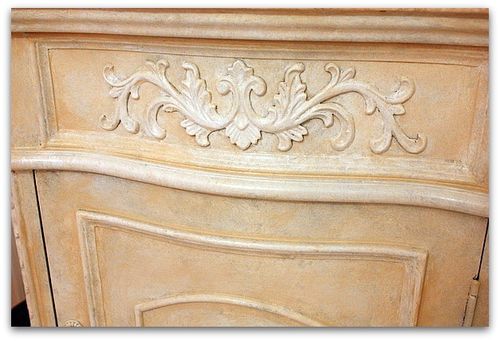
If needed, you can add a bit more of the white over the cream to soften it.
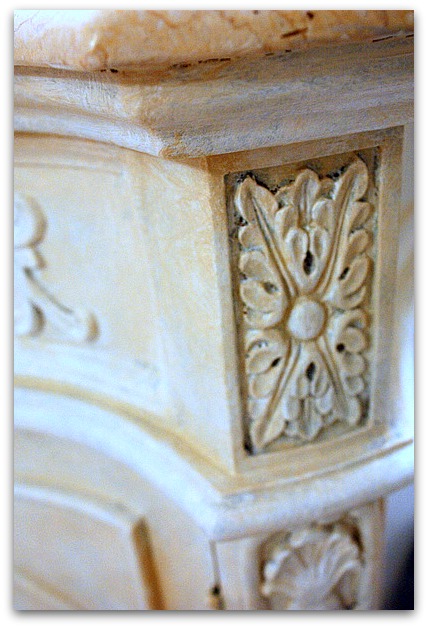 Since I used a good primer, and a high gloss paint, the finish is really durable and doesn't need a top coat.
Email me if you have any questions. I'm happy to help.
how’d ya know i was going to be painting out our antique dresser in our bedroom???!!! you are a psychic!!! it’s really dark wood..and i want to paint it a light aqua for our beachy bedroom…now i guess i have no excuse, eh? since i’ve learned from the master…lol…(soon to be older, master…lol) hugz
Thanks for sharing your painting technique. I’ll have to give it a try.
This looks so great! I have always hated sanding–love to know the name of the primer you use.
You’re the painting queen! I’m going to have to try this on some of my pieces (which are dark, which you would hate!) Thank you for sharing!
Absolutely beautiful:-)
Hugs, Biljana
What timing ~ I was just thinking of painting our bathroom mirror frame to look a bit grungy white but was afraid to try. Guess now I have no excuse not to!
Kathleen
I love that you shared your technique and I just love how your vanity turned out. Very pretty.
Danielle
Morning from Canada Karla…I enjoy your tutorials…they are so full of great hints…I never used to use the primer,sealer till i started reading your blogs,acouple of years ago…I do it faithfully now ,with super results…thanx again for your inspiration…Lorraine
Wow! This is great Karla, thanks so much, I just painted a little round table, white shabby chic, found your directions today, I always forget about the glaze, so will get some and put on the table, that should give it the finish I am looking for, Celeste, victoriantailor.blogspot.com
You’re a genious. I had kind of an idea b/c I’d already checked out your other tutorials. You are so kind to share your knowledge with us! On a related note, I was quite taken with those charming invites made by a Birdsong sponser that appeard on the eyeball entry in March–the first picture with a little bird. Is there a way for me to find out how she made those as well as the lovely little flowers? Do I have to attend Birdsong next year to find out? If so, I do hope you do a similar event… I hope you had a fabulous time with your fairygrandbabies this past weekend. I’m amazed that as busy as you are, you keep your priorities straight! –which is a good thing, because I have to say, I believe you are at your creative best whenever you get around them!
Hi Karla, Thank you so much for sharing. This is so beautiful. I love how you don’t need a sealer. It is just beautiful. Have a wonderful week. Hugs, Terri
Dear Karla, it looks so easy, looking what you have been doing— but I`m sure ,there are more to it than a dabbing 🙂 you are a master painter-
and your bathroom , looks FANTASTIC–the curtain is a dream- and the room so beautifull now.
And I love the two little fellows, they are just so sweet and cute, Karla–sitting there ,looking as they own the whole big room- 🙂
Hugs and happy evening.
Dorthe
and it looks fabulous. Totally love it. It was gorgeous before, but now it’s perfect.
x
Now that is something I could do! Thanks!
I’ve been looking for directions on painting, I’ve got several pieces to do. Thank you
Karla, did you use a different technique for your doors?
I love how you did the bathroom cabinet. I have a mirror that I bought that would look great done this way.
~elaine~
What an awesome effect! Thanks for the tutorial!
I love this chest/sink and the way you painted it.
You make it simple…and that I can do!!
Love the puppy party! Love your bathroom too. I have to confess, when I saw the vanity you were painting in the before picture, I though- Is she crazy? That’s gorgeous as is! But then I looked at what you did to it, and it’s even better now! Miss you! Someday I’ll have to make it out that direction with Matthew (when he’s older) and come say hi and have a craft day!
hi, I’m from England. I am going to repaint a garden table (I painted last year but didn’t work so good!) and an old desk. And I hate sanding! We don’t have Gripper Paint here so will try Unibond – think it’s ok! If I used a high gloss paint after the Unibond, do think this is ok outside for the garden table? Love what you have done here…
Thank you!
Lesley
norfolkcrafts.blogspot.com
primroses007@yahoo.co.uk
The finishing effects looks very impressive. Your skills are totally great and I do envy you for having those skills. I’ll keeps visiting to see more of your works.
I had lots of wooden furniture and now it looks too old, when I saw your post, Now I know what to do.
Hi, this is absolutely beautiful. Will this non=sanding technique work on pressed wood?
Yes, its all about the finish itself that you are covering, not the wood or pressed wood underneath the finish
Sent from my iPad
Thank you for sharing this technique. I have a couple of pieces in my home that I can’t stand, because they’re so dark and gloomy – but now, I can do something about them! Yay 🙂
And, my living room furniture! Because I thought I was stuck with them for life, if I didn’t get down and sand every piece!!
Thanks so much! xoxo
This is just the greatest tutorial for furniture ever! I actually loved it first look, but after what you’ve done to it? I’m totally obsessed with it! I hope I can find a similar one for me to repaint…
Good morning! I am obsessed with your site and specifically your painting techniques! Thank you so much for sharing. I wanted to ask about a piece I have that I’d like to finish similar to this bathroom vanity that you have. I am not a very good interior decorator and am trying to re-do my bedroom in a shabby chic sort of theme. My walls are painted pink and I would like the antique looking furniture in there in addition to my lamps. I have a very old makeup vanity that is now a dark mahogany color. First, what would your suggestion be for colors such as the priming color, paint and then finally the glaze? Next, I see where you use the Glidden’s Gripper primer and Behr glossy white. I have never used a glaze so I have no idea where to even start with that. Any suggestions would be greatly appreciated!
Thanks again!
Terri
In follow-up to my previous post, I forgot to mention that the contrasting colors in my bedroom are mint green and antique white. I was wondering what using a green color somewhere on the vanity would look like? I really respect your thoughts!
Thanks again,
Terri
Hello,
I used Gripper, then a semi-gloss laytex enamel on two nightstands. I would like to put a protective finish on them – I see you used Minwax Polycrylic on some pieces. The fellow at Home Depot said if I wanted to put a protective finish on the pieces I should use an acrylic. What would you suggest please, and thank you for your help.
Ann
Karla- I am wanting to repaint a crib for life bed frame. I certainly do not want to sand if I don’t have to. Could I do this same thing with white bonding primer and then pink paint and let the white primer show through??
I hate to give advice about painting cribs, Kimberly. I think that you need to seal the paint in a special way for it to be considered safe.
Hi Karla,
I have a heavy dresser that I want to paint. But it is so heavy, moving it will be a real pain. Is there any trick you use to paint heavy pieces ?
Thanks
Sharmi
Of course, Sharmi. If you cant lift it to set it onto a drop cloth, Get some thick painters tape and tape around the legs so paint doesnt get on the floor. Slip the edges if the tape under the legs as much as you can to protect the floor and tape right to the flooring. Use plenty of tape. Then use whatever drop cloth will fit underneath to catch drops.
Karla Nathan
http://www.karlascottage.typepad.com
http://www.karlascottage.com
I want to paint my old maple wood dining room table and chairs a cream white. Do I use same process 1) primer paint that will BOND of will adhere to Glossy Surfaces example glidden gripper and then 2)paint to finish have to be high gloss finish or if satin how do you seal so paint will never come off when people sit.
Is this okay to do on chairs as well as table without stripping and sanding. Does this also apply to top of table too?
Thank you for all your help
Yep, that is how Id do it. And if Im worried about wear for a high usage area, like a tabletop, I use polycrylic by minwax. Its a water based clear coat that wont yellow.
Just found your site, fabulous. I am Very new to painting ? Is you used an oil base primer/sealer do you have to use oil paint or can you use latex?
Use a bonding primer than cleans up with water, like Glidden Gripper and it works great with latex over it, Keziah.