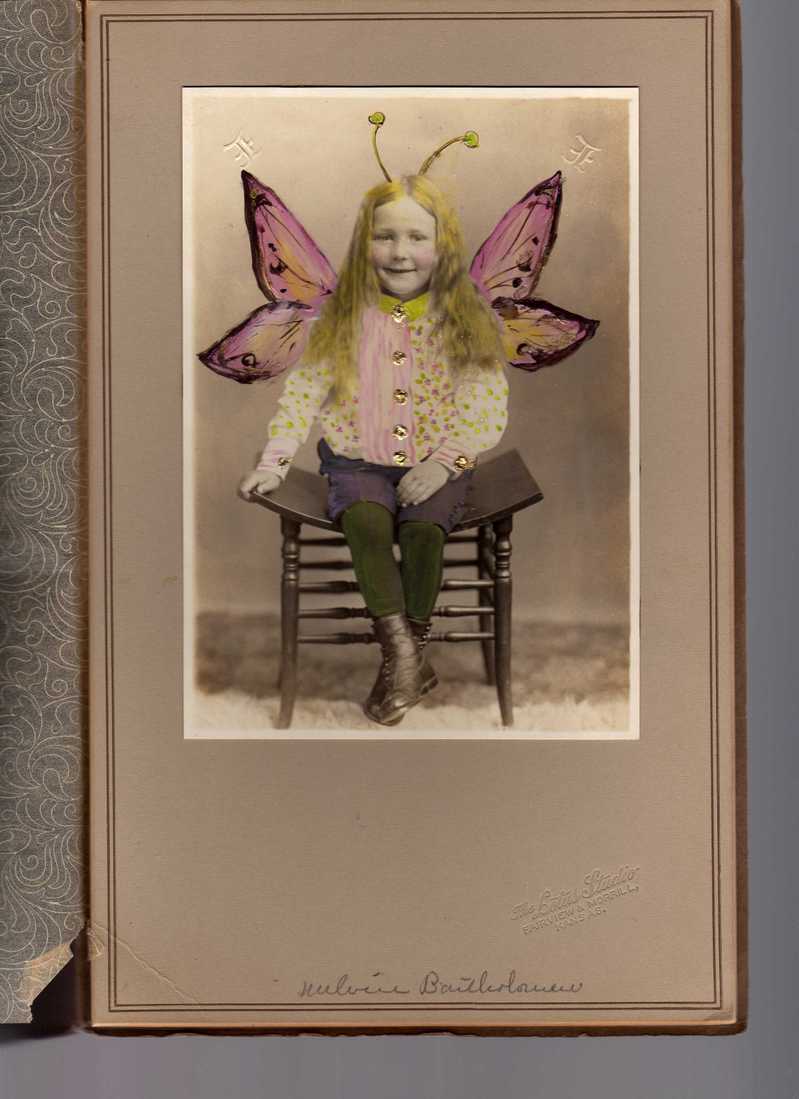
 On my junking day last week with friends, I found sepia photos for 50 cents each, so bought a dozen of the cutest for projects. This little girl was already as cute as she could be, but with that elfish smile, I thought she should be a fairy. I liked her so much, I painted all of the "new" old photos into fairies.
How To Hints: I used acrylic craft paint, glitter glue, gold pulver, chalk, and distress ink with artist paint brushes and cosmetic sponges
Ink and chalk are great for tinting in areas where you want to see through to the original picture, such as I did on the hair, stockings, and pants.
Craft paint is opaque, but doesn’t tend to want to stick. Build up layers slowly on the large painted areas like the wings. I used a cream color (never pure white, it is too much of a contrast against the sepia) and painted the wing shapes, then did about 4 coats of the cream letting it dry in between.
Once I had a base ready for the wings, I used pink and yellow to color them in and outlined them in brown/black together with a fine brush.
The flowered and stripe shirt and antennas were done without having to build up like the wings. I used acrylics again and just made dots and lines. No base coats were necessary since it was only simple strokes and was just gone over once.
Buttons are dots of glitter glue with gold pulver sprinkled on to the wet glue.
Karla it’s so so so cute!!! Thanks for the tips!
Great tips! I’ve been working with some original old photos like this ,that one of my moms friends gave me. She had no idea who the people in the photos were, so she gave them to me. I used to feel back about altering actual photos, but I have to think ,they would rather be enjoyed than just sitting on a shelf in and antique store! right?