cottage

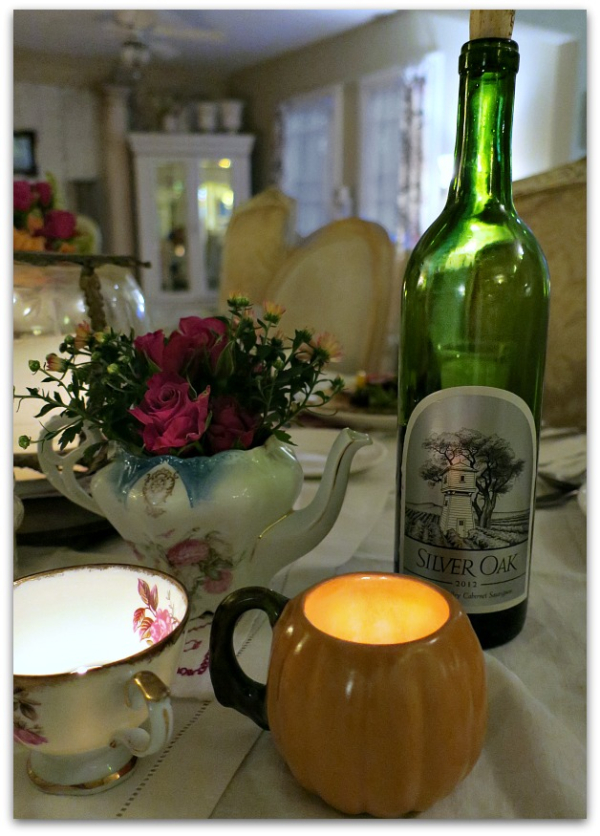
An Autumn dinner party and some views of the new room

celebrations, cottage, Hearth Room, Kitchen remodel

IMG_0608

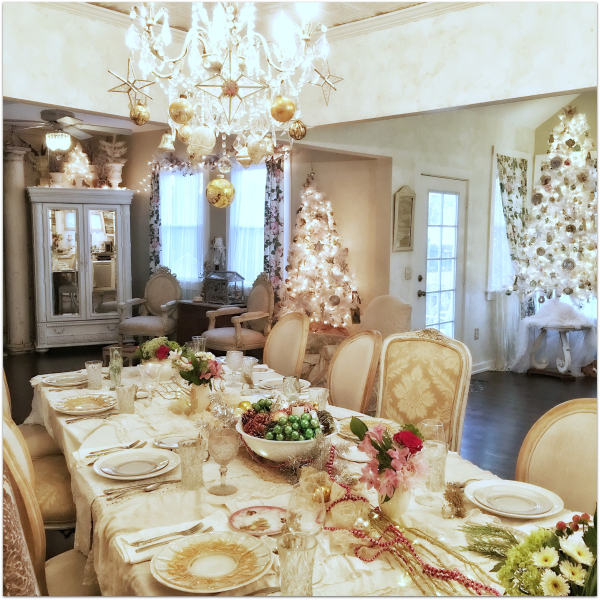
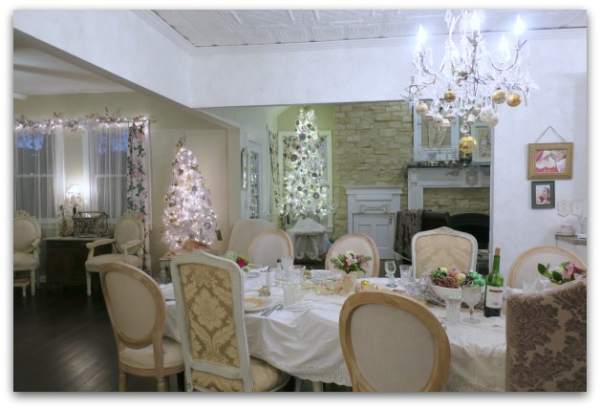
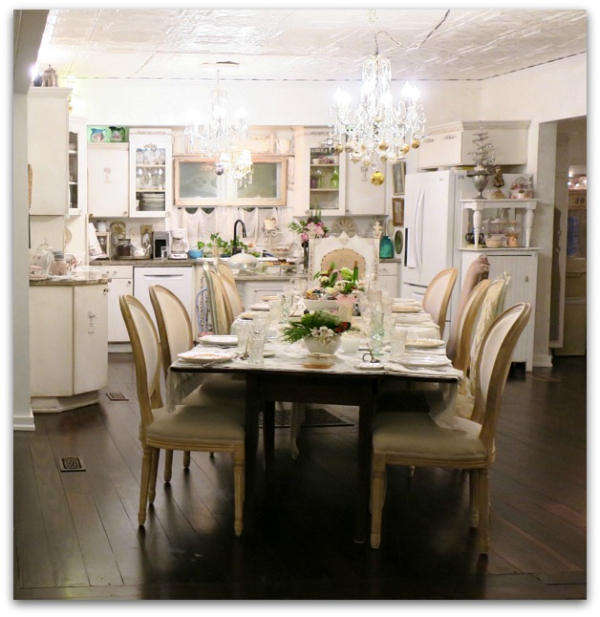
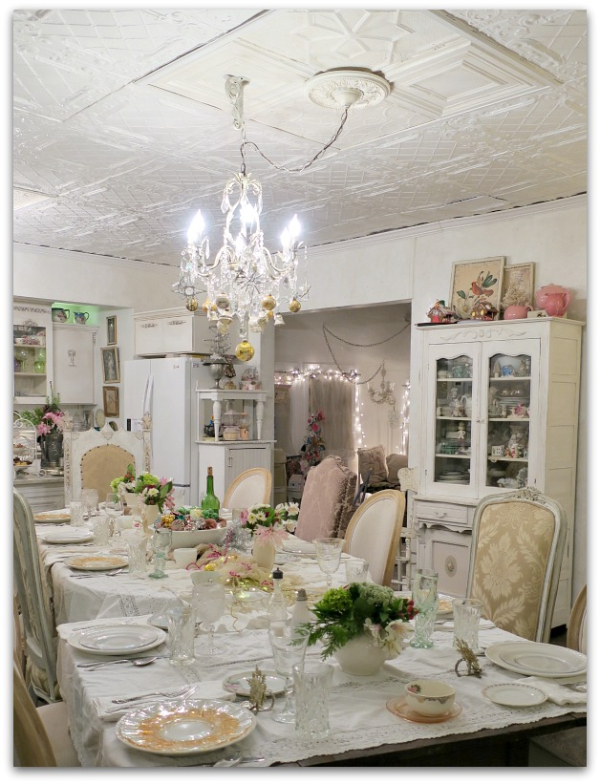
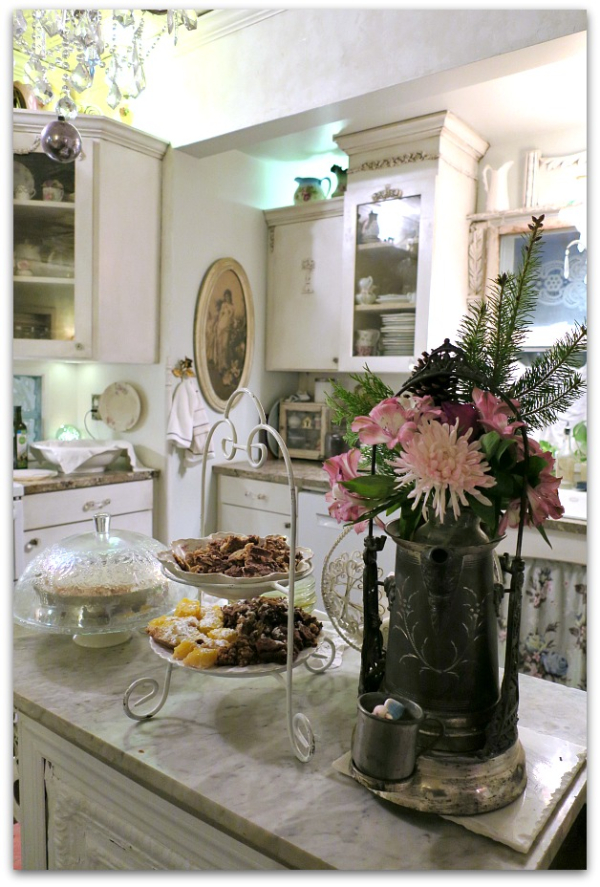
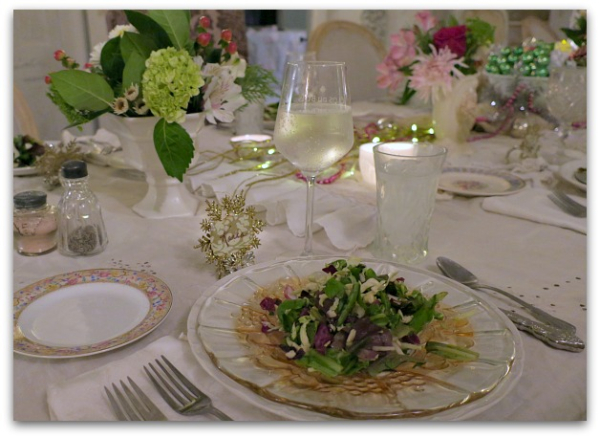
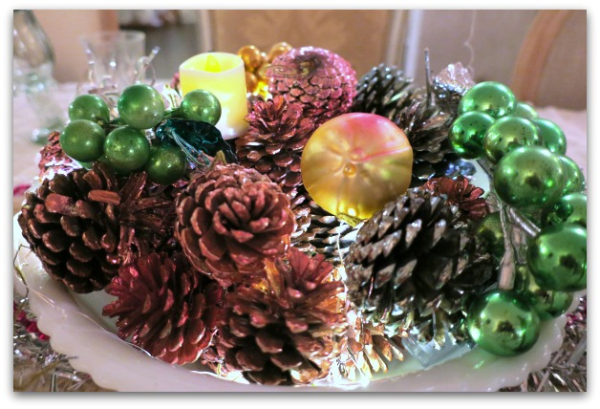
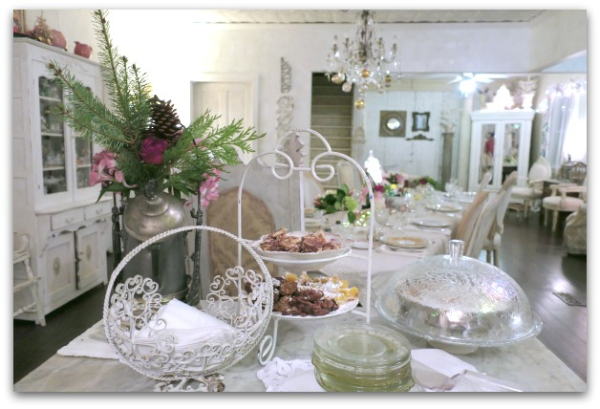
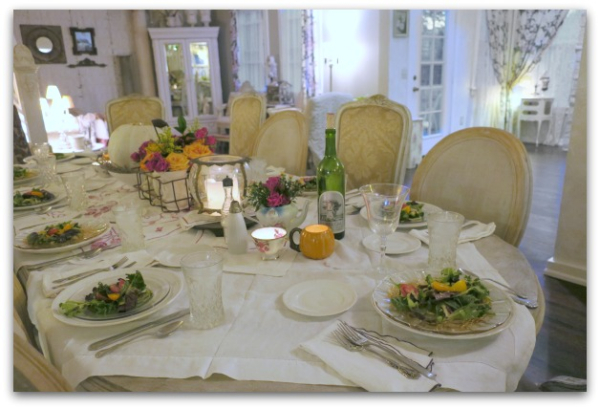
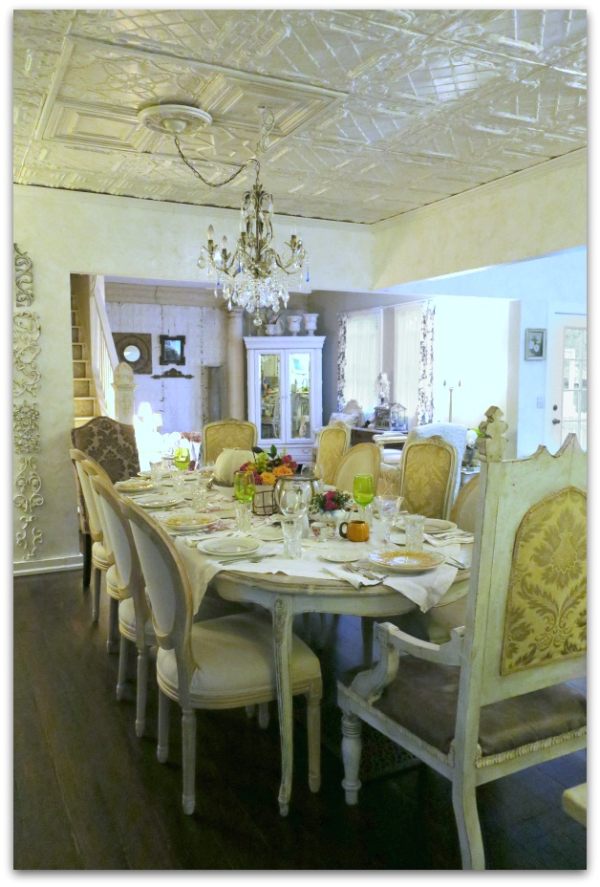
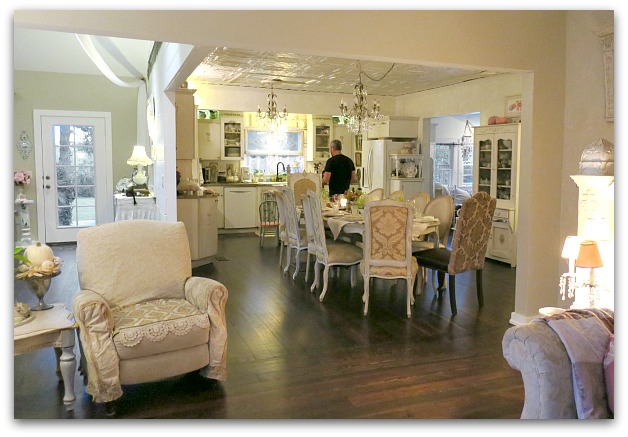
While I was setting the table for a dinner party my husband was throwing for co-worker friends, I thought I should get some pictures of our new space while the area was cleaned up. (You know how fleeting that window of time can be with a houseful of kiddos!).

IMG_0588

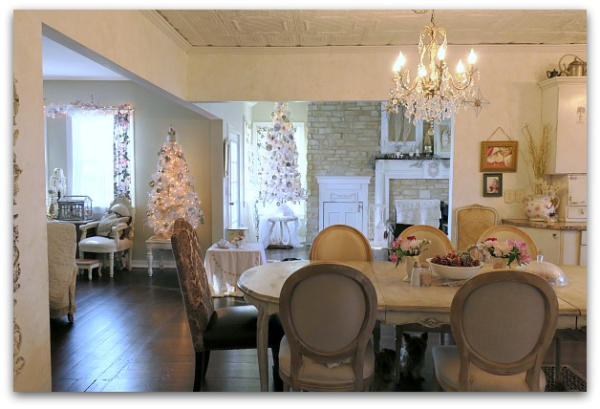
This is from the new room, looking into the kitchen.

IMG_0590

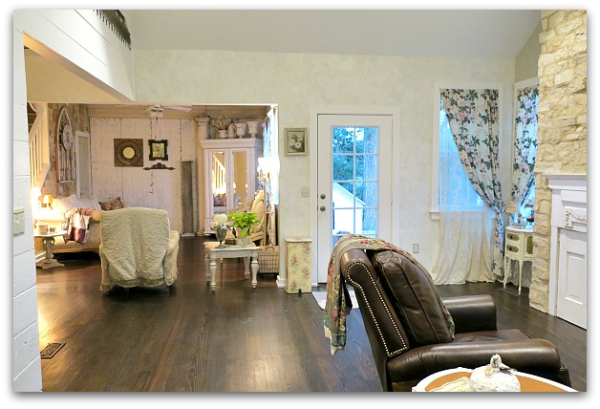
From the new front door in the hearth room looking through the space into the living room.

IMG_0595

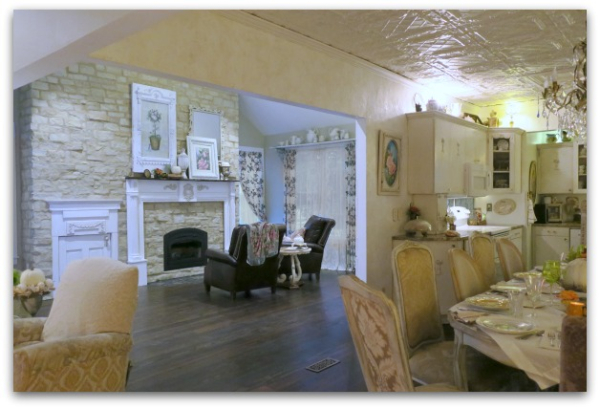
And from the kitchen into the living room.

IMG_0597

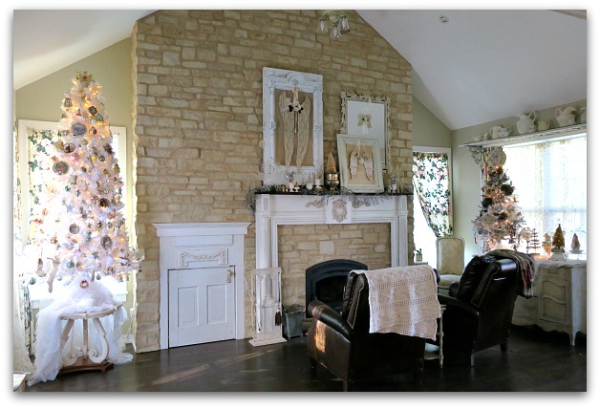
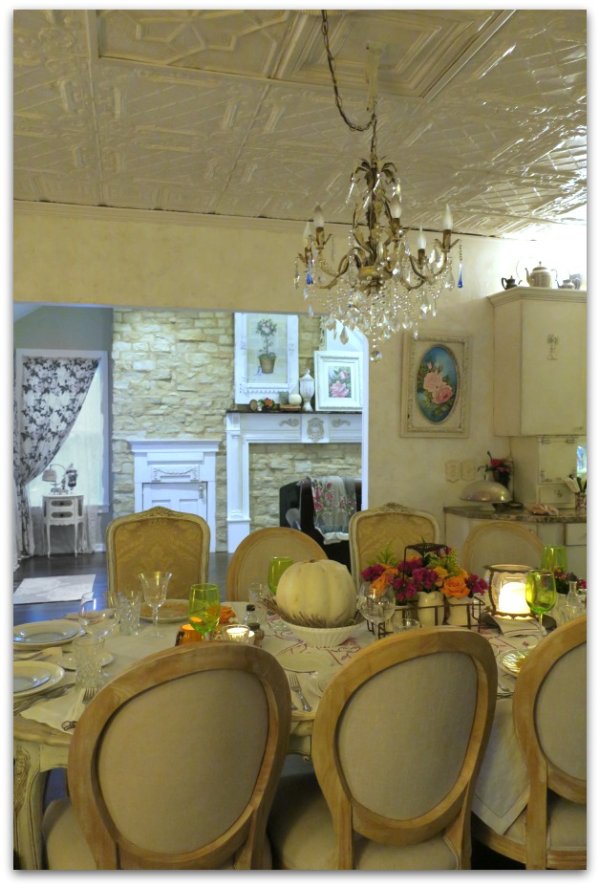
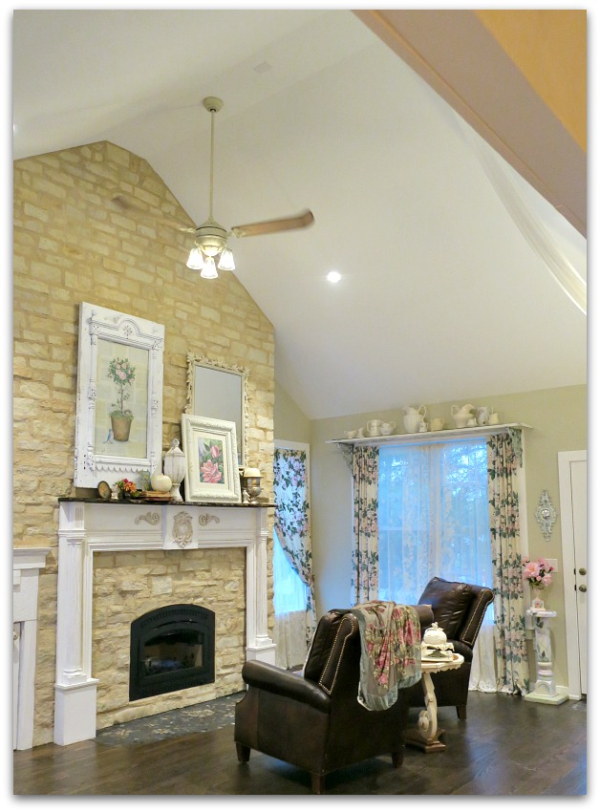
From the kitchen into the new room, with a view of  the mantel.

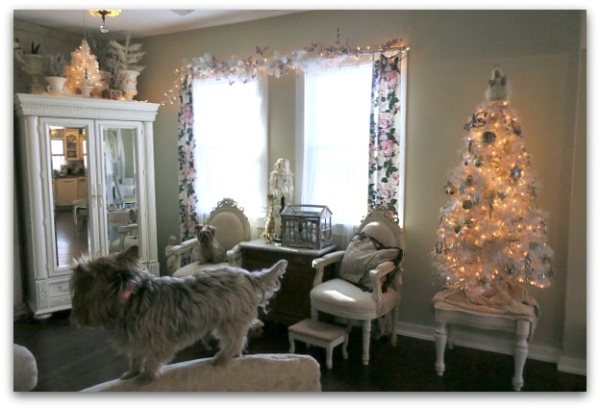
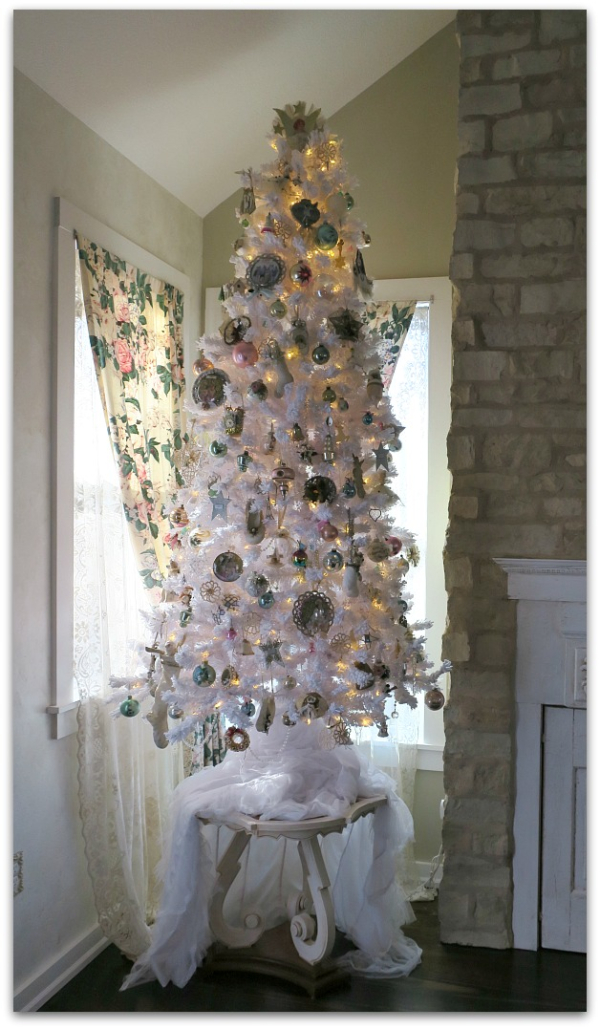
I can't wait to have a Christmas tree set up in there!  I'll be counting down till the holidays just like the grand fairies do.
IMG_0598

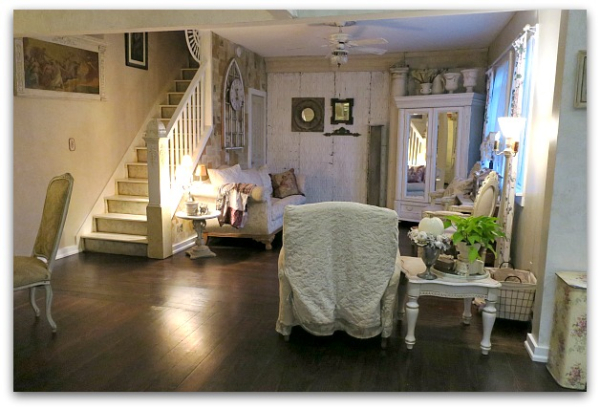
This one is taken from the stairs.

IMG_0603

And here are the stairs. They are covered in rose pattern wallpaper, that I glazed over to blend in better. The bold, rose pattern stood out too much before. Now, it is subtle and muted.

IMG_0599

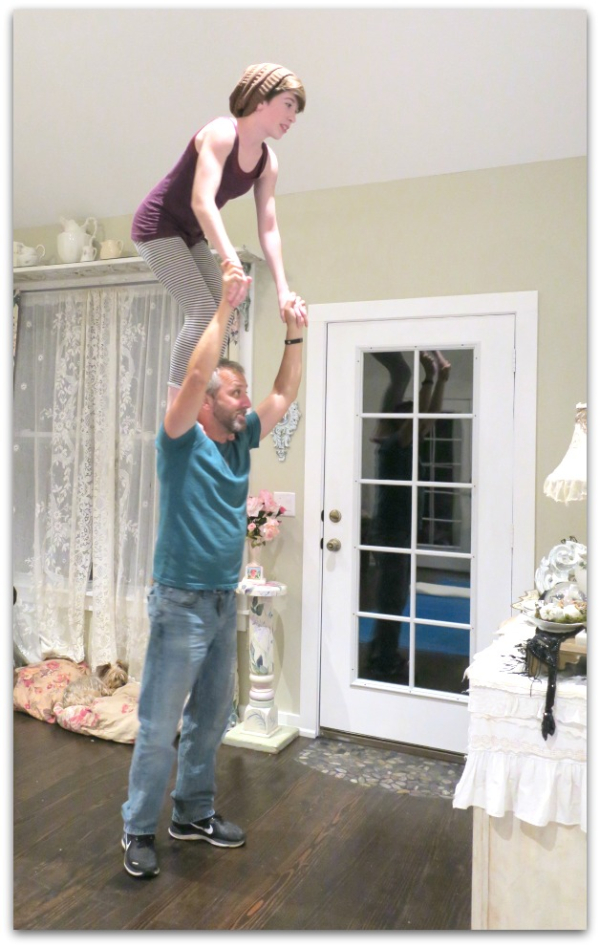
The ceiling is 15', and my son put in the pine floors, with my husband's help.  In front of the fireplace and both new doors, is a pebble mosaic that I did.  Ryan hung all of the shelves and curtain rods.

It is nice that we all had hands on in creating something for the space, even though the big job of it was done by a contractor and his crew. It feels good to have a part in doing some hands on work ourselves.

IMG_0602

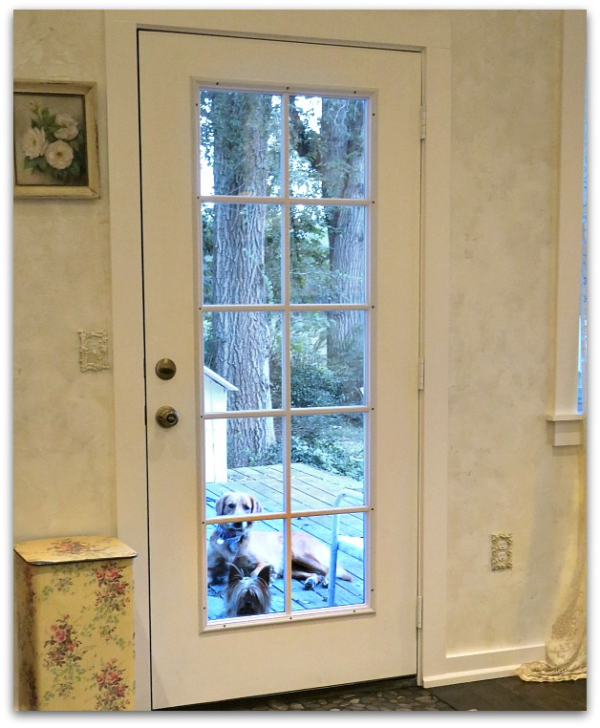
I had planned on putting curtains on the doors, but Honey voted against that. She prefers being outdoors for most of the day, but likes to keep an eye on what we are up to. Recently, she learned how to open the door knob, so she comes in whenever she feels like it.

Now, if she'd just learn to SHUT the door behind her. You'd think she'd been raised in a barn.

IMG_0604

This is from the living room looking into the kitchen.  I still can't believe how wonderfully open it is, and also, how well the new floor matches the original 90 plus year old floors once all were sanded down and re-stained. I beat up the new floors with crow bars and hammers to help the aging process a bit.

IMG_0607

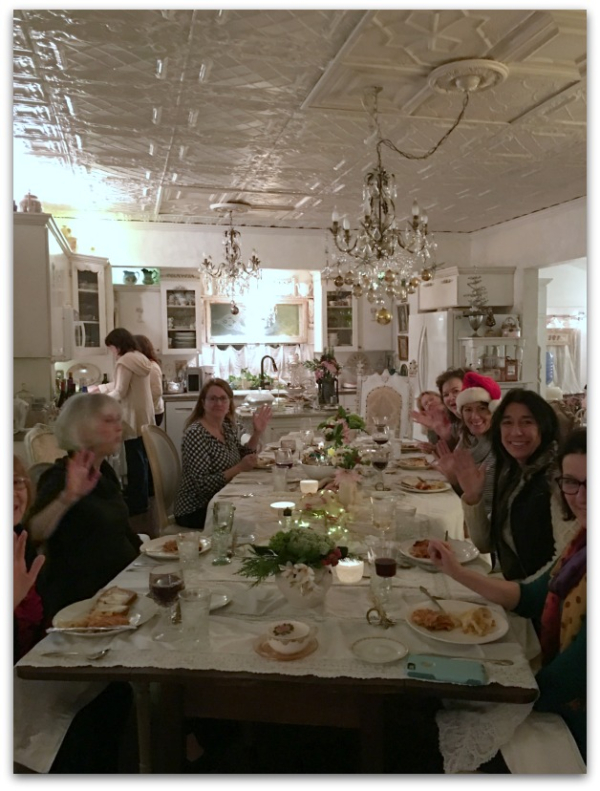
This party was also in celebration of finishing the room.  That very day, the last of the construction items were crossed off the list.  What a good feeling.  

You know what will be an even better feeling? The first day we light a fire in that new hearth and cozy up by the flames to read a good book.  I'm a Spring/Summer person myself, but this redo could be the impetus to switch me into becoming an Autumn gal.  


Some things are meant to be

cottage, Hearth Room, junk

IMG_8724

I'd been hoping to add some old trim to the new room, to age it up a bit.  There were quite a few options I'd seen, but I kinda knew what I had in mind and didn't want to rush a purchase just to have something on the wall, I was willing to wait for ideal, not just okay.  

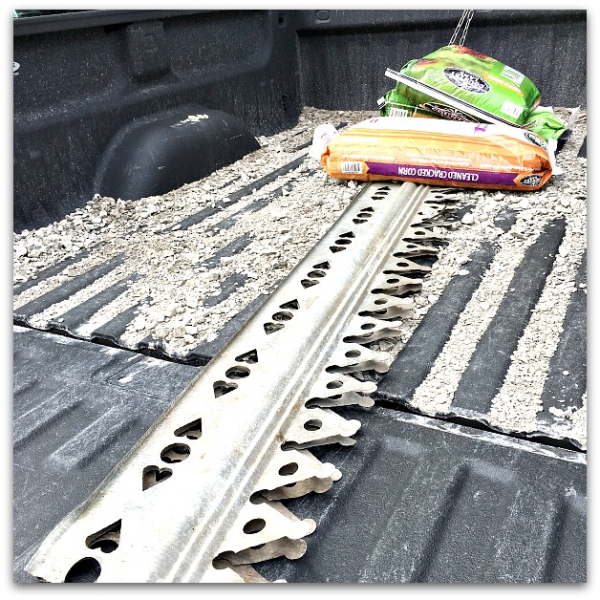
Beth was setting up a booth at Sandy's annual show in Lee's Summit, and I went to help her. I was standing in her spot and said, that I'd bet this show was a good place to look around for trim.  As I said it, I saw these pieces directly across the aisle in a booth by some Good JuJu ladies.  I ran right over and snagged them before the show even opened. (if you are ever invited to help a friend set up a space in an antique show, jump on the opportunity for some pre-show shopping! Better yet, volunteer your services so you know you won't miss out)

6a00d8345159d669e201b8d21ab3b5970c

Normally, I'm not driving my husband's truck.  The show was over an hour away, it wouldn't have been easy to run home to get the truck, but luckily I'd taken it that day to pick up some chicken feed. The trim is very light weight and was too long for me to shut the tail gate.  It was lucky that I had that chicken feed back there to use as an anchor to keep the trim from blowing away on my way home.

This is probably the only time I'd ever gone to the feed store on my own, my husband always picks up the bags, so yes, this was a very lucky happenstance to have both the truck and the heavy bags of grain in the back of it so I could take these perfect strips of tin home with me.

IMG_8733

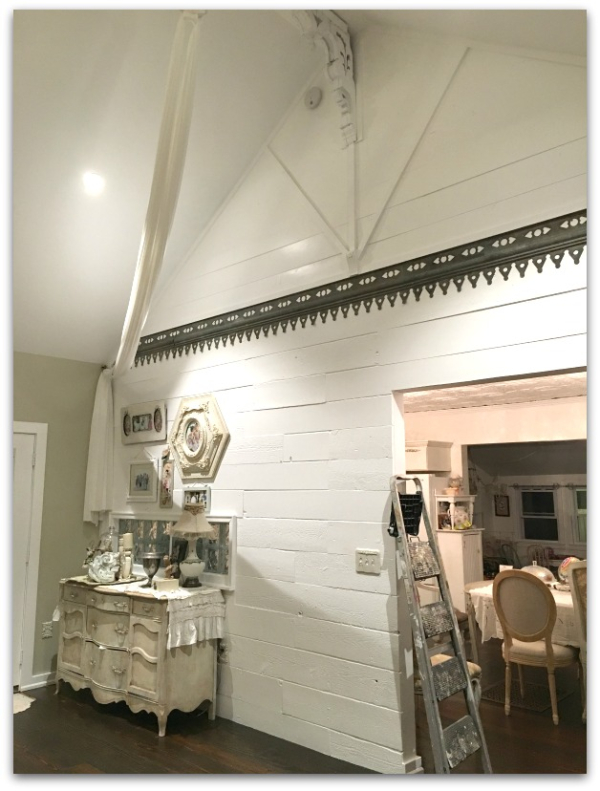
See what I mean??!! Perfect for the spot.  Rustic and old, but with a pretty design.  Ryan and I used tin snips to cut them to fit and then hung them on screws.  We didn't have a drill bit for metal, so we simply put screws in the wood wall and hung these onto them.  Someday, I'll get the right drill bit and put them up better.  

For now, I'm happy with them as they are, and I doubt if they will fall down.

Drawing in wet cement

cottage, Hearth Room

IMG_8534

One of the things we splurged on for the new addition was having a concrete patio in place of a wooden one.  It wasn't that much more, but a few hundred dollars here and there add up if you aren't watching your invoices while remodeling.  There are some areas that we went cheap on, and others that we didn't. Over all, I think we made some good choices.  (although, the ceiling fan is a different story, more about that later)

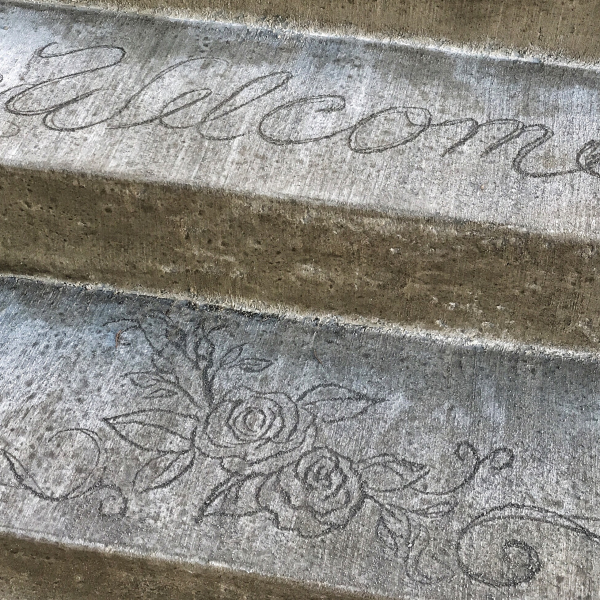
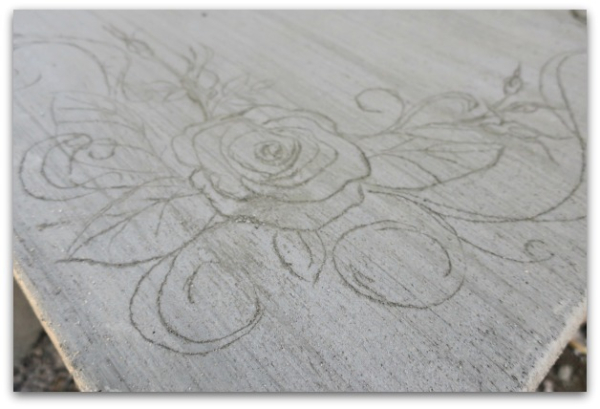
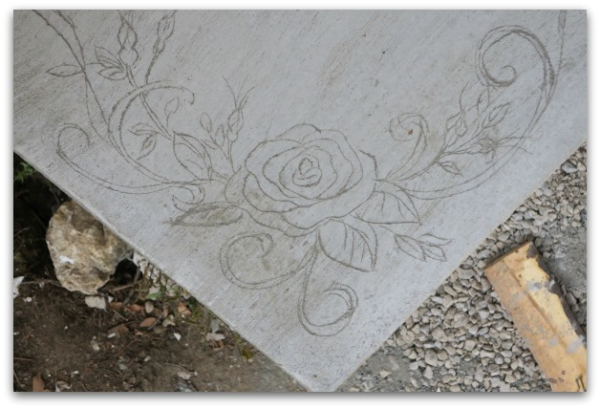
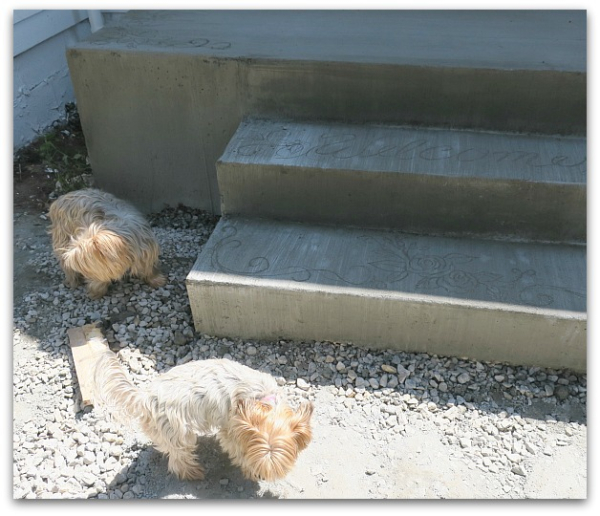
While the 8'x4' porch with two steps was still wet, I picked up a nail and added some flowers, along with "Welcome."

IMG_0032

Earlier, I'd sketched out an idea that I wanted to use, kind of in a chalkboard style, with the words, "Welcome to our Home" on the porch part.  Then, I realized that my ams weren't long to accomplish that, and I could only draw along the steps and corners, the porch itself was out of my reach.

IMG_0037

Wet cement has a very short window of opportunity to draw in.  No time for planning, I just started drawing. It is far from perfect, but it is cute. There were only a few minutes to get it done before the material started to set up and I had to stop.

IMG_0031

I'm happy with the choice of concrete and gravel for the front of the building. The cottage is not fancy and this seems to fit it just fine.

Little Decor Details- adding age to a new room

antiques/junking, cottage, Hearth Room, Kitchen remodel

IMG_8559

Beth gave a brass door knocker to me for my birthday last May, and I had not used it yet.  When I was finishing up little things for the new room, and painting outlet covers and switch plates to match the walls, I decided to paint this too. It is now on the bathroom door, and gives the little grand fairies a lot of pleasure in BANGING  it when the room is occupied by one of the sisters.

On it, and on the vintage brass outlet covers, I used a spray bonding primer in white, let it dry, and then washed the pieces with the "sandcliff beige" color I'd used on accent walls.  Afterwards, all got a spritz of clear polyurethane.  

IMG_8631

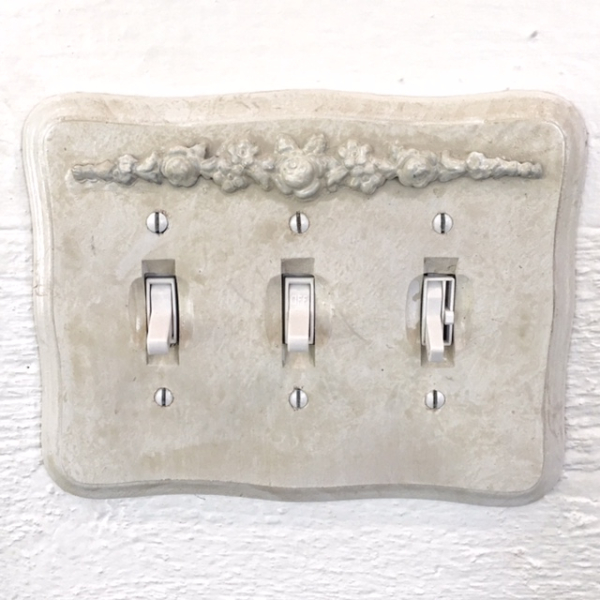
Nowhere I looked had a vintage 3 toggle switch plate.  So, I glued a little bit of old, metal trim onto a wooden plate, and painted it in the same way.  Not many of my electrical covers match, I have a few different styles, so it seems to fit in just fine.  I think it looks much better than the white plastic one that came from the electrician.  That was way, way too shiny and new in our old house. I did what I could to make the new addition look like it belonged with original the house. 

IMG_8684

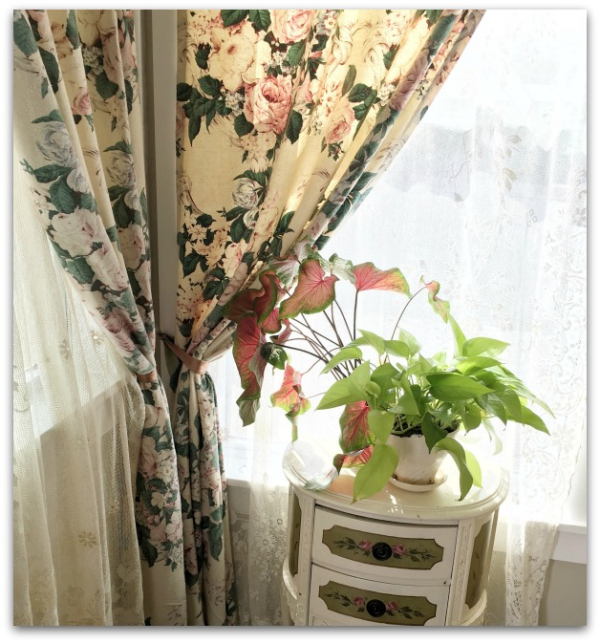
Like using vintage curtain fabric on the windows.

IMG_8693

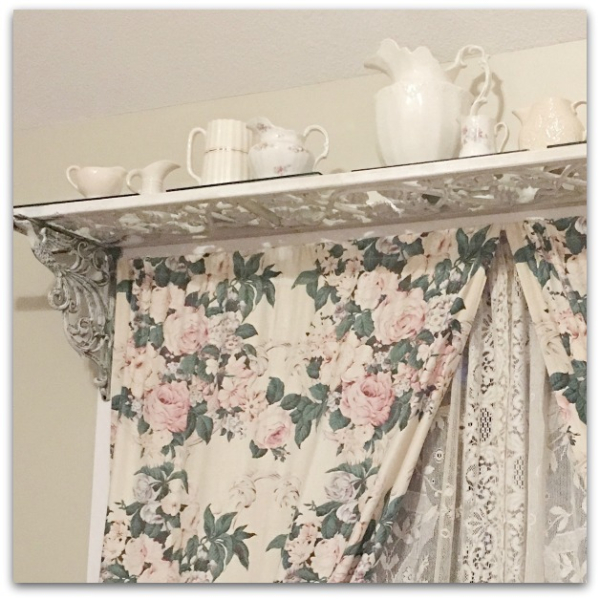
 And re-using this old, iron shelf that had previously  been in the kitchen. I debated hanging it up again (it is made from a chippy, iron porch rail and two rusty brackets, the rail is probably from the 40s and the brackets are new, but look old- plus they are birdies!!).  It had been over the dining room window for ten years or so, and I thought maybe I was over it.  But I realized that I'd enjoyed it for that long and still did, I was glad to add it back into the new room.

When I was a full time, antique dealer, my home felt like it had a revolving door on it.  Things were constantly changing and I was always finding something better than what I had before.  Stuff had stopped moving around as much as it used to, mostly it gets shuffled, not replaced anymore. 

I figured I might be getting boring.  And I shouldn't just reuse the same stuff over and over. 

Then, it dawned on me that I'd found pieces that I really liked keeping and there was nothing wrong with having some forever pieces.  Why get rid of them for the sake of change? I think I'd settled on these items because I loved them. And they all mix and match with other things I love in my cottage.

Also, as I unpack belongings, I am being picky about setting things out. Just because I own it, doesn't mean it needs to be out, right?  I can have goodies stored away to play switcheroo with when I feel like a change.  There still is a revolving door with stuff moving in and out, but now it is into a storage cabinet, not gone forever.

Faking a closet

cottage, Hand Painted Furniture, Hearth Room

IMG_0063

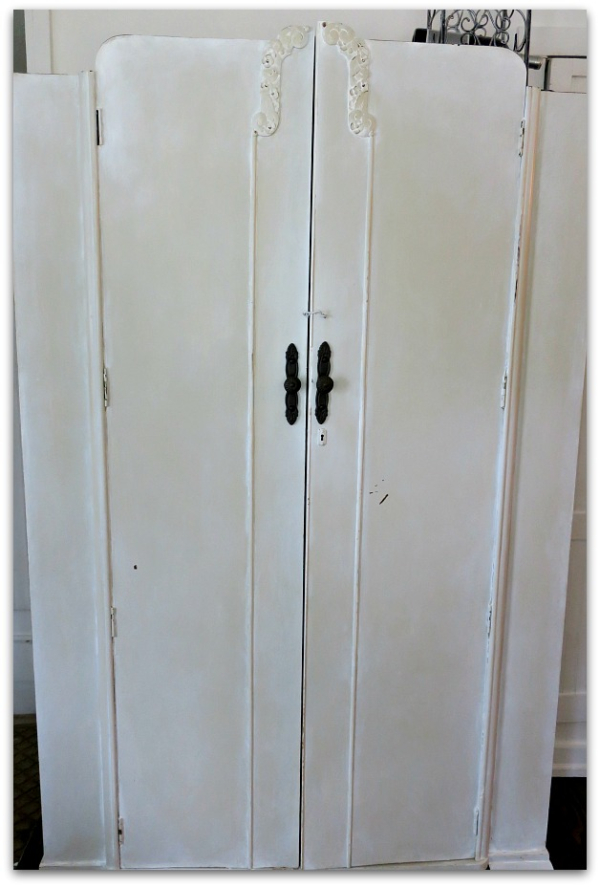
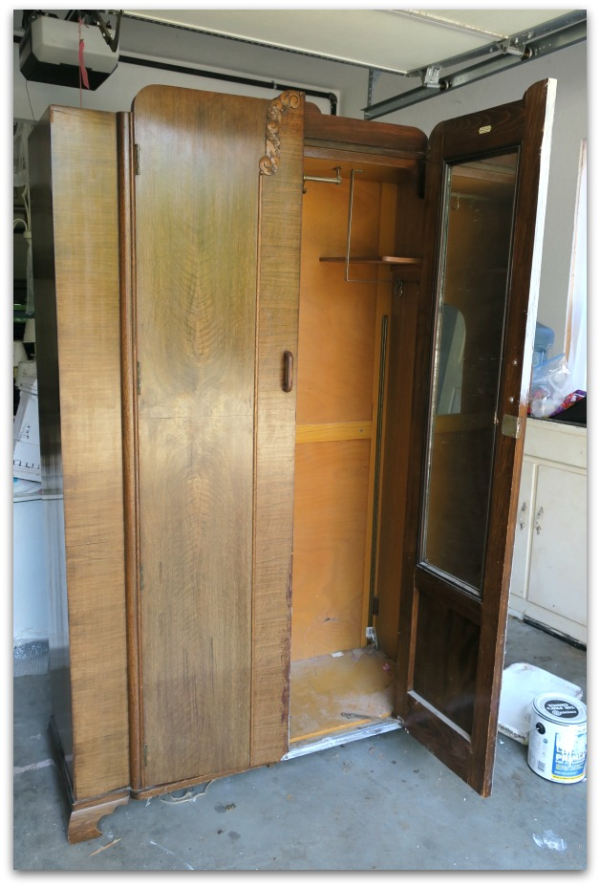
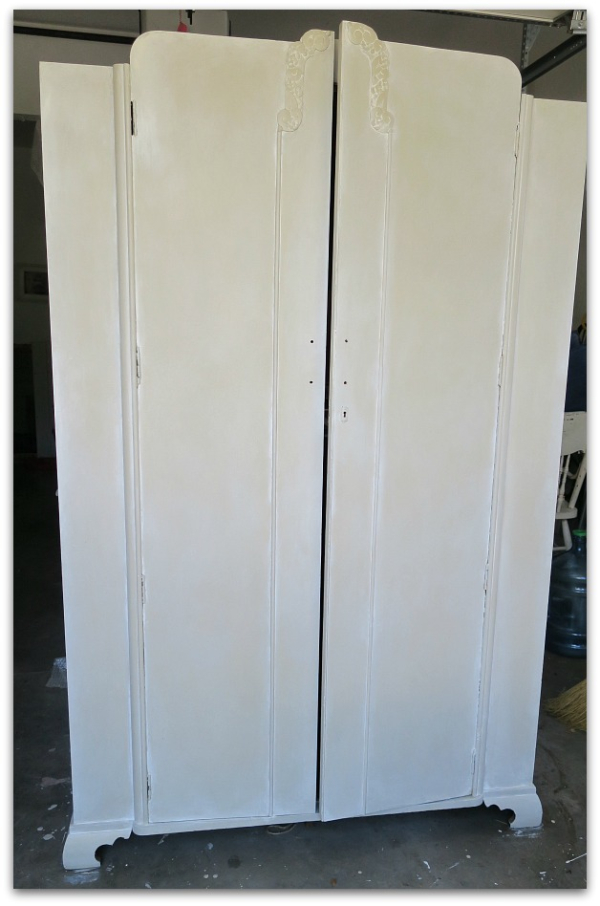
One thing I really wanted when we planned the new room was a coat closet for odds and ends, jackets, and a vacuum cleaner. But, we decided on generously sized windows that left no wall space for a closet.  As a substitute, I  added a wardrobe to use as a closet in the kitchen since we had removed an old wood stove durning the remodel and with some shuffling, had extra wall space there.  

IMG_0056

This one was $119 at the Old West Bottoms last month, and the wood was a little beat up, but it was a solid piece.  

IMG_0057

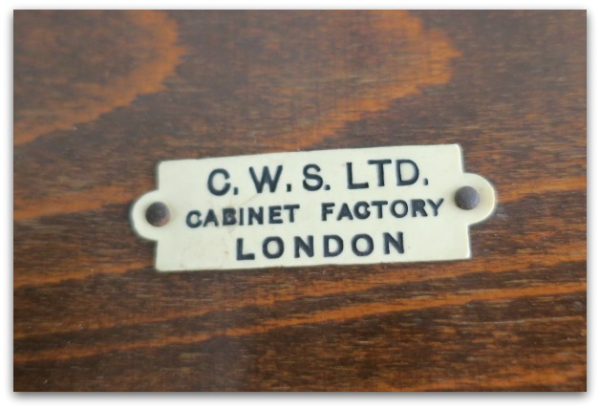
And was made in London.

IMG_0059

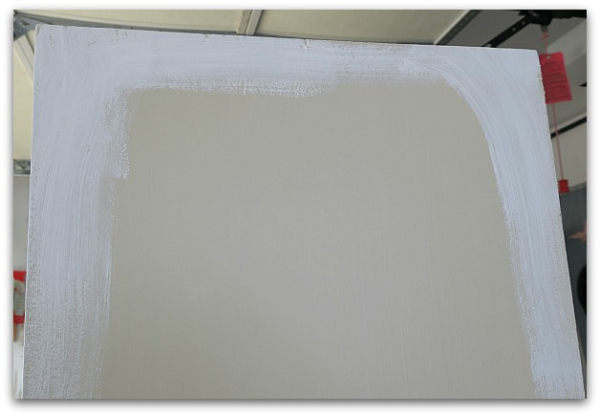
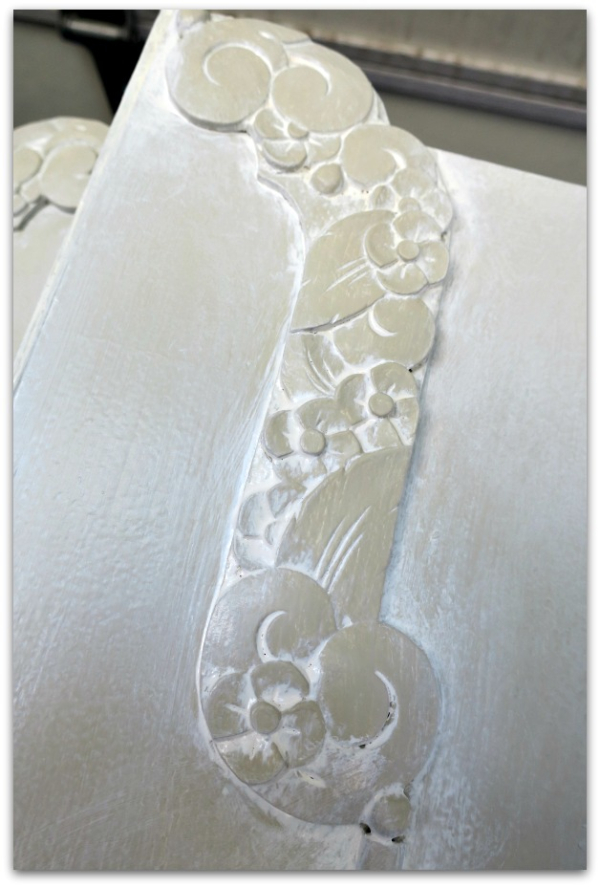
The wood was too dark for me, so I painted it. I almost went with white, then thought I had too many white pieces and decided I'd try tan with white over it. 

I painted it the base color after priming with a bonding primer (no sanding, no stripping)  Then mixed some white paint with clear glaze and brushed it on in small amounts at a time.

IMG_0060

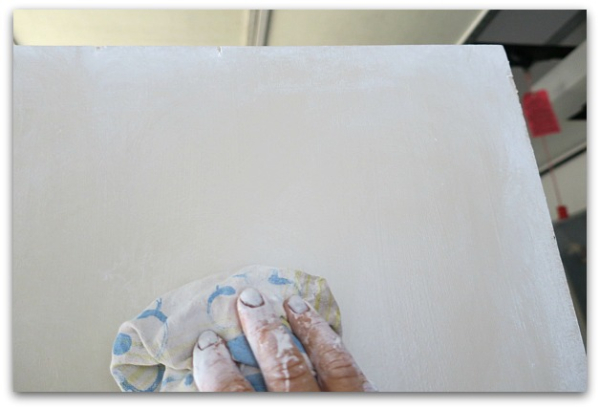
I wiped off the white glaze with a washing motion using a damp rag.

IMG_0061

I really liked the way the white glaze accented the ornamentation.

IMG_0062

Pretty, huh? 

I lightly distressed it with sandpaper too.  No top coat was needed, I'd painted it with semi gloss latex paint, that is pretty durable.

IMG_0064

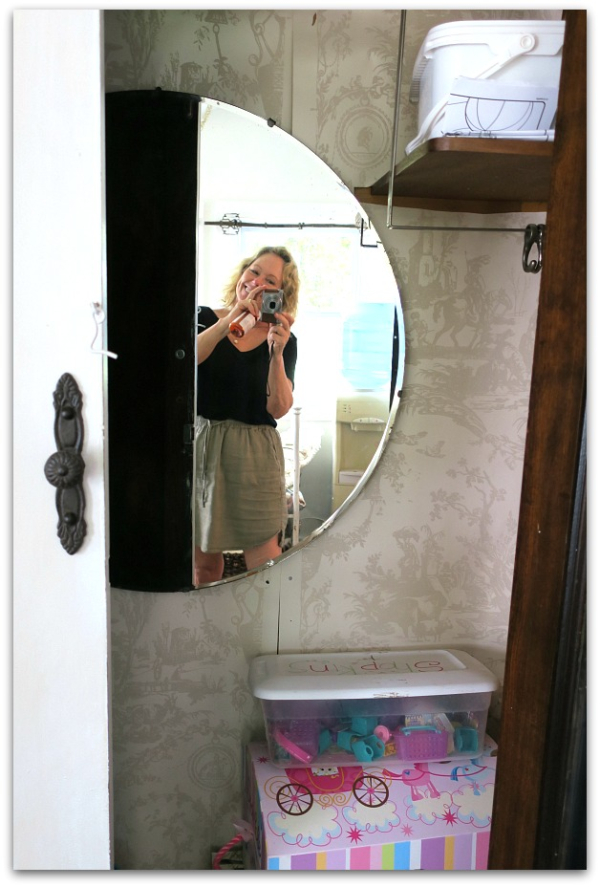
The interior was in good shape, except where a huge hole had been cut to make space for the previous owners to use it as a TV cabinet.  Plus, it was dark inside. I didn't want to paint the whole thing, so I covered the back in vintage wallpaper to match the paint and then covered the hole with a mirror.

The wallpaper is lazily tacked up, not glued down, and I didn't even bother to match the pattern. I just wanted to lighten it up. Don't you hate looking for something in a dark closet? This brightened it up nicely.  And the piece is perfect for hiding boxes of Shopkins, Playdough, and princess dolls.  

I hope I can squeeze in a few jackets and a vacuum cleaner like I'd planned on. Seems like toys take over pretty fast.


Rebuilding an old mantel

cottage, Hearth Room, Kitchen remodel

IMG_8626

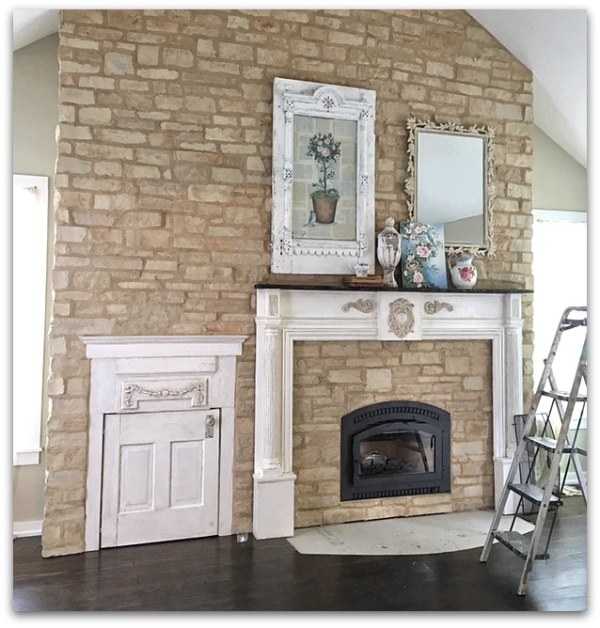
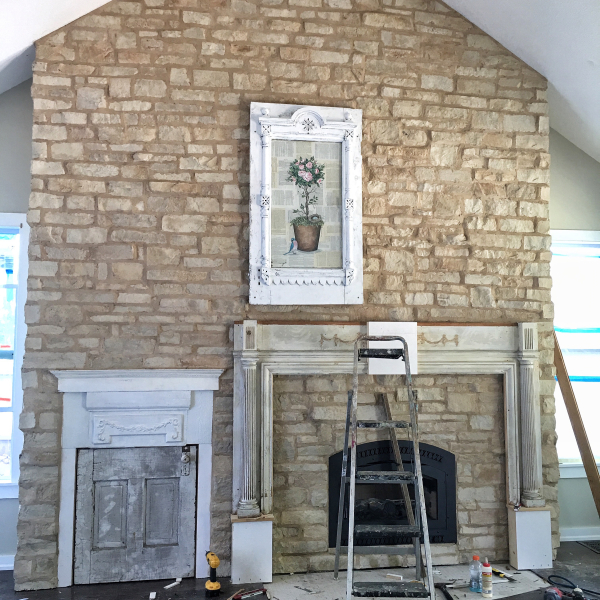
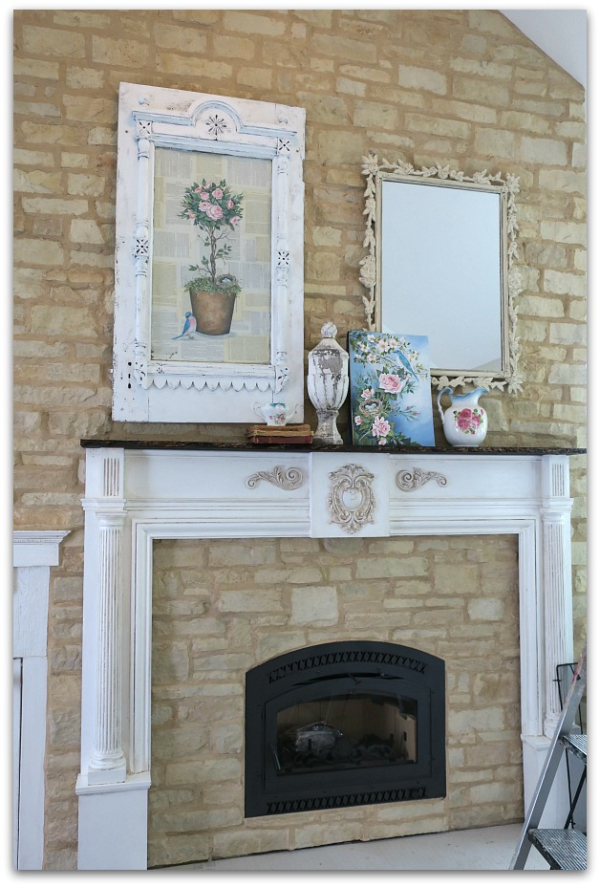
In this photo, the room is close to being done.  I still need a large, ornate, white frame for the smaller painting. Once it is on, I'll be leaning it against the mirror as it is now.  Unframed, the scale is a bit off, it needs to be larger.

I have a mosaic planned for the floor, pics as it gets planned and completed.

IMG_0041

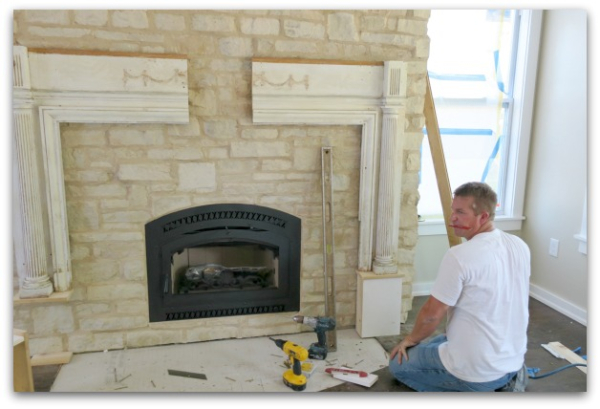
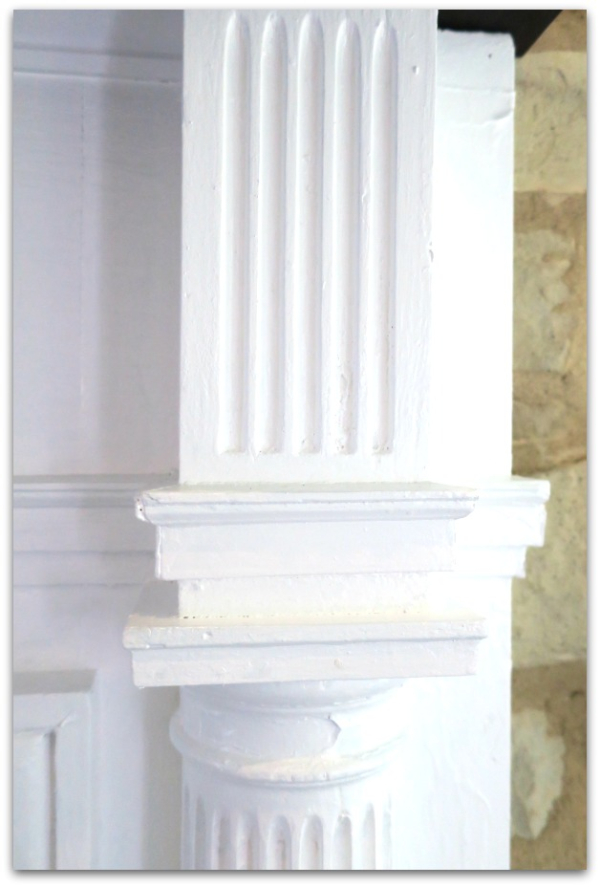
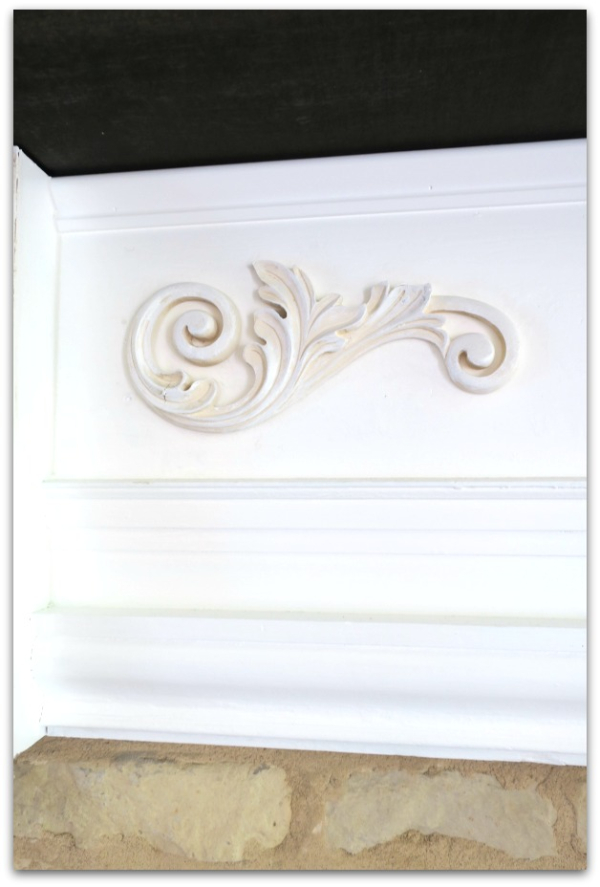
The old mantel that a dear family friend gave to me 20 years ago and had been saved thinking…someday.  Sadly, it didn't fit the space after all.  But we saved it!  The builder cut it in half, added a center block to widen it, then built up two blocks to heighten it.

IMG_8538

 But, in doing that, we lost the old trim on the piece.  And the shelf board thing on the top had to be removed.

IMG_8557

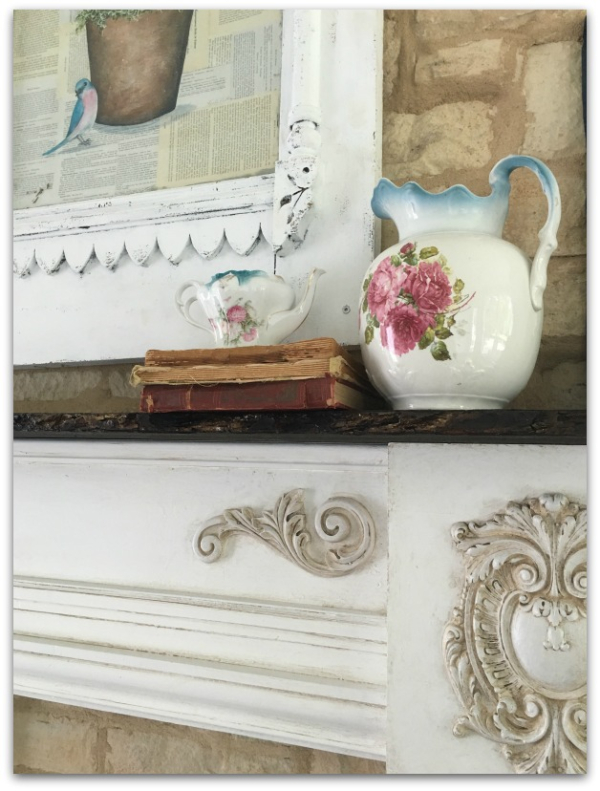
 But I found a rough, piece of oak still with the bark on it that was long enough to use, and I stained it dark like the floor.

IMG_0038

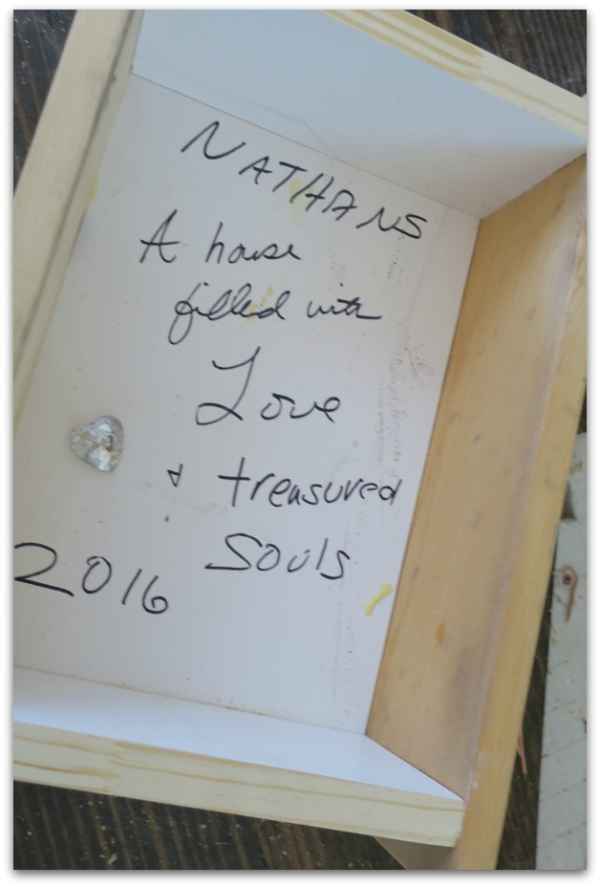
As the contractor was putting the boxes that would support the mantel together, I thought it would be sweet to turn one into a time capsule.  I wrote on the interior with a Sharpie and grabbed a crystal heart button that fell off of Sugarwings' cape.  The cape was one of the four Aunt Terry made for the girls for Christmas, and it represented a meaningful family moment for me. (I can pick up another button to sew back on the cape later.)

IMG_0053 IMG_0052

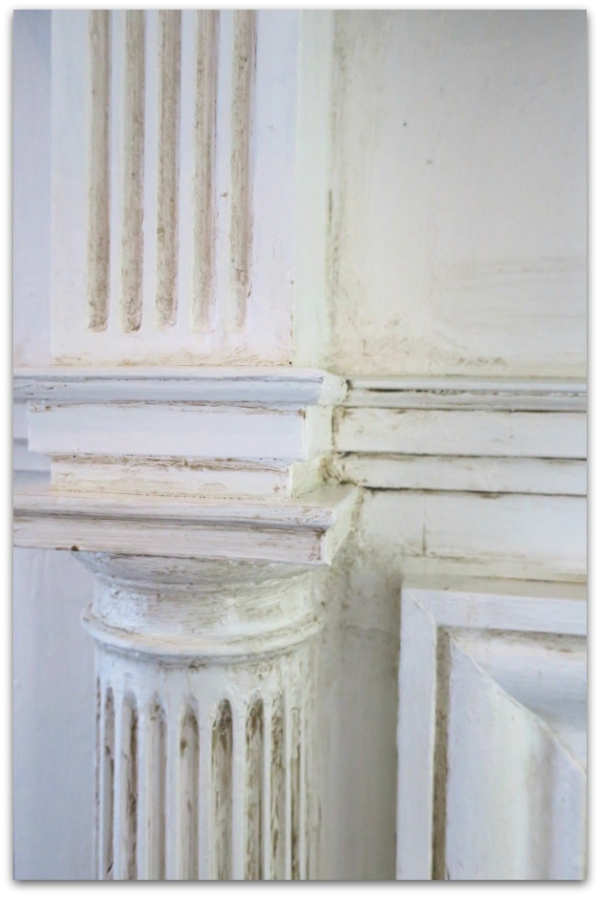
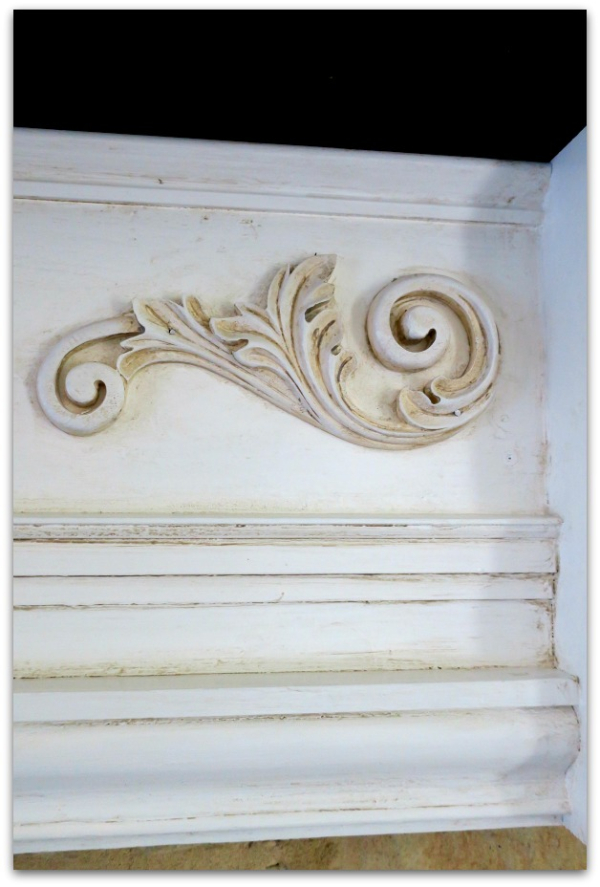
All of the wood was painted pure white, semi gloss after the pieces were assembled and I'd replaced the ornamentation on the mantel with some reproduction pieces.

IMG_0054 IMG_0051


After that, I painted a dark walnut glaze over the paint and wiped it off with a soft cloth to take some of the "new" away.

IMG_0065

Ta da!

Next up, that mosaic floor and searching for a large frame for that leaning painting.


Inspiration for a painting

cottage, Hearth Room, Kitchen remodel, paintings

IMG_8484

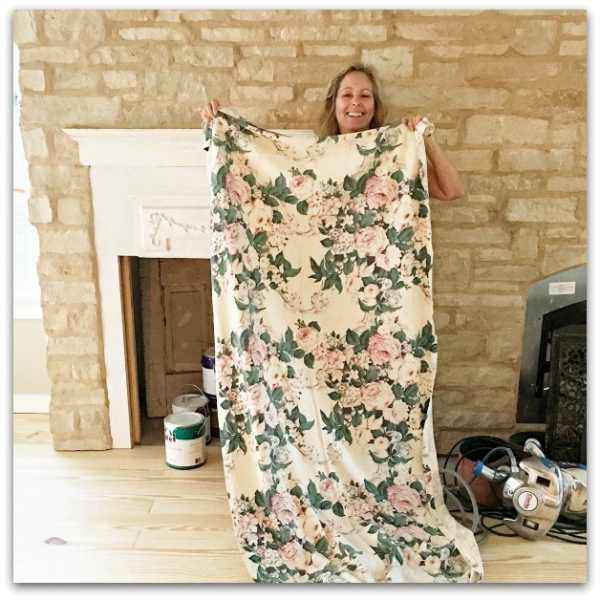
Last month at Good JuJu I stumbled across the perfect curtains for the new addition. They are not what I was looking for, and I hadn't even planned on curtains. I thought I'd go with shades covered by lace sheers (I'd bought a boxful of vintage ones at an estate sale for $6, that just needed a little repair and hemming to fit).

IMG_8483

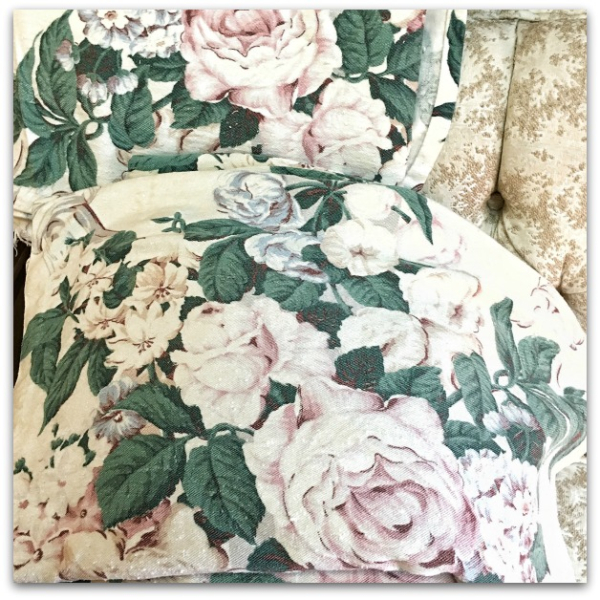
But when I saw a pile of these, perfectly faded, soft colored, old barkcloth panels in great condition, I fell in love.  I've had a thing for barkcloth since I was a kid and spent time in my Grandma's cabana room on the side of her Sarasota trailer.  She had curtains and seat covers, all in mismatched tropical patterns, in that nubby, old material.  Later on, when I discovered that cool, old fabric was made in ROSES too, I was enamoured with it.  

Silly me, I debated the purchase of these for about a half hour of dithering, and almost walked away.  I wasn't quite sure if they would fit the windows, and fabric wasn't on my shopping list that day. 

Then, I came to my senses and realized that 6 long panels and one extra length valance of beautiful, vintage fabric for only $150 was a deal I should never walk away from.  Even if they did not fit the windows, I could make pillows and slipcovers, it was a lot of material.

And I was right, they didn't fit the windows. Though, there is a deep hem, and with some finagling, I can make them work.

IMG_8493

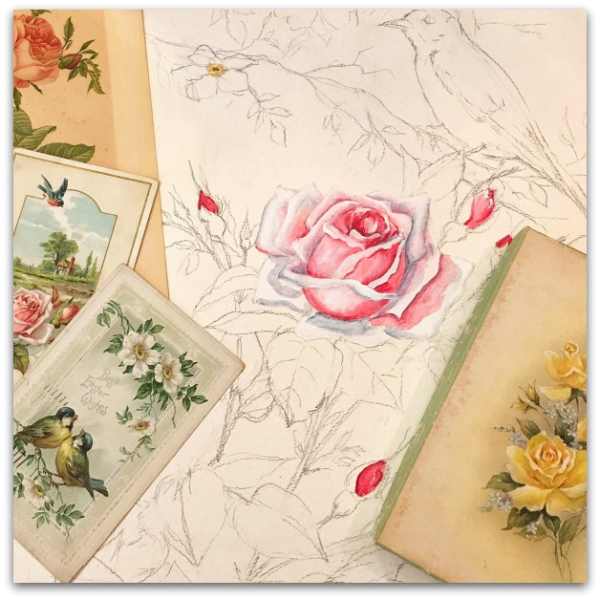
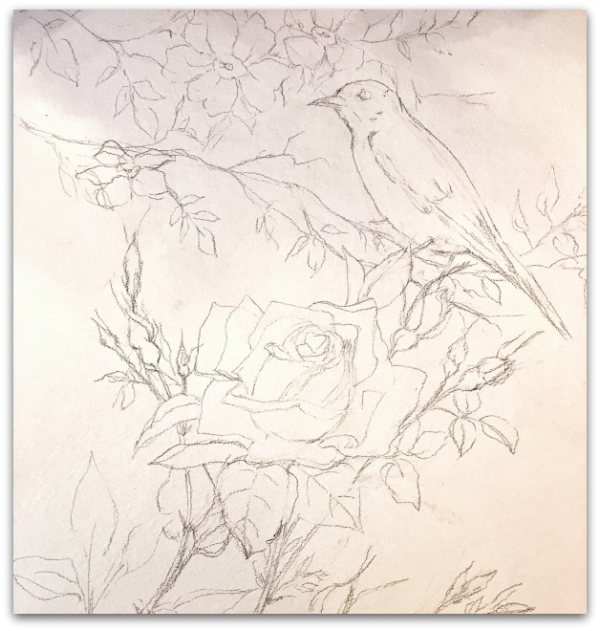
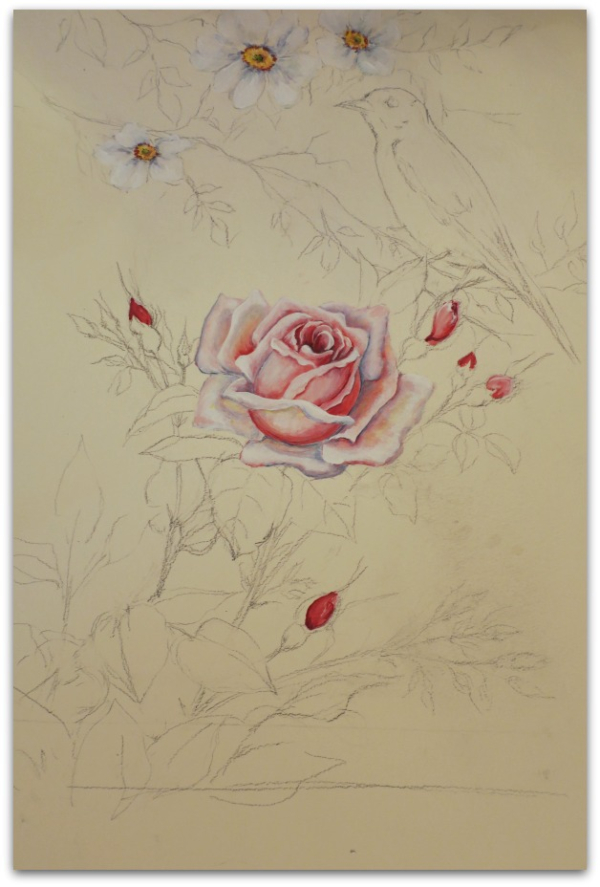
Once I had the curtains, my plans for the room changed up a tad.  I needed a coordinating something or other for over the mantel and I decided to paint some pink roses in the style of old postcards to hang up there.

IMG_8491

And the picture should have a bird in it.

IMG_0005 (1)

Here are some of the steps of the work.

IMG_8496

IMG_0023

IMG_8500 (1)

IMG_8503

IMG_8514

And here is the finished painting.

Trouble is, it was too small and too busy for the giant frame I had in mind.  I needed an enormous anchor piece on that 15' stone wall, and this needed to be closer to eye level to enjoy, not up so high. I'll still use it on the mantel, but will set in directly on the mantel and lean it against the larger painting.  I'll post about that one later.

PS- Before this gets framed, I hope to get some copies made for my shop. I'll let you know.

Some on the fly design ideas to fix a problem in our remodel project

cottage, Kitchen remodel

IMG_8474

When the siding on the old part of the house was being pulled off to add a room on, I was excited to see planks of wood underneath. Kind of ship-lappy, but not quite.  I had planned on doing a similar style on the ceiling, but after seeing it already existed on the wall, I decided to sheet rock the ceiling and not the wall, to use the wood siding as is, but with some patches of new wood added in since there wasn't quite enough old stuff to finish the whole thing.

IMG_8442

 I should have supervised the nailing of the planks so that the old wood was pieced back in a mixed fashion. Instead it was used in blocks of all old wood, then blocks of all new wood.  Once primed, it was very obvious that two kinds of wood were used, one smooth and the other, wonderfully textured.  

In a blocky, stripy pattern.  

IMG_9256

Luckily, I have the world's best contractor on the job!  He and I pulled some of the remnants of the old planks out of the trash heap, and he patch worked it into the area that was a big swatch of all new wood.

This was just enough patching to make it look like it wasn't patched, if that makes sense.  It was no longer a striped pattern that stood out, it is now a more random, piece work look, and not noticeable.

IMG_8455

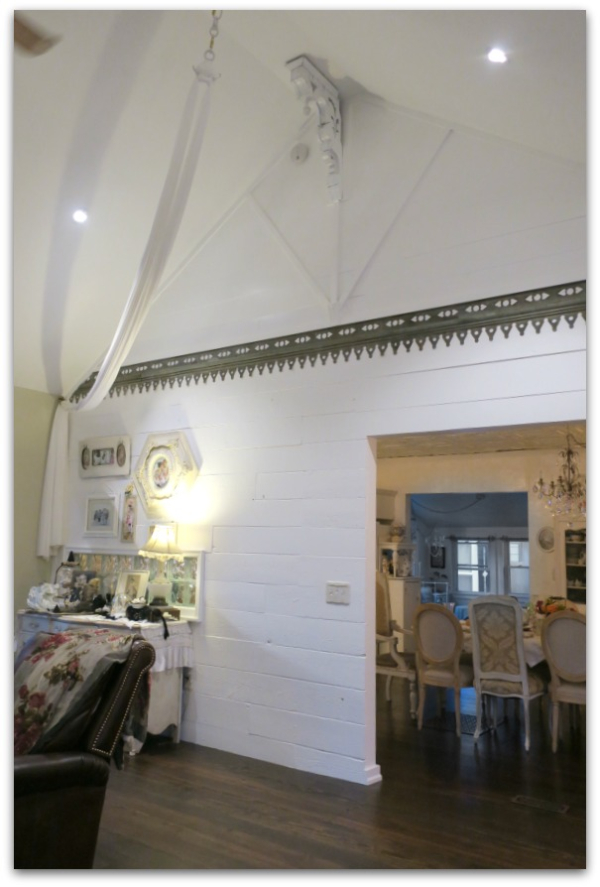
The trouble was, that the whole peak was all brand new boards and there wasn't enough old bits to patch it.  So, I decided to add some trim to make it look like it was meant to be that way.

Once again, we went out to the scrap pile in the yard, and found some leftover strips that were big enough to create a cottagey design on the wall.

IMG_9259

And I found some decorative pieces in my stash to age it up a bit.

IMG_9258

Hopefully, this makes the top portion where the wood was a completely different type of wood, seem like it was meant to be that way, not like we ran out of boards and had to make do?

IMG_9257

I'd like to find a wonderfully old strip of scalloped wood to go across the bottom piece of trim and age it up even more. My son can nail that up for me later when I snag the perfect chunk of wood.  But I'm happy for now, with this quick fix with things on hand.

IMG_8475

Another change I had to make was paint color.  Originally, this 15' peaked wall was to be a faded, duck egg blue.  But, I didn't want the wall colored and the trim white, that sounded too busy to me.

So, the top triangle area and all the trim is painted gloss white to match the trim in the rest of the room and the wall below is egg shell finish in the same color of white.  It blends together nicely (Its not all painted in the photo).

I also didn't want to have the top and bottom sections in different colors, because it would have given the illusion that the ceiling was lower and we love that vaulted ceiling.

IMG_8515

Here is the finished wall.  The photo is taken from outside because the floors were just stained and coated and the smell is so strong that my eyes were watering, just standing by the open door.  It is sooooo bad that I can't imagine it ever dissipating.

But the floors are looking great!!  And someday it will dry and the smell will be gone, all the little details can be finished, and we will be DONE!

What's left?  The mantle, lighting, touch up paint and trim, then the front porch. The exterior is being painted, but that doesn't get in my way of foofing up and and soaking up the joy of the new room.  I'm getting excited now, the work is winding down.  

By the way, lots more photos to come. You probably guessed that, huh?

A dog cottage for Honey

cottage, dogs

IMG_0010

My son built this cottage for Honey, Sugarwings picked out the colors, pink for the walls because it is her favorite and Honey colored shingles for the roof to match the dog. I thought of adding the pickets after we took out part of the fence to add the new addition to our house.

My boy designed it, from some vague, rambling descriptions I told him.  

IMG_8499

Thanks, Adam, it is cute as can be!!

Keep Calm and “Just look at the Flowers, Karla.”

cottage, Kitchen remodel

IMG_0003

It is pure chaos around here with the remodel going on.

Don't get me wrong, I'm very excited about the whole project and I have no complaints. It is going perfectly well.

But it isn't for the faint of heart.  It seems like every corner of my world has been affected, so I'm trying to concentrate on the areas that still have some pretty left in them. Like this view.  

If I'd turned the camera around, you'd have seen that all the plants and tables were pulled away from the house and the patio was a turmoil-ed spot too.

IMG_0013

Because when we went to replace some siding that the puppy ate, we realized that a large percentage of the siding had to be redone due to water damage, and now we have to repaint the entire exterior, not just the addition.

IMG_0008

In both photos, the tan boards are the new ones.

It will be wonderful to have a freshly painted home, once it is all done, but for now, it does add to the rest of the mess. 

IMG_0007

I think the process is starting to bug me now, because the level of chaos has quadrupled while the floors all get re-stained.  Every bit of furniture, and all of my doodads have been stashed here there and every where.  We parceled out our belongings between the bedroom, bathrooms, breezeway, studio, and garage.

IMG_0022

The studio got off light, with only a chair and the sofa stored out here.  Although, we are also using it as a temporary kitchen until the floor is done.

Which is very, very tempting to me as I work.  All day, I keep thinking about the snack items right across the room from me.  I might have strolled over to check on the cracker and treat levels a few times as I painted.  

You know, just to  make sure we had plenty.

IMG_0015

Although, it is the studio itself that gives me the will to live through this current job.  I look back at what we went through to build this addition, and know how very, very, very worth it that was.  I adore my studio.  And then I think about all of the other big redos we have accomplished in the 20 odd years it took to transform a 900 sq ft home into a 5,000 sq ft home a bit at a time, and think how much I love the final transformation.

Of course, some people might have just bought a bigger house.

Or moved (and I wondered at times when we had the floor open to the Hell Pit below our house, if moving was still an option).

IMG_0018

We haven't done it the easy way.  Every few years, we tackled another area. We have had a lot of tearing up and tearing down and adding on.  We added rooms in the attic. We tore out walls and made rooms bigger. We added a second house and tied it on with a breezeway.  We did it piece by piece as we could afford it (financially, as well as emotionally).

Our house is a weird, hodgepodge of meandering rooms. 

And I LOVE each and every one of them.  Just like I'll love the new hearth room this winter as I sit by the fire with a good book.  The short amount of time the workers are here might feel like a lifetime while the house is torn up and we are camping in the office and eating sandwiches in the studio, but in a true lifetime span of living in a home we love, that is a small amount of time to sacrifice.

IMG_8410

Soon, it will be done and I'll have the fun of gathering up pretty things to fill the space with.  

I'll leave you with more in progress photos.

IMG_8477

IMG_8472 IMG_8473 IMG_8476


Scroll to Top