Hand Painted Furniture

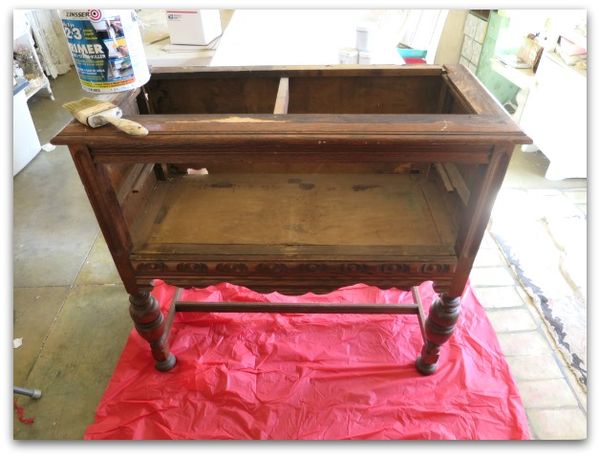
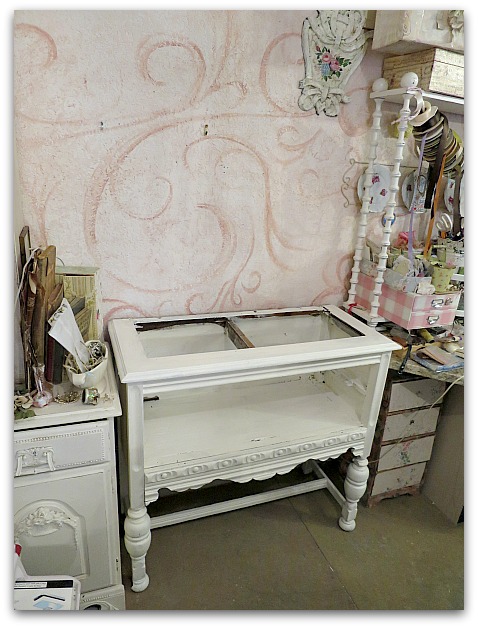
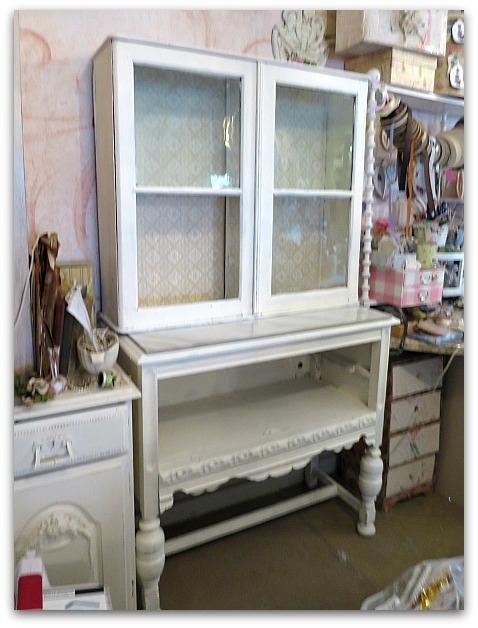
Restoring an antique table with no stripping

antiques/junking, cottage, Hand Painted Furniture, paintings

IMG_1930

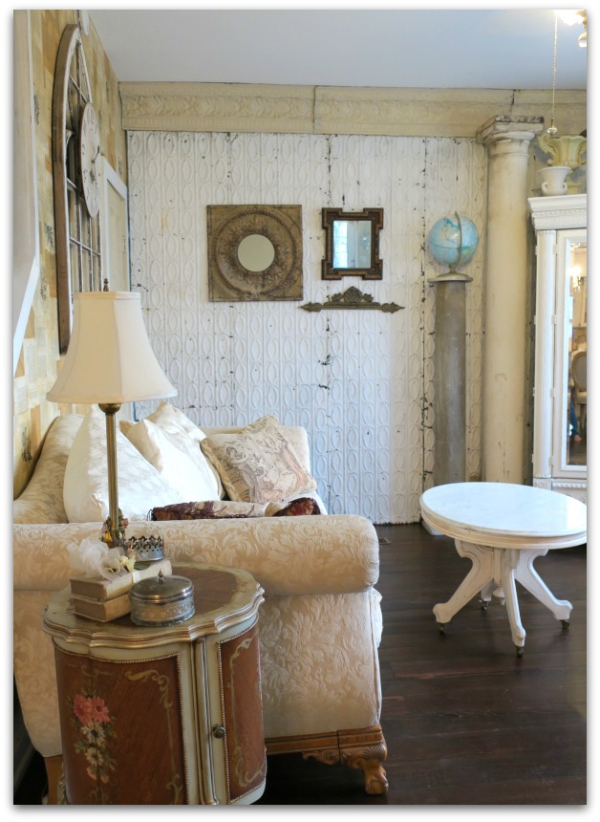
I love my "new" French side table!

IMG_1821

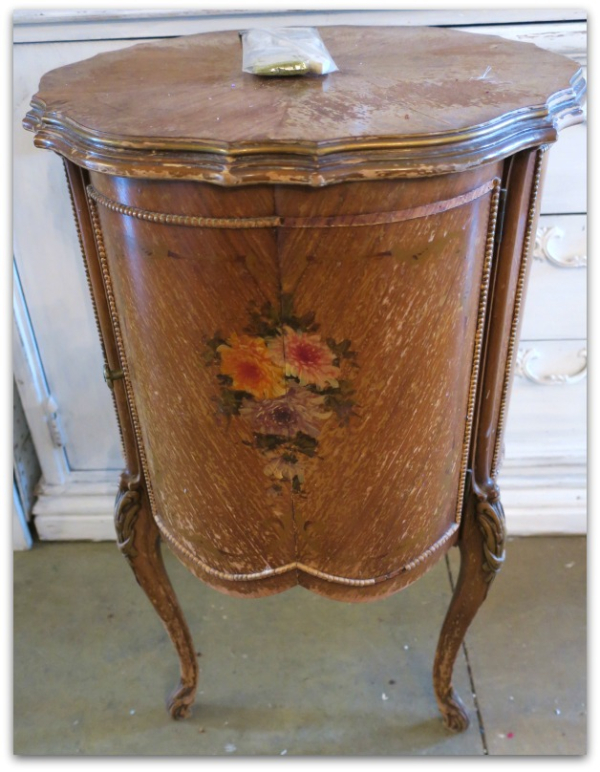
It started like this.  $30 at an estate sale, good lines, ruined finish, missing a few bits of trim, but sturdy.  The first thing I did was rough up the finish with a sanding block, taking off as much old varnish as I could, but not all of it.  

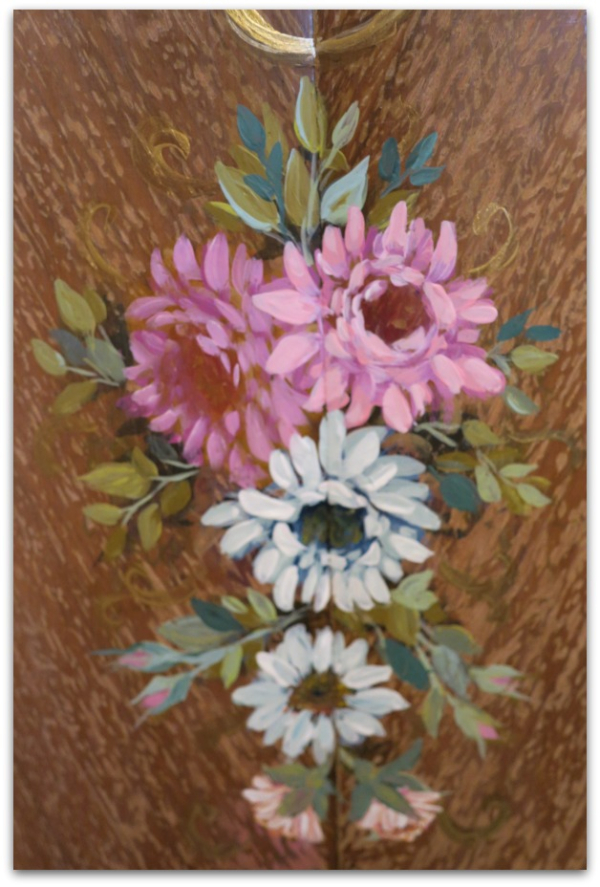
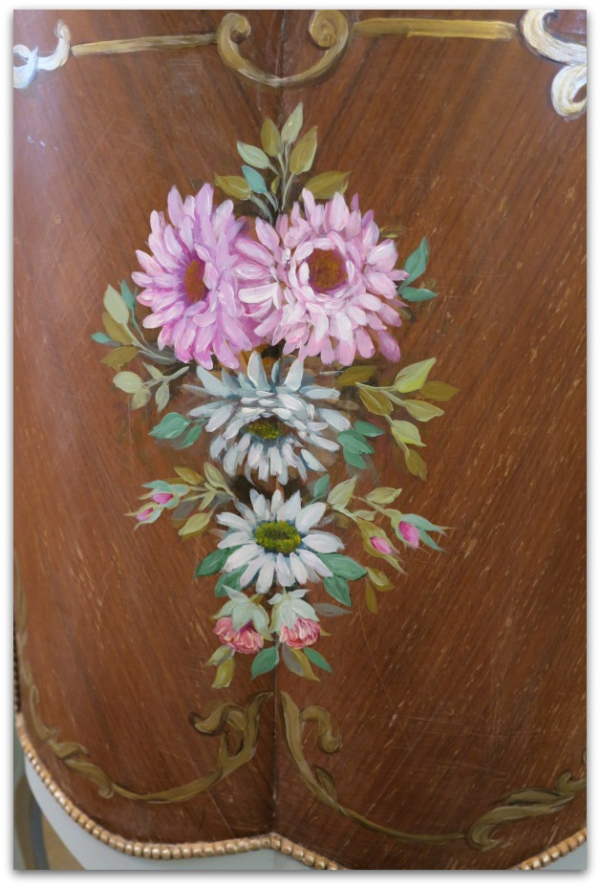
I thought I could touch up and restore the flowers, but it turned out they needed completely repainted.  The style was so pretty, I used that as a basis for my own painting, and tweaked the colors to suit my own taste, a little less purple and orange, a lot more pink and blue.

IMG_1898

You can tell the varnish was still spotty, some came away when I sanded, but I didn't try to get it down to bare wood.

IMG_1896

There are flowers on all three sides.

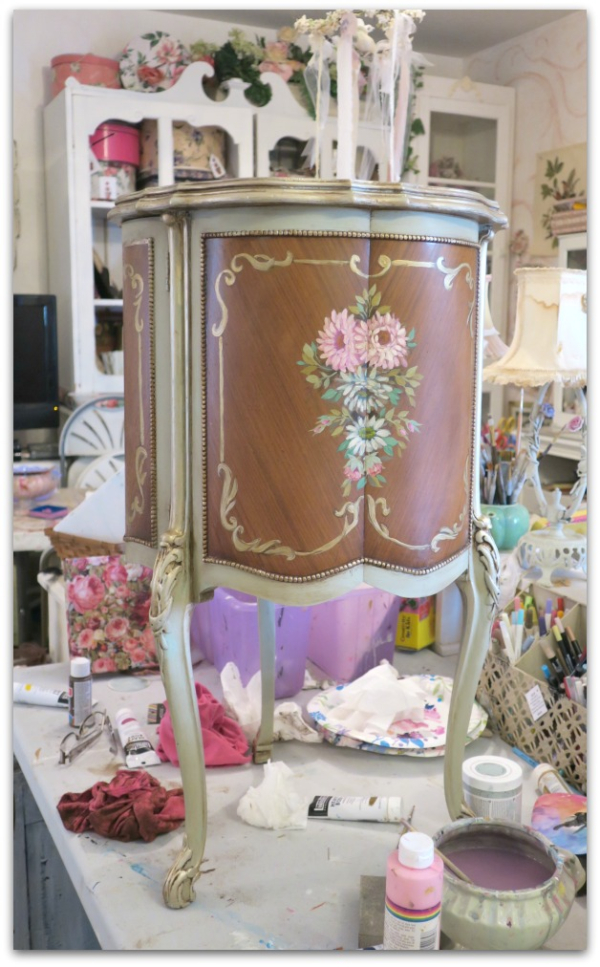
Next I painted the edges aqua with chalk paint from Hobby Lobby.  And added trailing viney-swirly gold, and painted the beaded trim the same gold.  I rubbed that gold paint over the raised carvings on the table legs with my finger tips.  

After that dried, I generously brushed on dark wax, and wiped it off with a soft towel. A chip brush is the best tool for getting down into the crevices of the trim and carving. I added more in places where the bare wood still showed, and made sure it got soaked in to those spots.  The photo above is with one coat of dark wax, it looked better after a second.

IMG_1899

The finish isn't perfect, but perfect is over rated. I like things to look aged and worn. So, some spotty varnish is okay with me. I also didn't try to replace the few places where the beaded trim was missing, that sort of thing happens over time on vintage pieces.

IMG_1906

If you are not a painter, you could still use this technique on old wood, without the flowers I added. It was all pretty quick and easy.

More painted furniture

collections, cottage, Hand Painted Furniture

IMG_1919

The grand fairies love to do art projects in front of the tv. (Actually, I won't let them watch tv without a project in their hands, Legos, play dough, coloring, anything other than simply staring at the screen). 

So, we've used various folding tables over the years, while I've kept my eye peeled for the perfect solution in a table the right size that looked good and didn't have to be put away every time, because if left out was an eyesore.

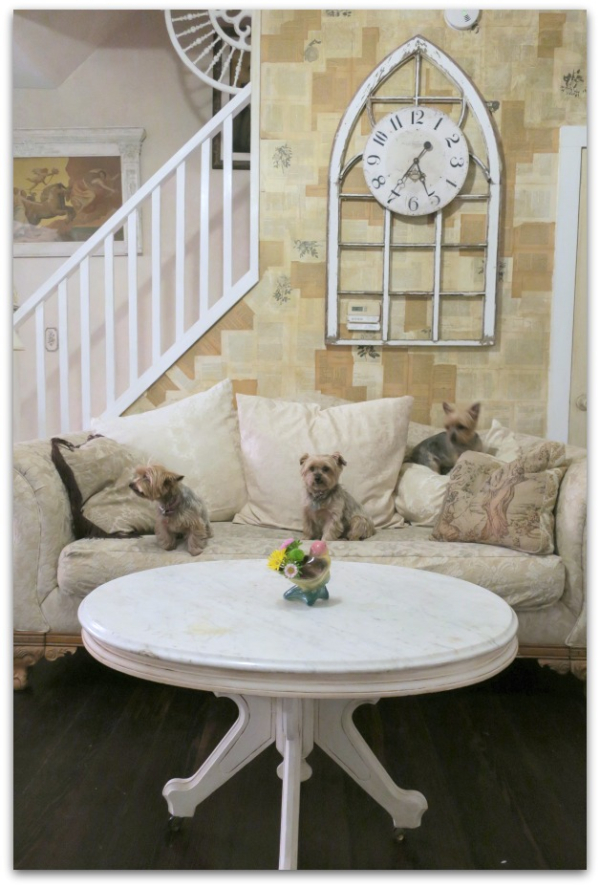
This is a marble topped, walnut one, with wheels!  I can roll it from in front of the couch  to in front of the tv when they need it to work on. I'd painted it white with dark antiquing glaze and didn't like it that way, so put another coat of white over that glaze to tone it down.
IMG_1901

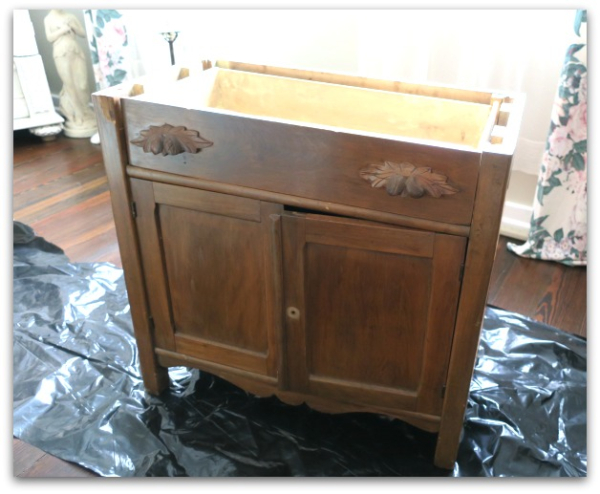
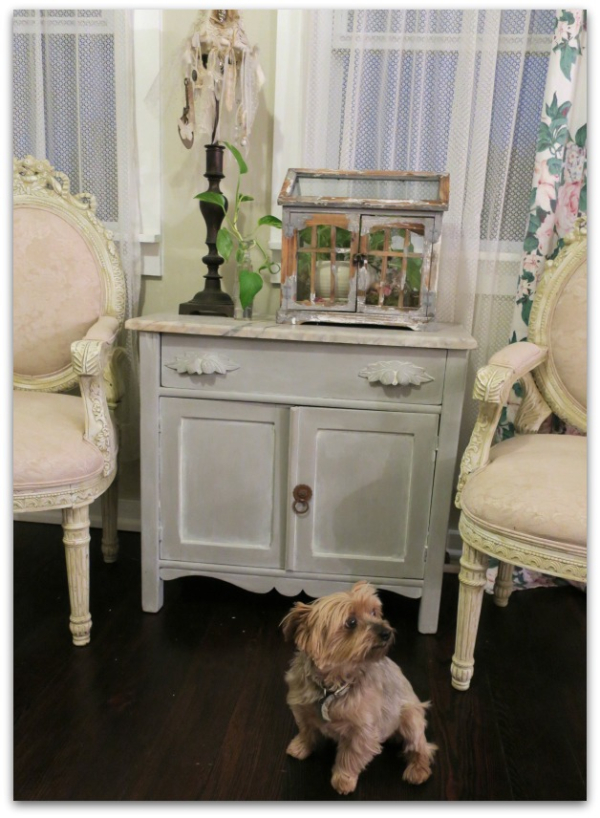
This cabinet has been in the room since last summer when we remodeled.  It has a broken drawer, and a crooked handle, so I got it cheap. I bought it mostly because I like having side tables with storage space in them, and it has a great, marble top.  I even didn't mind the natural wood tones in my house, it was a nice change.  But I got tired of that, and decided to paint it after all while I was on a roll.
IMG_1922

I repositioned the handle, painted the wood gray, and white washed over that. Then, added a rusty, old bit of hardware.  

I might change the handle out to a glass knob.  But for now it is fine.
IMG_1902

But that wasn't the end. I was in a painting mood.

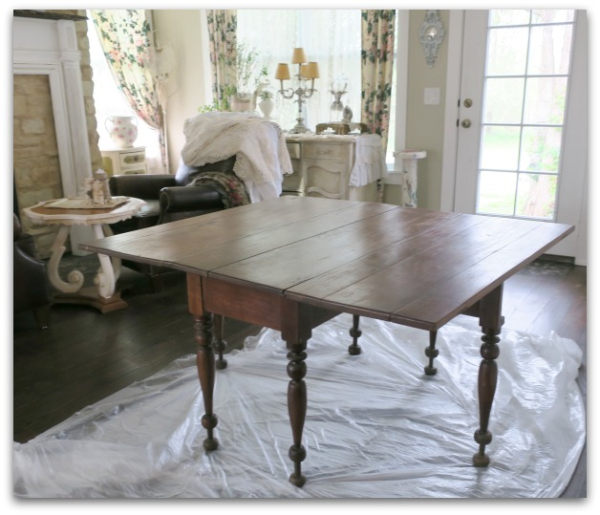
I'd found this drop leaf recently, and fell in love with its lovely, turned legs. I'd searched for a year for just the right table. I wanted one that folded to a narrow size, so I could store it in the new hearth room, and pull it into the dining room to add some space when we had a big group for meals.

It was $145 and is very solid.  Some gate leg or drop leaf tables that I looked at weren't as sturdy, but this one seems good.  If you are seated at the corner, you could use bad manners and keep your elbows on the table without worrying about the top drooping.
IMG_1915

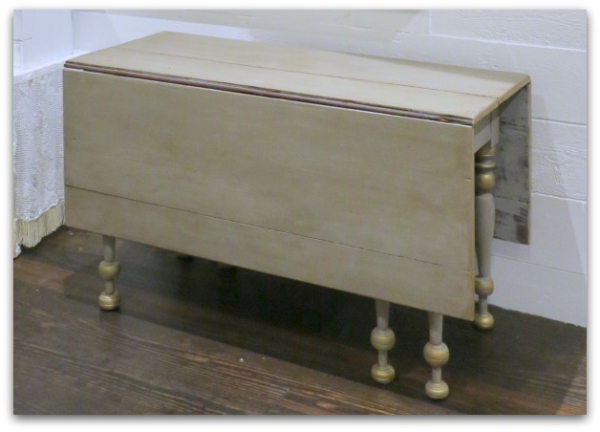
With the dark floor, the table was a little too dark for the room.  So, I painted it the same gray as the other piece, accented it with gold, and wiped a dark wax over it.

I wouldn't use wax on a dining table that got used daily, but I'm fine with it on something that only gets set up for special occasions. I'm afraid that heavy duty use and wiping down would be too much for wax. I have clear poly on my kitchen table. 
IMG_1914

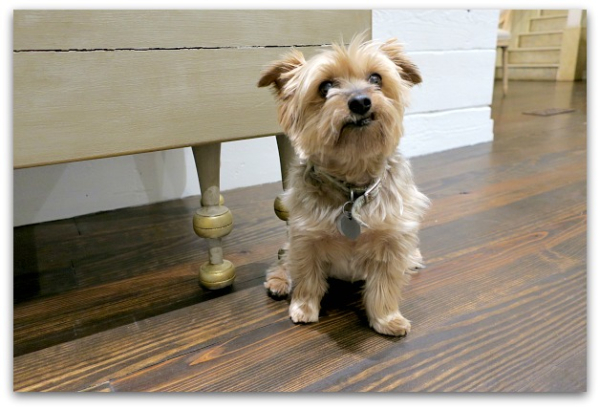
The gold makes the pretty legs show up more too.  
IMG_1932

Oh, but that isn't all!  I figured that while I had my  mess and paraphernalia in the house, I should do this piece the same day too.

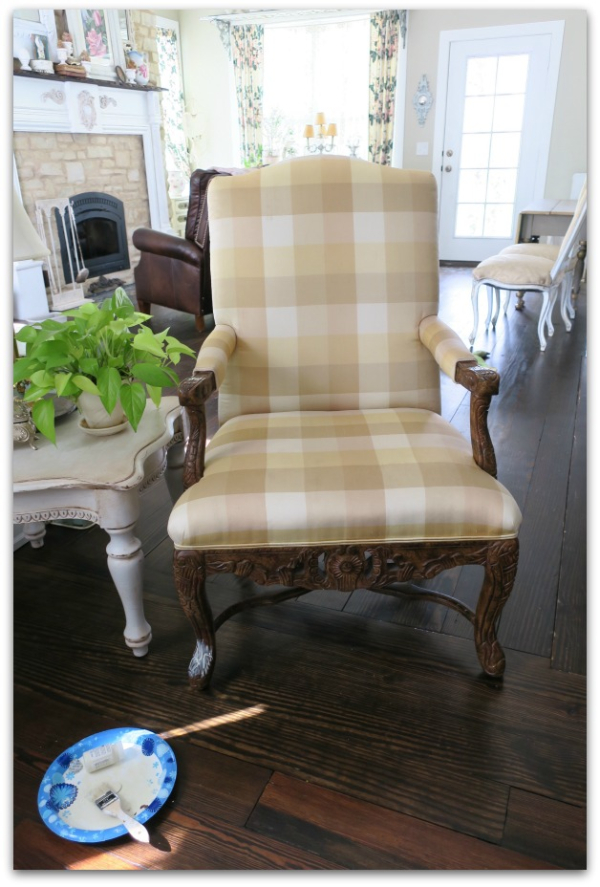
I've had this chair, ($30 from the Habitat for Humanity REstore) for a while and keep thinking I'm going to recover it. The colors match my house, but the fabric isn't quite me.  But it is silk, neutral, and in good shape. 

I decided whitewash the wood with cream wax, but then hated the look on the leg where I'd sampled it.  The carvings on the chair just weren't pretty enough to accentuate.  So, I painted it all white with chalk paint.

Still didn't like it.

I dry brushed cream over that. Better.  But not quite.

Dry brushed some white over that to blend.  Not bad.

Then, decided it needed distressing.  But my sand paper was worn out, it was midnight and I was DONE.  It got a tiny bit of distressing, a coat of clear wax, and kept its original fabric. NO reupholstering for now.  Also, my camera battery died, so no picture of the finished chair.  I'll post one later.
IMG_1928

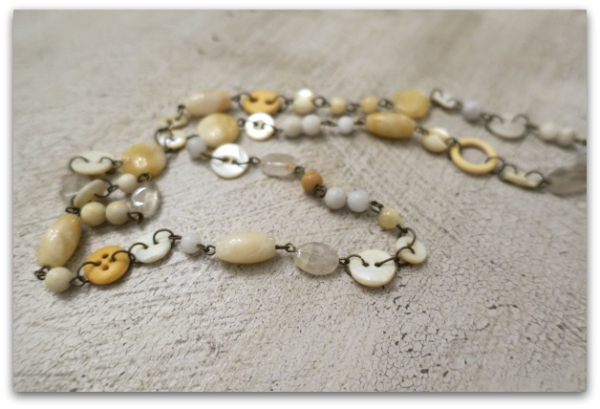
It was a busy day, I'd also painted the hive for my husband's new bee keeping hobby, and made this necklace too.

(This is the top of my kitchen/dining room table.)  One thing I like about the room is that there are lots of different finishes and colors that all go together.  I like to vary the tones and treatments on pieces around the room, so that they do not look like they were all painted in the same day (as many were), instead like they were gathered over time.


Faking a closet

cottage, Hand Painted Furniture, Hearth Room

IMG_0063

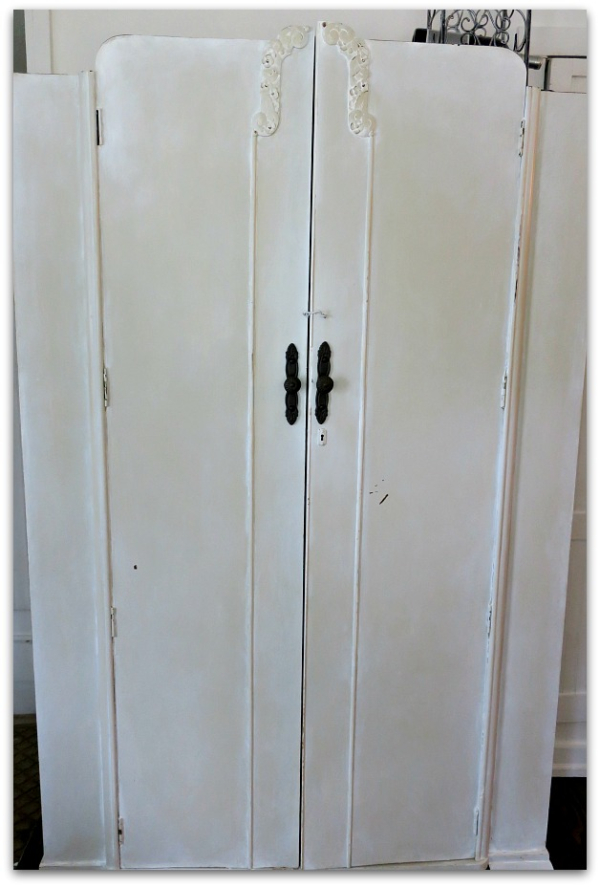
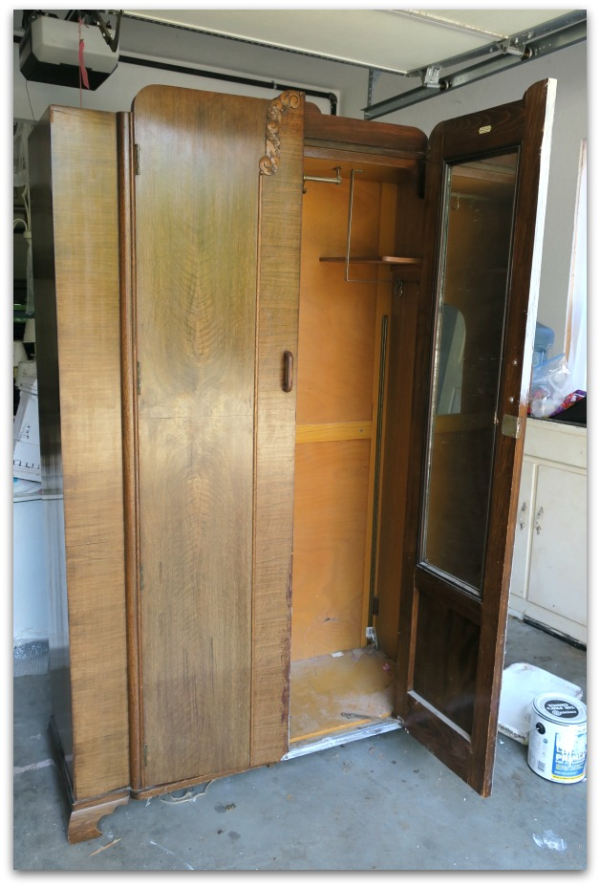
One thing I really wanted when we planned the new room was a coat closet for odds and ends, jackets, and a vacuum cleaner. But, we decided on generously sized windows that left no wall space for a closet.  As a substitute, I  added a wardrobe to use as a closet in the kitchen since we had removed an old wood stove durning the remodel and with some shuffling, had extra wall space there.  

IMG_0056

This one was $119 at the Old West Bottoms last month, and the wood was a little beat up, but it was a solid piece.  

IMG_0057

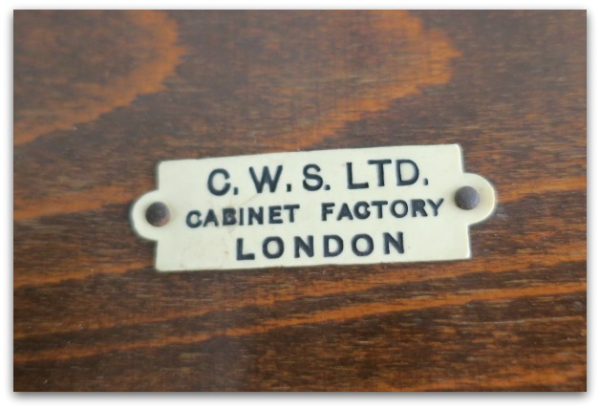
And was made in London.

IMG_0059

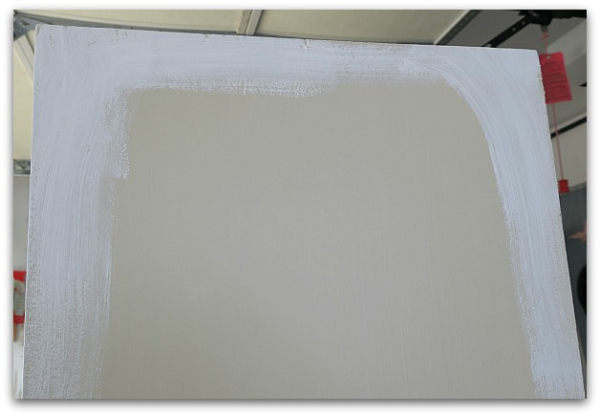
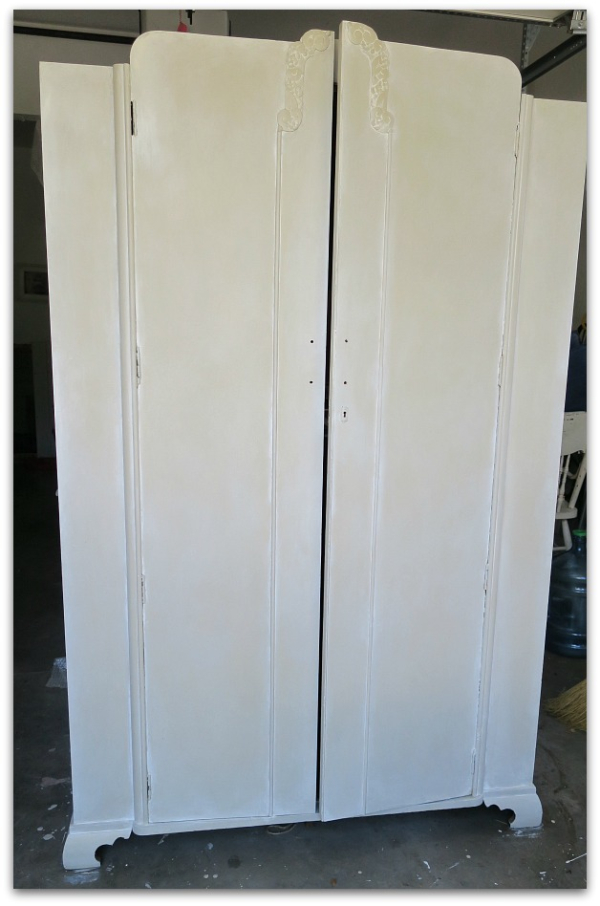
The wood was too dark for me, so I painted it. I almost went with white, then thought I had too many white pieces and decided I'd try tan with white over it. 

I painted it the base color after priming with a bonding primer (no sanding, no stripping)  Then mixed some white paint with clear glaze and brushed it on in small amounts at a time.
IMG_0060

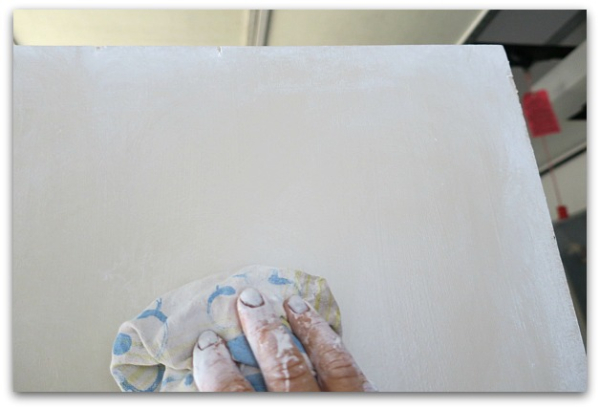
I wiped off the white glaze with a washing motion using a damp rag.

IMG_0061

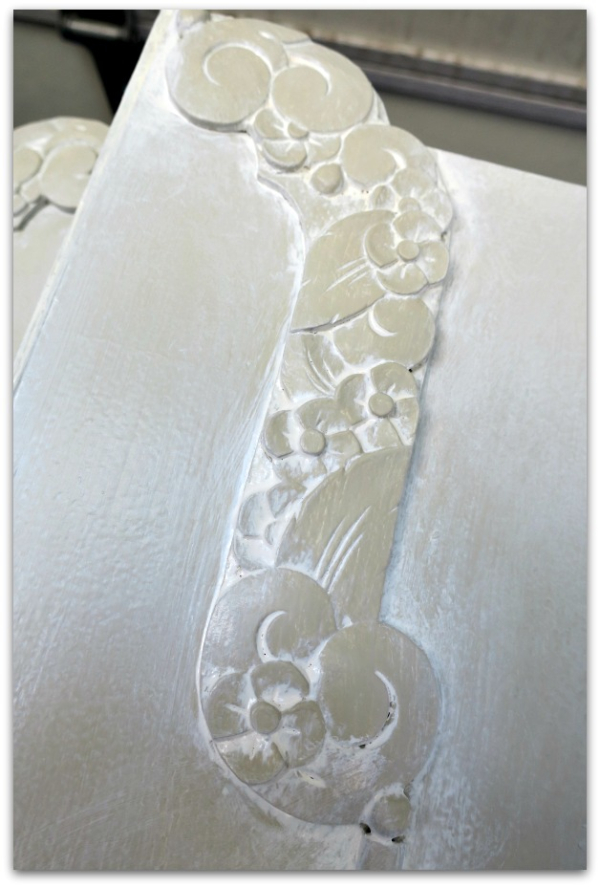
I really liked the way the white glaze accented the ornamentation.

IMG_0062

Pretty, huh? 

I lightly distressed it with sandpaper too.  No top coat was needed, I'd painted it with semi gloss latex paint, that is pretty durable.

IMG_0064

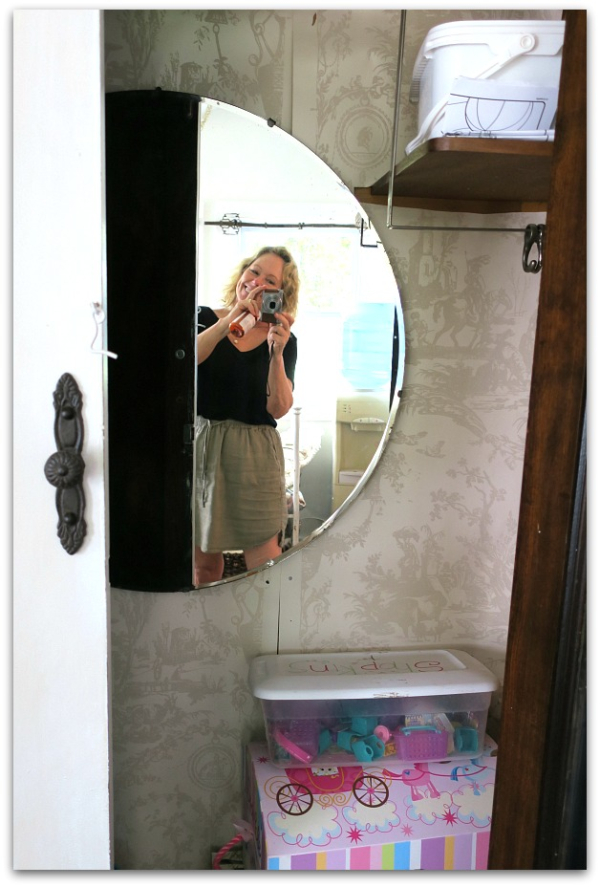
The interior was in good shape, except where a huge hole had been cut to make space for the previous owners to use it as a TV cabinet.  Plus, it was dark inside. I didn't want to paint the whole thing, so I covered the back in vintage wallpaper to match the paint and then covered the hole with a mirror.

The wallpaper is lazily tacked up, not glued down, and I didn't even bother to match the pattern. I just wanted to lighten it up. Don't you hate looking for something in a dark closet? This brightened it up nicely.  And the piece is perfect for hiding boxes of Shopkins, Playdough, and princess dolls.  

I hope I can squeeze in a few jackets and a vacuum cleaner like I'd planned on. Seems like toys take over pretty fast.


Have a seat

cottage, Dorkies (Yorkshire Terrriers), Hand Painted Furniture, Hearth Room, Kitchen remodel

IMG_8365

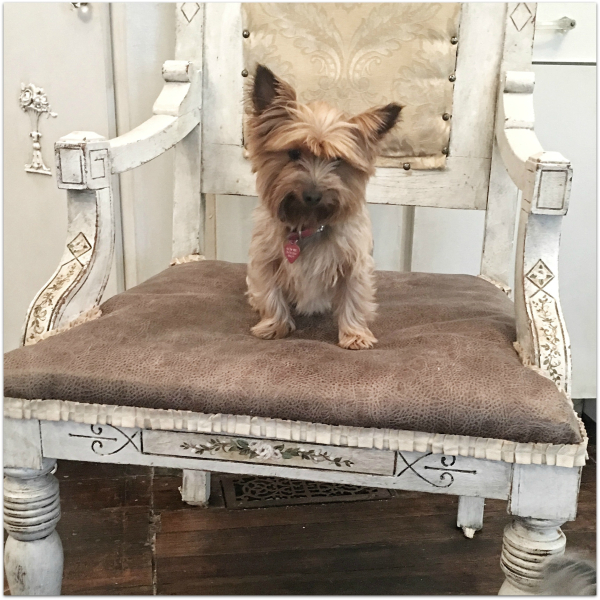
Dorothy is happy to be back and to resume her role as blog model.

This chair has been needing a new seat for, well, way, way too long. It is Sugarwings' seat at the dining table, and she tends to be…a messy boisterous diner.  The original seat was quite ugly, and I hated it from the minute I saw it, but it didn't show the results of her dining mishaps.  I'd made a seat slipcover to use over it when company came, but didn't leave it on all of the time, because it was light colored.

IMG_8360

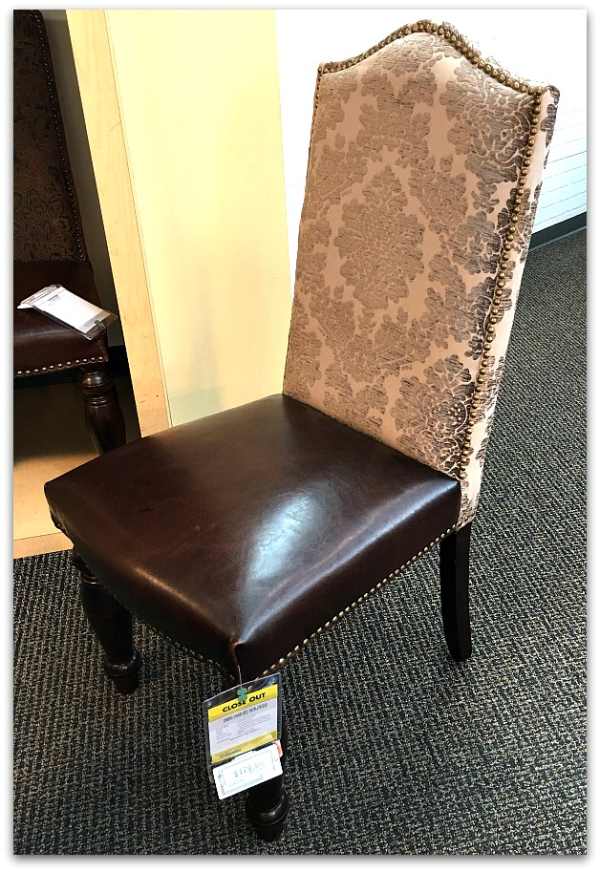
When I saw these chairs on clearance at Nebraska Furniture Mart, I was inspired to recover Sugarwings' seat in a faux leather look, to compliment this chair, which I bought for the other end of the table.

IMG_8364

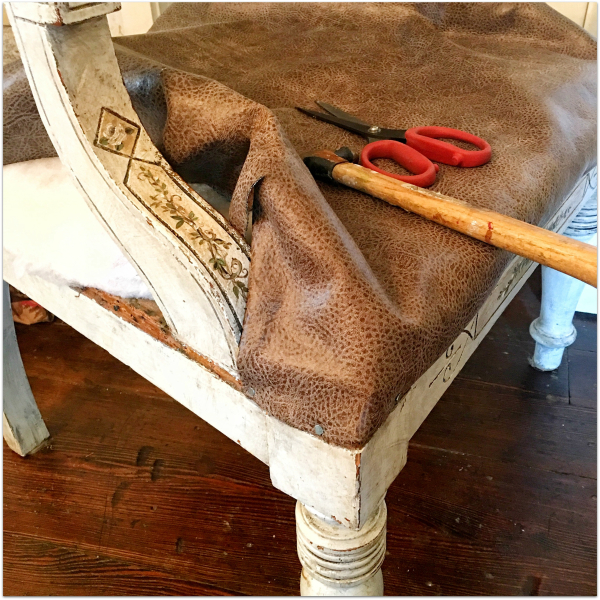
Hancock Fabric is going out of business, and I got the cloth for 75% off, and a ruffled trim for  an 85% discount.  The two chairs don't exactly match, but I prefer things that blend nicely, not match perfectly.  The other chairs are a mix match too, but I'm considering covering the seats with this 'pleather' stuff.

IMG_8357

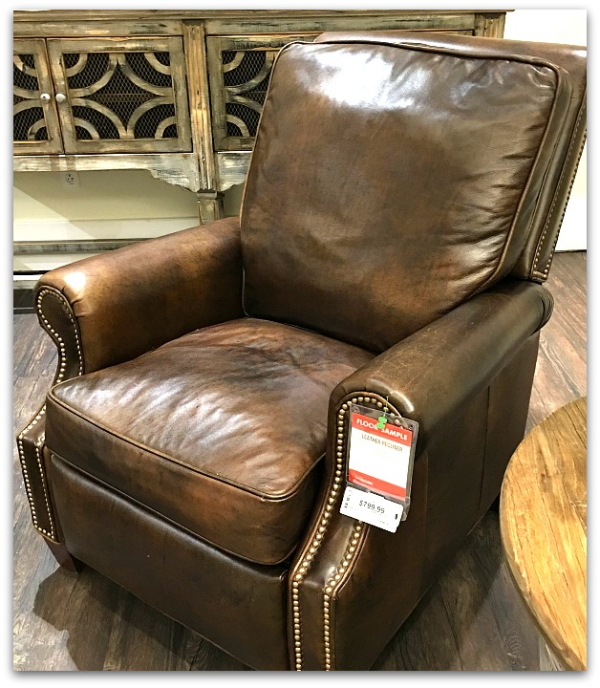
The kitchen/dining/living rooms will all be open to the new hearth room, where two of these genuine leather recliners will sit in front of the fireplace.    The home will still be mostly whites and creams, but I'm looking forward to adding these darker, more rustic elements of leather, especially in the hearth area.

I'm not a fan of recliners, but my husband is.  And the fireplace is his dream.  So I searched high and low to find a couple that we could both live with.  While I'd prefer some cushy, velvet seats with plush footstools instead, I have to remember it is his space too.  And don't you think that this recliner is less recliner-y than most? It reminds me more of a leather club chair than a typical recliner, so I think I'll like it. 

Maybe with a soft throw over each, and a distressed, white table between them?  Oooh, and an alabaster lamp!?

Plus, they were half price. Well, at least the floor model was, and the salesman gave the second one to me at the sale price too!

IMG_8372

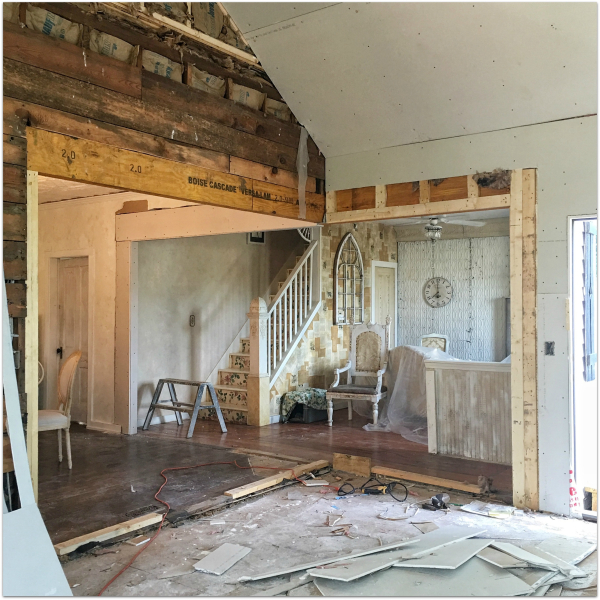
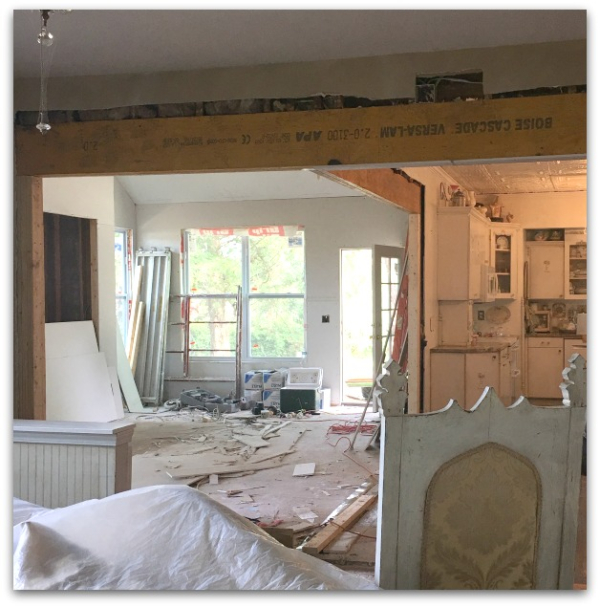
See what I mean about how open it will all be?  When the deconstruction started, it was a gamble, not knowing if we'd be able to have it this opened up or not.  Old houses can be tricky and the builder told us we'd have to see what was in the walls before he could say for sure whether it would require supports or not.  

But we lucked out and the room will be finished as we'd hoped.

Now, to pick out paint colors. And from looking at this photo, I think I need to redo the wallpaper on the stairs. In the past, you couldn't see the roses on the risers and the text on the wall next to them, at the same time. Now, from the new room, they are on full display and look a bit busy together.
 

IMG_8371 (1)

There is a lot of work ahead, but I can feel it coming together.

Paint is magic

cottage, Hand Painted Furniture, how to's

Cake topper circus 008

Before repainting the dining room table, I wanted to try out the crackle paint on something.  

Cake topper circus 001

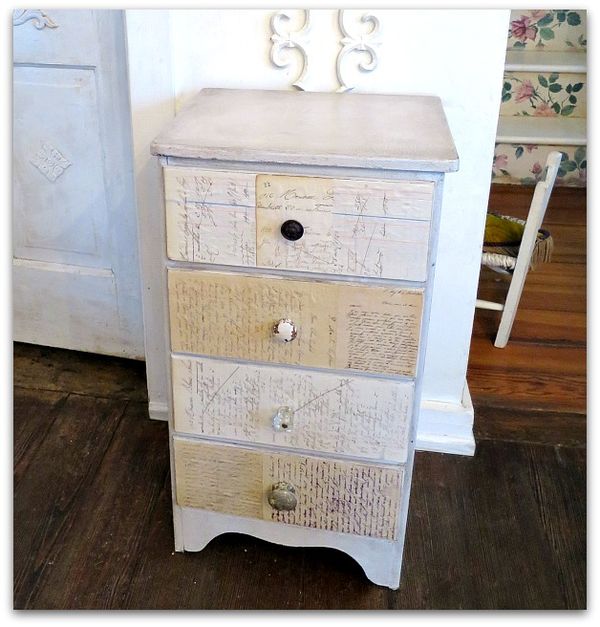
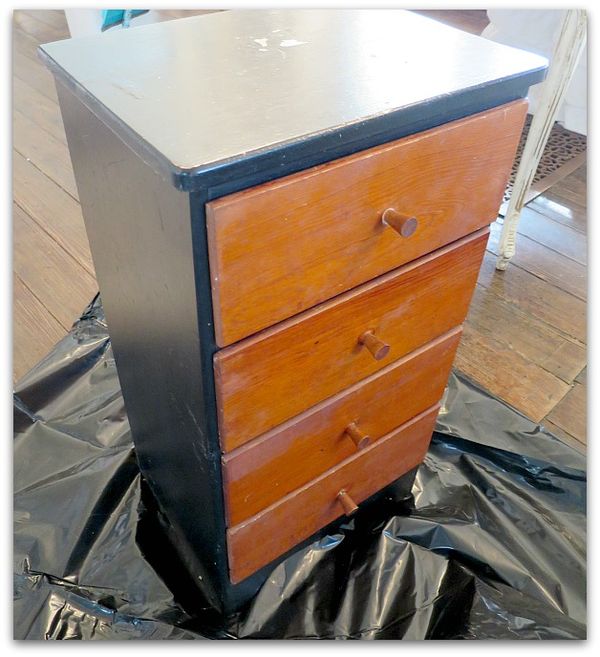
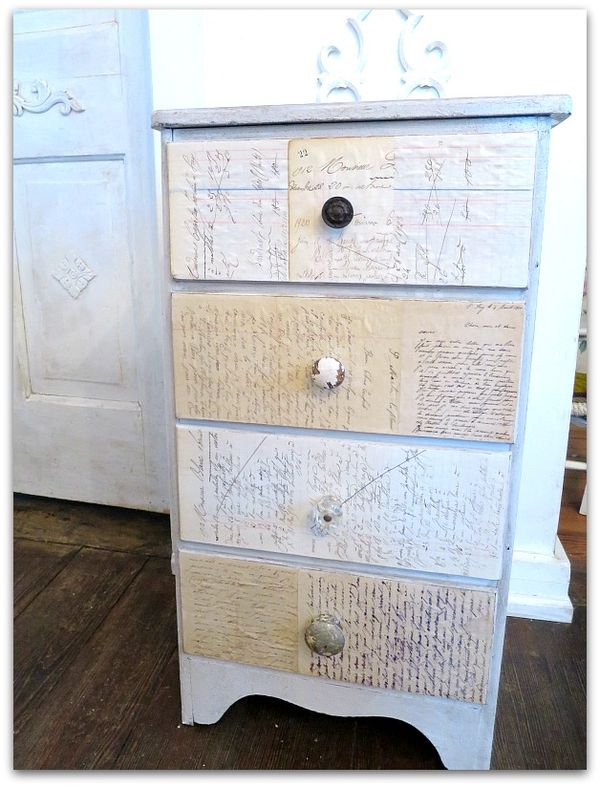
This is an itsy chest of drawers I'd found at an estate sale for ten bucks and it desperately needed a make over.

Cake topper circus 003

But I liked the two toned style of it as it was. Just not quite as it actually was…  Seriously, there was a desperate need for a redo.

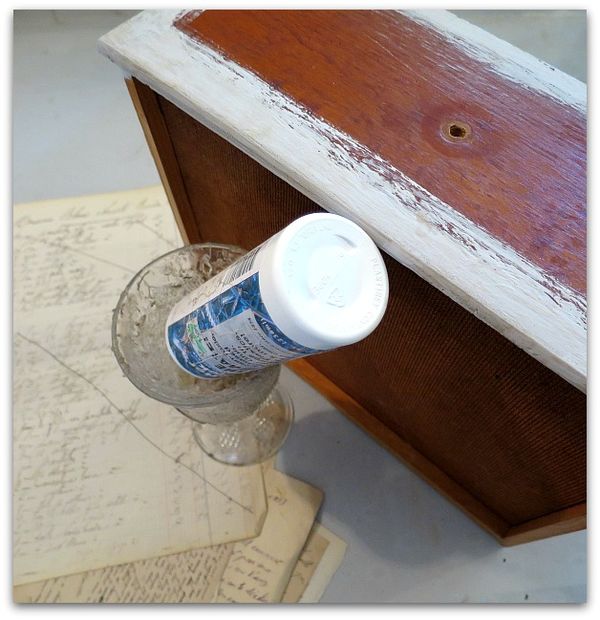
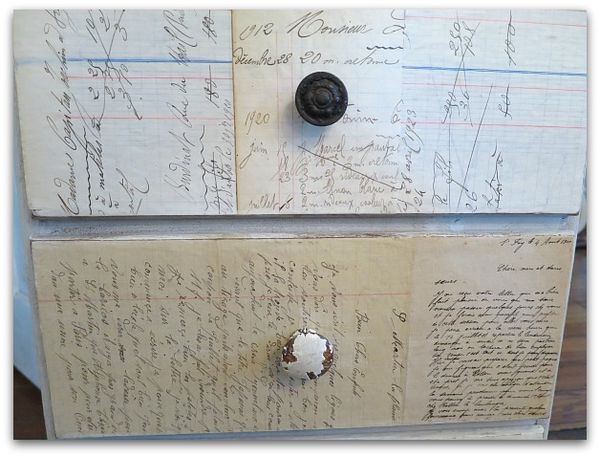
I decided to paint the cabinet and cover the drawers in paper. 

Cake topper circus 004

Personally, I dislike modpodge. I live in Kansas, which is very humid and I knew that a piece of furniture with that on it would be a sticky mess in July.

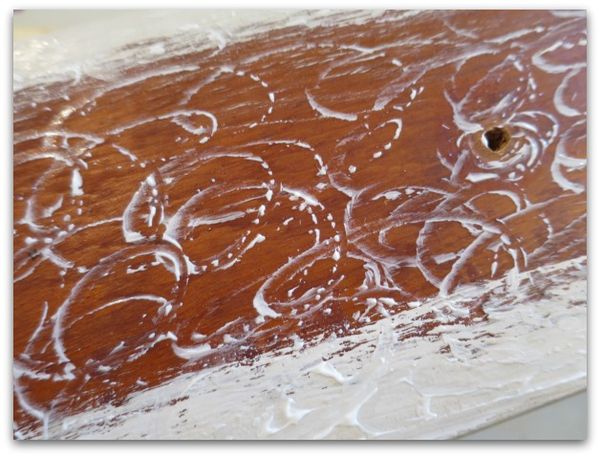
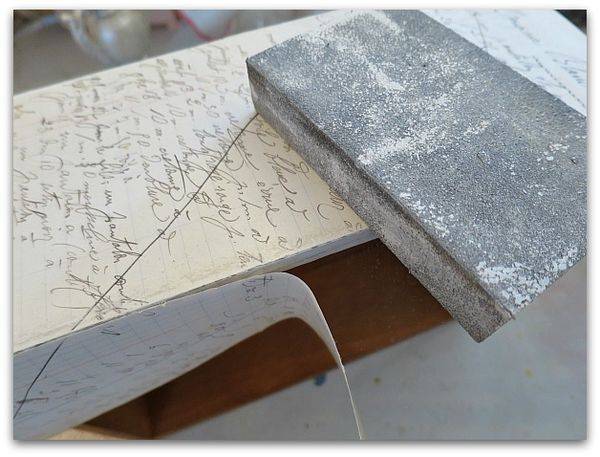
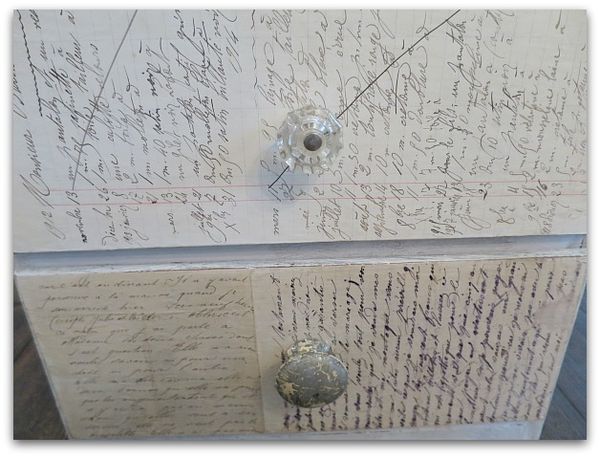
Also, I didn't want the over 100 year old handwriting on the paper to smear. So I drizzled The Ultimate glue over the drawer fronts and pressed the pages into it, burnishing it well.

Cake topper circus 005

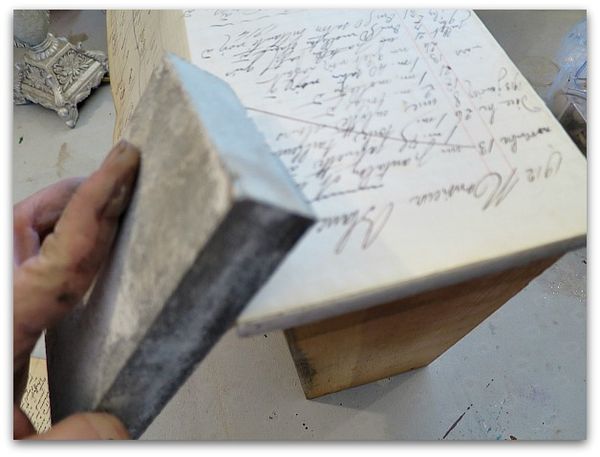
I don't pre-cut or measure. The paper gets glued down, then trimmed off with a sanding sponge.

Cake topper circus 006

Not only does it give the edge a clean cut, it helps adhere the paper to the wood.  

Because the paper is so old, I couldn't use a top coat over it. I didn't want that ancient ink to run.  This probably isn't a good idea for a piece that will get heavy use, so wherever I decide to put it, should be a low traffic spot.  I might use it in the studio, or a guest room.

Cake topper circus 009

Funny, I didn't have any place in mind for it when I bought it.  I simply wanted to save it. Years ago, I redid furniture for a living, and I miss that sometimes. When I see a small (NOT heavy!) piece for cheap, I can't help myself. I have to snag it and fix it up.

Cake topper circus 018

And I'm glad I got this little guy. 

Cake topper circus 019

I think he fits in just right at my house, wherever I end up using him.

Repainting my kitchen table

cottage, Hand Painted Furniture

Cake topper circus 014

Well, I hadn't planned on doing this.

6a00d83451ead569e201b7c82eb42a970b-600wi

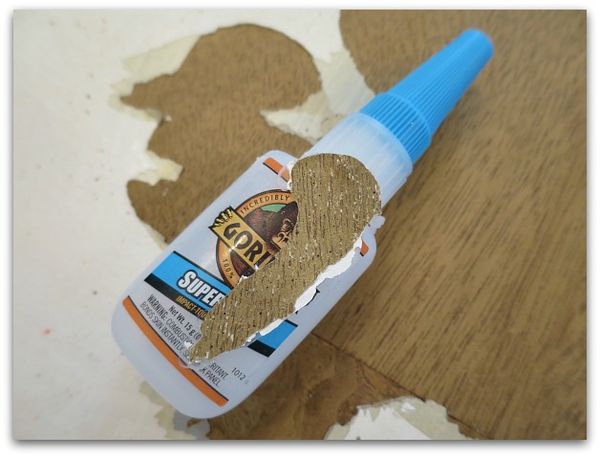
But after spilling super glue and having it take off the paint in a giant chunk, I had no choice.

Cake topper circus 011

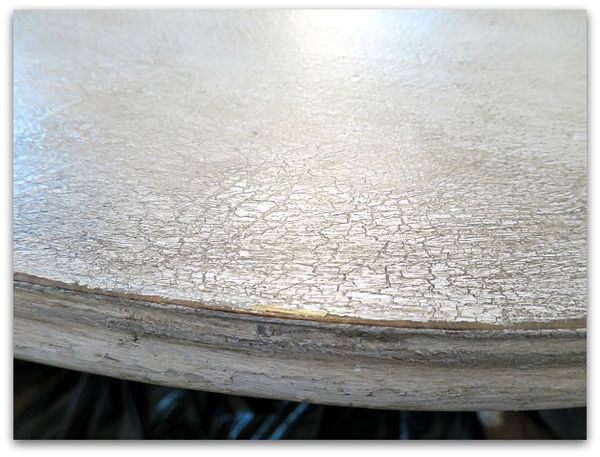
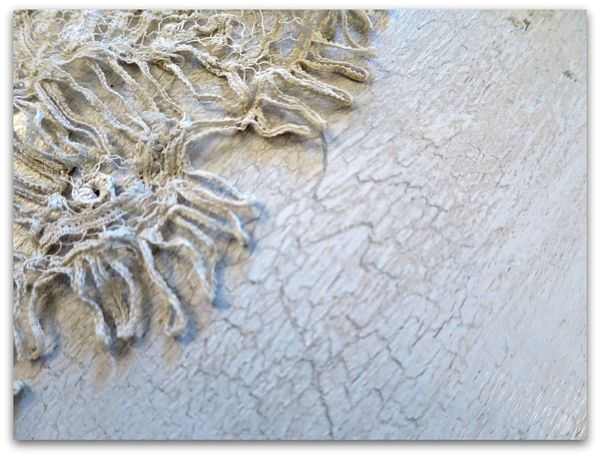
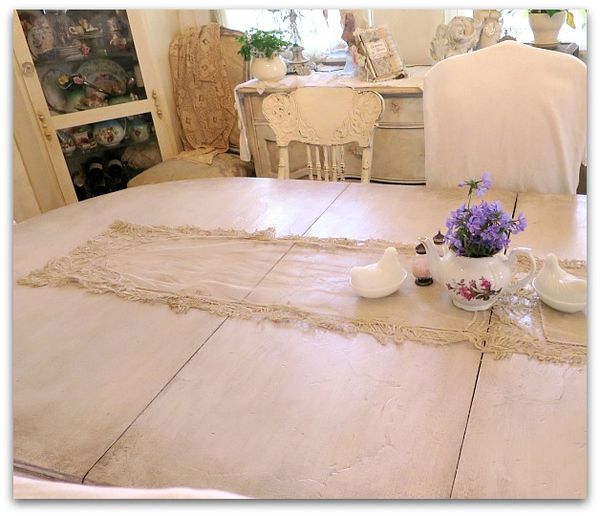
Of course, I'm always up for a change and glad to try a new look. I'd been pretty happy with the bright white with speckles that the table was done in before, but if I was repainting, I wanted to do something different, so I went with gray, then a crackle finish, then white, then a dark glaze under a clear topcoat.

Cake topper circus 016

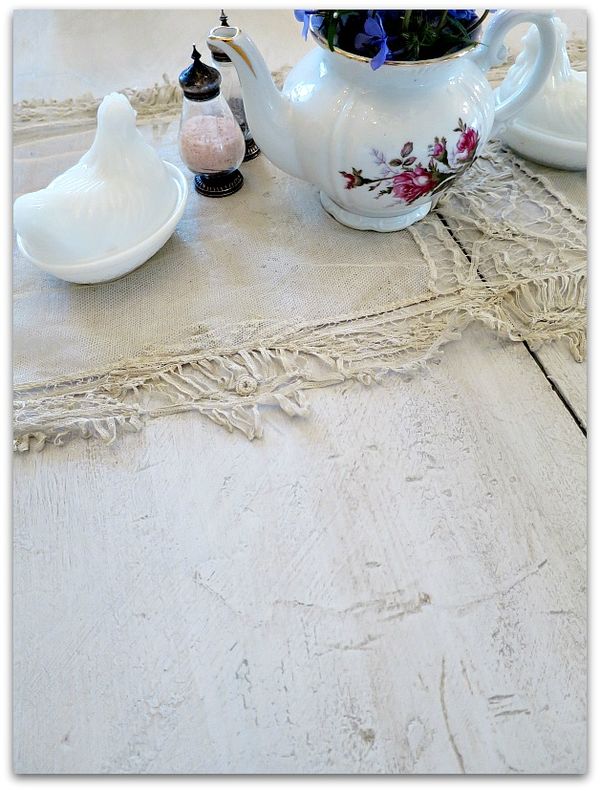
Now that it is done, I'm loving it.  It still has that white feeling that I wanted, but in a more rustic way.

Cake topper circus 015

Plus, it looks great with the "new" French net runner I got at an estate sale for $2.

13010836_10154058525329477_2324309566397310453_n

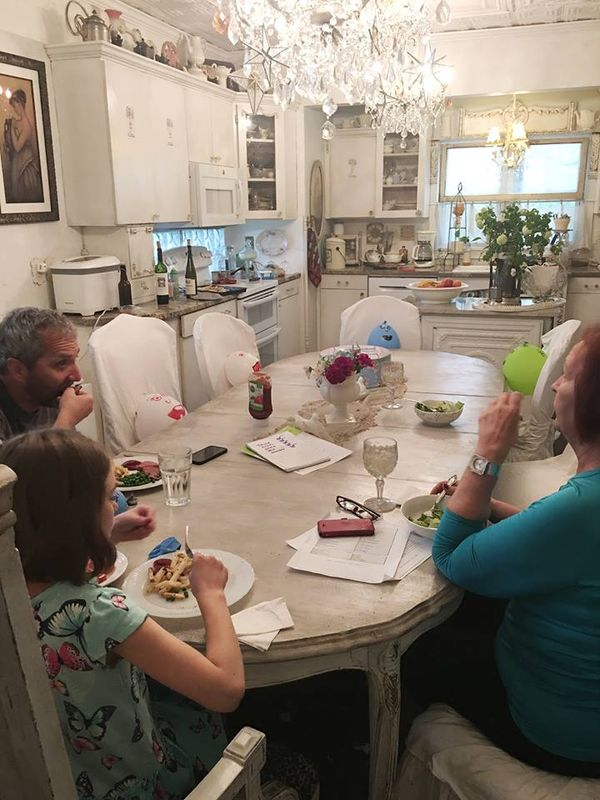
Our dinner guests seem to like it too. Sugarwings invited some of her friends to join us around the table when Aunt Sharon came to visit.

13006714_10154057132619477_4098147154492301734_n

At the moment, I am trying to really, really, enjoy my kitchen and appreciate every bit of it, because we are about to start on a remodelling project and I'm afraid I'll be living out of boxes and in somewhat of a jumbled mess for a while.  Once we are done, I'll be thrilled with the new room, I'm sure. But I see some rough times ahead before we get to that point! Please wish me luck.

Aging a picture with crackle

Hand painted, Hand Painted Furniture, hand painted signs, how to's, how-to projects, paintings

1

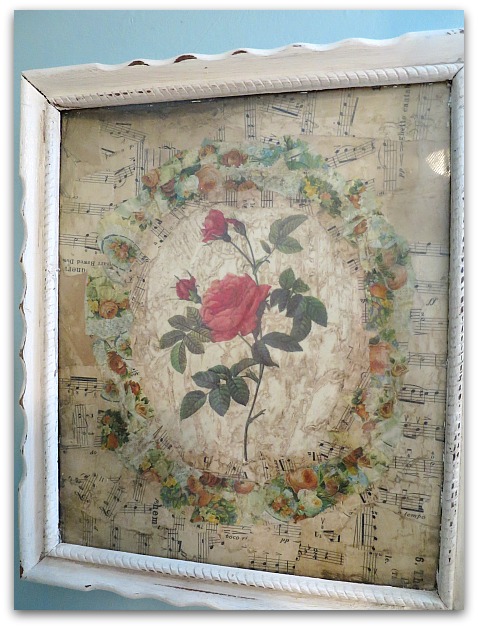
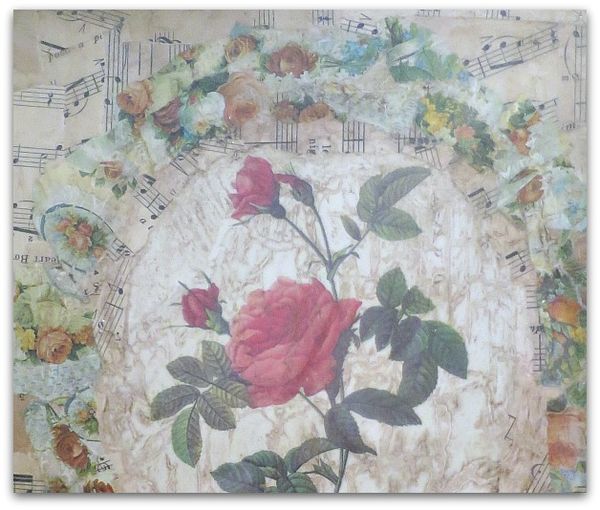
I was asked about this picture in my new guest room, so thought I'd give a quick how-to.

First, find a botanical, or other picture you like. Glue it to a canvas.

Next, tear and collage old papers around it. I chose a background of sheet music with an oval "frame" of roses torn out of old wrapping paper.   All are rough, torn edges, different shapes, and glued down with white school glue.

Pinkbathroom 004

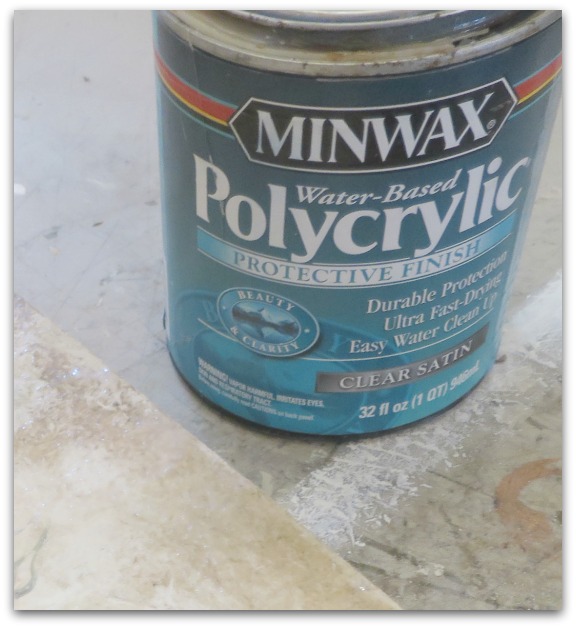
When dry, I clear coated it with water based Polycrylic from Minwax.

Pinkbathroom 003

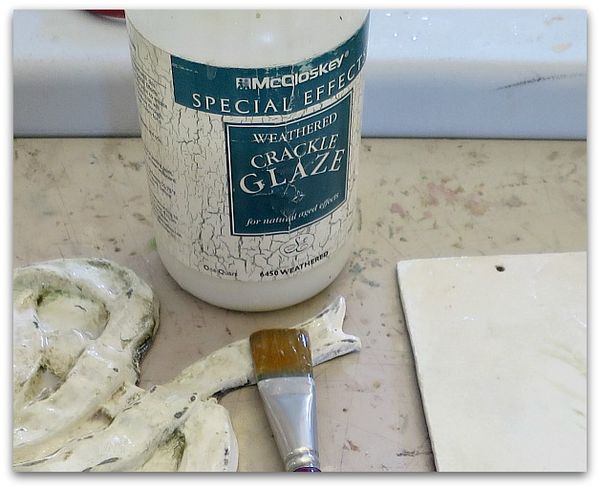
I let that dry, then brushed on a weathered crackle finish by McClosky.  

After that dried, another coat of Polycrylic went on.

The next day, I wiped on a sepia tinted glaze, let it settle into the cracks made by the weather crackle, and wiped it off. 

Cottageguestroom 016

Weathered crackle finish usually is applied over paint, then a second coat of paint is used over it to create a crackled paint finish. 

But, water based clear coat is much like paint without color, and creates the same effect.  But this way it is tone on tone, and clear. So, adding the sepia glaze shows off the crackle and ages any paper or canvas you do this over.

CrackleFinishCanvas2

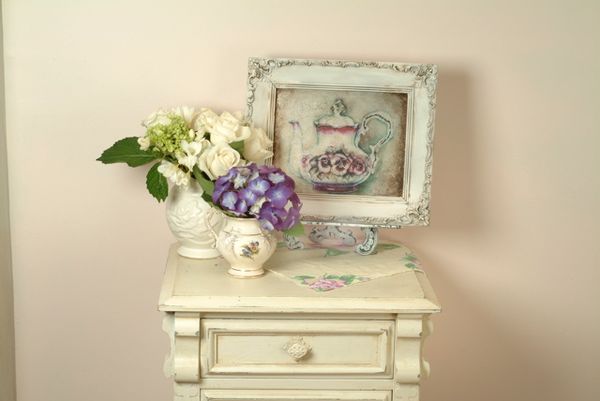
Here is a picture I used this technique on years ago for a Romantic Country article. The teapot is a photo copy of one of my original watercolors. 

For this one, I glazed over it after it was in a white frame, concentrating the sepia tone heavily in the corners, and also using it on the frame too.

Photo (4)

 I sincerely hate the look of crackle applied as it is supposed to be used, it is soooooooo fake. But I love it to use in aging a picture. And in aging other things too. The trick, to me, is to keep it tone on tone, to add texture.

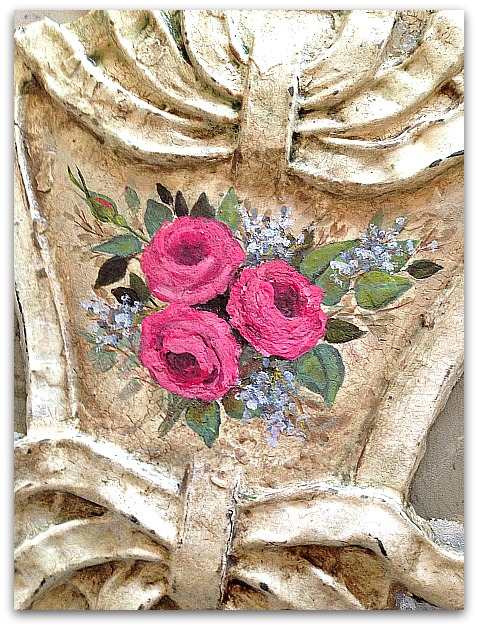
Here, I took an old piece of scrolly metal. It was antique, but it was not painted and I didn't want the paint I added to look too new. 

So, I painted the piece white, did the crackle, then a clear coat, then the glaze. Over that, I did the hand painted roses.

984271_10153011057194477_3476767174569364117_n

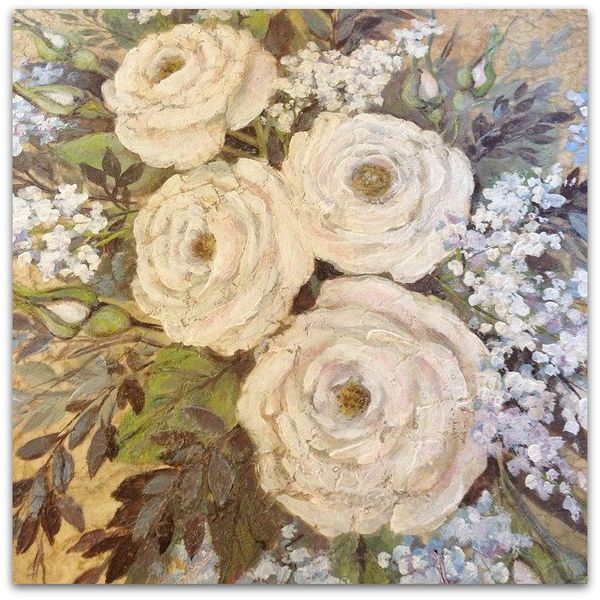
Same technique was used here on this canvas before painting roses.

Instant age for a brand new painting!

Does the chain reaction redoing ever stop? A Studio Shuffling

cottage, Hand Painted Furniture, studio tour

Bedrdo 002

When we decided to rip out the carpet and redo the guest room floor, I also decided to get rid of most of the things in the room. It was a hodge podge of misfits, leftovers from an antique booth, stuff that never sold, things that I just shoved in there to fill the space.

This piece is a good example of the decor.  It had a piece of wood on the top and a tablecloth over it and was filled with stored books.

I'd kept it for years because I felt like it had potential, but I'd never done anything about it.

Bedrdo 003

A coat of white paint was a big help. But it still had a huge, gaping hole on the top.

Bedrdo 004

But that was easy to fix with two 18 x 18" marble floor tiles from Home Depot. Then, I sat another book shelf on top of it after giving that a coat of the same paint.

Jan 061

Previously, I had this table in the space, it was okay, but not as efficient for storage.   And the mosaic shelf above it was useless. Purely decorative and a waste of precious storage space.

Even in a large studio, every bit of space counts!

(I might use this table in the freshly redone guest room, I don't think it counts as a leftover, or unwanted piece, I still like it)

Pinkbathroom 043

I'm still not done with my rearranging, but I'm liking the use of space so much more.  I've redone a lot of the shelves and have the things I use on a regular basis nearer to my desk chair than before.

Pinkbathroom 047

Hmmm, yes, I know this doesn't look very tidy, but for me, it is.   

Pinkbathroom 044

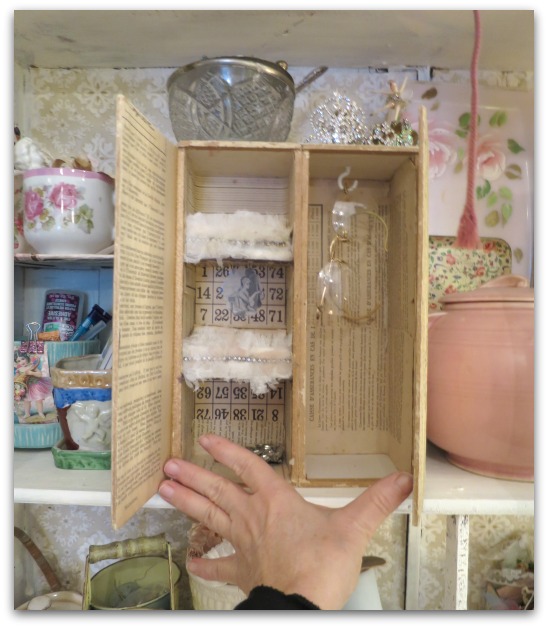
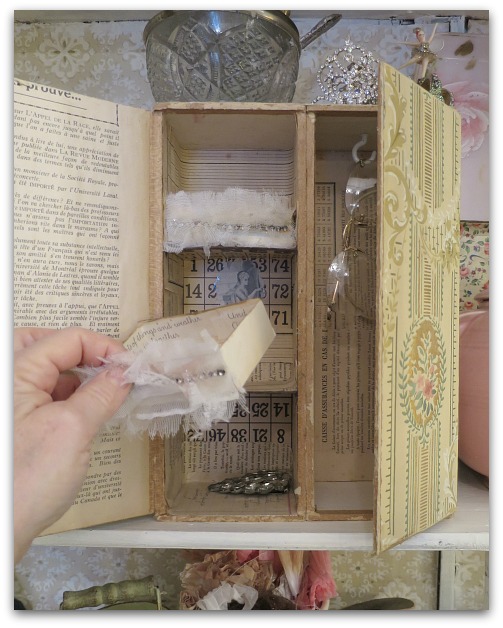
While moving things around, I found this mini cabinet I'd made from two old boxes glued together and covered in old paper. 

Pinkbathroom 045

It is going to be ideal to fill with little tidbits for crafting.

When my guest room gets all settled and finished, I'll be sure to show some pictures of that too.  


A Grand Fairy Indulgence, or the chain reaction of redos keeps on

cottage, Hand painted, Hand Painted Furniture, paintings

Pinkbathroom 032

When I was showing Dewdrop the paint chips for the guest room, she came up with a brilliant plan.

 I should paint their bathroom pink.  

The cute part was  when she tilted her little head, tapped her tiny chin, and acted like she was really making a deep consideration about the color.

 Which is funny, because in her mind, PINK is the only color that should exist.

And since I kinda like some pink myself, and since I'd been redoing and shuffling things around the house, and was still in that mode, I said, "Great idea!"  And went for it.

Pinkbathroom 029

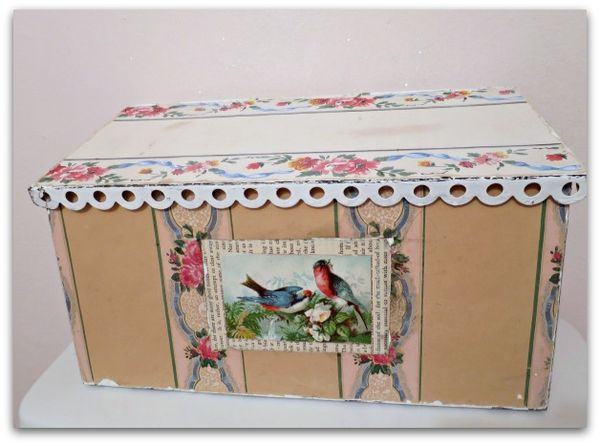
And anyway, when redoing the guest room, I moved a piece of furniture to the studio, and when I redid that area of the studio, I no longer had a place for this sweet little tin box covered in old wallpaper.

So, heck, I needed to redo the bathroom to make a spot for it.

Right????

Pinkbathroom 020

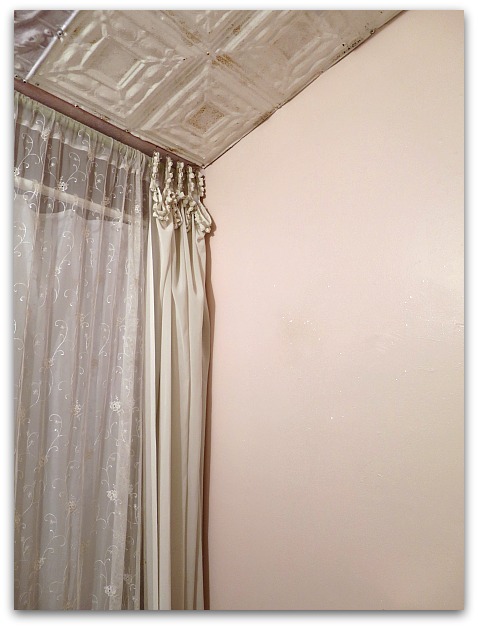
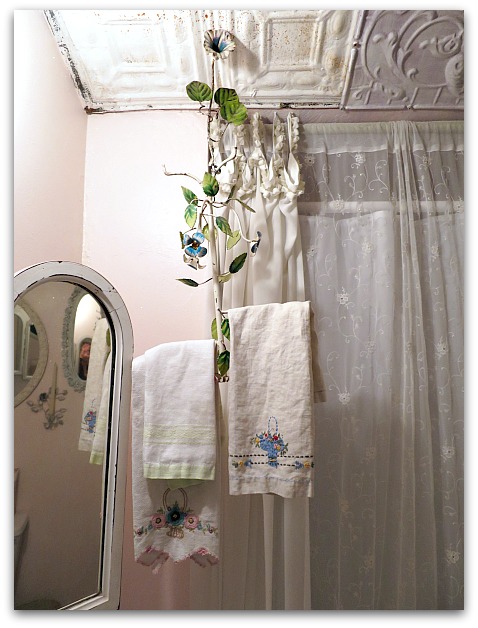
The shower curtains were due for a freshening  and needed to be taken down to be washed. The room used to be grey, and the shower liner was tan, so I bought a new white liner. That alone really brightened up the space.

 There is something about dull, Kansas winters that makes me want to brighten and lighten. I felt so much happier with my pretty, soft pink, sparkling walls and white shower curtain.

Pinkbathroom 021

The best part of the pink is that sparkle.  I dumped a few gold and silver glitter bottles into the paint before rolling it on. But to make it really dazzle, when the paint was still wet, I gave it a fairy dusting.

I filled my palm with glitter, and blew it onto the wall to stick to the wet paint.  Perfect results! (Unless you consider what a mess the floor was, and how much of it got tracked through the house. Which doesn't really bother me. I like to leave a trail of glitz and sparkle every where I go, and apparently the dogs do too.)
Pinkbathroom 019

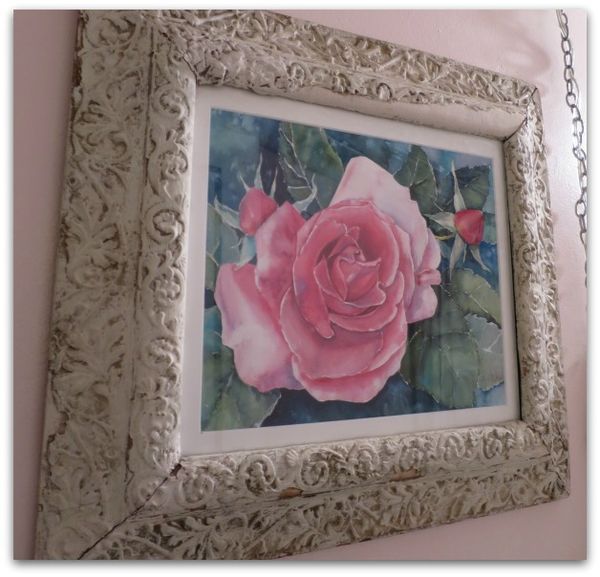
And while I am pinking up the bathroom, I am considering de-pinking the kitchen.  I moved one of my paintings from the kitchen to the newly pink guest bath. 

Pinkbathroom 024

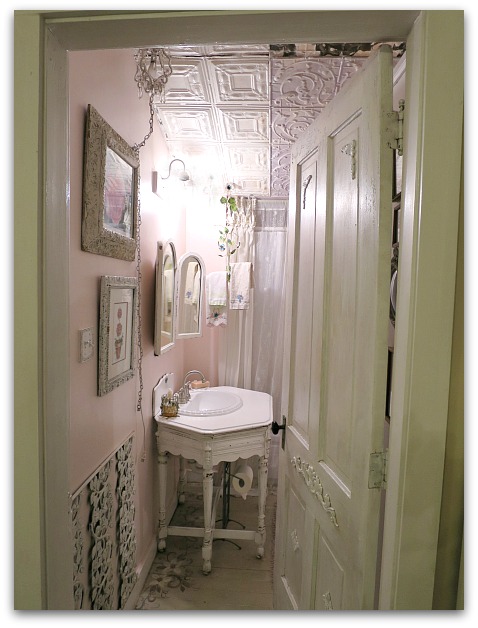
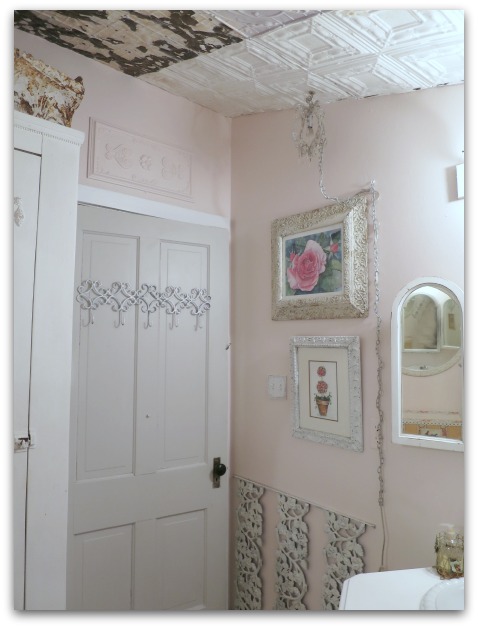
The door stayed gray. I liked that neutral shade with the wall color. I almost painted it white to match the trim, but am glad I changed my mind instead of the door color.

I also left the old tins on the ceiling rustic and natural instead of painting them all white, like some already are.  And not just because I detest painting ceilings, but because the roughness of the rust helps cut through the sweetness of the pink.
Pinkbathroom 023

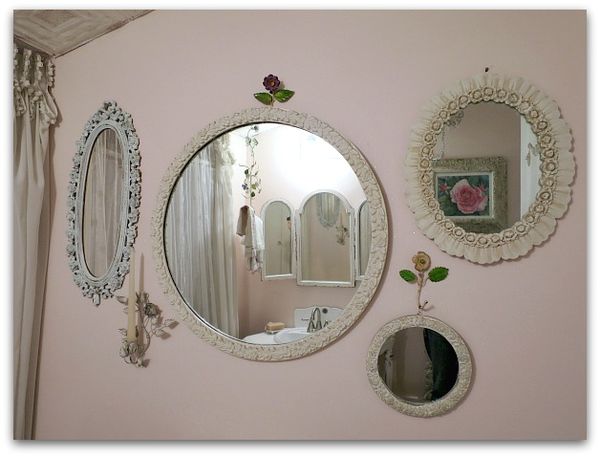
And there is plenty of sweetness going on.  Previously, there was a similar wall of mirrors. The largest and smallest were here with two other ones. But in looking around the house, I realized that I had two more mirrors with a rose patterned frame and I switched them out and added them to the other rose rimmed mirrors.

Pinkbathroom 027

Dewdrop hasn't been by to see it yet (as I am writing this ahead)  but Sugarwings was very pleased. And I am too. It is so dainty and pretty that I no longer can refer to it as a guest bathroom, I think I'll have to call it a "powder room".  That seems to fit it so much better.

Pinkbathroom 034

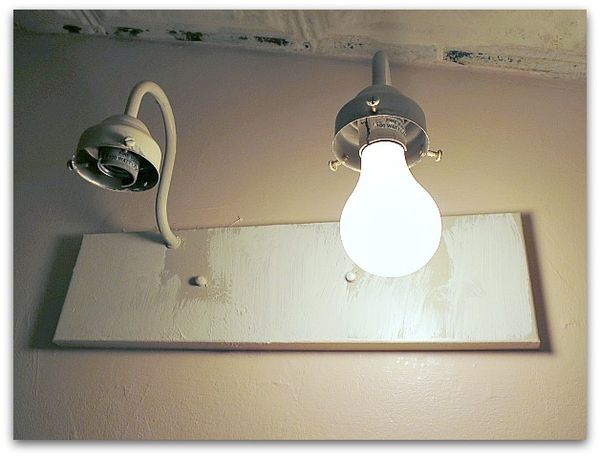
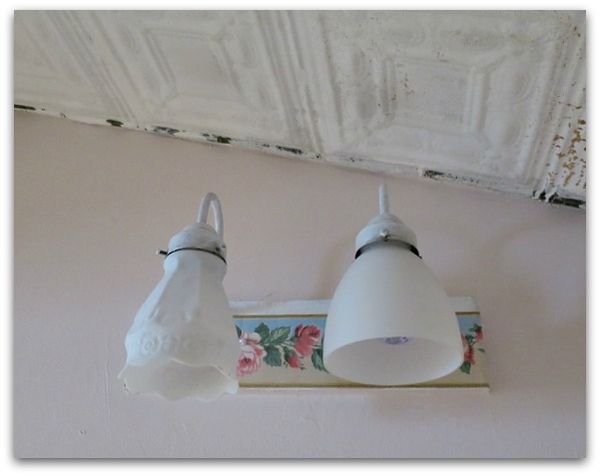
There was a very ugly light fixture in there, previously it was painted to match the wall and disappear.   I thought I'd paint it white, but wasn't happy with that.  I bought a new fixture to hang, but decided I didn't want to spend that much. So far, my only expenditure was for a gallon of paint, a few bottles of glitter, and a $9 shower liner. The $89 light fixture gave me a pause, plus it was just too new looking for this old house.

Pinkbathroom 035

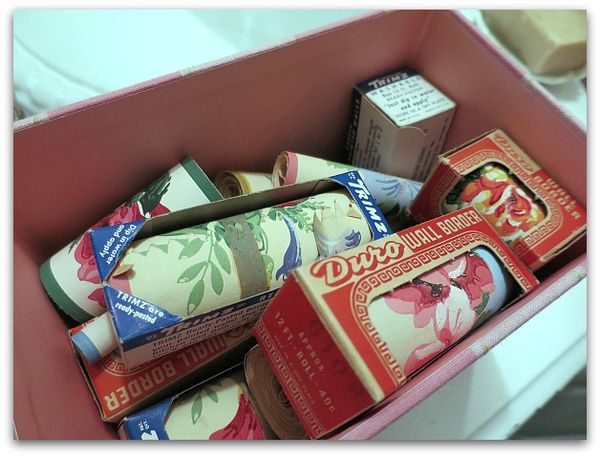
The tin box covered in wallpaper that had been moved from the studio, made me think of these rolls of wallpaper border I had.

A strip of old paper dressed up the light fixture just fine for me.  

Pinkbathroom 038

And I'm happy with the mismatched, vintage shades on the fixture.  They seem to suit my old cottage.

I think Dewdrop will like the pink flowers on the light.  Of course, she'd probably rather of had pink kitties…. I can't leave all decisions up to her!

Decorating chain reactions, one little change leads to another- Part 2

cottage, Hand Painted Furniture

Gaveston 084

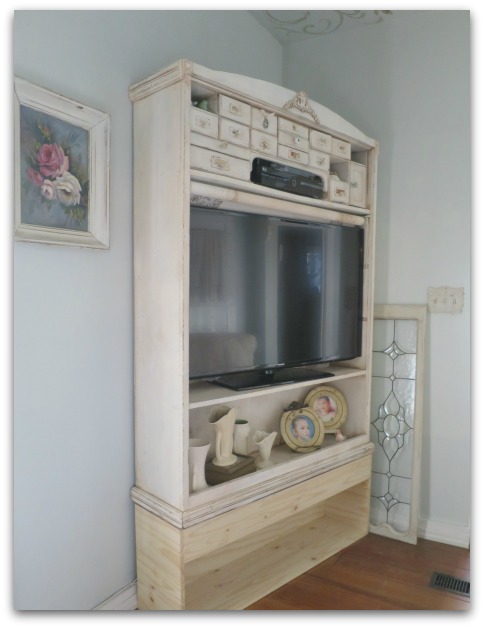
Recently, we'd switched our TV cabinets around, this one that used to be in the bedroom was moved to the living room.

Birdsong 3 weekend 047

This old bookshelf that I redid had been in the living room, but we wanted a bigger TV in the bedroom, where we watch most shows, so we did a switcheroo.

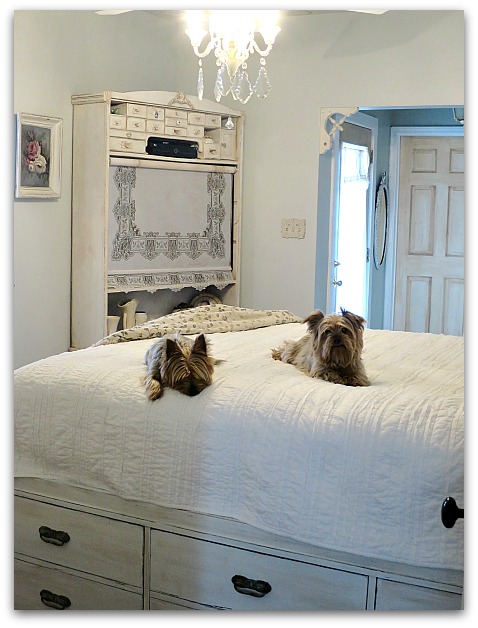
Problem was- our new bed with the drawers underneath was taller than our old bed. And I couldn't see the TV (or at least anything below the top of anyone's head) from my side of the bed.

Jan 050

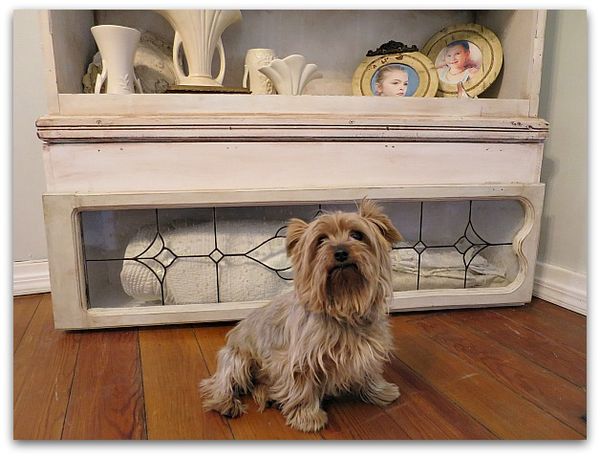
My darling, and talented son, built a box to raise it up. And remember the stained glass piece  from my friend that I hung over the bed? She also had made the one leaning against the wall in the photo for me, it was on a narrow cabinet that I was taking out of the guest room (another re-shuffling is going on there).

What are the odds that it fit the box exactly??? Yep! Pure luck, it is ideal for the base of the cabinet!!!

Bedrdo 027

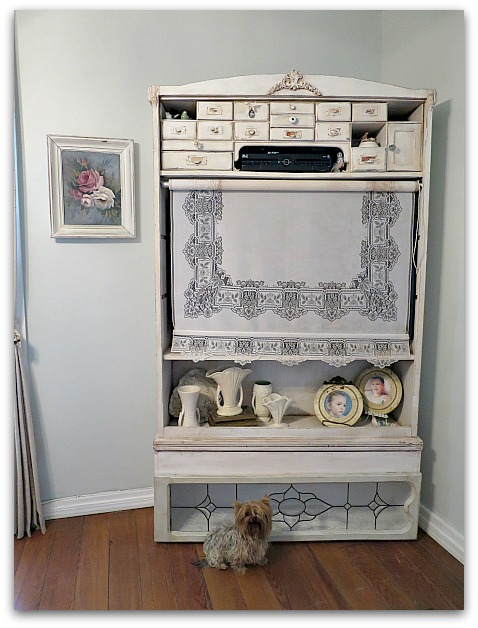
I'm keeping extra blankets and another set of sheets in that cubby hole now.

Bedrdo 012

And I can watch TV from my side of the bed.

Bedrdo 020

There is a blind over the TV for when I don't want to see the big black screen. But honestly, I rarely shut it. I'm such a television junkie, the set is always on. 

Bedrdo 034

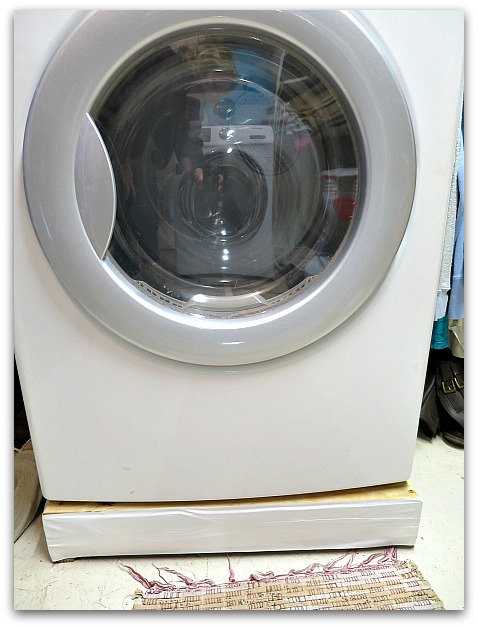
I don't know what I'd do without my boy, all these little redos have kept him busy. We had some changes in the laundry room too, moving the dryer, getting a new washer, adding shelves.  An electrician took care of moving the outlet, and set the dryer up. But when my son saw it, he said it was too low to vent directly outdoors, and built a box (from scrap lumber saved from ripping out the deck last year)  to set it on to raise it up high enough so that the vent can be straight through the wall and not have to zig zag up and over the baseboard.

Pinkbathroom 042

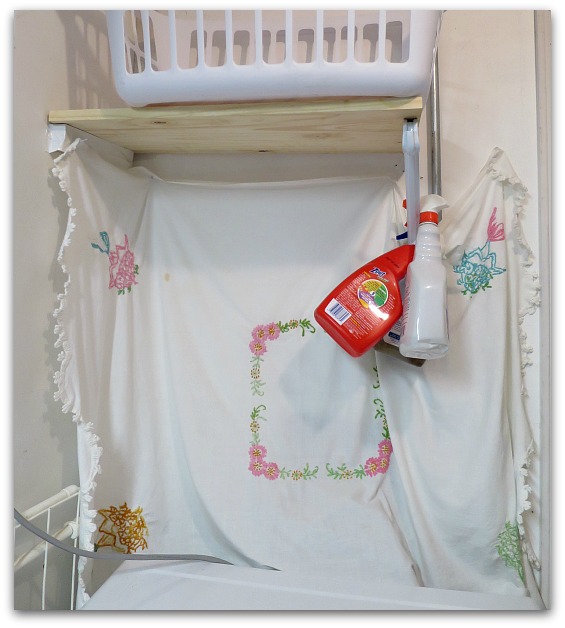
Not all redos are pretty, I used white duct tape over the old deck wood instead of painting.  It worked so well, I did the same trick over laundry room shelves my son made for me too.  (the left corner under the shelf)  And while I wasn't going to do too much to gussy up this master closet/laundry room, I did tack up a curtain over the water hook ups and some of the ugliest parts.  I could paint the conduit the electricians had to use to run the power to the dryer… nah. It's a closet, this is fine.

My son is very busy right now with two other carpentry jobs, so I'm waiting for him to finish those before he lays the floor in the guest room.  I'll have pictures from the chain reaction of decorating that  redo has caused soon too.

PicMonkey Collage

Or if you'd rather see them in person? Come and visit me at Birdsong 5!  

(I promise I won't make you take a tour of the duct tape projects in the closet)

Scroll to Top