Hand Painted Furniture

Decorating chain reactions, one little change leads to another- Part 1

cottage, Dorkies (Yorkshire Terrriers), Hand Painted Furniture

Bedrdo 022

Have you ever noticed that one little change means a chain reaction of other changes? 

Santa swim 071

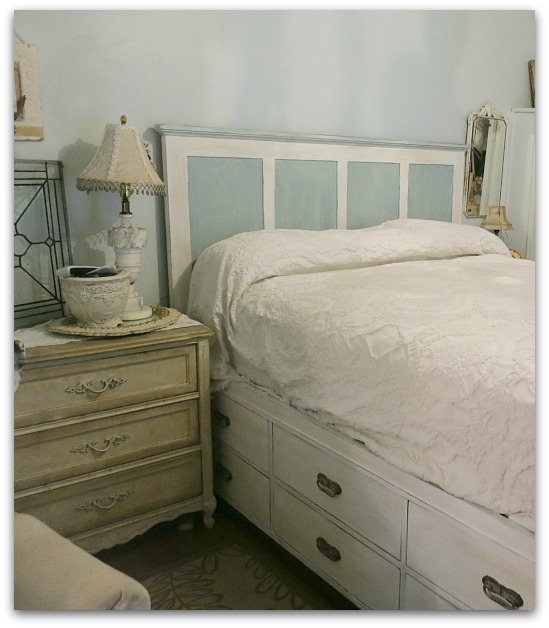
The new bed was great, I really did love it once it was painted.  It saves space, it is cottagey-cute, and it has a cozy mattress.

But, not only did we no longer need the bedside dresser, the drawers udner the bed were blocked by it. 

And all of my bedding was too long, and life is too short to tuck the bedspread under the mattress all the way every morning. But why have drawers if there is a blanket covering them up and you have to move it every time you want to open a drawer?

Plus, this head board was lower than the last one and the wall looked very blank.

Bedrdo 023

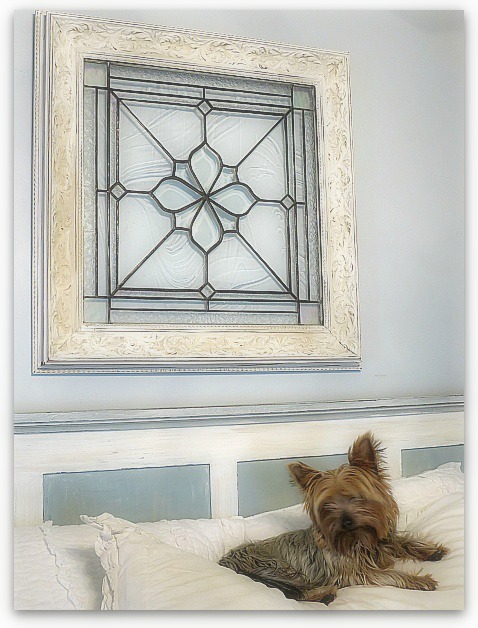
I had this piece of stained glass made by a friend framed to hang over the bed, and that took care of the blank wall.

Bedrdo 025

I found a white quilt and shams on sale at Target that fit exactly without tucking in under the mattress.

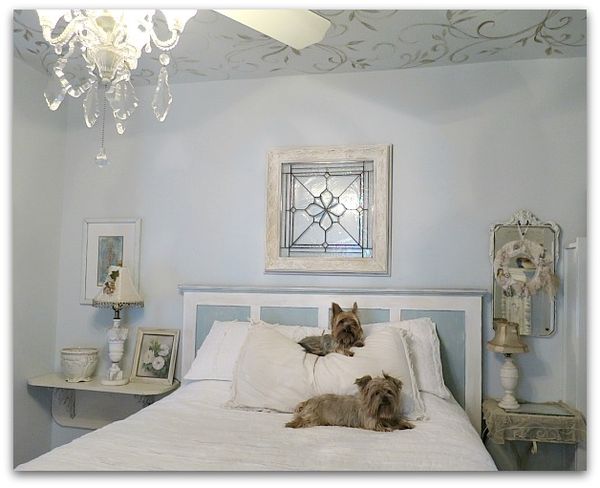
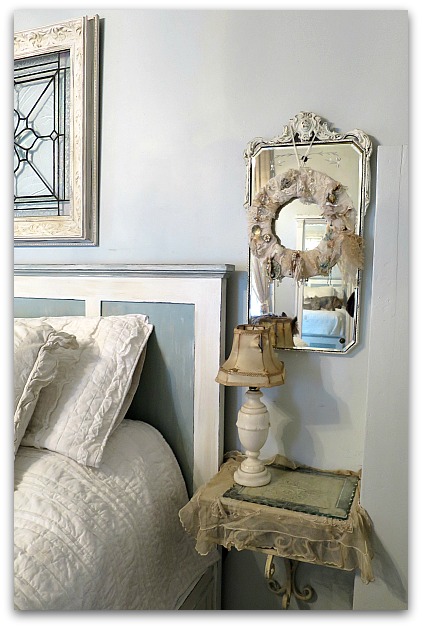
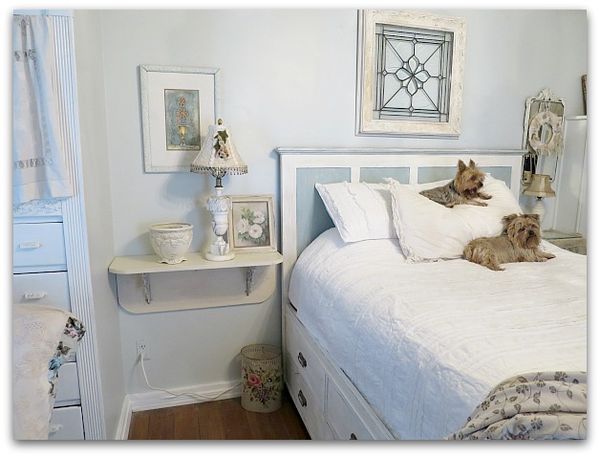
And best of all, I thought of using shelves on the wall in place of end tables. (they aren't lopsided, that is just a camera angle)

Bedrdo 017

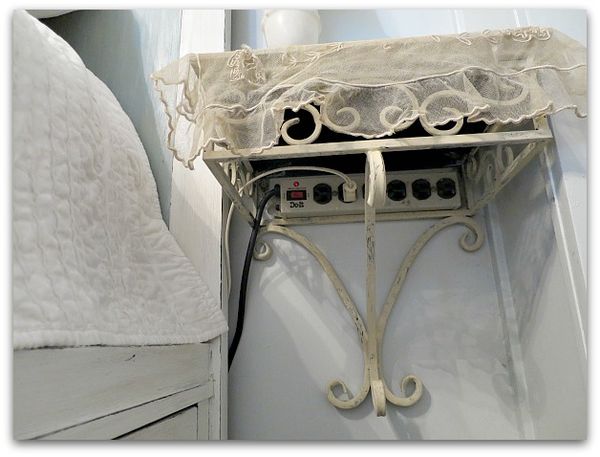
This smaller one is from Hobby Lobby, it is black metal and I painted it with leftover paint from the bed. We screwed the power strip up under it to plug in the lamp and my iPad chargers.  The outlets are nicely hidden unless you are looking up from the floor.

Ftlauderdale 002

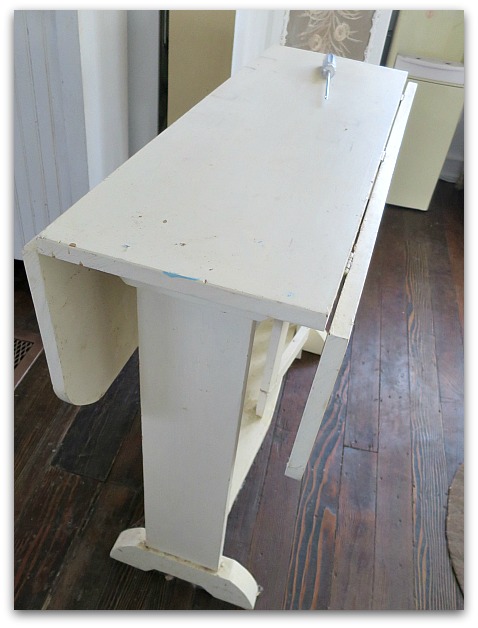
For the other side, I needed a bigger shelf and couldn't find what I wanted. Till I noticed this old, broken drop leaf table out in the garage.  My son took off the leaves, added iron brackets, and it was just what we needed for the wall space. 

Bedrdo 016

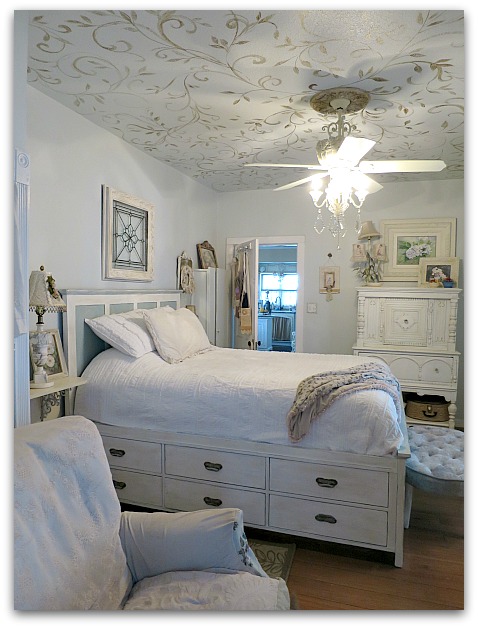
I've been really happy with both. And what a perfect fit! The two shelves, plus the bed are the exact size to fit the space. Wow, what luck.  

But there was one more change chain reaction yet to fix…. 


A Cottage Bedroom Makeover, brand new dark oak gets lightened up, or why I will never use chalk paint again

cottage, dogs, Dorkies (Yorkshire Terrriers), Hand Painted Furniture

Bedrdo 021

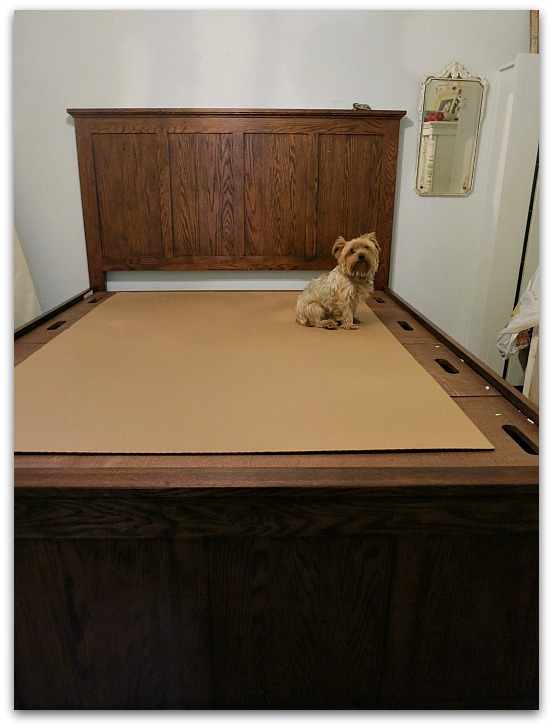
We needed a new mattress.  So, headed to Nebraska Furniture Mart to test a few out. While there, my husband spotted a bed filled with drawers underneath and he had to have it.  

Now, he is NOT a shopper.  We almost ended our marriage once at that same furniture store over a recliner.  It is now and forever known as the Crying Chair. Long story, but basically, he hates to shop. He walks in, glances about, buys stuff, and leaves as fast as he can. 

He prefers letting me make choices 99% of the time.

Santa swim 068

When shopping for a mattress, though, he had to go along and approve the fit.  and we discussed that it had been a good life together, and if Nebraska Furniture Store succeeded in ending our marriage like it tried to do before, we knew that we'd at least had almost 30 years of happiness together.

Bravely, we decided that we could face the challenge. It was a quick trip for a mattress, right?

Santa swim 065

Then, he spotted this bed.  When he does shop, and sees something he likes, he never hesitates, or looks around. He likes it, he buys it. And when he saw this bed filled with storage options, he thought it would streamline our lives.

I thought it was DARK. And too new. But figured, hey, it's his house too. I wasn't going to let the Crying Chair incident repeat itself. We bought the bed.

Santa swim 072

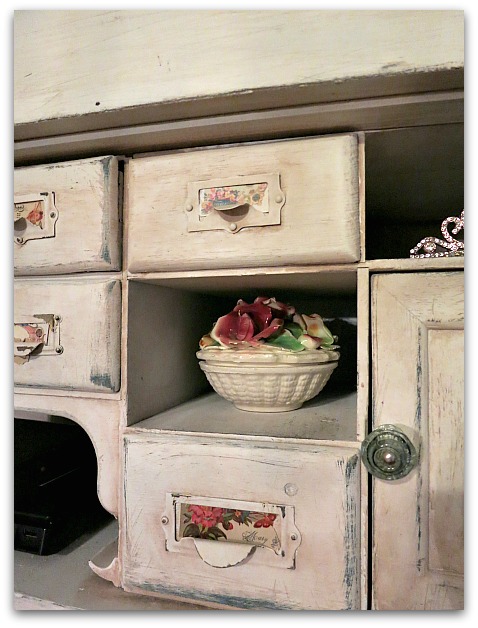
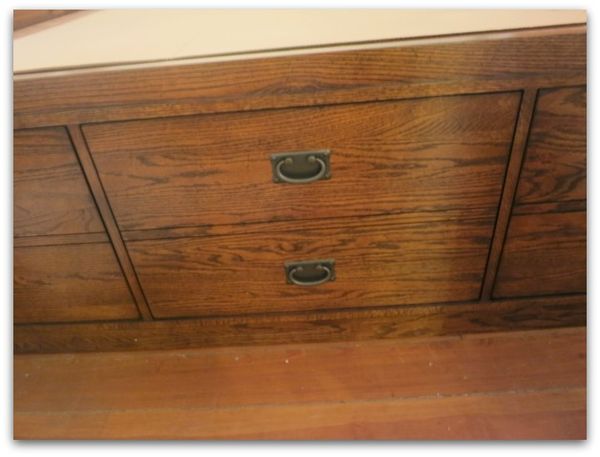
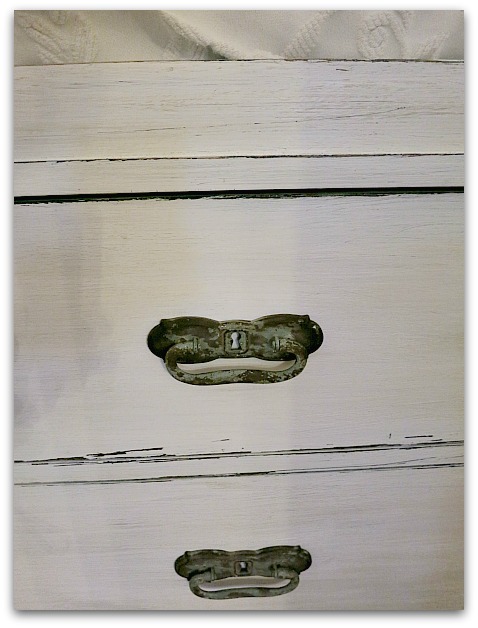
I repainted it within minutes of its arrival to our home. And found these great handles (at Hobby Lobby) to replace the heavy ones that came with the drawers.

Jan 060

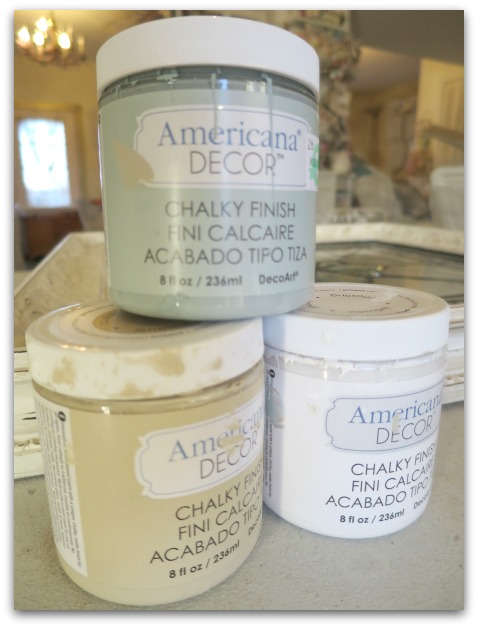
Everyone raves about chalk paint, so I thought I'd give it a try. Hobby Lobby now carries this brand, it is $8 for a little bitty jar, but I made multiple trips with a 40% off coupon to get enough to tackle the job.

I'd heard that you don't have to prime, it covers well, uses very little paint, and is easy to sand through to see the previous layers of paint.

Hmmm….

Well, yes, I was able to paint without priming. (But a coat of primer and a coat of paint is an equal amount of work as two coats of chalk paint, and cheaper)

But- the coverage was not good. I had to go buy more paint. It took much more than I had planned.

And- I took a lot of care, layering colors, thinking I could sand through them for a varied look. Nope, when I sanded, I hit wood. You could not see the layers of colors underneath. I had to dry brush the colors over the white to get the look I wanted, after doing all those layers, and sanding. 

Also, chalk paint simply must be sealed.  You either wax it or use a sealer like Polycrylic.  And I don't think everyone realizes that wax is not permanent. Just like on floors, it wears off, you need to re-wax.  So, I chose the Polycrylic top coat (water based).

If I'd used a bonding primer, painted it gloss white, and drybrushed acrylic craft paint over that, it would have cost much less, I wouldn't have to seal it, and it wouldn't have taken as long.

For the exact same look.  Oh well, I'd been wanting to give chalk paint a try. I won't be spending that much on paint again.  And I like the bed now, so all is well. Lesson learned, and it still looks pretty.

Bedrdo 033

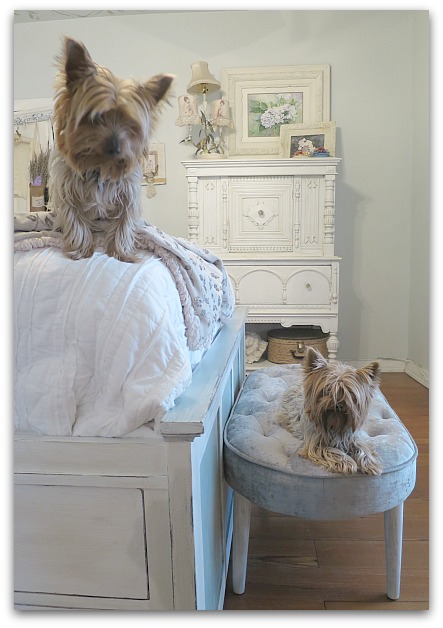
My Handsome Husband also made another purchase that day. After buying the oak bed, and walking out, he saw this velvet bench and said it would be ideal for the dogs to be able to use to get up and down with.

I think I might just have to take him shopping more often, whether he enjoys it or not. He is pretty good at it! I love the new bed and bench, (after they got lightened up).  

I'll show you details of the rest of the room next time.  We had to come up with a plan for bedside tables, because what we already had blocked the drawers on the new bed.


A mini redo, white on white

cottage, Hand Painted Furniture, Kitchen remodel

Books 039

Before I went on my trip, I had one night alone. Totally alone. No girls, no sons, my husband was out of town, I was on my own. 

I thought about going to a movie. Instead I decided to paint the kitchen.  

But I bought the world's worst paint and only got as far as the mud room part of the kitchen. Here is the after, pure white walls. I've always wanted a white on white room, but I usually tint everything ivory or tan, or cream.

Fifi 002

Here is the before, see, the walls are tan, with a green ceiling. It's now white with a faded birds egg blue ceiling.

Books 043

I used the same pure white to paint the cabinet/pantry door in that area.  

Books 028

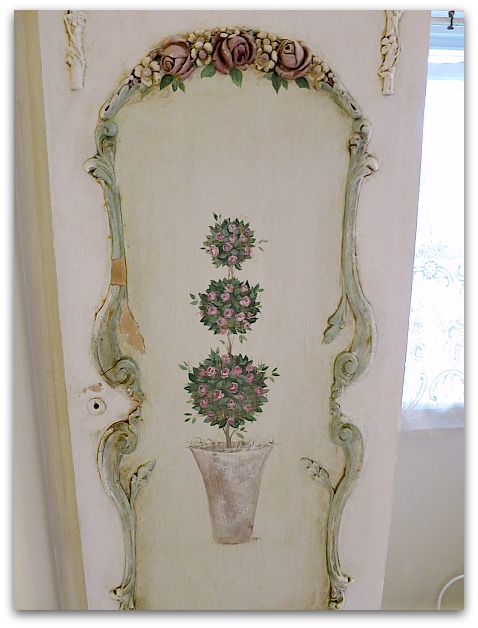
Here is the before, ivory with a coffee colored wash over it, and a topiary painting. Some of the trim had broken off, that had been bothering me.

Books 030

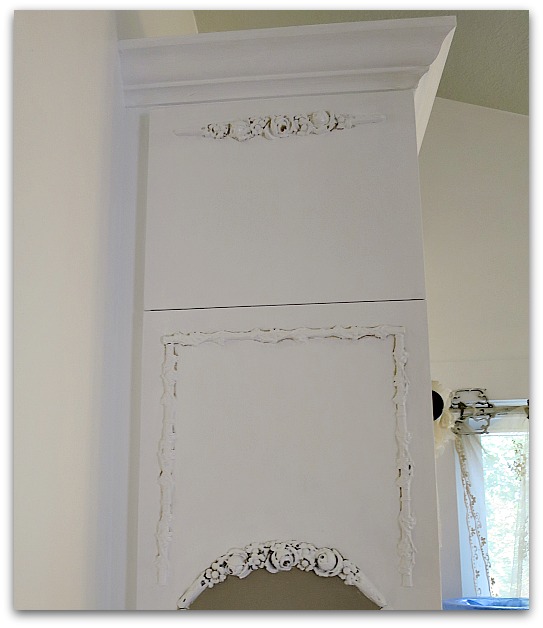
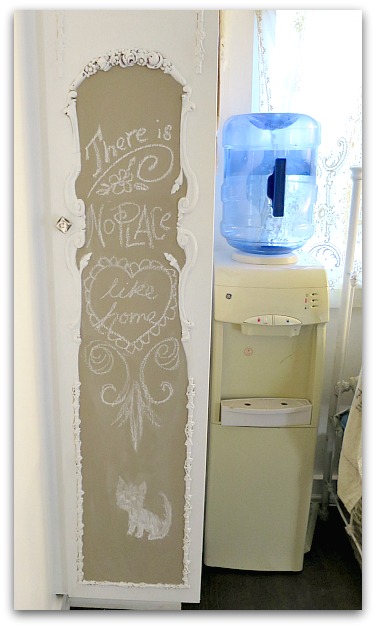
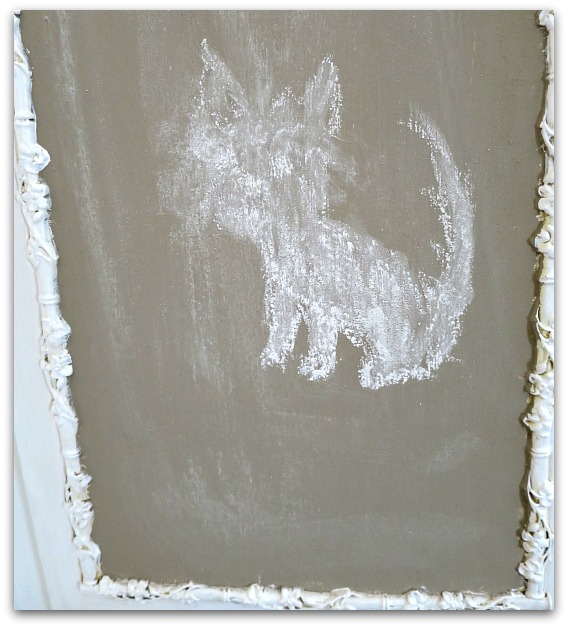
Once the trim was repainted, the missing pieces didn't show. I did the center in chalkboard paint (mix plaster of paris into any paint color to make some).  I'd love to repaint all of the kitchen cabinets pure gloss white, I think I'm ready for all white cabinets. But first, I'll keep an eye on this area to see if I still like it after a while, or if I only like it now because I wanted a change.

Books 033

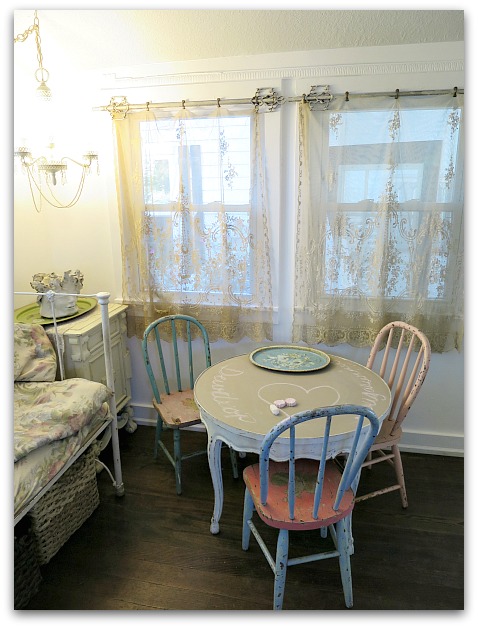
The same chalkboard paint was used on the girls' table in hopes that they wouldn't redo my cabinet door for me.  But they already have, as well as Dewdrop deciding the floor could be drawn on too. Not a big deal, it wipes off, but still a bit messy.

I think I'll paint their table back to normal, the chalkboard paint isn't the best choice for it. They use that table for play dough, making cupcakes, and all sorts of activities.  A fresh coat of white might be better, and I'm already tired of the chalk dust.

Books 038

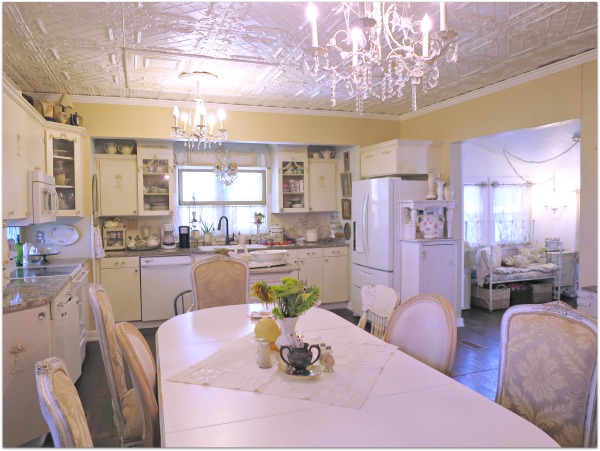
High gloss pure white from Behr was what I used on the trim, cabinet, and kitchen table top (over bonding primer for the cabinet, since it was previously done in oil paint)  I used the paint and primer in one, and have always LOVED Behr paint.  But when I used the new, one coat paint and primer called Marquee in eggshell for the walls, I absolutely hated it.  Instead of one coat, it took 5-6 for white to cover soft tan. Crazy! and exhausting.  An afternoon's work turned into two days. 

I love having my table redone in a clear clean white! But it was a little too bright, so I flicked some splatters of tan on it with a toothbrush before doing a clear, protective top coat.

6a00d83451ead569e2013480222b91970c-800wi

This is the original painted surface on the table.

Books 034

This is what it is now, white with speckles.  I left the chairs and table legs as they were, it is only the table top that needed a freshening up.

Books 036

I also painted the inset area behind the kitchen sink the same blue as the slanted ceiling in the mud room to the right.

Maybe I'll paint the kitchen walls pure white (eggshell) like the mudroom too, I really like it. But I will never, ever use that Marquee paint again. I'll go back to the regular Behr paint or even switch to Valspar.  

When I paint, I don't tape off or use drop cloths, I've had a lot of practice, and with good paint, there aren't many drips. But the Marquee brand from Behr flew everywhere when I used a roller and dripped in huge blotches, ran down the wall and was a total wreck.

I only had time to paint one part of the kitchen instead of the whole room.  Which I guess will give me a chance to decide if I want to repaint it all white or try something else when I get around to doing it again. Without Marquee. Or as I was calling it, Machiavellian.

Books 042

And I had thought about trying the chalkboard markers for a tidier sketching experience. But from what I hear, they are hard to remove unless you are drawing on real slate chalkboards.   Regular chalk is already looking messy on the door, so I might have to make some changes here too. 

I could paint the bottom half white again, and just have the chalkboard part higher, so the smudging from little fingers is less.  

A couple of customized furniture painting tricks

cottage, Dew Drop, Dorkies (Yorkshire Terrriers), Hand Painted Furniture

Rainbow 001
Sugarwings' mom has recently graduated from nursing school, is working at a Big Girl Job as an RN, and moved into a Big Girl house.  As a birthday gift, I thought she might enjoy a custom piece of furniture, something nice and solid, kind of a start on Big Girl furnishings.


Tin wall 003

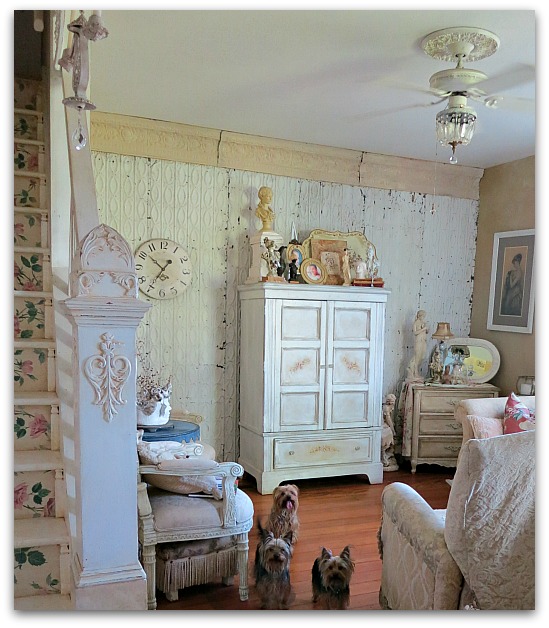
I bought it a few years back as a tan colored cabinet from Nebraska Furniture Co.  I rarely buy new pieces, but I think I've mentioned before that for TVs, it's hard to find the right cabinet to fit them and their components if you don't buy something made for a television. 

I repainted it white with roses when I got it. 


Fifi 009

When we got a different TV, I had to find something else and was able to customize an old book shelf to fit our flat screen.

The original telly wasn't bad, we only replaced it so we could get something bigger to see from the kitchen. So, we offered it to our Hippy Chick for her new place. Trouble is, the roses on the cabinet we had it in didn't suit her at all.


Rainbow 002

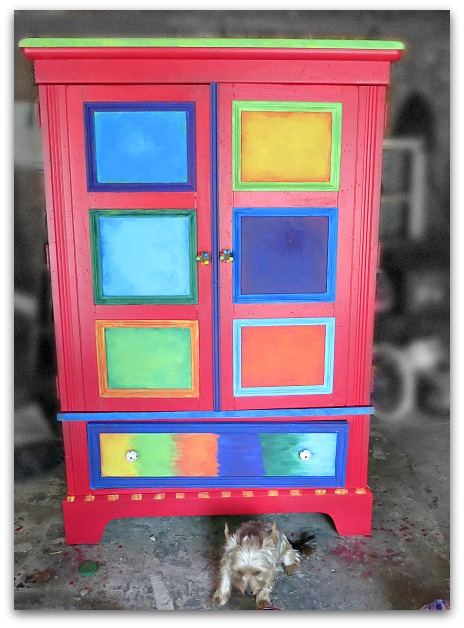
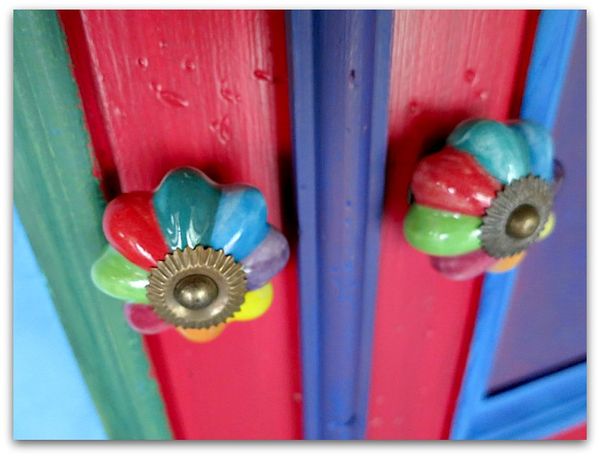
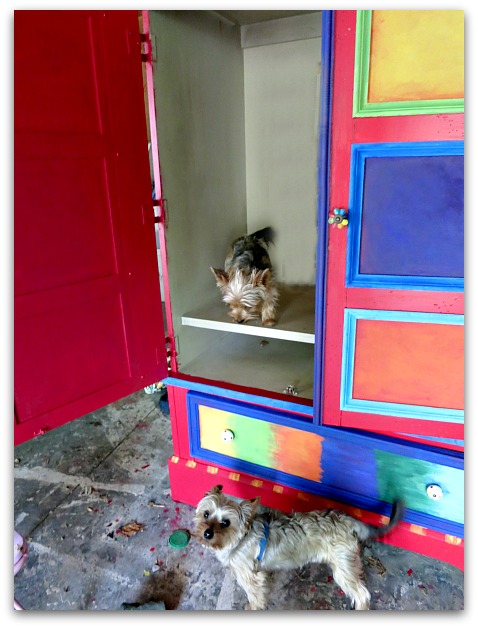
So, I thought I'd surprise her with a new look on it for her birthday. These knobs from Hobby Lobby were the inspiration for the redo.


1011656_10151753371989477_1098424813_n

Dewdrop helped chose them, she is a big fan of going to Wobby Blobby, as she was calling it. There was a slight argument when she thought we should get the pink knobs, and she doesn't like losing arguments at all. 

But in the end, I convinced her that Auntie Cake, (aka Hippy Chick) would like rainbows.


Rainbow 003

Since I was the person who painted the cabinet before, I knew that I'd primed the factory finish and used latex paint on it, and another few coats of more latex paint would adhere just fine.  So, no bonding primer. Although I did use Behr's paint and primer in one simply because red is such a horrid color to work with.  It doesn't cover well and takes a lot of coats. By using the primer/paint mix, I cut down on a few applications. It still needed three coats plus touch ups.

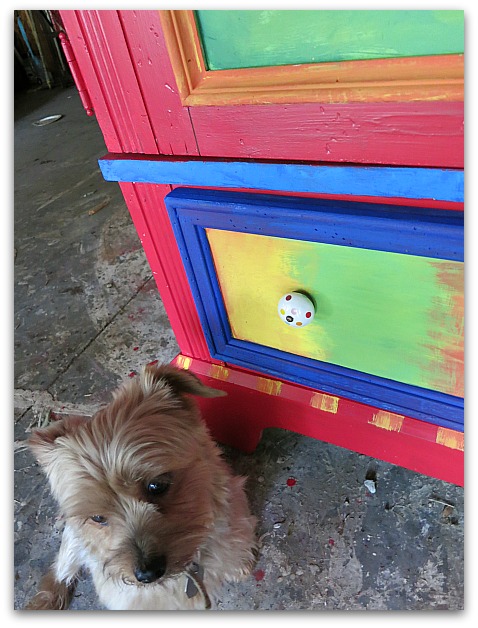
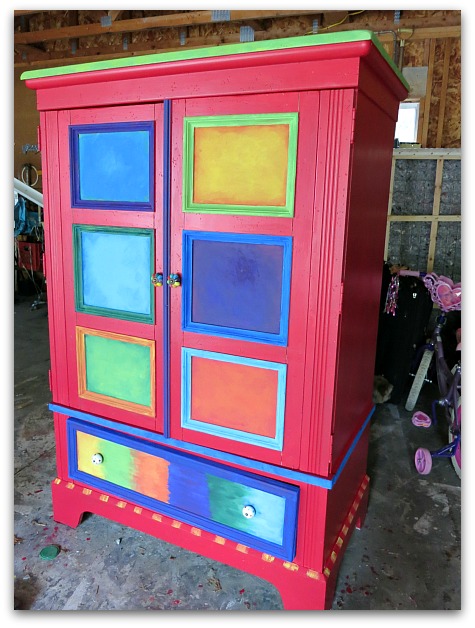
The main body was painted cherry red, satin.  Then I painted each square and frame around it a different bright color.

At that point, it was beginning to look like Rainbow Brite vomited all over a preschool.

Very primary colored and very bright.

So, I washed each square and frame with a different shade.


Rainbow 005

The wash coat of color was brushed on heavy in the corners of the squares, and was wiped into the center with a damp rag.  It was dry brushed onto the frames.

(light blue over green, red over orange, orange over yellow, purple over dark blue, etc, a nice mix up)


Rainbow 007

The base of the cabinet took almost a quart of interior paint. For the accents, I used 2 oz bottles of acrylic craft paint. 


Rainbow 006

The finish on the craft paint is flat and the red paint is satin. I could have covered the accents with a satin clear coat, but I liked the contrast in textures.


Rainbow 008

The interior was left as is, except for the interior of the doors. When the TV is on, those will show.


Rainbow 009

I think the faux finished gave the cabinet the appropriate, custom look I was going for, instead of just blocks of bright colors.

You can tell by the floor that I have done a tad of painting out here… I used to paint furniture practically daily.


Rainbow 011

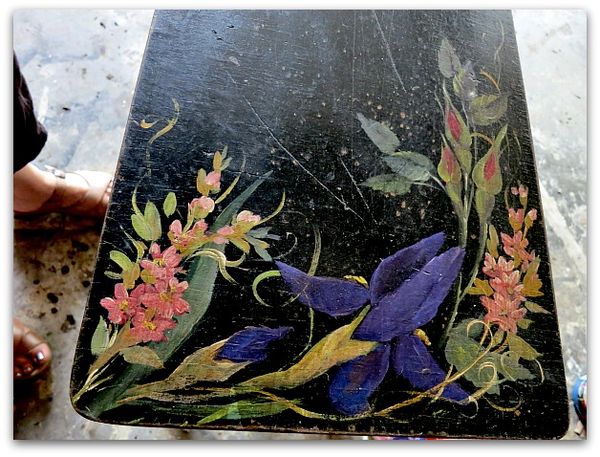
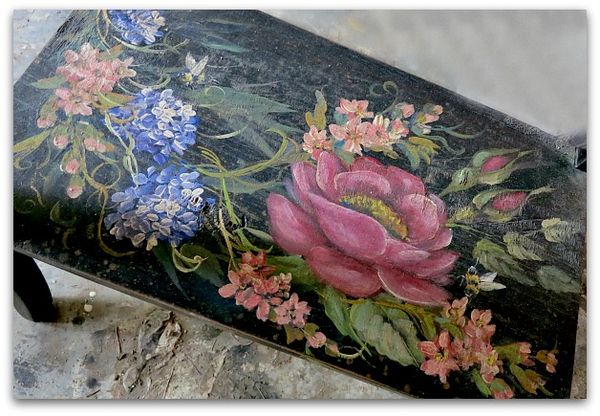
Often, like with this table that was sitting in the garage, I'd use a poly top coat mixed with walnut stain.  I think it leaves an attractive finish.

But for the rainbow cabinet, I left it as it was, no walnut aging affect.  Hippy Chick likes her colors vivid.


Rainbow 010

Here is the shelf of the black table. It's a bit dirty from the garage, but I think you can still see the walnut top coat. To do this, I used Minwax stain/poly that comes premixed.  I'd pour about 1 cup into a bowl, add 1/4 of paint thinnner, and slip on some gloves. Then brush the mixture on the piece, and wipe off with an old, soft, dry tee shirt scrap.

Work on one section at a time, and wipe off gently.  It looks really pretty over solid black, too.  This trick riches up the color and gives it a custom feel.  Just like adding the faux finish to the rainbow colors turned a preschool looking palette into colors that would suit a Big Girl piece of furniture.


I really can’t sew very well

antiques/junking, cottage, Hand Painted Furniture, sewing?

Thro 007
Anything I sew is wonky.  Maybe, just maybe, I should break down and measure? 


Cahair

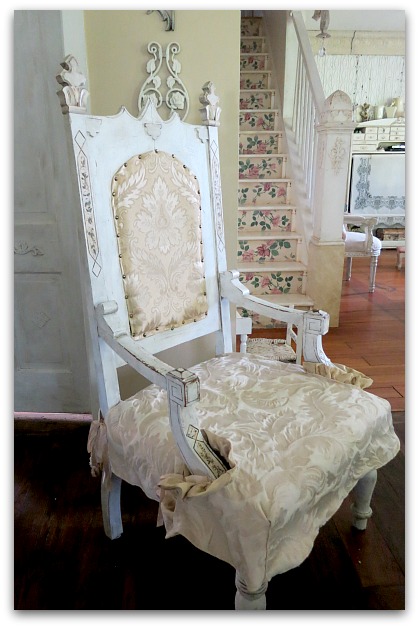
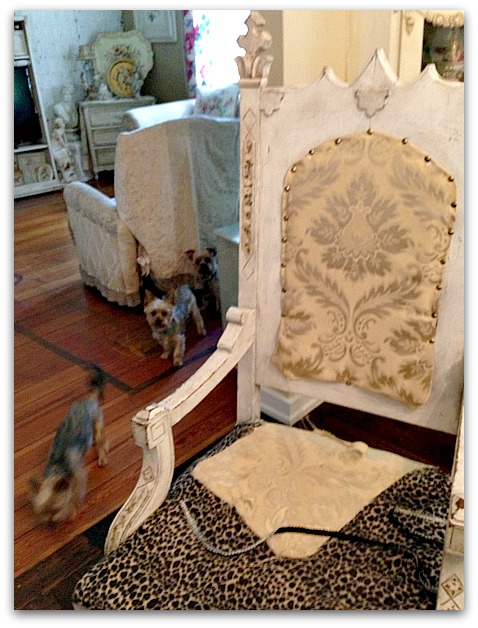
A long, long time ago, I found this throne at a garage sale, and finally got around to painting it about 18 months ago, thinking I'd recover it then too. 

It did not get recovered til recently, because Sugarwings uses it and she, well, shall we say, is a pig? is not the tidiest kid at the dinner table?  I left the fabric dark so her sliminess wouldn't show as much.  But lately, she has been growing up and being less of a mess.

Still, I worried that a light fabric on the seat was just asking for trouble.  So, I decided a washable slip cover would be the best way to go, but man- those arms were hard to fit the cover around!!


Thro 008

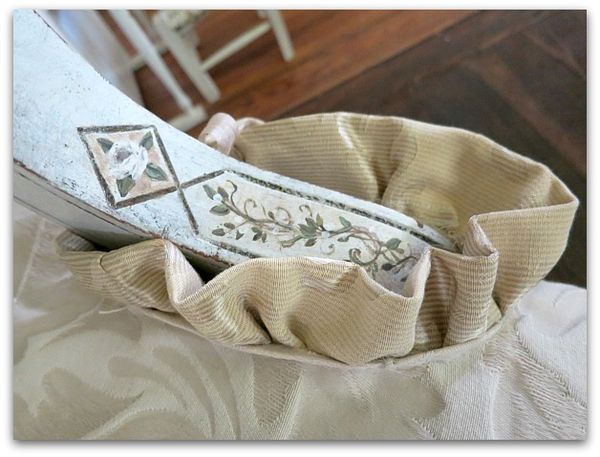
I ended up cutting them out way too big.  So, I fixed the gap with a ruffle made of the fabric on the back of the chair.  I'd cut the fabric off my old dining room chairs that were broken, and saved it.  There wasn't enough to cover the seat too, so I did a mixy matchy thing, and I think this ruffle was just what I needed to make the mix match up nicely.


Chair

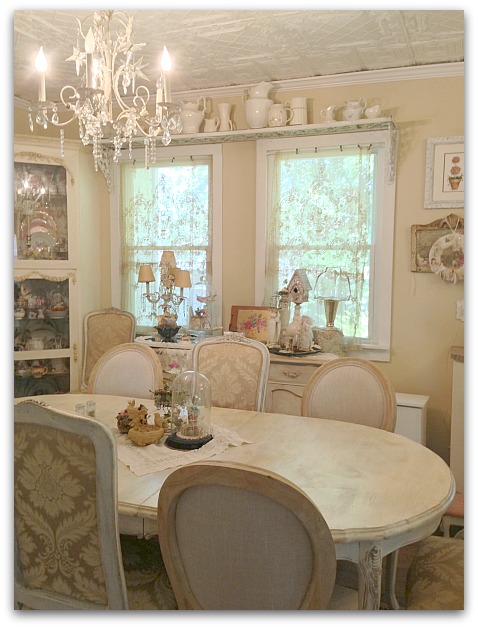
The whole dining room is now mixy matchy.  After searching here, there and everywhere, I finally found some new chairs to replace the ones that had broken. (by the way, I have a magic driveway, anything at all that I sit at the end of the drive gets picked up by someone. It's fun to wonder who got it and what they did with it, and nice to know that it isn't in the land fill!)

There were 4 chairs at TJMax for $99 each (plus 10% off for opening a card and a cash back bonus for spending that much)

I'd hoped to find old chairs to fix up, but these were a decent price, solidly made, and didn't need a thing done to them besides Scotchgaurding).  Forget about the throne seat, I feel like a princess sitting in BRAND NEW CHAIRS! What a treat!!!

Rosy room redos

antiques/junking, cottage, Hand Painted Furniture, hand painted signs

Thro 004
While I was taking time off, hanging with the grand fairies and on my home improvement kick, I spiffed up the guest rooms a little.

Cottage 029

 
Not much, just some switching of linens for this room, and bringing in a bedside table. (I really, really hate the carpet, but the room is used a couple times a year, it's not worth ripping it out and putting in wood or laminate, like I'd prefer)


Cottage 061

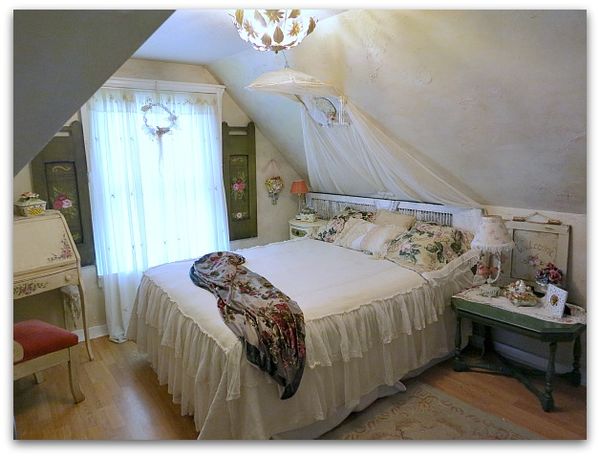
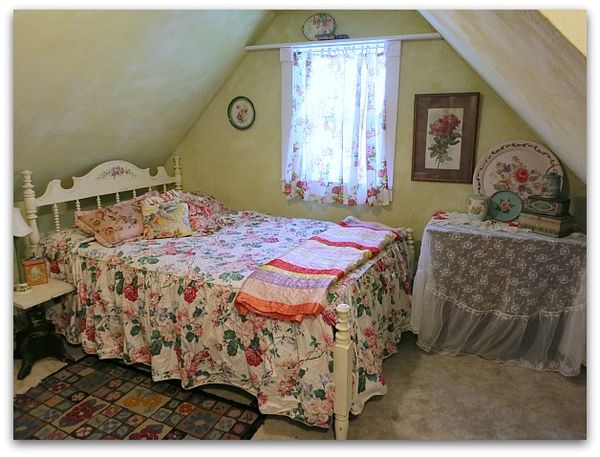
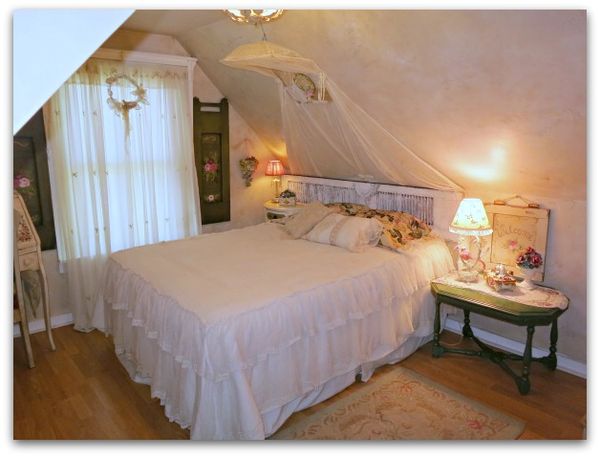
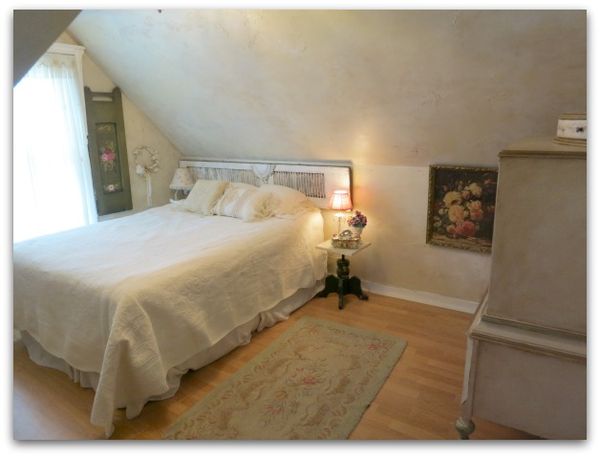
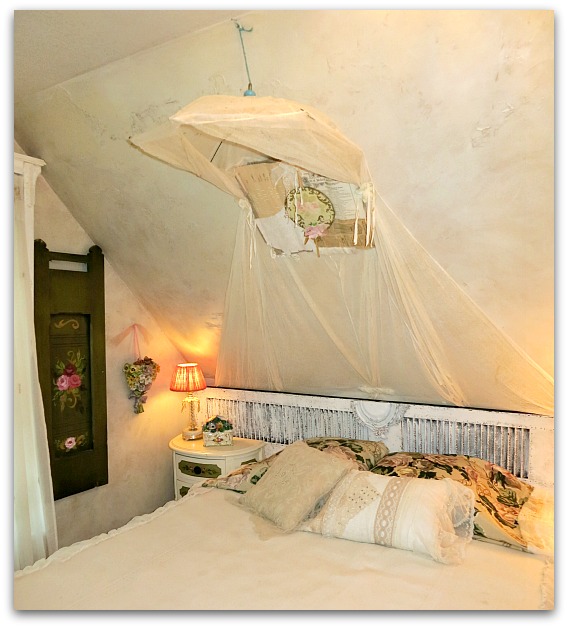
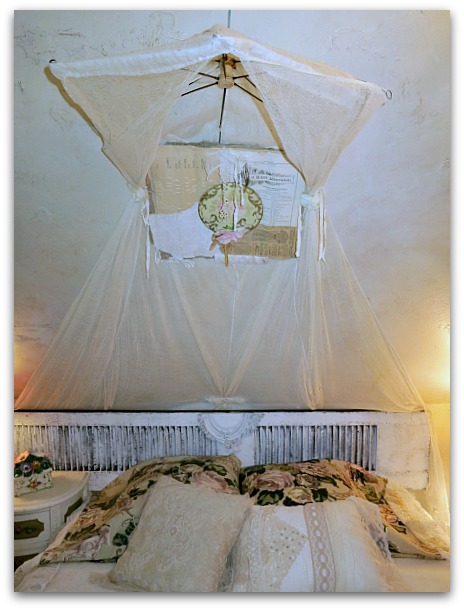
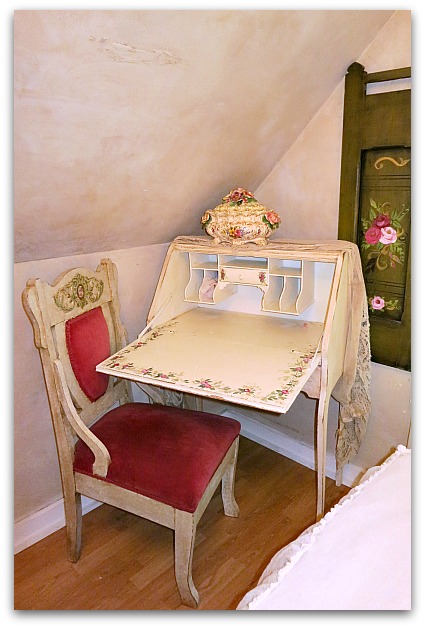
The second attic guest room got more of an overhaul.   I hung a cool, old, mosquito net that Lisa had given me, and added a gorgeous net and lace bedspread from her too.


Home 2013 july 042

Here is a before. We don't use the room much, and around here, the guest rooms seem to just get leftover bits and pieces put in them.  It was okay, but a little blah.

The dark green shutters on each side of the window needed balance and I happened to have a $7, dark green table from a garage sale wasting away, and thought that helped a little when I brought it in. (both are things I thought I'd paint white and never did, but I'm liking the contrast with the rest of the room)


Cottage 055

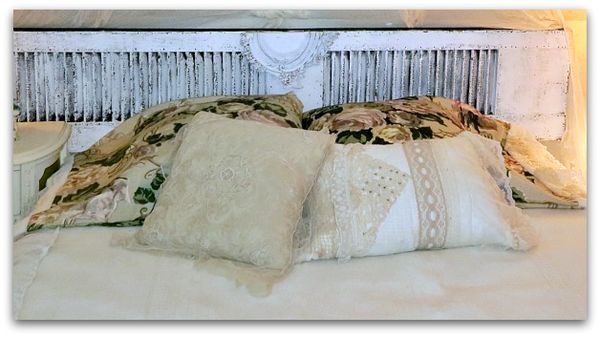
But it made the bed look washed out, so I added some pillow cases I made out of some green and rose curtains from the 40s.


Cottage 059

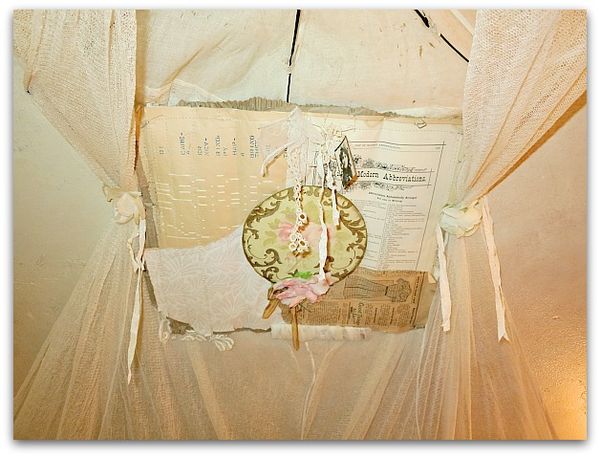
I had a heck of a time getting the netting to hang right, so it wasn't drooping down too much.  I decided to use a beautiful hand made bit of wrapping paper from Lori Oles as an anchor to hold it on the wall.  It worked, but was too light colored, so I pinned a round piece of floral wallpaper in the center of it.


Cottage 056

Then, I broke a ruler in half, wrapped it in torn strips of ivory cloth.  I gathered the netting, and nailed the fabric wrapped ruler over it in two places to hold the pleats in place.

The room is hard to photograph since it is so small and has those angled roof lines. The canopy thingamajig looks better in person than it does in the pictures. The bed is kind of cozy looking this way.


Cottage 065

I stapled a millinery flower on each side of the ephemera piece, and trimmed Lori's ribbons to dangle a little bit, but not too far.


Cottage 057

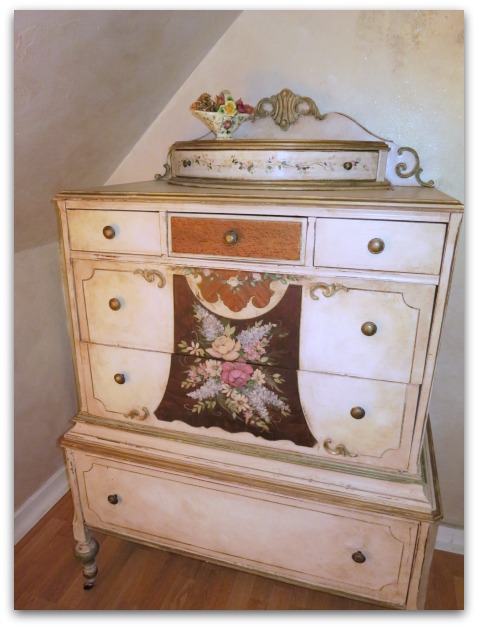
This room is full of hand painted rose pieces too.  I used to have an antique biz and I'd paint furniture.  All this is leftovers from that.


Cottage 064

Sometimes I think my house only has things that no one else wanted it in. Either stuff I never sold, or things I bought dirt cheap second hand because another person wanted it gone. (except for the lovely gifts from Lori and Lisa, this room is all cast offs)

These shutters are actually a custom order that was never picked up, which is why they were dark green in the first place.  And that inspired the rest of the redo. And it wasn't even something I'd chosen to do for myself or the room. 


A fairy play room part 3, a hand painted mermaid bed, with no sanding

cottage, fairies, Hand painted, Hand Painted Furniture, how to's

Cottage 082
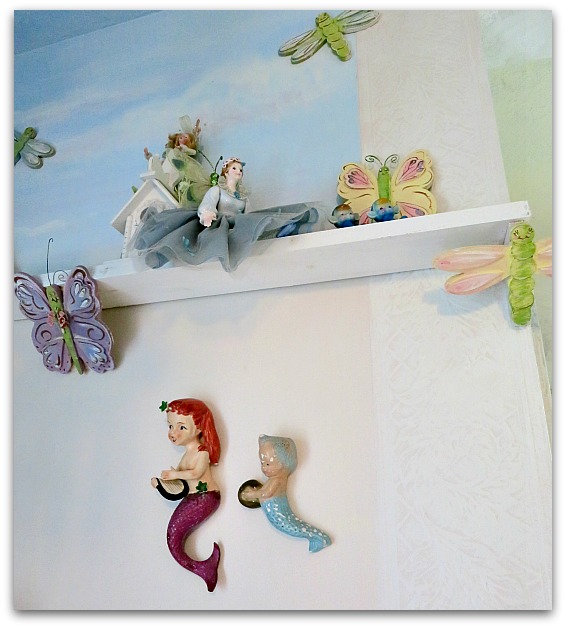
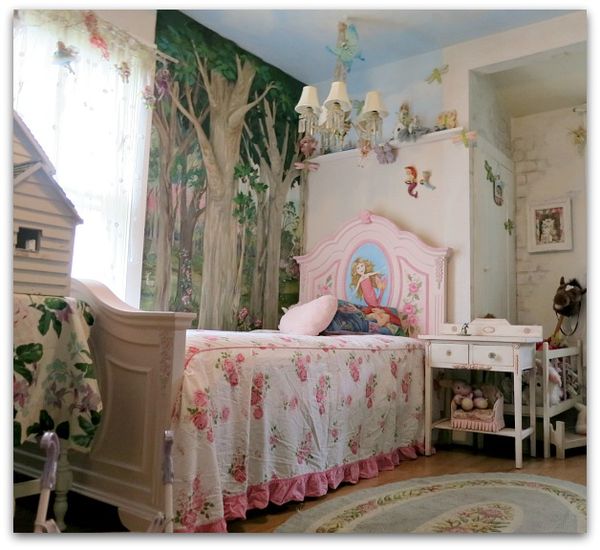
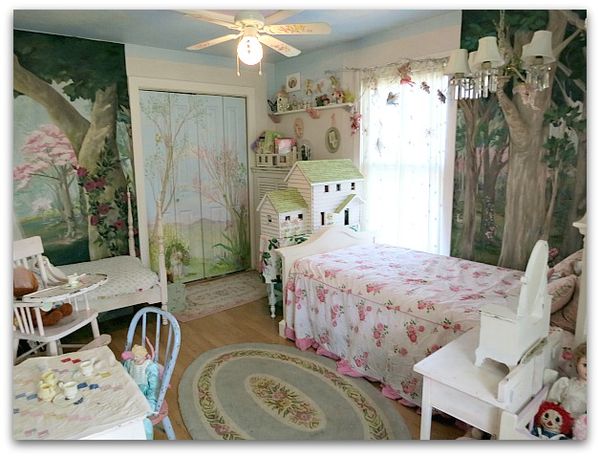
As I was telling you last time, we did a few changes in the fairy grand daughters' room.  And of course, one change leads to another.  A fixed up area makes its surrounding areas look left out and forgotten.

Sugarwings loved that we were redoing her room, but as she looked around, she said, it would be nice to have a pink bed.  And pink curtains.

Well, I think I have some sheer pink curtains packed aways somewhere, I'll need to dig those out. But for now, I've been redoing her bed.


Mermaid bed 001

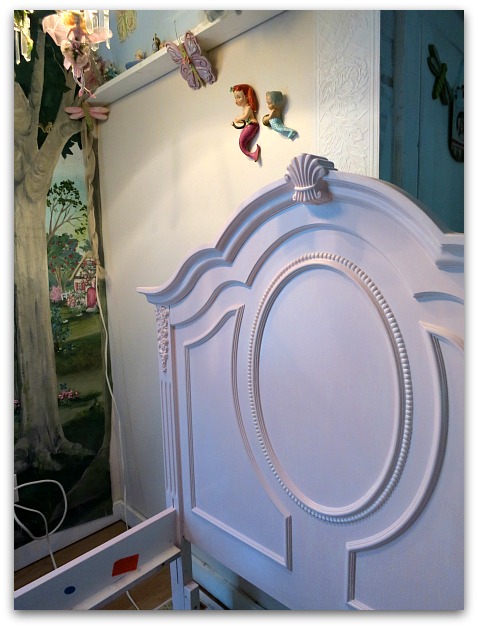
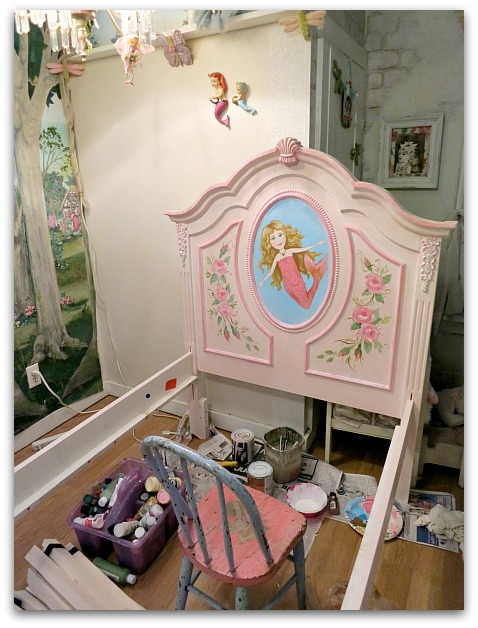
Very few things in my home are brand new.  But sometimes when you need something, you need it now, and don't have a few months to find the perfect vintage piece. So, we bought this bed for our little fairy when she outgrew her tiny bed, and had declared herself too big to sleep there anymore.

Little did I know, she was just making a play to sleep downstairs on the sofa… and didn't sleep in her new bed for a year after I got it. I guess I could have searched for the perfect vintage piece after all.

Anyway, it was creamy white and was fine, but not to the taste of Sugarwings, who thinks the entire world should be pink and has taught Dewdrop to ask for pink in everything too.

First step, NO sanding. I hate to sand.  I use Glidden Gripper bonding primer under my interior wall paint and never have a problem with peeling. 

There are multiple posts about how I paint furniture, you can get step by step instructions here.

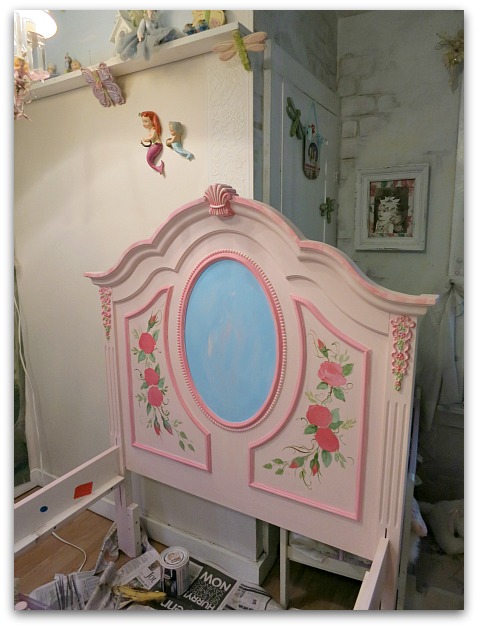
I chose Ballerina Pink from Glidden to paint the whole thing.


Mermaid bed 002

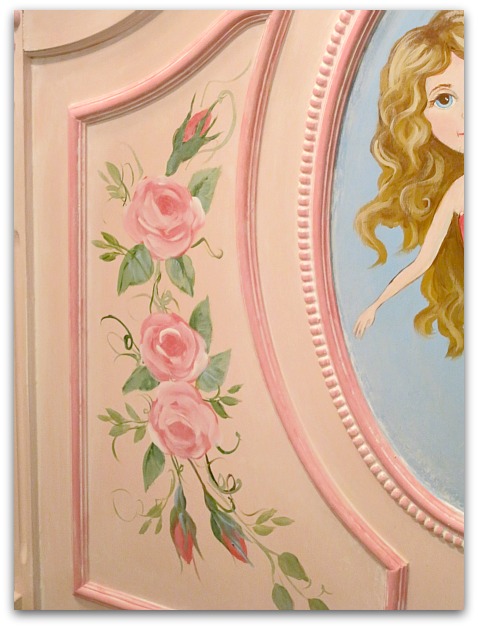
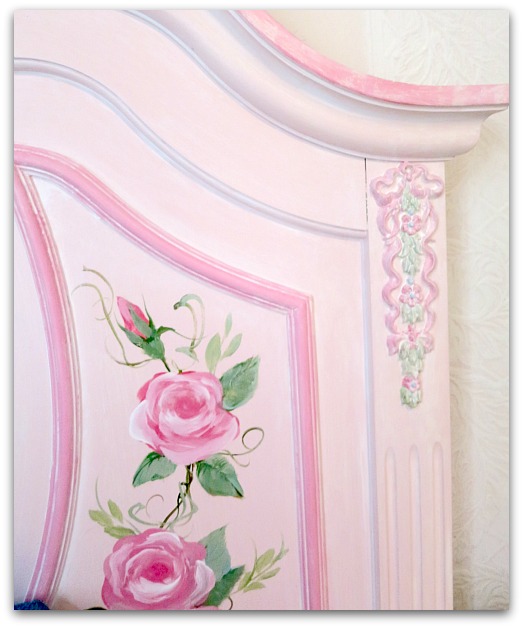
After the base coat, I added a blue background in the oval and color to the trim, plus some roses on the sides.  I was too lazy to paint the foot board, it is just base coat pink, no flowers on it.


Cottage 081

This little girl loves mermaids and has been a huge fan for almost her entire life. If I had it to do over again, her whole room would be an under the sea theme.  But then, Dewdrop would feel left out because she loves fairies and "honies" (My Little Pony, or unicorns).  And I like the fairies that are already there.

Since the room is such a jumble of choppiness and different things going on anyway, I went with mermaids in the woods with the fairies for her.  We'll just call it a fairy tale theme and not worry about the details.


Mermaid bed 003

 I painted a mermaid in the center of the oval.  She adores Ariel, but I went anti-disney.  Plus, I wanted a sweet little girl, not a teen.


Mermaid bed 016

And I know, I should have added a crown, but didn't feel like going back to do it later when I thought of it. At that point, my paint plate had dried out over night and I wasn't up to mixing up the colors again. You can't just slap a crown on, you have to blend it in with the right shadows and make it look like it is actually sitting in her hair. 


Mermaid bed 005

When she (sob!) gets too old for mermaids, it will be easy to paint over this oval and change up the bed for a more grown up look.


Mermaid bed 015

Over everything but the portrait and the flowers, I painted on and wiped off white glaze.  I mixed one cup of clear glaze with one 2oz. bottle of white craft paint.  I made sure I got it down in the cracks and crevices really good, and wiped it off the high points.


Mermaid bed 020

Now, where are those pink curtains at? I'd better go look through the closets, I know they are hiding somewhere.

Mermaid bed 013

A fairy play room part 2

cottage, fairies, Hand painted, Hand Painted Furniture, Snow White

Cottage 086
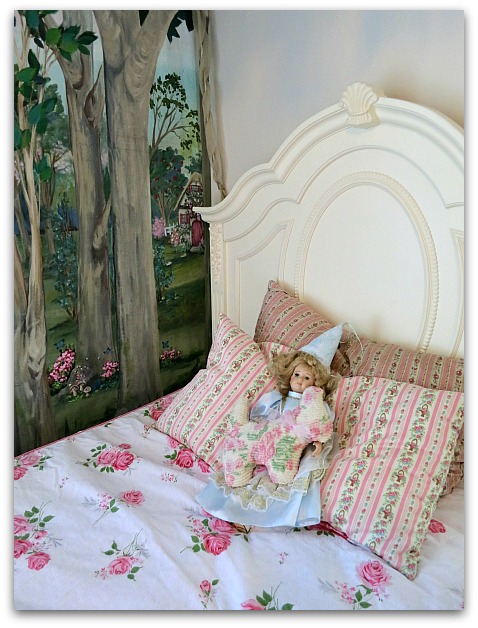
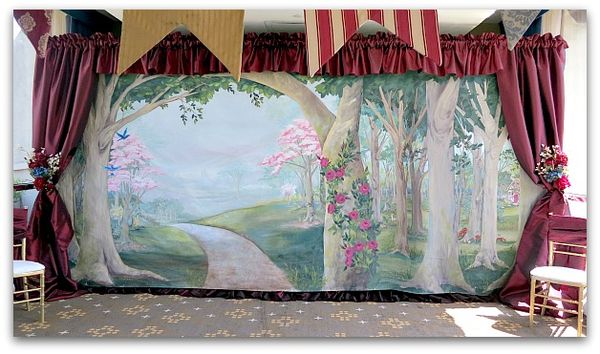
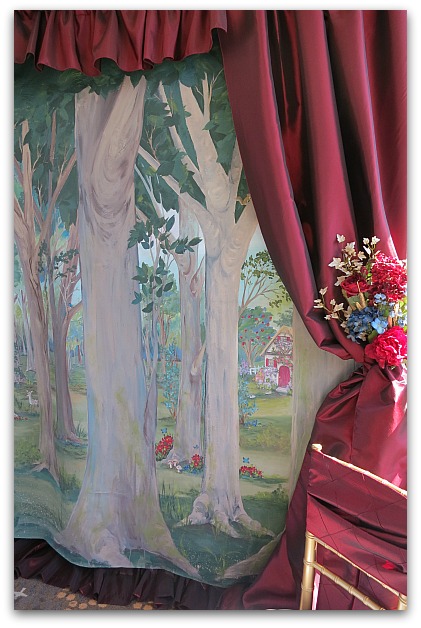
A few weeks ago, I showed you some photos of the little fairies' room after I added part of the canvas mural I'd done for An Enchanted Affaire

After thinking about it, and talking to Sugarwings, we decided that more of the mural needed to go in the room.


Enchanted weekend 031

Here is the whole thing, set up at the event.  I'd designed it so that the right side was a darker side of the forest and the main interest was to the left.


Cottage 092

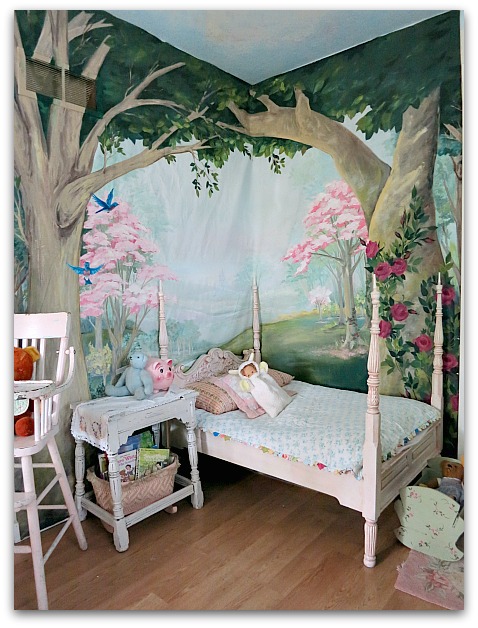
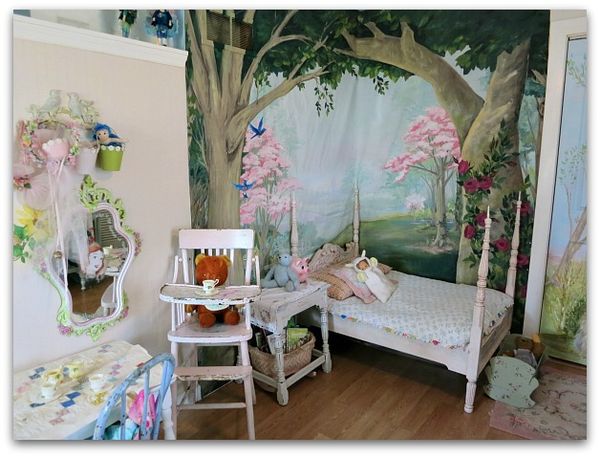
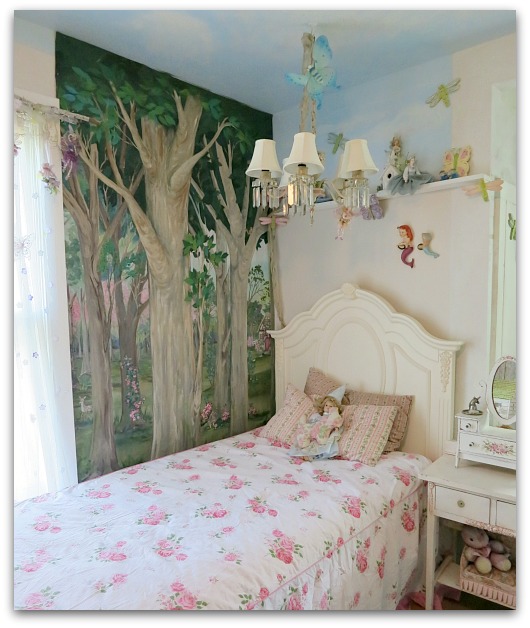
We cut off  the sunlit meadow side and put it behind Dewdrop's tiny little bed.


Cottage 076

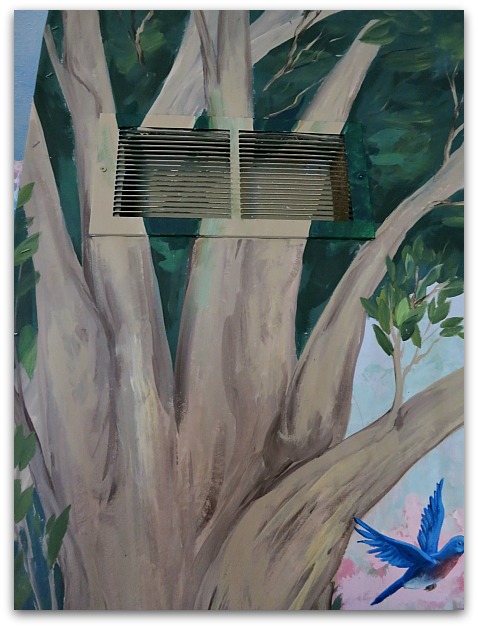
Later, I went back and painted the vent to make it blend in.


Enchanted weekend 034

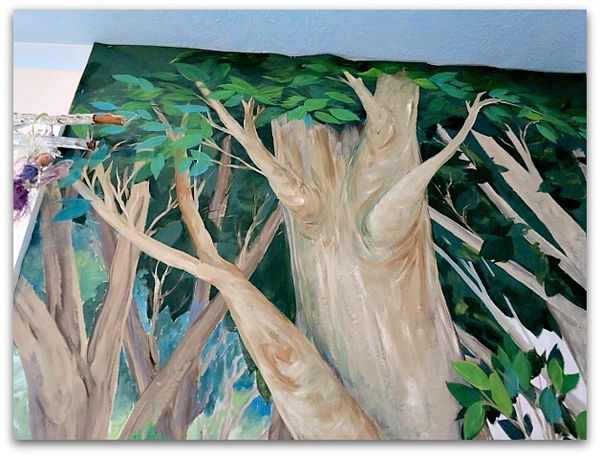
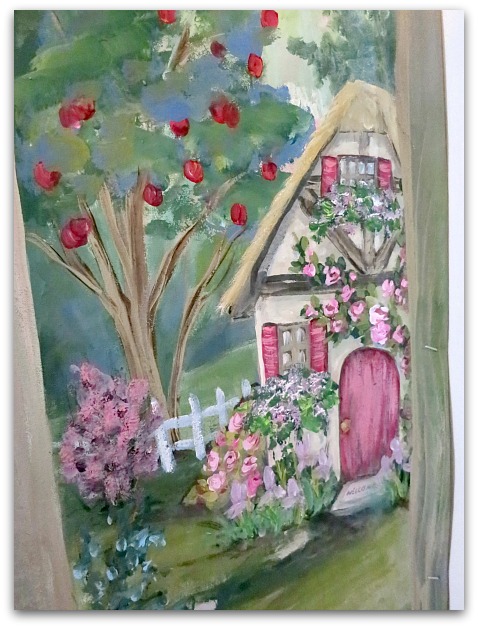
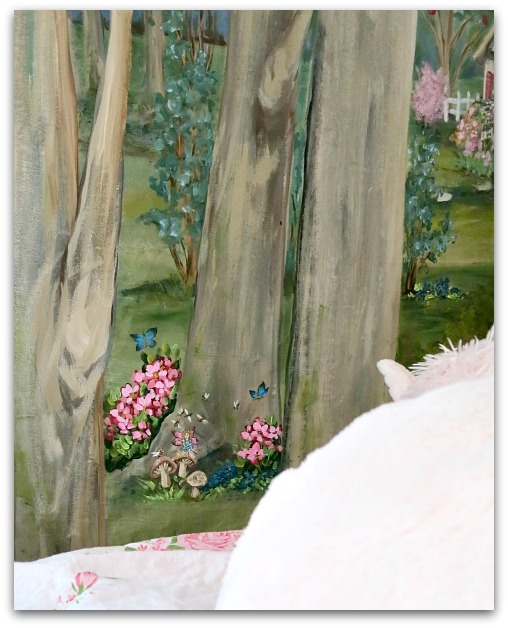
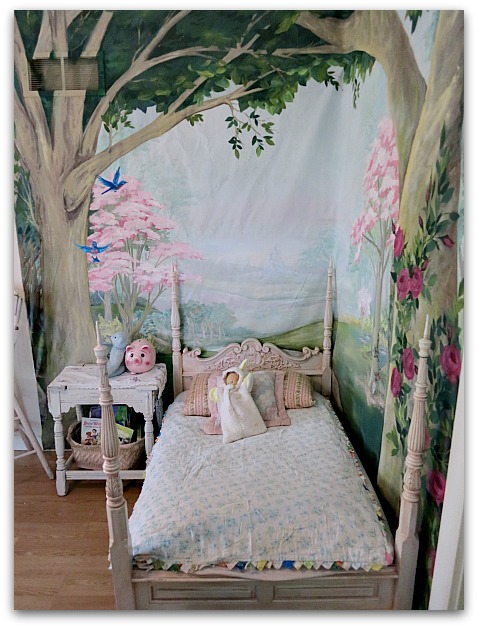
This was the section left over to use by Sugarwings' bed.  For one thing, the center tree is just blah, it wasn't meant to be a focal point. For another, the flowers were too red, and so was the cottage.


Cottage 075

So, I livened up the central tree with more branches and some lighter toned leaves.


Cottage 072

And pinked up the cottage. (sorry, the crooked photo makes it look like the house is melting)


Cottage 074

One of the smaller trees in the distance got some vining roses.


Cottage 073

And the blue bird got bluer.  Basically, I wanted the whole thing a bit lighter and brighter since it was going to be part of a little girl's room now.


Mermaid bed 009

All the red flowers became pink ones, and a fairy with a flock of bumble bee friends was painted in right where Sugarwings could visit with her when she laid down to sleep.


Cottage 068

My poor, old, eyes! This girl was only about an inch or so tall. 


Cottage 084

After repainting the forest, I looked around the room to see what else we could do.

I changed out the bedspreads with some lighter weight ones for summer. The girls also now have a vintage, pink high chair to use when it's feeding time for the teddy bears.  Dewdrop had outgrown the chair and I was wondering what to do with it. Giving it to them to play with has been a hit with them.


Cottage 085

I'm not sure about the droopy wrinkles in this part of the canvas, but the kiddos don't mind.

Cottage 079
Just like they don't care about the choppy look  the room gets from it's various wall treatments.  From a design standpoint, this could have been done much better, and I know that the original mural on the closet walls doesn't go with the canvas ones that we hung in there.


Cottage 077

But it has some sweet fairies on it, so the theme still fits, even if the style doesn't.


Cottage 091

At least the ceiling still matches, I painted it like a sky before Sugarwing's was born.  When she was still just a wish, not quite a person yet.


Speaking of wishes…. my little one loved the redo, but was wishing for a pink bed. So, what do you figure I did about that?

Part three of the saga up next!


Antique bookshelf makeover to a flat screen TV cabinet with no sanding and no painting just primer and glaze

antiques/junking, bird song art event, cottage, Hand Painted Furniture, how-to projects, redos

Girls room redo 031

When we were updating to a new flat screen TV, I knew I'd have to lose the cabinet we'd used for the older set that we had.

Tin wall 003

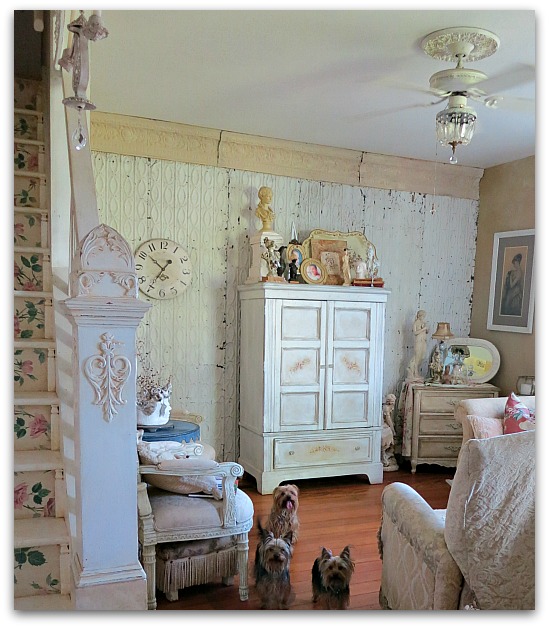
Our living room is pretty small, and the armoire we kept the TV in wasn't all that big, but it was kinda bulky and seemed to take up a lot of space. But it wouldn't be wide enough for a newer set.

It is one of the few brand new pieces of furniture that live in my home, it was bought to fit the TV, and looked way too new, so I repainted, and aged it, then added glass knobs the day it was delivered.

I searched everywhere for a cabinet that would fit a new 50" flat screen and still have doors.  Our TV is on a  LOT, but when it isn't, I don't like to see the big, black hole that it makes in my white on white decor.  But when I looked at new cabinets, I was told that the door span would have to be so wide to accommodate a large set that it made the cabinets top heavy and dangerous.  So, most TVs go onto a wall, a mantle, or a flat surface.

Birdsong 3 weekend 044

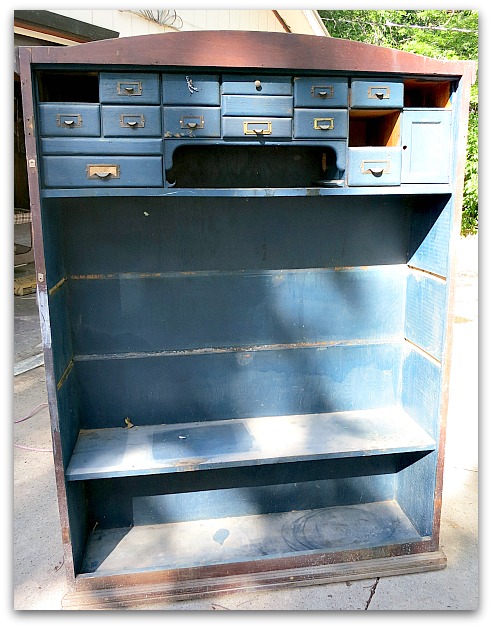
 I turned to antique shopping (which I prefer anyway!) and found the same situation.  No doors that were wide enough, unless they had a bar down the middle, which wouldn't work. I found this old bookshelf and my son pulled the nails out of two of the shelves to make space for the television.

It needed a deep cleaning too.  It could have been in a barn for a while from the looks of it.

This is 11" deep and 46-1/2" wide inside. I measured 50" TVs and found the one I wanted before shopping with a tape measure in my purse to find a cabinet to fit the TV I'd picked out. 

And yes, this doesn't have a door, but I thought some lace curtains would be nice.

Birdsong 3 weekend 045

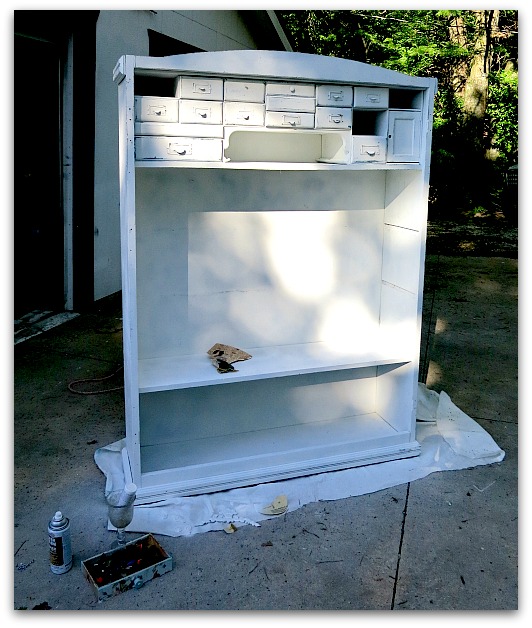
I used 5 cans of Zinser Bullseye spray primer meant for glossy surfaces, with no sanding.  I figured with so many cubbies, a spray would be the way to go. 

Birdsong 3 weekend 046

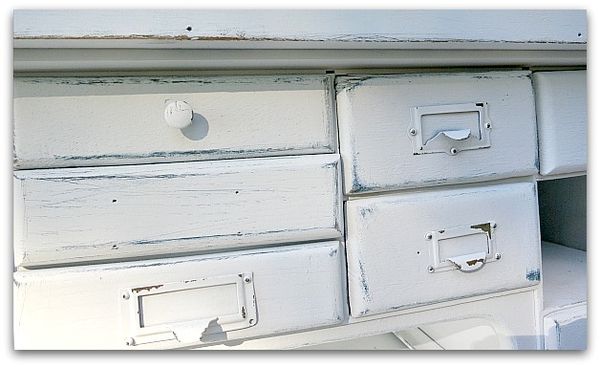
After priming, I did some distressing with sandpaper.

Birdsong 3 weekend 049

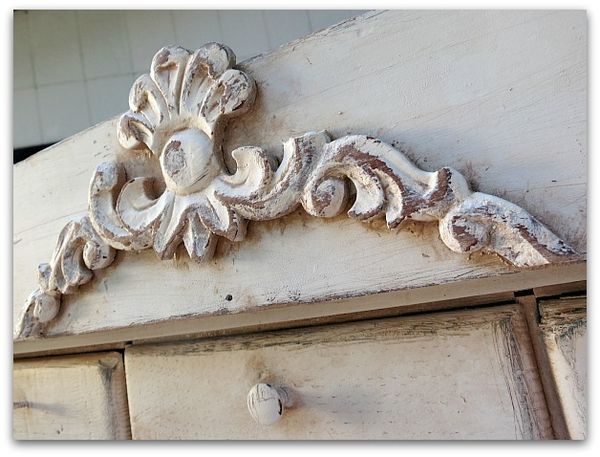
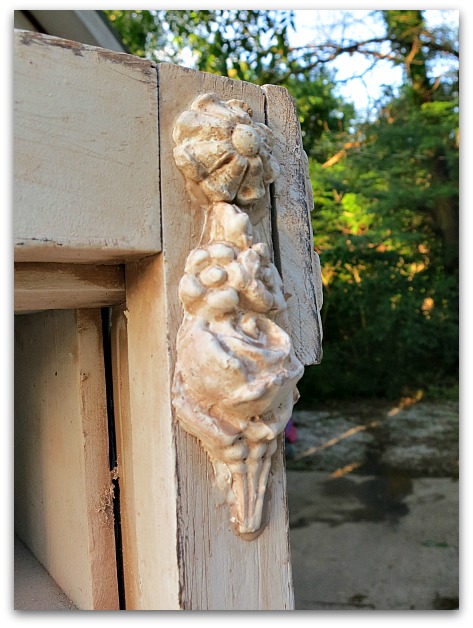
And added some fancy work details and some tinted glaze.

Birdsong 3 weekend 048

For one pint of clear glaze, I mixed in one 2 oz bottle of coffee and cream colored acrylic craft paint.  I brushed it on heavy and then wiped it off with a damp, well wrung out towel.  A torn up old tee shirt works great.

 If you do this, rinse often.

Birdsong 3 weekend 047

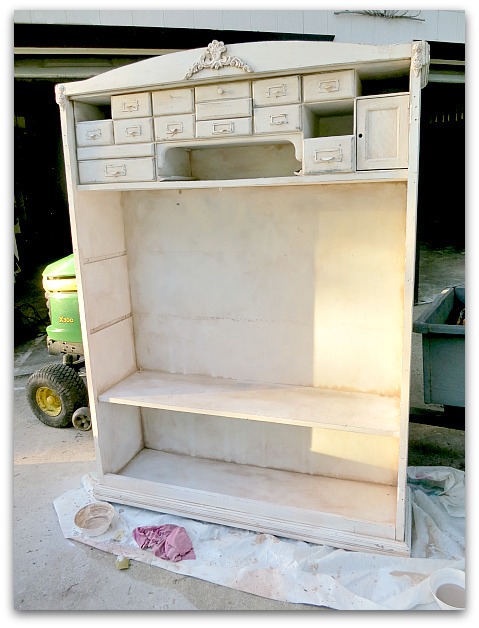
If you are wondering why there is a John Deere in the picture, it was doubling as a step ladder to paint the top and something for the piece to lean against as I wiped the glaze on.  I was afraid it was going to fall over backwards.

And if you are wondering when I painted it, I didn't!  I went straight from primer to glaze.

Primer CANNOT be left as is!!

It isn't paint and is meant to be covered. 

But who says you have to use conventional paint?  I skipped straight to the tinted glaze.  It covers every bit of the primer and is basically about the same as clear paint with tint in it, so dries with a paint like finish. 

I didn't top coat it, because it won't be a heavy use item. If I do this technique on a table top, or dresser, I always use a water based, non yellowing top coat, like Polycrylic from Minwax.

Birdsong 3 weekend 050

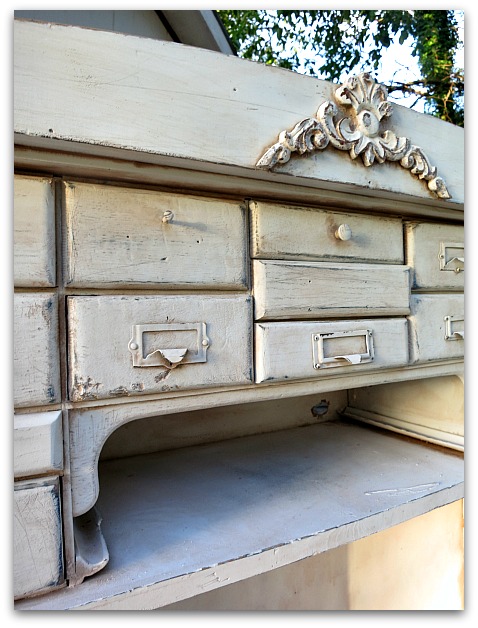
   We drilled holes in the top compartment for wires to the DirectTV box and DVD player, and also in the big opening for the television.

Girls room redo 026
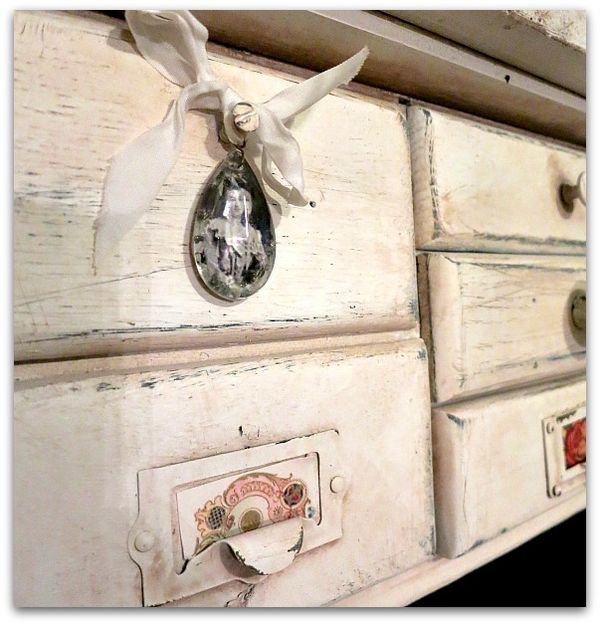
I didn't try to match up the existing hardware in the places where some pulls were missing. Instead, I went with odds and ends that I had around.  One drawer had just a screw as a knob, and I left that, but tied a chandelier crystal with an image added on the back to the screw.
Girls room redo 027
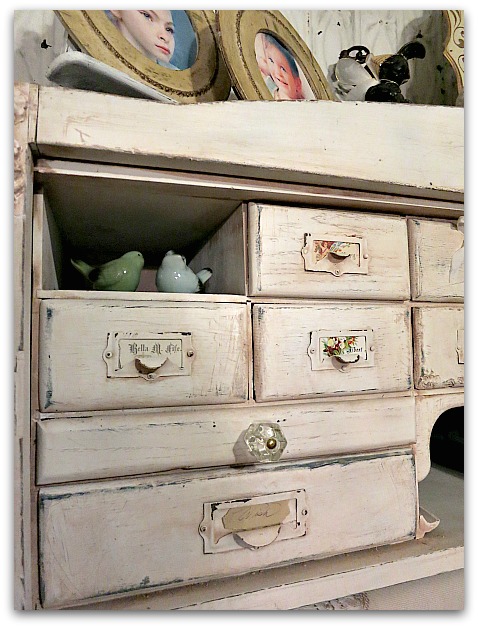
Old calling cards were a good fit for the slots in the pulls.  Especially favorites that I'd been saving for some special use, like one that says "Bella" and a couple Marys (my grandma's name)

Girls room redo 032
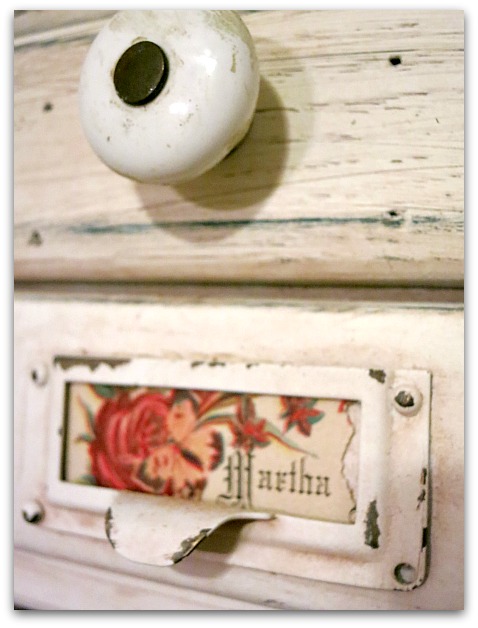
And Martha, my mom's name.


Girls room redo 024
I used some vintage floral paper and a couple of notes in my sister's pretty handwriting in others.
I guess, if I was organized, I'd have gone with actual labels of what was in the drawers, huh?

Once it was set up, I wasn't thrilled with where the curtains would have to hang, past the sides so as not to cover any of the screen.  So, a blind was suggested by my sis, Terry.


Photo

I'd seen some great lace blinds at the Victorian Trading Co. and since Birdsong was coming up and I had guests to show around KC, we'd planned to go there the next day any way. Kansas City is the headquarters for the online store and catalog and they have an outlet store here.  Lucky us! And lucky me, the blinds are only $20 at the outlet store compared to $69 online.

Since I knew most of the ladies coming to Birdsong were from out of town, I made sure to tell them about this store.  When we pulled up, we saw an Iowa plate in the parking lot, and I rightly guessed that some of our friends were inside shopping.  When we went in, the manager gave me a huge hug because I'd sent so many people her way. 

Gitf 053

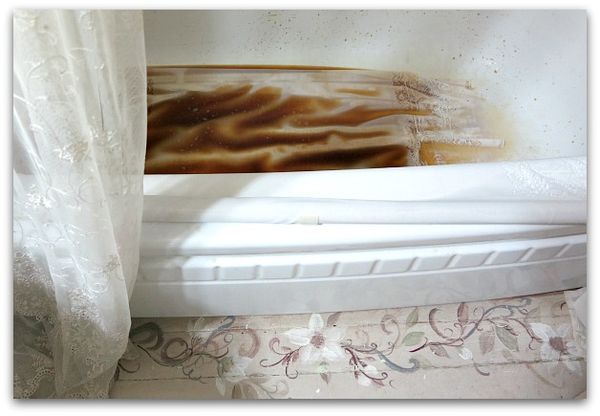
There just happened to be a set of blinds exactly the size I needed in the clearance room! But they were very, very white.  I placed them in the tub and poured coffee over them, then laid them out to dry in the sun and got just the color I wanted.
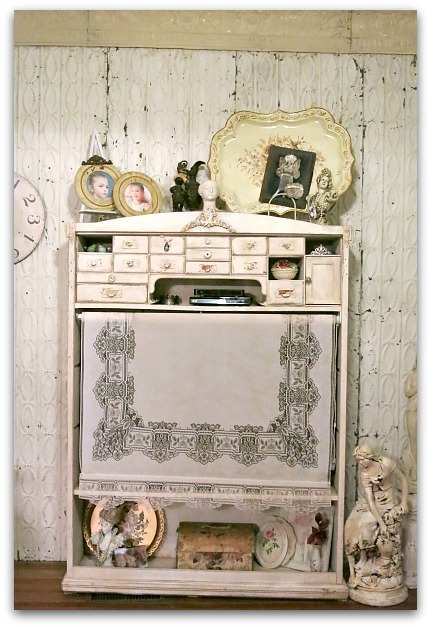

Girls room redo 029
I'm looking for more old, wallpaper covered boxes to set on the bottom shelf to hold the kids' DVDs, I think it looks too busy right now with all the doodads on the shelf. A few boxes would be better.

Later on, I might print an image on linen and add to the blind…. that would be pretty wouldn't it?  .

PS- Don't forget that Google Reader is closing soon! If you are
reading this from that site, you need to make a change real quick or
your list of blogs will be gone.

I've tried Feedly myself and basically all you do is sign up and it
will import all your Google Reader sites in the click of a mouse.  Very,
very, very simple.Bloglovin is another good one.

You can also follow my blog through Networked Blogs and read it on
FaceBook that way.  There is a list of different reader site buttons on
my sidebar that you can click on to follow me in. 

Hope I'll still be seeing you around!


Karla paints a table for Karla

Hand painted, Hand Painted Furniture, redos

Done 013

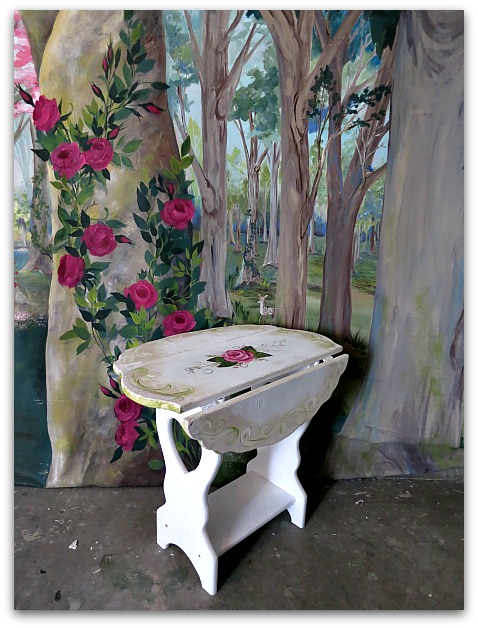
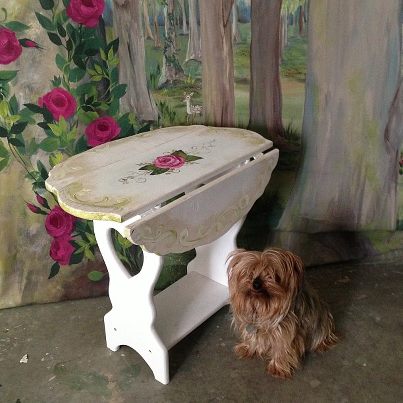
While I had the paints out and my work clothes on to work on the giant mural/banner, I finally painted this little table for Karla.  Last year, she helped with my Pay Pal sorting for tax time, like Beth did for me this year.  It's a good thing to have accountant friends!

Done 014

So, about 6 months ago, she dropped off this little white table and said I could return the favor and paint a rose on it. 

Here is what I did:

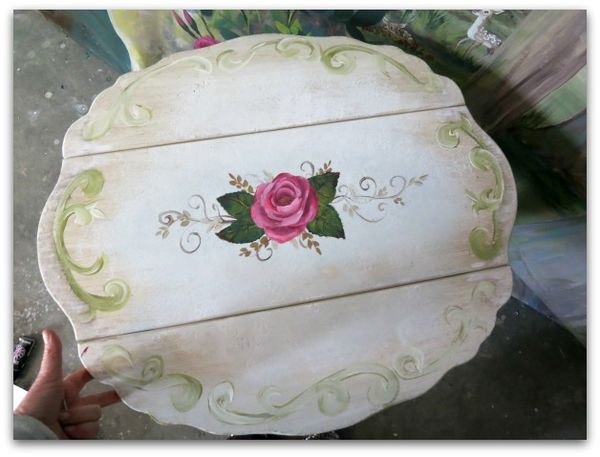
  • First, using a large, flat brush, I dry brushed toast color across the whole table top, over the white paint that was there.
  • Next, I took a kitchen sponge dipped in white and sponged the center of the table, leaving the toasty color heavier around the rim.
  • With a one inch flat brush, I dry brushed a hint of white from the very edge over the toast toward the center of the table, but only about 2" or so away from the edge.
  • With the sponge, I wiped on a green around the routered edge.
  • Where the toasty color was left as is, I painted a swirly design all around the table top.
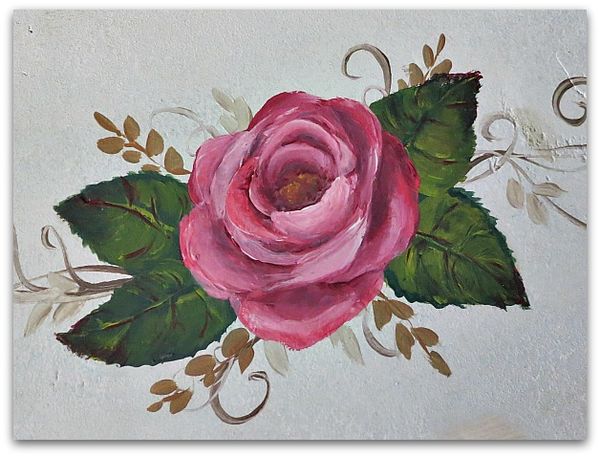
  • Last, I plopped a rose in the center.


Done 012

I was happy to do it, but it took me forever to get around to it. I just don't paint furniture on a regular basis like I did in the past and it took some gearing up.  When I started painting roses on the banner, it occurred to me that it would be a good time to get out the much delayed project and slap a rose on it too.


539122_10151508764939477_754895452_n
(Twinkle insisted that I take her photo too)

Hope the pink is the right tone. It's been so long since she showed me the pillow sham she wanted to match, i can't remember what it looked like. ooops


561259_10151505814189477_141559949_n
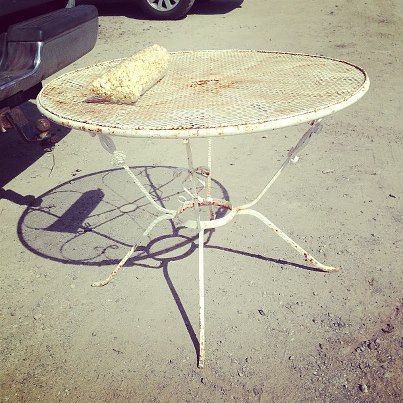
Here is a table I found for myself, to use in the garden. Only $5 at the West Bottoms in KC. I paid that much for the bag of kettle corn on top of it.


535997_10151511969889477_1536081053_n
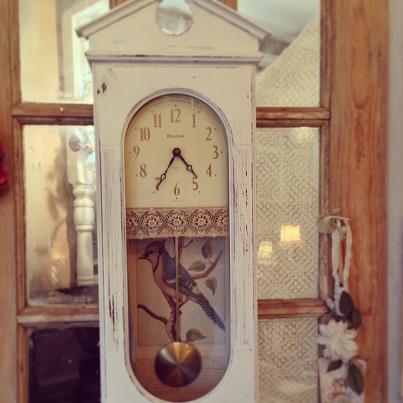
And here is a mini redo that I did for  myself.  Years ago, I'd given my Great Aunt Caroline's clock a coat of white paint and then distressed it.  But it was still dark inside.  So, I leaned a page from a vintage bird book in it, and added a rim of lace (held by a couple dots of glue) to the frame under the clock face.

  It only took a couple of moments and I think it added a lot.

Scroll to Top