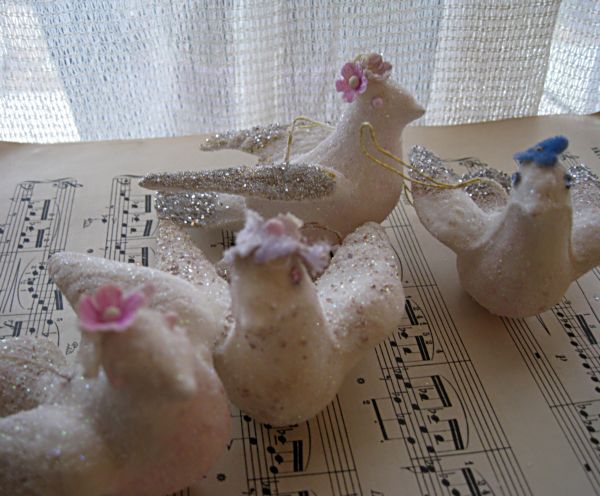
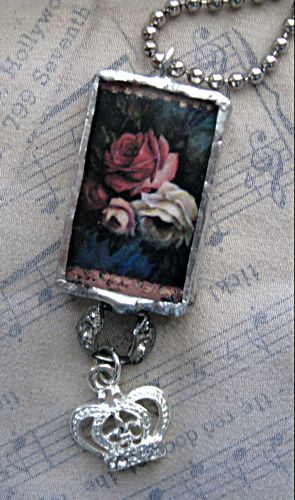
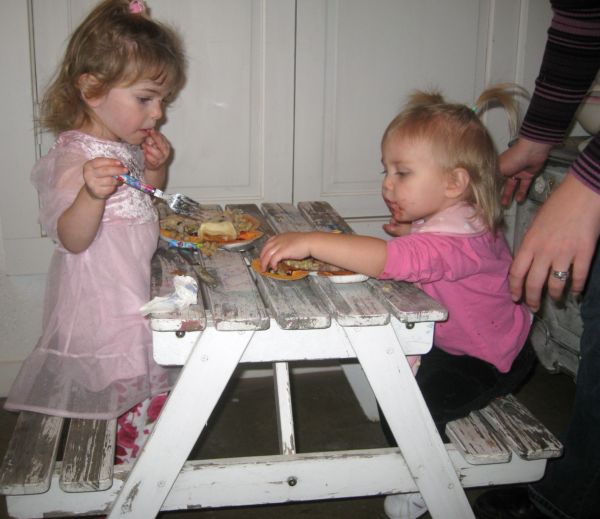
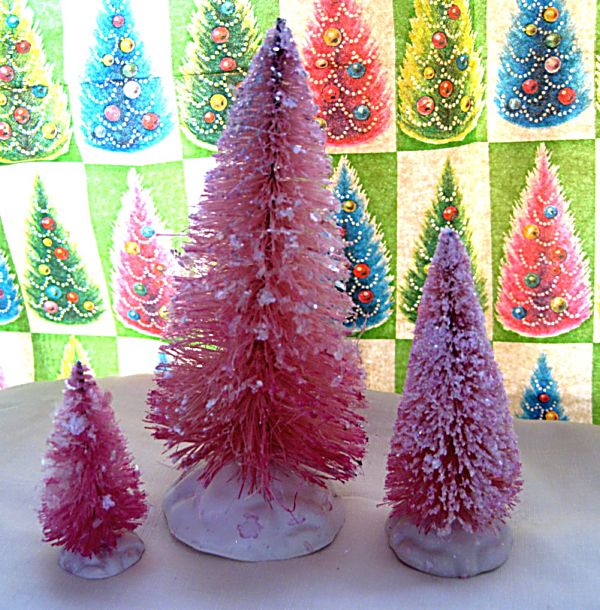
holiday decor

FOUR winners!

Etsy Goodies, fairies, give away, holiday decor, magazine pictures or articles, Silver Bella, Sugarwings

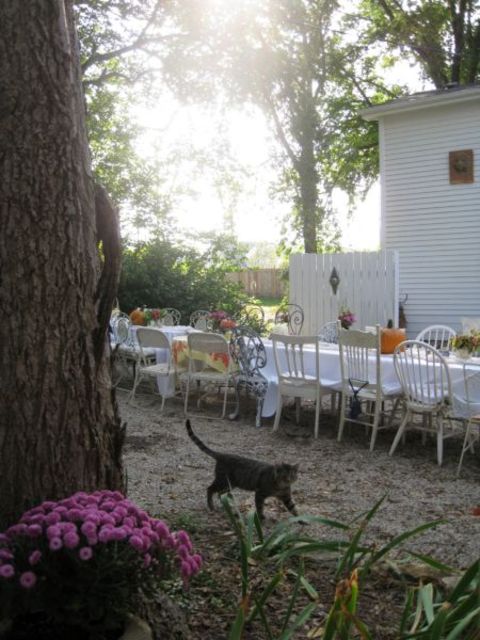
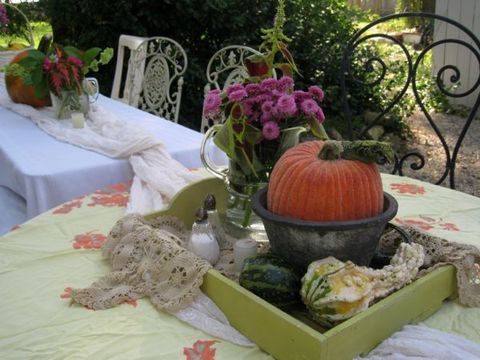
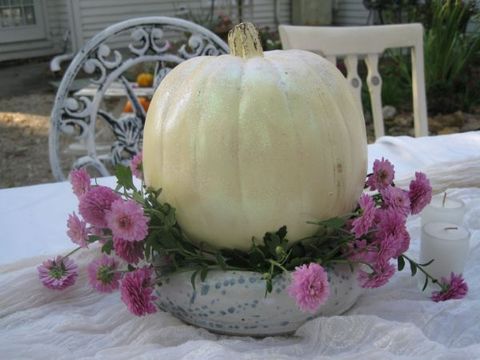
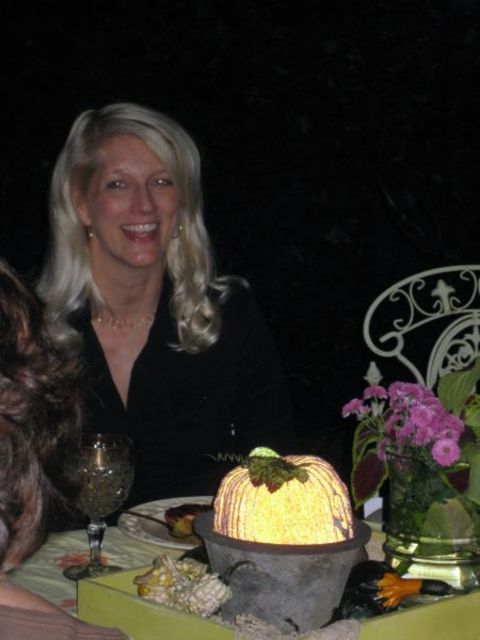
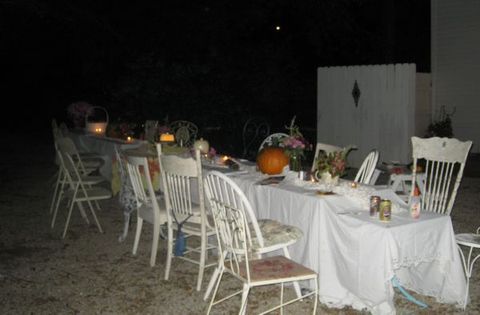
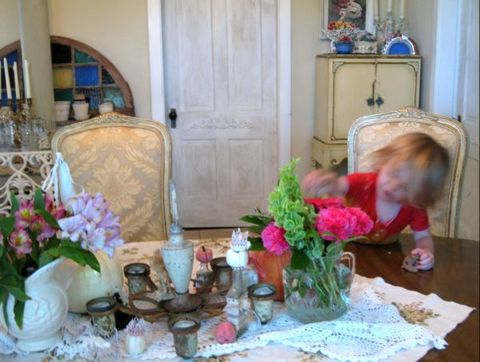
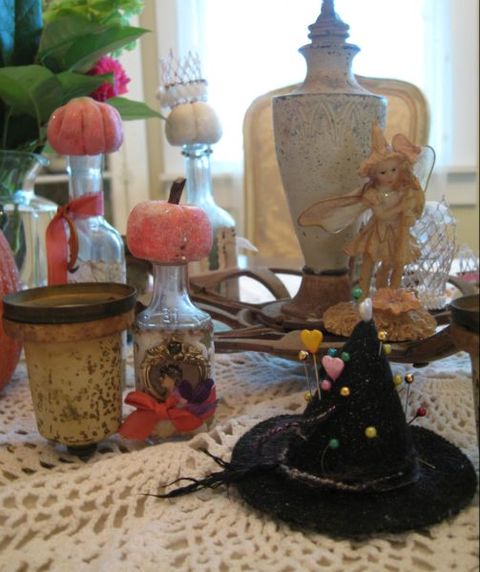
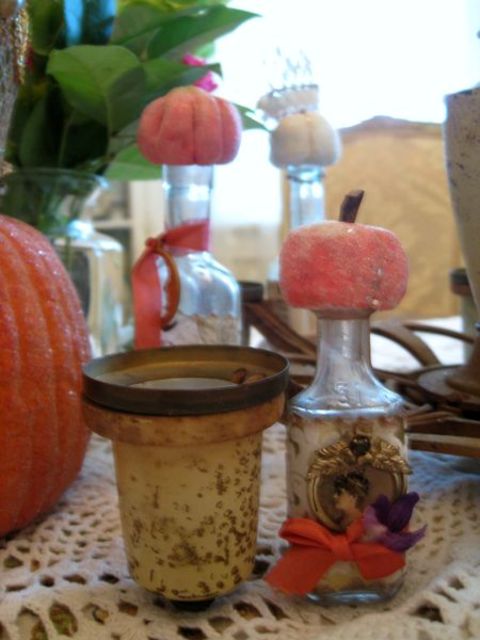
Sculpy_099 Yesterday, I had a brunch for some friends and decided that I should set out some of the fall decor I have, and some of the pumpkin bottles I have been making.

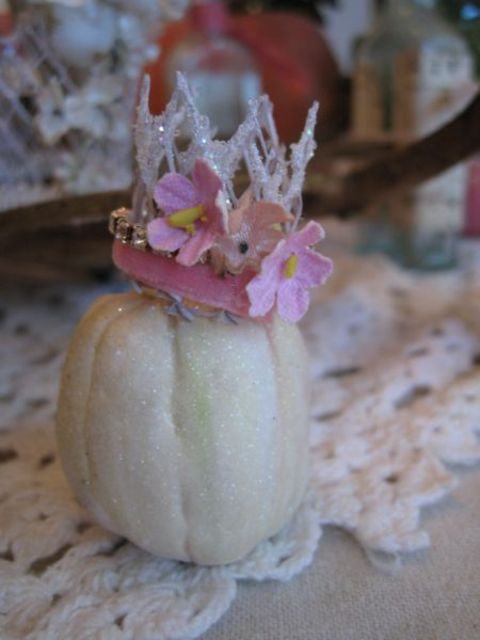
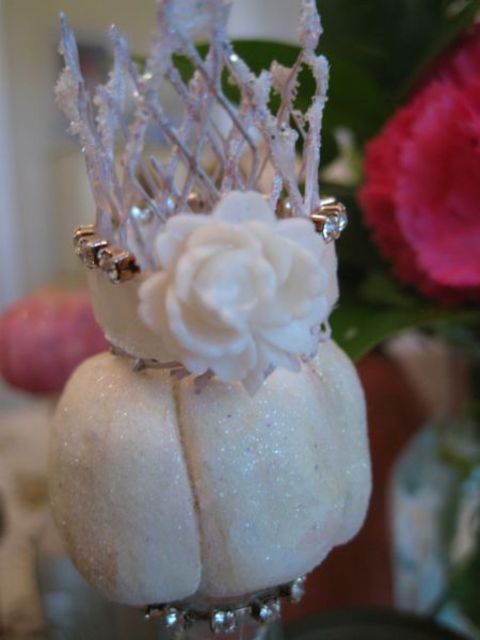
I turned a white tussie mussie from Heather upside down and it became a hat for my white glittered pumpkin, I think that is my favorite part of the tablescape.Sculpy_083_2

Sugarwings was in "Extreme Two Year Old Mode" yesterday and EVERYTHING on the table top was her favorite.

That girl was so quick at  getting into stuff all day long, that every photo I took of her was a blur.

Am I finally going to have to give in and baby proof my house? I usually just tell her "that is Grammy’s that is yours, you play with your stuff, not mine" but yesterday she was swinging a lamp by the cord and hiding the phone under the bed.

I guess I can’t really put all the lamps and phones away, as well as wrapping my whole home in bubble wrap.  She is just acting like she is a two year old and I need to be an eagle eye around her to keep her away from my stuff and directed towards her own things. 

Sculpy_089

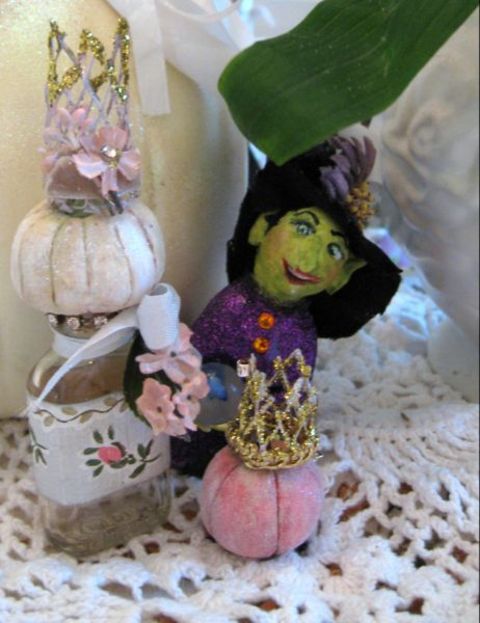
Of course, having sparkly witches on the table is enticing for a baby girl.Sculpy_094

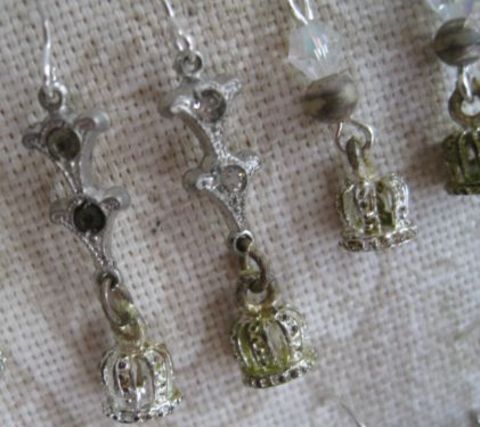
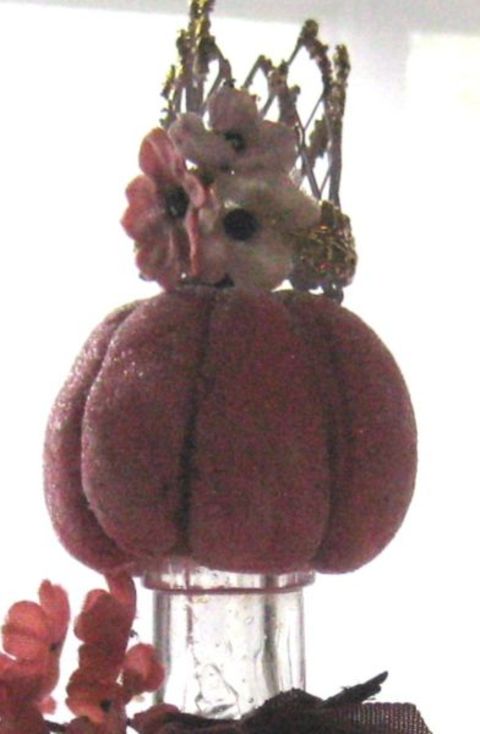
And she really enjoys playing with these little pumpkins.  I do too. We take the tiny crowns off and put them on our fingertips to turn our fingers into princess puppets.Sculpy_093

This little witch’s hat was a gift from my Sissy when she was here. She made it herself and it has a jingle bell in the stuffing.

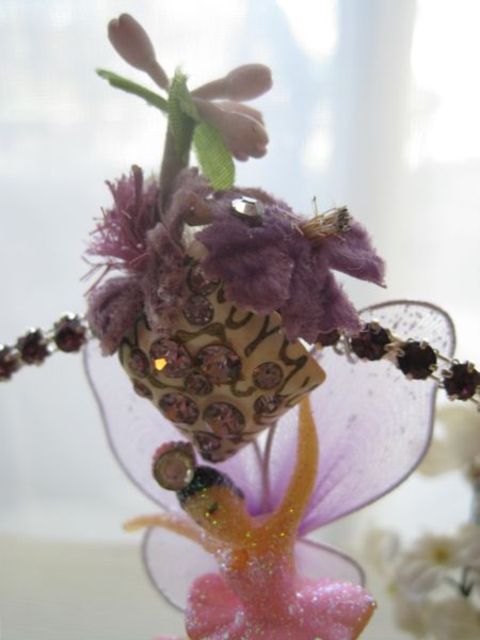
The fairy was a present from my sister, Bobbie Sue, isn’t it cute?  And her colors seem just right for a fall display.  She’s an earthy fairy. My neice, Shelli also brought me a special gift. A package of Imitrex!  I get migraines, and on our insurance the meds are $200 a package, but on hers it is $15. So she gives me her extras. Sculpy_096

Sugarwings and I made more scuply pumpkins yesterday.  I let her paint them all herself when they were cooled off, so maybe now that she has her own pumpkins, she will be content to not play with the ones on the table?

No, I am kidding myself there. No such thing as a contented two year old, they want to touch everything they see!

Yet another reason why I don’t use much real glass glitter. I cut myself enough with that lethal stuff, I don’t need the baby getting hurt on it!!Sculpy_092

Oh, but now, I am sure you are interested in hearing which one of you is going to get your own hands on a crown?  Here are the winners for "Karla and Carol’s Romantic Country Celebration Giveaway"

Thanks for all the comments to Carol about how wonderful her crown and pumpkin ideas are!   The name I drew from her comment log to win a crown kit is:

Cammi

And the winner of a pumpkin topped bottle from my Silver Bella bonus drawing goes to

Bella Wanda.Sculpy_070

Now, ANOTHER  winner of a pumpkin topped bottle (not this bottle, it is listed on Etsy, I don’t have a photo of the one I’m sending handy).

The Winner is:

Bobbi

Gifts But wait, we aren’t done yet! I have one more giveaway to announce!

My Sweet September Prize Pack goes to:

Sheila

I think I’ll add a little glittered pumpkin to it too. 

Remember, I constantly have a giveaway going.

Aren’t they fun? I sure like doing them!  I’m not sure what October’s prize will be, but all comments starting today, will count for it.

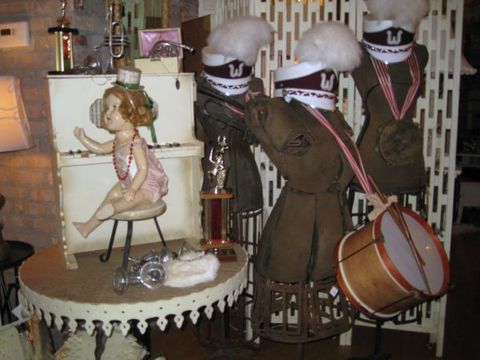
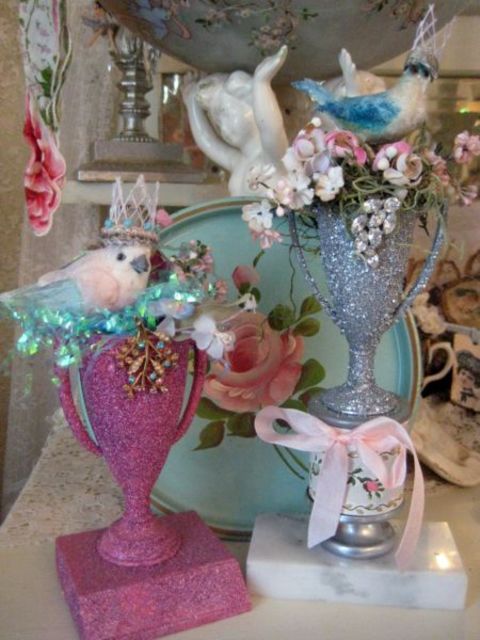
Sculpy_047 These are some more Silver Bella creations I am making. Lately, I have been buying trophies, inspired by a gift of a nesting bird in a teeny  trophy from Robin last spring.

I have a boxful of vintage automobile trophies that I can’t wait to froof and doodad up.

Before I go and get back to work on my trophies, I want to thank Sara Duckett of Sadie Olive for helping me de-clutter my blog a bit and add my latest magazine covers to the side bar.

If you notice, now the blogroll is on a separate page that you can click on to go and visit.

I spent a little time redoing the blogroll while Sugarwings was napping, but didn’t get very far.  I need to organize the rest of the names and add a TON of fun places that I go to. I will  let you know as I get more added. 

My links have not been exactly true to the blogs I read the most often and I want to add some of the dozens of addictive places I visit!

Still redoing the studio

antiques/junking, Etsy Goodies, holiday decor, how to's, I do tend to run on, don't I?, Sugarwings, swaps, vintage paper/collage art

Brenda is hosting a tour of "Where Blogger’s Create" today and since I have some studio pictures here, I thought I’d join in. For  a list of other bloggers  who are showing their studios today, go HERE.

And please, remember that all comments are entered into my August Giveaway, the 50’s housewife kit- jewels and a frilly vintage apron!

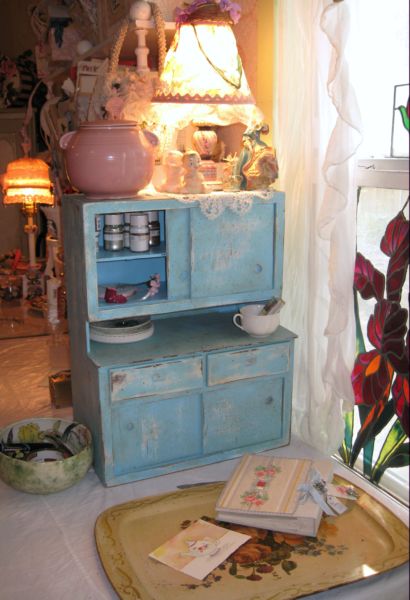
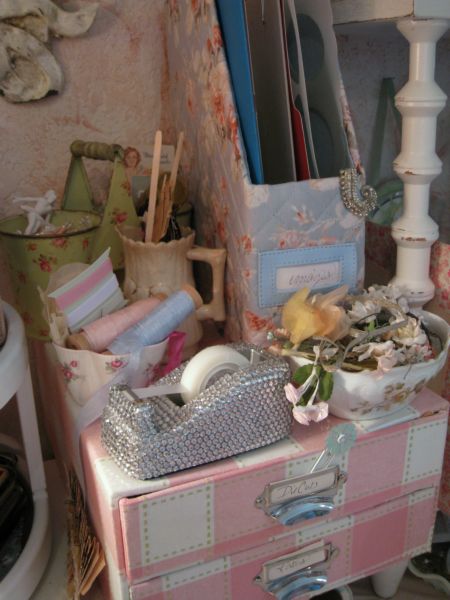
Studio_clean_up_028 I’m still plugging away on the studio redo. It is taking so long because I stop and make things as I go and spend too much time on fixing up the storage areas. Like this little hutch, that I am storing glitter supplies in. (it still needs glass knobs)G_sailing_002

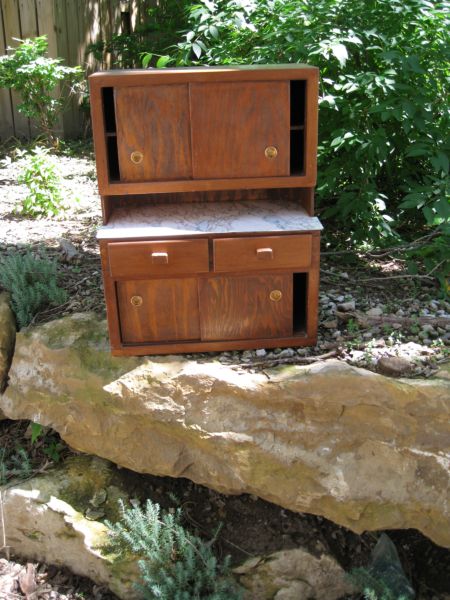
Here is the before, sitting outside my studio’s back door.

1-I primed it with Zinzer Bullseye spray, bonding primer, then a spray coat of aqua.

2- Let it dry, then sanded it quite a bit with a palm sander.

3- Topped it with a black walnut stain/poly mix and wiped it down.

4- As a finishing touch, I dipped the brush back into the stain mix and flicked it over the hutch for speckles, then dabbed the more pronounced ones a bit with a rag.

So, things like that get me side tracked, and instead of just making the room cleaned up and functional, I do projects.Studio_clean_up_022

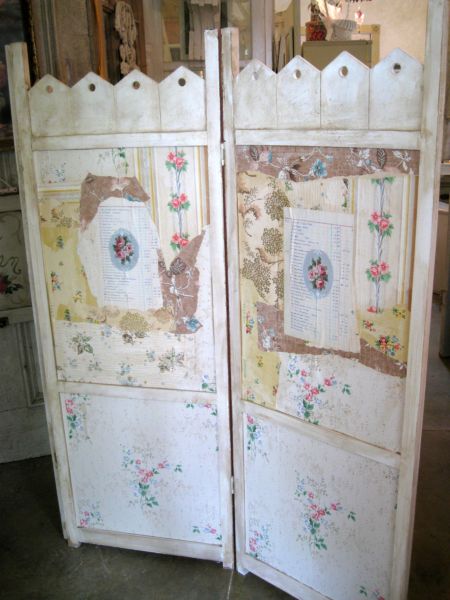
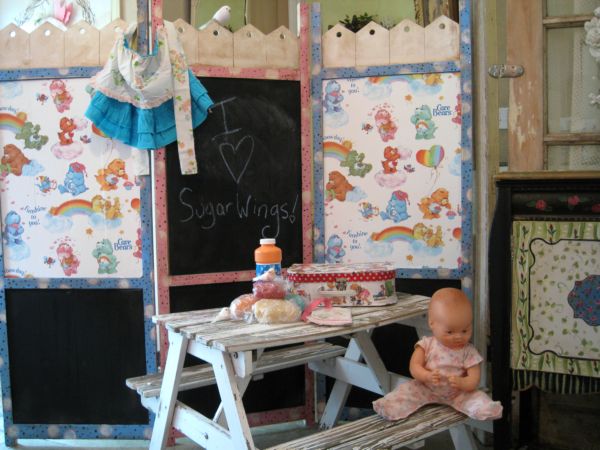
Like this one. I bought an unfinished pine folding screen at a garage sale for $10 last weekend and decided to make a mini studio within my studio for Sugarwings with this as walls.Studio_clean_up_021_2

The side facing out is covered with my floral papers and trimmed in white paint top coated the same way I did the little hutch. (which I had bought to use in Sugarwing’s studio, but it ended up in mine!)Studio_clean_up_030

On the fairy grand baby’s side of the screen, I painted the trim in pink and blue and white polka dots with chalk board paint in 4 of the areas, and some Care Bear wallpaper in the others. 

Then, perfect timing- (but is there ever BAD timing for a lovely gift???)

Robin sent a huge, overflowing box of goodness our way!!!!!

I had admired the apron she had posted on her blog, and look- here is one for Sugarwings!Studio_clean_up_031 

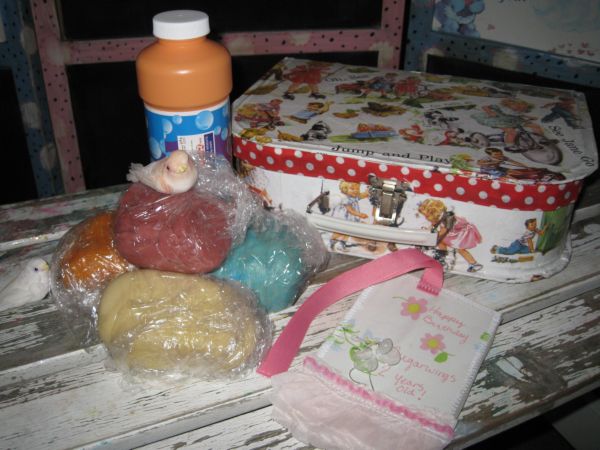
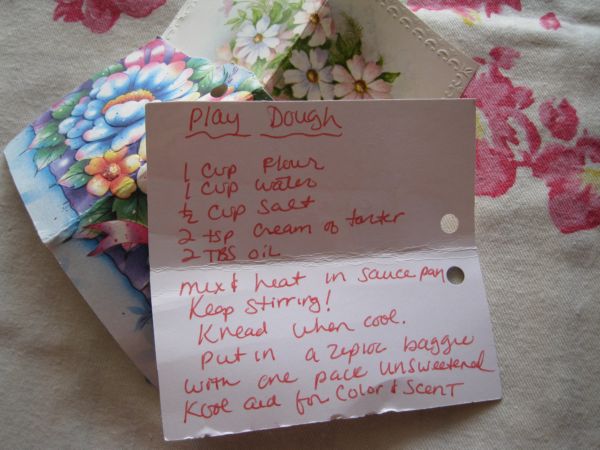
Not only did she send the apron that I admired, she made up scented play dough, this sweet tag, and this cute little collaged box too.

As well as TONS of other surprises.  The birdies are from her too, I added one to the top of the screen, by just looping it’s wire around the hole in the picket.Studio_clean_up_033

All of her packages in the box were wrapped so cutely, and she used old greeting cards to make up tags for each package, then included the play dough recipe on one too.Studio_clean_up_026

That box of goodness was jammed packed full of fun.  I’d also admired one of these ceramic hands that she showed on her blog, and Robin sent one of those too. I was sad to see it had broken into a million pieces in the bottom of the box.

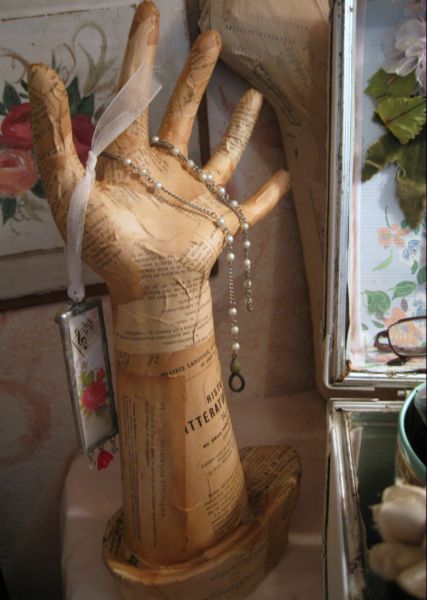
That hand was definately worth putting some time into fixing, so I glued it all back together, then decoupaged it with pages from an old French book to cover the cracks and gaps that were stuffed with tissue paper.

Robin lives in the same city where my husband and I keep an apartment out East, so I will keep this hand on my desk, as a friendly wave from a neighbor.Studio_clean_up_039

I’m embarrassed to say that Robin’s box was part of a swap we did.  She had bought a hat covered in tiny pink flowers and I offered to trade a handful of her pink ones for a mix of a bunch of my other colors, so she’d have a variety to work with.

And because the pink ones she had were so perfectly pink!

And yes, she sent the pink flowers, I have them tied to the storage box.  And what did I send to her?

Just a handful of flowers.  And I haven’t even shown you all of what she sent to me!!! Like I said, that box was jammed full of goodies!

Thanks so much, Robin!Studio_clean_up_037

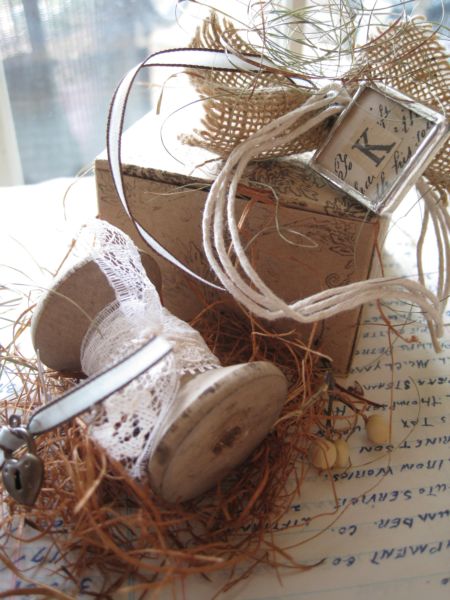
And thanks also to Carol. She sent in her swap boxes for the Pre-Bella Get Acquainted Swap that I am hosting, and included this giftie for me.

That K is going onto my chandelier filled with collected Ks that hangs right over my computer.

I didn’t peek into her swap boxes, they are just too darling to open.  I am afraid my photo of them wasn’t as good as it should be, but the one on her blog is. She owns one of those Canon Rebel cameras I whine about all the time.

You should look at her photo, she is a talented stylist and every picture she takes is a beauty.Studio_clean_up_027

I forgot to mention that the flowered china in this picture is a gift from Beth. She thinks of me when she is at an auction and is always bringing me pretties she gets there.

I tried re-taking this photo (same as the last post) in daylight, but unless I have direct light, my photos are never good. Etsy_sales_004

That is why every photo I take of something for Etsy is in front of the French doors in the light.  I try to use different papers and table clothes as backgrounds, but it is always the same location, since it has the best light in the room.

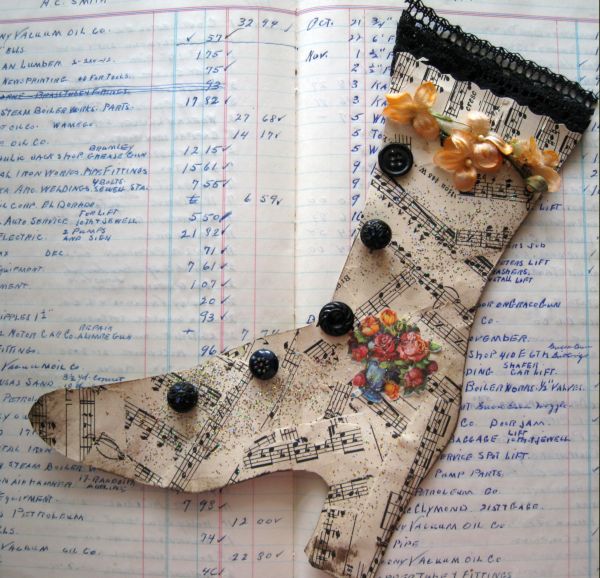
This Witch’s Boot might be my only Halloween offering, besides black and orange millinery.  I won’t have time to do much for Halloween, I am going to skip straight to filling up my 10 x 10 booth at Silver Bella for Christmas and making things for Lollyshops.Btnshare2

After the shoot

Etsy Goodies, holiday decor, Silver Bella, swaps

Img_6407 My bedroom photo shoot went well, Diane and I finished in record time. 

Img_6412_3 My Queen Anne’s Lace was tinted perfectly blue over night and was ready to go into the bottles on the mantel in time for the pictures.

Normally,we count on about one hour per photo, but yesterday, we had sparkling sunlight shining through the windows and that made the whole process go so much easier!   We had all 7 photos in 3 1/2 hours, that is a record for us.(although these blog photos were taken at night with a flash, not nearly as pretty as the ones with sunlight for the magazine)

By the way, this trick of using food coloring in the water to dye white flowers works with blossoms other than this weed.  Try daisies or carnations too. It is a great teaching tool for kids so they learn how flowers soak up water through their stems, too.Img_6401

Here is a snippet of my first paragraph:

"A romantic retreat with morning light dancing through lace curtains and reflected from antique mirrors will make you want to linger in bed with a tray full of treats while sinking into plush pillows."Img_6405

The first time I did a photo shoot, I thought it would be a perfect time to have a party, afterward. I thought that my house was at its most spotless and foofed up best and I should invite people over while it looked good.

But, at the end of an exhausting day of hard work, my house looked like some one had picked it upside down and shook it!

During a shoot, all throughout the day, furniture and knick knacks are shifted here and there, moved  out of the way, switched around, taken in and out of the frame, and moved away to make space for the camera.Img_6413

Kind of a mess, with stuff piled up everywhere to get it out of the sight of the lens!

Not the best day for a party!   Since then, I have learned to not plan anything else but sitting down after the shoot ends. 

I wait and put it all back together and write the article the next day when I have recovered.  No matter how much fun it is to do, there is a lot involved and it does tend to wreck the place.Img_6414

But today, all is back to normal, my piles of books and bottles of water are back beside the bed and all the clutter is spread back out where it usually lurks.

I’ve been adding to my etsy shop this afternoon.thanks, this one is sold

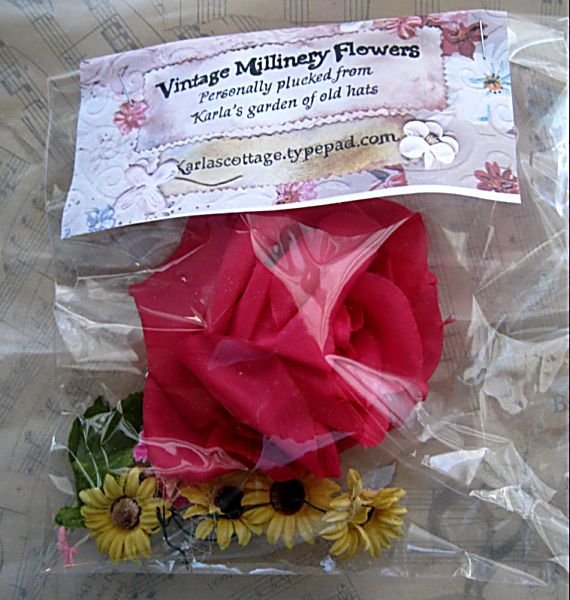
  Img_6437 Nothing that I have made, but creative pieces for others to use.  I keep seeing Halloween projects popping up all over blogland and thought the timing was right to make up some millinery flower packs in these colors.Img_6431 sold

Making up kits and supply packs is almost as much fun as actually creating a piece. Img_6427_2  I just love picking out items that go together prettily and imagining what they will become when they go to their new homes. 

If you have ever ordered anything from me, you’ll notice that I love to wrap and make the package pretty. One thing I don’t do though, is use brand new packing boxes. I do my best to recycle and reuse, and don’t much care if the outside of the envelope has past addresses marked out.

all Halloween packs are sold, but I am listing more.  I will have maybe 8 more to list, then am out of black and orange!

It is important to me to make the presentation of the item itself pretty, but the envelope, I’d rather reuse and keep my shipping prices down while helping to save the world in my own little way.Img_6203_2

But after receiving this box, that was perfect from the outside, in, I might have to change my practices!

Oh my, it was delightful. Even the outside was pretty, every detail was gorgeous.Img_6224

The box was from Andrea, and was filled with her goodies for our Pre-Bella swap. 

Oh my.

Did I say that already? Well, this gift box was so pretty, I might have said that a few times while gazing at it, trying to decide if I should open it or place it on a shelf and enjoy the box as it was.Img_6227

Of course, I opened it!! And once again, OH MY! Look at the prettiness involved in this box.

This pile is gifts that Andrea sent to me, as hostess.  Oh my, I haven’t even opened my swap box from her yet. I am waiting till all of the packages are in from the rest of the swappers.

I am so lucky to be a part of this talented group of artists who agreed to be in this swap with me.  Here is the list, if you’d like to visit any of them, they all have wonderful blogs!  I know I have posted this list before, but it is a fun group and definitely worth you going to visit.

A Get Acquainted- Get Inspired

Pre- Silver Bella   Swap

1-Heather- http://www.prettypetals.typepad.com/

2-Cheryl Dack- http://roseyposeyconfections.blogspot.com/

3-jennifer Hayslip- http://sweeteyecandycreations.typepad.com/

4-Jessi Nagy- http://www.scrappyjessi.blogspot.com/

5-Kim Caldwell- http://www.artisticbliss.typepad.com/

6-Holly- http://www.hollydoodledesigns.com/shop/

7-Natasha- http://www.natashaburns.blogspot.com/

8-Analisa- http://www.leesiebella.typepad.com/

9-Andrea- http://velvetstrawberries.typepad.com/andreasingarella/

10-Cheryl Stoneham- http://www.insidethebubble.typepad.com/

12- Carol Spinski – http://raisedincotton.typepad.com/Img_6395

And don’t forget that every comment is entered into my August giveaway. Heck, maybe I’ll even wrap it up in a pretty new envelope to send it out!

What are you hoppy about this year?

Etsy Goodies, fairies, family, holiday decor, Sugarwings

Easter_egg_057_2 My studio is semi- cleaned up and the tables are set for our family Easter dinner tomorrow.

Every holiday, we go around the table and take turns saying what we are grateful for this year.  At Christmas, I ask what they are "Merry" about.Easter_egg_054

And at Easter, I ask what they are "Hoppy" about.

Everyone rolls their eyes and makes a protest, but they all go along with it to humor me, and I think, that they really do enjoy it, since it is such a tradition at this point.Easter_egg_063

As far as setting the table, I don’t go to a lot of trouble.  All I do is the center pieces, the food stays right on the stove and everyone serves themselves buffet style.Easter_egg_043

But look at my pretty pan for tomorrow!  A PINK skillet from TJ Max.  The Easter Bunny brought it by to me a little early so I could whip up something tasty in it for guests.

I line the center of the table with some pretties, usually my latest projects. This year, I have teacup nests and lots of birdhouses.Easter_egg_058

And of course, a fairy or two! This one is listed for sale on Etsy right now. 

(oops, I just realized it is not listed yet! If you are interested for $18, email me)Easter_egg_071

I’ll put out some fresh flowers and probably fill the center of the table with even more pretties I have made.  I like it to be full and have something interesting in front of each dinner guest.

There will be more birdhouse pictures on Thursday for the party Beth and I are having, "Bling your Birdhouse Day" or  "What do you LOVE about your Birdie’s Home?"

I will be giving away one of these birdhouses that day, leave a comment to enter the drawing.Easter_egg_052

I have my Easter bonnets all ready to wear.  I think I might try this new blue one, I got it today for $6 and it is abundantly full of blooms!

It was a lucky flower day, I got the little white flowered hat for $5 and the roses, carnation, and little velvet posies were a gift from a friend. Now that is a good friend! She knows what I like.Bookclub_077 

Since I knew that Easter would be busy, with turkey basting, egg hunting, and all the visiting, we got the littlest Nathans together early and took photos in their fancy dresses.Easter_egg_039_2

One of Sugarwing’s photos is already framed, so I can surprise my husband with it as his Easter treat.Easter_egg_035_2

Another copy of that picture has been added to my scrapbook. I cut out around the baby’s picture, then cut a slit into the rose cart with an exacto knife, following the outline of the roses.  The portrait was then slipped into the slit and glued down, then the whole thing was glued to some vintage wallpaper.

hmm, I should add some fairy wings toBookclub_096  this….

Little Madison was a much better poser than my Sugarwings.  She is still too little to get away from the camera!

My fairy grand baby was too much of a moving target, running up and down the stairs, and dumping out the baskets full of grass and bunnies.

  Most of her photos are  of her diapered backside as she scoots up the steps again for the 50th time.Bookclub_099

Her dainty dress and her tidily fixed hair didn’t last long either. This little wild child was having too much fun to care about pictures.

And to me, this shot of my pixie is even more precious than the perfectly groomed and posed ones we had hoped to get.

I hope all of you have a wonderful holiday with your own cherished loved ones.  I can’t wait to see mine tomorrow!

Frilly Things, Blings, and Butterfly Wings

fairies, family, holiday decor, how to's, parties, Sugarwings, vintage paper/collage art

Bookclub_113_3 I was invited to a fairy tale party with Sugarwings yesterday and of course it was right up our alley. We got to wear our wings and frilly things, plus do some blingsBookclub_132 !

The party was at our local HyVee grocery store promoting the release of "Enchanted"Bookclub_137

All the little girls got craft packs to decorated crowns and wands, that of course came with a ‘poisoned’ apple, since they were all fairy princesses. Sugarwings decorated me with most of her glittery stickers instead of putting them on her tiara.

Afterwords, when I went grocery shopping to get some forgotten items for the dinner for 18 I was cooking that night, I looked very sparkly in the store with my extras the baby added to my fairy grandmother outfit.

They dined on mini pizzas. Dessert was a chocolate fountain with lots of goodies to dip into it.  So, she wasn’t too hungry for my build your own burrito bar that night for the big family dinner.  I don’t blame her, its hard to come back to reality and eat a burrito when you have spent the afternoon as a princess and being served chocolate from a magical fountain.Easter_egg_002

With company here, gallbladders going bad every where I look, and tax season approaching, there certainly has not been much creative time at my cottage lately.

I was able to squeeze in an hour or so yesterday and made 3 eggs.  I’d seen these made at Amy’s and hers are so much better, but I chose to use throw away materials,  not anything wonderful like her velvet ribbons and rhinestones.Easter_egg_003

The trim I used was just snippets of crepe paper and tinsel. I was too cheap to use the ‘good stuff’

Easter_egg_004 Heres a quick how to:

Start with the large sized plastic eggs

pick a paper you want to cover the egg in, tear in small strips and soak the paper for a moment in water

brush glue onto one side of the egg, add paper strips, mushing them down well with your fingers, then brush glue over the top and sprinkle with glitter (I used the kind that looks like sugar)Easter_egg_007

Repeat with the other half of the egg, being careful to get close to the edge but not interfere with the lip.

Glue trim along the edge to cover the rims, so they don’t show when the egg is put back together.

I’d keep these out of candy baskets, because of the glitter, but they make a pretty display and I will put a gift card in them to give to the bigger kids.Easter_egg_012

I also got started covering my Swiss Chalet music box. Not exactly a birdhouse, but it is a house and I will add some birds, so I think that if I get it finished, it can come to our Bird House Bling Party next Thursday. 

Check out the details if you’d like to be a part of it. And remember, you don’t have to be a blogger, you can get a free flickr account and upload photos there too.

This chalet is barely begun, but I think that the pink polka dot ribbon might be jarring.  I usually go for all vintage trims and maybe this one is too new looking??  The velvet is a scrap from a rocking chair I redid for Sugarwings when she was born.  I found some white velvet, and was able to do a soft pink marbley look with fiber reactive dyes.  Her little Hippy Chick mom loves tie dye, so this was done just for her.

Today will be a craftapoolza- Beth is coming to play! We will be making birdhouses all day to be ready for next week (I hope you join us! Feel free to add the button to  your blog too).  We’ll also be plotting our next swap, so I hope you’ll join that also.Easter_egg_003_2

We aren’t the only ones planning a party, there is always something fun going on in blogworld. Sandy is hosting an Easter Parade today and is asking us to show our Easter Bonnets.  Here are some of my latest purchases, in a basket on the fairy grandbaby’s piano. She likes to wear one while she serenades me.Bookclub_105

She is going through a hat phase right now and luckily, I can keep her supplied with plenty of rosey ones to show off in.Easterparade005

Thanks, Sandy!

Easter_egg_004_3 And over at the Part Tea Planner’s there is a tea party welcoming the first day of spring.Firstdayofspringteaparty_header_cop

Enjoy the celebrations!

I really didn’t need to go shopping today, but wow!!

antiques/junking, collections, family, holiday decor, Sugarwings, swaps, vintage paper/collage art

Peat_pots_046 Don’t I have enough hats yet? What is wrong with me??? I can’t resist.

Truth is, I do use the flowers in my projects a lot.  But even if I used them daily, I probably have enough millinery flowers to get me through the next decade or so.

Peat_pots_044 Yet, today I buy 4 more hats. One has a large, single velvet rose, nicely smashed with age (for $2- how could I leave it behind??). The others are LOADED with flowers and were $4 each. 

I might have bought a few buttons too…… There are some not pictured also.   Lots of cute shapes and rhinestoney ones in the jars, so I just had to get them at about $5 a jar. 

Scranton and 4-Corners, Kansas are small towns in the middle of nowhere, but they have some great antiquing bargains!

Most things were cheap to start with, but there were also sales, of 25-50% off a lot of booths.   Except for the hats and buttons, everything in the picture here was $2 or under, including the glass jar. I think I’ll use it for my paint brushes.  But on the other hand, I do have plenty of buttons to fill it with!Peat_pots_051

And how many vintage photos can you get in 4-Corners, Kansas in  a bag for $5?  I stopped counting at 50.Peat_pots_047

Of all the things I got today, these are my favorites.  Oh, I can’t wait to get started on these projects!!  Don’t they look like Marie Antionette?

One project will involve these figures, some small round boxes, vintage wallpaper in soft pastel colors, lots of millinery flowers and more than a few rhinestone buttons.

The frame, I will paint white and put a different picture in. I will be needing this print for the lining of one of these boxes that these mini Maries will be perched upon.Peat_pots_056

What a sweet baby photo this is. It was in the bag of old pictures that I got today and I think it might be my favorite of the bunch. Feel free to copy and use it in your own projects. This baby needs a loving home! How sad when family photos are lost to the family and for sale in antique stores. I always feel like saving them.

Peat_pots_063 There certainly is no worries that my little fairy grand baby’s pictures will go neglected!

I had a little scrapbook party on Saturday and between fixing a big dinner, playing with babies and just plain old hanging out, we managed to get a few pages done. 

Sugarwing’s cousin out grew this dress and it  was torn. Her mom had the idea to use it for our pages of the little girls.

I cut out a square to make a pocket out of it, with the dress ruffle at the bottom.  Then glued the buttons down the side and added sparkly flowers to their centers.  The velvet bow was part of the dress already.

When I put photos in pockets, I always glue two back to back, or glue scrapbook paper to the back of one, to make them sturdier.  I also punch a hole in the corner and add a ribbon to use as a pull to take the photo out of the pocket.Peat_pots_058

This page of a summer day on the lake with the family is laid out on a piece of paper that I did a water color wash onto. 

I added a frog cut from a copy of one of my paintings.  Its only in black and white, maybe someday I’ll tint it, but I doubt it. Once I move on from a project I rarely go back, no matter how good my intentions are.

Peat_pots_023 I accented this picture of a couple of my friends and I with a paper doll dress that Beth gave to me.

I like to use tags, ATCs and other art that I have been given in my scrapbooks.

Not only are they usually well done and attractive, but they are sentimental to me too and I love to keep them somewhere that I can enjoy them.

Speaking of friends, my pal, Carol, and I Gardenboard are collaborating with the Fabulous Fifi on an upcoming project! Fifi called last week, and she is every bit as wonderful to talk to as her blog is to read.  No details yet, but here is a teeny sneak peek of something Carol is whipping up for  our prospective article. 

Another pal, Heather featured in an article in Romantic Homes.  How cool. I can’t wait to pick up a copy.  Heather and Carol are both buddies that I met through Silver Bella, and blogging.

And my poor pal, Beth, is under the weather. The pitiful thing is suffering from a horrific knitting injury.  Actually, I think it is just tendinitis, but she was achey enough to miss Scranton and 4-Corners today. If you get a chance, wish her a get well soon.Img_1239

My Sissy sent these St Pats tags in for the Two Tag Swap I am hosting.  You wouldn’t believe the pile of pretties I get to go through and send out to people! Such great tags came in the mail this week, I can’t wait to play with them all.

Oh- I have been tagged by Connie to list seven things about myself.  I know I’ve done the 7 weird things many times, but don’t seem to run out of weirdness to write about.

This time, I’ll keep it simple:

1- I am a serial painter. It is a serious mental problem, I am sure.  I really can’t control it, I paint, and repaint rooms all the time.Peat_pots_024 Right now I am considering blues for my bedroom.

2-  I work really fast, and can get quite a bit done in a short amount of time. My studio is drowning in finished projects. I think it takes longer to try to sell them than it does to make them.

3- When we have a litter of kittens or puppies at our cottage, I pick a theme and name them all to match. My favorite Dorky puppy names were herbs, I had Rosemary and Dilly in that batch of pups.Huberta_002

4- My Great Aunt Caroline is about to turn 100 and I plan on taking after her and living at least that long. I have a lot I want to make or paint and it will take me till then to do it all.

5- I fell off a horse and broke my back 15 years ago this summer, and never thought I’d be without pain, but really am doing very well now.

6- I no longer own horses!

7- I never get tired of these 7 things lists, but I am bad about those award things.  Louisa gave me a couple and I want to thank her for them.  And instead of passing them on to another blogger, I’d like all you readers out there to be winners. Thanks for coming by and listening to my rambles and obsessions, and for keeping me company.Peat_pots_022

Oh, before I forget, I wanted to remind everyone about the Birdhouse Blinging we have going on March 27th.  Join us here and at Beth’s, please!

And everyone, blogger or not, is invited to show birdhouse pictures on our Flickr group:

http://www.flickr.com/groups/692795@N22/

A day of frivolous things

Dorkies (Yorkshire Terrriers), Etsy Goodies, holiday decor, redos

Stairway_redo_139It was so nice to have my group of artist friends over for brunch today.  We don’t do this as often as we used to, sometimes life gets in the way of getting together with your friends.

But when you have good friends, you always know that they will still be there when you do have a chance to catch up and visit. 

Stairway_redo_149Often, we’ll meet at a coffee shop once a week or so, and sometimes one or the other of us will have everyone over for a brunch or coffee and bagels.

I’m always looking for an excuse to set my table and have a mini party, so was glad to invite them all over today to fill each other in on what has been going on.Stairway_redo_133_2

I set up an Easter themed table scape as a centerpiece for the meal, all gathered together on a vintage blue mirror.Stairway_redo_150_2

I raided my shelf of things I have  listed for sale on Etsy and used some of  them on the mirrored tray along with vintage goodies. 

This little sugared ballerina in a tiny tea cup nest is too cute to be hiding away on a dark shelf until someone buys her! She deserved to come to the party too.Stairway_redo_148

My table scapes are usually pretty busy (and gaudy), but guests seem to enjoy looking through them, the displays are full of little surprises.

I always start with something underneath, to pull it all together. Either a tray, a doily, or a mirror, something to focus the mismatched pieces that I bring in.

Two things that I ALWAYS include are fresh flowers and candles.

The tallest thing, usually the candelabra, goes onto the table first.  Next, the flowers. After that, I find something else to use for height, to build layers.  Usually a cake stand, basket, or compote to fill with pretties. Stairway_redo_136

I fill in around the taller items with some bigger pieces like this tussie mussie that I placed a nesting bird into.

This is the nest I received from Jeweled Elegance, my partner in Speckled Egg’s Nest Swap. Thanks Heather!!

I like an eclectic mix in my center pieces, hand made things, vintage, elegant, cute, unexpected and traditional all together (did I mention busy and gaudy?)

After the:

1.base underneath

2. the taller items

3. flowers and candles

4. larger items

5. I then tuck small items here and there and fill holes, making sure that there is something of interest as a focus for each seat at the table.Stairway_redo_153

One friend  wasn’t feeling well, so  she couldn’t make it today.  I packed up some Cinnamon rolls, blueberry muffins, egg casserole and yogurt to take over to her.

Of course, I had to include a pretty!Stairway_redo_152

I wrapped some carnations in a wet paper towel, then slipped them into a plastic bag and tied them up with tissue and a ribbon.  The bouquet fit right into this tussie mussie along with a fluffy chick.

Stairway_redo_155

And you know how one redo begets another? I am working on slipcover ideas for the sofa now. I have been buying vintage fabrics and will soak them in a tea color dye to make them all tie together better. 

So far, I can’t make up my mind which fabric I want where, but do know that I want to get some ticking stripe to use so that I break up the florals a bit.

And I think I decided to go for a trailing skirt on the couch, like in the sketch on the bottom of the pile of ideas.Stairway_redo_163

And of course, I am still not done with the dining room. The corner cabinet still seemed too country-cottage, with its bead board sides. I looked through my vintage wallpaper and found one that matched well in the room and taped pieces to the back of the cabinet.

I didn’t glue the paper down, some day I might want to have the bead boards show again. I do tend to change my mind a bit……Stairway_redo_161

This large glass knob  will be great to add to the door,  but I don’t have the right length screw, of course.  Does anyone ever have the perfect screw handy when you want to change a knob?Stairway_redo_170_2

The corner cabinet seems better now that I have added the trim and the wallpaper.  The glass knob will help too.

The room seemed off balance, so I moved this narrow cabinet into the other corner.

I’m starting to feel  more satisfied with the space and it certainly was a comfy brunch, with everyone around the new table!  The chairs are very welcoming.

What a pleasantly frivolous day. Brunch, visiting a friend, sketching, doodling around with centerpieces and fine tuning the dining room.  I also went to a movie, then rented a nice gory vampire movie to watch with my son.  Yep, a fine day of making things pretty and hanging out with people I care about.

The Snow Ball Effect- Avalanche Style

antiques/junking, Etsy Goodies, fairies, holiday decor, Sugarwings, vintage paper/collage art

Stairway_redo_048After seeing that gorgeous stairway while shopping in Virgina, I have been on a redo roll. Avalanche style, right down the mountain, gathering momentum and growing and growing.

I call it the snowball effect for two reasons. One- we’ve had the worst winter I can remember in years and I have been snowed in staring at my house way too much.  Staring and finding fault.

Two, because as the project rolls along, it grows and grows.

Redoing the stairs meant that the walls should be repainted while I had the carpet up.  I am entranced by Strawberry Whoppers right now and love the color as much as the taste.  So, I mixed up a gallon of paint just slightly muted in that shade. (I used some leftovers in the garage, mixed and matched and added some tints till I got just the right pale, malty pink)

Under the rug, Stairway_redo_027_2I knew the wood was going to be construction grade and meant to be covered with carpet, and that there would be some gaps here and there. But man… it was bad.

We ended up buying new pine steps for $7 each at Home Depot.Stairway_redo_051 

And to cover the gaps along the risers and the wall, I found these little corner pieces ($2 each)  that just fit.

The steps are replaced, the paint is on, the walls are painted.  Now I need to wallpaper them all.Stairway_redo_043

When I cut out and held up slice of vintage rose patterned wallpaper, I loved it so much, I started to hate the rest of the room.  The stair way is open to the dining room and all of a sudden it just wasn’t measuring up.

I bought a new (antique) dining set on sale at my friend’s store ($600).  Then, of course, the curtains won’t match the new chairs. I picked up lace panels at Target ($60) Doesn’t Target have the best curtains???

And now, standing back from the baby’s room and looking down the stairs, I am thinking that carpet  in there could use replacing….  And I saved so much by making my own paint and using vintage wallpaper  that I already had and finding bargains for the dining room.  And by doing the work myself with my son instead of hiring someone, that labor savings was huge!  Heck I am redoing TWO rooms for way under $1000, on Trading Spaces they can barely do one.  (well does a stairway count as a room??)

Aren’t I good at rationalizing?  Stairway_redo_028

I am feeling very spoiled by getting these re-dos done, but I am not nearly as spoiled as this little one.  Sugarwings got some gifts in the mail from blogging friends.Stairway_redo_055

How cute are these?? The little purse is from my pal, Phyllis and the cute collage with the baby’s photo on it is from Mahala.  I think I will fill the little bag with Easter grass and toys, and tie the tag to it to give to her at Easter.  Won’t they be cute together?Stairway_redo_036_2

Of course, this little girl is just as happy to eat mud as she is to eat candy.  I babysat her all day yesterday and she did quite a bit of mud snacking. (notice her lips)

So Grandmama taught her how to spit.  That is a trick I am sure her parents will appreciate.  We also went down to the creek to sit on the bank and throw rocks.  Spitting and throwing rocks, yep, her parents will be thrilled with me.W_folder_131

Between working on the stairway and babysitting, I found some time to make pretties too.  I bought these child’s tea cups from Shabby in the City with plans to give them to the baby, but she is too young yet for china cups.

W_folder_129

So, they became nests for a fairy and a couple of sugared birds with vintage millinery flowers.  I hope to get them all listed on etsy but time seems to be getting away from me.W_folder_146

Time has not been on my side lately.  Listing seems to eat up a lot more time than actually crafting! 

I managed to list these two little Easter peat pots that I made, the pair for $10.  I made a TON of these last night, because I just can’t seem to make one of anything.  For me, creating things is  like a bag of Lays potato chips.  (remember those commercials?)  One is never enough.W_folder_154

If you would like one of these I will sell them to my blog readers for $4 each, plus postage instead of the Etsy cost of  $10 a pair, for the saving me the time of listing them! W_folder_152

Same with the child’s tea cup nests- if you’d like one with birds now, it is only $10.   $12 for the fairy.

While my house is torn up with remodeling and changing out furniture, I am extremely behind and am happy to give you a discount if it means I don’t have to edit pictures for Etsy right now!

These aren’t the best photos are they?  Come to think of it, this isn’t a real pretty posting, with the murky photos and the ripped up stairs.  Oh well, there is a Sugarwings picture, that makes the post beautiful to me!

In case you can’t tell,  the peat pots are glittery and sweet, I used lots of vintage goodies, old soft yarn and trims, plus some German die cuts. No two pots are alike.

Email me or comment if you are interested.  If not, I hope to get them Etsy sometime before Easter passes me by and  it is too late!

And oops, I can’t forget this–

My winner for my February giveaway is:

PENNY

W_folder_156 And don’t forget, if you are entering my St Pats Two Tag swap, they need to be mailed to me by March 7th. Isn’t that the date I said? I forget.

And honestly, it isn’t my fault- look at my calender!!!! It has the first half of Feb. and then goes directly to the second half of June!!! 

Last year the calender I had gave me 31 days in each month, and I didn’t notice until August. Now, two years in a row, I get a bad one, what are the odds of that???? And I never know what date or day of the week it is anyway, so this really doesn’t help me at all.

Thanks everyone for entering my drawing.  In March, you get another shot at winning, actually two, because I am giving away a bird house on March 27th too.

Good luck!
I’m a crappy little crafter today

Books, Etsy Goodies, holiday decor, swaps, vintage paper/collage art

Beth and I had a fun but frustrating craft day at her house yesterday.  Well, I guess I should speak for myself, she was on a roll and doing fine.  I, on the other hand was messing everything up, and at one point, said "I am a crappy little crafter today!" And for some reason, that gave us the giggles.  Whats a craft day without giggles?

I tried to do a St Pat’s tag for my swap using a rainbow theme.  It looked like a Jamaican preschool project.

Shitty_crafter_006  

I gave up on the rainbow colors and stuck with what I knew I could handle. But that wasn’t my only issue. Everything I did, I had to redo. Shitty_crafter_008_2 

These tags somehow ended up finished and not horrid after all, but there was a lot of ripping, replacing, and complaining while doing them.

These are for my St Pats Day Two Tag Swap.  I will extend the deadline till March 7th if you still want to get in on it.  Email me if you do!  All you need to make are two tags, and you get two other people’s tags back. 
Well, hopefully. I screwed up on Phyllis’s Sweet Treats and Roses Swap and sent her own tag back to her on the recipe book!!

She is in my St Pats swap, so I will make an extra tag to add for her to make up for it.  Shitty_crafter_010

While at Beth’s I decorated these two old green bottles.  And yes, there were some issues as I worked on these too.  It simply wasn’t t an easy day for me.Shitty_crafter_013_2

I was smart enough at this point, to use my text from an old book about rainbows, but not try to add rainbow colors after the tag fiasco.Shitty_crafter_016

I listed both of these bottles on Etsy this morning, if you are interested in either. 

The small one has buttons and a pretty little Made In Japan glass cameo in green on it too.Shitty_crafter_028

I had forgotten all about these cameos I had. I used to add them to charm bracelets and make earrings from them.Shitty_crafter

At one time, I had tons of them.  Now, I am down to a couple handfuls. I traded a few to Beth for some of her white, (sorted and cleaned, which is really nice!)  vintage buttons.Shitty_crafter_001_2

Notice the nut cups?  Beth wants to do a challenge- "what do you do with a nut cup?"  Of course, you can always put a nut in it, like she did.  I think that if she is going to make herself a hat from it, she should add some old millinery flowers at least.Shitty_crafter_021

Look at what  found! THE nicest, old wallpaper book I have ever seen. Perfect condition!  I just don’t know if I can cut it up and use it, the pages are so pristine.Shitty_crafter_026 And the book itself is giant! (and heavy)

This picture is on the inside cover, she looks pretty high fa-luting, huh? I’d say this was a high dollar wallpaper book from the looks of it, pretty classy.Shitty_crafter_023

And unique too, this metallic penguin paper isn’t typical of what I usually see around.Shitty_crafter_025

Another reason to not cut into it is that the designs are all very large. Small patterns are better for collage work.  These are beautiful backgrounds, I might just save the book to use as a photo back drop.Shitty_crafter_024

Shitty_crafter_022 What a lucky find!  I like flipping through it as if it were a magazine.  And the cost was reasonable, only about $20, it cost more than that to ship it! I think the seller should have used book rate, but I was so happy to get my greedy little hands on the book, I didn’t care.

Speaking of spending money on whims, I need to get back to my stairway redo. Time to pickup Sugarwing’s daddy so he can help  me pull off the carpet and see just how hard (and expensive) this task is going to be to complete!

Short cuts and tips on blinging up a birdhouse

Etsy Goodies, give away, holiday decor, how-to projects, parties, swaps, vintage paper/collage art, We're having a party

Beth and I are having a party.  A self swapping, self linking "What do you LOVE about your Birdie’s home?" party.   Details are HEREBirdhouse_015 And we hope you can all join us and show off your own birdhouses. Either something you have made by hand, or just a favorite of yours on display in your home or gardens.

I’ll be giving one of my own away today, if you leave a comment on this post, and will give a 2nd away the day of our party, Thursday March 27th.

And if you’d like to make one, and could use some tips, here are a few things I learned while decking out a few birdhouses.

First thing I noticed, was that my hands look awful in these photos.  Oh well, as  grandma,  I am getting used to things like that. Wrinkling up old skin, knobby knuckles, saggy neck.  Back to birdhouses, and away from old lady skin issues (which I could go on forever about, and you really don’t want to hear).Birdhouse_004

I’ve bought houses in an assortment of sizes and shapes.  Some from the craft departments of Wal-Mart, Hobby Lobby and Michaels in unfinished wood or paper mache, some already painted and with cool shapes in the garden department at Hobby Lobby.

All are smaller, some mini, none made for outdoors, they are for decorative purposes only. 

The prices have ranged from 67 cents to about $5 at the most.

Birdhouse_074 A minor buffing up with a sanding block will take off any rough edges.Birdhouse_005_3

And I discovered that the homes were much easier to decoupage onto if you don’t have to worry about crevices and corners and edges.

So, I base coated all the cracks, and up under the eaves, the perching post, and the inside of the hole as well as any other spots that looked like it would be hard to cover in papers.

No reason to paint the entire piece, since most of it will be covered up.Birdhouse_073_2

Although, for this one, I purposely painted all of it, just so there would be some contrast for the photos I was taking of the steps.

And notice that I didn’t sand the edges first? I wanted you to see the rough wood, it shows up better on the blue house, look inside the hole at the jagged edges.  A quick little twist of the sanding block inside that will knock those bits down pretty smooth.Birdhouse_077

Here is a short cut I came up with for making the houses go more quickly.  I have been making a LOT of houses, so speedy tips help me a lot.

I used glitter paint to draw lines across old sheet music. You could also use plain glue or glitter glue.Birdhouse_081

I sprinkled glitter over the lines.Birdhouse_085

Next, I used a paint brush to spread the rows of glitter out a bit flatter.Birdhouse_099

With decorative scissors, I cut narrow strips of sheet music, just perfectly sized for gluing onto the edges of the roof or around the base of a bird house.Birdhouse_063

Birdhouse_086 For this house, I decided to glitter the painted roof. I used the same glitter paint that I used on the sheet music. 

It was brushed on after the paint was dry, and then I sprinkled more glitter over it while it was still wet.

After all my prep work was done, I gathered up my supplies.  I looked around to find colors and tidbits I wanted to work with. 

Go ahead and pull out extras, you are never sure how much you will end up using, but having a pile to chose from, already selected, and in the chosen palette not only saves time, but is an inspiration for the project.Birdhouse_088

You will need:

a sanding block (or sand paper)

an exacto knife (and be generous with yourself- replace the blades as needed!! It really does make a difference to have a fresh blade)

glue (I always store mine upside down so it flows better)

a Popsicle stick or something similar to burnish paper down with

scissors

goodies to add to the house

Birdhouse_092 Here is a point where you might want to make a pattern. I just go ahead and use my wallpaper.  I fit it to one side of the wood at a time, bending and creasing to show myself where to snip it with the scissors.Birdhouse_093

You can also trim it with your exacto knife.

If you are making more than one birdhouse of the same design, or have a limited amount of old paper and don’t want to waste any, it might be a good idea to make a pattern this way and then using the pattern to cut out your chosen papers.Birdhouse_091

I poke the perching post through the paper, then trim around it with the exacto knife. 

After the paper is cut, I liberally add glue to the house.Birdhouse_095   Attach the paper, and using my exacto knife, poke a hole into the area where I think the house’s hole should be.

I then saw with the exacto knife to the edge, and around the hole to cut it out.

Wooden Popsicle sticks or coffee stirrers are great for rubbing the paper down.

Once the glue is dry, I lightly sand the edges with the sanding block again, being careful to not tear the paper.  Birdhouse_098_2

Now we get to the fun part.  Decorate it!  Baubles and buttons  and doodads and glitter and stripes of coordinating papers.  Old jewelry, ribbons, lace, what ever makes your bird joyous.

Birdhouse_071_3

I have a few more houses to foof myself.  One is actually a little Swiss music/jewelry box that I got for a quarter at a garage sale.  But of course, this decopauge technique will work on all sort of different things, not just bird houses.

Another suggestion I have to offer is, that whether you use scrap booking paper, vintage papers, or whatever you decide, the papers do seem to look better with a smaller print, or an over all pattern. The smaller the house you cover, the smaller the print you should try to use.

If you have any questions, feel free to ask.  My husband is leaving to go back East and I am going to be lonely. So any question is welcome, I could use the company! 

I hope you’ll make a few and join the party on the 27th!  Bird Feel free to add this button to your blog so people will know you are participating.

I’ll be adding bling kits to my Etsy shop and fill them with fun bits and pieces to work with if you need supplies to make a house. 

And remember, I will give away one of my creations to someone who comments on this posting, plus another to someone who leaves a comment on our party day.

St_pat_6  And if you would like to be in my St Pats tag swap, you have until March 5th to send me two tags and I will send out two tags to you from another swapper.    Email or comment to ask for details.

One thing I love about blogland, is all the holiday decor! I haven’t gotten into decorating for every holiday like this since my boys were toddlers! Most years, I totally ignore St. Pats or Easter as far as setting out pretties or making things for them.

I haven’t seen much about St Pats in blogworld, we have all jumped ahead to Easter.  But Easter seems early this year, so I can see why.

Speaking of Easter, W_folder_104  My pink bunny watercolor is finished and hanging in my studio, although hopefully not for long, I have it in my Etsy shop now.  This is an original watercolor I have added to a  vintage wallpaper base, then dooded up with some of my favorite pretties.

Have fun blinging out that birdhouse!

Edit, added on:

Here are some highlights of the $10 Cottage Collage Birdhouse Bling Kits I added to Etsy today.  More coming, no two are alike and they take a while to photograph and list!!Birdhouse_121 Birdhouse_127

Keep in mind that these kits would be pretty used in many projects, not just a birdhouse, and that there is more in a kit than is needed to finish a small house. Birdhouse_136 Birdhouse_147

Birdhouse_155

Scroll to Top