how-to projects

How to make Goblin wings

Good JuJu, holiday decor, how-to projects

SavingPNG

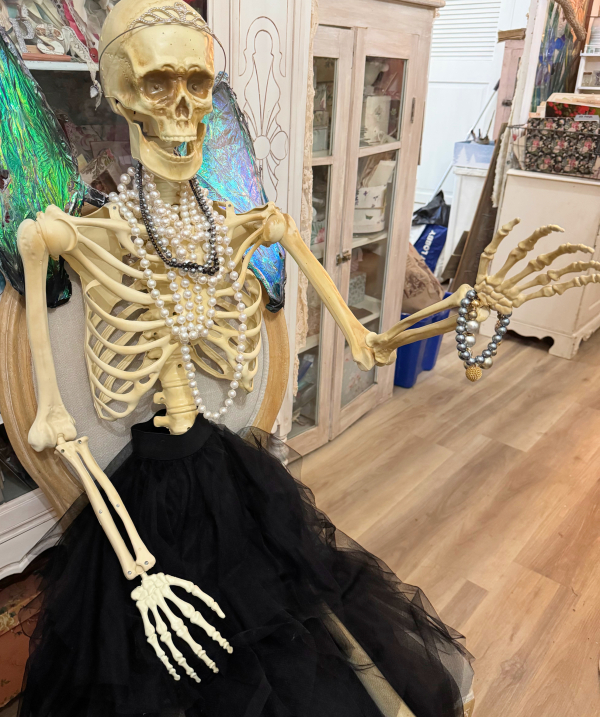
Guncle Randy gave Sugarwings a skelly, and I asked to borrow it for booth decor.  But first, she needed some foofing up.  Jewels and a skirt helped, but this gal needed wings.

SavingPNG
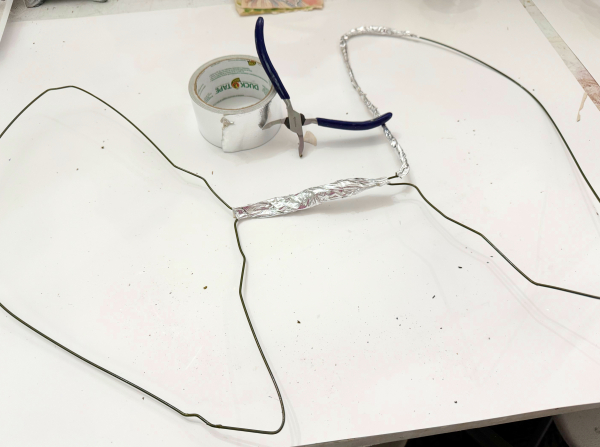
I wanted wonky, messy wings, more hobgoblin than fairy.  I used coat hangers to form them, and left them slightly crooked.  Then wrapped them in shiny duct tape, in a bulky, not too perfect way.

SavingPNG

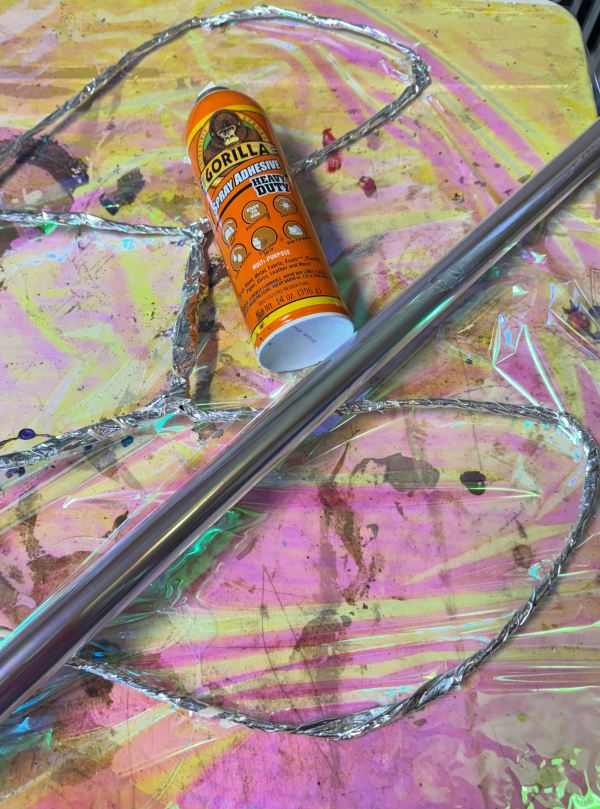
I roughly cut out a piece of cellophane, sprayed it with adhesive, and then folded it over a wing.

SavingPNG

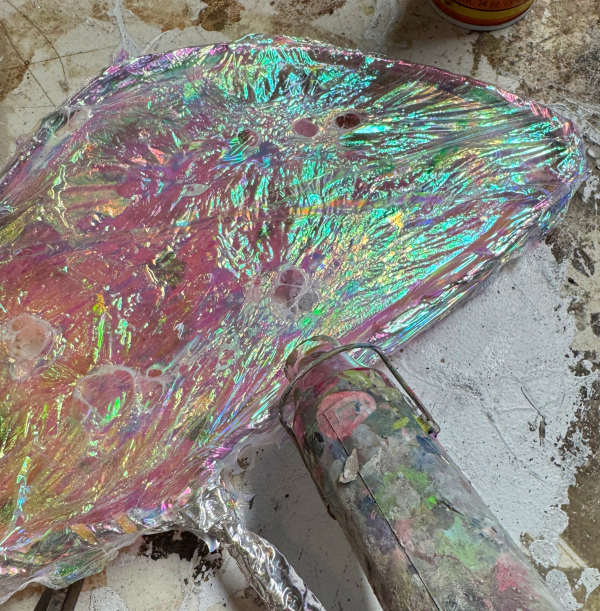
After firmly pressing both sides together, I used a heat gun to finish the adhesion by melting the front to the back.  I let the heat gun burn holes through the wings here and there too.  Then jaggedly trimmed off the excess and hit those raw edges with more heat to curl up.

They looked pretty good, but I wanted them more sinister than sparkly, so misted their edges with black spray paint. 

This went so well that I decided to make a few more pair to sell too.  I think the skeleton looks complete now.  I’ll wire them into place and hang her from my ceiling. 

A Wonderful, Wonder Horse Redo

Hand painted, how-to projects

SavingPNG
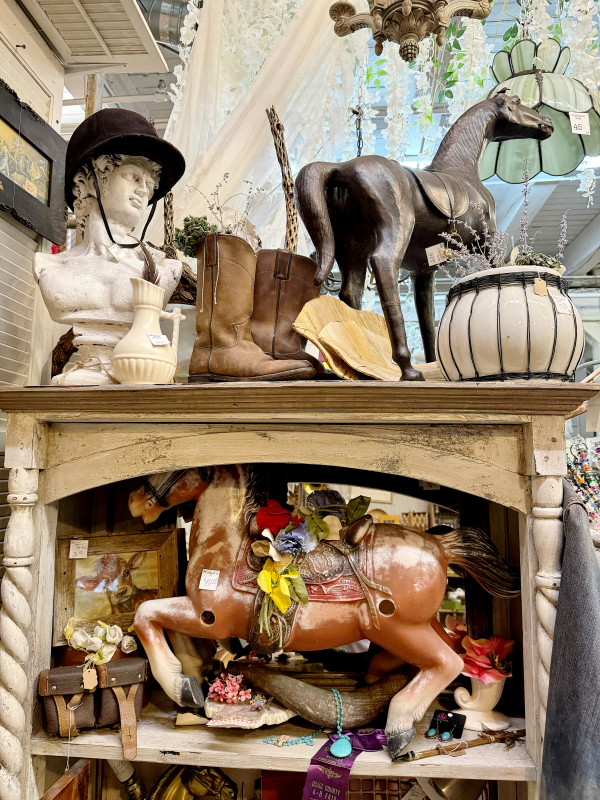
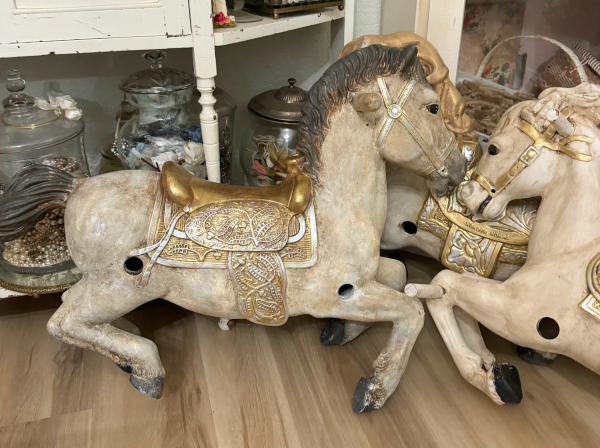
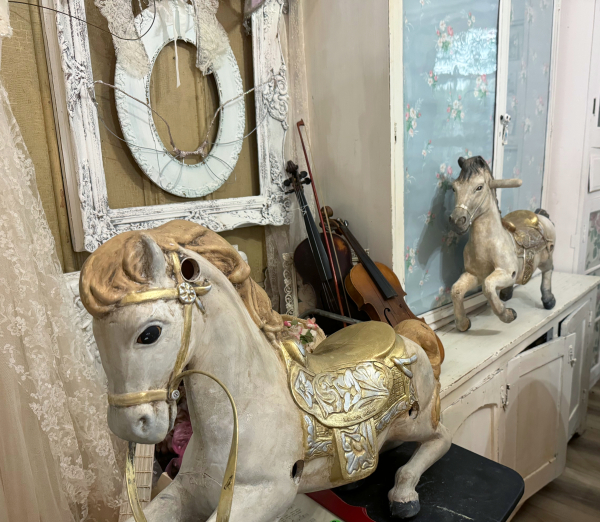
Last month at the Good Juju venue, I had a western/equestrian theme going.  In it, I used vintage Wonder Horses.

Enlight1824Here is how it looked on display.

SavingPNG

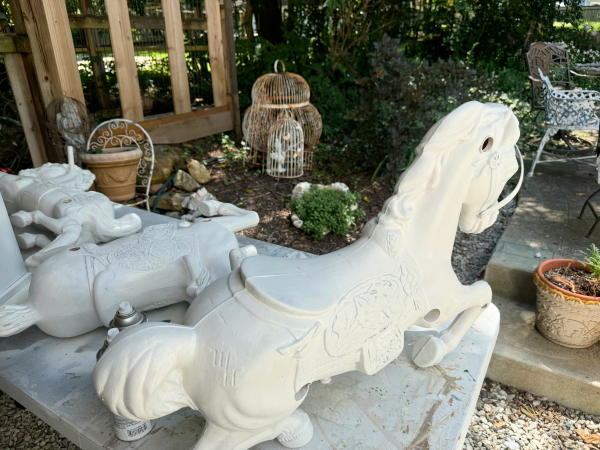
Now that I am done with that idea, I thought I’d reuse them for the holidays, but turn them into more of a carrousel look.  First step was primer.

SavingPNG

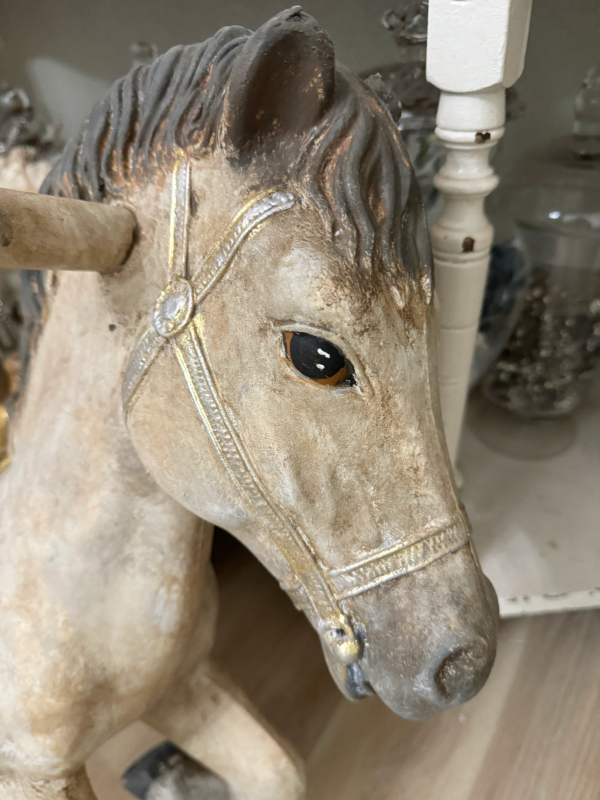
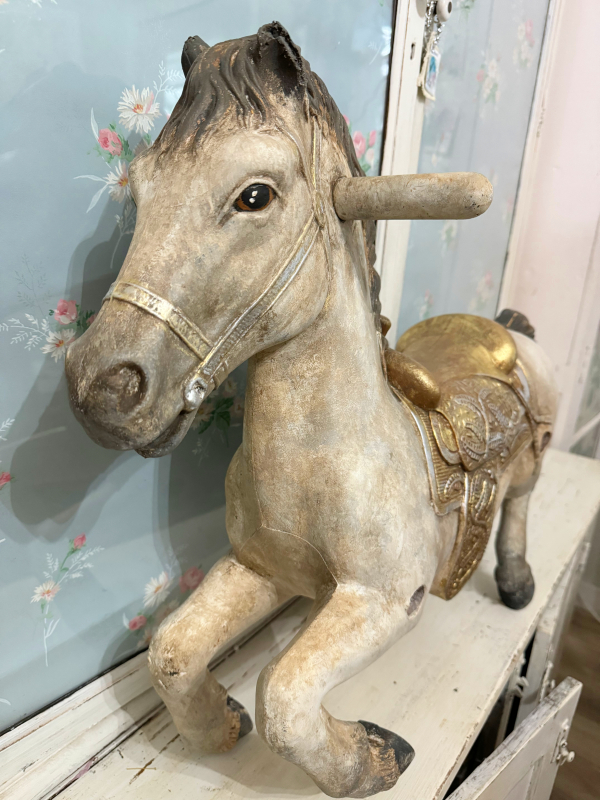
Then a textured white paint as the base, a darker color for the mane and tail, black for hooves.  I painted the saddles tan.

SavingPNGThe eyes were painted with the same black and tan, then I brushed a coffee colored glaze over the entire horsey, a little bit at a time, wiping off as I went.

SavingPNG

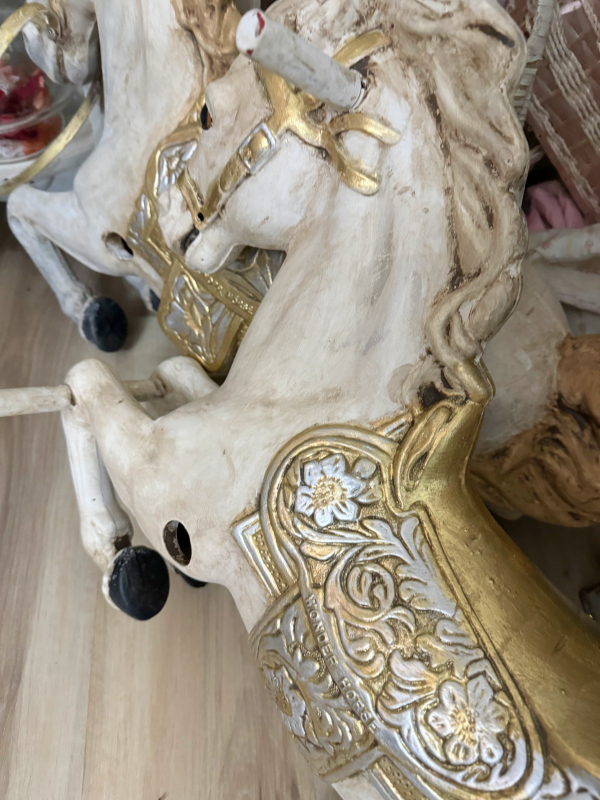
To give them the holiday sparkle that I was looking for, I covered the tan “leather” with Elmer’s glue and sprinkled a shimmery gold powder over them.  After that dried, I used a silver Rub N Buff to highlight some areas.

SavingPNG

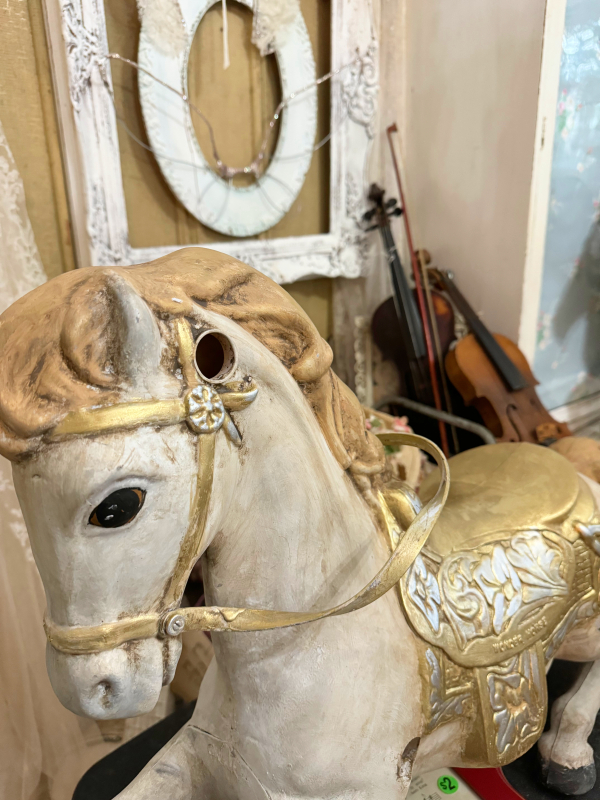
The plan is to hang them from the ceiling over the entryway of my booth. I have gold glittered ornaments and vines to use too.

SavingPNG

I’ll put dowel rods through the holes, and suspend them from fishing line tied to the rods.  This project makes me so excited to decorate for Christmas!  

But then again, I always am counting down till I get to do that.  

Loving Cup makeover

antiques/junking, how-to projects

Enlight1340
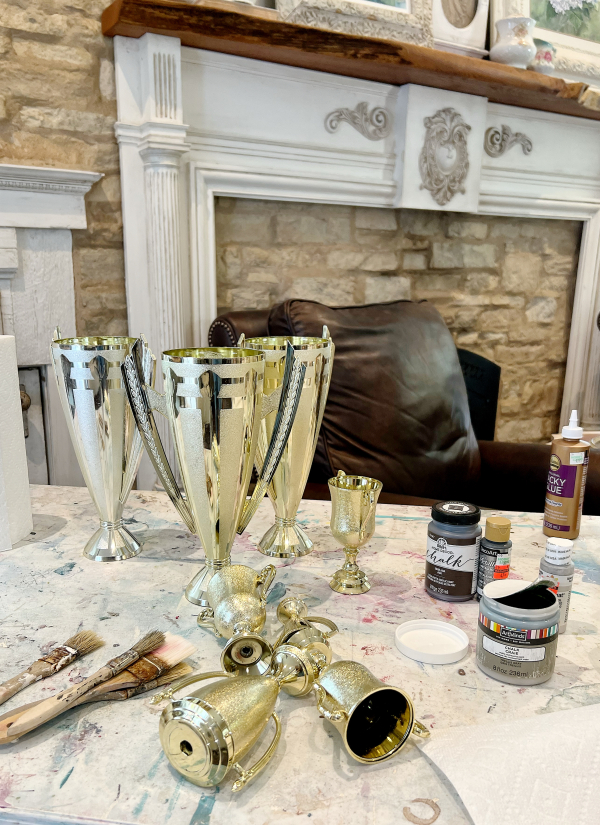
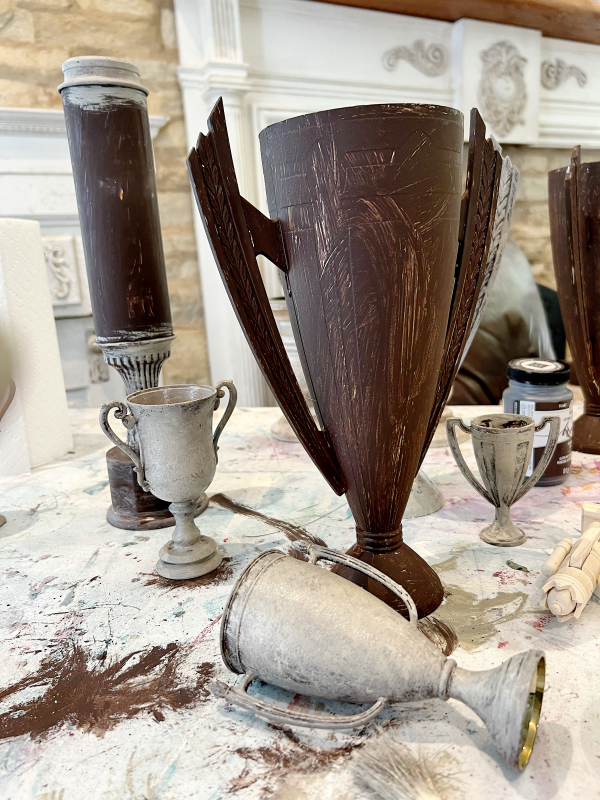
This summer, I picked up a few trophies at garage sales, then took them apart, salvaging the cups and some marble bases.

Enlight1339

Most were dated 20-30 years ago, but I wanted them to look old, and metallic.  First step was dark brown chalk paint.

Next I used a flat pewter and shades of metallic paints, including bronze and silver.  I applied those in a messy, stippling fashion leaving some of the under color showing through.

Enlight1338

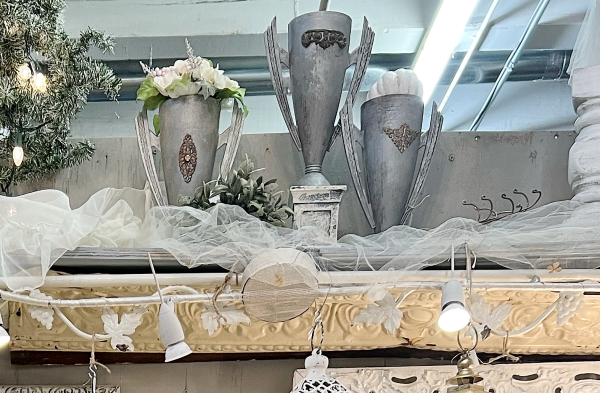
They each got simple, rusty embellishments.

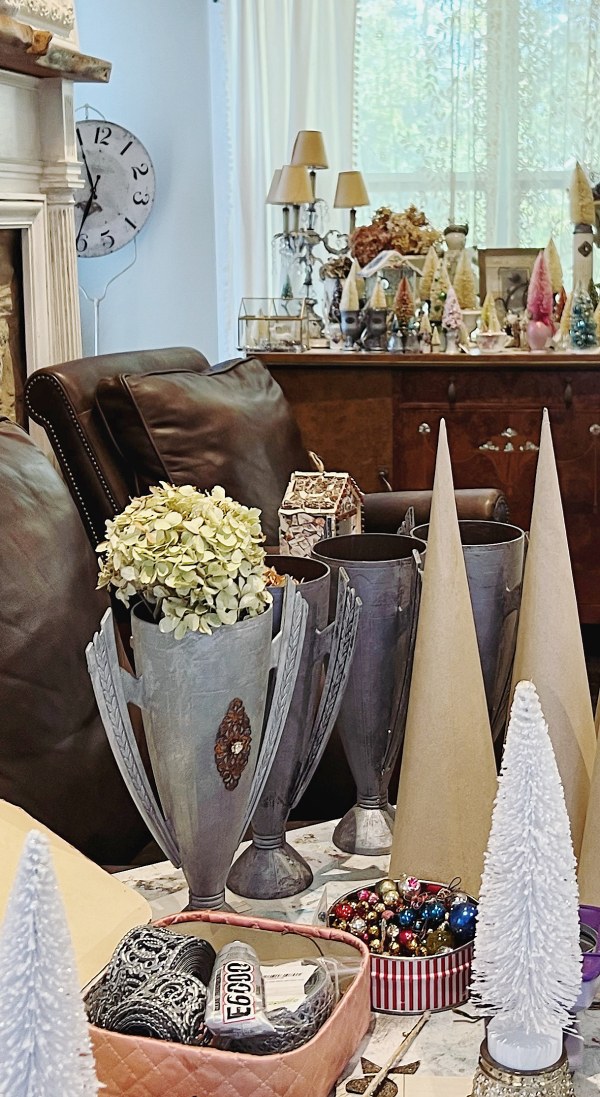
The plan was to fill them with trees.  But when I did that with the large cups, they didn't look right. The bottle brush trees were too small, the paper ones too streamlined.  They looked kind of like bullets.Enlight1337 
So I’ve displayed the big cups without trees.  I kept one for myself, and brought the rest into Juju for the November sale.

Enlight1336

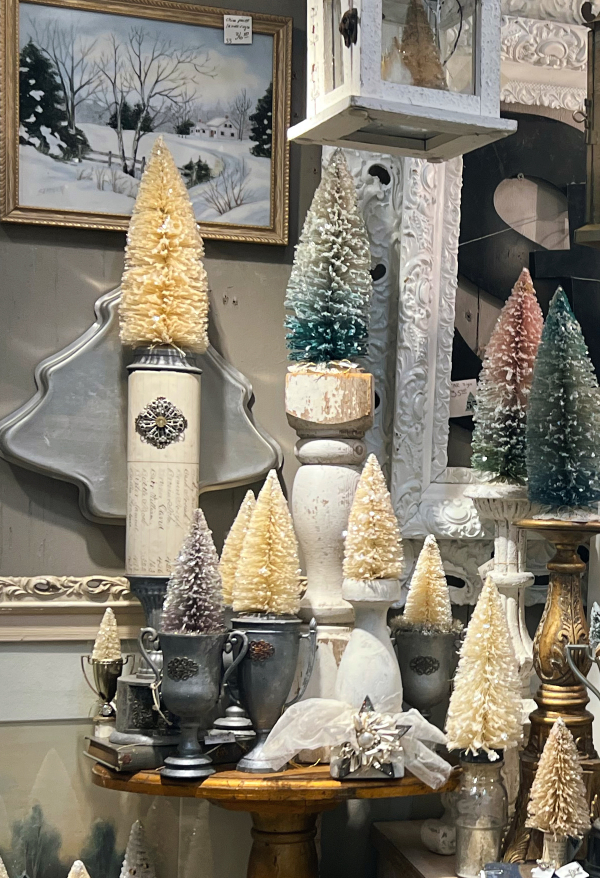
The smaller ones were ideal for my bottle brush trees.  And one tall, skinny trophy got covered in old paper on some of it, then I removed the topper and replaced it with a tree.  I really like that one.

Actually, I love them all.  This was a project that I was very into.  I guess you could say, I am loving these cups. 


Hand Crafted Witchy Brooms and some instructions on how to

Good JuJu, holiday decor, how-to projects

29BF0638-1EEE-4382-9428-933FA0D9ABEF
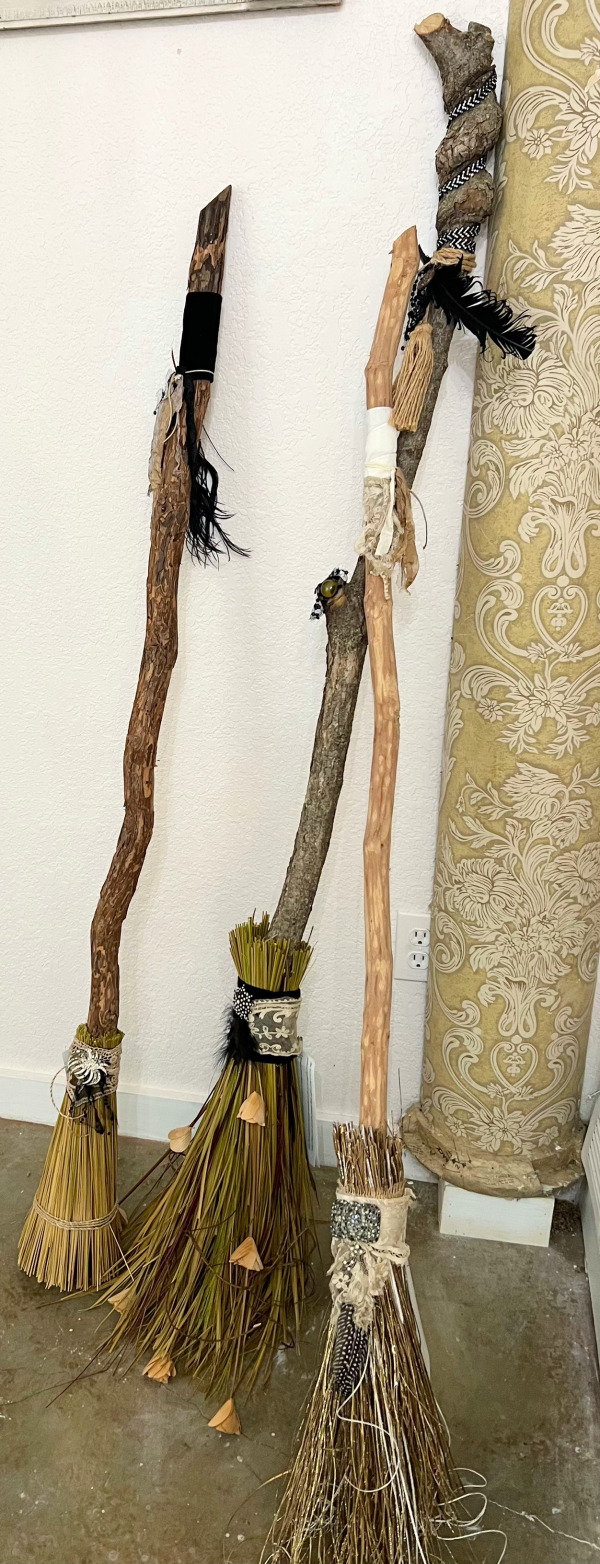
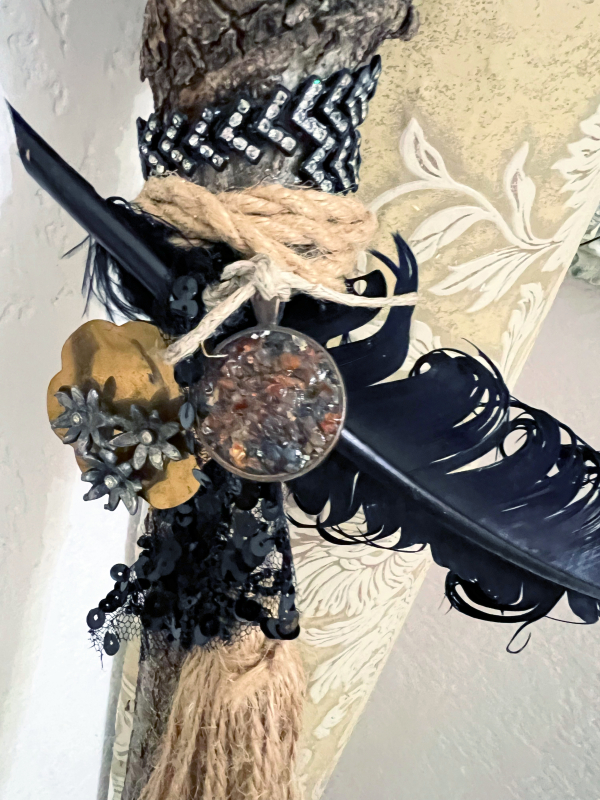
My husband makes walking sticks from grapevine growing in our woods.  It needs to age and dry a year or so, then can be used.  He said I could use a few, and after finding dried, curly and glittered straw flower arrangements at a garage sale, I knew I wanted to make witch brooms.

9BCA955E-E69A-4026-A800-4CFEA7B278A3

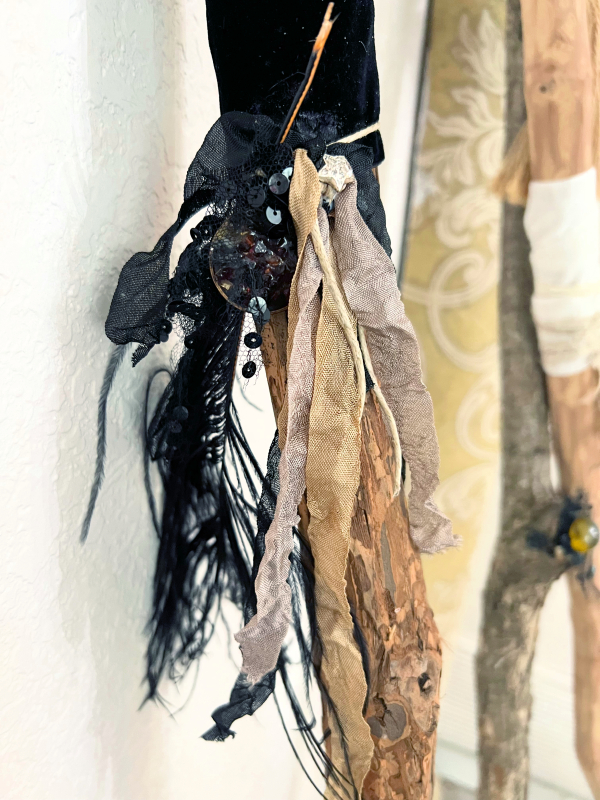
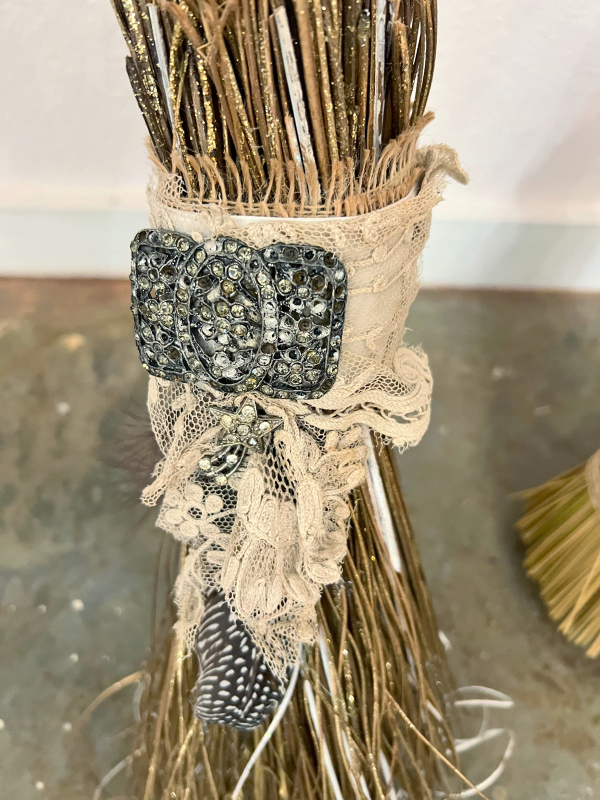
Each one was decorated with velvet and crinkled ribbons, a genuine stone charm, some vintage bling, and feathers.

14CDC1A6-6E6B-4B6A-9772-13758C5249B8

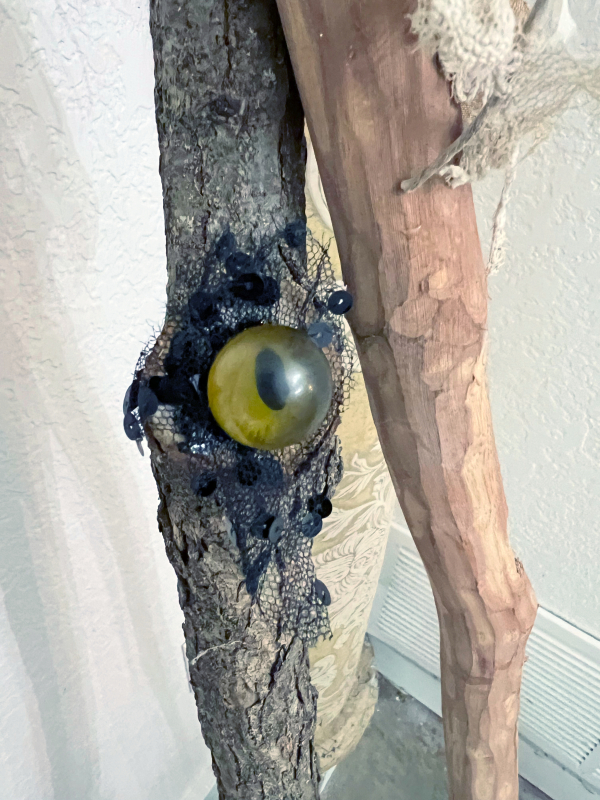
This one had a knothole that I placed a vintage eyeball button on, with a bit torn from a tattered, sequined gown underneath.

E6944149-3ECE-4985-BD7C-E928D368F730

The old jewels I used weren’t in perfect condition, but that is why I chose them.  They look like they’ve been flying through the air on a broom for decades, right?

84E07666-6C46-4FD4-A9FD-8A08465F8D08

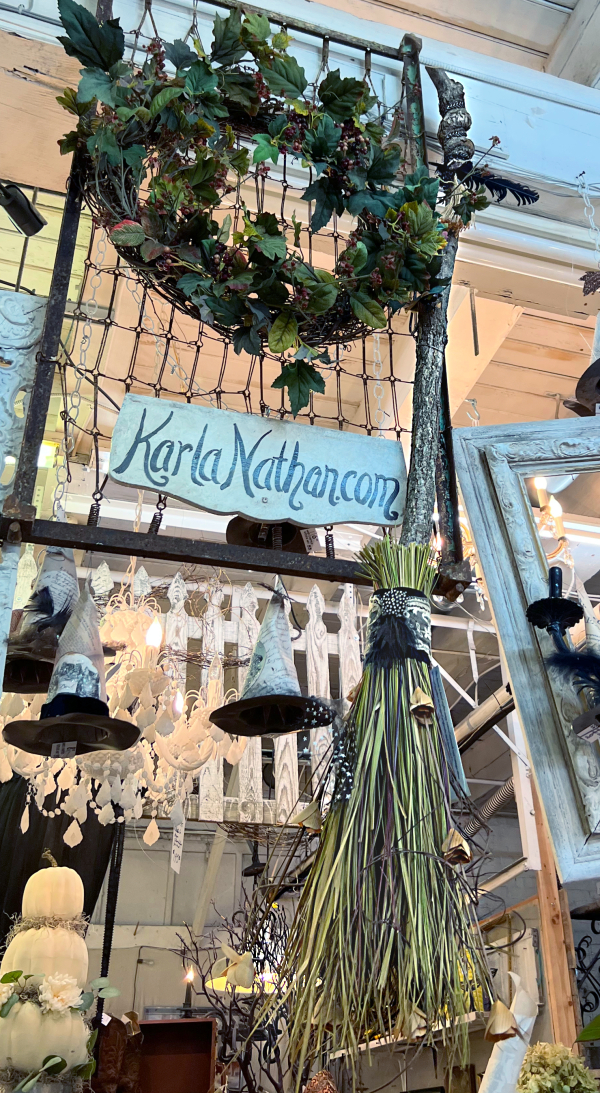
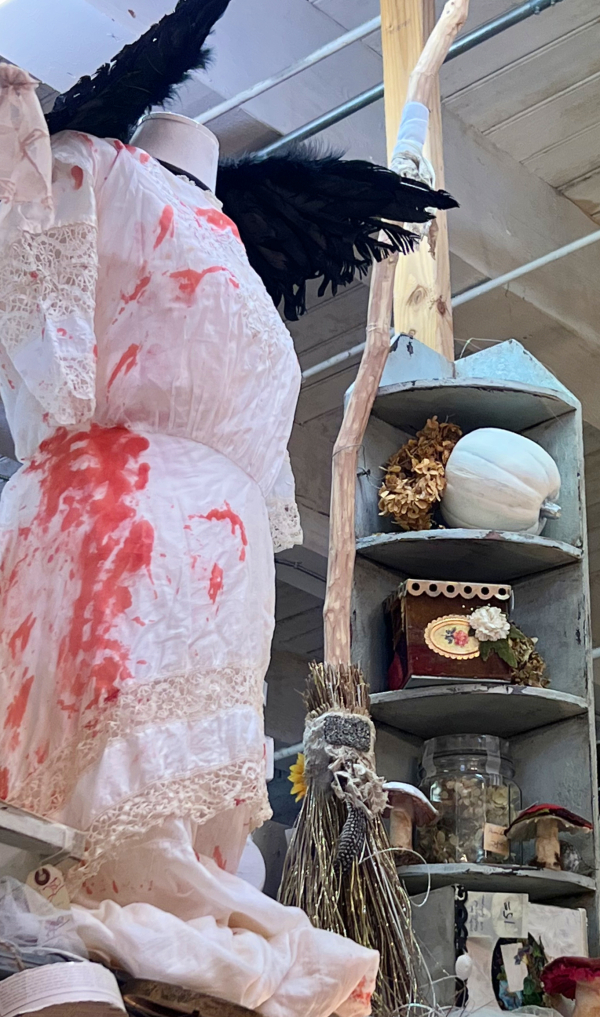
My set up for Good Juju’s First Friday weekend was already complete (and Halloween themed).  But I made these work, by hanging one up high, one on the top shelf, and one nestled into a corner. Not the best for showing them off, but I wanted to get them in there  case I could sell them this week.

B51FC42E-0D94-4130-964F-65A7AB117DC5

I can show people photos on my phone if they want to see more about the brooms that are up high.  And I’m happy to get them down if needed.  I know it’s not the best situation, but I only have 8-1/2’ and I fill it up over the brim.

E0AC29A6-69F6-4F69-BDDD-799FA5BD5CE6

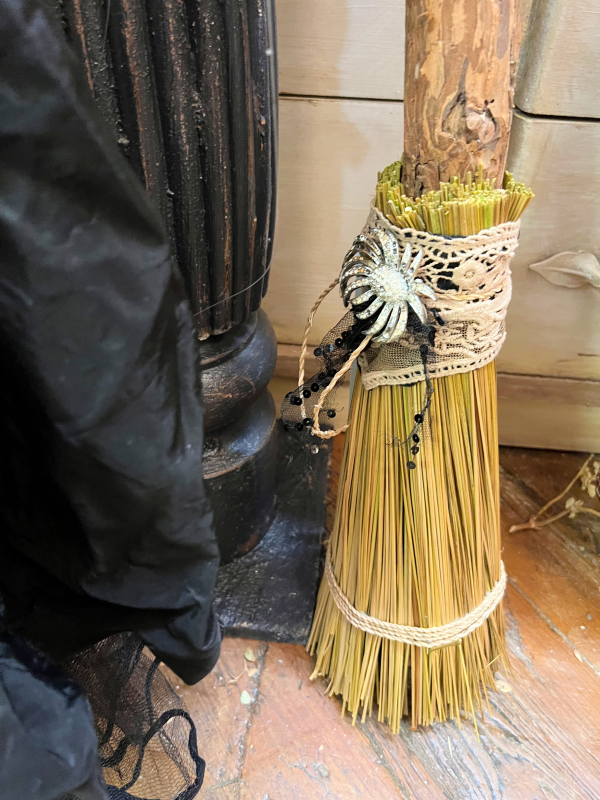
This one is made from the base of the straw arrangement and stands on its own, so it is the one on the ground.

D8C74F4B-4866-49E0-8A43-6208F4E11D43

I really would enjoy making more, and in a half size so I could sell them online.  But for one thing, I’m starting a major studio redo and have no time.  For another, these guys are HARD to make!

Here is the process:

Trim the straw to the length you need

Divide up the straw into small bundles

Add strong glue to the tiny bundle of straw about 4” from the top, then tightly wrap that area in wire

Keep wrapping bundles until you have more than enough to cover the stick

I had the end of my straw at the base of the stick for stability 

Wire and glue each bundle together to the stick until the broom is full

Glue and tightly wrap twine around your wired areas

Put screws through large washers and screw them into the wood through the twine area, so the weight of the stick doesn’t make the straw pull away when you stand it up

And now the fun part- cover up the twine/wire/screw area with something pretty and start decorating.


My dolly redo obsession has GROWN (to about 4’ high)

antiques/junking, holiday decor, how-to projects

CFCFF0BB-84BC-4F8F-9546-E67012375E86
I have remade many, many old dolls into fairies, angels, witches, and zombies.  I can’t help it, I see a doll that needs a makeover and I’m itching to start gluing things all over her and giving her a new look.
FDEDB7B1-8EBF-483F-97C0-449A35F07B1E

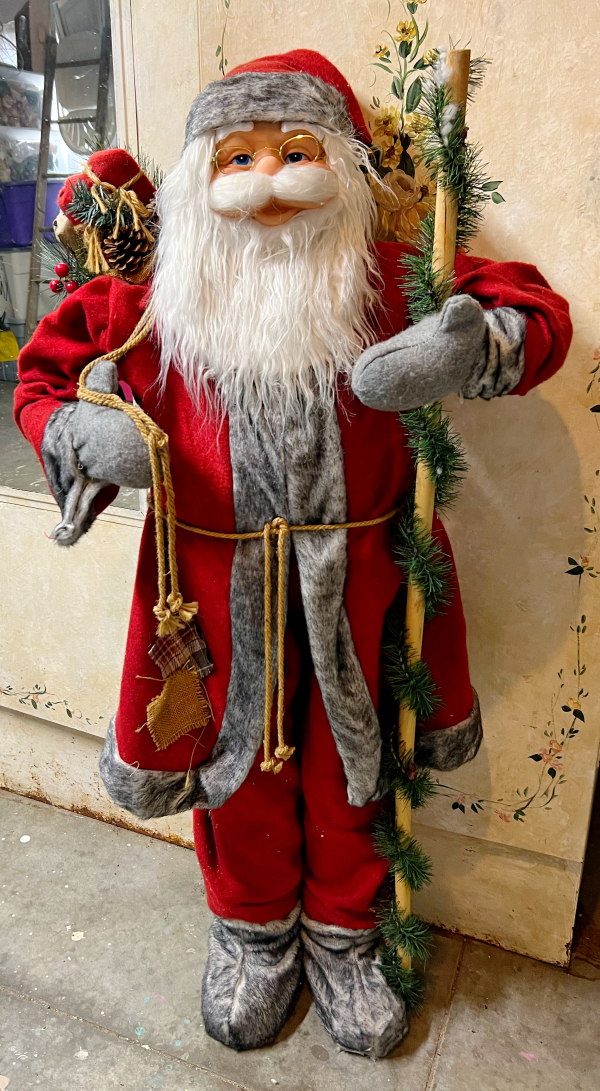
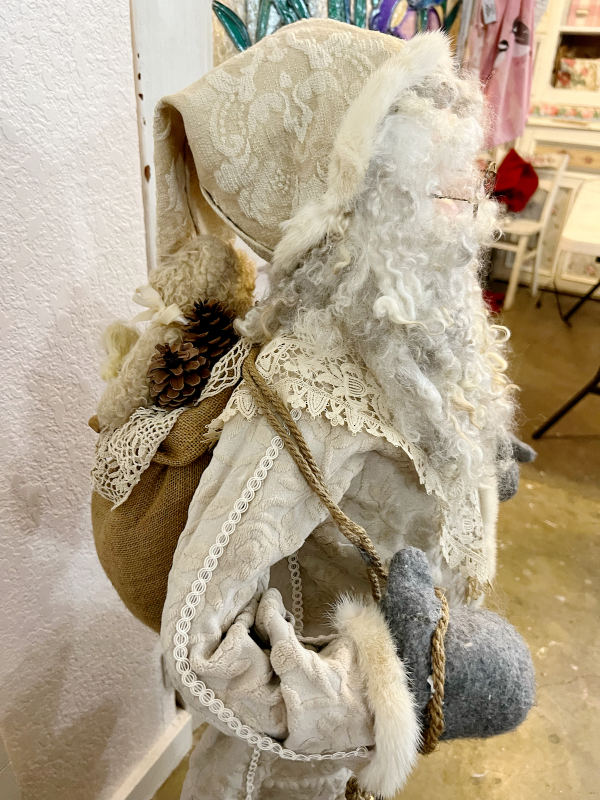
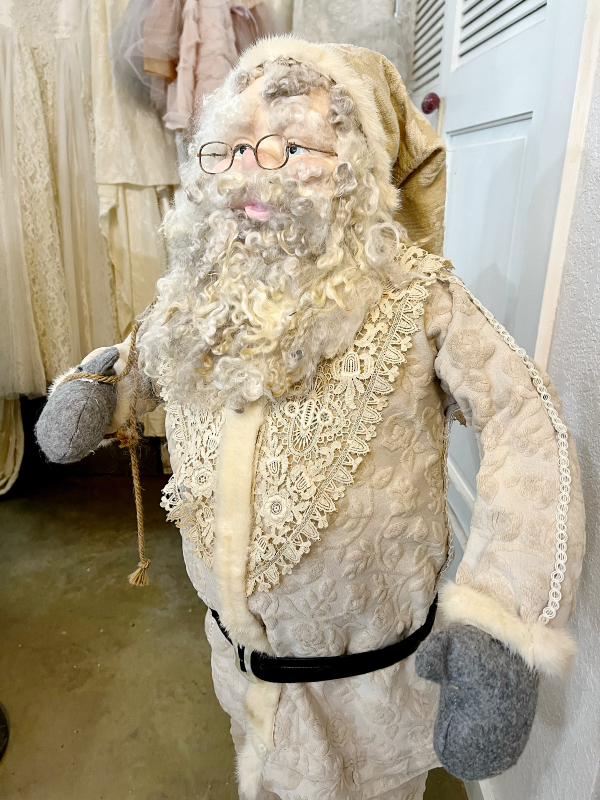
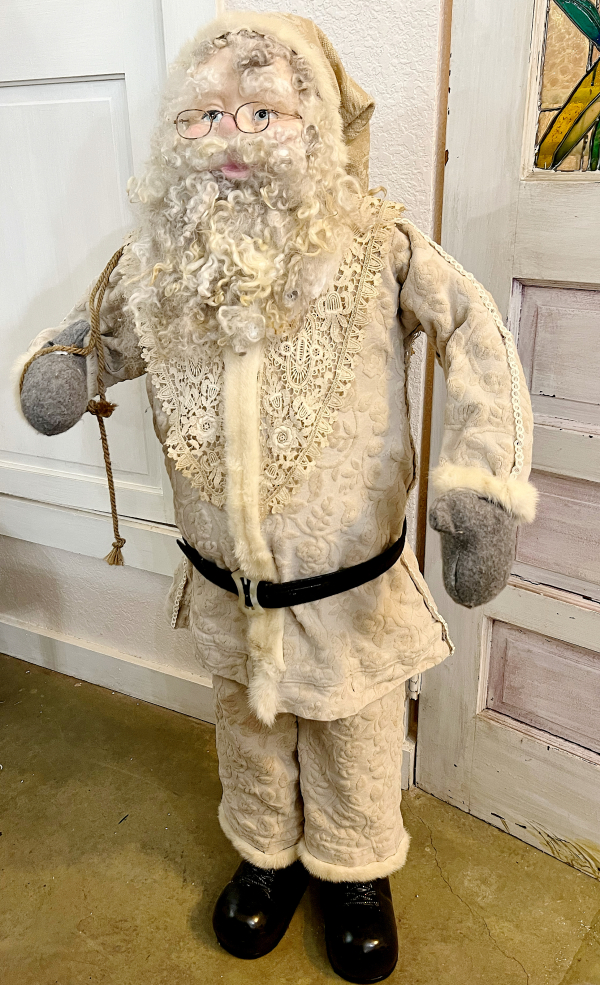
St Nick, here, is my latest and my biggest. And while he might not be a fairy, he is a jolly old elf.

 He was at a garage sale where everything was a dollar.  

(Including a dining room table with six chairs.  Seriously, every single item was $1.  The same day, I was at a sale where everything was 50 cents.  You just gotta love garage sailing, you never know what you’ll find.  Even if it is something you do not need.  I’m very proud of myself for not coming home with a dining room set.)

He caught my eye, because I knew he deserved better than a felt suit.  Poor guy.  I’m sure he was fine as is, but he was not living up to his full potential.
6C4541AB-301B-4F84-93FC-C642641636E6

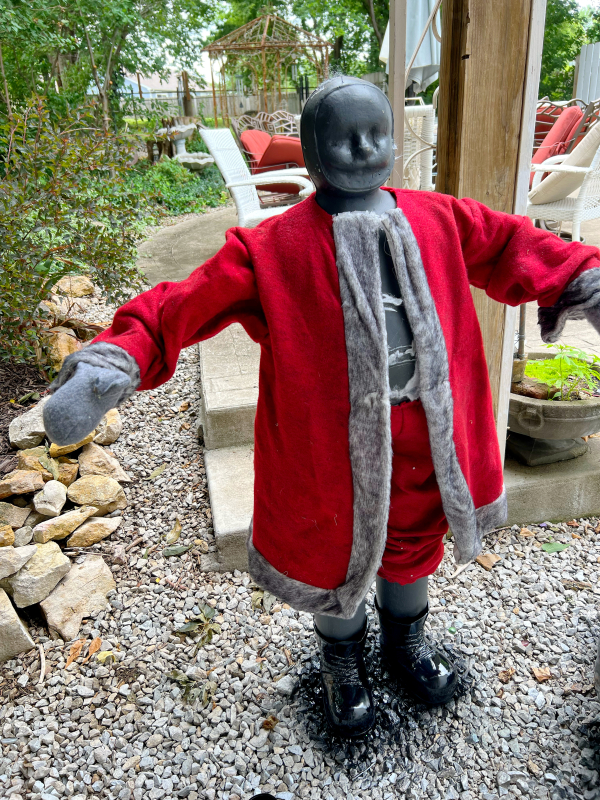
I had no idea what was lurking beneath, or how I was going to redo him, so I just started pulling him apart and taking it as I found it.

My best surprise was that under the fake fur covers, he had nice boots.  All they needed was a shine in the form of some high gloss spray paint.
A994E4AD-34B9-4B87-AC99-A5267DD64809

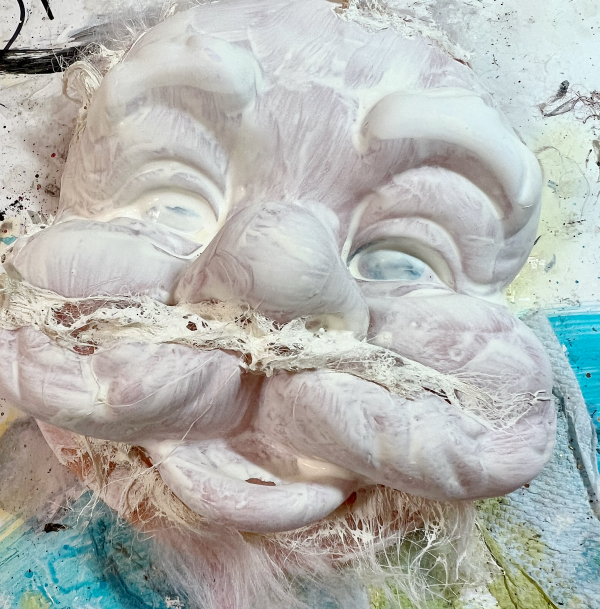
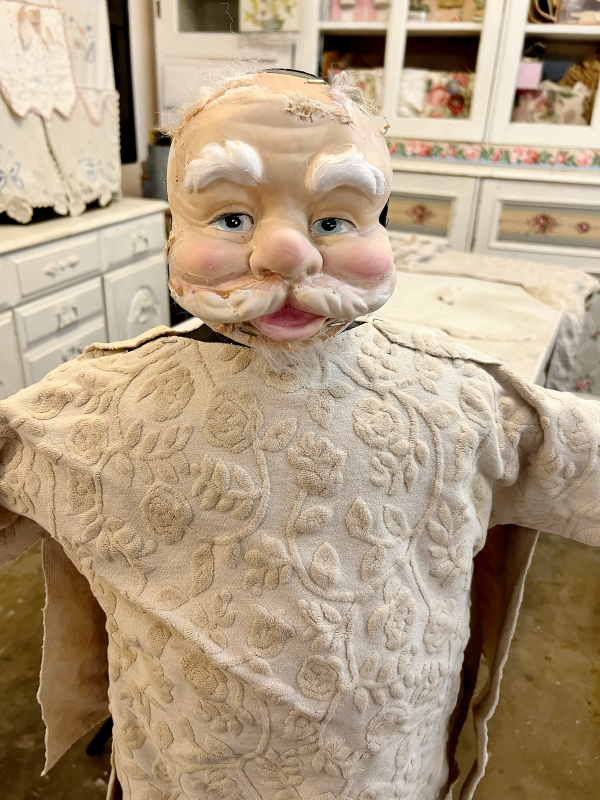
His rubber face needed paint too, and a lot of it.  I primed that first thing, to let it dry while I worked on other elements.
78063154-9FEA-4AA9-B369-4BF88FB0DA48

There, that new face is better!

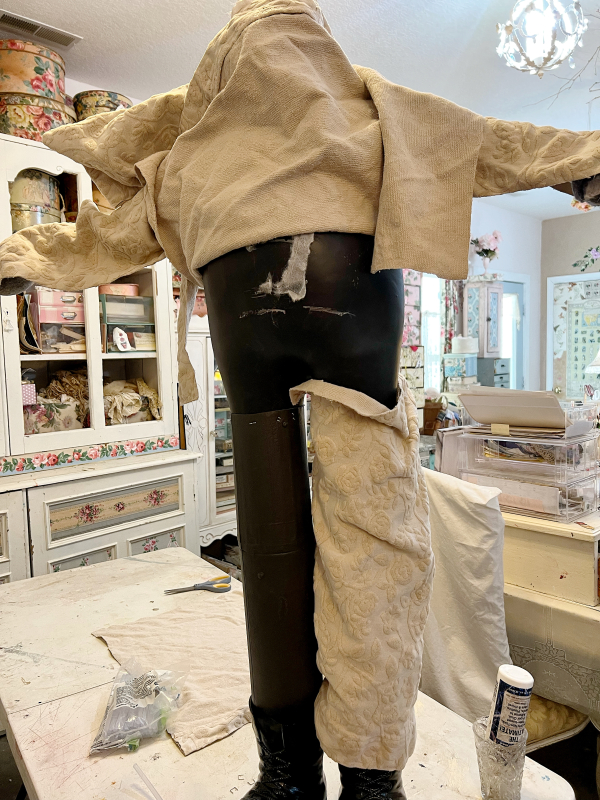
The painting part was easy, but the clothing? That gave me some issues,  I am not a seamstress.  And the heavy, cut velvet fabric (it used to be my old sofa’s slipcover)  was pretty thick.  I envisioned many broken needles if I attempted getting the sewing machine out.

So, first I tried staples, and discovered that they sorta worked.  At least a couple could hold material in place while the glue dried.  So with a combo of hot glue and The Ultimate, I started sticking the fabric to the plastic and gluing seams in the clothes.  Since I wasn’t using a needle and thread, I carefully cut the velvet to make sure that finished edges made up my hemmed areas. 
DD82865A-0C45-4618-87EF-8B9A6A036FD4

But then, I started to fret about the pants.  His previous britches were real pants, with an elastic waist.  As I tried to figure out how to replicate that, I realized that he was not going to be pulling them off and on, and I did not need anything that complicated.

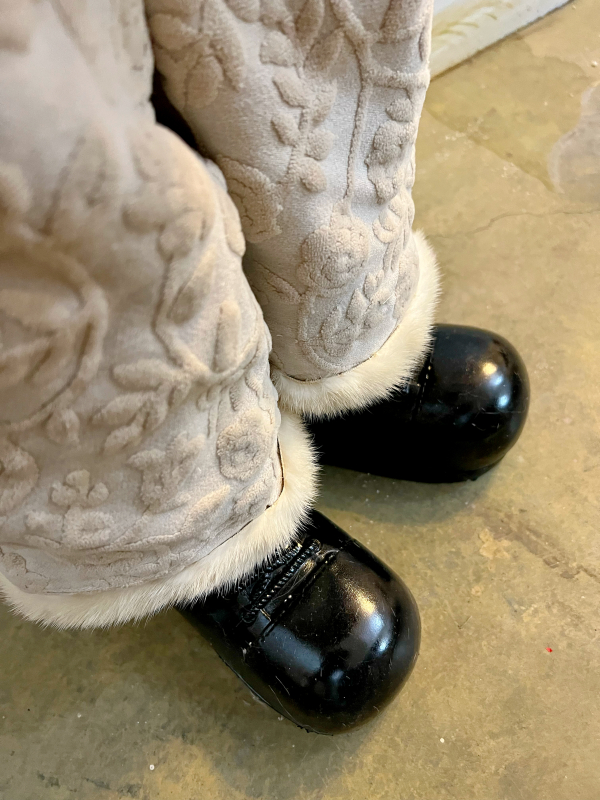
So I made two legs out of rectangles glued them to his thighs.
8FF03DBE-D1E7-4395-9614-8E8B3A4C6D0D

While they already had a finished edge from the hem of the slipcover, I still covered that with fur.  Because, well, dur, Santa!  Of course his trousers are fur trimmed.

And not just any old, fake fur this time.  I used strips cut from a vintage, white mink pillow.
493D5986-BF9B-426F-8593-F8B5490BB73E

Next, I covered up my most hideous glued together seams with trim and old lace, then added more mink in appropriate places.  I did not have quite enough to go around the bottom of his jacket, like a traditional Santa suit, but did what I could and made it go as far as I could by using thin strips.
89762A71-62AF-4200-87B4-7FC5C09F2A0C

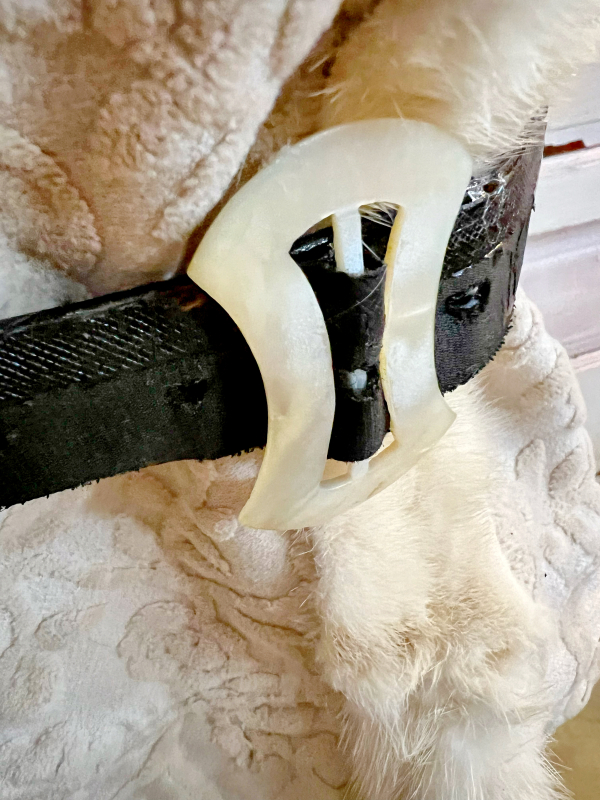
I knew that my husband had the world’s rattiest belt in his closet, one that should’ve been thrown away years ago.  It was practically in shreds.  I cut the buckle off, glued it together where I could, peeled off the worst straggles and spray painted it like the boots.

The buckle is an antique, mother of pearl one that I slid in place and glued on.  But first, I tucked a couple handfuls of stuffing under the jacket.  I thought this guy was looking too slim.
44BC4610-8F0B-4986-987A-139950B7A226
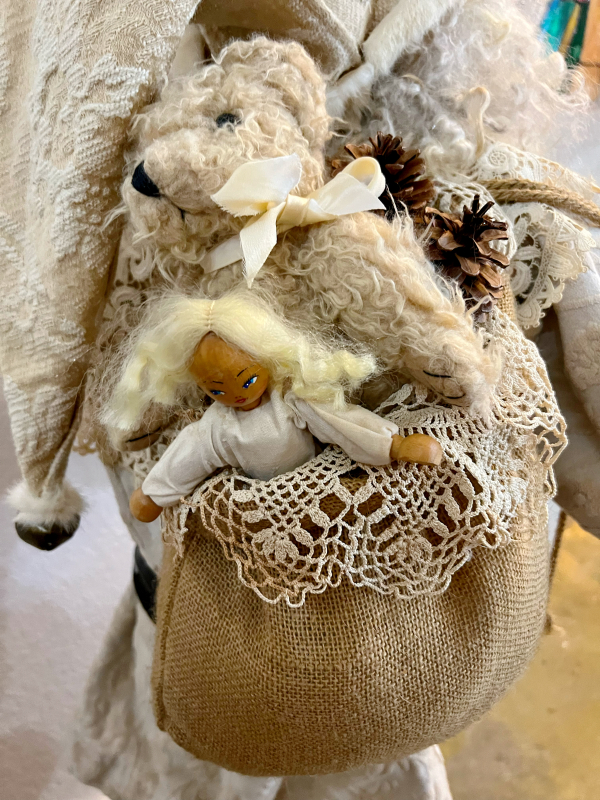
Originally, Santa had a bag of badly wrapped gifts (more felt) and cheapo plastic garland.   No kid wants that delivered down the chimney.

So I lined the bag with a pretty doily and added a fluffy teddy and an old doll (she had no legs, and was scheduled to become a zombie, I’m sure she prefers this life).  

The bag is glued, stapled and pinned into place, and the rope to it is glued to his mitten.  

I left the mittens as is, they are the only part that did not get a makeover.
8D32F0A4-CE79-4EEF-A833-A2F60C0F7903

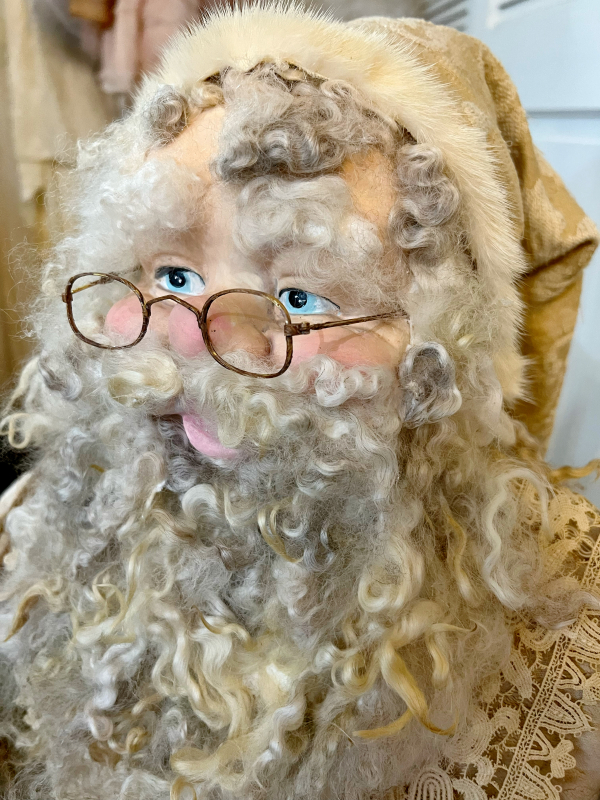
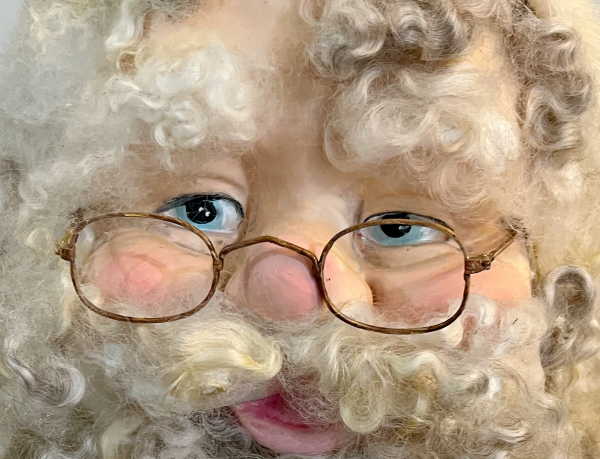
His too shiny glasses got a little tarnish with paint and I made his beard, mustache, and eyebrows from curly locks goat hair.

The hat is pretty simple, it’s from another fabric, but with a similar look, and is also trimmed in mink and glued together.
7B75713B-7905-4C83-B030-879B91827D9E

All in, it took me almost five hours on a day that I should’ve been working on something else.    But I could not help myself, it had to be done.  And everything I used was stuff that was repurposed and hanging around in the studio.

And speaking of hanging around in the studio, I have nowhere to put this guy til Christmas.  I have a feeling he will become my loyal companion while I work out there.
E07CA331-0592-4C2D-9EA0-D93151B74187

Painting with grout? Yep

antiques/junking, cottage, Hand painted, how-to projects

7E6710A1-BD2F-48CF-98DB-5BDE01EFC72C
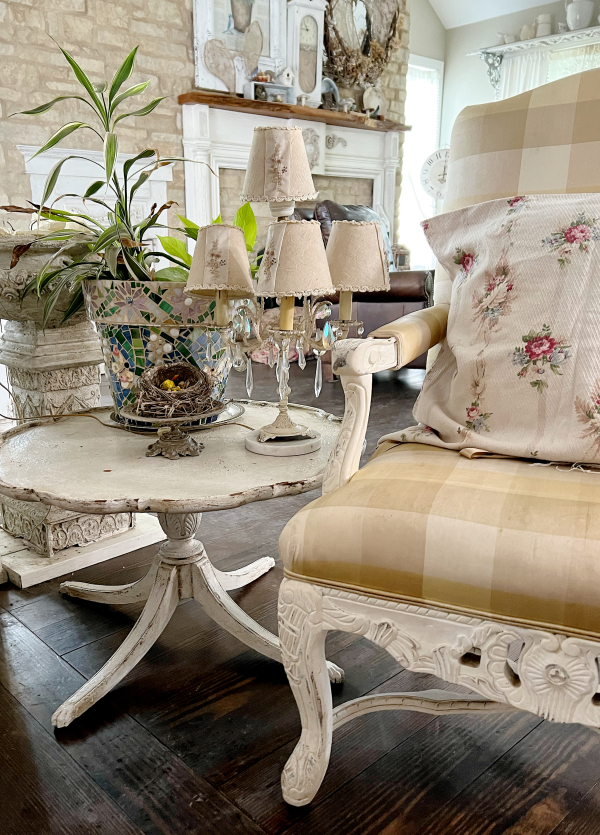
For years, I have been using the grand fairies’ outgrown craft table as a side table in my living room.  Not because I loved it, but because it was the exact size I needed at the holidays to set the Christmas tree up on.  It wasn’t ugly, it was just a simple, round, white table.  But it wasn’t anything I adored, that’s for sure.

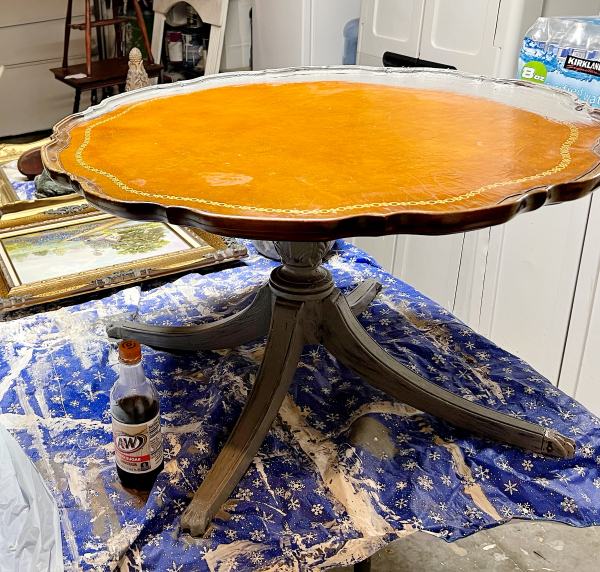
Then, I found this table at a garage sale for FREE.  Well, basically free.  The lady sold me an entire car load of stuff for twenty bucks, and the car was stuffed to the brim.  I felt like this table was a bonus thrown in with all the inventory I’d bought.

CA311D49-E963-42BA-A7AF-2B171FD28136

Here is how it started, perfectly nice, no problems, just a little too traditional for me.

2905E1EA-FFA9-4919-BC0E-7E75E4943D5F

I wanted it to look old.  Well, that’s not exactly right because it already is old.

It needed to look like it had been painted and repainted over time.  More cottagey.

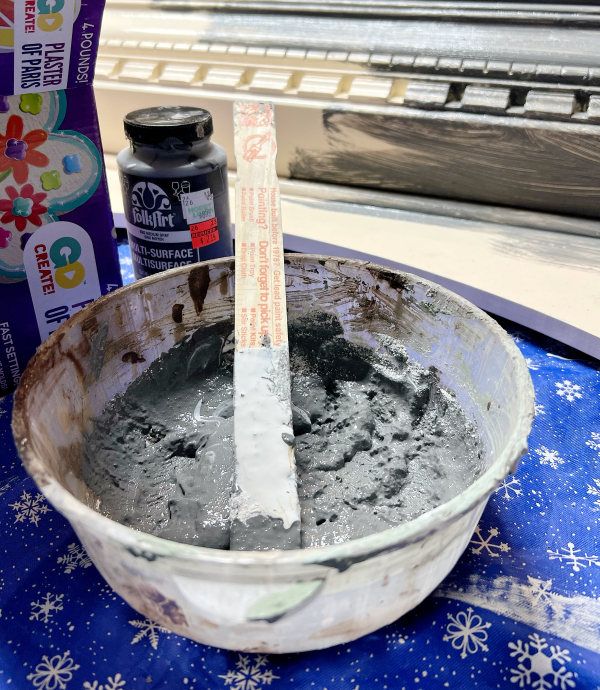
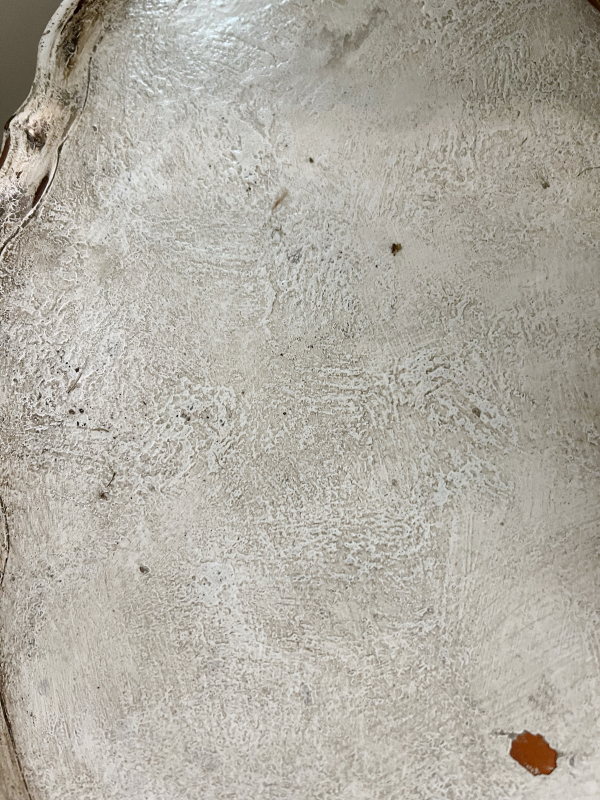
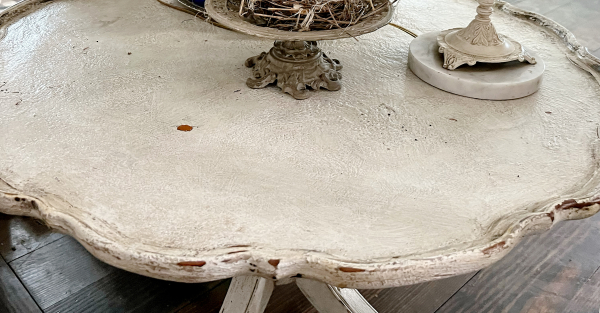
So, first it was primed, then I mixed up grout into gray paint and gave it a thick, gloopy coat of that. Next, white paint, then sanding the clumps away.  There were some ugly spots that didn’t sand well, so I touched up with the white again, then a glaze of umber went over it all and was wiped away.  

To finish, a polycrylic clear coat went over that.

D9B8893F-EFBB-4916-AF4D-37DE5867CABB

The paint looks properly mistreated now.

D6D94D51-07F1-4A27-902E-87A699C281E5

My Christmas tree will look great on its new pedestal!  And I think I do adore this one.  Bye-bye to the kiddo’s craft table.


How to make a tiny snow globe

holiday decor, how-to projects

IMG_5863

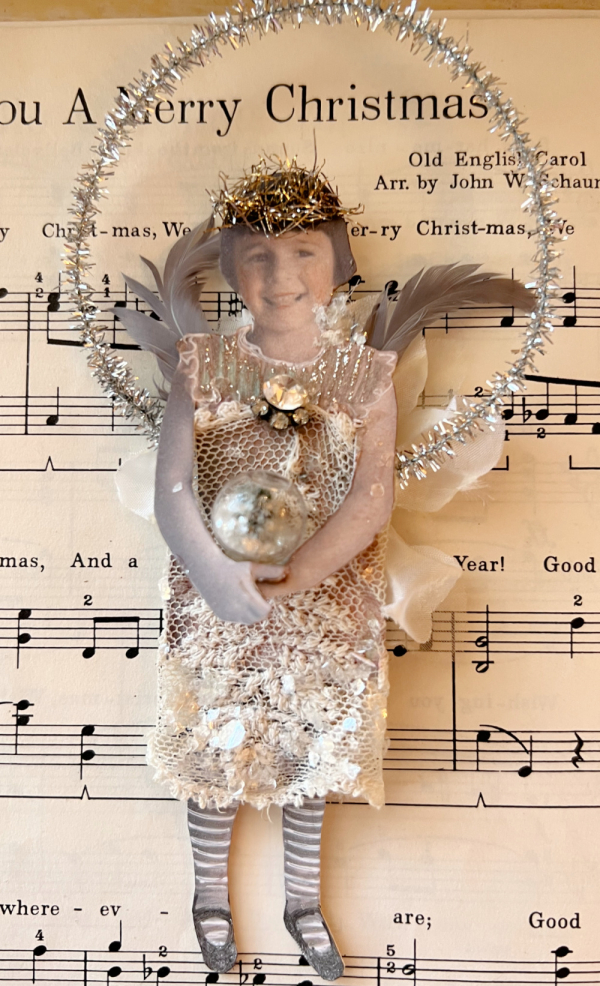
I cannot get enough of making Sugarplum Fairies.  While I reuse the vintage scans, I never make the same girl exactly the same twice, each is a unique little sprite. 

IMG_5858 2

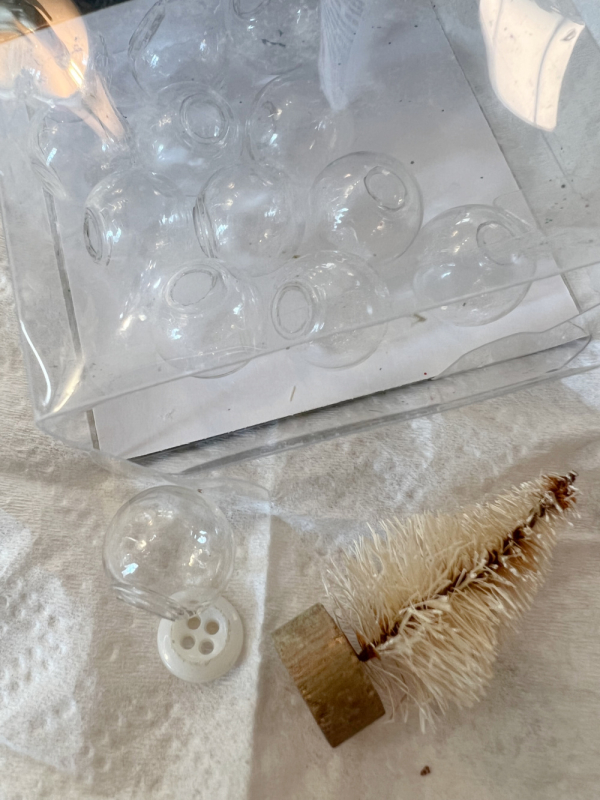
I wanted some of them to have snow globes and found packages of tiny, round glass jars at Hobby Lobby.  They had tops meant to hang on necklaces, but I didn't want to use those.  

IMG_5811

Instead, I thought a button would be cute to use as a base.  There were NO trees to be found that small, but I have discovered that the little bottle brush trees that I bleach and dye are pretty easy to trim to fit.

IMG_5813

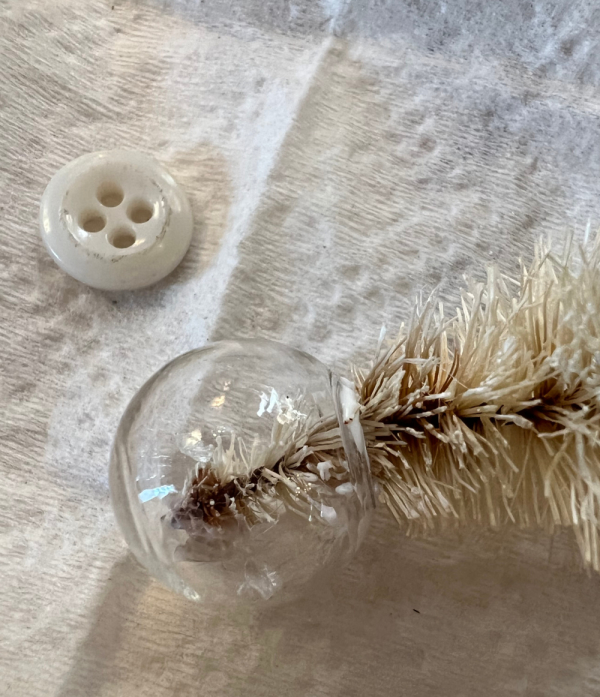
First step is to put a pinch of glitter or mica flakes into the jar.  Then a bit of glue around the rim.  

After that, I twist my tree into the globe as far as it will go.

IMG_5816

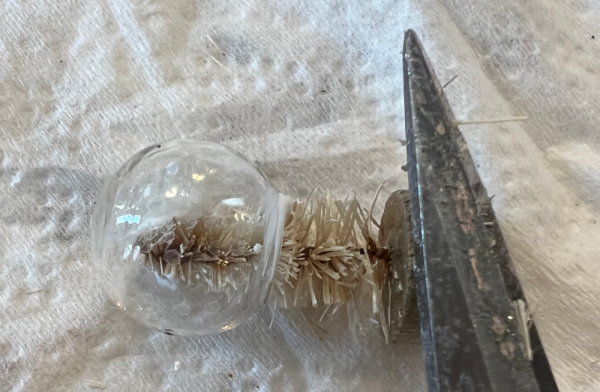
The super sharp, Tim Holtz scissors are ideal for cutting the wire of the tree.  I trim it to the edge of the glass.  (Make sure you don't trim it so short that the tree gets lost inside the globe, the bottom should be even with the hole or slightly longer.)

IMG_5815

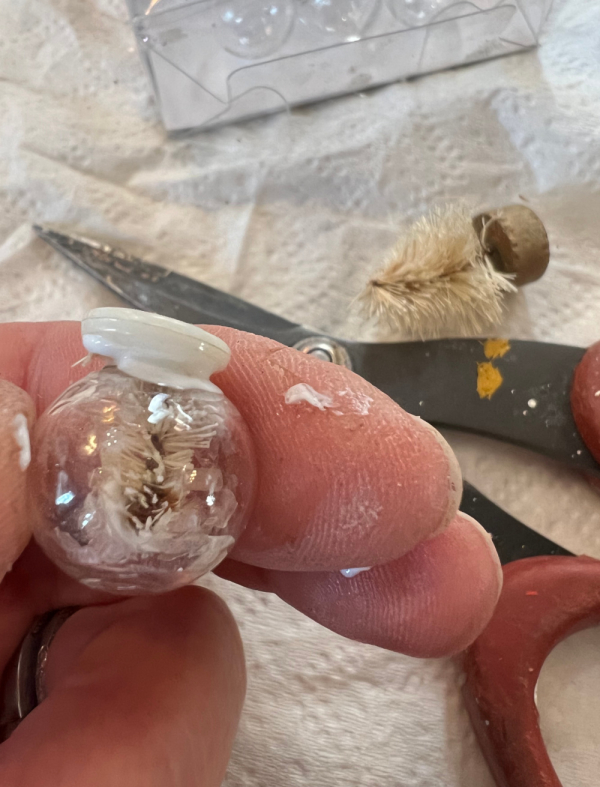
After the tree is cut, glue a button base to the opening.  Having the brush of the bottom of the tree at the very edge of the glass gives you something to glue the button to, and keeps the tree in place.

IMG_5818

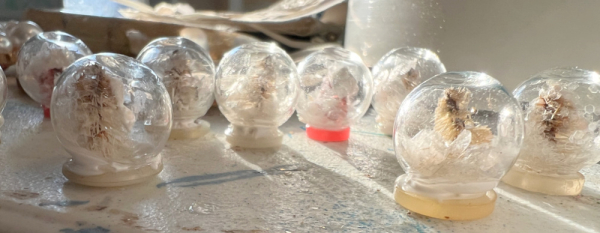
Aren't they cute as a button? Ha.


How to refresh your tile floor for under a dollar

cottage, how-to projects

220521FA-53C7-4A92-A22E-4AE9BC77DE56

This is the after photo.  I am sooo happy with it!

03DB8B11-9D4E-4257-911D-330C3A535FCE

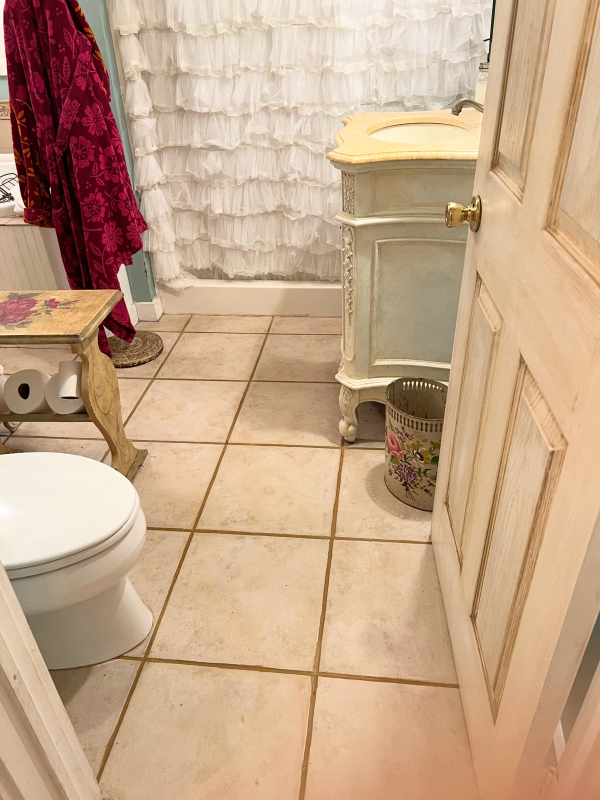
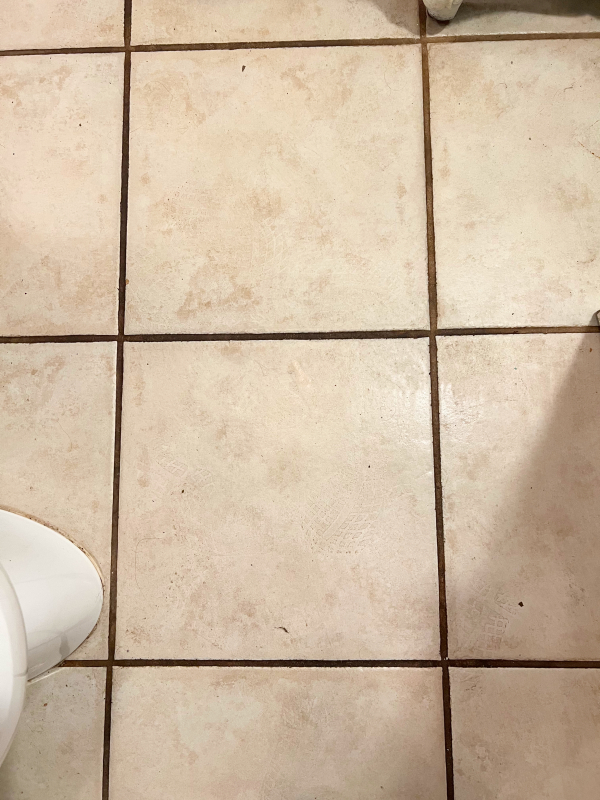
This is the before.  Years of wear had discolored the grout.  I’d tried peroxide, bleach, scrubbing with a tooth brush, every kind of soap and cleanser I could try.

I even hired a company to steam clean the floor.  No luck, the grout was turning black in the heavily trafficked areas.

E588CF46-7E85-416D-952A-9081C5895734

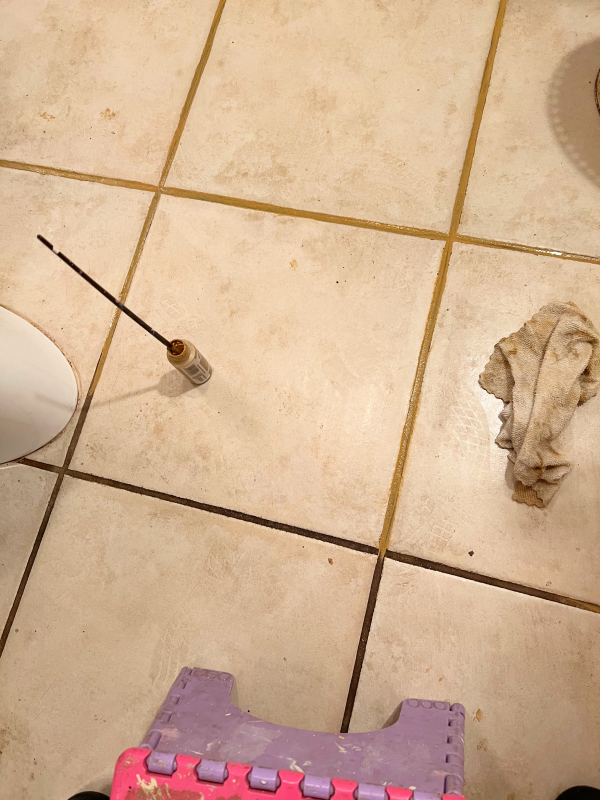
I cannot speak for the longevity of this solution- yet.  But as someone who works with paint a lot and understands the properties of it, I’m not too worried.  

And even if I only get a year or two out of it, it is a fast, cheap solution.  I could spring for another 79 cent bottle of acrylic craft paint and an hour of my time to redo it.

Here are the tricks I learned- 

  • Using a brush that fits the grout line, apply the paint full strength, not watered down.
  • Keep a wet towel handy for mopping up big smears on the tile.
  • Don't fret the small smears.  Grout is porous and it’s “tooth” will hold acrylic paint.  Smooth, porcelain tile will not.  So, paint the lines and if you get a bit on the squares, just wait till it’s all dry, and wet mop.  The lines will stay painted, the tiles will come clean.  But very important- don’t wait too long or you might need some elbow grease to remove it.  It will come off, but will be harder if you leave it more than a few hours.  


How to make folded paper Christmas balls

holiday decor, how-to projects, vintage paper/collage art, wallpaper

522FC5B1-3CF9-4421-8869-42099AC8F70D

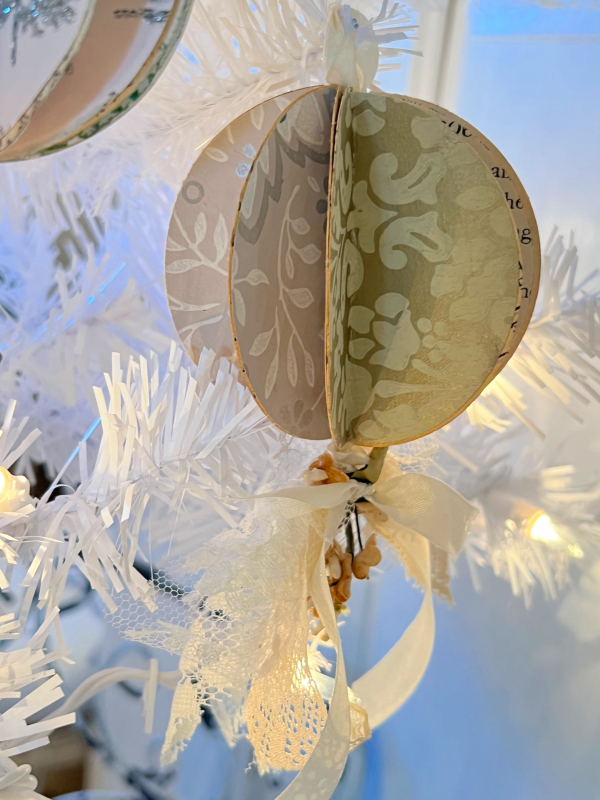
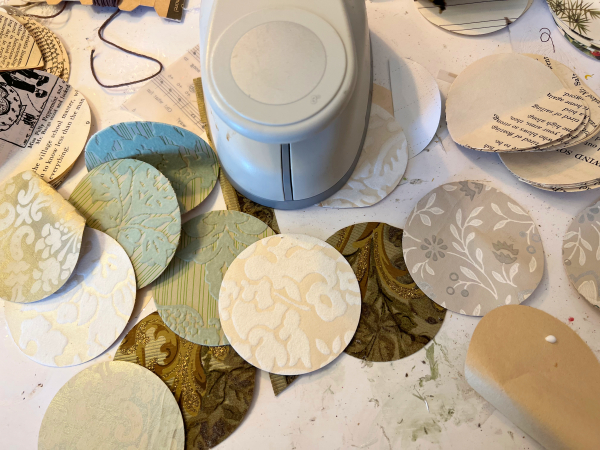
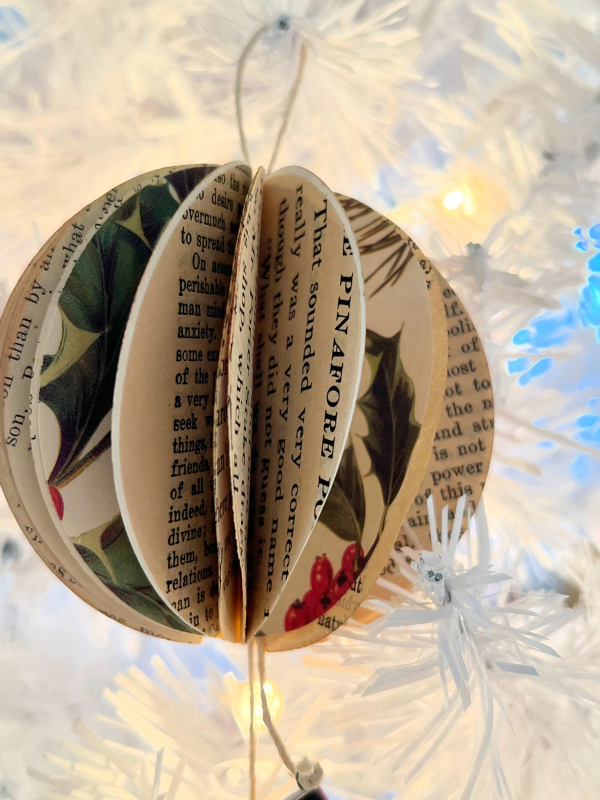
These layered balls ended up being pretty easy to make once I figured it out.  My first ones didn’t come out as nicely, but they got better as I made a few.
7ED1B0A9-F5C1-40A1-A5CA-8B0353EA2789
My first mistake?  Using only vintage papers, and not being careful to find ones that aren’t brittle.

I discovered that the ideal paper is scrapbooking card stock, but since I love the old stuff so much, I tried using some book pages and wallpaper too.  Plus, a mix looks pretty together.

Vintage flocked wallpaper is ideal, and some more sturdy wallpapers are too.  But most of the antique ones disintegrate when folded.  

I used some Xmas wrapping paper also.  

If you have a fragile paper you just love, and really want to use, maybe try backing it with card stock first.

94CA83ED-8600-4906-A4CC-914880E5D5DA

These were some that worked for me, as well as some book pages. To test it, fold the paper a few times and see if it cracks.  If not, it should work okay.  
84784D8E-D7EE-4DC8-9904-6C627680983A
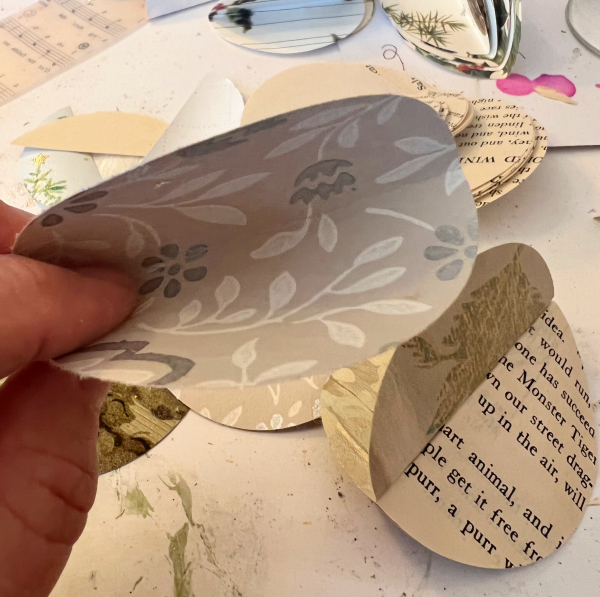
Cut and fold all of the pages ahead of time, so you have a pile to work with and not have to pause while gluing.

Fold each piece with the most interesting side inwards, so you are gluing the outsides to each other.  
4E0A986E-EC9A-4560-AAE3-4AC42662EFEB
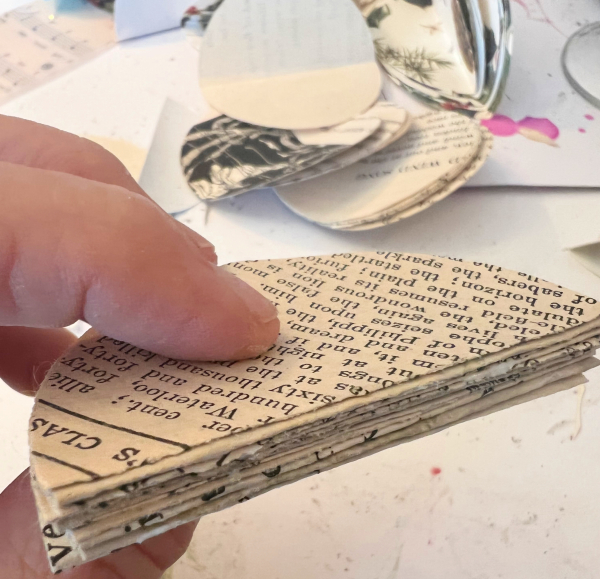
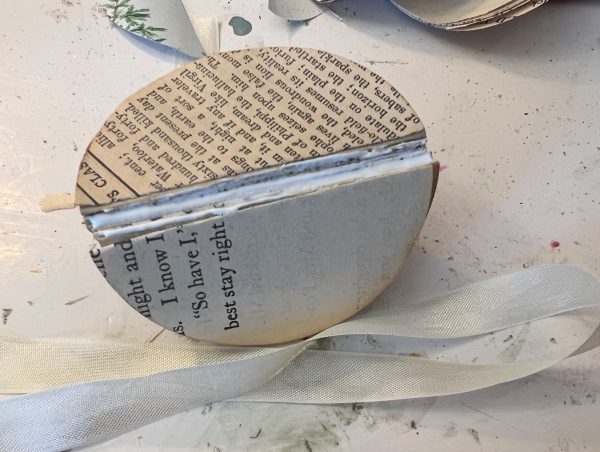
Glue one folded piece to the next until you have a stack that looks like this.

Another discovery that I made is that it’s a good idea to glue all of the folded circles together and set them aside to dry.  If you try to make the orb while the glue is wet, the paper is more fragile and will easily tear.

BF308834-C96A-4B93-9DA6-68FF11CA09FD

While still folded, you can ink the edges.

93C48250-68E6-4A23-93E6-35A9A1496142

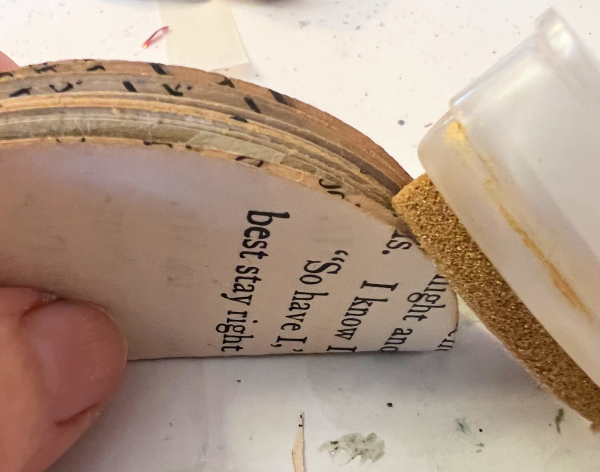
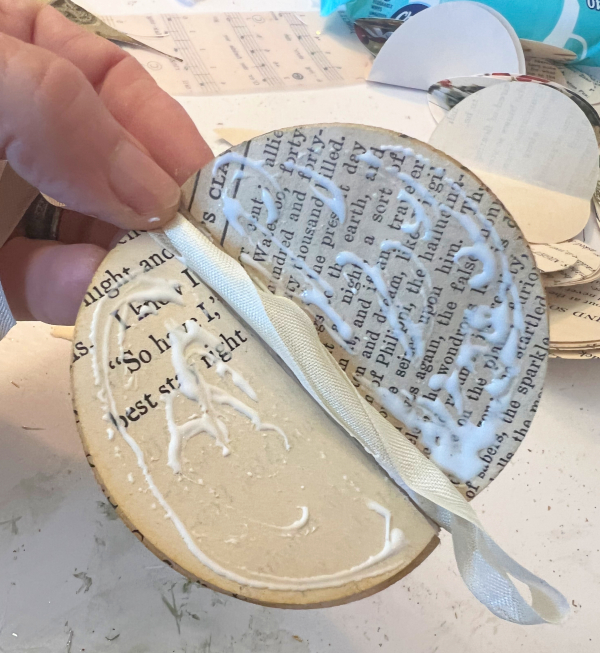
Add some strong glue (I like The Ultimate) along the folded edge.

4F983F90-4101-4823-AC52-73BE2DDC012A

Cut ribbon or string, and fold it in half with a loop at the end.

 (I used pipe cleaners down the center of some, and it did work, but for me, it was too easy to poke through the papers with it, string or ribbon is better).

Then stick the ribbon into the glue, with the loop at the top and the two ends hanging out of the bottom.  

Open the pages.

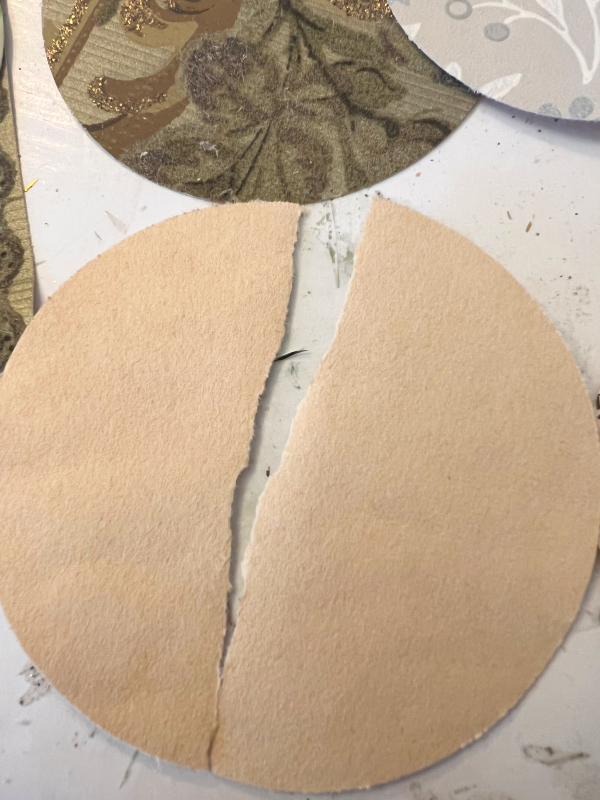
Apply glue to both half circle sides, then press them together to make the orb.  Smoosh them together and there it is!  You might need to carefully pick each layer apart, gently manipulate them, and form the circle.

If you get a tear when opening it up, just attach an extra circle over that segment.

56B603CC-D4D5-40F6-90EB-D55B2AEB7BA8

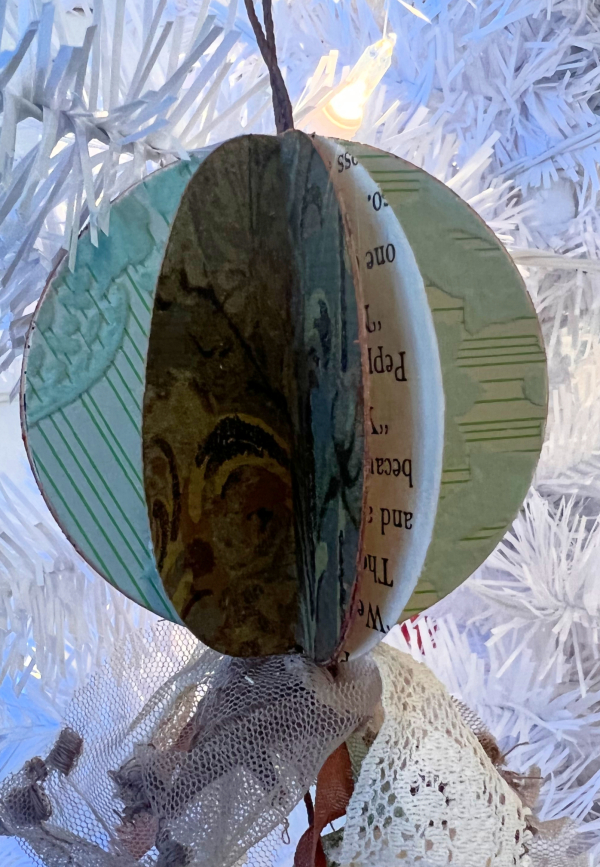
You can use the two trailing ends or your ribbon or string to tie a bundle of netting and ribbons to the bottom.

063664DB-CA52-472C-9464-7DACA3AFE626

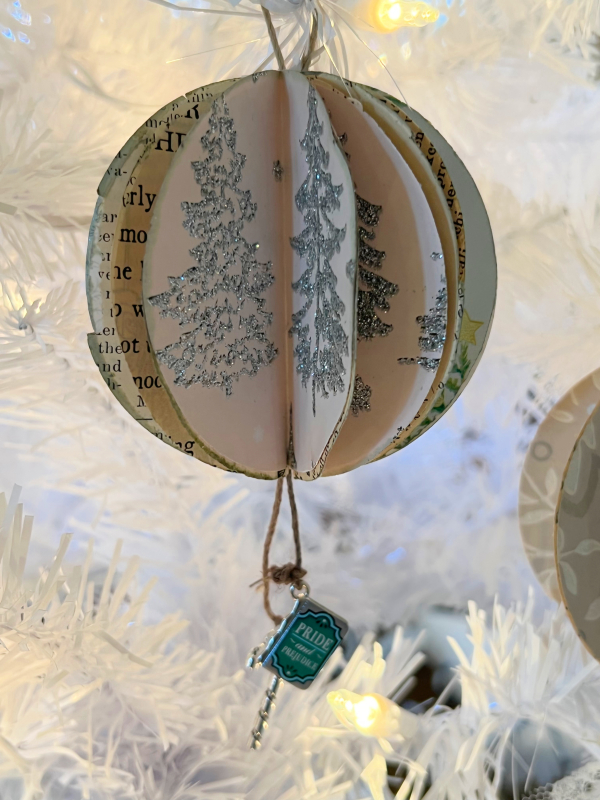
Or use them to tie on charms.  Or do both! (I liked the idea of book charms with the old book pages).

2B18A3B7-F620-42F1-A237-E7AD52C12463
How many circles did I use?  Well, they are all different.  The thinner the paper, the more you need.  The heavier papers fill out nicely without as many. And because they are thick, too many makes the stack so high that when you put them together you have a huge gap in the center.

So, about 20 for thin papers, half that much for heavy ones. 


Painting a cement floor entryway

cottage, dogs, Dorkies (Yorkshire Terrriers), how-to projects, Kitchen remodel, paintings

57D7E325-82DA-4698-A8CD-8E31C567D207
Years ago, I covered my steps in mosaic, on a whim.  Not much planning went into it, and very little skill.  My dad was ill, I was waiting to hear his diagnosis, and needed a big project where my fingers were busy, but my mind could wander.  I didn’t have a design or the right supplies on hand, I just used what I had, and then had to make runs for more marbles and squares to complete what I’d started.

My dad was a lifelong gardener, and I think the abstract vine pattern just sorta formed itself while thinking of him.  

928BCCAB-1CD6-4F54-B791-543E2F6FAFB9

Luckily, it hasn’t fallen apart, at least not too much.  Even though it wasn’t done correctly. There are a few tiny cracks in some tiles, and a couple marbles popped out, and were glued back in. 
The 100+ year old cement floor by it also had some issues.  The paint on it had started to peel.
31A7CFB3-2529-4C68-B11B-07818464B090
So I thoroughly scrubbed the floor and while I was at it, I went after the steps with a brush and vinegar and got the tiles to sparkle again.  Then, I added a big scoop of plaster of Paris into some exterior latex paint and repainted the floor.

That gives the paint some “tooth” help it adhere to the cement.

4937F775-B3C9-4FE4-A922-A34A975CA2C7

I hope that it works, because I got carried away and started to paint vines on the floor to coordinate with the steps.  That won’t be an easy patch job if the paint wears off, it will need a total redo.

7C135624-6370-40E8-B594-481E0A8013A0

We are not able to use rugs on the floor here because of this critter, Dorothy happily tinkles on any rug she sees, thinking I generously supplied her with a pee pad.

540F9EFC-6FB6-44F9-AC92-5C5088525654

My design makes this into kind of a painted, pee proof rug.  
C490DE89-C646-4C5C-A34C-8CF2F083050B
Yep, I know it’s pretty busy.  Especially when you add in the hand painted roses on the wall.  But it is a very small space and not visible from the rest of the house.

(by the way, there is only a small window of time when the hooks are not layered four deep in jackets, backpacks, hats, leashes and more, I just did spring cleaning and the re-piling up has not yet begun)  

8B1668A9-D444-43AD-A289-E8591FF87B34

After the vines dried, I brushed on a brown glaze and wiped it off, let that dry and coated the floor with semi gloss Polycrylic.  I’d rather have used a stronger topcoat but I was worried about the odor and my baby puppies.  So, I stayed with water based.

Fingers crossed that the paint lasts a few years!


Scroll to Top