how-to projects

How to make a little fairy diorama

cottage, fairies, family, how-to projects, Tutorials

36389382-7DAC-4820-9789-44CCE0D5028A

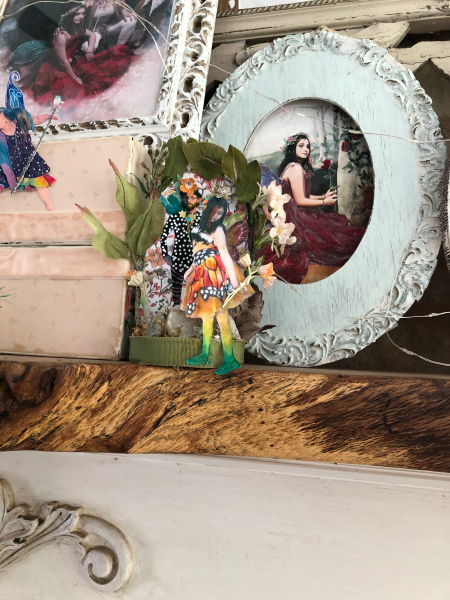
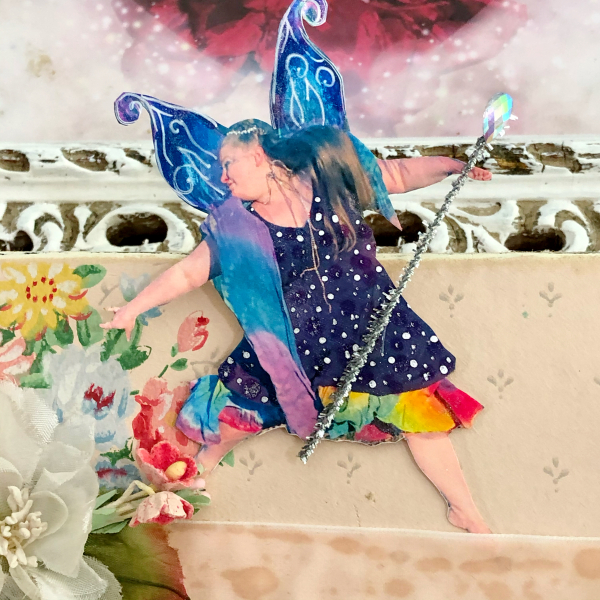
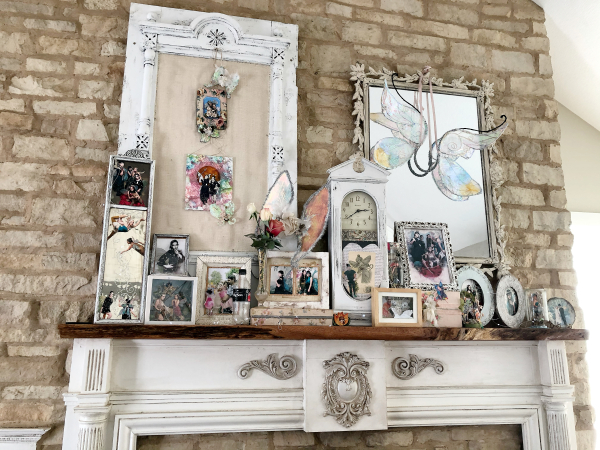
There were more fairy family photos to add to the mantel from our wing making event that Miss Tree gifted us with at Solstice.  

1AFD8D80-FEDB-4777-8F66-7E2757742EE6
Now, I think I have us all represented over the fireplace.  I’ve used a variety of ways to display them from frames, shadow boxes, in bottles, hanging, and more.

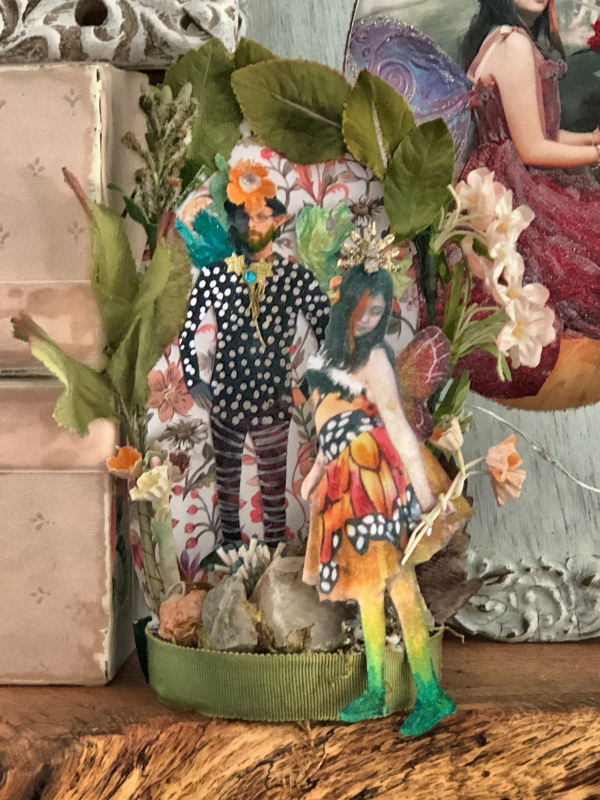
I ran out of space for more frames, so thought I’d craft a mini diorama for my son and Dewdrop.

EDA0A133-159E-4E8D-9ABF-C704FB6E7EA7

The first step was to cut out, glitter and decorate the people I wanted to use.

Next, I cut an arch shape from two sided cardstock. No pattern, just a roughly arch shaped piece because I knew it would be covered.

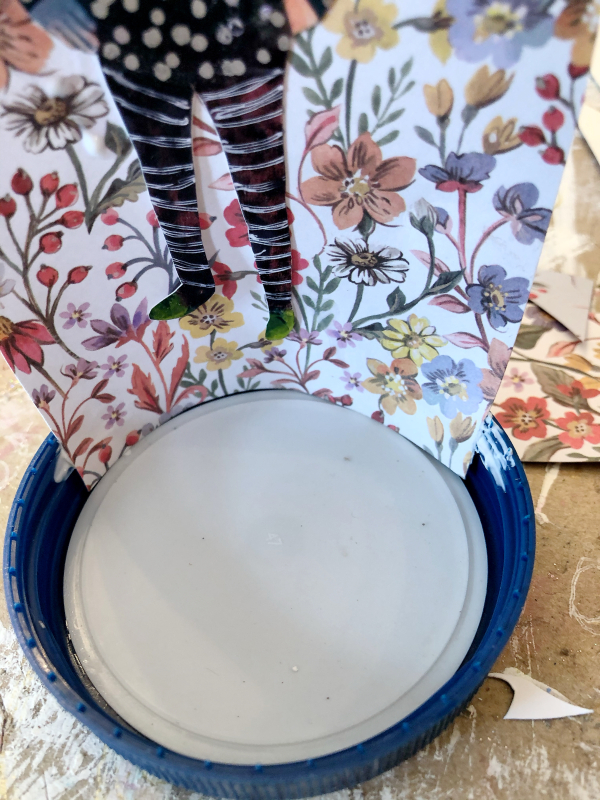
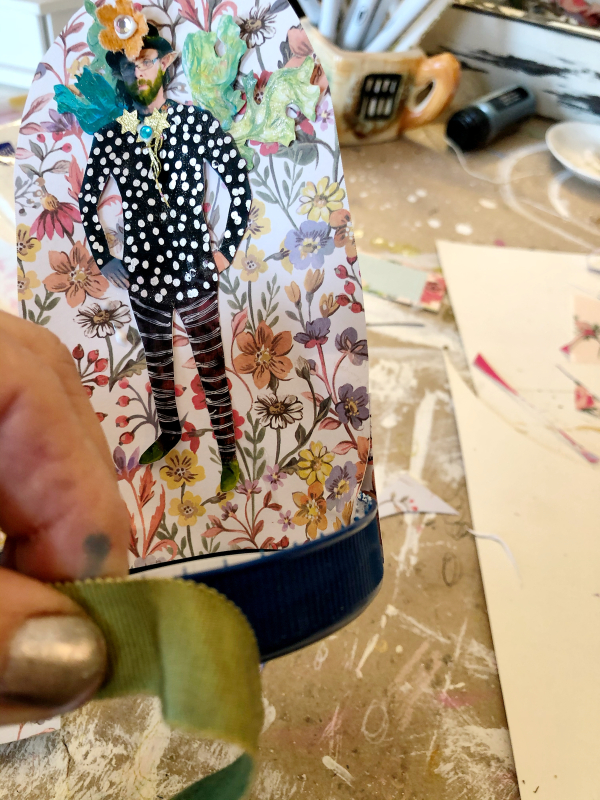
I glued Adam to the arch and then glued the arch to the inside of a mayo jar lid.

EA5DDC4B-59A9-42F5-AEDA-35C2F3CD23D0

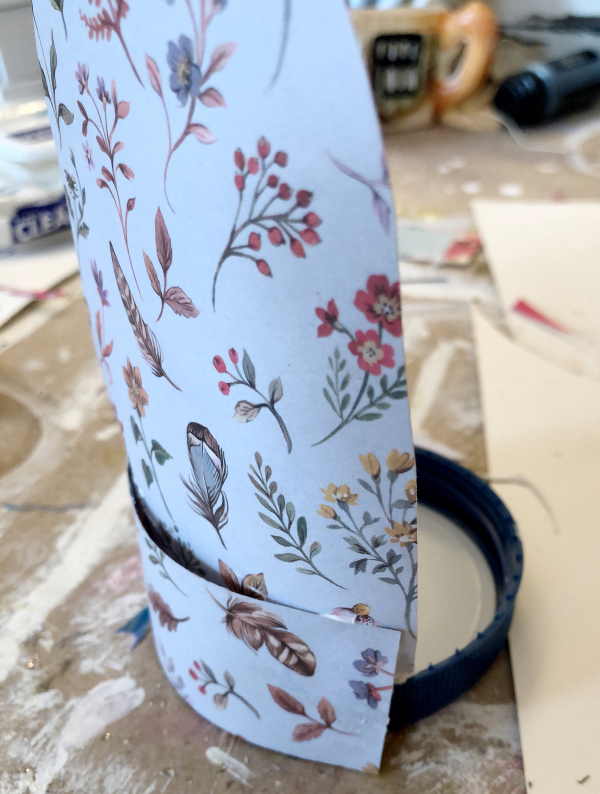
To strengthen and support the arch, I added a strip of more cardstock to the back.

8831F8D2-89C8-47C8-B7E9-68B05A81FA9E

Some grosgrain ribbon covered the lid up.

F3531804-A876-47BE-8609-7283EB4364D4

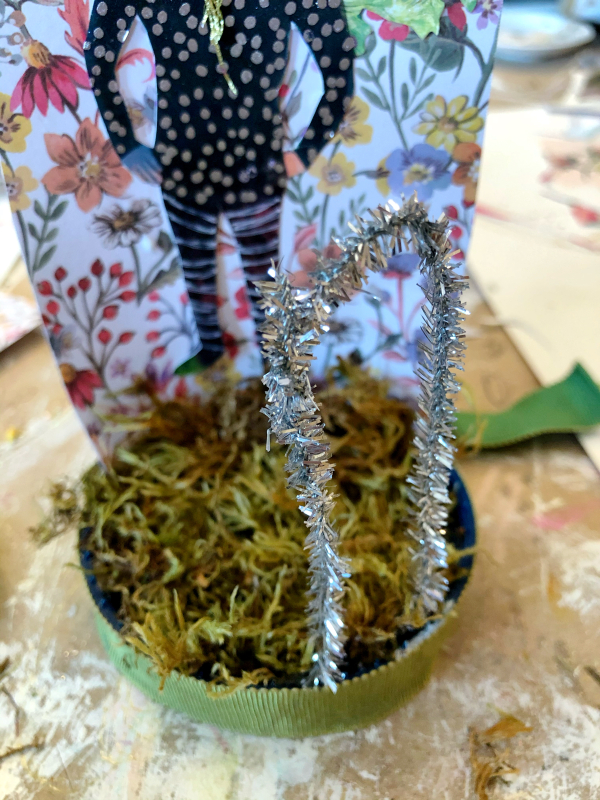
I filled the inside of the lid with blobs and globs of Ultimate glue, stuck a bent pie cleaner where I wanted Dewdrop to stand, then filled the lid with moss.

65523818-4D30-4099-A9CA-E4457A4D5465

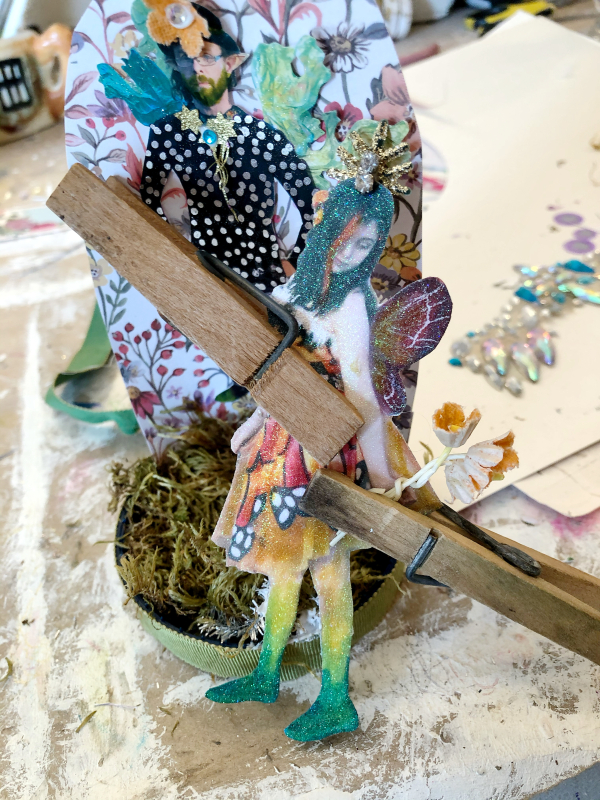
Dewdrop was then glued to the pipe cleaner and clamped til dry.

37189C6D-61A7-4277-BC9A-0D579728B7FF
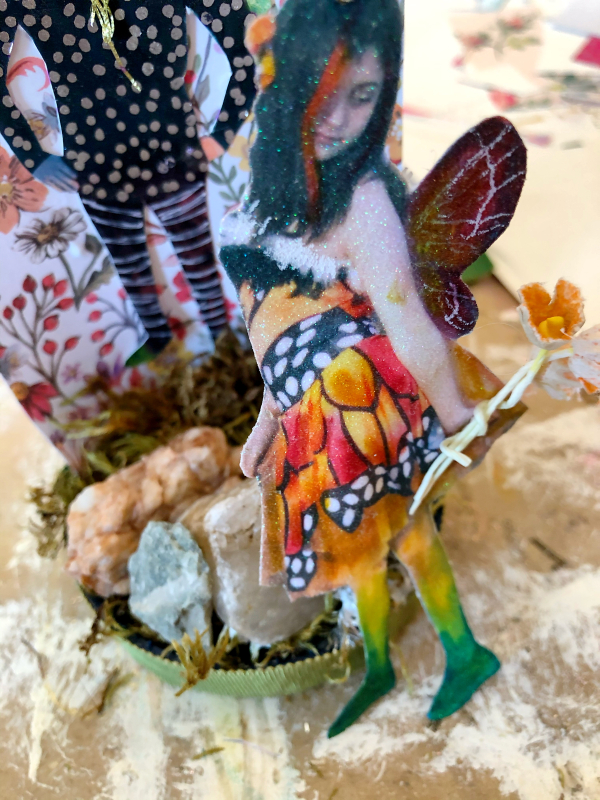
To stabilize the pipe cleaner, I glued pretty rocks onto the moss.  They also worked as weights to keep the piece upright.

AF6569D9-5EEF-470B-A14A-657E877E62EC

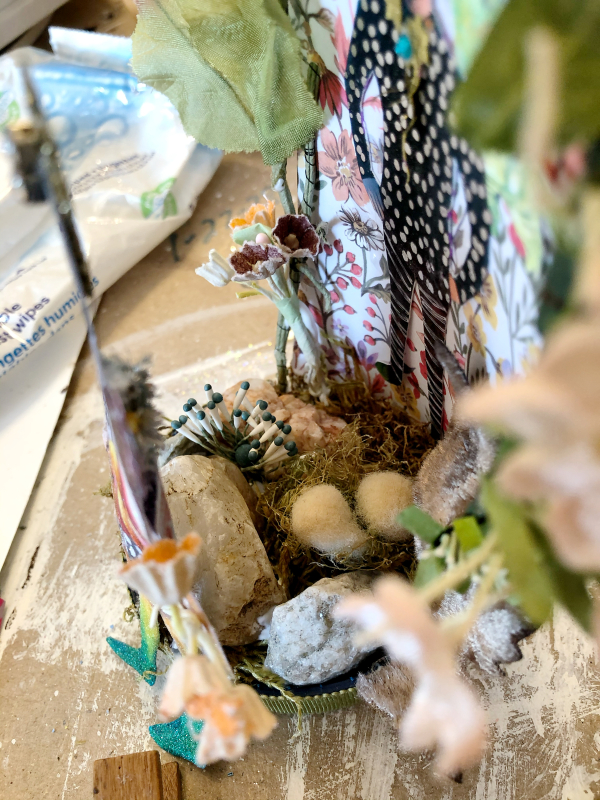
You can see behind Dewdrop into the lid in this picture.  I added flowers and leaves around the archway and a few flowers into the moss too.

D4DE9B6A-5A6B-46B7-A6E3-E55EB30BE3E6

Ta-dah!

This isn’t a very refined, or perfected project  just a quickie not meant to last a life time.  But it suited my purposes for a way to add more family fairies to my display.

21576CF7-68B6-4956-B69F-3780EB846CD5

This is my springtime mantel  and I like it so much, it might be up all summer.  I think I even see a few spots where I could squeeze in a few more sprites…


More mini redos

cottage, how-to projects, vintage paper/collage art, wallpaper

E126A243-7296-43BF-AF35-F50467BA543E
Sometimes, all you need is a little change.

1426A810-CF8B-4B9F-A243-3F672BA4EC6F

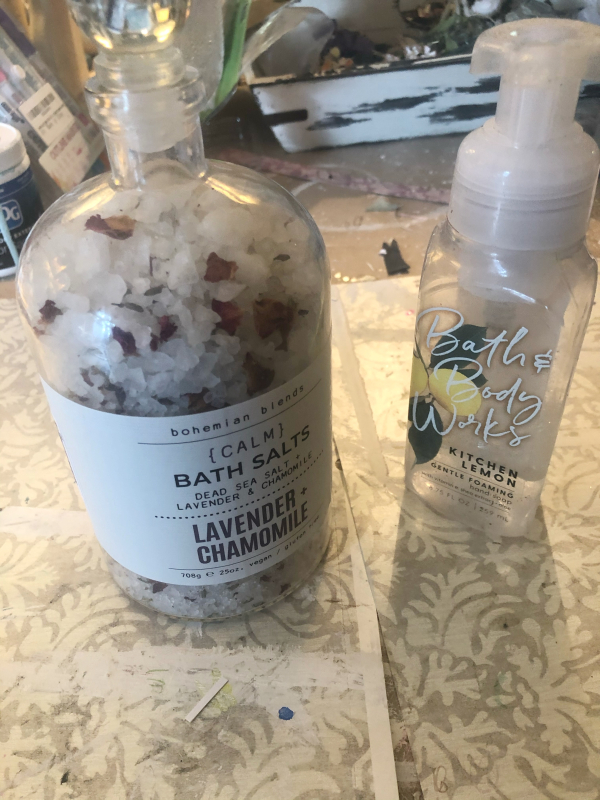
Like the mini overhaul of this, already pretty bottle of bath salts from TJMaxx.

I just glued a bit of wallpaper around it and glued a silk rose to the neck.  It took a matter of moments for a new look.

ACCF3113-323E-4162-9D8B-B0B37E7CA828

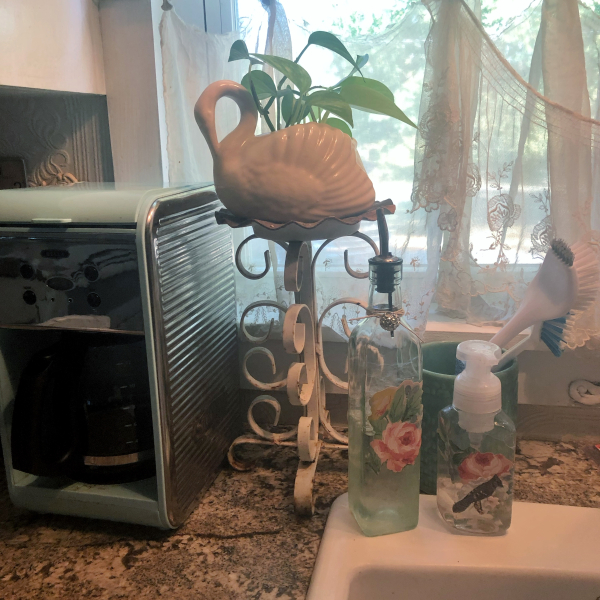
The Bath and Bodyworks bottle got a makeover too.  The labels were kind of vinyl-ish and peeled off easily. Once they were off, I glued some wallpaper flowers and a bird onto it.

While I was at it, I slapped a flower on the dish soap bottle too.

Making something prettier doesn’t  have to be complicated. Sometimes, just a simple little bit can make a big difference.

Since they are soap bottles and get wet, the paper doesn’t always last.  I have glued other ephemera to the same dish soap bottle in the past.  So, there is no reason to spend a lot of time on the project and making an arty collage label.

Have you used the foaming soaps before? I really like them.  I didn’t realize at first, that the foam was made by the pumper, not by the type of soap. Instead of replacing the empty bottle, I now refill it.

My mix?

Fill one third of the way with a plain, liquid soap like Ivory, or another inexpensive brand.

Fill the rest of the way with water.

Add a drop or two of essential oil.  I used grapefruit and rosemary.   Sounds like an odd mix, but it smells great.  


How to make and paint memory foam Squishies

Corona virus, holiday decor, how to's, how-to projects

B283A511-2A63-4C5F-B6C7-D58DAE054688

My creative efforts have been kinda low key lately.  Because of knee surgery which was harder to recover from than I had expected, I haven’t gone to the studio.

517F608E-72F5-4977-864F-E78E6B46915B

So, I did a little busywork, and some simple things to keep my hands busy.

6B64EBF1-9089-4893-8F8D-CE45ACCCDB92

And to take my mind off of the world wide crisis we are in the middle of.  I don’t think I have the mental focus to start a big project, and these little bits of cuteness were just what I needed.

759D332B-98F9-4B91-9924-AA2C18F5BAB4

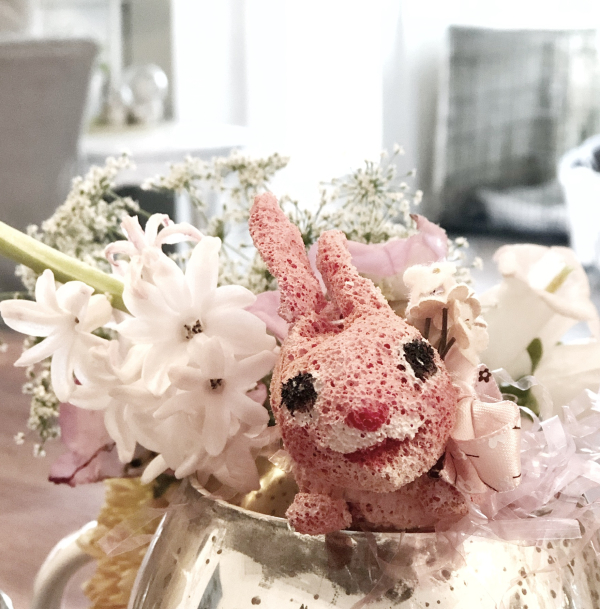
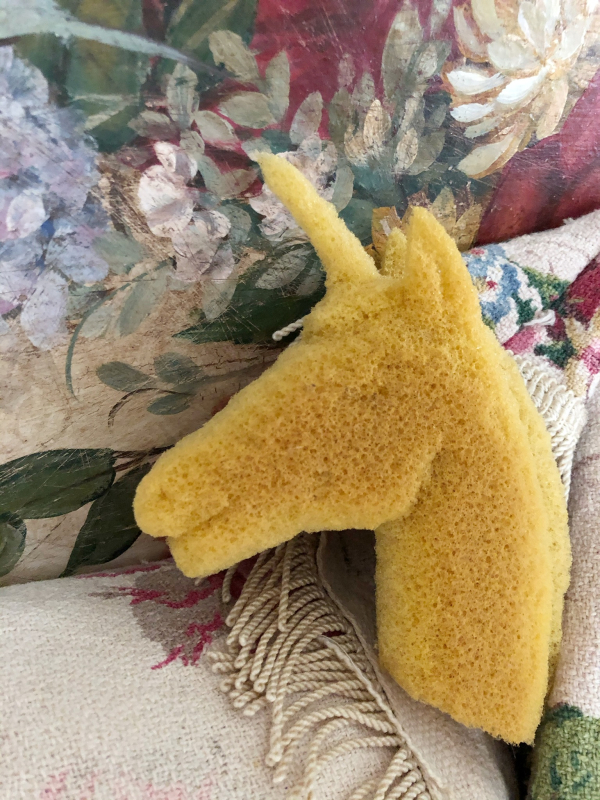
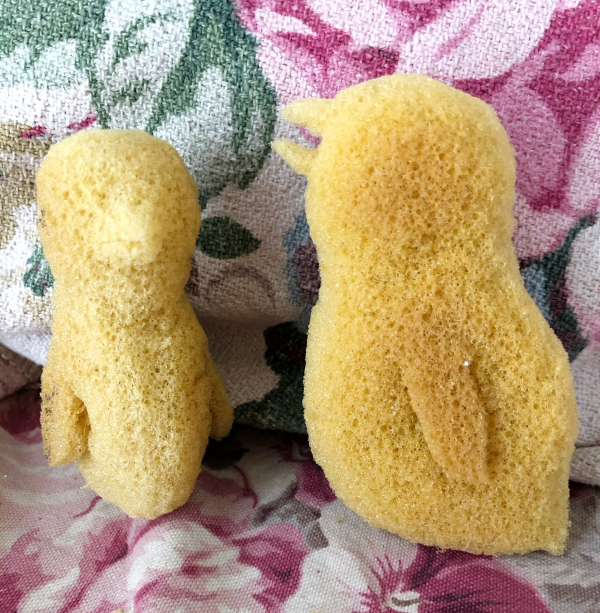
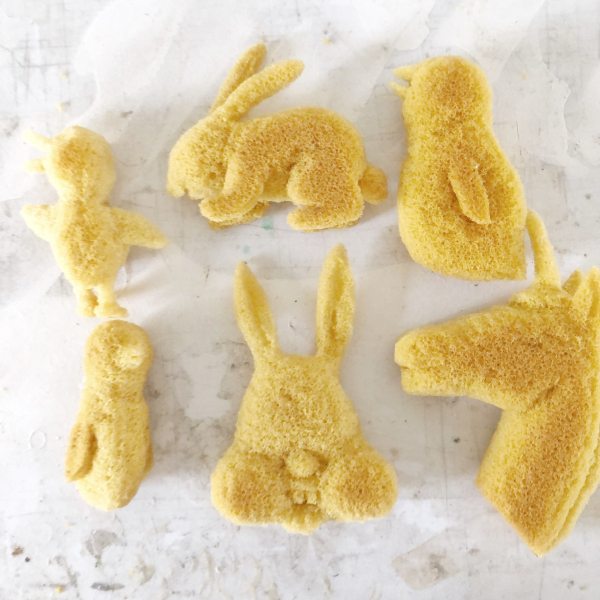
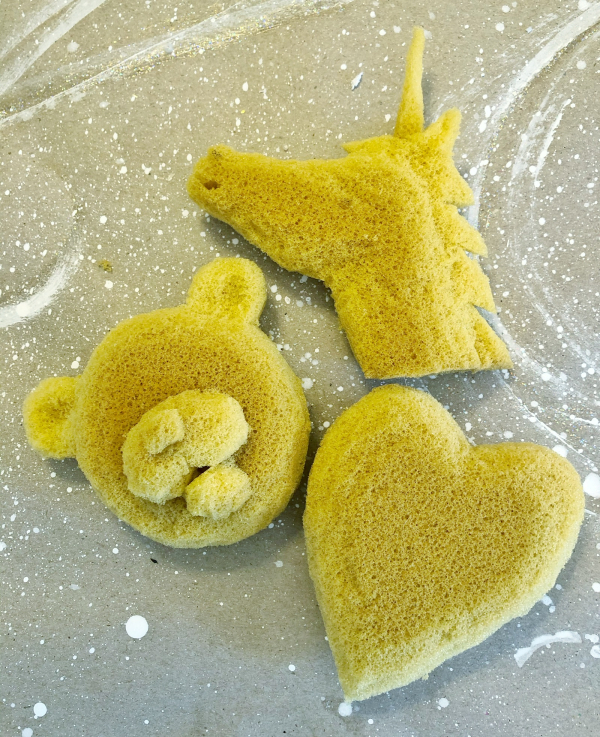
Sugarwings is hooked on watching Squishy makeovers on Youtube, and I told her we could probably make our own little critters.  When I went on the long camping trip to Florida, we trimmed up some memory foam pads to fit our camper bed and I saved the remnants.

AD7E3ACF-C4F1-485C-82AD-0F4ABAD94593

They were not perfect for this craft because they are not as thick as I’d like and they have a grid pattern cut into the backside.  But for our purposes, they were fine.

B2F517B1-7CBC-4FF3-AD29-FD40A21BDD47

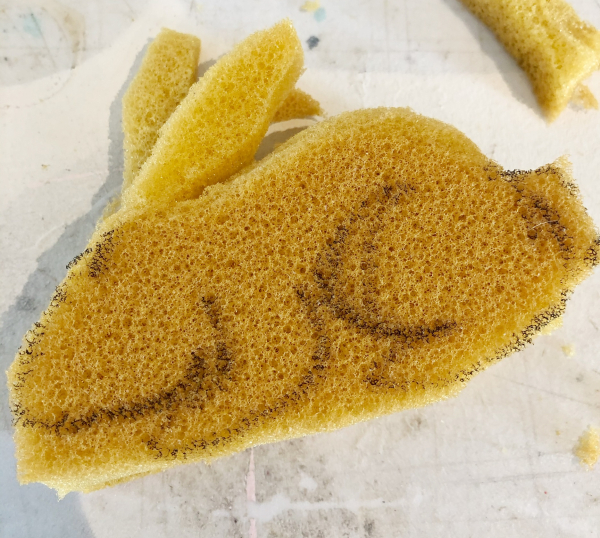
First step is to draw the design on the foam with a marker, then roughly cut it out.

D1C938DF-81F0-4F12-B5AC-10E325234C03

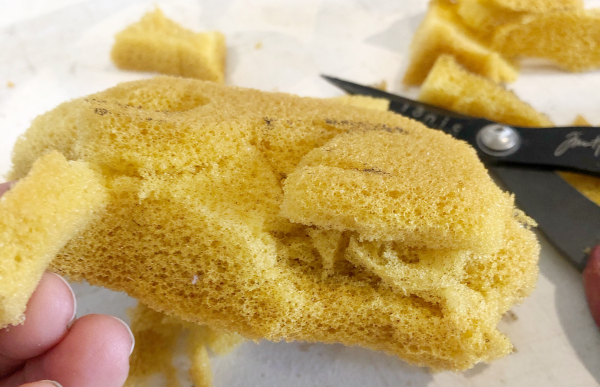
At first, the cuts are larger, but as I get the shape to come out, they become teeny snips.

CB66A1FA-054A-42F2-A531-32700AED3704

When my fairy girl started making hers, she was chunking them up too much and got frustrated.  Once I showed her the trick of making itty bitty cuts, she got the hang of it.  And soon, my home looked like the scene in Edward Scissorhands where Johnny Depp made snow from paper and created a blizzard.

F303D53A-B5FD-4DA3-B389-D068F39B5613

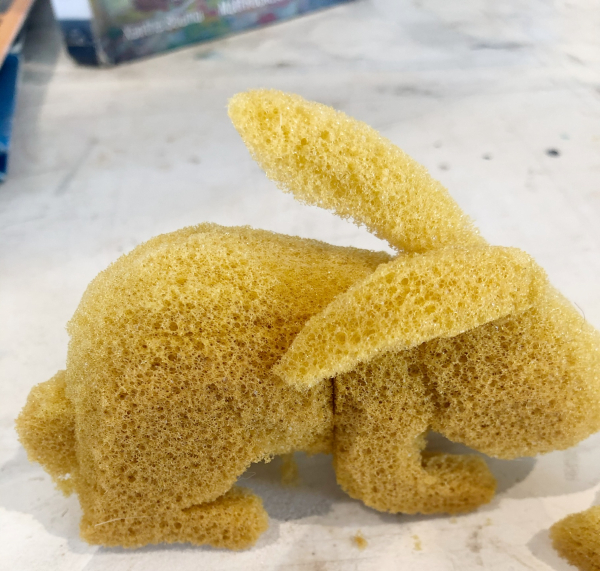
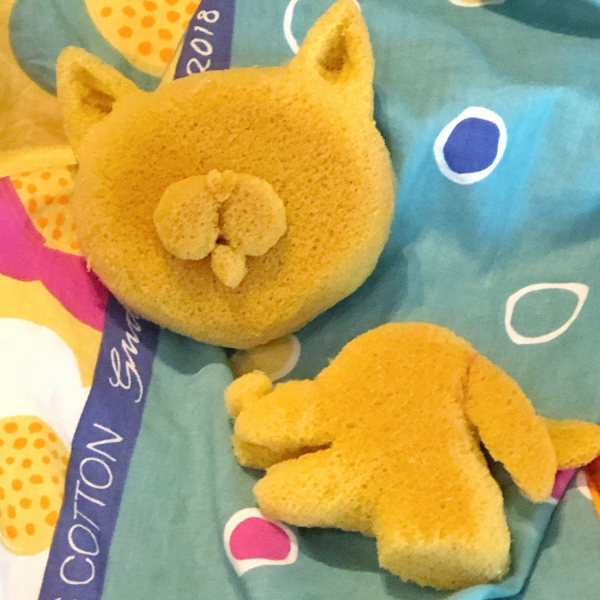
I use fabric glue to seal the grid cuts that I mentioned, and to add pieces, like a wing or something to them.  I try not to do many add ons, I like the challenge of cutting 3D shapes.  But Sugarwings enjoys making hers in pieces and then attaching them with glue like they do in the videos she watches.

904D7BC5-3F27-4B80-BD65-3A5ADEE3493F

The kitty has a glued on mouth and nose, but the puppy is all one piece.  They can be done either way.

Mine were all made to give to kids to play with and paint themselves.  But I wanted to try out the paint myself first to see how it went, so I could offer some advice.

5385887D-C1C8-4206-8818-7C024A2FA355

The paint has to be pliable so that when the foam is squeezed, the paint moves with it.  You can use puffy paint, or fabric paint.  Or make your own fabric paint by adding textile medium to acrylic craft paint.  I have heard that you can make your own by using glycerin, but I had used all of my glycerin to make hand sanitizer.

Here is what I discovered: These are SPONGES, so they take a lot of paint!

D7C89509-0008-438E-83CD-F4C23833F20D

It soaks right in and makes them hard to decorate.  I decided that my best move was to cover them in a solid coat and leave it over night to dry.

Once dry, it was much easier to add other colors and details.

B392FCF0-A0DF-4D93-9BD2-23B24B6DE824

In the scheme of things, these are not anything that were worth much.  But, they gave me joy and in my mind, creativity is good for the soul, whether you are making something simple and cute, or a spectacular masterpiece.


A Quick and Attractive Fix for a Soot Stained Mantel

how-to projects, redos

1A88CE9D-AB9A-4135-91E7-0AC001002BA3

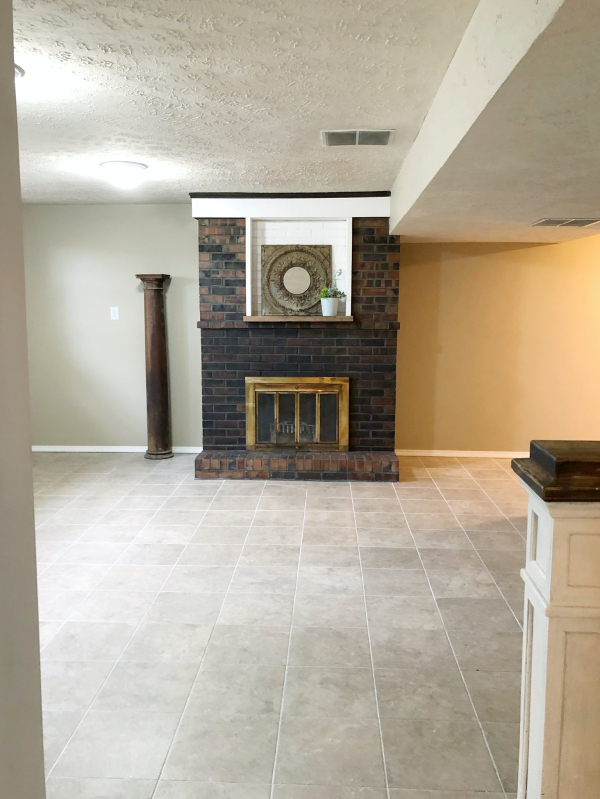
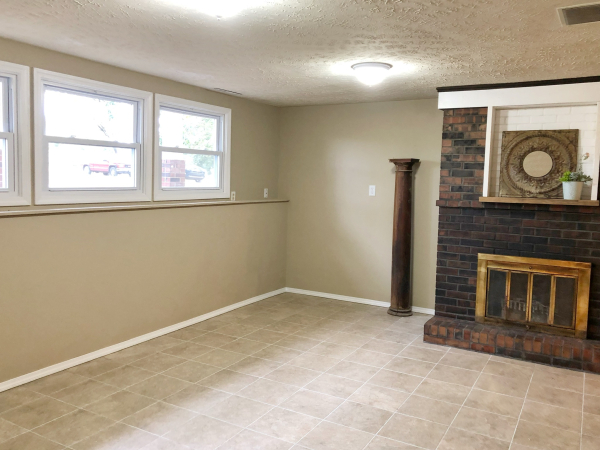
This is the downstairs den in the house we have been working on.

263A95DA-A535-4FE8-A386-00EF3471C184

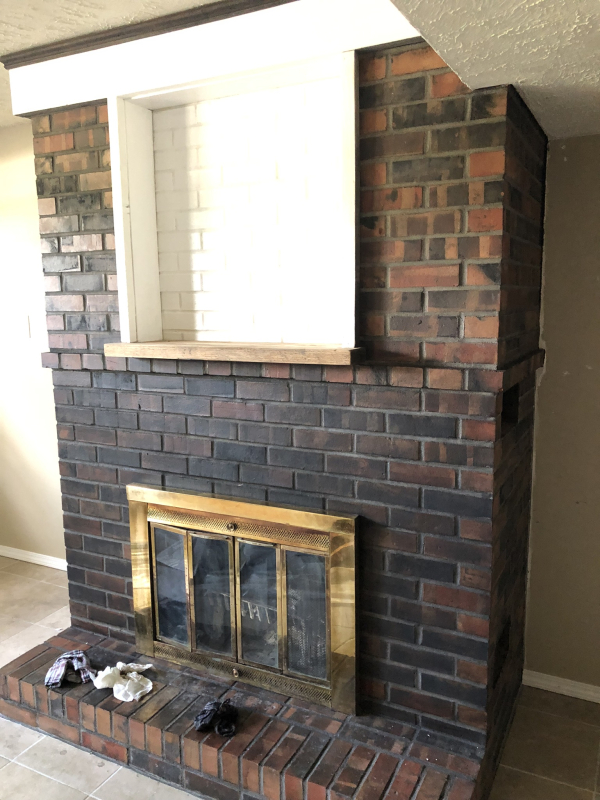
Here is how it looked in the Zillow listing when we bought it.  It didn’t need a lot to get it market ready, fresh paint, two matching light fixtures, and a mantel tweaking.

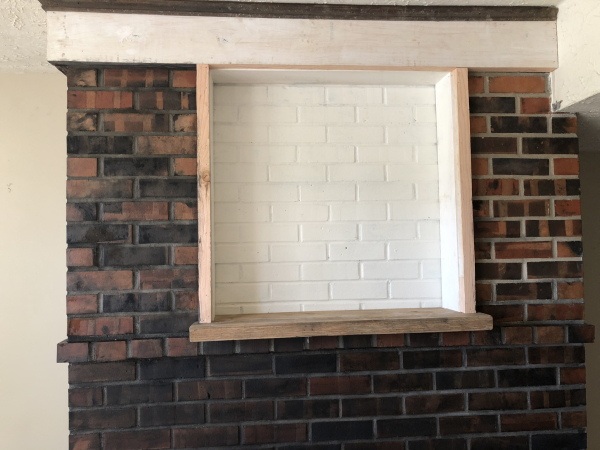
While living there, my son had done some customizing to the fireplace to fit a piece of art work he had built in.  After taking that out, it needed some trim and paint to restore it.
EB7840CC-F54E-4CF8-B2A4-8ADF0EB8F8F3
Also, there was a dark, sooty blob above the doors.  I used black concrete stain to blend the rest of the bricks to match.  This is a “during” picture.

B2700945-E5BE-4C74-802A-D031DDF9384FThe bricks and mortar to the left are done, the right are not in this photo.  Doesn’t the black wash (Is that a term? Like white wash?) update the hearth?  I think this treatment drug the fireplace right out of 1972!

15D163E5-83E6-4AEB-8A23-B9ED5BEC352C

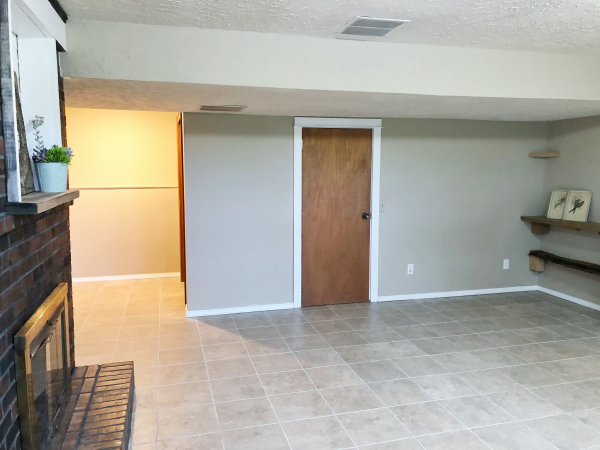
The rough hewn and live edge shelves in the corner were installed by my son.

We repainted the ceiling, which the previous owners needed to do ages ago.  And all of the trim was freshly painted. 

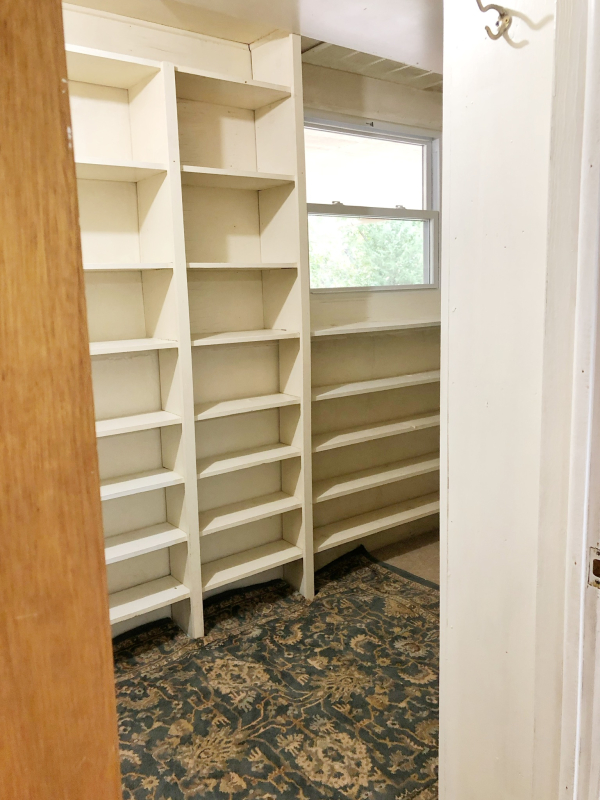
3755A7D0-5E69-4A14-9E84-07AE194BDA85Behind that door is a giant, walk in storage area.  I cut notches in a  rug to make it fit over padding glued to old linoleum, repainted the ceiling and the shelves.  This was the last thing I did, and I used up all of the odds and ends of light colored paint that I had left.

It seemed okay for a closet, and at least that made it clean.

A3190E34-8C93-493D-90DE-25F0BB5132A6

You know one thing that brightens a room that most people don’t even notice?  Repainting the air vent covers.   Over time, with gas heat, they can discolor.  So can the area around them.  Cleaning and repainting is a small thing to do, and I will bet you no one even notices that I did it.  But I will also bet you that they can feel that it was done, even if they don’t see it.  

The house feels much fresher and cleaner with the vents tidied up.

One thing I did not do that bugs me, is that I left the shelf under the windows the same as the walls.  Not that it looks bad, I think the unbroken color is a good choice.  But as a painter, I know that eggshell finish wall paint isn’t as durable for shelves as a satin or semi gloss.   I could do a quick, clear coat over it to ease my mind.  


What have I been doing besides raising goldendoodles?

how-to projects, Tutorials

3DF2A187-9B66-4FF6-99EA-A9C4B7AF1CB2
About a year and a half ago, we bought a house and 13 acres for our son’s family. 

Sadly, their circumstances changed, they can’t keep it.  They all moved out and renters stayed a few months.  Between cool, hippy projects my son did, that aren’t mainstream enough for new buyers, other projects that he began but could not finish ( since he thought he had a life time, not a year to do them) and the neglect that comes from strangers using a home-it needed a LOT of work.

613E4FC5-C878-471F-BFA6-2D5363843A4F

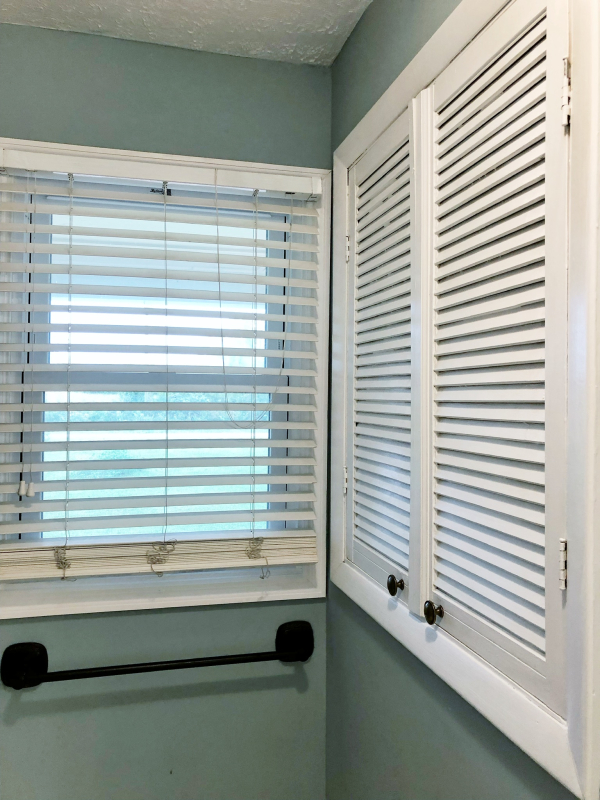
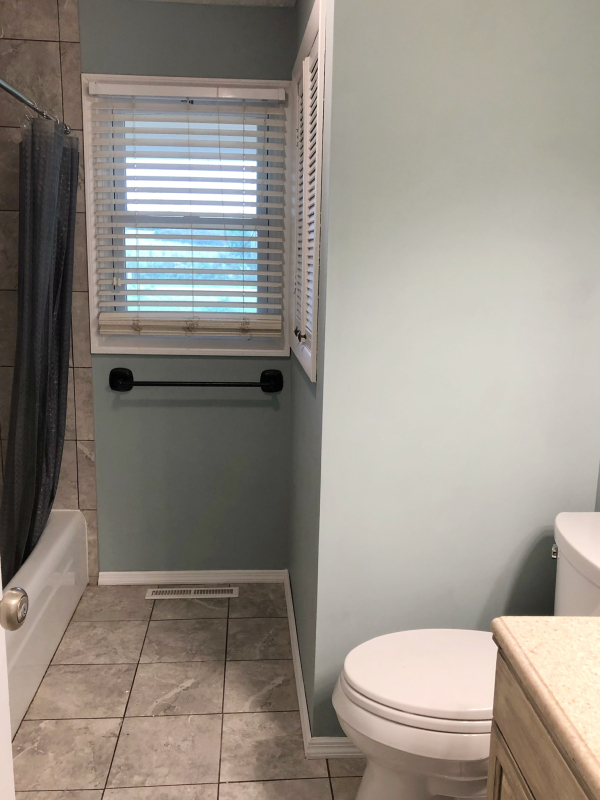
Also, the house was pretty dark from the original seller’s paint choices. I wanted to lighten and brighten, but not go so far as my own home, with its shabby chic, romantic style.  

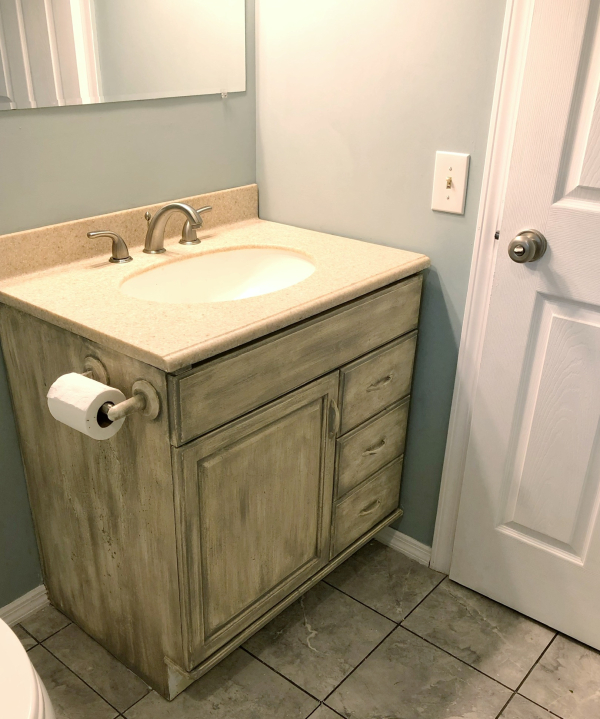
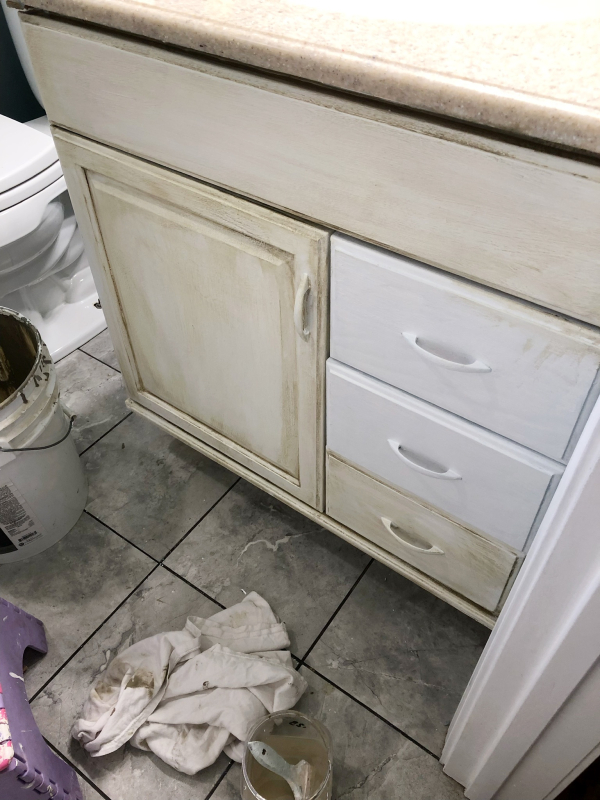
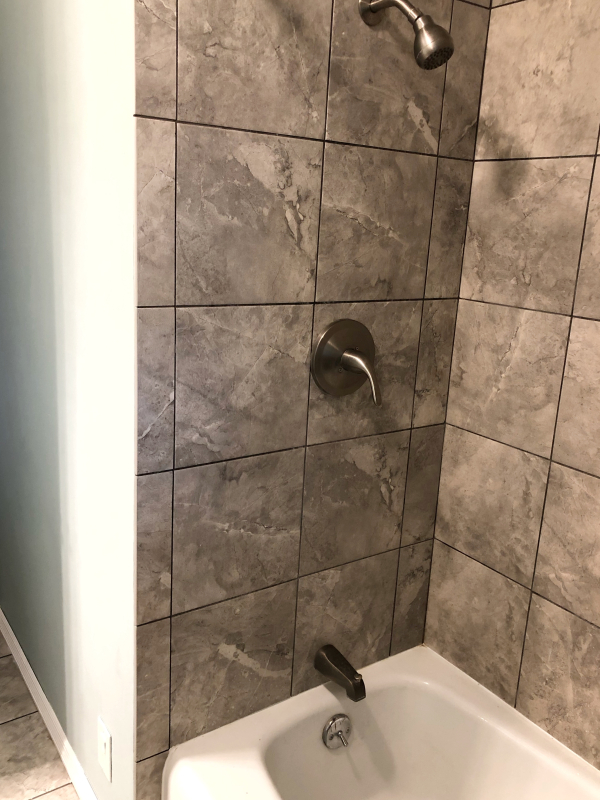
So I chose a warm blue for the bathroom, and repainted the mismatched Formica yellow cabinet.  The butter yellow did not match the tan counter tops or the gray floors.  So I tied those colors together with paint.

B0C2FF7D-A174-448C-9E27-261751FFAF86

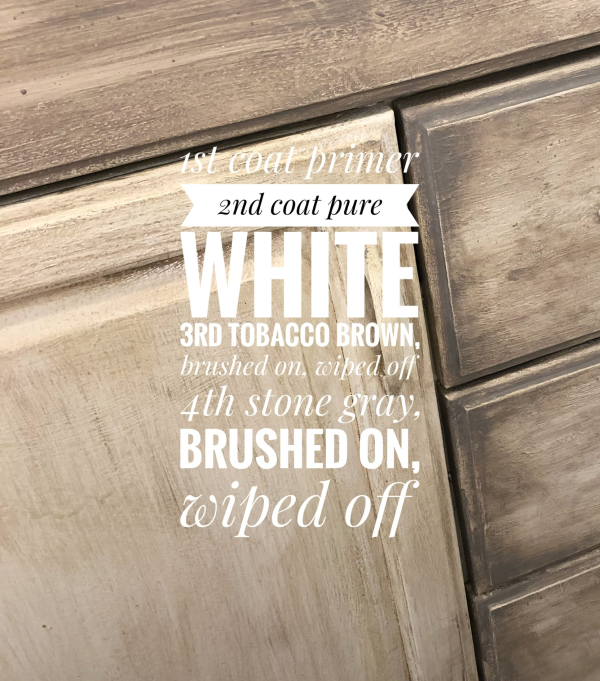
First, a bonding primer.

Next white.

Then I brushed on a color to match the counter top.

(See the paint in the bucket?  That is the original wall color, way too dark for this room)

941C1121-EB82-4CF8-AD4D-D5BDFB86DE70

Over all of that, a stone gray to match the floor.

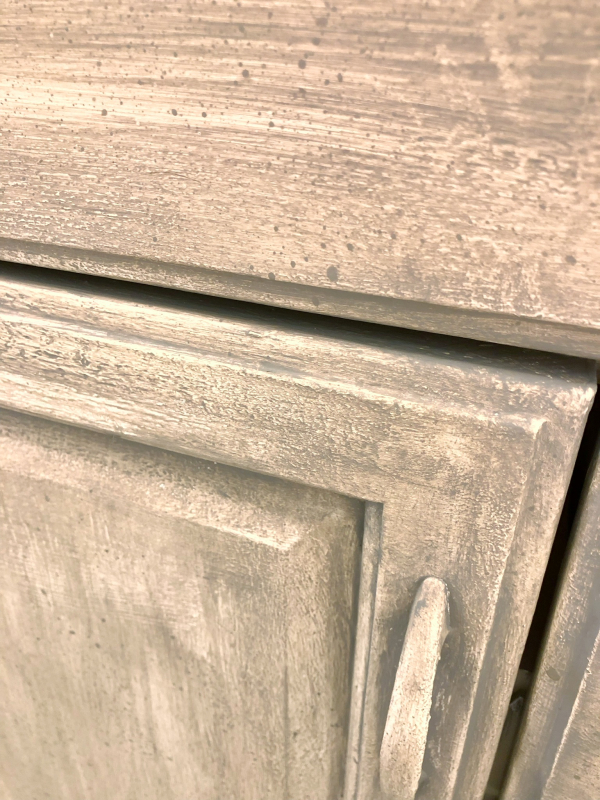
Then, flecks of grey splattered with a toothbrush.  The grey is a Behr exterior paint that I used on the barn, so is very durable and every bit as good as using a clear topcoat over the other layers.

8A5A36C2-976E-47AA-81DD-78C8EB72F857

I wanted a farm house look.  And I didn’t want to spend any more money, we are already spending thousands on the place.

So I used what I had on hand and made it work.  Now, I love paint treatments, so in my mind a custom painted vanity (that was in good shape and not very old) is better than replacing it with a brand new one.

I hope buyers agree.

F5B687CF-99ED-4BBF-80C4-7E4A877C667C

I really really really really hope that buyers agree!

The bathroom was newly renovated when we bought it, so had “good bones”. 

E76B6433-0237-4AC0-8A80-4DCF90271DCE

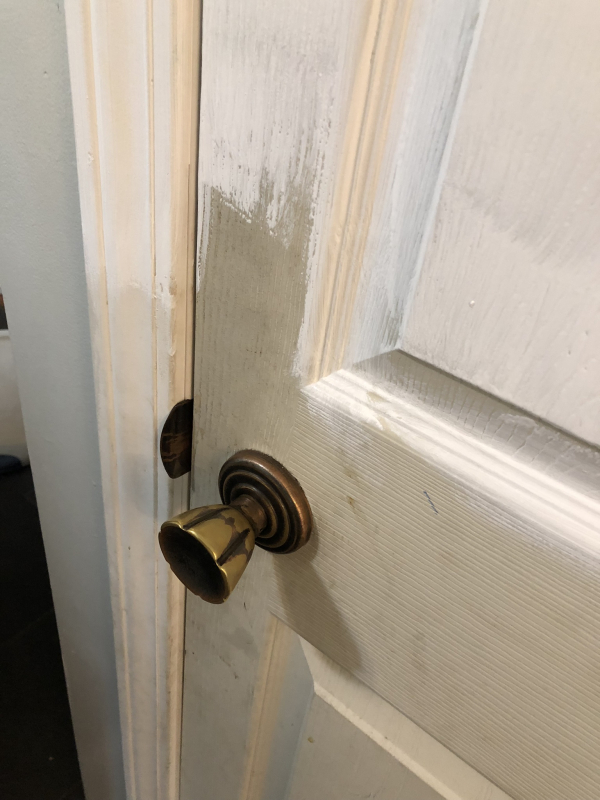
But the people who remodeled did not paint the doors and woodwork they installed and left it as is.  The primer that comes on white woodwork from the lumberyard is not a bright, clear white and it grabs dirt.  So I am repainting it all with fresh white in a satiny finish.

D07B9E12-7D7F-478C-ADF0-A6150F9E5505

Including the cabinet doors.  

BD35D053-4EE7-44B3-B69E-7BE7C6E879F2

All of the rooms are getting spiffed up, and this is the first one all done.  I am afraid that I don’t have before, except ones from Zillow.  As I redo and stage, I can show some of them

Please wish us luck, I am afraid that I will need it!


How to Make a Holiday (or everyday) Felted Gnome

fairies, holiday decor, how-to projects, Tutorials

IMG_2968

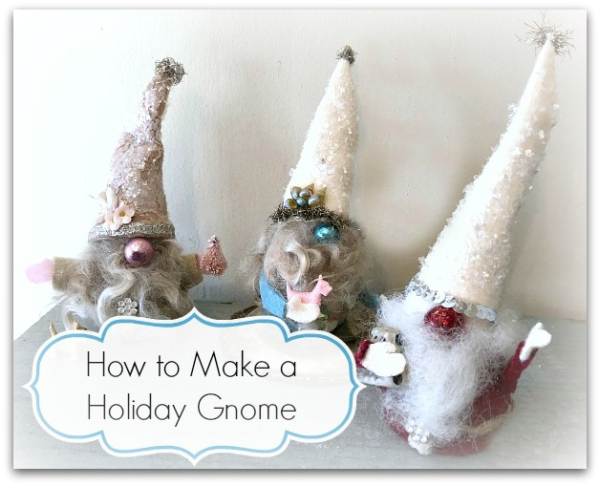
For quite a while, I've been wanting to make a furry, lil, gnome guy. Then, my Sissy sent me photos of some she collected for her holiday display and I was freshly motivated to make one for her as a gift (and a few more too)

I chose to give these a holiday theme, with the mica flaked caps, mercury ornament noses, and tinsel trim, but of course, gnomes aren't just made to hang out with Santa's elves, they can be enjoyed year round without the festive additions.  A nose can be a wooden ball, or a pom pom. You can leave the tinsel or glitter off.  (Oh, but why leave them un-glittered??? Glitter is a daily adornment around here, not just a holiday foof!)
IMG_2837

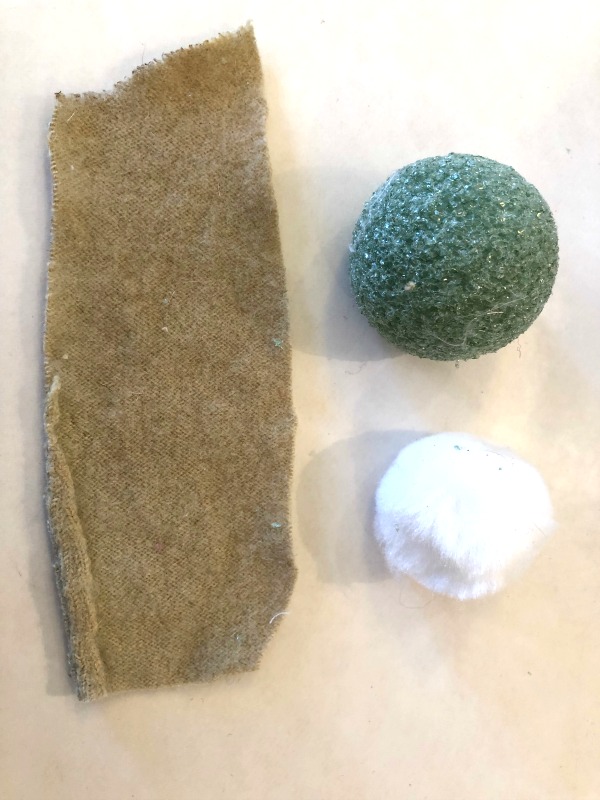
I started with a styrofoam ball, a rectangle of felted wool, and a pom pom.

You could also use a wooden ball for the head, or a smaller styrofoam ball.  You can exchange the felted wool for regular felt or other fabric, too.  In the picture of the gnome trio, above, the red and blue are felt, the pink and tan is a wool sweater I got at Goodwill and felted. Either works.

Although, I noticed that my favorite glue in the world, The Ultimate, doesn't do as well on felt as it does on natural fabrics and I switched to FabricFusion instead.
IMG_2839

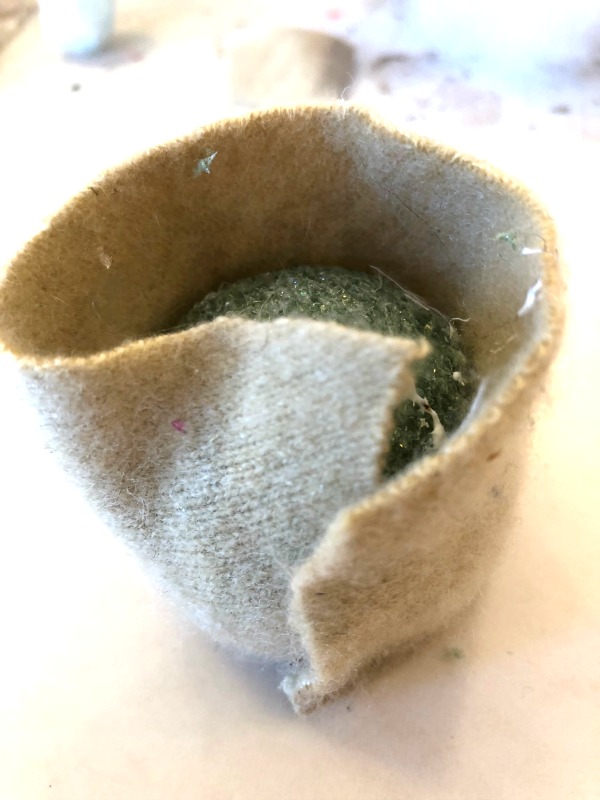
To begin, I sliced the bottom off of the large ball with a serrated knife, to make a flat surface that allowed the critter to stand up.

Then, I covered the ball with glue (NOT THE FLAT BOTTOM PART) and wrapped the fabric around it.

I pinch pleated and folded the top down, pressing it into the glue.

With scissors, I trimmed excess, top and bottom.

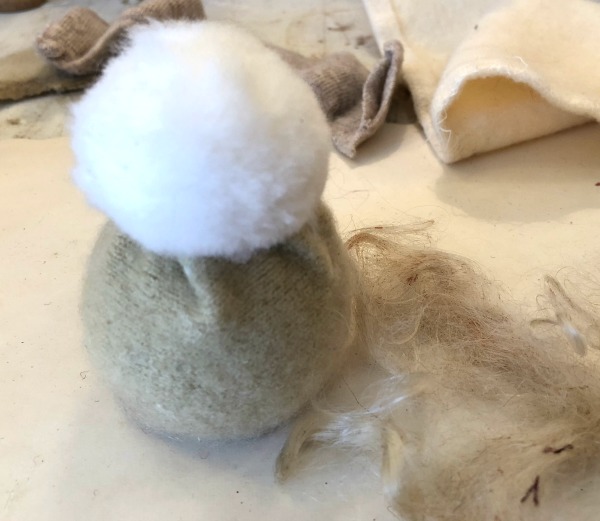
Next, I glued the smaller ball to the top as a head.
IMG_2841

On mine, I added the beard and hair (made of wool roving, found at Hobby Lobby or Walmart) at this point.  I discovered that it would be easier to decorate the torso before adding the beard, because I was holding the hair out of the way to attach buttons and a belt.

So, if you want the body decorated, do that first.  I'm afraid it doesn't really show much, if you have a glorious beard flowing down his belly, so the belt and buttons are sort of optional.

To add them, simply cut a string, ribbon, bit of twine, or whatever you'd like to use, to fit around his midsection. Glue in place, and top with something to emulate a belt buckle. I chose a small rhinestone cluster.  Then, add a row of buttons made from either actual buttons (the smaller the better) or beads, or crystals.  Do 3 dabs of glue down the center of his body, and place the baubles into the glue and you are done.

The beard is wool roving (or dacron if you'd rather) is pressed into glue on his face, and then arranged to look beard shaped.  Don't be stingy with it, these guys are just about lost in the hair.  Add some around the back of his head too, but not as much or as long as the beard on his face.
IMG_2842

I'm all about no-sew projects.  And no-measuring too. I found that the felted wool worked perfectly with gluing, but the regular felt did better with a bit of stitching.  It wasn't too much, so I struggled my way through it, thinking I was being really brave about facing my nemesis- the dreaded thread and needle- when my pal, Beth, took it away from me and quickly sewed it up.  I have a feeling that she really wanted to sew my mouth shut too, but settled for just fixing the hat for  me.

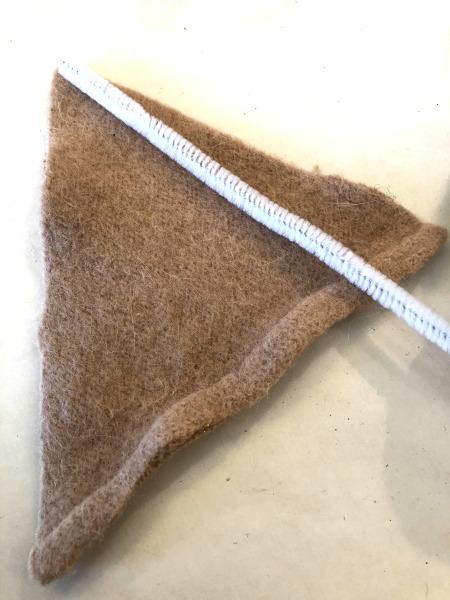
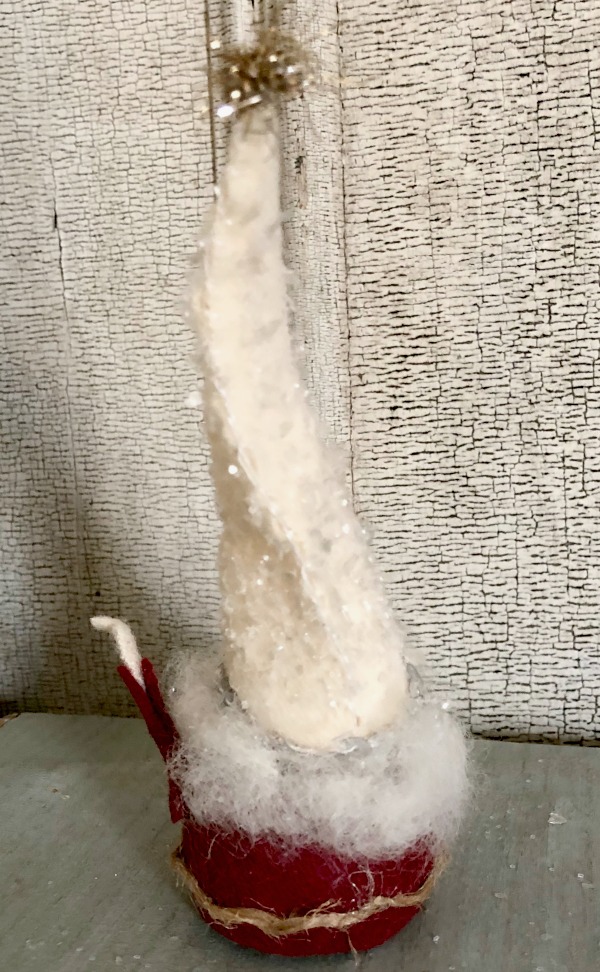
I like hats that are tall, and have a bend in them.  To get the bend, I glued a pipe cleaner inside the triangle I had cut to make the hat.  
IMG_2965

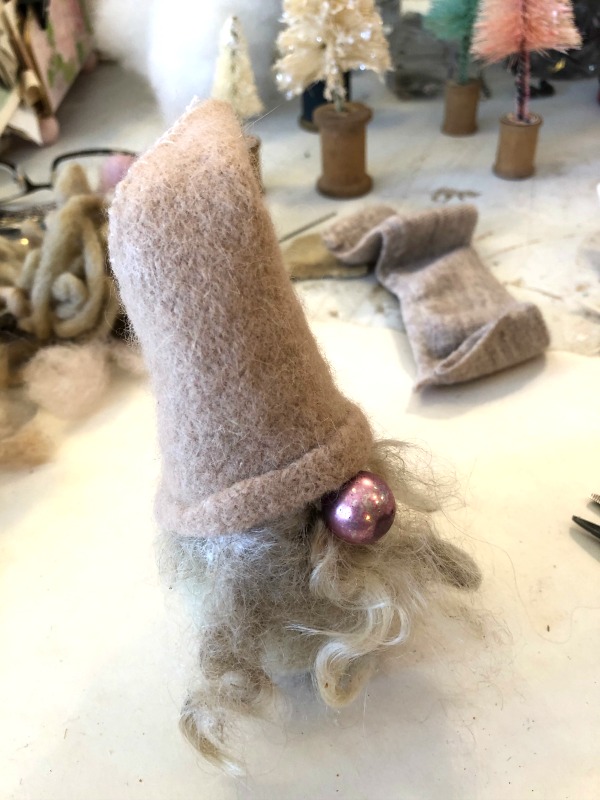
The triangle was cut extra big, and then held in place on his head to see about what size it should be, trimmed to fit and then put together (with glue or stitching).  After, I glued it to his head.  

Here is a back side of the red gnome to see how much hair I gave him.  
IMG_2843

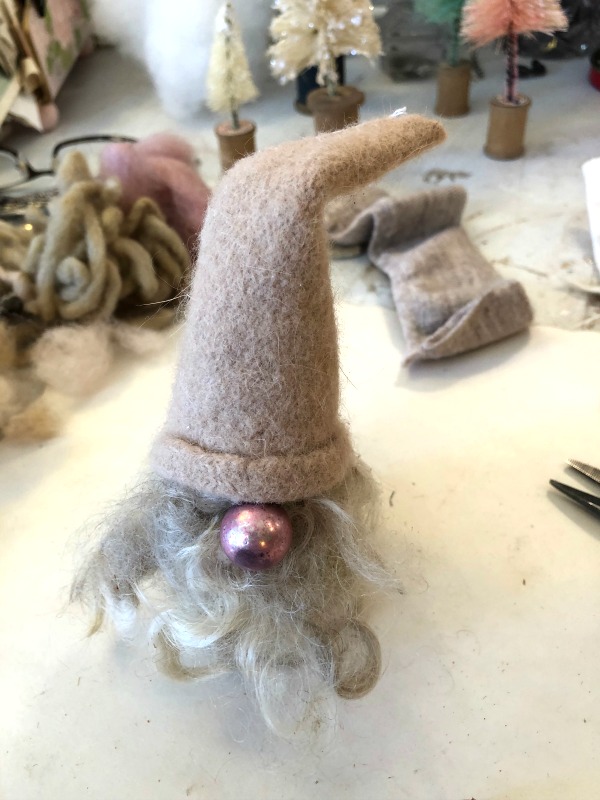
As you can see, the face is mostly hat and hair.  

He has a small, vintage, shiny brite bead as his nose.

This hat has a rim that is actually the seam of the felted sweater, which was a serendipitous accident. I just happened to be using up little remnants of the material and this is what I had. 
IMG_2875

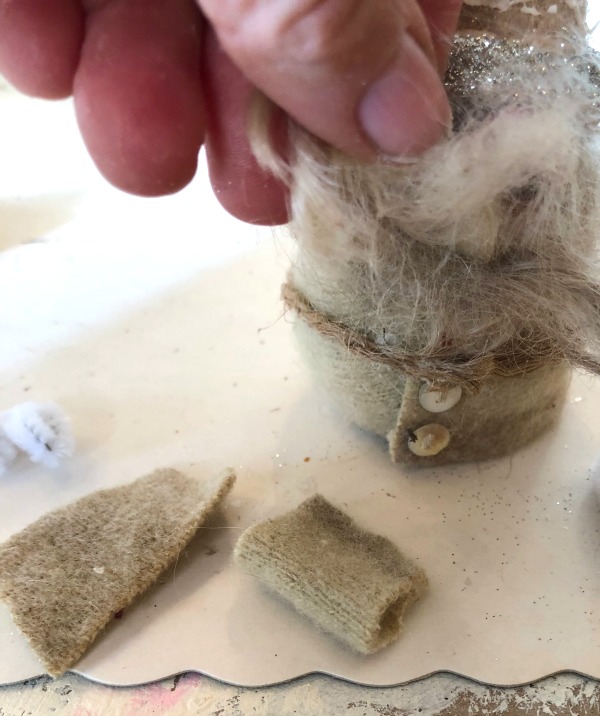
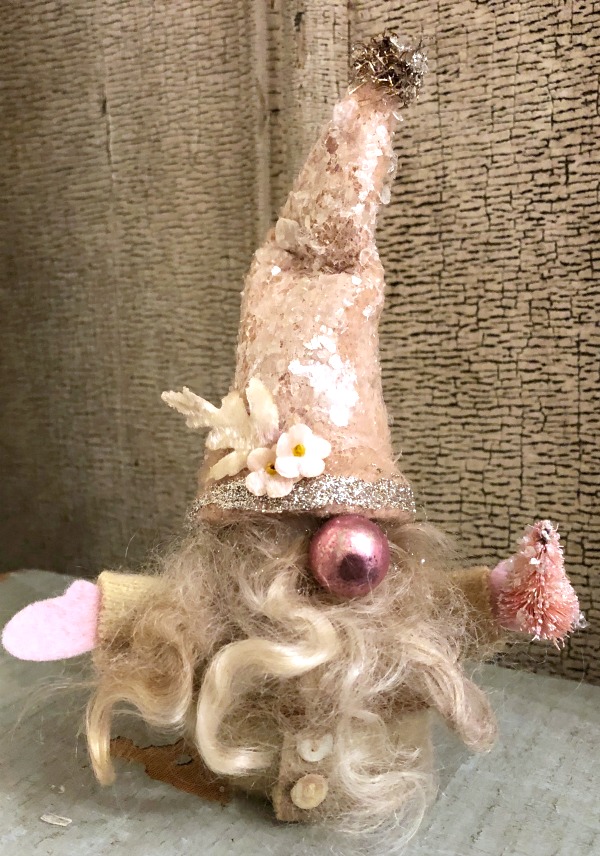
The arms are little rectangles glued in half and added to the body.  I cut out mitten shapes and stuck them into the sleeve opening. Mittens are as simple as an oval with a thumb. If you aren't comfortable with that shape, a plain oval works too.
IMG_2880

Left on their own, the arms will stand straight out.  You can glue something, like this mini tree to one.
IMG_2971

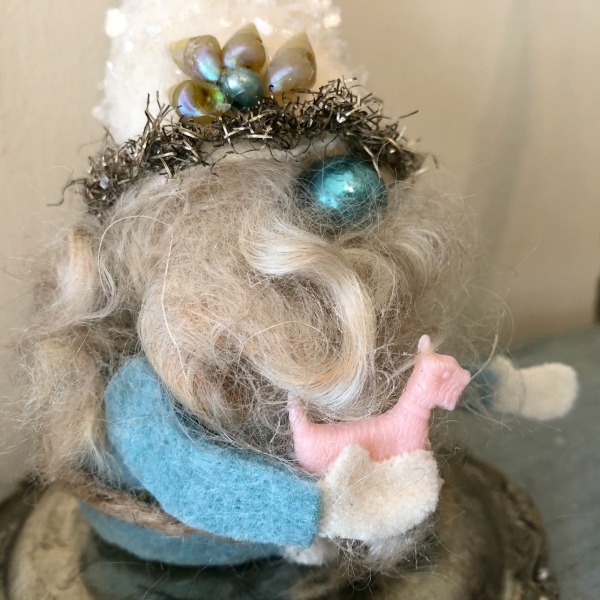
On this one, I glued a puppy charm onto his sleeve and glued it to his beard, so he looks like he is hugging his pet.

I've added mica flakes of glitter to their hats.  And trimmed some in tinsel, some in other glitter.  You can add a tiny jingle bell, or bead, or tinsel to the tip of the hat too.

(I gave the blue one some iridescent sea shells because he is a beach gnome for Sissy)
IMG_2968s

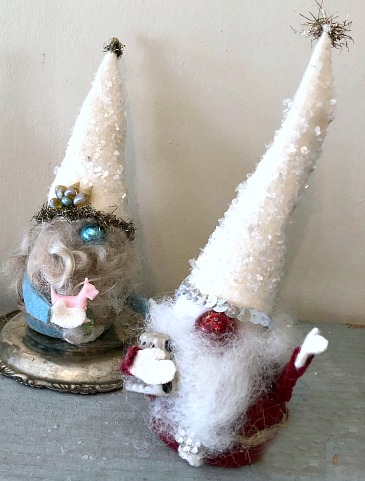
The red one for Guncle Randy, the Pet Butler, is also holding puppies and has a sequin trimmed hat.
IMG_2844

All of these gentlemen have a lot of personality and charm.  And are easy to personalize by your trimmings and color choices.  
A Cameo Makeover

how to's, how-to projects, jewelry

IMG_3800

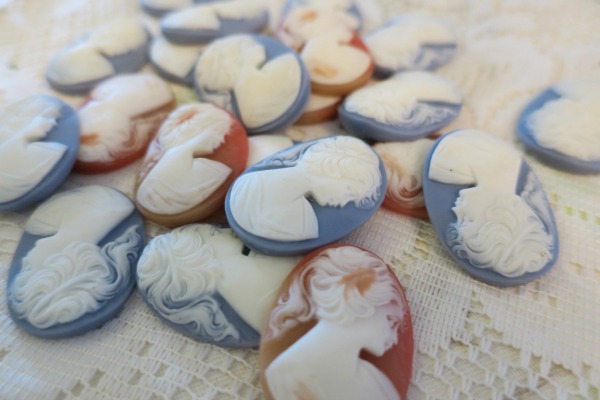
I found a deal on these resin cameos, but thought they were a little too obviously resin.

IMG_3801

So, I thought I'd age them up a bit.

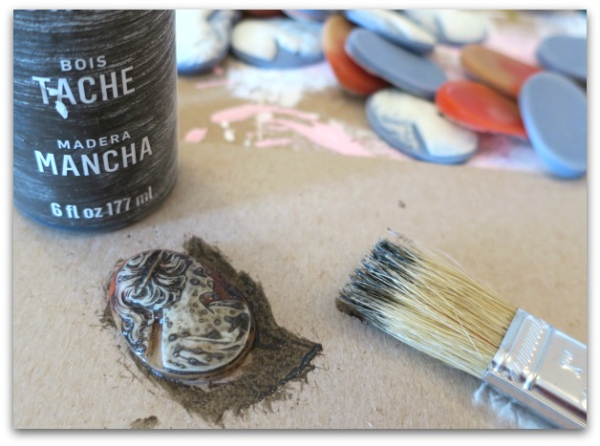
I used this Martha Stewart stain, but a dark glaze would work too. Or if you were quick and careful, watered down brown paint would do.

IMG_3802

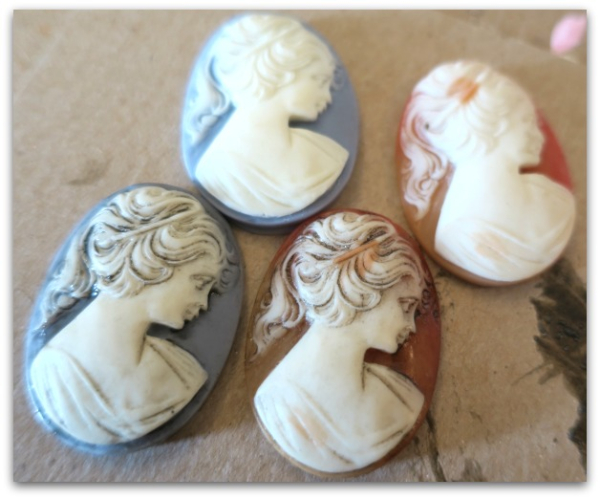
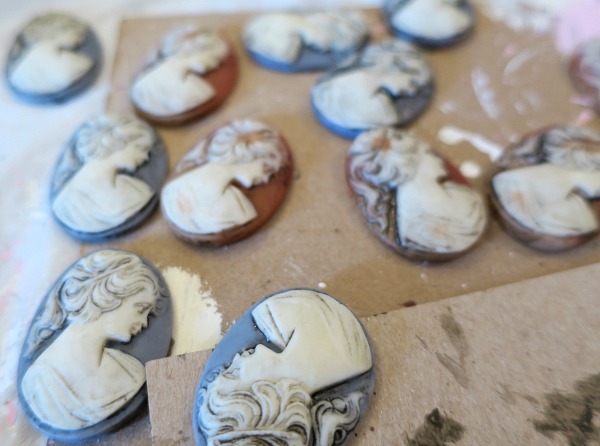
Just brush it on, wipe it off, leaving the darker tone down in the creases and shadows.  Here are some before and afters.

IMG_3803

I was happy with the way they turned out.  


More tart tin Easter decor and another step by step tutorial to make your own

holiday decor, how-to projects, the Boutique at Karla's Cottage, vintage paper/collage art

IMG_0449

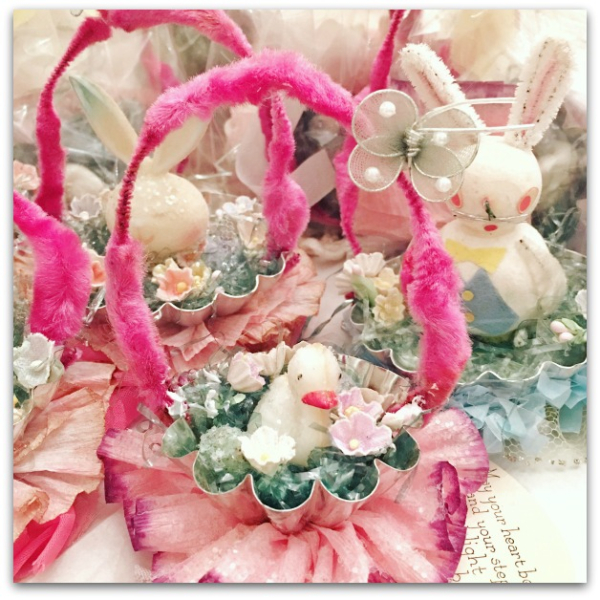
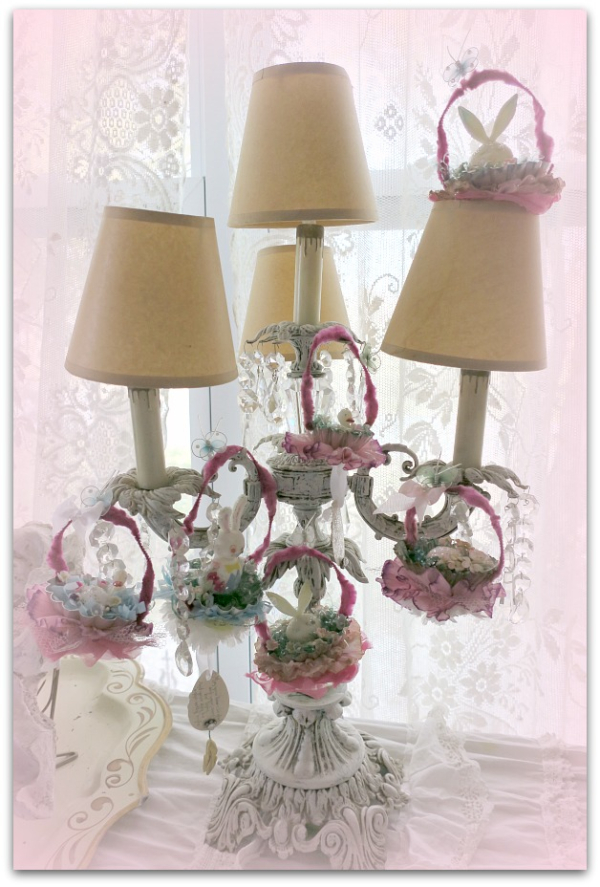
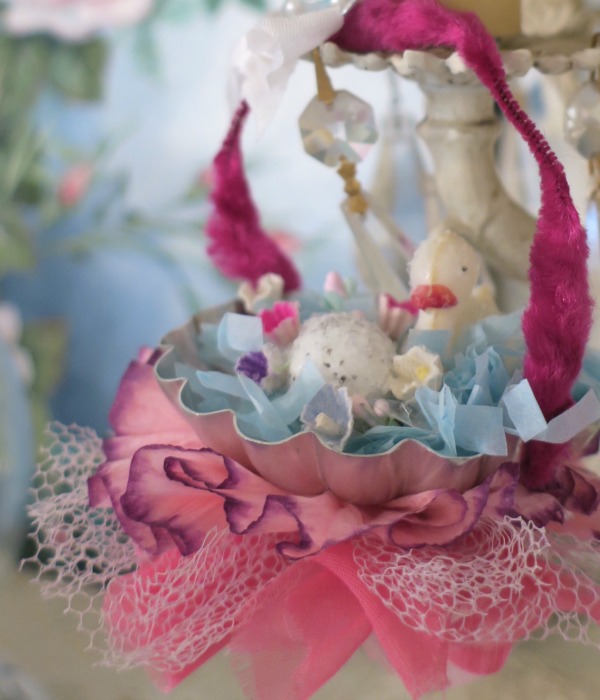
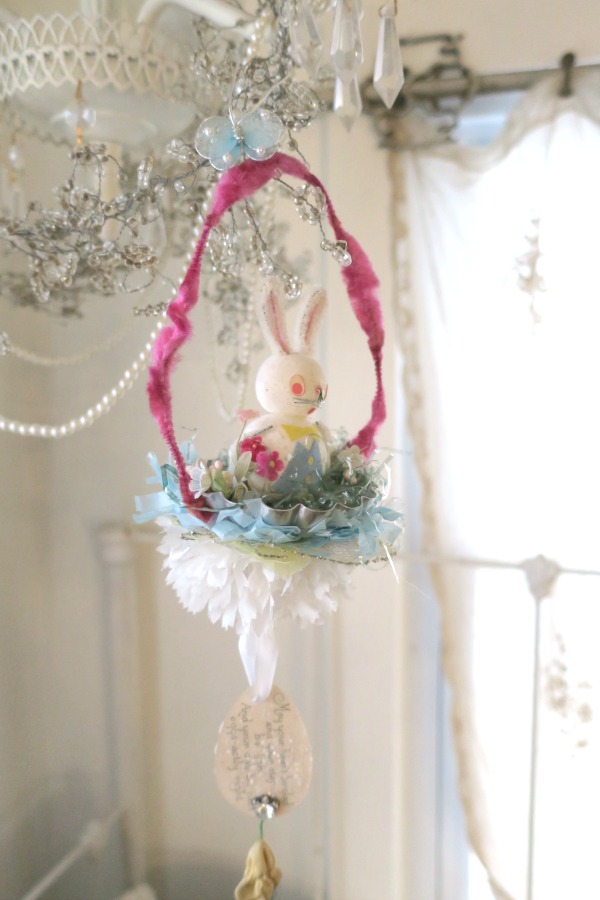
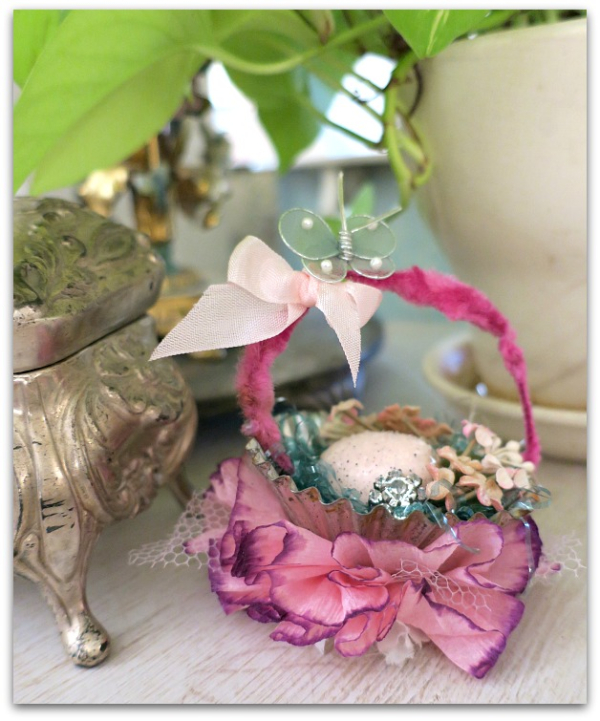
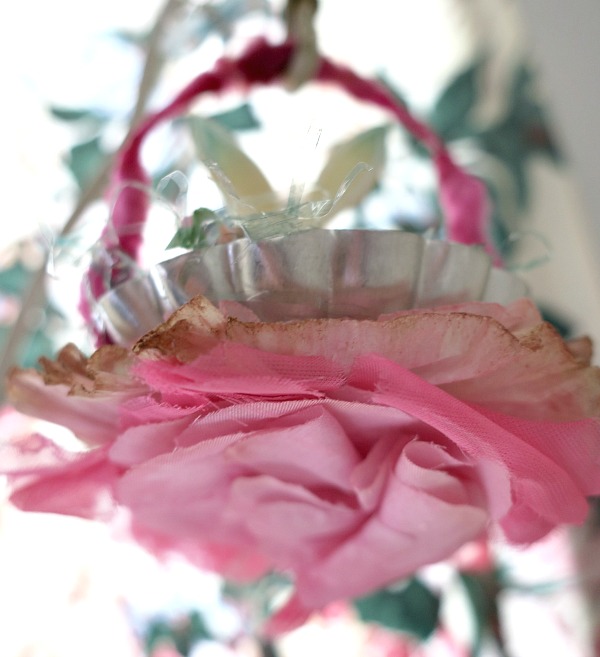
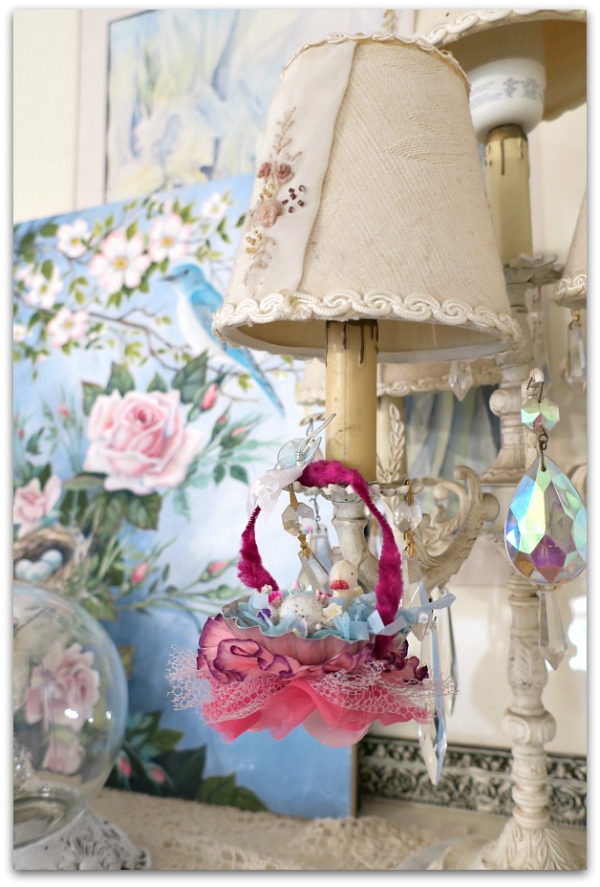
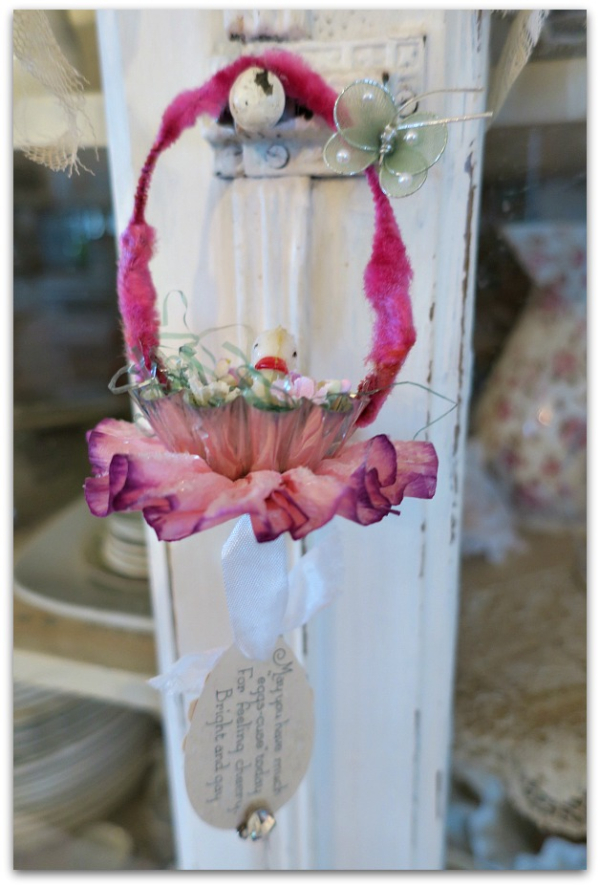
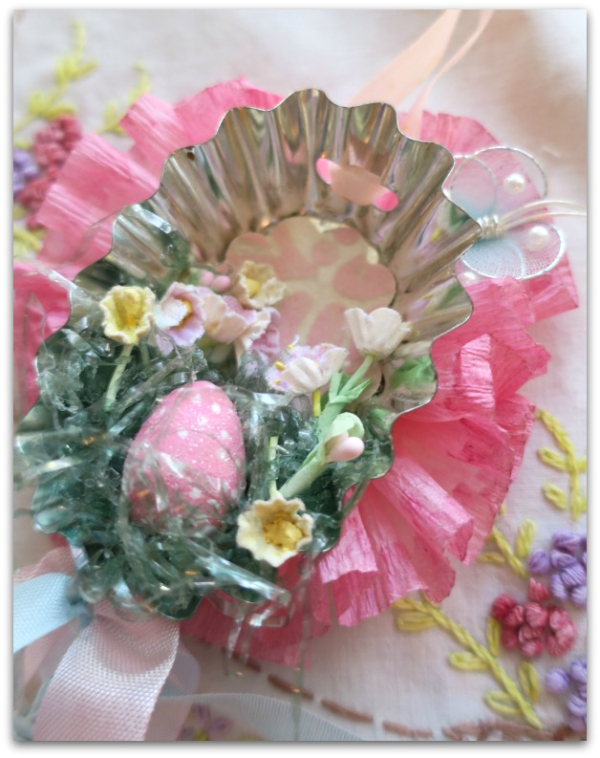
These are just too much fun to make. And I hope that you guys think so too, my previous kits are sold out! So, I made up a few more, this time making the tins into baskets with vintage chenille stem handles.
IMG_1386

There are a different versions completed and for sale in the Boutique as well.

IMG_1422

Because you know me, I start to make something and become enamoured with the process and  make a BUNCH of them! (by the way, I've got more banners and banner kits coming up too)

IMG_1426

And these guys were all so sweet to do.

IMG_1418

All are meant to hang, but a few are okay for sitting on a table top too.

IMG_1392

In case they are hung up, the bottoms are pretty to see.   (of course!)

IMG_1421

Since I listed so many to sell in the Boutique, I'll have to make more for myself, I miss seeing them around the house where I'd hung them for photos.  
Maybe the grand fairies can create a few with me, I think they'd enjoy it too.

IMG_1415

Here is the one I've made up kits for.  I'll tell you directions here, and will use the kits as my guideline.If you do not have a kit, please feel free to sub your own supplies for the ones I  mention.

  • Such as using a peat pot instead of a tin?  
  • Or pipe cleaners instead of the vintage chenille stems for the handles?
  • Or little eggs from a hobby store if you don't have a vintage cutey to add to your own basket?  
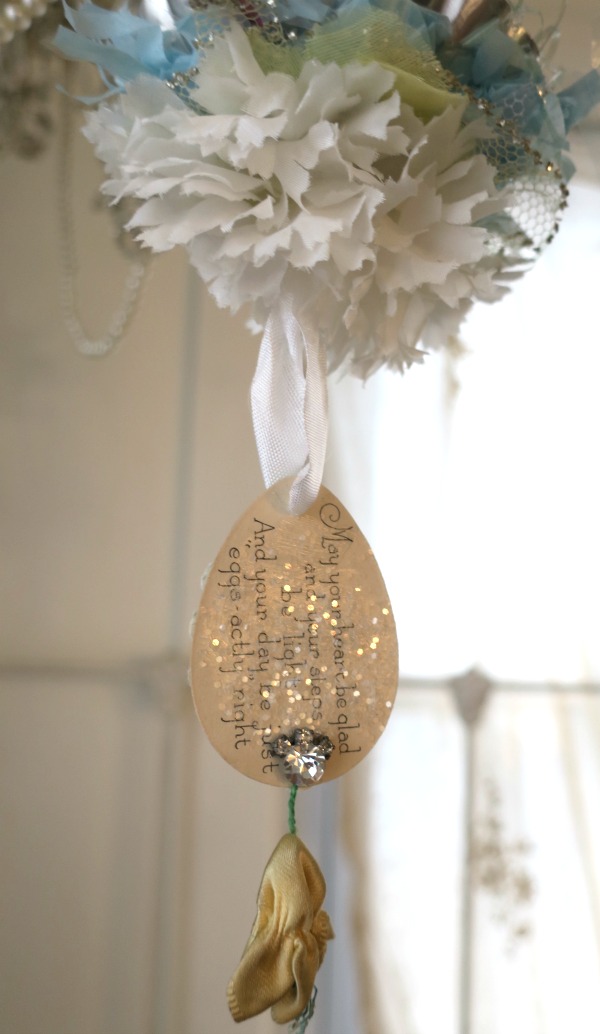
  • I've hung an egg shape taken from a Victorian card at the bottom of my own creation, but you could make your own piece with a pretty hole punch instead.

IMG_1371

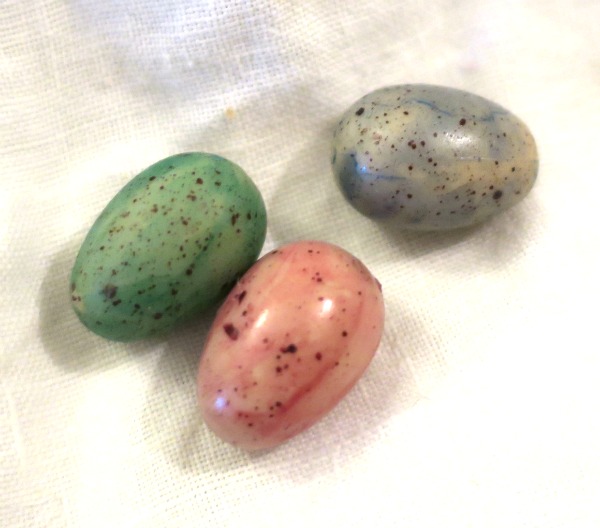
These are the little wooden eggs I have in the kits. I've colored them with Coptic markers, then added white dots to them and coated the eggs with glue and dipped them into clear, crystal glitter. 

Each kit comes with two eggs.

The glue I always recommend is Crafter's Pick The Ultimate.  Use what you are comfy with, but I swear by this stuff.  Always store it upside down in a cup, it is thick and will settle to the bottom.  If your bottle lasts for more than a few weeks, be sure to stir it with a dowel, because that stuff will not shake up.  

IMG_1372

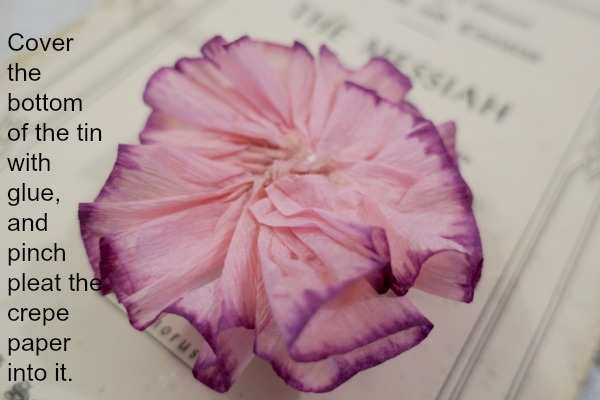
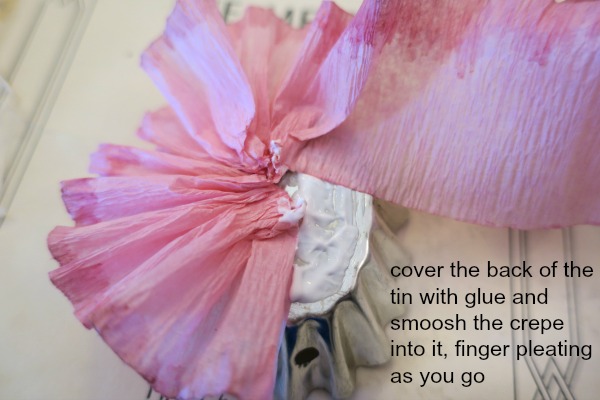
The bottom of the tin is covered in glue, then crepe paper. You can see more pictures of this step in the  post I did last week– here.

IMG_1375

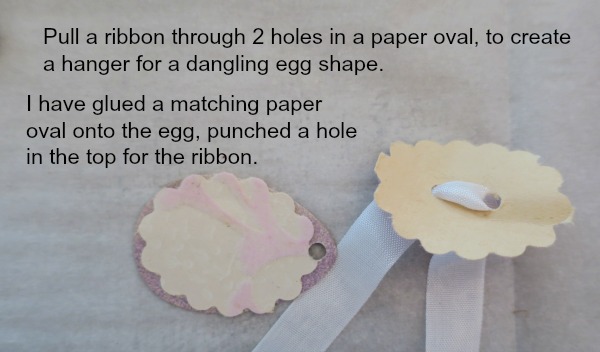
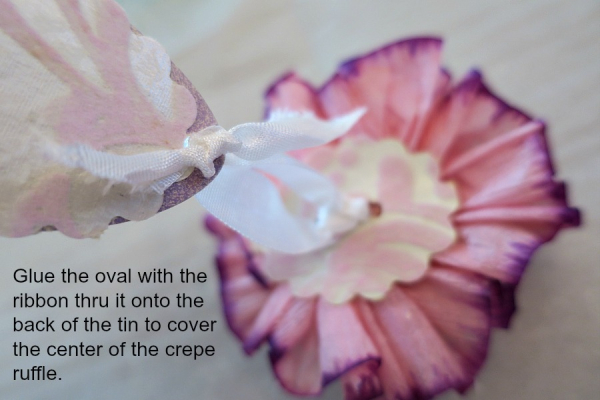
I always cover the rough edges in the center of a crepe paper ruffle medallion.  This time, I used a decorative hole punch on flocked wallpaper to make this oval.  Another oval goes onto the back of the egg shape that will hang from it.

Two holes are punched into the first oval, and a ribbon is pulled through it.

IMG_1376

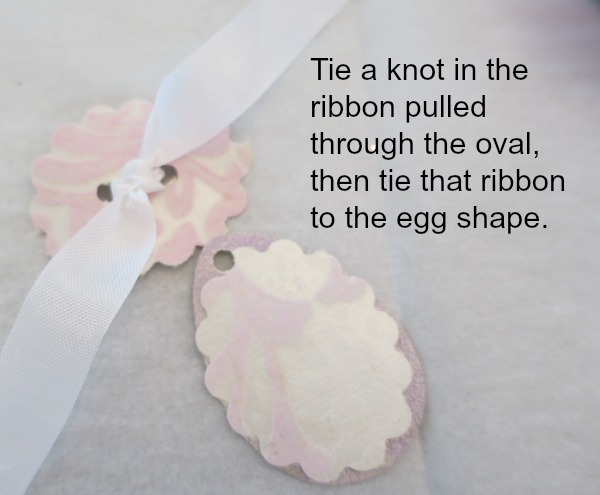
A knot is tied in the ribbon, then the dangling piece is tied onto the bottom of that ribbon.

IMG_1378

In this photo, I am holding up the egg shape piece that is tied to the oval that was glued over the crepe paper ruffled medallion on the bottom of the tin.

IMG_1379

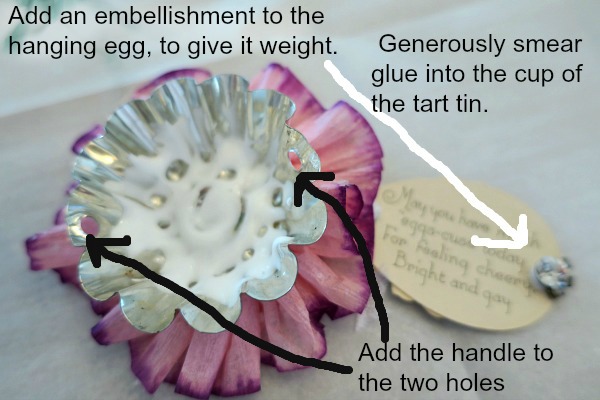
The paper piece that is  meant to dangle is pretty light weight, so I added a rhinestone cluster to make it a bit heavier. That will make it hang nicely.

The tart tins that I provide in kits have the holes pre cut.  If you are doing your own without a kit, use a Crop-O-Dile to cut them, that amazing tool makes it simple, and slices through the metal like it is a piece of cake!

The ends of the pipe cleaner, or chenille stem go into the holes, poke thru and fold up.  Secure with a dab of glue.

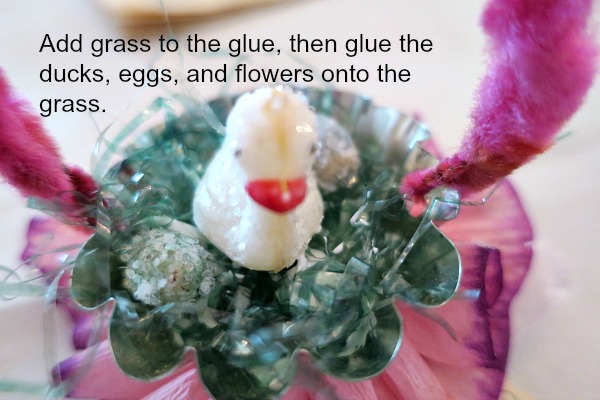
Then, generously add glue to the bottom of the tart tin.

IMG_1380

I provide a bit of faded, old Easter grass. But new grass would work too.  Press it down into the glue, then add more glue to that and add your embellishments. You might need to hold them in place a moment or two so that the grass adheres firmly and your pretties stand up right.

IMG_1381

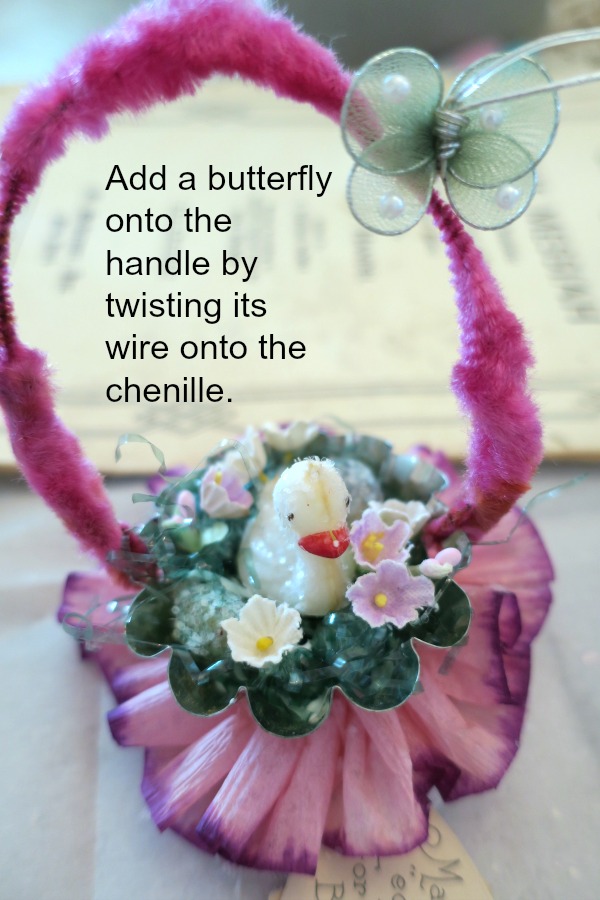
The butterfly in  my kit is a sweet little millinery piece that has a wire on it, that wire simply twists onto the handle.  Put it near the top, slightly to the side. If it is at the very top, the piece won't hang right. If you put it too far to the side you will weight it over that way and the basket could tilt when hung.

IMG_1428

Once you know the basics, you can make up lots of variations to the themes, like I did.


How to make a vintage tart tin Easter decoration- step by step

holiday decor, how-to projects, the Boutique at Karla's Cottage, vintage paper/collage art

IMG_1368

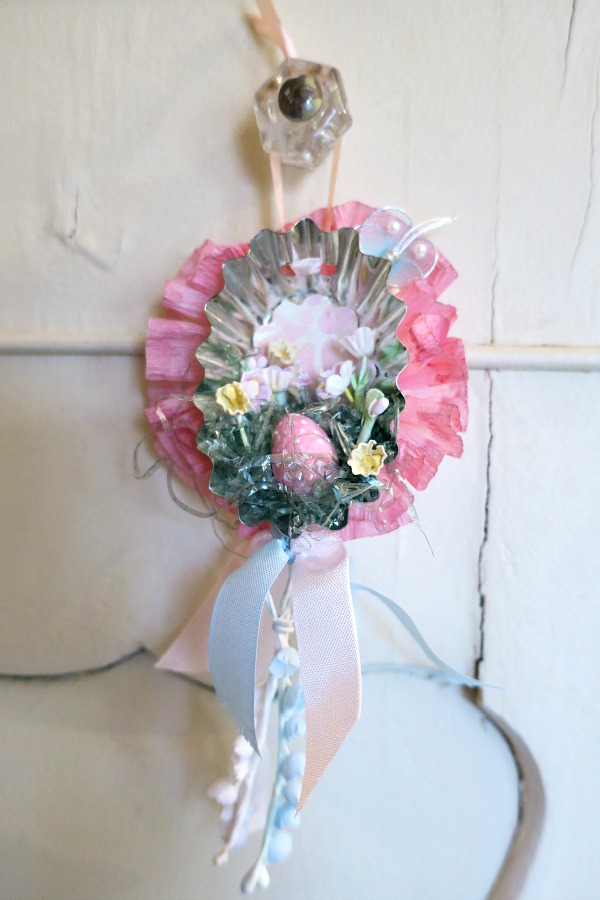
Don't you love tart tins? I never pass them up at estate sales.  I especially enjoy making holiday decorations with them, like this Easter egg to hang.

 I'll list the steps here if you'd like to make one yourself. Since I have some kits available, I'll be talking about building this with the supplies I used, but you can take the ideas and use your own supplies if you don't order a kit.  They are pretty simple to make, and you don't have to do yours exactly like mine, of course.

IMG_1355

The tins in my kits already have holes punched into them.  If you are using your own tin, a Crop-o-dile makes adding holes so easy to do, like slicing through butter!

The top holes are for the ribbons that hang it, the bottom ones are for a bundle of ribbon.

Please put two holes into the fluted metal, as near to the flat bottom of the tin as you can get, at least on the top of the tin.  Putting the holes toward the bottom makes it hang straighter.  Too far the other direction and it will hang oddly.  Use two at the top, two at the bottom, so you can thread the ribbon through them.

After you have the holes in, glue the crepe paper to the back.  I am providing pink crepe, with dyed edging in my kits, so if you are using the kit piece, make sure the deeper color is toward the outside.

IMG_1356

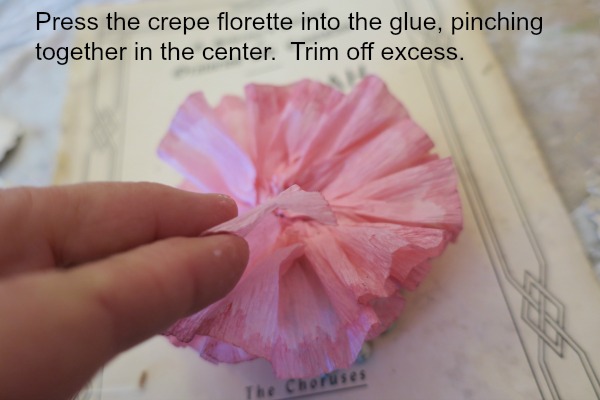
You are making a little floret on the back of the tin with pinch pleats pushed into the glue.  I prefer Crafter's Pick The Ultimate glue.  It holds quickly, and is strong.  

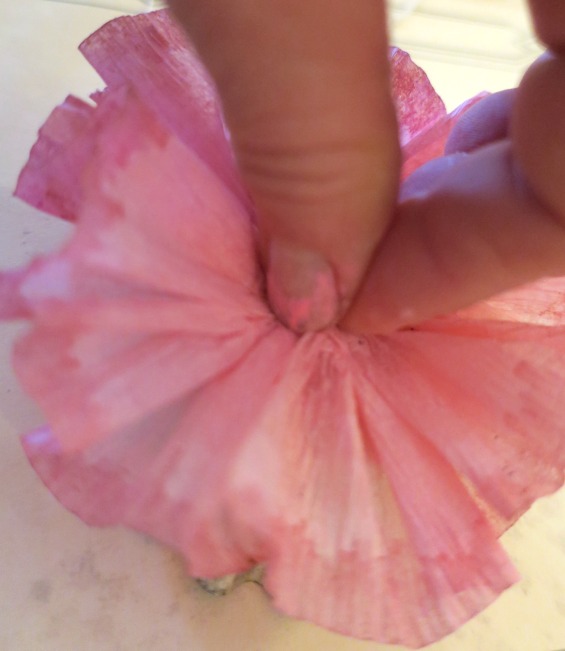
At this point the glue is still mushy enough to slide the crepe paper around and get it positioned, but it will not stay that way long. You can double check that your floret is where you'd like it and the shape is right.  Be careful to not tear the paper.  (My kits contain extra paper, you won't need to use it all)

IMG_1357

Push the center down tightly.

IMG_1358

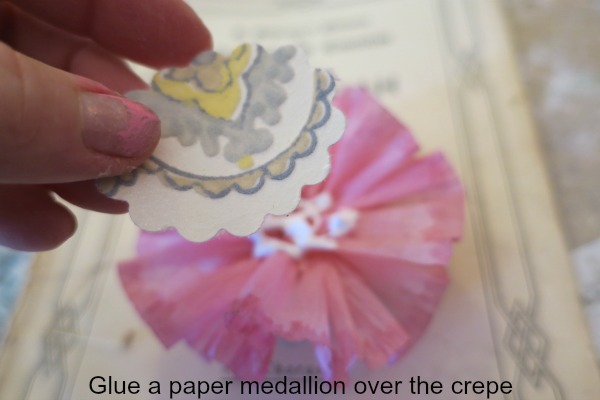
Glue a paper medallion over the back of the crepe paper. (the kits include flocked wallpaper cut and ready to go)  I used a hole punch, but if you don't have one the right size, trace the bottom of the tin onto your paper before adding the crepe paper to get the right shape.

IMG_1360

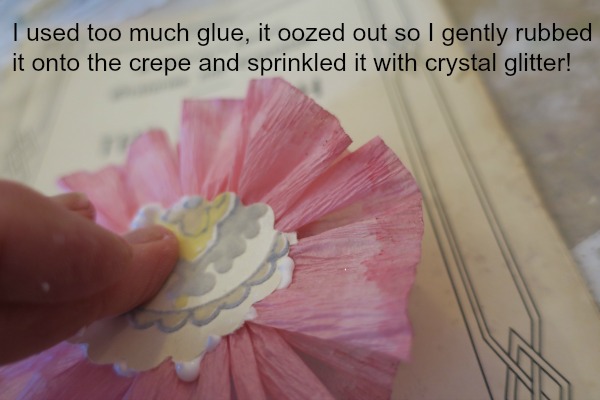
I was sloppy!  My glue oozed out from under the medallion.  

So, I gently spread the glued out toward the edges of the paper with my fingertip, and sprinkled crystal glitter over my mess.  It became an "I meant to do that" moment.

IMG_1361

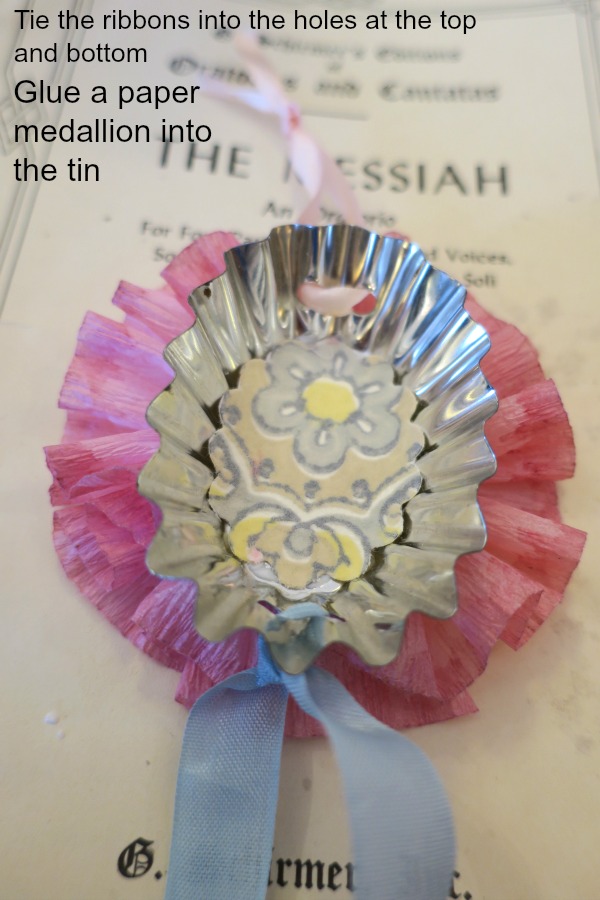
Next, add the ribbon to hang it from, and another at the bottom to tie a bundle of ribbons and flowers to later.  

Then, glue in the second paper medallion.

IMG_1362

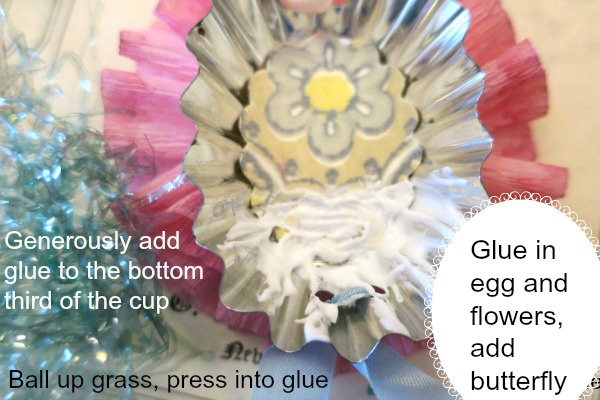
Cover about 1/3 of the bottom of the tin in a heavy coating of glue.  

Add Easter grass (my kits are nicely faded, vintage grass).

Drizzle a little more glue over the grass, and add the flowers and egg (mine is a hand painted, wooden one, with polka dots and glitter)  

If you have exposed glue and feel it looks a little messy, sprinkle more glitter over it.

IMG_1369

At the bottom, add a bundle of pastel ribbons, and a sprig of flowers.

IMG_1367

I have also included a teensy, vintage butterfly in the kits.  If you want to add one of these, you can either twist its wire to the ribbon at the top, or cut off the wire and glue it to the piece where ever you'd like it. Maybe inside the tin? I glued mine to the ruffled crepe.

IMG_1365

The kits are here if you want to order one. The include everything but the glue, and the extra glitter you might want to use.  The painted egg is already "sugared" with clear, crystal glitter.

  IMG_0384

ps- I'm working on adding a few more tidbits to the Boutique too


Wire and lace angel wings

holiday decor, how to's, how-to projects

IMG_0781

When we built the new mantle, I had hung a couple of my paintings and a mirror above it.  To keep them secure, we anchored the frames to the stone.  Which was  a good idea, but wasn't handy for changing out the pictures for the holidays, and I felt that the pink roses were a little springy for Christmas.

So, I covered the glass of the two paintings with burlap, using two sided foam tape, then hung some hand  made angel wings over that.

IMG_0768

I wanted one large pair of wire and lace wings for the giant frame that used to be the top of a Victorian door.

To make them, I used wire wrapped in raffia.  I thought that roughness of the raffia would be a good surface to adhere the lace to, I'd worried that the plain wire might be too slick.  I'm sure I could've made it work by either wrapping the wire in ribbon first, or stitching the lace instead of gluing, but I also liked the rustic look of the brown raffia under the dainty lace I was going to use.

I cut two pieces of wire the same length, and twisted them into wing shapes. leaving a tail on each to twine together in the center to connect the two wings.

IMG_0769

This vintage, beaded, lace dress was from a thrift store for $5.  I cut the lining out and and roughly trimmed two sides of it to fit over the wire wing shapes.

IMG_0771

Glue guns are rarely my favorite tool, but in this instance, just what I needed.  I glued the lace to the top of the wire in small sections at a time.

IMG_0772

Once the lace was attached, I flipped the wings over and trimmed the fabric down to about an inch of excess.

IMG_0773

Then, I rolled it around the wire and glued it down on the backside too.

IMG_0774

I liked them as they were, but wanted some embellishments.  I added a few white feathers, and velvet leaves, to the center, and tied on silk ribbon to hang them from, then glued a faded millinery bloom over that.

IMG_9354

The silk is tied to a small nail I put into the frame.

IMG_0786

When they were hung, they were a bit wonky. I think a heavier gauge wire would prevent that. To keep the wings from swaying and looking like a pair of droopy stockings, I stretched them out and used straight pins to attach them to the burlap.  They keep their shape ok that way, but if I make another pair, I will definitely use a sturdier wire so there is  no droop.

IMG_0776

The ruffled pair of wings is similar to the tutorial Dawn has for angel wings.  I did these differently, but it is the same sort of style.  Mine are layered with dyed crepe paper and more of the beaded lace from the vintage dress, then embellished much like the wired set.

IMG_0775

I'd drawn  my own pattern onto cardboard and covered it.   Dawn offers a pattern and full directions on her site if you'd like to make a pair yourself.  Plus, she is just plain old, nice to visit.

IMG_0781


Scroll to Top