how-to projects

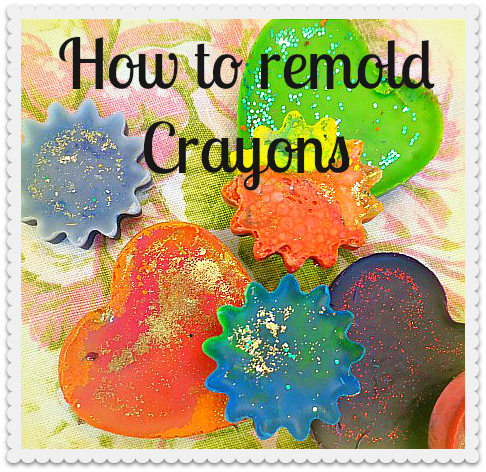
Upcycled crayons

family, how-to projects, Sugarwings


6a00d83451ead569e201a73ddc8464970d-500wi


Our summer of projects and experiments got off to a fine start.  This one really turned out good. 

6a00d83451ead569e201a73ddc83f3970d-500wi

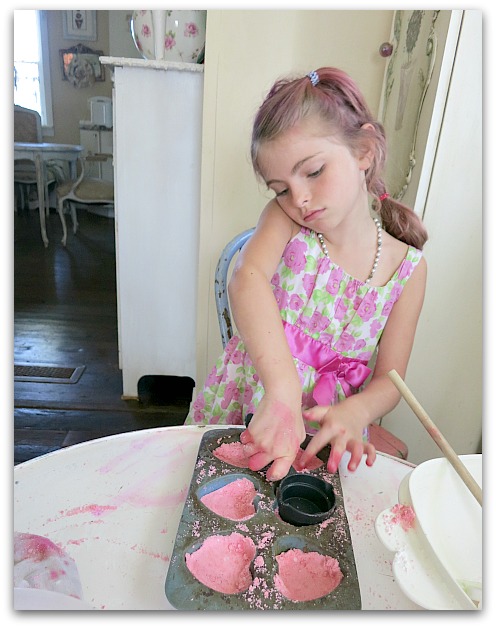
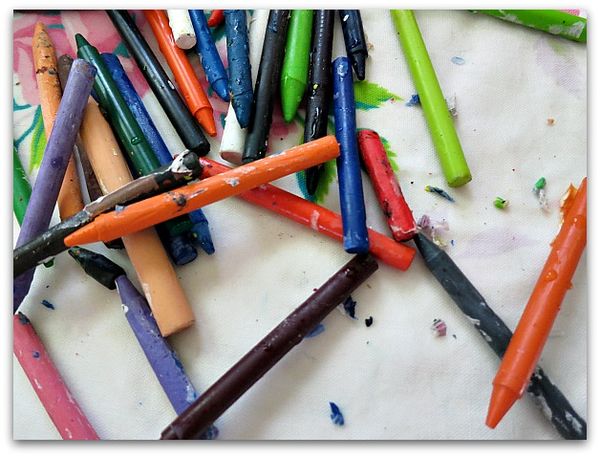
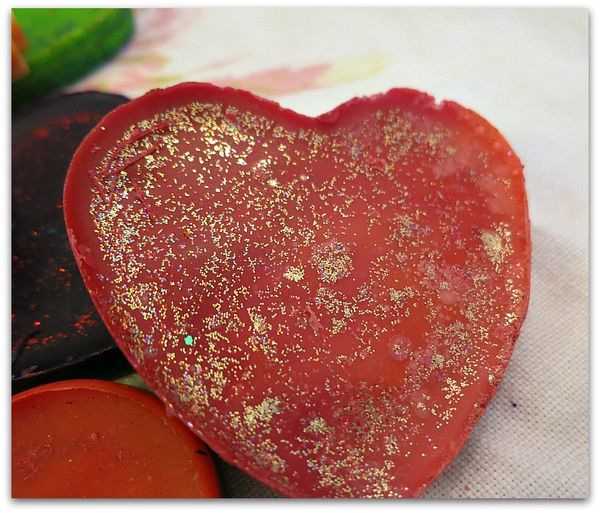
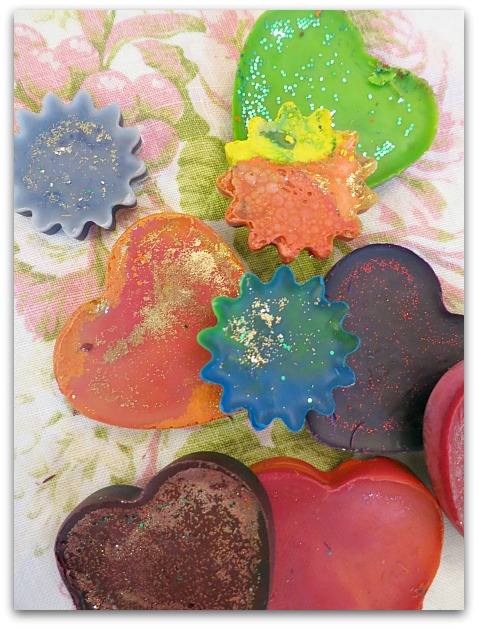
We made some new crayons in fun shapes.  Those two grand fairies had an unmanageable amount of art supplies, and way too many open boxes of "color crins" (what I always called them as a kid, and still think of them as. I really thought that was the name of them and Crayon was the name brand. Like the whole tissue/Kleenex thing- it was crins/Crayons)

Crayons 007

We decided to melt them down into a new look and share them with friends.

It was also a good excuse to clean out the craft drawers, and along the way we tested each marker to see if they still worked, threw away the duds, and got all the supplies sorted.

Crayons 013

Here are a couple of things I learned in the process:

1- The papers come off easier if you soak the crins in hot water for a bit.

2- Name brands matter!  Crayola's are the BEST.  The cheap knock off crayons were not as easy to work with, they got all mooshy in the water, the papers stick and don't want to come off. On the Crayolas, the papers just fall away, and the crayon itself still is perfect.  I know that with my own art supplies, especially paints, cheapos aren't worth buying. I'll remember that for the kids too.

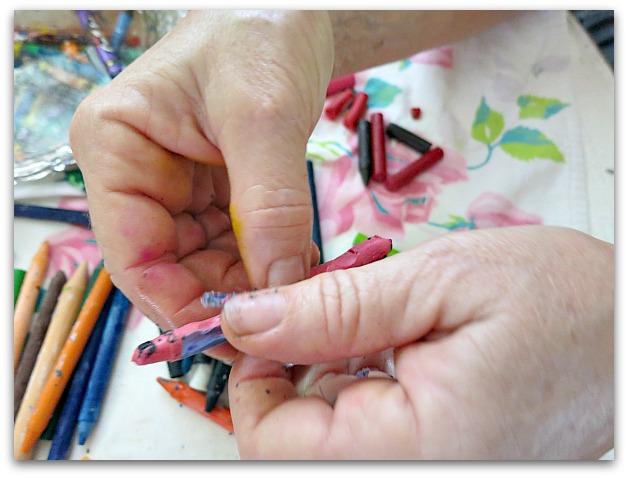
3- Unwrapping crayons is a hideously monotonous job and you should either find a partner with an extended attention span to help, or plan on doing it alone while she entertains herself.

4- One of the most fun parts of the job is shaking the glitter out of the table cloth when you are done.

Crayons 004

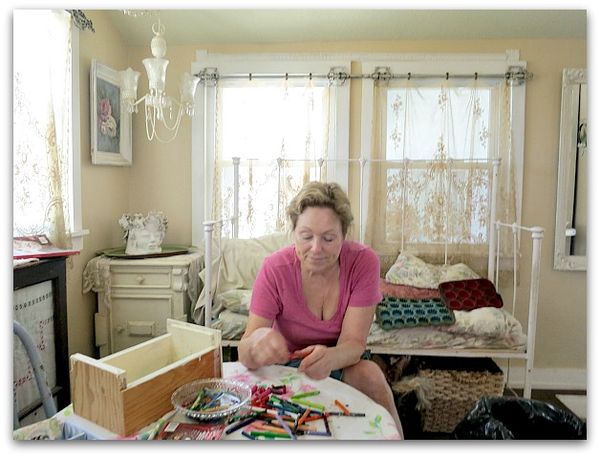
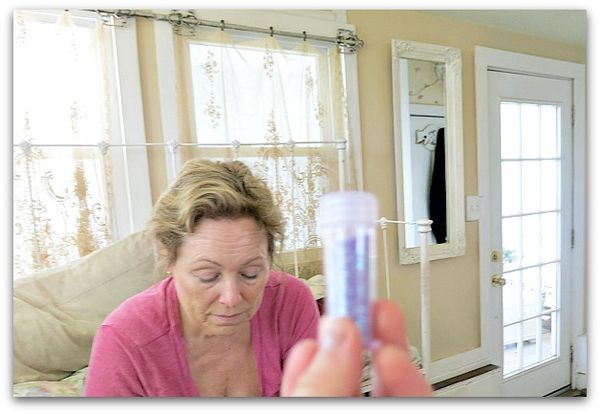
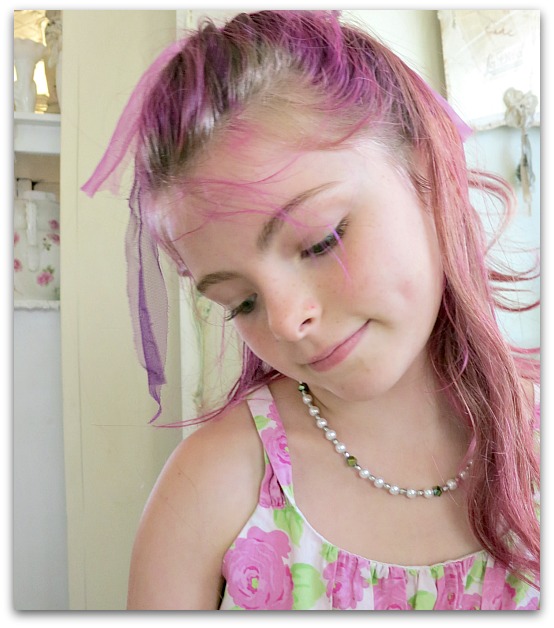
My partner isn't one of those people with an extended attention span. She decided to entertain herself choreographing the project and taking my photos while I worked away on the monotonous part of the job.

Crayons 010

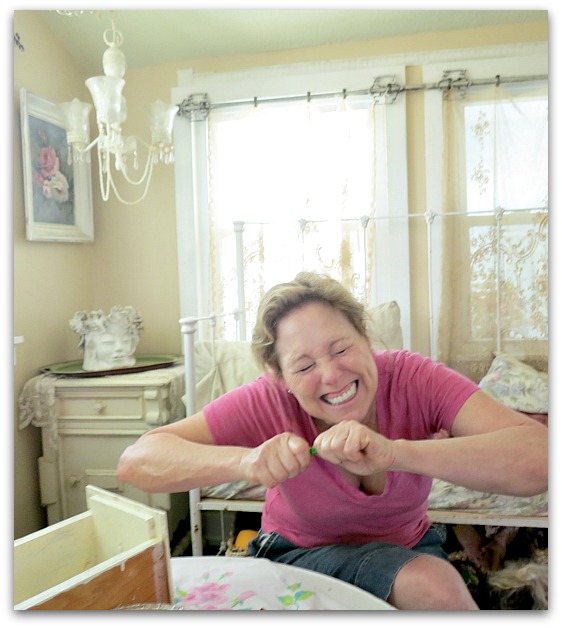
She has some directorial skills and coached me into being a better actress for the camera. (I wish she had directed me to the make up trailer before my closeups…)

Crayons 020

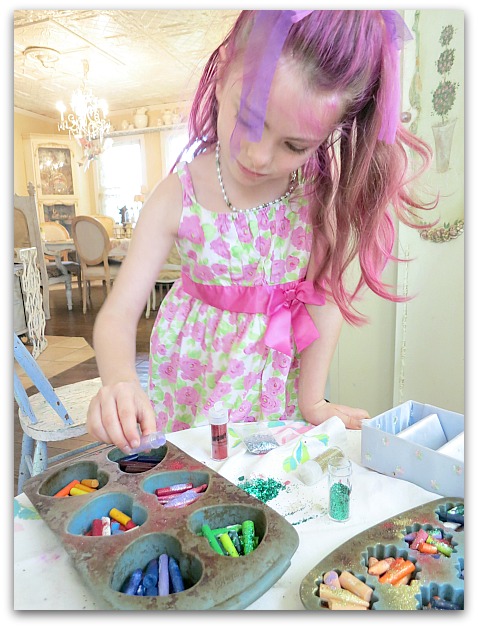
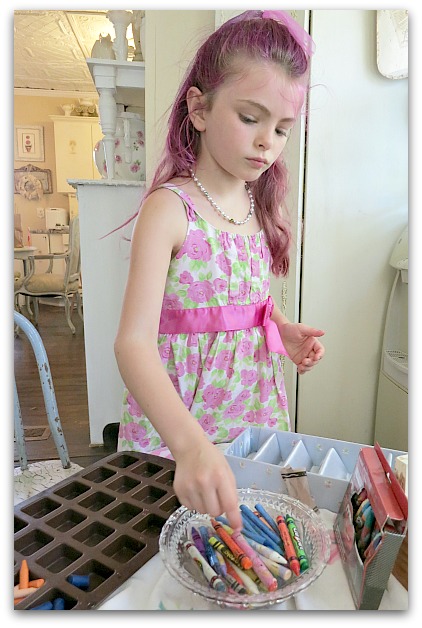
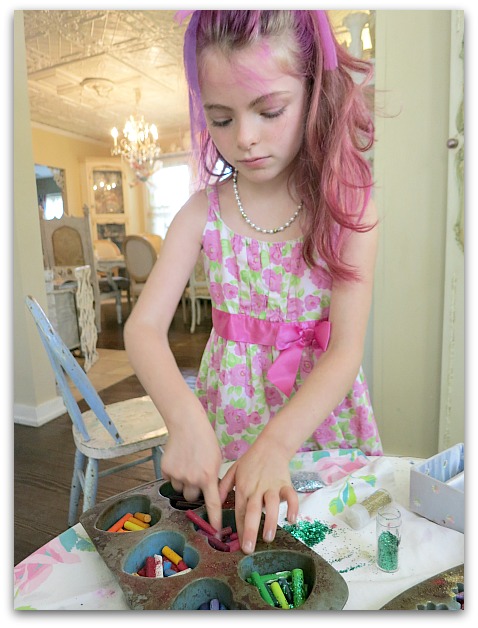
Once we got to the part where she could break and sort the colors, then add glitter, she became involved again. I'll spare you the photos of her toothbrush, closeups of the trash can, and the other items she took pics of while I unwrapped and unwrapped and unwrapped til I gave up and decided we had PLENTY of crayons to work with.

Crayons 011

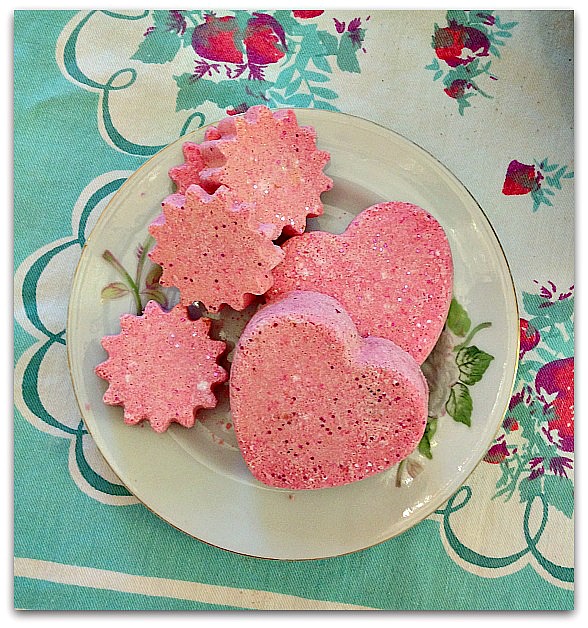
The directions I'd seen for making these, said to use a silicone baking pan. We started to use this one, then decided other shapes would be more interesting.  So, we went for flowers and hearts.  But, I discovered when we were done, that the wax doesn't all come out. I'm glad I didn't follow Sugarwings' advice and make a few of each shape. I'm wishing now that I'd stuck with just one pan, not two.  Because both are ruined.  But I guess that means that they are now craft pans. 

Crayons 001

We will use them for home made side walk chalk and salt sculptures.  Those are some of projects we have lined up.  I filled a shopping cart at Walmart with summertime supplies, here is what we are keeping on hand for various activities:

  • 2 boxes of rock salt
  • 1 gallon of vinegar
  • 4 boxes of baking soda
  • food coloring
  • 6 boxes of corn starch
  • 2 squirt guns
  • 6 cans of shaving cream
  • Pink, purple, and white tempura paint
  • 1 large box of plaster of paris
  • Tons of pink and silver and purple GLITTER!
  • 100 pounds of play sand

Crayons 045

The crayon shapes turned out cute. I don't know that the glitter will actually transpose onto paper when you draw with them.

But we enjoy dumping it into everything we do.

Crayons 052

Here is how you make the shaped colors:

  1. Soak and peel off crayon wrappers
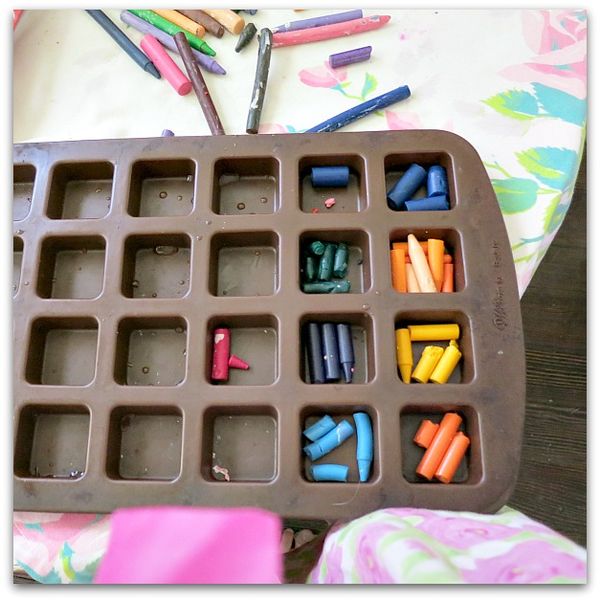
  2. Break crayons into silicone baking pans
  3. Sprinkle on glitter (just for the fun of it, I doubt if it stays on the paper when you color)
  4. Bake at 350 for 5 minutes, check every minute after that till all are melted.  
  5. Leave pans alone for an hour or so. If you try to get the wax out too soon, the crayons break.
  6. Bake some bread or cookies right after so the house smells better. Hot crayons stink.

Crayons 040

  6a00d83451ead569e201a73ddc8464970d-500wi

How to make a champagne cork cage chair

bird song art event, how-to projects, jewelry, vintage paper/collage art

Gifties 002

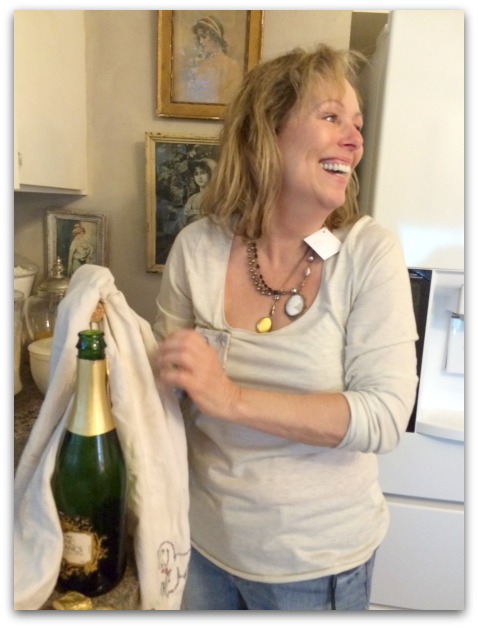
My good pal, Hope, was a Birdsong newbie this year, and a very welcome addition.  She is fond of bubbly, but had never opened a champagne bottle before.

Securedownload (11)

My youth was spent as a single mom who waited tables or bartended to raise my kids.  I've opened a few champagne bottles in my time, so I gave her a lesson.

Securedownload (10)
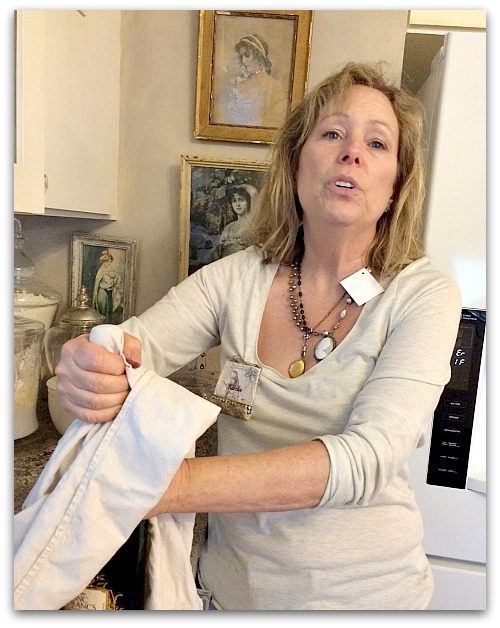
My tip is to cover the cork with a towel, and then wiggle it side to side.  The cork slips out and the towel stops it from putting your eye or your light fixture out.

Hope is a skilled and avid journaler.  She documents everything, so she took pictures of the lesson.

Peeps 020

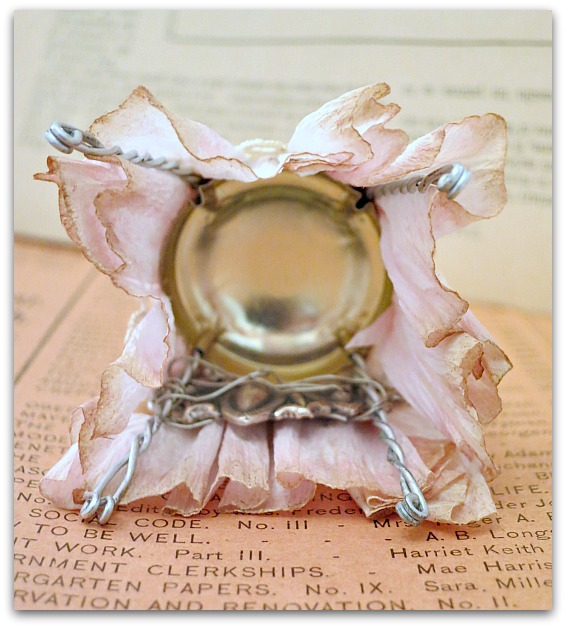
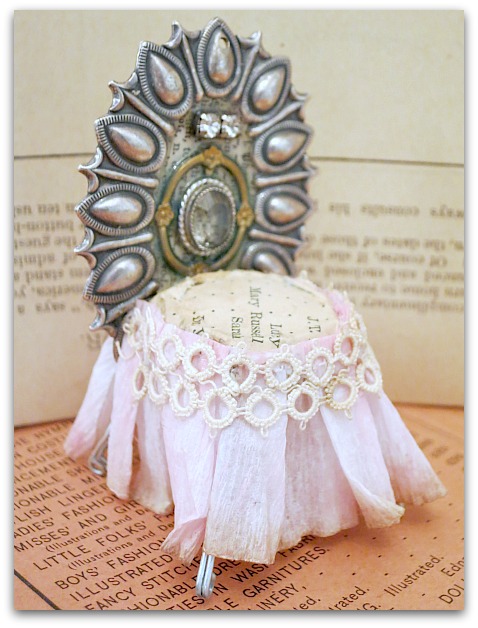
Since I knew she was sentimental, I saved the cork cage for her. And turned it into a chair.

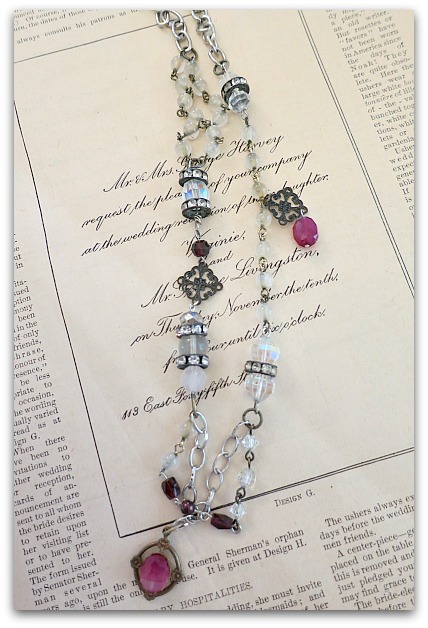
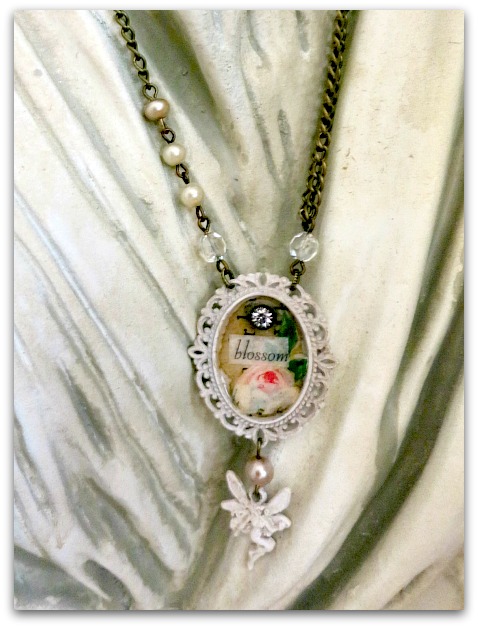
I had a charm thingie that was part of a necklace I'd made in a class last year, but it was a bit large for me, so I took it off the chain, and wired it to the back of the cage, and the squirted in some glue and clamped it together over night.

Gifties 003


Of course, I remade the necklace so I could wear it without the larger charm I stole from it. 

Peeps 017

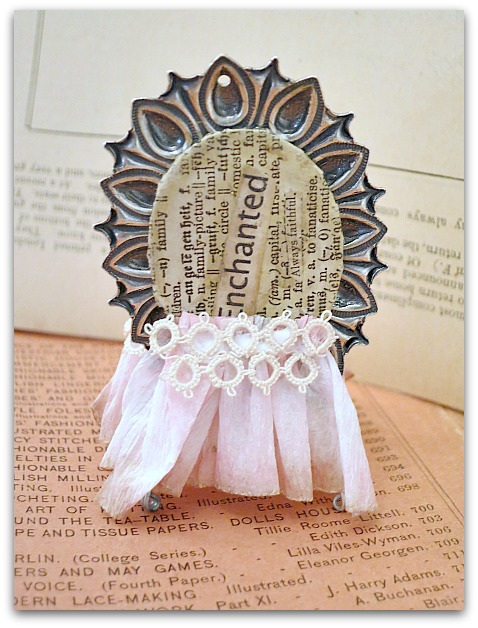
I then glued old paper to the "seat" of the chair, and added a bit of ruffled crepe paper as a skirt, and topped that with tatting.

There is a hole at the top, that was once used to suspend it from the chain. I left it as is, in case Hope wants to hang the chair from her journal.

Peeps 018

If you wanted to make one, you could use a brooch as the chair back, fabric or paper to cover the seat, and lace or ribbon for the skirt.  I should drink more champagne, it would be fun to have a collection of these chairs!

 ********************************************************************************

 ps- I'm having a Summer Clearance sale in the Boutique. I've neglected that poor little shoppette too long, I need to clean up, clear out, and refresh it all. You are welcome to soak up some summertime savings and help me get a fresh start, by using this link and getting 50% off everything in the store:

 http://www.karlascottage.com/?code=Summersale


(You must use that address to get the special price. Going to the regular address does NOT take you to the 50% discount)

An antique picture frame redo

antiques/junking, how-to projects

Valentine 012

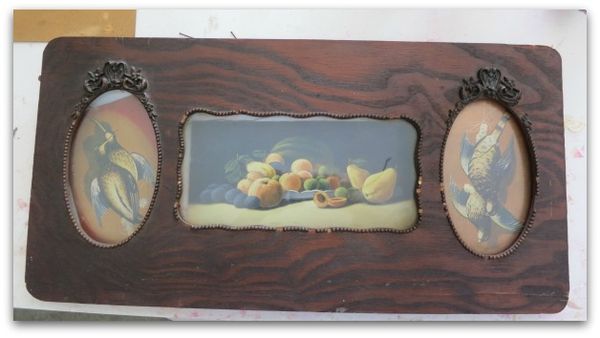
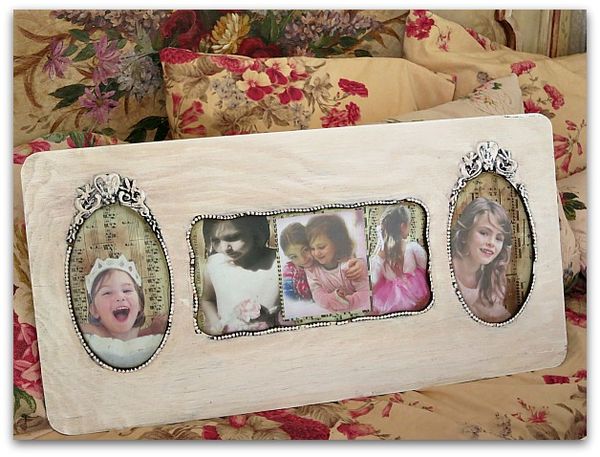
 A while back, I found the coolest old frame at a flea market.   But it certainly needed a redo.

Valentine 009

This is how it began. I liked that it wasn't perfect, was a bit beat up and looked its age, but the pictures sure weren't my style, and I like things much lighter.

I've done a lot of painting over the years, and have many how to's listed HEREFor different looks, you paint things in different ways.  For this, I wanted it white, but not "clean" white. So, instead of priming, like I suggest in most of the tutorials, I lightly sanded it. When I coated it in white satin latex paint, some of the wood tones bled through.

Valentine 013

If I had used a primer, I'd have lost a lot of the wood grain that I wanted to still see.  This paint was pure white, but also because I didn't prime, the wood wasn't sealed.  The natural oils of the old wood stain caused the paint to darken.

I did a purposely semi-sloppy paint job, didn't get all the edges, left the indentations in the trim dark.  But I was careful to always make my brush strokes the same direction as the wood grain so it didn't look messy.

Valentine 010

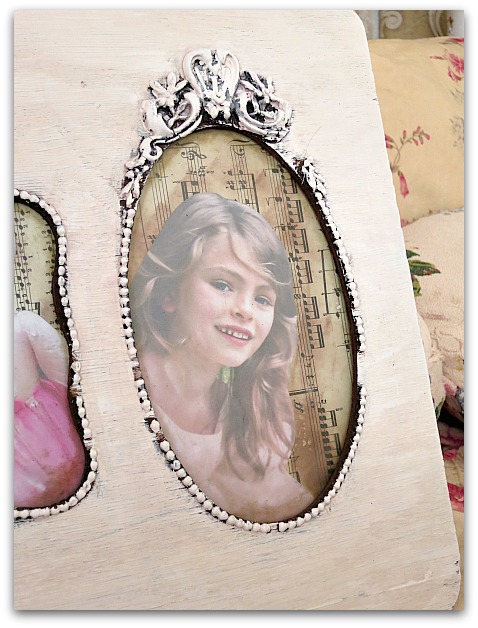
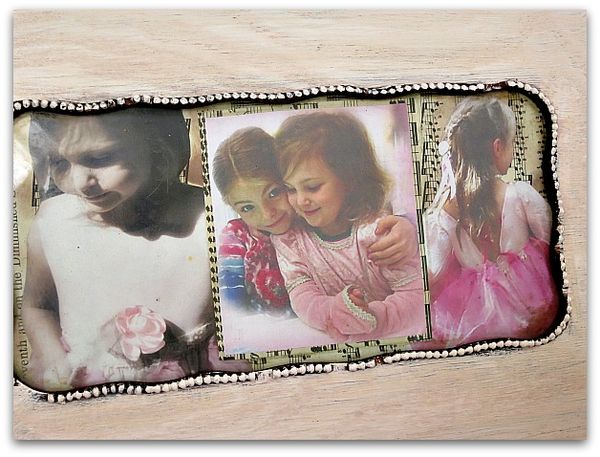
The frame sections weren't typical modern sizes, so I didn't have pictures that would fit without having mats cut to fill out the frames. And since I didn't want the formal look (and expense) of mats, I layered cut out pictures of my fairy grand daughters over sheet music. 

This is not a technique I would try on something that was in heavy duty use, like a table top. Unless I applied a ton more elbow grease into the sanding. But for a decorative wall piece, the light bit of sanding was plenty.

Valentine 015

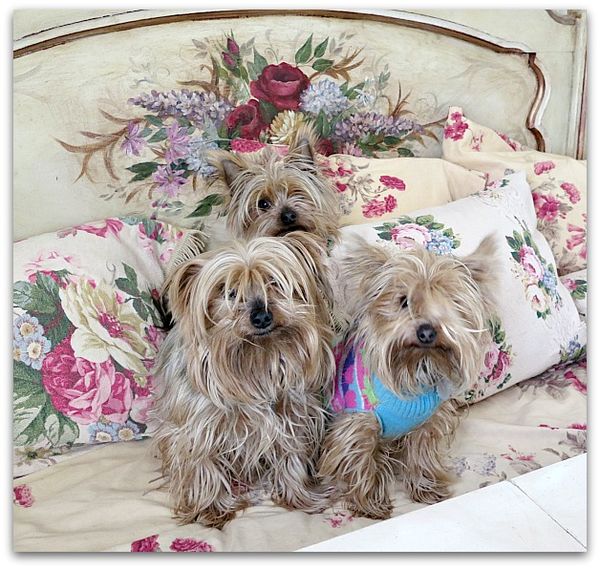
Once I was done taking a picture of the pictures, the dorkies insisted that I photograph them. They patiently waited by the bench while I took the frame's picture, then jumped up for their turn as soon as I moved it. 

How could I say no to them? Little hams!


The ugliest pictures I have ever posted or how to make roving from angora goat hair

how-to projects

Mermaid 006

My niece has a friend who raises angora goats and at our Valentine Fairy making party, she asked if I'd like some angora to use for the doll hair.  Oh my yes!!!!!!!!!!!!

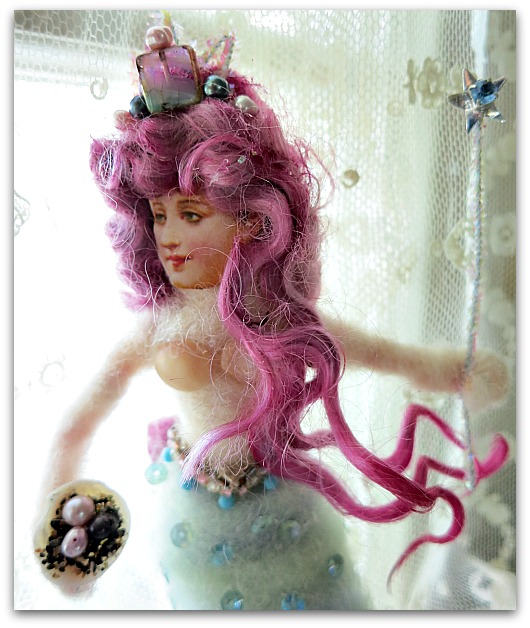
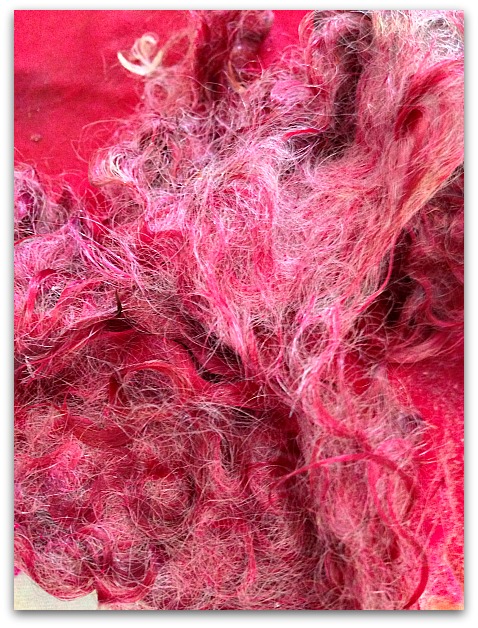
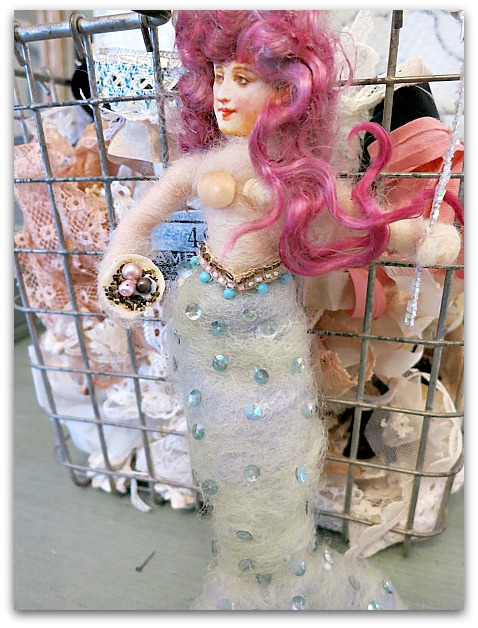
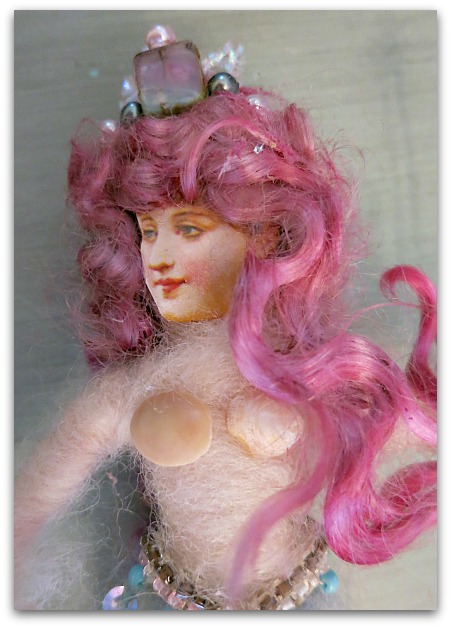
I didn't quite realize what I was getting myself in for when I said yes.  The "raw" fur didn't exactly look like these perfect pink curls.

This photo is of the finished product.  The long, angora soft, curls are wonderful, and quite pretty. But I have to warn you, the rest of my photos aren't as nice to look at.

Gao

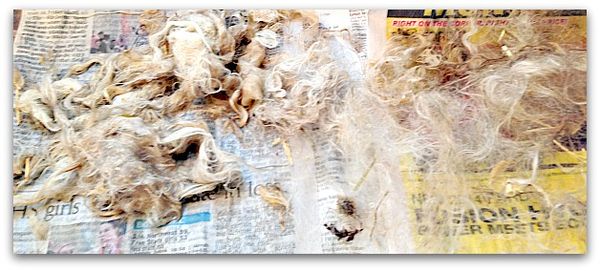
Of course, I didn't realize that it came complete with all this, this, well, we will call it detritus…. that had to be picked out.

Some hay, no big deal.  Some burrs, a few sticks, sure, no problem.  A bit of unidentifiable something or another. Sure, I'll dig that out.  I won't even think about it maybe being a poo clot. 

Actually it wasn't bad at all. I started out being very careful and conservative, and as I went along I became more ruthless. Instead of picking out the little bits, I tore away hunks around the little bits.

Sink

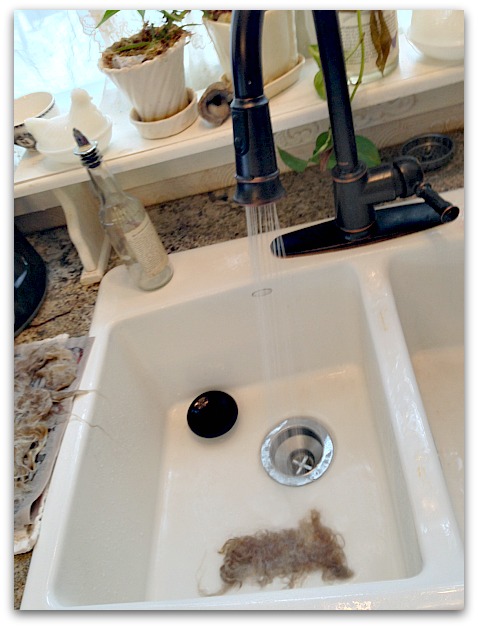
After that, it gets rinsed. And rinsed. And rinsed, a handful at a time.  The instructions said to do it outdoors with a hose. I didn't have that option in our below zero weather, so used my sink. I was pretty surprised to see how easy it was to do and how little mess it was. The stuff clumps to itself and doesn't go all over the place. The clump stays politely where you set it while it is being rinsed.

Nety

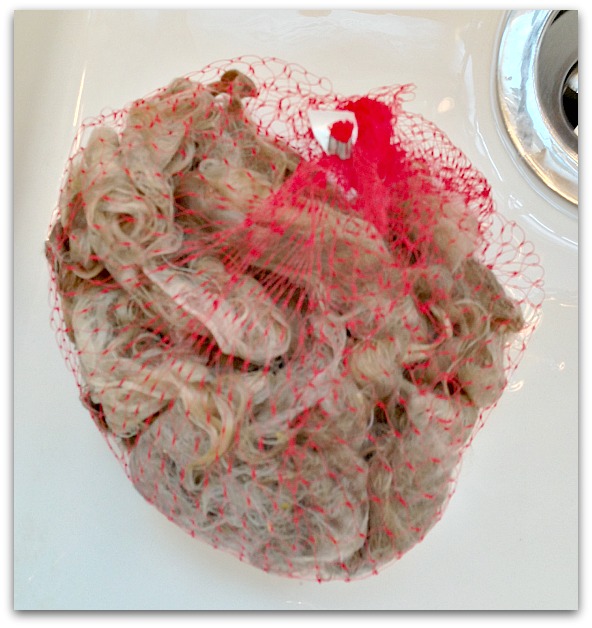
Next, I tied up all the picked and rinsed hair in a net bag that had held onions.

Spoon

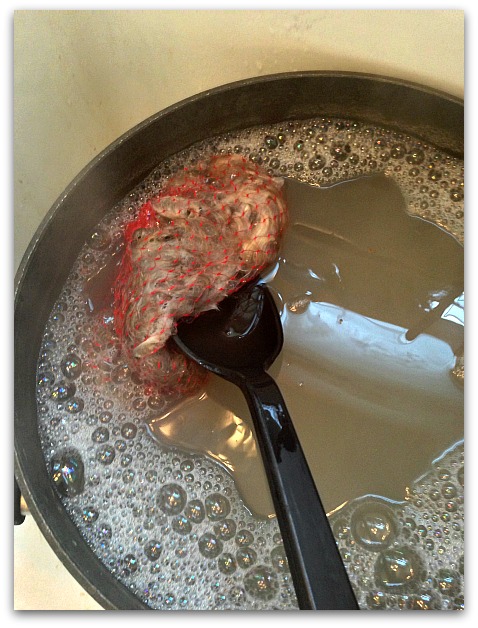
The bag went into a pot of almost boiling water, that I added a ton of dish soap to.  Then, I set it in the sink with a lid on the pot, stirring every once in a while and letting it soak for an hour.

At this point, the whole counter top and the sinks got bleached and scrubbed.  Like I mentioned, it wasn't messy. The hair sticks to itself and didn't clog drains or float away. It stays where you put it. It was mostly the germs I was going after when I cleaned up.

After that, I rinsed it, then put the bag back in the pot with equally hot water, no soap, to soak again.

Dyer

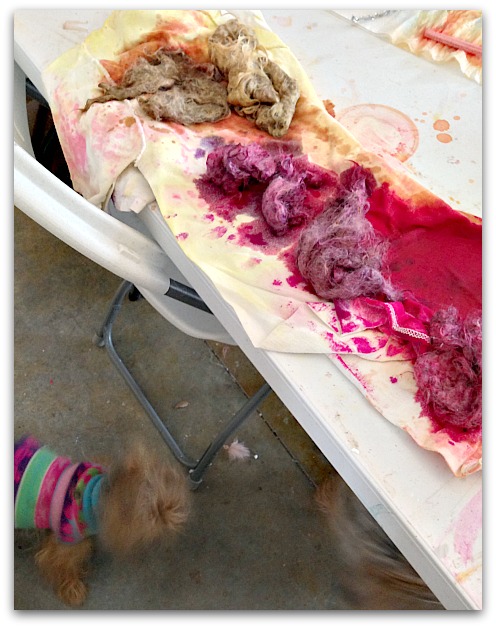
While it was still wet, I took it to the studio and dyed it with fiber reactive dyes. I was going for hot pink and raspberry colors along with some blond.

Done

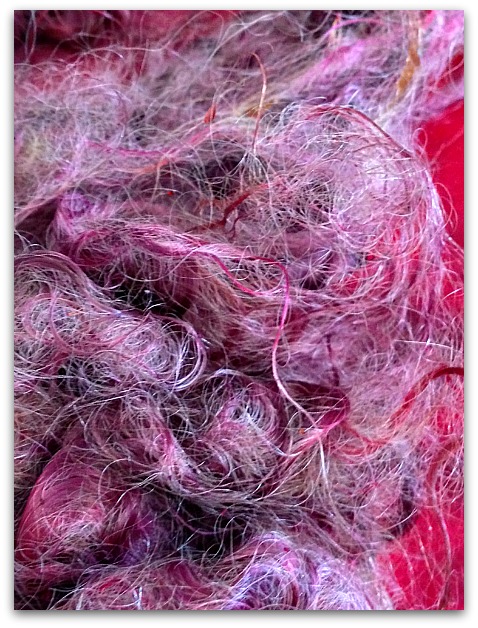
Parts of it look great, but the color did fade as it dried where the hair was more gray to start with.

Ddd

And some of it was clotted, and clumped, not soft like wool roving, so I cut those out.  I think that maybe it was supposed to be pulled and treated somehow, but I didn't want to disturb the nice, curling parts that were silky, so I just used what I liked and not the rest.

Much of it, where the gray was too strong to cover, will be good to save for witch or crone hair. Or to make a grammie fairy? But some of it was sweetly curling hot pink.

Mermaid 004

All in all, an interesting experiment.  I've been told that I can get more hair from her if I'd like, but I'm not sure if I like the gray goat color. If it was white and I could dye it pastel shades, it would be ideal for my Birdsong fairy class. But for the gray that I ended up with, it isn't a color I'll need much of.  I think this bagful will do. 

Mermaid 002

 PS- if you'd  like to sign up for a chance to win a copy of Where Women Create, please leave a comment on my previous post  I'll announce the winner on my next post.

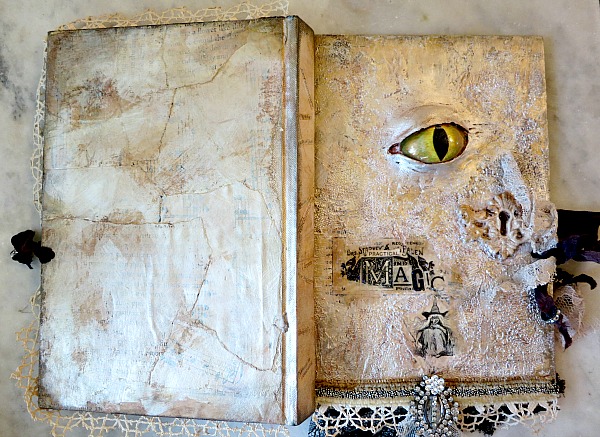
How to make a Hocus Pocus/ Practical Magic/ Grimmerie/ Evil Dead/ Evil Eye/ whatever you want to call it, magic spell book

Books, how-to projects, Tutorials

Sister visit and magic  books 173

My sisses came to see me last week and we were able to squeeze in a craft day between all of our runnings around.  One trip out was to the Victorian Trading Co. outlet store in KC, and Bobbie saw something there that she had wanted to order, but was glad she did because it wasn't as cool in person.

Sister visit and magic  books 182

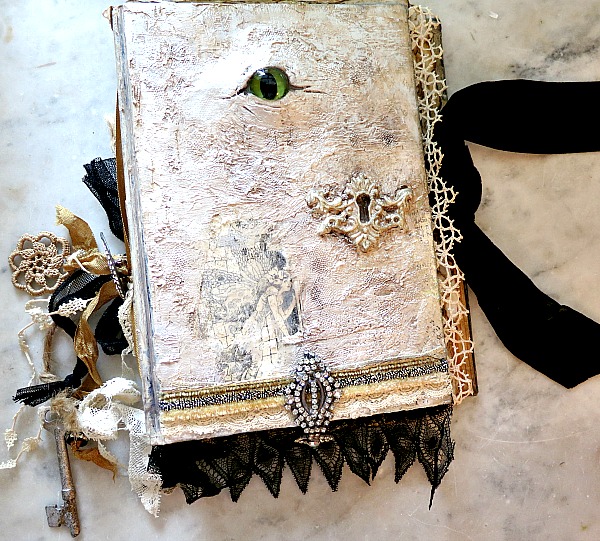
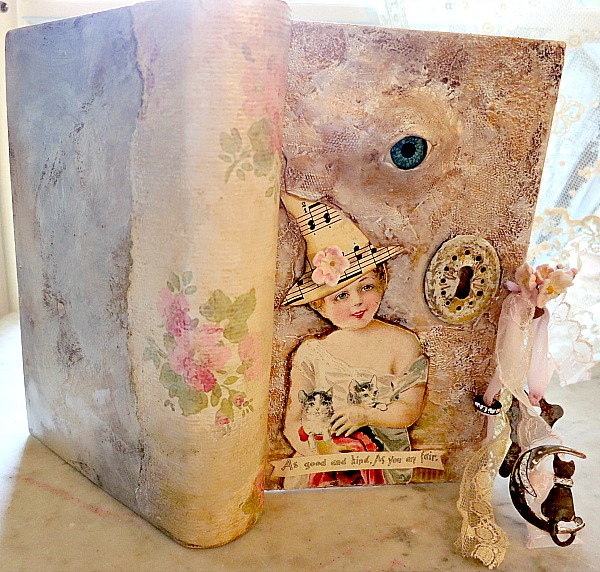
It was an evil eye, magic spell book.  Kind of like the Hocus Pocus book.  I decided we could make our own and use better materials instead of the resin that fake book was made of.  Plus, our books are functional, Bobbie is using hers as a photo album for our trip.


Sister visit and magic  books 168

One of mine is actually a faux book that opens up as a trinket box.  I've got three books listed on Etsy if you are interested in buying one.


Sister visit and magic  books 181

Or if you'd rather make your own, here are some quick how-to's.


Sister visit and magic  books 166

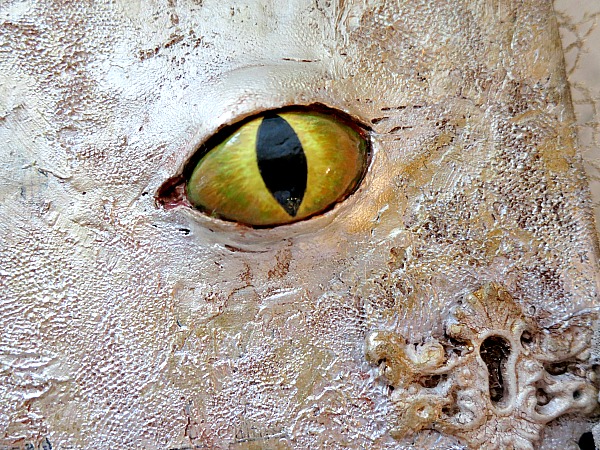
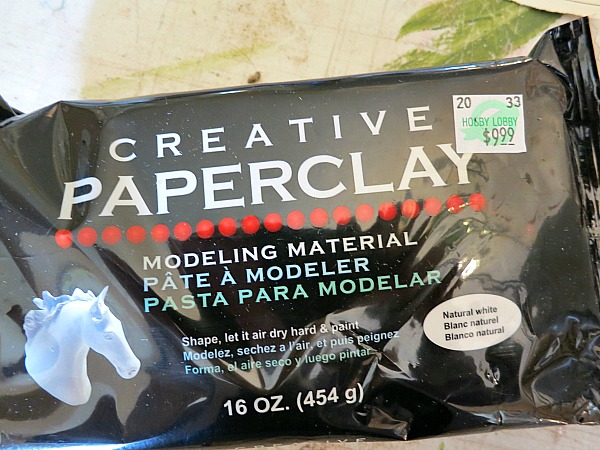
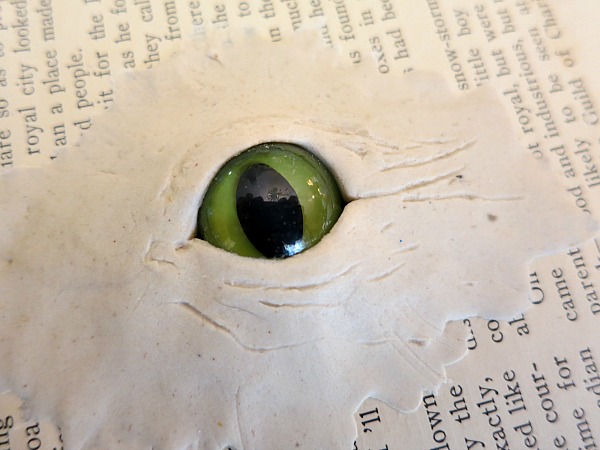
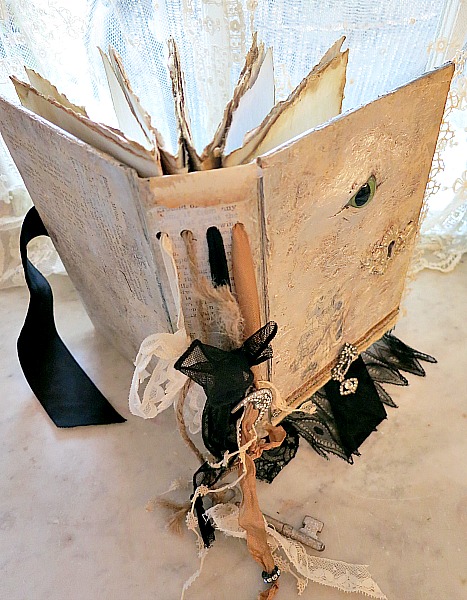
This eye, is made of paper clay and hand painted, but if you aren't a painter, I have a short cut for you.


Sister visit and magic  books 148

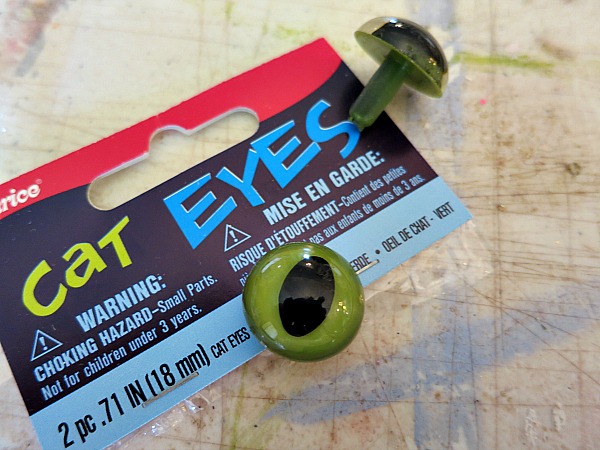
You can use a doll eye from the craft store.  


Sister visit and magic  books 150

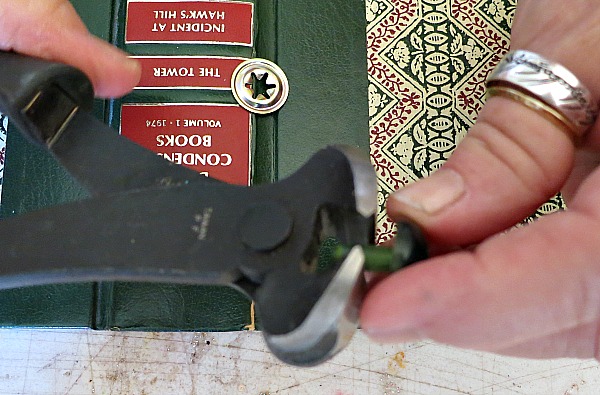
On this one, I cut the back off so it had a lower profile.


Sister visit and magic  books 149

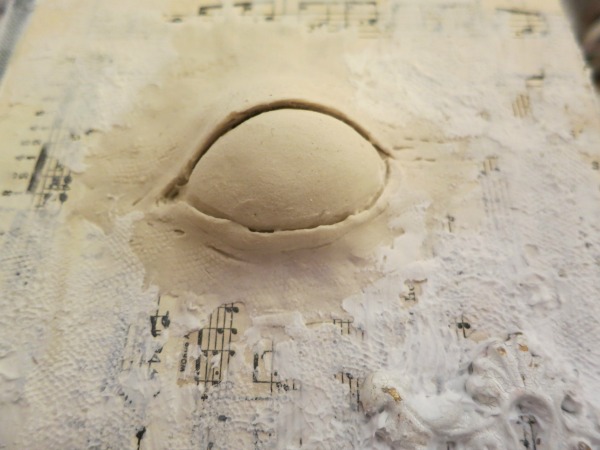
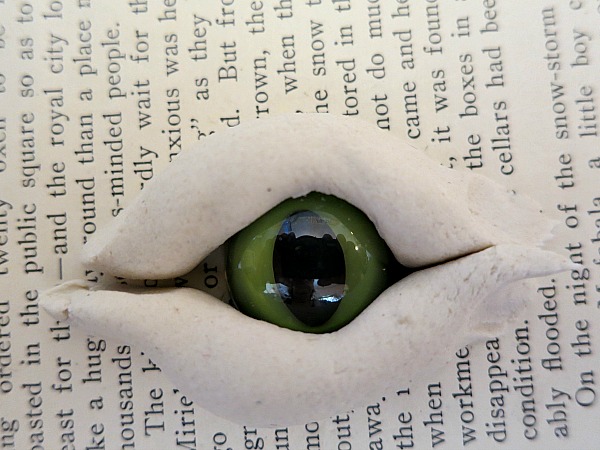
The eyelids are made of paperclay.


Sister visit and magic  books 152

Simply surround it with a couple of snake rolls.


Sister visit and magic  books 153

Then smoosh them out and add wrinkles with a toothpick or clay tool.


Sister visit and magic  books 178

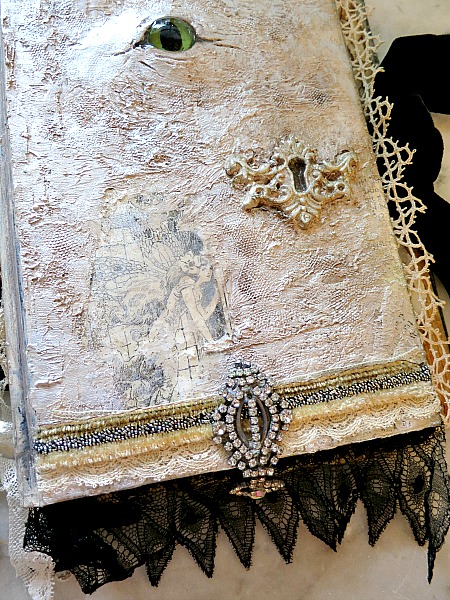
I used some modelling paste over the old paper I added to the cover, and a piece of lace to texture it all. You could also use a thin layer of paper clay, but it is more expensive and heavier, I found the modelling compound easier to use for an all over dragon skin look.


Sister visit and magic  books 167

I won't go into details about finishing  my books, the decor is a personal choice and you can embellish your book however you like now that you know how to make the evil eye.


Sister visit and magic  books 174

What was important to me while making them, was that I kept the covers pretty even while they were spooky.


Sister visit and magic  books 172

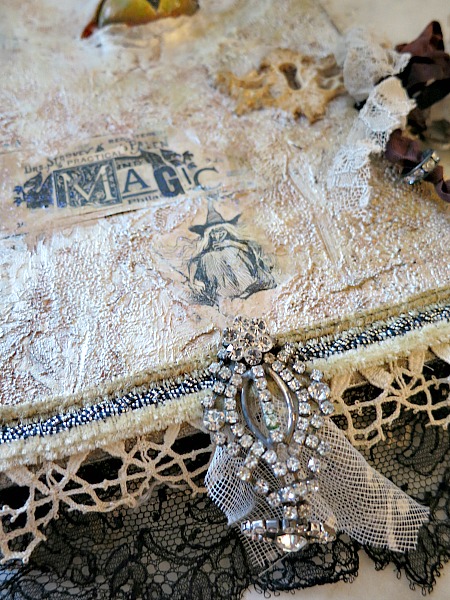
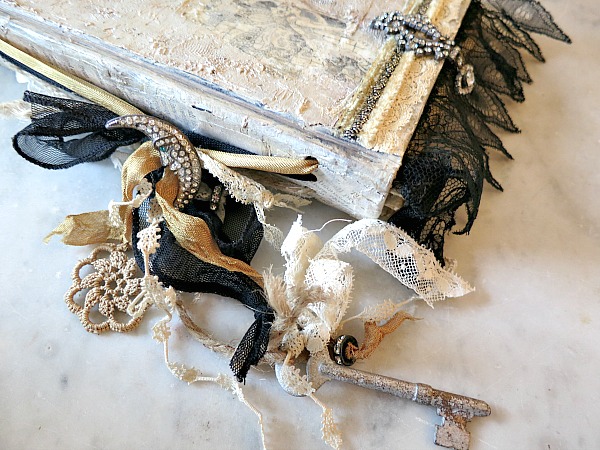
Lots of rhinestones, ribbons, and Victorian lace.

  The Good Stuff. 

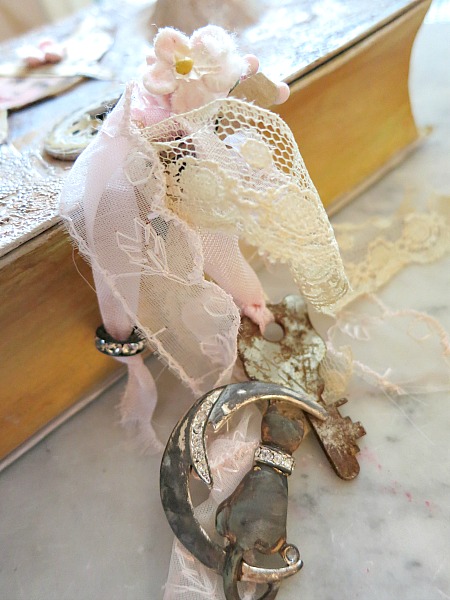
I also thought a key hole and key were a good touch.


Sister visit and magic  books 175

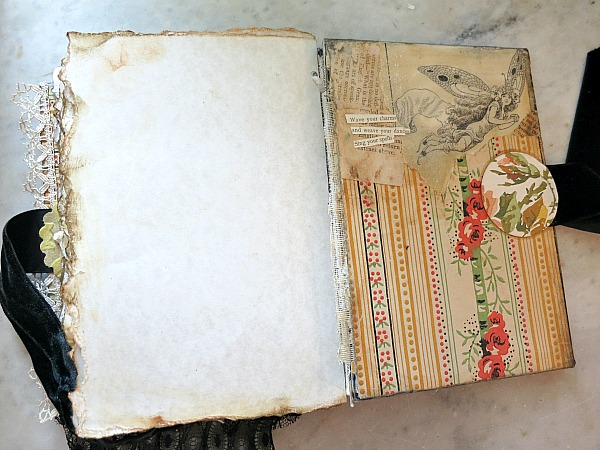
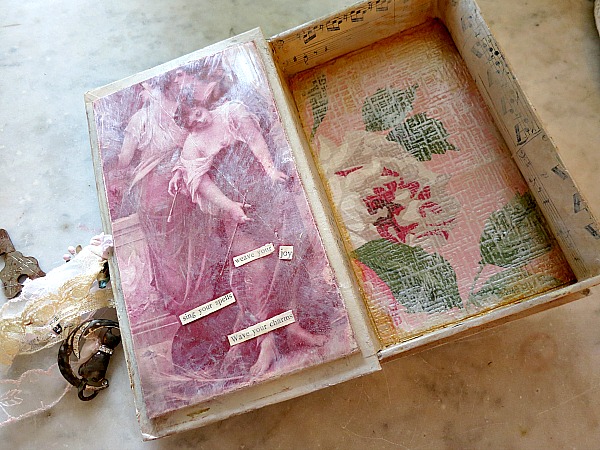
And don't neglect the insides! These pages are inked and edged to look old.  The inside covers are sheathed in vintage wallpaper.


Sister visit and magic  books 171

I even found some "nice" spells in an old fairy tale.

"Weave your Joy

Sing your Spells

Wave your Charms"


Sister visit and magic  books 176

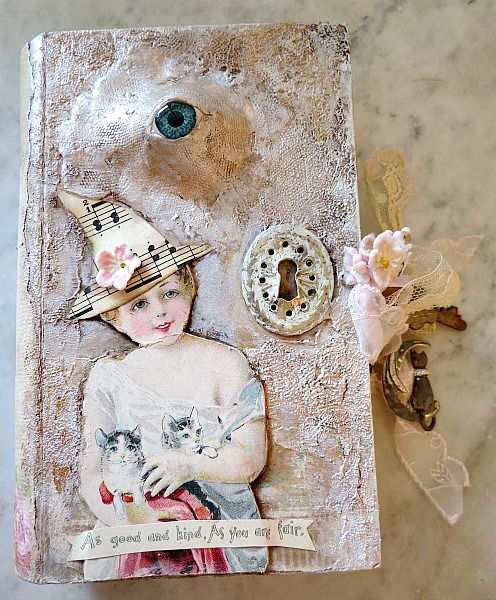
It seemed to me, with an eye that creepy on the front, the books all needed an extra wallop of pretty to counter balance that.

Plus, who wants an evil witch book around?


Sister visit and magic  books 170

I much prefer good witches. This cover reads:

"As good and kind as you are fair"


How to make velvet pumpkins

holiday decor, how-to projects

Pumpkins 027
Last week, I was working in the garden and found a damaged pumpkin.  To salvage it, I brought it in, cut out the bad spot,  sliced it up and baked it to puree so I could make muffins.

(they must have been tasty, there are only a couple left!)

I can't throw anything away.  So, I saved the stem and decided to try to make a velvet pumpkin. It's not like I didn't have anything else to do. I'm pretty far behind on a lot of things that need doing…. but sometimes, I just can't resist a side track into a new (for me) idea. 

And I've seriously needed a creating binge.  These pumpkins were just the ticket for pulling me up from the doldrums I'd fallen into.

Pumpkins 032

It was so much fun, that I ended up with about 20 of them.

Of course, since I didn't have 20 pumpkins to steal stems from, I had to get creative.  I re-purposed some of the vines the pumpkins grow on, by drying and cutting those at angles to make them look like stems. I found lots of viney, twirly, curlicues growing there too, and cut those out to glue to the end of the stems.  For most of the curlycues, I was able to cut a small slit into the stem, add glue and then stick the end of the curly bit down in.

Pumpkins 001

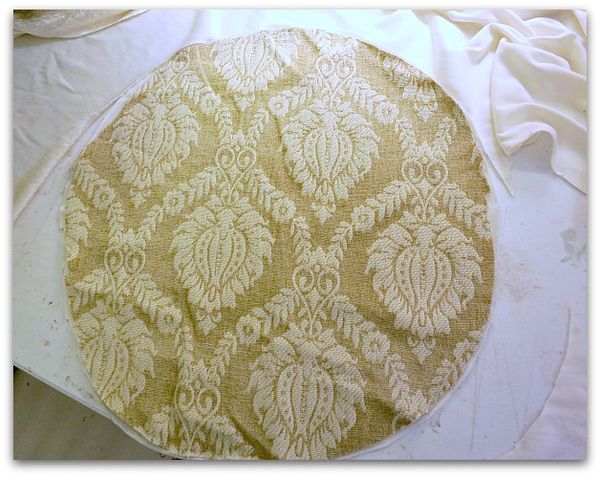
I found out that they are super simple to make.  I free handed a circle shape, a little larger than a dinner plate.  I figured that most pumpkins are a bit crook-edy anyway, so didn't try for perfection in my shape.

Some were made smaller, because I was using fabric remnants.  But the "larger than a dinner plate" size was ideal for me.

Pumpkins 003

To start, I gathered the edge of the fabric along my thread and needle, all the way around the circle, but stopping with about a 4-5" gap, so I'd have room to stuff it.

Here are some tips I learned while working on them:

  • A heavy thread is much better than regular weight thread.
  • Gather up a length of fabric and bunch onto the thread till you get a gathering of a few inches, then put a stitch in it to hold in place before gathering more. This is better than trying to gather the entire circumference of the circle at once, it stays tighter.
  • Softer, thin fabrics with some stretch work best.  I like the stretchy velveteen to work with more than the vintage cotton velvet I made some from too.
  • You can use about any kind of material, but the ones that ravel are tricky.  And heavier fabrics don't pull into as tight of a center as lighter ones do.

Pumpkins 004

For stuffing, I used some  poly pellets I had on hand for making a weighted "sensory pad" for Sugarwings. About a cup or so of these gave the gourd some heft and made it sit up straight, but I think you could also use beans or rice. 

On top of the pellets, I slipped in pieces of polyfil, and worked it into a nice shape.  Small bits at a time worked best for me.

After pulling the circle to its tightest possible closure, there was always a gap that needed stitched up.

Pumpkins 002

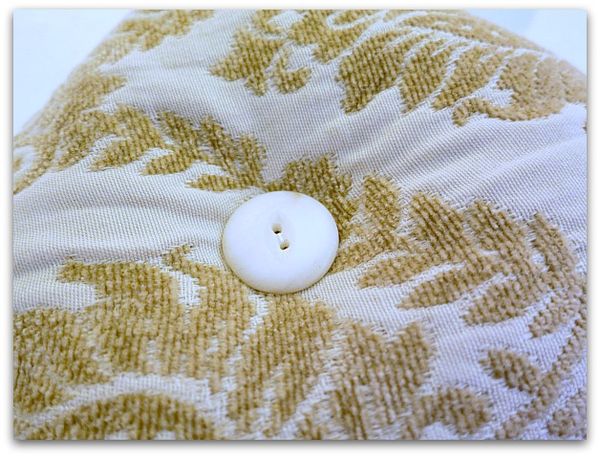
After I had it all gathered and stuffed, I decided the shape was too round.  To fix that, I sewed a button on the bottom by pulling the thread from the top of the pumpkin to the base, adding the button, then pulling it back through, so that it forced the orb into a more gourdy shape. (A long needle works best)

Pumpkins 018

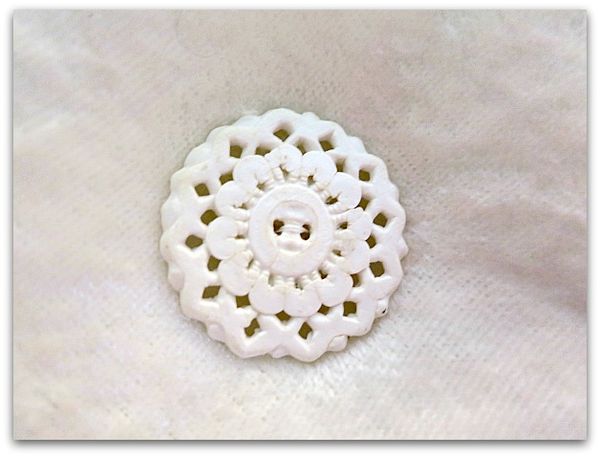
Kind of like tufting.  This is where it is really important that your thread is strong. When I used plain thread, it broke when I pulled hard on it to make a gentle dent in the bottom of the pumpkin with the button.

(I made sure to use pretty, vintage buttons. Because, something worth your time is worth using the Good Stuff, right?)

Pumpkins 003

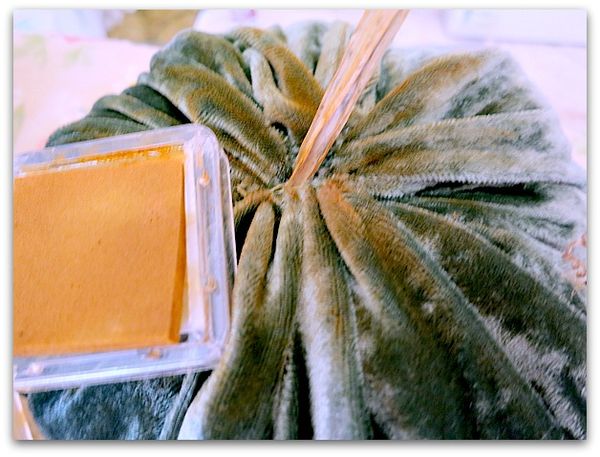
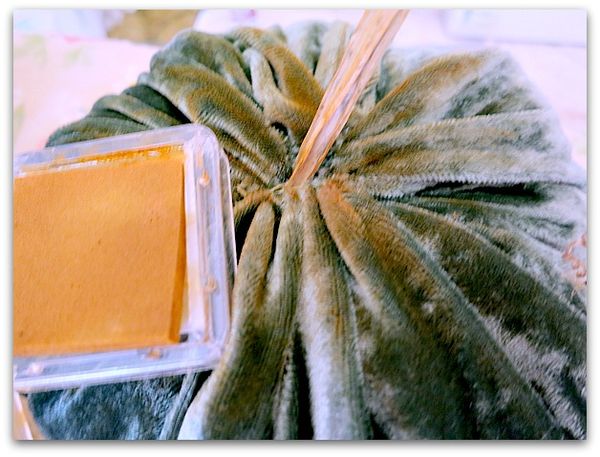
After gluing on stems, I inked the fabric at the top of the pumpkin.  Different colors for different fabrics.  This is a carmel tone on the green velvet. This is fabric that I'd saved from the back of a throw that fell apart years ago.

Pumpkins 006

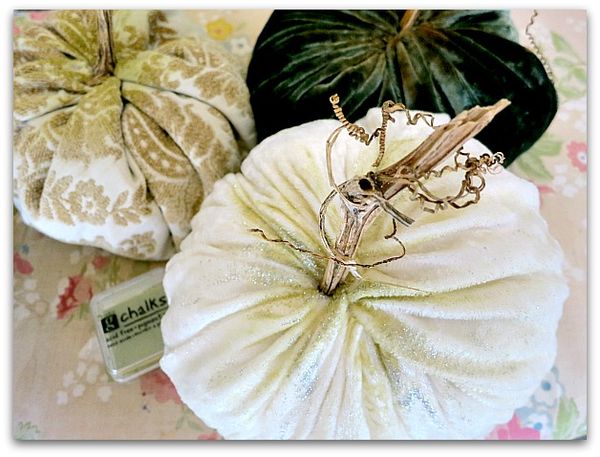
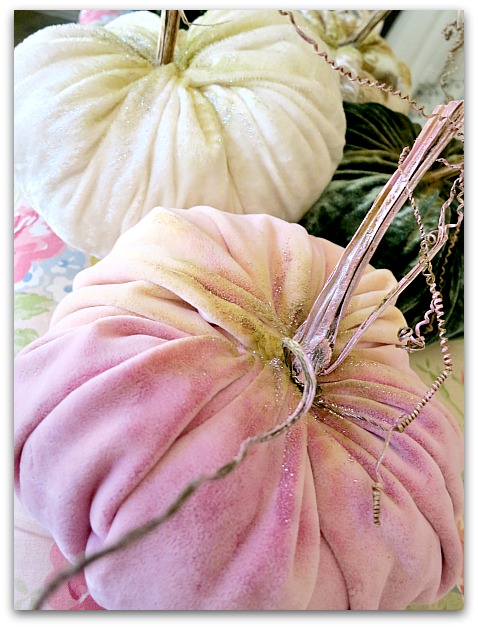
The pink is a white velvet that I'd dyed to reupholster a rocker for Sugarwings when she was born.  And the white is remnants from repairing that some throw that the green had come off of. (brand new velveteen from Hancock fabrics)  I try to save as many leftovers from other projects as I can, I just never know what I'll need someday.

(what I really need is a good studio clean out!)

On the pink and the white, I used an olive green ink.
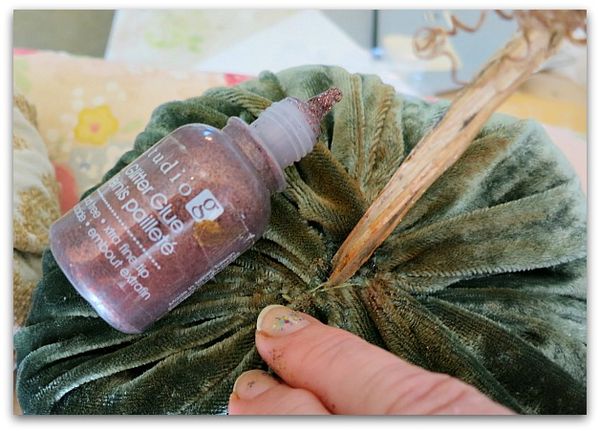

Pumpkins 007

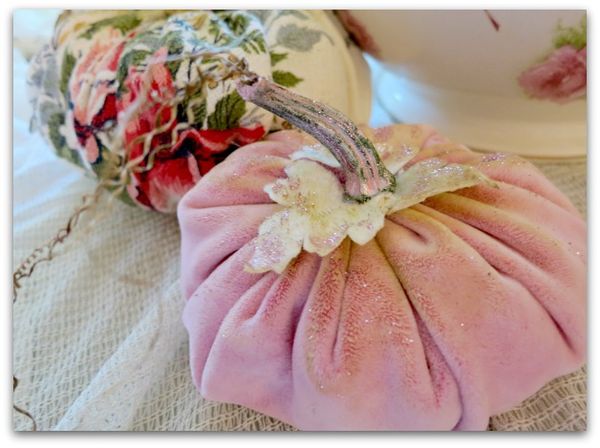
And over the ink, I rubbed some Stickles or store brand glitter glue. The finer the glitter, the better, which is why Stickles is so pretty.  But Michaels carries this brand for a dollar a bottle, and that is hard to beat.  I used bronze on the green, pink on the pink, silver on the white, and red on some rose patterned Waverly fabric that I tried.
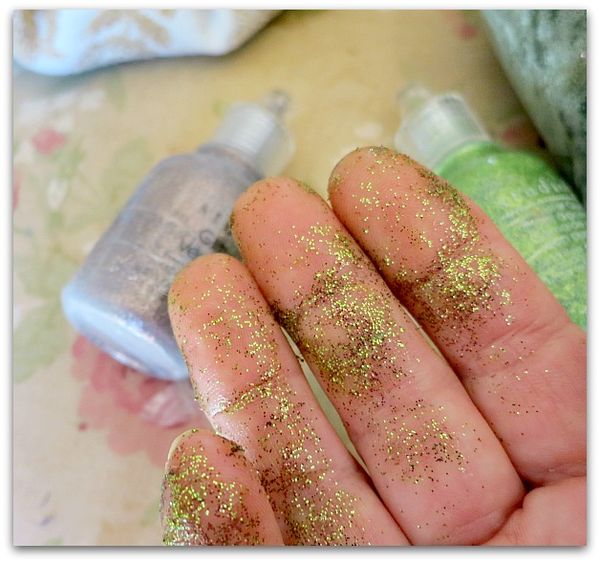

Pumpkins 009

I found it easiest to use my fingers.   A brush didn't leave a natural enough look for me.

But then again, is glitter natural on a pumpkin? It is at my house.
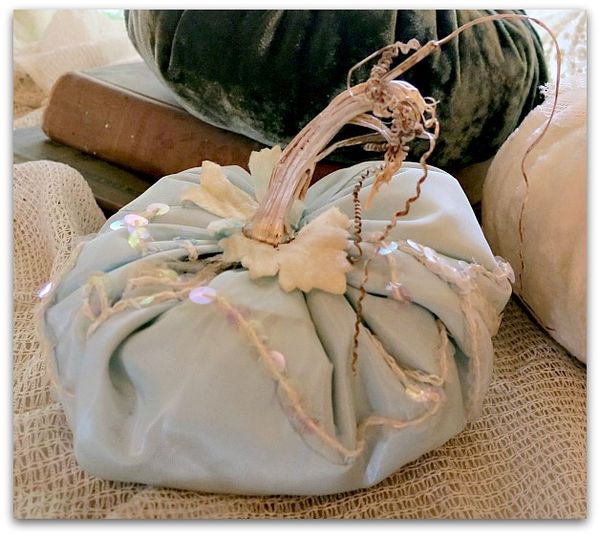

Pumpkins 015

This material is from an embellished rayon/satin doll dress that was ripped.  At a flea market recently, someone was giving away a box of vintage doll clothes, most in bad shape. But there were some very pretty bits in there that I picked through to reuse.

This was the hardest fabric I worked with.  It was stiff and heavy, and left a big, thick blob at the stem when I sewed it together.  So, I hid that with velvet leaves cut up to look like the stem base. Well, at least that is my story. If you look at a real pumpkin, there are no leaves around the stem.  Still, this little arty tid bit is prettier with the leaves, so I didn't care too much for accuracy. 

The shiny, elegant satin, looked too fancy for the rustic stem, so I painted the stick with white pearl paint. That looked so nice, that I added some pearl paint to a few of the other stems too.
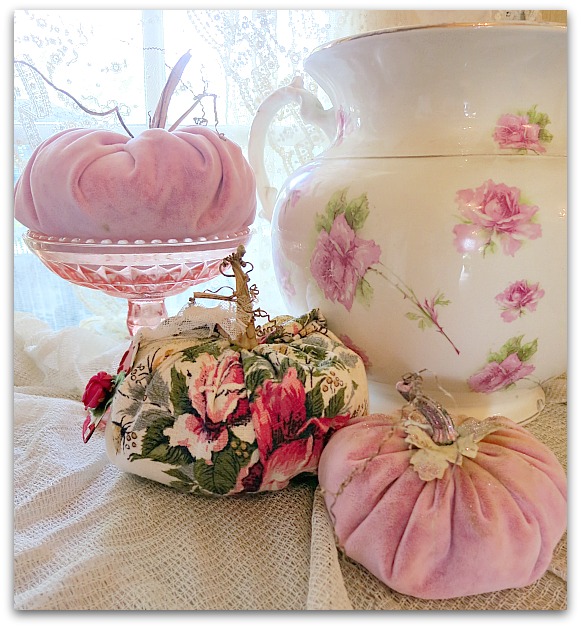

Pumpkins 010

Bark cloth was also not easy to work with.    But worth the effort, I love the floral punkin from it. (I've tied a tag with a matching millinery rose on it to that flowered gourd). 

And on one of the pink guys, I used some more velvet millinery leaves, just because it is sweet, even if it isn't accurate.

Pumpkins 024

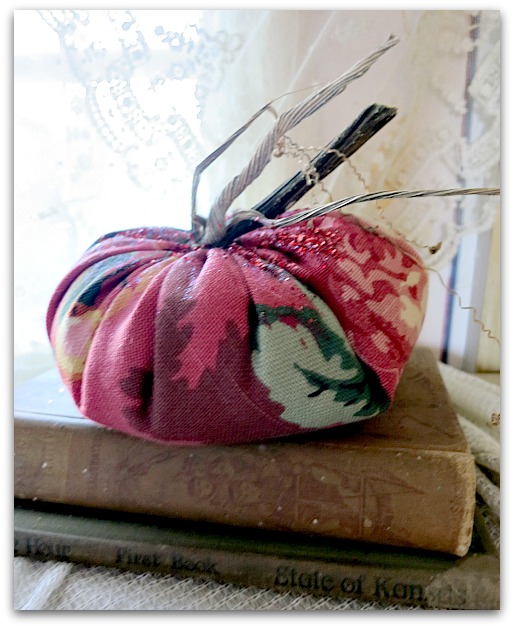
Around here, there wasn't a lot of bright colored fabric to chose from.  Our Hippy Chick admired the ones I'd already done, so I wanted to make one in her colors.    She likes rainbow shades, and this is as close as I could come in my stack of saved bits and pieces.  I think I had it from covering a set of dining chairs for the antique mall ten years ago.

It's a pretty rose and fruit pattern from Waverly, and turned out cute. But the edges were a bit ravel-ly, so I sealed them really good with a blop of glue around the stem, and sprinkled extra glitter over that to hide it, instead of using the Stickles glitter.

Pumpkins 020

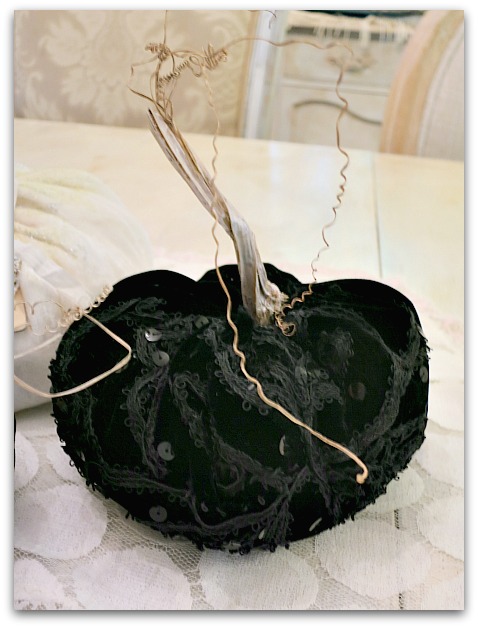
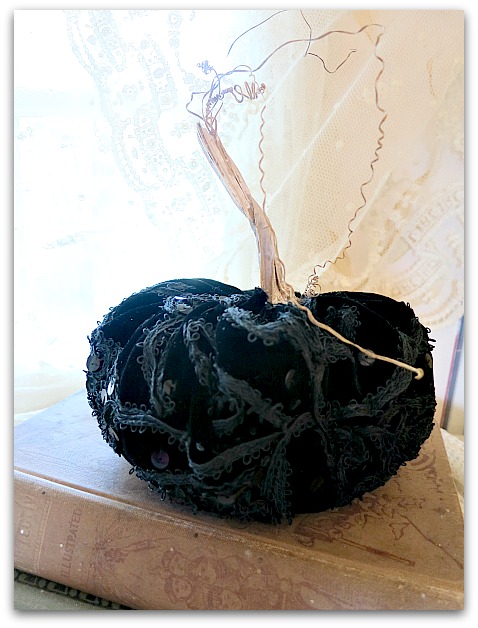
But of all of the ones I made, I think I like this one the best.  I'd bought a black velvet dress, with lots of embellishments on the bodice, at an antique store last year.  It was too small for me, but the fabric was so gorgeous, I had to have it.  The dress was a bit of a splurge, about $35. But after making a couple of pumpkins from it, I still have a ton of velvet left, so I think I'll get my money's worth from it.  

This looks more lush in person, the photo doesn't do it justice.  Even though black isn't usually one of my colors, I think I'll keep this little guy for my Halloween decor.

Pumpkins 017

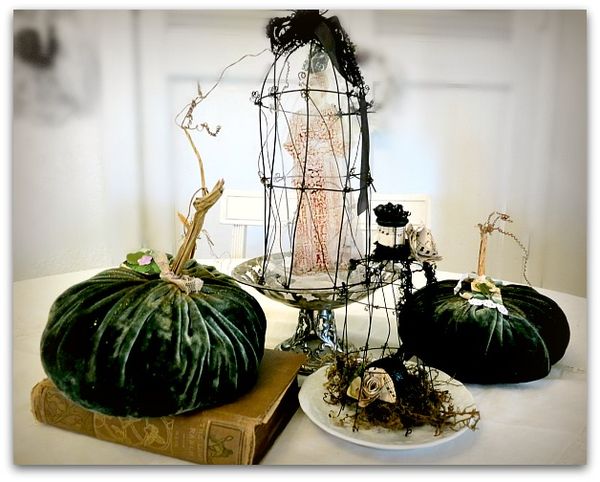
But then again, the dark green ones look good with my haunted birdcages, don't they?

Pumpkins 026

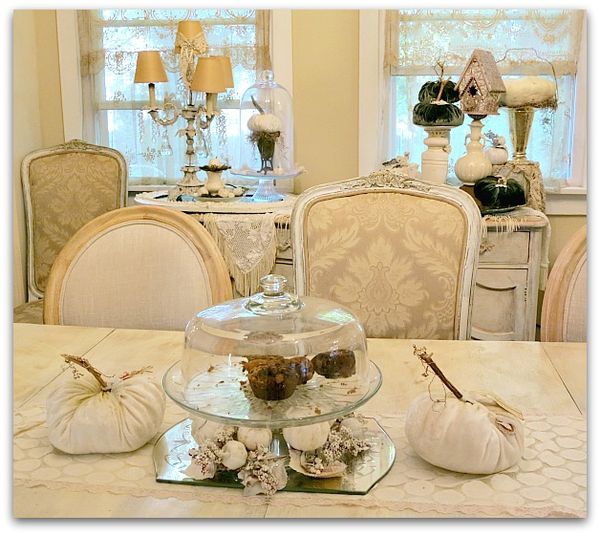
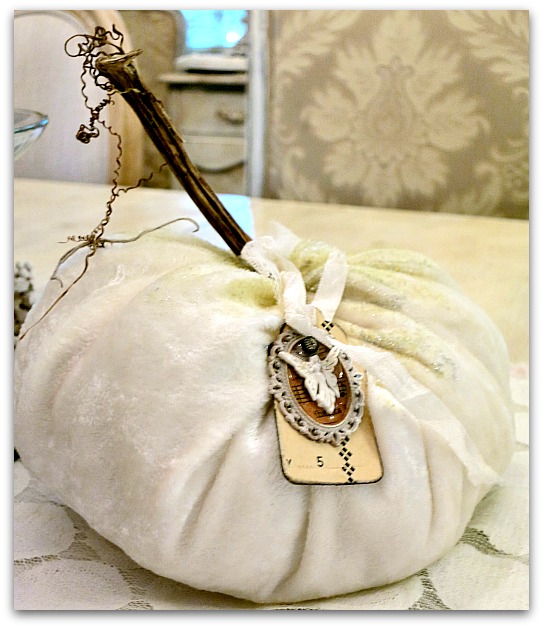
And on the other hand, the white really suits my home…

Pumpkins 013

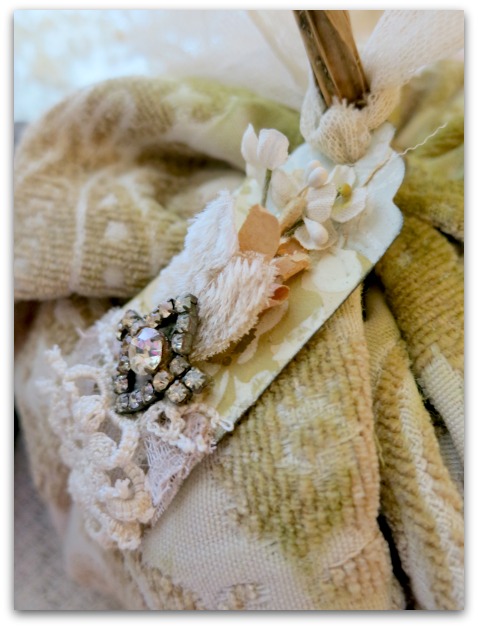
And how can I not want to keep the velvet brocade one made from leftovers when I sewed a slipcover for my recliner?

Pumpkins 011

Nope, I can't keep them all!  I've made some as gifts for friends at a get away I'm attending, and some for guests coming to visit here.  Actually, a lot of the fabric selections were with certain people in mind, so that makes selecting  my own pretty from the pumpkin patch a little easier. 

Pumpkins 029

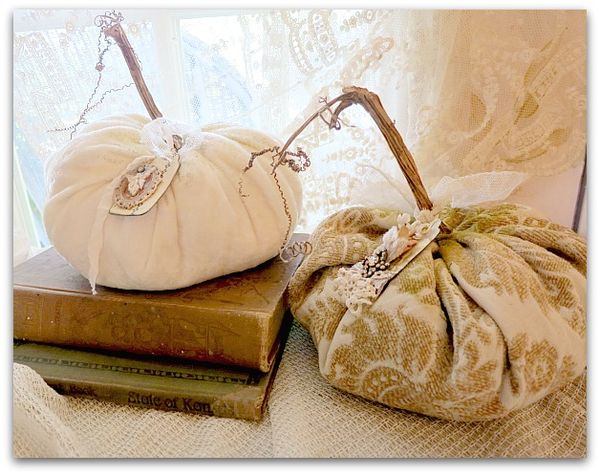
In the meantime, till I pack them up for their new homes, I'll enjoy having them around. 

Some are embellished with tags, some have 3D collaged charms (How to in this post).

Pumpkins 012

How to make a 3-D collaged charm

fairies, how to's, how-to projects, jewelry, the Boutique at Karla's Cottage, Tutorials, vintage paper/collage art

Traycharms 037
After Birdsong, I had a few of the pendant charms left and had a good time playing with them. So much so, that I bought a few more.


Charms 001

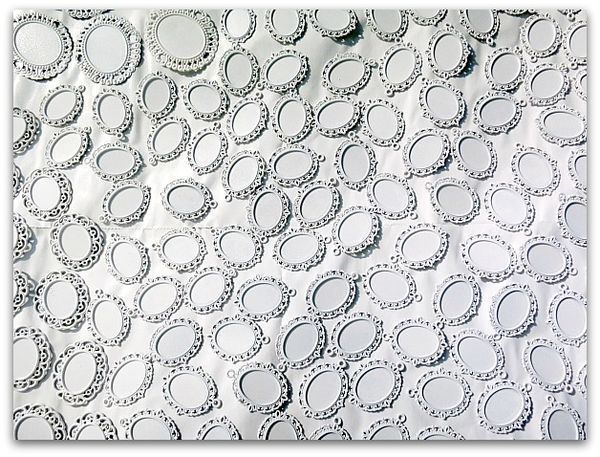
Quite a few more!  Actually, a couple hundred… I tend to over do when I get interested in something.  But, I figure that if I find it so much fun, then others might too. So, I get plenty to stock my Boutique with.

Yep, I did it! I added some stuff to my shop. Finally.  Did you even remember I had one? Except for my whining here and there about ignoring it, you probably forgot it even exists.


Charms 035

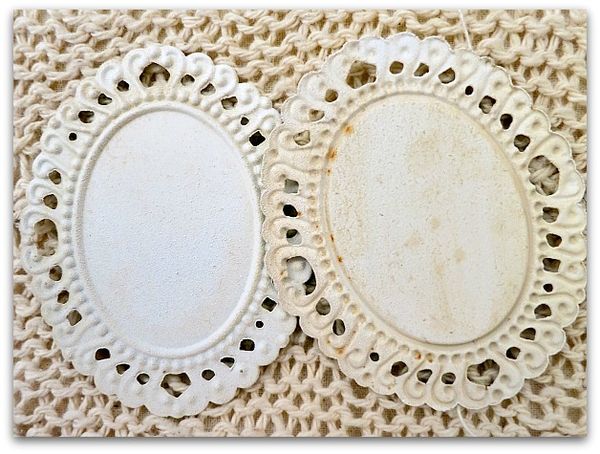
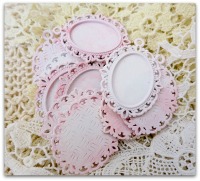
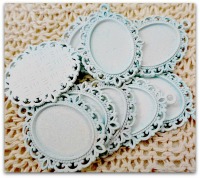
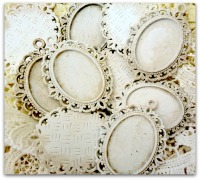
But now, it is filled up with plenty of primed and antiqued tray pendants in a couple sizes and in multiple colors.


Pink charms
Blue charms
White charms

I have a few more to put in there too.


Charms 029

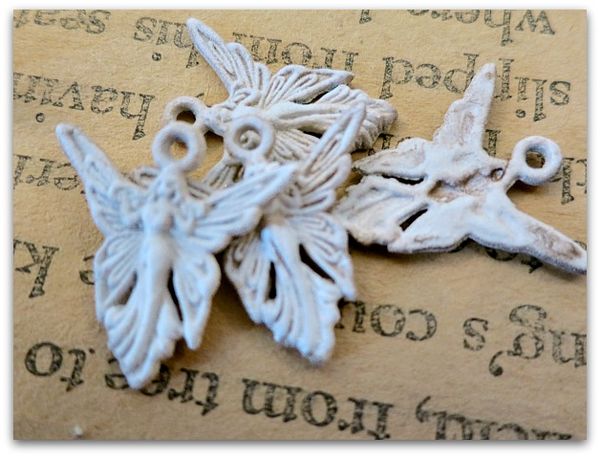
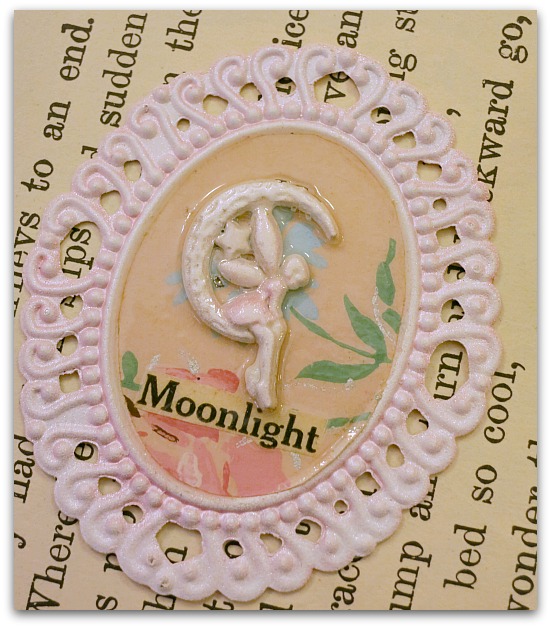
While I was at it, I primed, painted and glazed some fairy charms too to put in the shop.


Traycharms 001

And added lengths of rhinestone chain in lots of colors.

 
Rhinestons 006

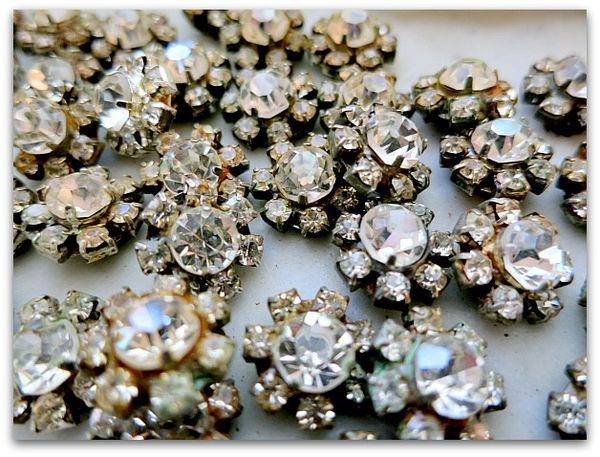
And lots of rhinestone clusters. 


Traycharms 018

And in case you were wondering how to use all these components, I thought I'd do a little tutorial with some ideas. 

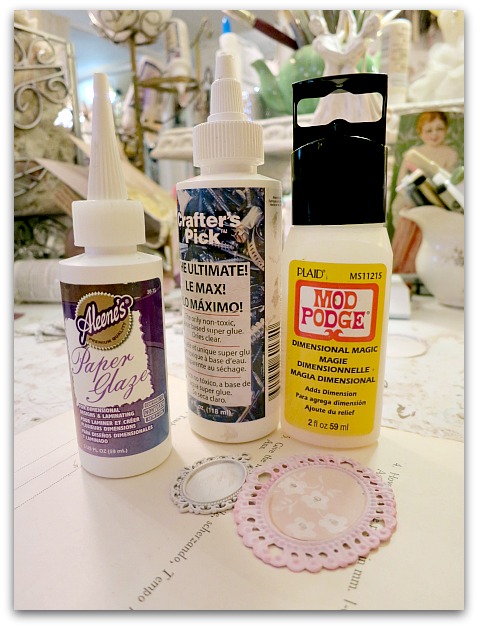
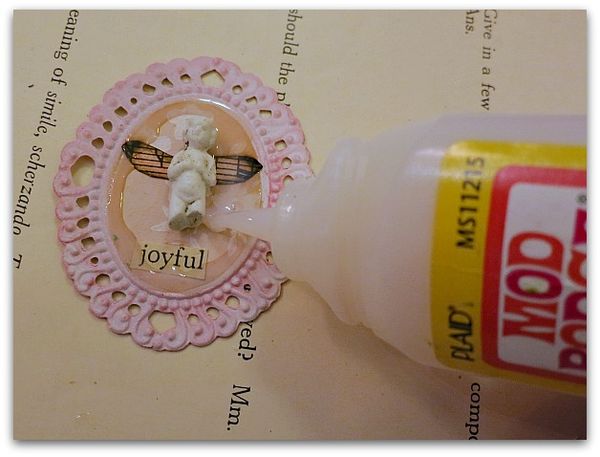
I've used the Mod Podge glaze on all of mine, though in the past have liked the Paper Glaze too. It tends to dry slower and can be milky if you use it too thickly.  Mod Podge is shiny and clear, and dries fast.


Traycharms 012

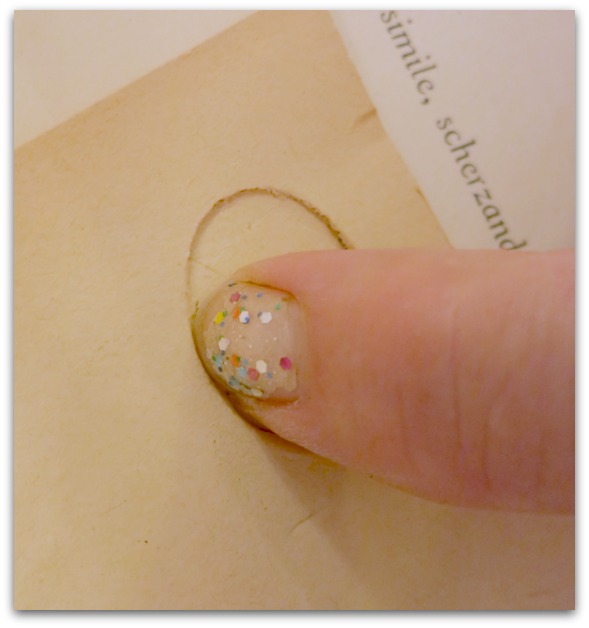
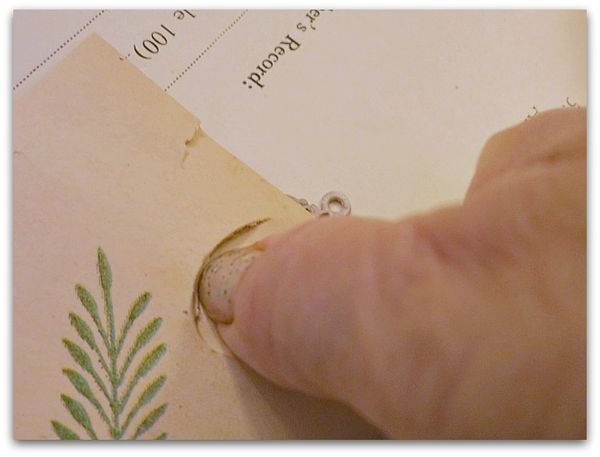
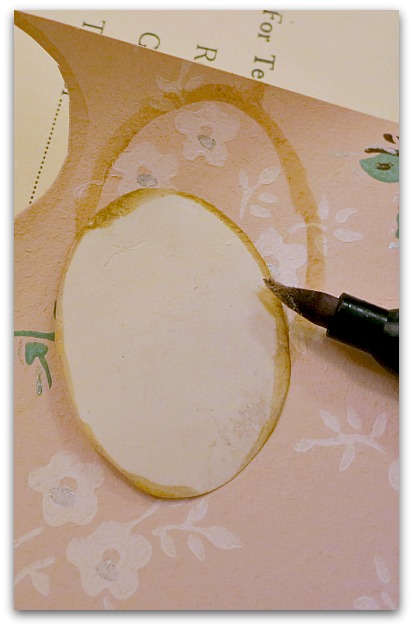
To create a pattern to fit the interior oval of the pendants, I simply place a thin piece of paper over it, and trace with my fingernail.


Traycharms 010

For me, this is better than the charm coming with a pattern. Because you can create your own pattern for any size charm quickly and easily if you learn this trick.


Traycharms 014

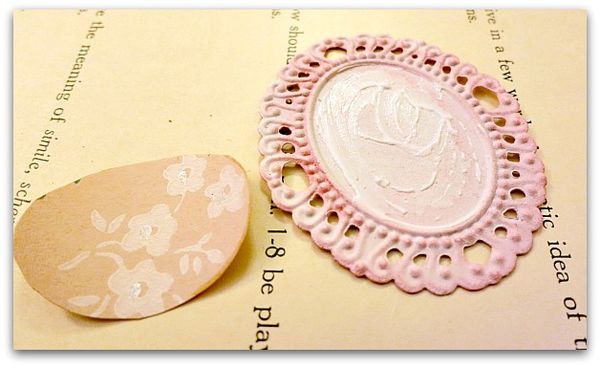
I cut out the pattern and use it to trace onto my pretty paper, and then cut out that.  For mine, I prefer using a tan marker, because it makes the edges look aged.


Traycharms 016

Next, glue it into the pendant.


Traycharms 002

Over this, you can create your collage, anyway you'd like.  If you are going to add a 3D piece, use a drop of Ultimate Glue under it. 


Traycharms 008

Rhinestones, charms, many things make a pretty addition over your paper collage.


Traycharms 019

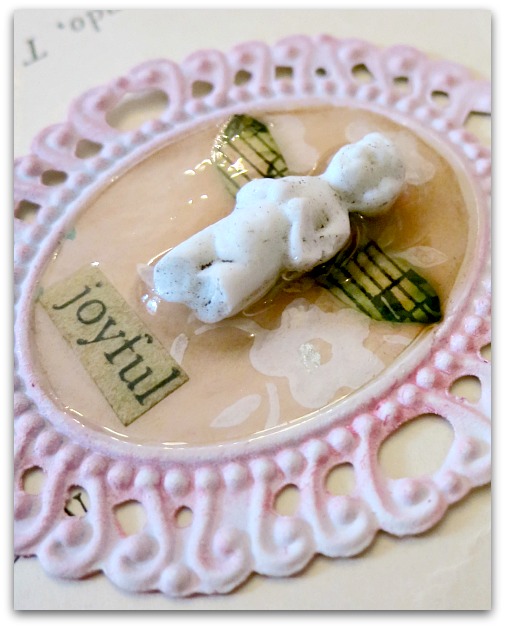
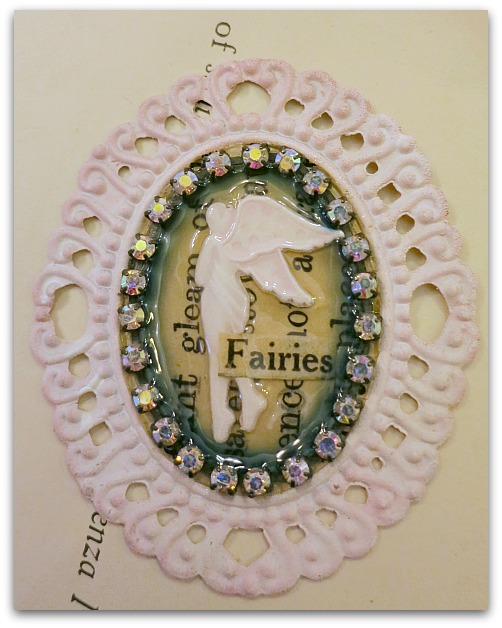
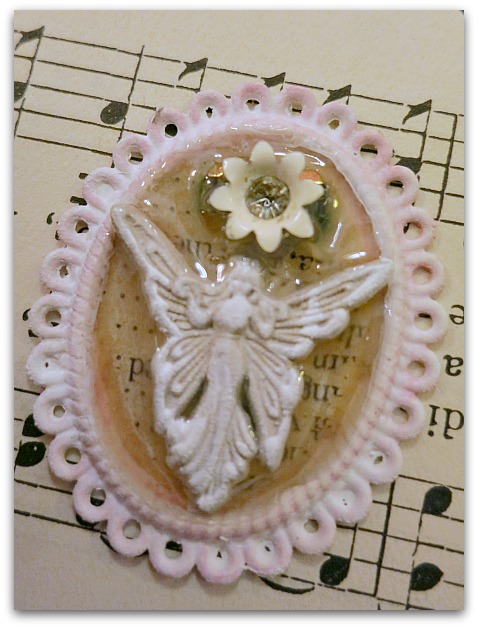
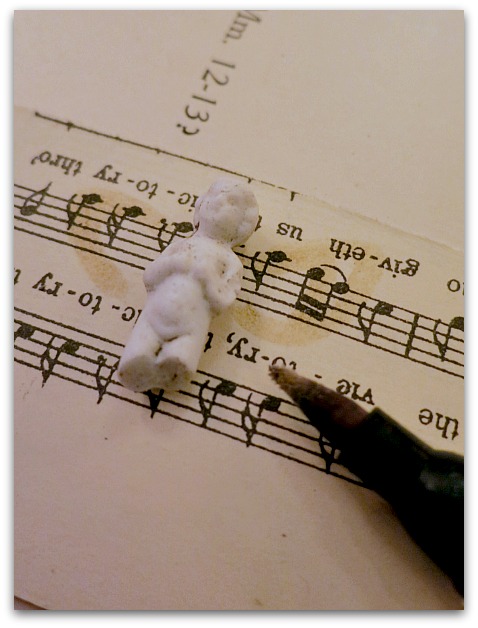
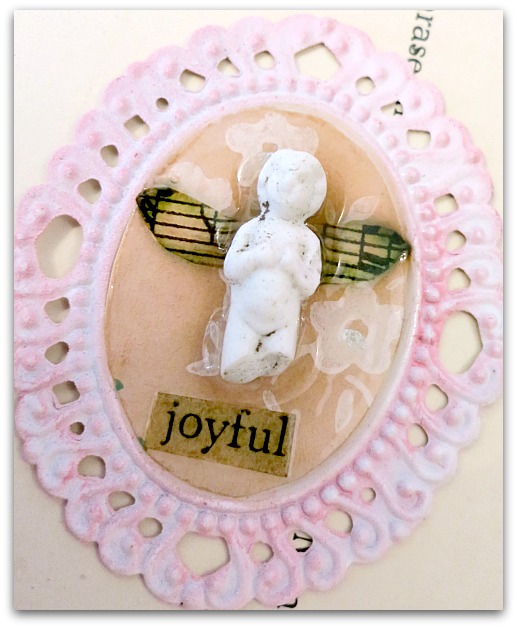
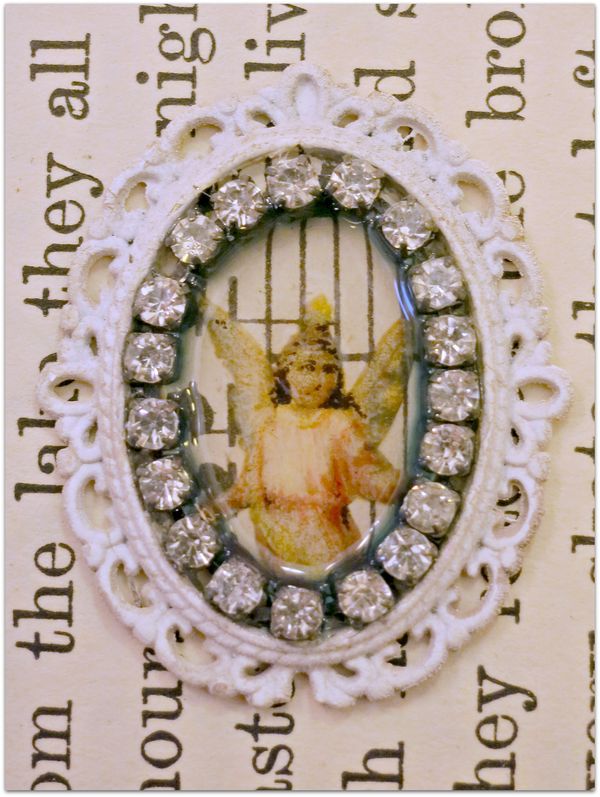
To transform this teensy, weensy Charlotte doll into a fairy, I laid her onto sheet music, drew wings to cut out and color with markers. 

Then, glued down the wings to the pretty paper in the pendant, and glued the doll onto them.


Traycharms 021

I found a word I liked, Joyful, and slipped it underneath. 

Have you ever watched Martha Stewart ice cookies?  You do the glaze the same way she does her icing. You outline the area (make a "dam"), and "flood" the interior after. (The rim of the oval tray holds the flow of glaze in place.  The Mod Podge brand is pretty fluid and almost requires a contained area, but the Paper Glaze is thicker and can be used on a flat surface with no rim)


Traycharms 023

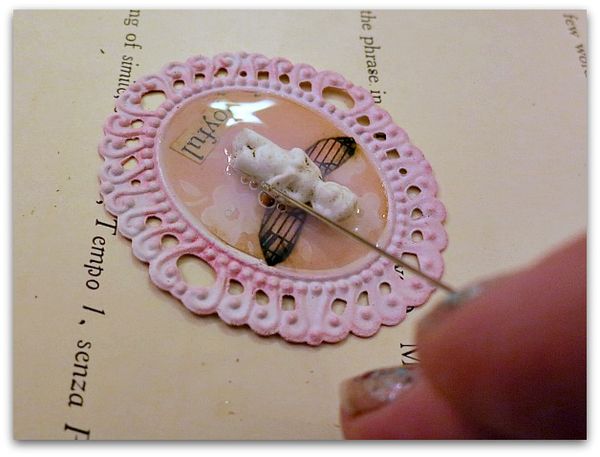
If you end up with bubbles, pop them with a pin.  If those bubbles roll away and won't pop, your pin isn't sharp enough. I like those tiny, thin, quilter's pins if I have trouble with a regular one. And wipe off the tip every single time. The glaze builds up on the end of the pin and it won't penetrate the bubble.


Traycharms 036

Then, set it aside to dry.  Between the glue under your chosen 3D element and the hardened glaze around it, the piece is secure. 


Traycharms 034

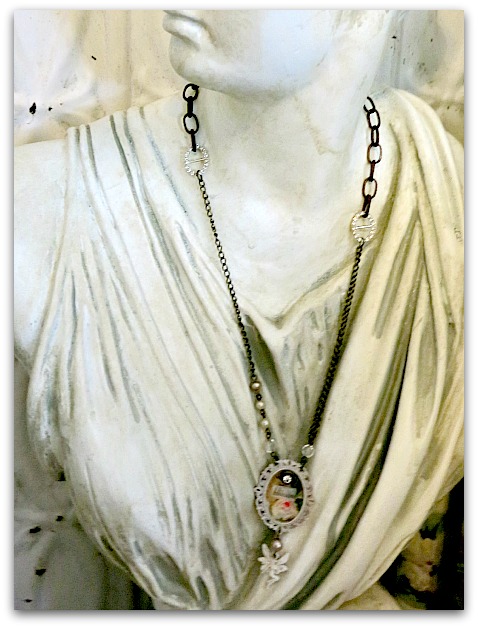
I've worn many necklaces with rhinestones, charms, etc. added to a pendant this way and all have held up well.


Traycharms 035

These fairies come with a ring at the top to hang them, and look nice this way too. If you decide to use them in a pendant instead of hanging off of one, you should snip that ring off. I use the Tim Holtz red handled magic scissors that cut through anything, but you could also use wire cutters.


Traycharms 004

Of course, the pendants look cute with simple paper collages in them also. (oops, missed some bubbles under the word there)


Charms 016

And they don't have to be used as jewelry. I glued one into my journal too.  I'm picturing some Christmas tree ornies too.  Hung from ribbons?  Maybe with dangly crystals?


Traycharms 006

Please note that when adding metal pieces, like the rhinestones, a patina forms from the chemical reaction between the glaze and the metal. I like it it, myself.


Traycharms 039

ps- After looking at my photos and seeing how messy my nails look, I think my next project will probably involve this.

Recovering a lamp shade and some other touch ups

cottage, flowers, how-to projects, magazine pictures or articles, paintings, sewing?

Fifi 002

Before Fifi asked me to do a photo shoot for Romantic Country magazine, I was already on a home fix up binge.  I've been making pillows, slip covers, touching up paint, rearranging and foofing.  Good timing for her call!

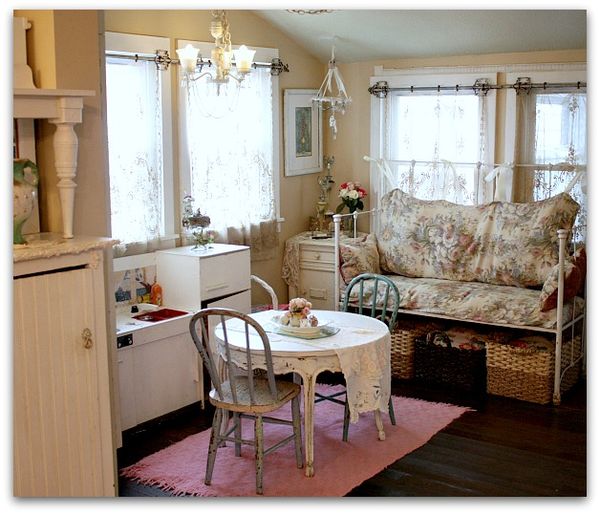
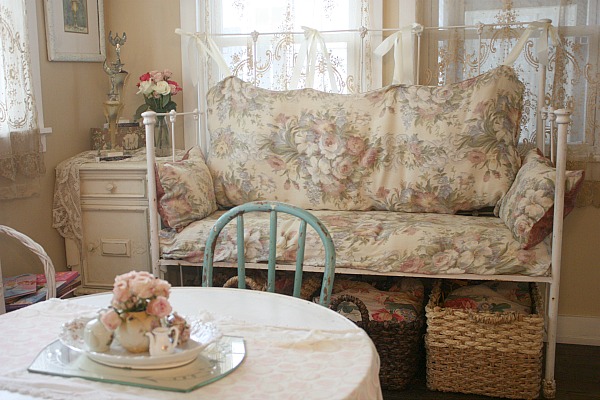
This bench was brought in from the garden a couple years ago, so we'd have a spot to sit and put on shoes by the front door, and the baskets under it are perfect for toys and kid's shoes.  But I'd never made cushions for it, I've been wrapping fabric around a cushion that didn't match and making do with that.


Fifi 004

About ten years ago, I'd found some old, floral curtains in a dumpster (I nicknamed it the "Dumpster of Gold", there was so much beautiful bounty in it!!!). They were just the right fabric for making pillows for this bench.  The top pillow is stuffed with poly fluff, but the bottom one is just a pillow case over that same cushion that I'd been wrapping around fabric before. That way, I can slip it off and wash it after muddy dogs spend time on this bench. Which they love to do.  It's Twinkle's perch so she can keep an eye on the front door and protect us. 
The pink rag rug was one that used to be white, but the white wasn't coming back after years of use. (I don't throw much away) It was still in decent shape, so, I dyed it, along with some  stained tees and other odds and ends. Because when I have a dye pot going, I always feel the need to scrounge around the house looking for other things to dip in it.

I used the liquid Rit Dye in fuchsia, but only a 1/2 bottle along with a 1/4 bottle of tan to tone it down. I think I could have done 1/4 of pink and 1/8 of tan and been happier with the result.


Fifitwo 005

It seems like I've been on the go nonstop for the last couple of years and hadn't really had a chance to nest.  Since I declared this the Summer of Whammy and took time off to simply be a grammy and enjoy my family and home, I found lots of little projects that needed tending to.  Like this lamp shade that I revamped. 


Fifitwo 001

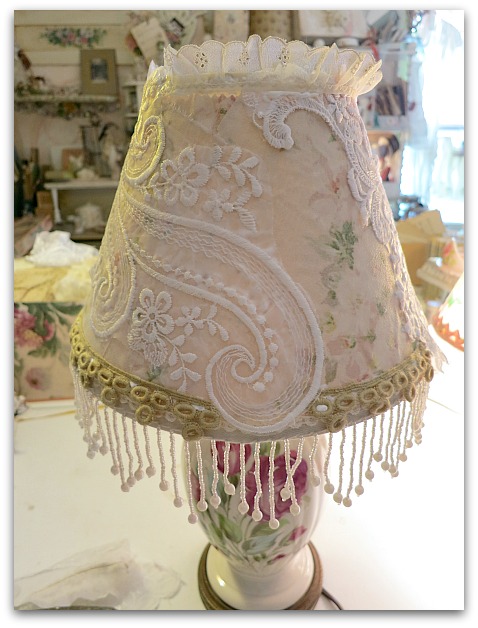
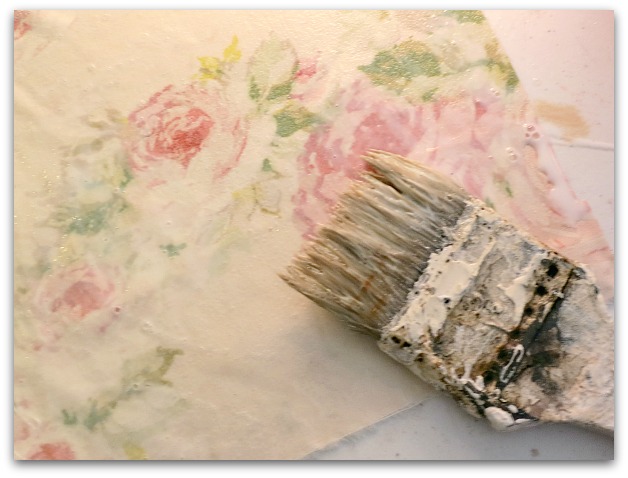
If you have ever covered a lamp shade, you know that with the curved shape, it's hard to smooth fabric down onto.  To avoid measuring, I decided to patch work it.  I took scraps of rose pattern cotton, and brushed the lamp shade with school glue, and brushed some onto the scraps too, then laid them onto the shade.


Fifitwo 002

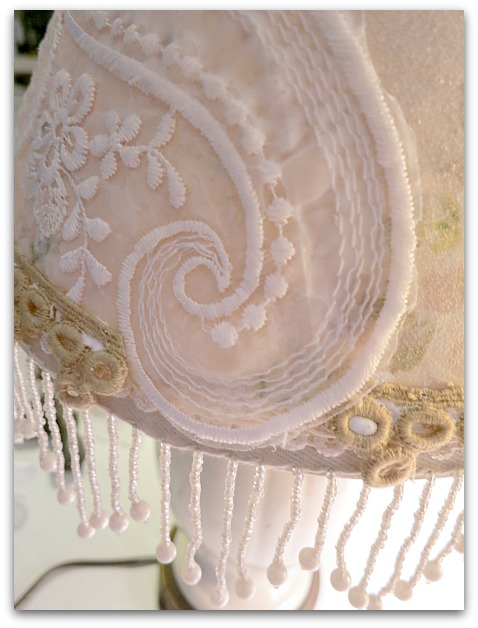
After piecing in a background of roses, I covered the seams with lace applique bits (picked up on the Enchanted Affaire bus tour in downtown LA for 25 cents each).  And made a bottom trim border from some old tatting over a row of dangly beads.

Fifitwo 004

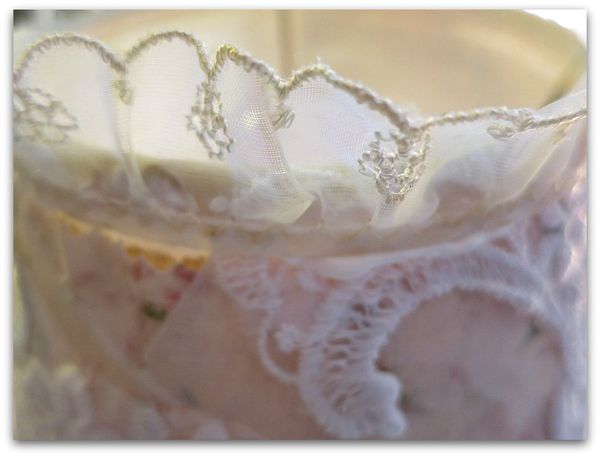
Around the top, I used some trim from a vintage skirt.  All the lace and trim was attached with Ultimate glue, but I'll bet fabric glue would work the same. School glue wasn't strong enough for this part.


Fifi 037

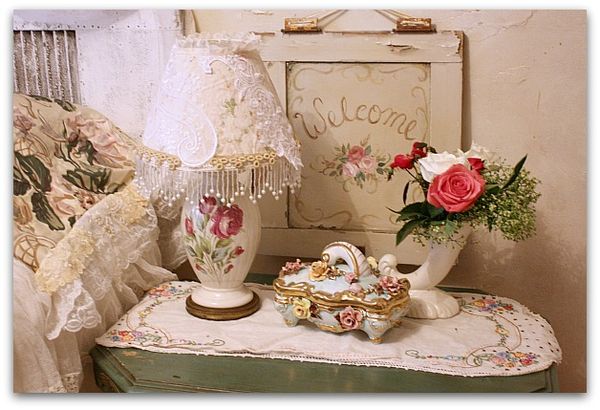
Tah Dah!  Just perfect for the Rosey Room, to go on the $4 Goodwill lamp that Aunt Sandy left behind for me when she left here.


Fifi 036
The throw on the bed got a make over too.  It was one that I thought was just lovely, but it sure fell apart fast. The top is sheer with cut velvet roses, and velvet trim. But the backing on it shredded and fell off. I saved the top because it was such perfect fabric and I always thought I'd use it someday for something.

Who knew, that I'd return it to being a throw again?

I came across the piece of fabric when I cleaned out the closet for the Studio Tour and decided I was ready to reuse it. What great timing, since soon after, Fifi made arrangements to photograph the house.  And this was just what the Rosey Room needed.

All I did was buy some stretchy, crushed velvet on sale at Hancocks for $4.40 a yard, and sew it on the back. I am hoping that the stretchiness will help it last longer than the previous lining. And the crushed velvet is soft and comfy to wear over my lap as I watch TV. So, this throw will go to the living room now that the photos are done. The guest room doesn't get used often enough to keep it up there. It's so pretty and soft, I want it in the living room to snuggle under on a regular basis.


How to make a tincture of lavender oil

flowers, free images, how-to projects

Tags 014
The girls and I made some lavender extract/oil recently. We experimented, after I read through lots of online how-tos and picked out the easiest parts from what I saw. 

Hopefully, my jimmy-rigged attempt will work out.


Tags 012

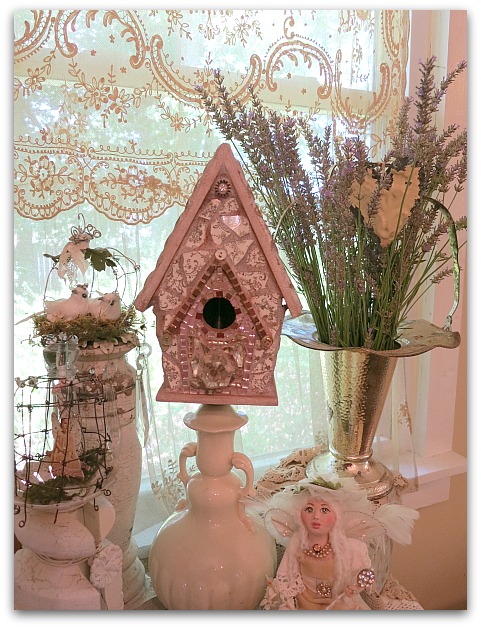
This is the first year that my lavender has really taken off, so I had a beautiful bush of it. Well, I don't know if they are condsidered bushes.  But this was so large, it practically was a shrub.

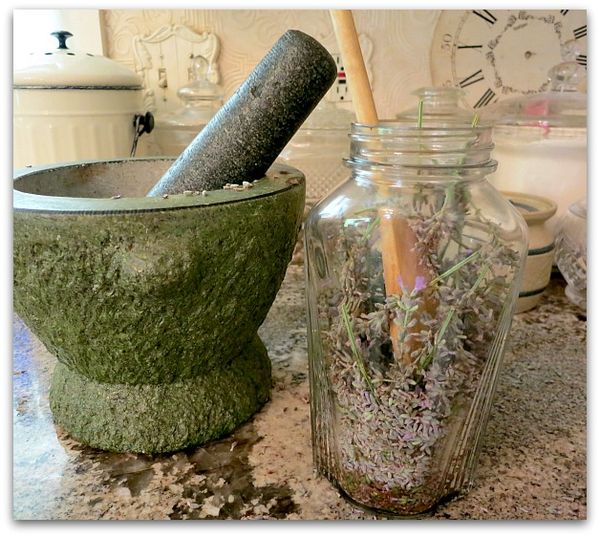
I filled a vase with some, then, we set up an assembly line of cutters and crushers to make the oil.


Tags 015

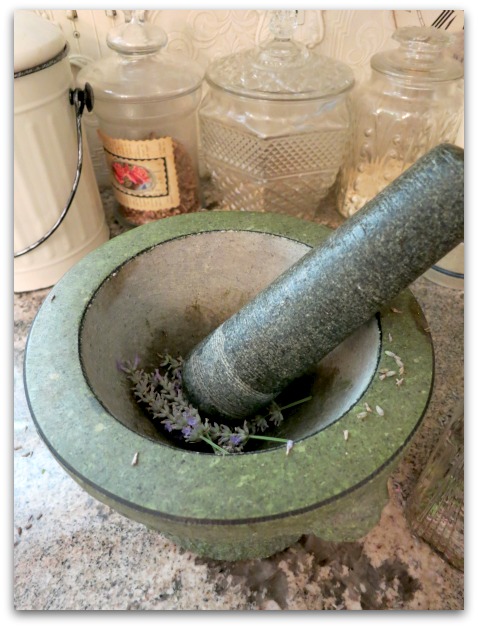
Sugarwings was in charge of the scissors, Dewdrop had the job of throwing the blooms into the bowl.  We all took turns using the pestle. 


Tags 016

It was then shoved down into a clean, glass jar. (vintage of course!)

We covered it with vodka to soak. (to me, this seemed less likely to cause bacterial problems than soaking it in oil might, although I'm sure if done right, oil is fine) At that part, my husband walked in the door as I nabbed his bottle of Gray Goose, and he was wondering if trying to make this concoction with the help of the two little fairies had driven me to mid-morning drinking.

Once I explained what we were doing, he thought I might be wasting the good stuff (I don't drink vodka, but once the price was explained to me, I quickly looked in the cabinet for something cheaper)

Here is how we are making it, I'll let you know how it all turns out:

1- Trim most of the stems off, but you don't have to take the blooms off completely, just cut the stem off at the base of the buds.  (I placed a few cut off long stems in each trash can around the house, as air freshners)

2- Lightly crush the blooms, just to release the oils.  Don't smoosh them to goo.

3- Fill a clean, glass jar with the lavender, cover with vodka cheaper than Gray Goose.

4- Tighten the lid, and shake. 

5- Shake a few times a day for a week or so, and store in bright light. My bottle looks pretty on the windowsill.

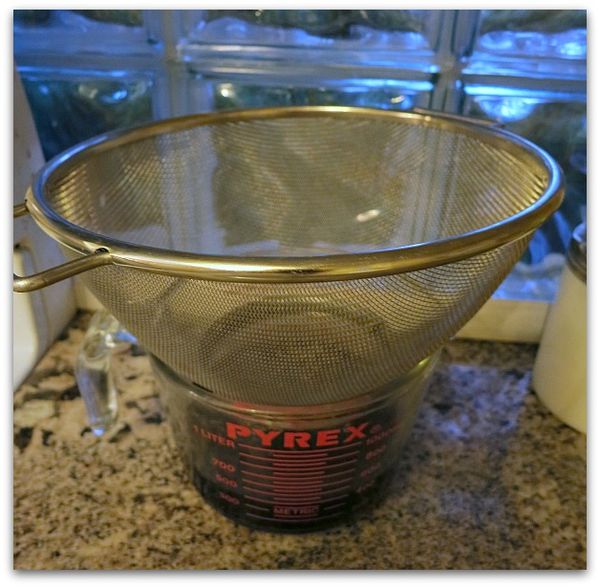
6- Pour the liquid through a sieve into another clean, glass container.


Kitty hawk 043
7- I used the sieve as a lid over a big, glass measuring cup and let it sit for a few days so the alcohol could evaporate. Cheesecloth is what you are supposed to use, but this seemed fine.

8- When it is done, I hope to have a concentrated tincture of fresh, organic lavender oil to use in my cleaning supplies and to scent bath products I like to make.

9- Store in dark bottles.  Make sure you make a pretty label for your bottle!

Tags 014
You are welcome to use this one if you'd like.

One site I looked at for making herb tinctures seemed good, But I only used parts of it and parts of a few others, so please google tinctures and oils before you make your own too, you might find other ways that suit you better.

How to make playdough with glitter

fairies, family, how-to projects, Sugarwings


Studio tour 2013 016

We recently made some playdough.  And it was pretty easy to do, plus for DYI-ers like us, a lot more fun than just opening a can.

Here is what was in it:

2 cups flour

2 cups warm water


1 cup salt


2 Tablespoons vegetable oil


1 Tablespoon cream of tartar (optional for improved elasticity)


Mix all in a saucepan and cook.  At first I was dubious, it looked like crumbly pie crust gone bad.  But all of a sudden, as it cooked, it turned into playdough.  One minute, I was ready to toss it out, the next, it looked and felt like the real stuff.

At that point, we added scent.  Sugarwings chose mint extract. I voted for orange or vanilla, but she won.

That is usually how it goes around here.


Studio tour 2013 008

Once it cooled, we mixed in food coloring. I heard you could use Kool-Aide, but that isn't something we keep on hand and this was a spur of a moment idea.  So we tried the expensive, paste kind of food coloring that comes in so many pretty colors.

A couple were okay, but most turned it odd tones. The plum shade made a yucky shade of brown. Well, yucky till we decided it looked like gingerbread, it's all in how you look at it.


Studio tour 2013 014

After that, we tried the cheapo, 4 pack of liquid colors. It was quite messy, but the color was truer.

(all the liquid food coloring washed out of her clothes, wore off her skin, but some of the paste coloring stained the white table.  I've not made much of an effort to get it off, bleach will probably do it.  Or another coat of white paint?)


Studio tour 2013 012

After we worked the color throughout the dough, we piled on the glitter. And LOTs of it. This was a fine one, not too heavy, so it didn't feel gritty when you played with it.

(Make sure you don't use the glass stuff, sorry, I know that is obvious, but  I felt like I had to say it, I've seen that dangerous stuff used in some stupid places)


Studio tour 2013 009

The sparkles are very pretty in it. And the texture was really nice. The smell was wonderful, but between the talk of gingerbread and smell of mint, we had to whip up a batch of real gingerbread and throw ourselves a Christmas in July party.


Studio tour 2013 020

The darker the color, the better the glitter showed up. And Sugarwings likes adding color, so we had some pretty dark ones.

We've had the stuff wrapped up in zip lock bags and everything is as nice this week as it was last. I don't know if I'd store it too long, with no preservatives in it. It could go moldy. At least, that is my guess.


Studio tour 2013 001


Scroll to Top