how-to projects

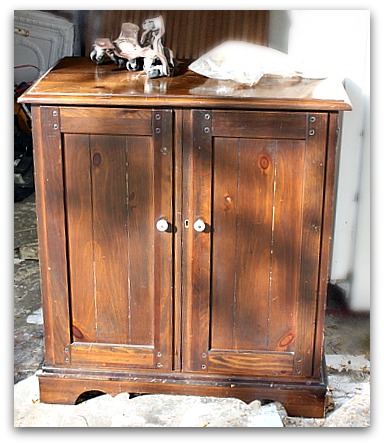
Antique bookshelf makeover to a flat screen TV cabinet with no sanding and no painting just primer and glaze

antiques/junking, bird song art event, cottage, Hand Painted Furniture, how-to projects, redos

Girls room redo 031

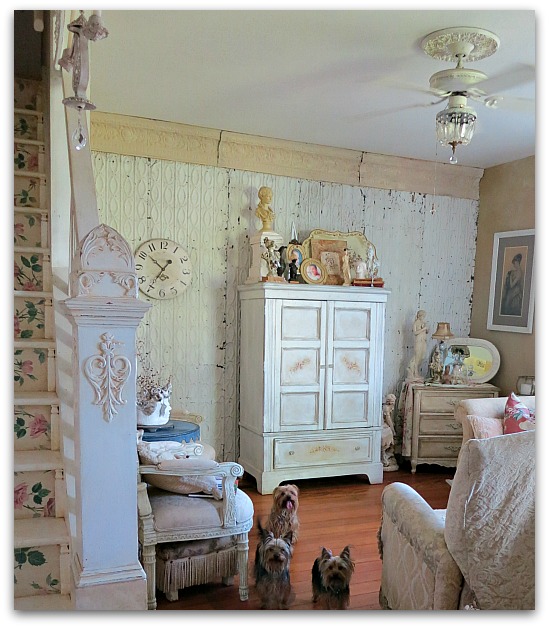
When we were updating to a new flat screen TV, I knew I'd have to lose the cabinet we'd used for the older set that we had.


Tin wall 003

Our living room is pretty small, and the armoire we kept the TV in wasn't all that big, but it was kinda bulky and seemed to take up a lot of space. But it wouldn't be wide enough for a newer set.

It is one of the few brand new pieces of furniture that live in my home, it was bought to fit the TV, and looked way too new, so I repainted, and aged it, then added glass knobs the day it was delivered.

I searched everywhere for a cabinet that would fit a new 50" flat screen and still have doors.  Our TV is on a  LOT, but when it isn't, I don't like to see the big, black hole that it makes in my white on white decor.  But when I looked at new cabinets, I was told that the door span would have to be so wide to accommodate a large set that it made the cabinets top heavy and dangerous.  So, most TVs go onto a wall, a mantle, or a flat surface.


Birdsong 3 weekend 044

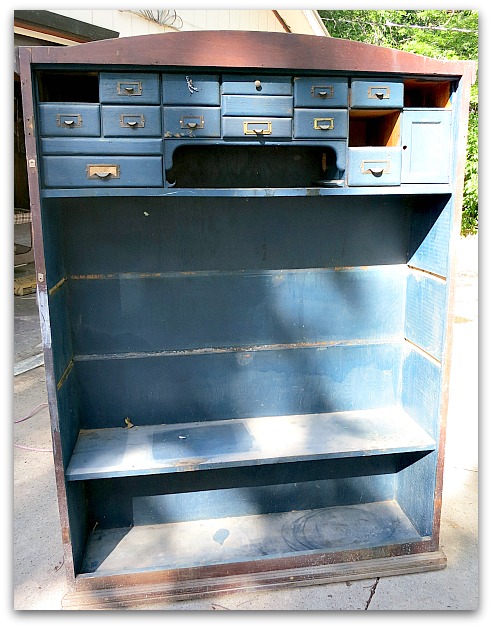
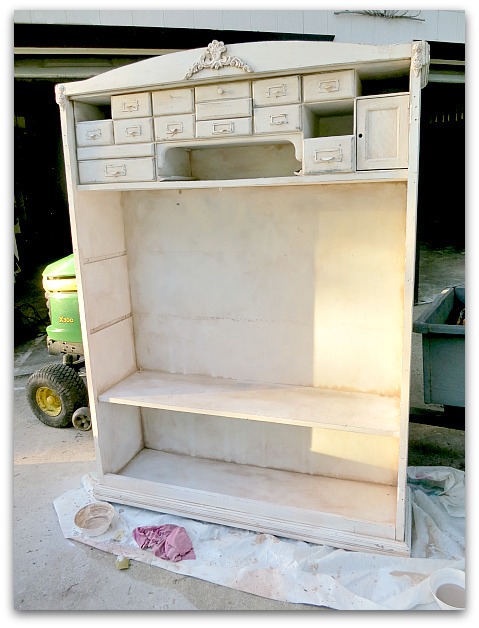
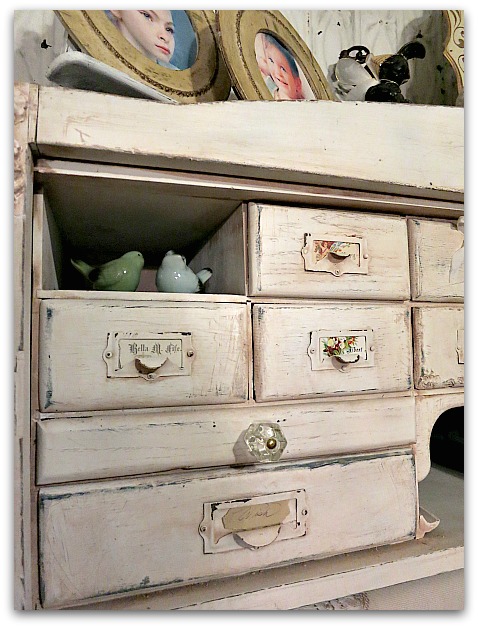
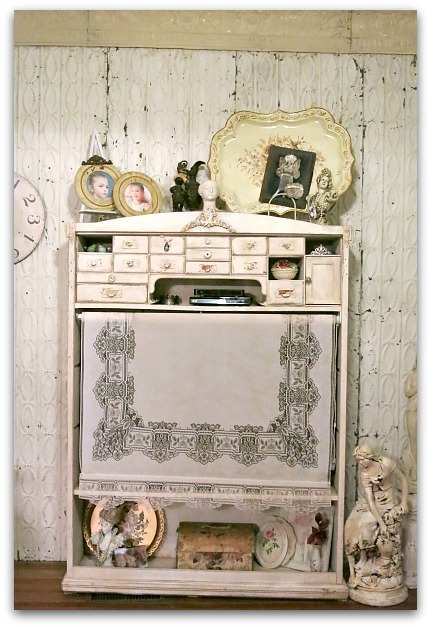
 I turned to antique shopping (which I prefer anyway!) and found the same situation.  No doors that were wide enough, unless they had a bar down the middle, which wouldn't work. I found this old bookshelf and my son pulled the nails out of two of the shelves to make space for the television.

It needed a deep cleaning too.  It could have been in a barn for a while from the looks of it.

This is 11" deep and 46-1/2" wide inside. I measured 50" TVs and found the one I wanted before shopping with a tape measure in my purse to find a cabinet to fit the TV I'd picked out. 

And yes, this doesn't have a door, but I thought some lace curtains would be nice.


Birdsong 3 weekend 045

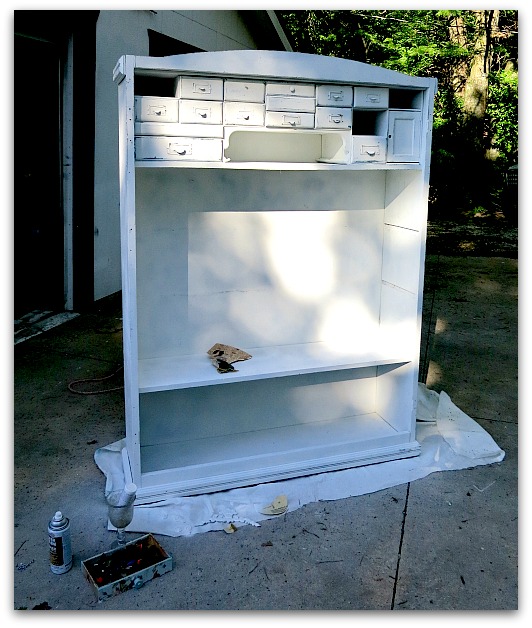
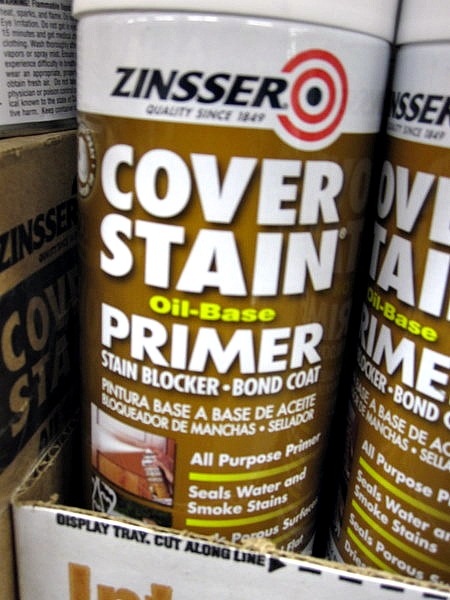
I used 5 cans of Zinser Bullseye spray primer meant for glossy surfaces, with no sanding.  I figured with so many cubbies, a spray would be the way to go. 


Birdsong 3 weekend 046

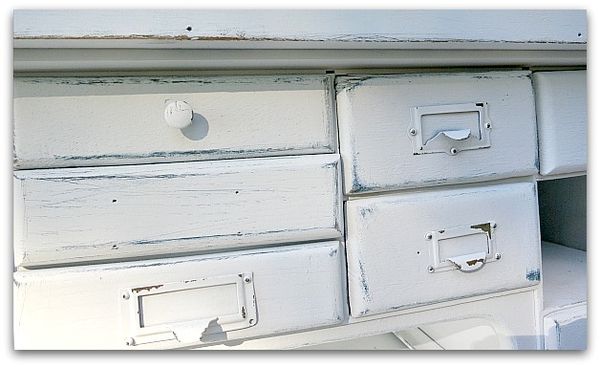
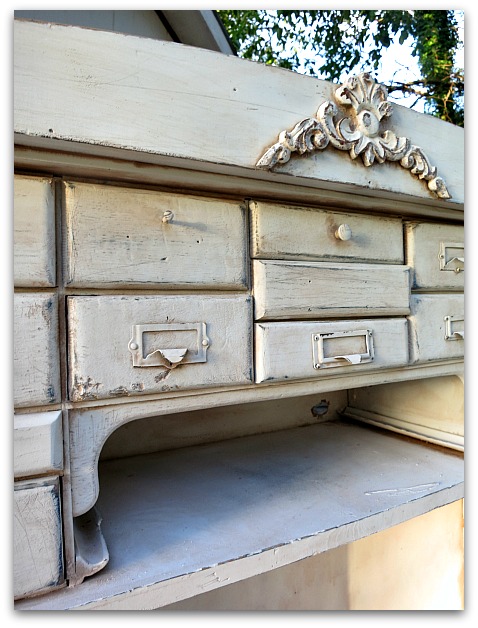
After priming, I did some distressing with sandpaper.


Birdsong 3 weekend 049

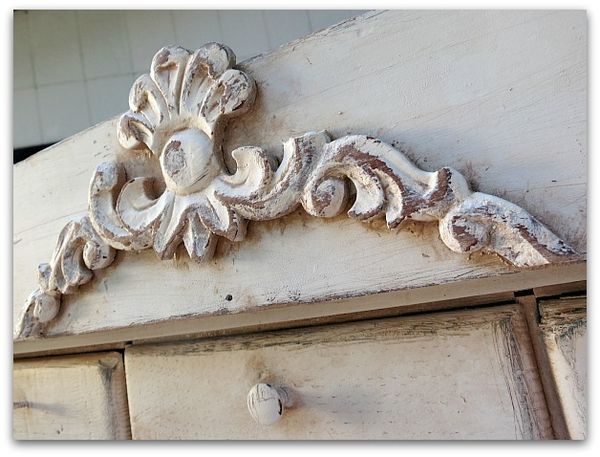
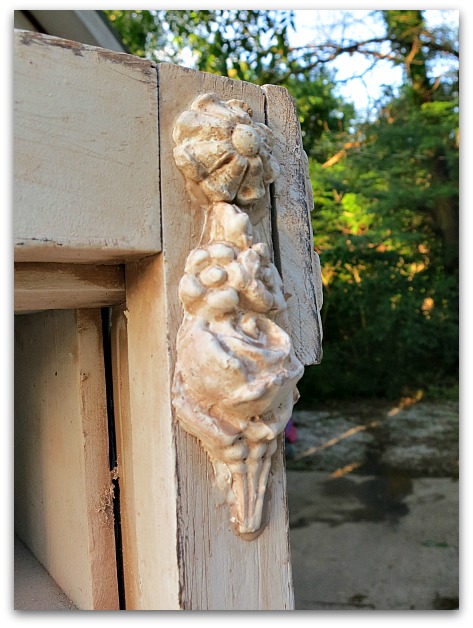
And added some fancy work details and some tinted glaze.


Birdsong 3 weekend 048

For one pint of clear glaze, I mixed in one 2 oz bottle of coffee and cream colored acrylic craft paint.  I brushed it on heavy and then wiped it off with a damp, well wrung out towel.  A torn up old tee shirt works great.

 If you do this, rinse often.


Birdsong 3 weekend 047

If you are wondering why there is a John Deere in the picture, it was doubling as a step ladder to paint the top and something for the piece to lean against as I wiped the glaze on.  I was afraid it was going to fall over backwards.

And if you are wondering when I painted it, I didn't!  I went straight from primer to glaze.

Primer CANNOT be left as is!!

It isn't paint and is meant to be covered. 

But who says you have to use conventional paint?  I skipped straight to the tinted glaze.  It covers every bit of the primer and is basically about the same as clear paint with tint in it, so dries with a paint like finish. 

I didn't top coat it, because it won't be a heavy use item. If I do this technique on a table top, or dresser, I always use a water based, non yellowing top coat, like Polycrylic from Minwax.


Birdsong 3 weekend 050

   We drilled holes in the top compartment for wires to the DirectTV box and DVD player, and also in the big opening for the television.


Girls room redo 026
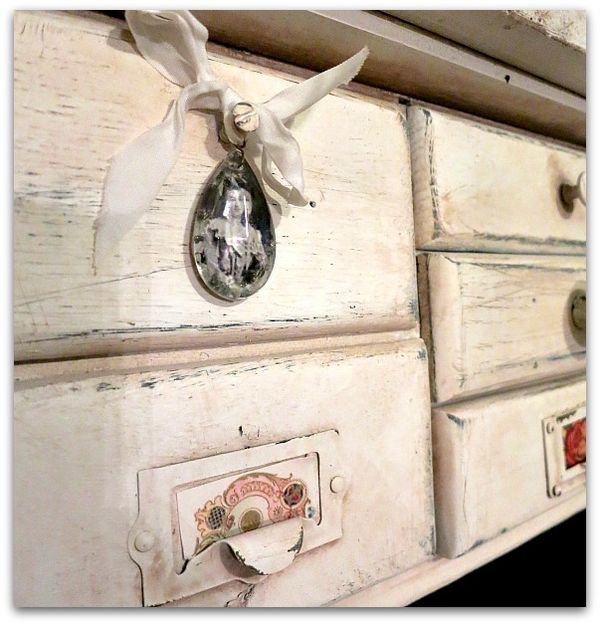
I didn't try to match up the existing hardware in the places where some pulls were missing. Instead, I went with odds and ends that I had around.  One drawer had just a screw as a knob, and I left that, but tied a chandelier crystal with an image added on the back to the screw.

Girls room redo 027
Old calling cards were a good fit for the slots in the pulls.  Especially favorites that I'd been saving for some special use, like one that says "Bella" and a couple Marys (my grandma's name)


Girls room redo 032
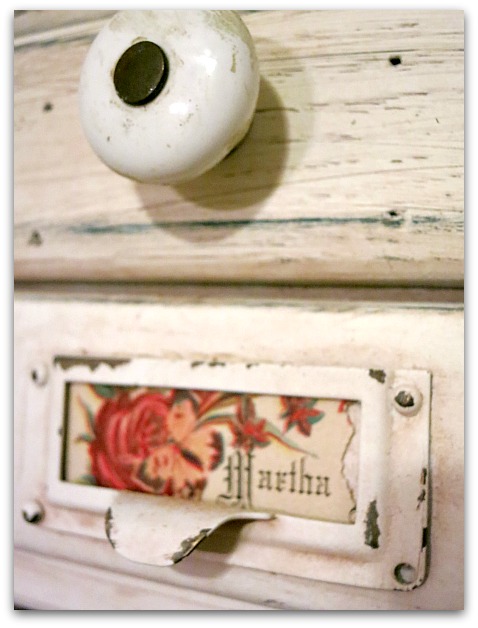
And Martha, my mom's name.


Girls room redo 024
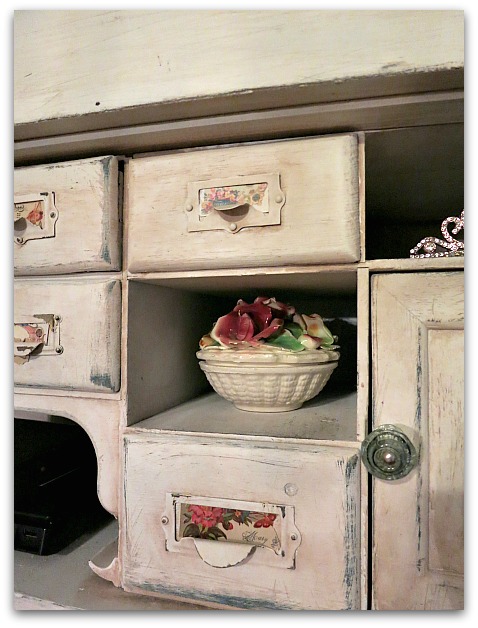
I used some vintage floral paper and a couple of notes in my sister's pretty handwriting in others.
I guess, if I was organized, I'd have gone with actual labels of what was in the drawers, huh?

Once it was set up, I wasn't thrilled with where the curtains would have to hang, past the sides so as not to cover any of the screen.  So, a blind was suggested by my sis, Terry.


Photo

I'd seen some great lace blinds at the Victorian Trading Co. and since Birdsong was coming up and I had guests to show around KC, we'd planned to go there the next day any way. Kansas City is the headquarters for the online store and catalog and they have an outlet store here.  Lucky us! And lucky me, the blinds are only $20 at the outlet store compared to $69 online.

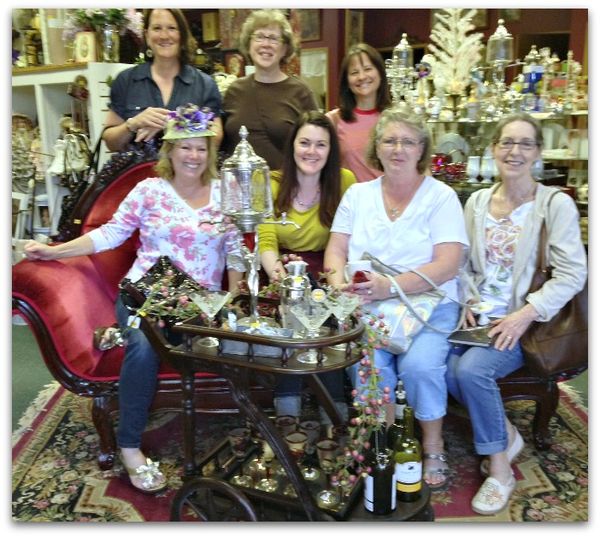
Since I knew most of the ladies coming to Birdsong were from out of town, I made sure to tell them about this store.  When we pulled up, we saw an Iowa plate in the parking lot, and I rightly guessed that some of our friends were inside shopping.  When we went in, the manager gave me a huge hug because I'd sent so many people her way. 


Gitf 053

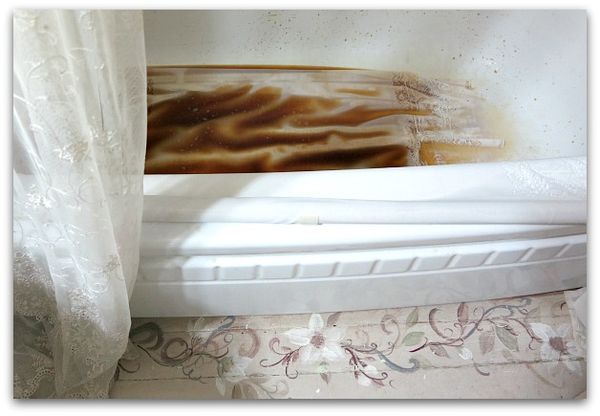
There just happened to be a set of blinds exactly the size I needed in the clearance room! But they were very, very white.  I placed them in the tub and poured coffee over them, then laid them out to dry in the sun and got just the color I wanted.


Girls room redo 029
I'm looking for more old, wallpaper covered boxes to set on the bottom shelf to hold the kids' DVDs, I think it looks too busy right now with all the doodads on the shelf. A few boxes would be better.

Later on, I might print an image on linen and add to the blind…. that would be pretty wouldn't it?  .

PS- Don't forget that Google Reader is closing soon! If you are
reading this from that site, you need to make a change real quick or
your list of blogs will be gone.

I've tried Feedly myself and basically all you do is sign up and it
will import all your Google Reader sites in the click of a mouse.  Very,
very, very simple.Bloglovin is another good one.

You can also follow my blog through Networked Blogs and read it on
FaceBook that way.  There is a list of different reader site buttons on
my sidebar that you can click on to follow me in. 

Hope I'll still be seeing you around!


How to hand dye ribbon

holiday decor, how to's, how-to projects

Jars 021
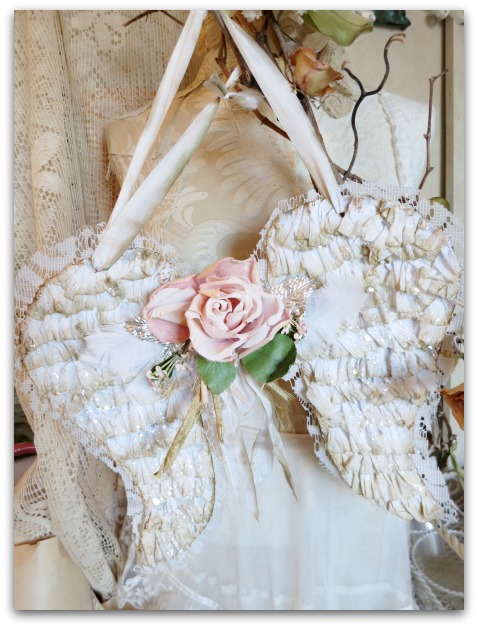
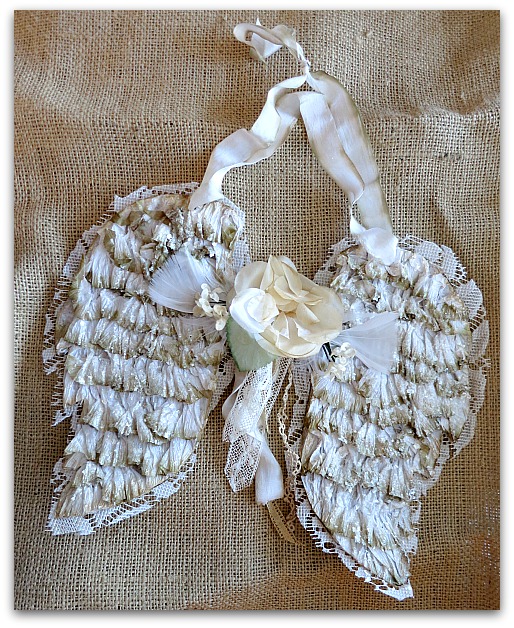
The angel wings tutorial that Dawn is selling are still inspiring me to create some wings of my own!  Her instructions are a bit different than what I do, if I am creating something I like to make sure it looks like I did it, not like someone else's design.    But the original idea is all Dawn.

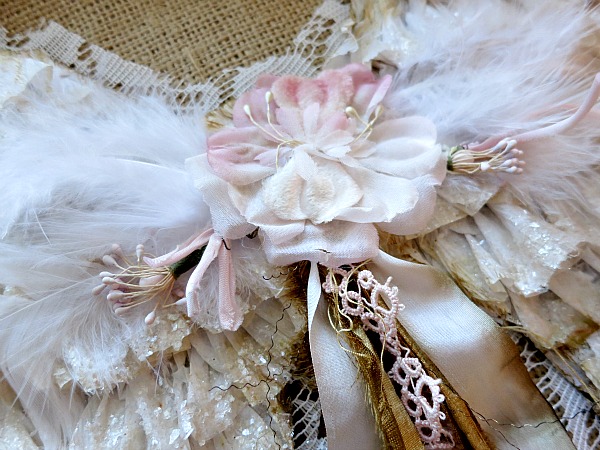
So, I draw my own pattern, and no two pair are exactly the same, each is cut out differently.  I also used dyed crepe paper for the ruffles and added vintage millinery (of course!!)


Jars 024

The backs are covered with sheet music and then lace cut from old curtains, so that it peeks out from behind. 

This pair is in the Boutique, the other two sold as a custom order.  I made up three pair for her to chose from and she picked two of them, that was a nice feeling!


Jars 027

The dangling silk ribbons are hand dyed, the same way I did the crepe paper. Here is how I did it:


Trees and wreathsfor etsy 001

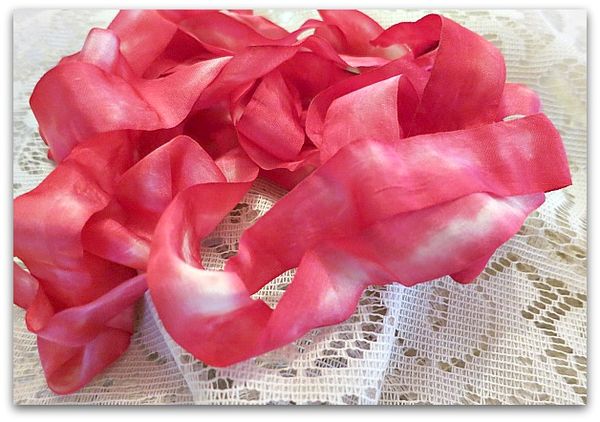
The ribbon pictured on the wreath is silk, and was dipped in coffee and then spritzed with Glimmer Mist in a dark brown color. This ribbon is satin, and I dyed it rosey in a similar manner.

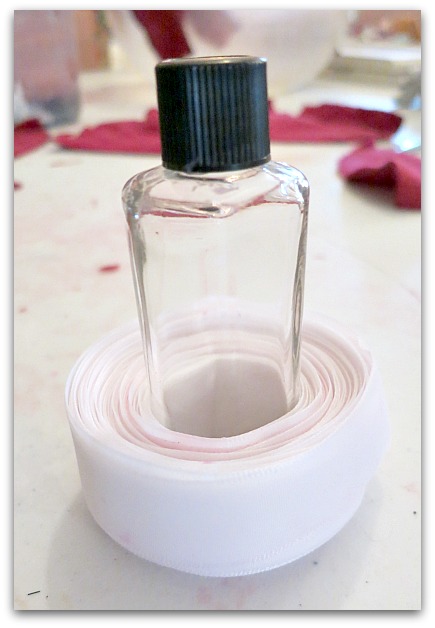
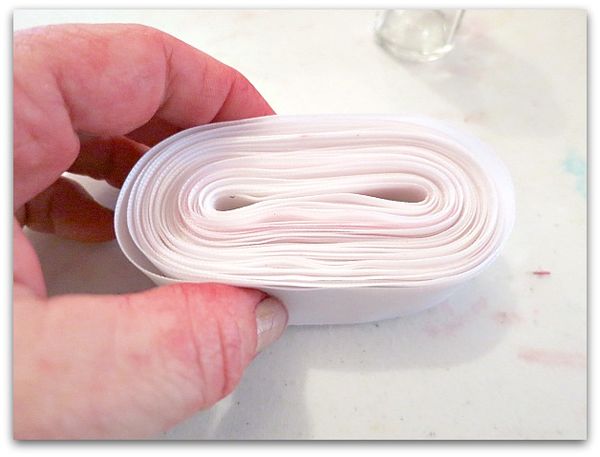
First, I cut off a length from the roll, and to get the edges even, I wrapped it around a small bottle.


Trees and wreathsfor etsy 002

I pulled it off the bottle, and dipped it into water.  The white ribbon is a little pink at the moment because I am a slob, and my hands were all dye-ey and a mess, some red from my hands leached into the water.  But that was okay since I was dying it anyway.

(some snowy cotton trim for a Santa hat that I was working with later, should have been treated more carefully. Pink snow isn't what I was going for)


Trees and wreathsfor etsy 003

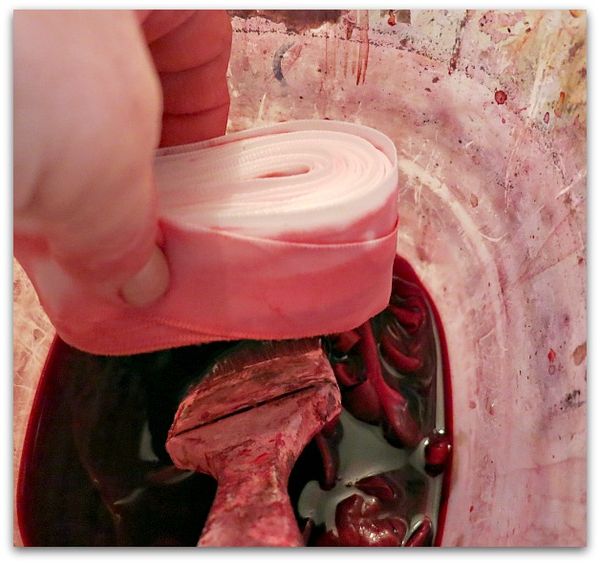
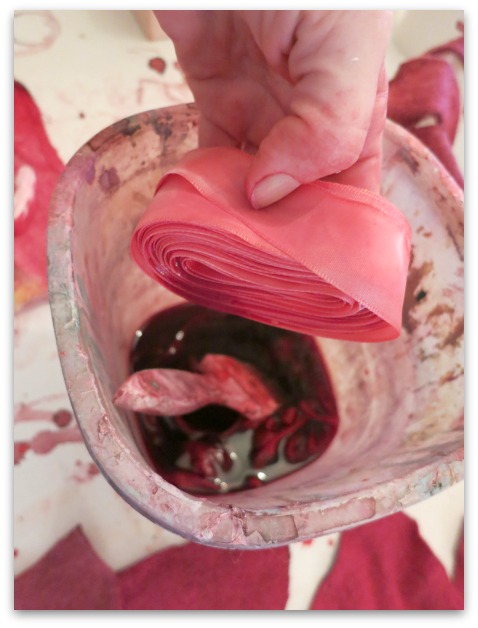
The wet ribbon gets dipped into the dye about half way or so. I dipped it a little deeper this time, I wanted more color than white for the final result.

I used paste food coloring heavily added to hot water, which means its not washable.  If you are coloring ribbon for sewing clothing or something else that will be washed, use Rit or fiber reactive dye.

(ugh, this looks more like a Halloween photo than a Christmas one, that dye is gorey!!)


Trees and wreathsfor etsy 004

Next, I dipped the other side. 


Trees and wreathsfor etsy 007

The hard part is to let the ribbon set for a couple of days till it dries. It needs to be left alone till all the moisture is gone.

Now, the outside of the roll is all dyed , but the interior is a nice variegated color, where the dye doesn't seep all the way to the center.


Jars 020

You can see the principle in practice more clearly in the crepe paper, since I dipped my ribbon so deeply into the rose colored dye.  For the crepe paper, I just dipped the edges in.  Since the rolls are wet to start with, the moisture pulls the dye toward the center.  The deeper you dip the roll into the color, and the longer you leave it in, the stronger and wider the result will be.

Stockings and wings 002
I've added angel wings to the Boutique.

Stockings and wings 005
Along with stockings made from vintage sockies.

Stockings and wings 009

Stuffed and filled with vintage pretties.

Stockings and wings 013
Stockings and wings 016
Stockings and wings 017
Stockings and wings 020
This one has mica flakes, the others do not. If you order one and would like mica flakes added, I'd be happy to at no extra charge. Its a quick little thing to do.

Stockings and wings 019
Stockings and wings 033
Stockings and wings 026

How to make a hand painted banner on canvas and tips on painting a rose topiary

flowers, hand painted signs, how to's, how-to projects, paintings, Travel, Tutorials

Banner 001

Here is a little break from Birdsong talk!

I've spent a lot of years painting murals, I travelled around the country and painted quite a few hotels, day care centers, and even a casino, as well as people's homes.    But the scaffolding and ladders really got to me, so I moved on to other things. 

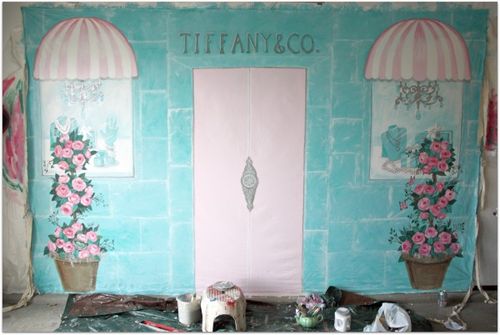
Every once in a while I'll get to do one again and always enjoy the opportunity. Especially a canvas one that I can work on in my own space and take my time on.  This one was sent to my pal, Kim, for her Tiffany's event, where I am at right now.  (I've pre-posted this)

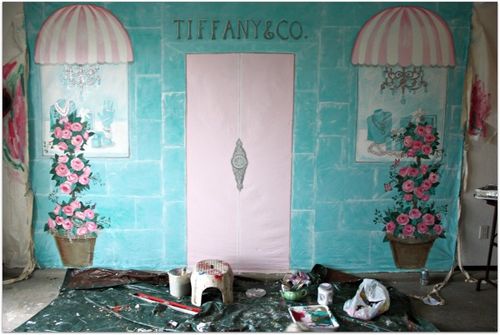
While this isn't exactly what the front of a real Tiffany's shop looks like, it is just right for the ladies attending Kim's party! Whimsical, fun, and pretty.

!cid_tie_8CEB029EE824472_6AC_D916

Kim wanted something more light hearted than the cold stone of the original building in NY. 
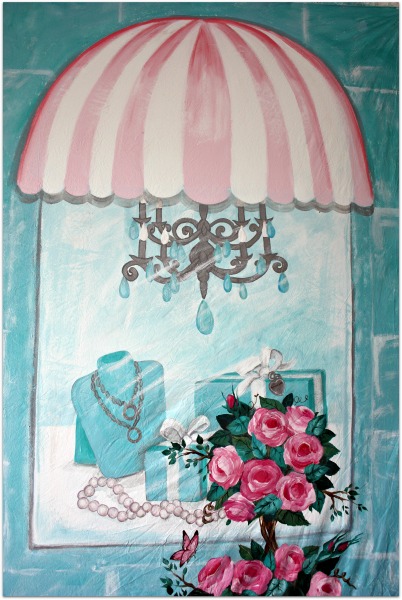
Finished banner 013

So, we took a few liberties with our design. 

My painting is all free hand..  I just paint as I go.  My lines aren't perfectly straight, but I think that adds to the whimsy and suits my style.

Plus, I know that I could NEVER do straight lines, so I don't even try! But since this was so architectural, I used a level to help out with the door and window shapes.

!cid_tie_8CEB185855D263D_9D4_24421
Here is the inspiration that Kim sent to me.  I used the fanciful nature of this with the stone front of the real building, along with the colors she asked for to come up with the banner design.
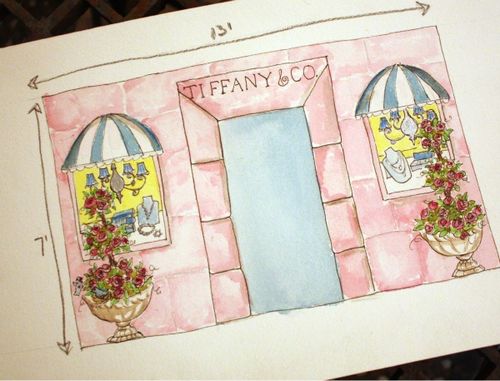
Banner 009
Here is my basic sketch for the idea.  We decided to flip the color scheme, so more of the Tiffany Blue would show. The canvas is being used as a backdrop for a photo booth, and with people standing in the middle, not much of the door itself would show.
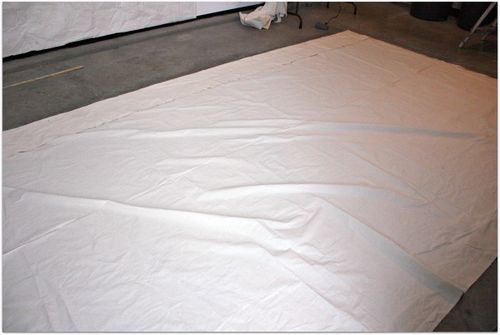
Chicken coop building 063

My first step was getting the canvas ready. I like to paint on drop cloths, but this picture was larger than most seamless dropcloths are.  I found fabric big enough to avoid seams at Darhma Trading Co.

I washed and dried mine hoping to remove the fold marks that way. MAN, WAS THAT A MISTAKE!  It came out of the dryer looking like a wadded up piece of paper.  I had to IRON the whole thing, and 13 x 8' is a lot to man handle over an ironing board.

  I'd say, iron the folds only, don't do it the way I did! 

After struggling with the ironing board till I was  steaming myself,  I laid it out on the floor to cut and pin.  After carefully measuring and cutting, I hemmed the two sides on my sewing machine, and then laid it back out on the floor to pin the rod pocket at the top. I measured and cut it in a way that let me keep the hemline at the bottom as is, no sewing.

By the way, it helps to have a second set of hands to wrangle the fabric and help feed it into the sewing machine, this was a big job and even this lightweight canvas feels weighty when you are trying to sew it due to its size.

Another tip I have is to use duct tape to hold the hem in place along with the pins.  It helped me.

If you are going to hang it with grommets, add these later. We didn't want the ropes to stand out much, so didn't want to use grommets this time.  I cut up strips of the fabric I had trimmed off, and sewed them in half for added strength.  Then zig zagged them to the back of the cloth at regular intervals.

While this will hang from a pole in the rod pocket, I was worried that it would blow or sway in the breeze, so the straps of fabric sewns the the painting's sides can be tied to the structure, and will help secure it and keep it in place.
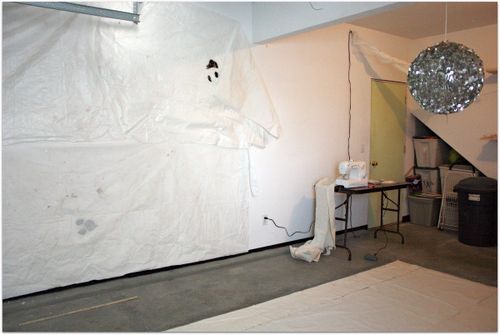
Chicken coop building 064
To do the artwork, I needed a large wall space, so I cleaned out my garage and covered one wall with drop cloths. Then, nailed the canvas up over it. (my drop cloths have also been used previously to make Halloween party ghosts, see the faces on them?)

(yes, I have a giant, sequinned disco ball hanging in my garage, it tells me where to stop my car when I pull in. I've seen people use tennis balls in the same manner but that doesn't seem to be as much fun)
Banner and baskets 018
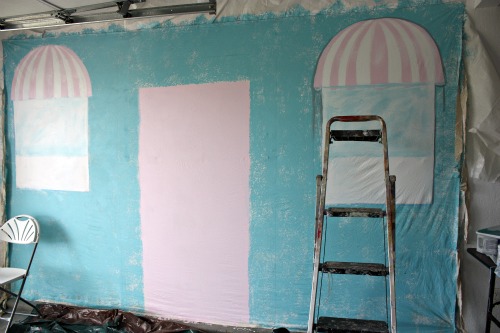
First step was to prime. 

I'm picky about primers, and know its important to use the right one for the job. In this case, a cheap, dry wall primer was fine. And I was glad I used it, because the fabric was thirsty and soaked it right up.

After it was primed and dry, I drew the door, and window with chalk and blocked in the colors.

For a large painting like this, quarts of latex wall paint in flat or eggshell works best for back grounds.

I used a sponge roller brush for the "stone"

To create the awnings, I marked the center of the top of each window, then tied a ribbon to a pencil.  The ribbon was cut to the length from the center of the window to the edge of it.  I held the ribbon at the mid spot, put the pencil on the corner of the window, and while holding the ribbon in place, drew the arc to the other corner.
Banner progress 001
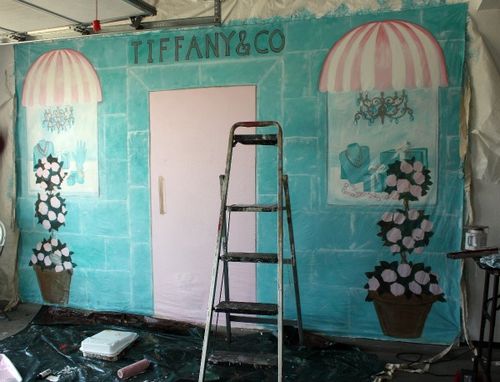
For depth, I dry brushed a darker aqua over the sponge rolled base color, then did the same, lightly with white. I used white to create the mortar lines too.  The mortar lines are drawn on with a sponge dipped in the white paint.  I didn't want a sharp line that I might have got from a brush.

Next, I finished the window paintings and awnings.  Always work from the background out.  Nearer things are last to paint.

The two topiaries are my foreground, so I blocked those colors in after the windows were done.

Notice the Tiffanys sign? I stupidly painted it too high, over the rod pocket, so painted over it to redo.  Which really isn't a big deal. Its only paint. It can be changed till you get it right.  You might notice my doorknob is different in this picture than in the finished one too.  After I roughed this in, I didn't like  it, and a swath of pink paint over it erased the plain door knob quickly.
Fairy designers 035

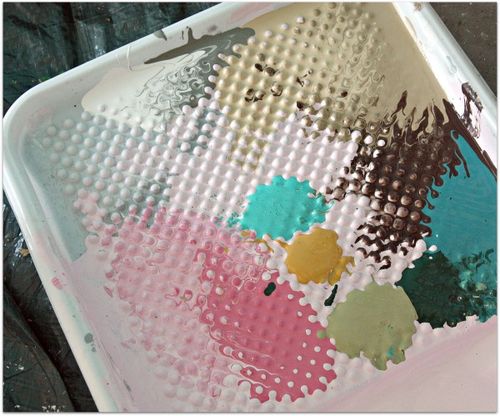
For the detail work, I used 2oz bottles of acrylic craft paint.
Finished banner 005
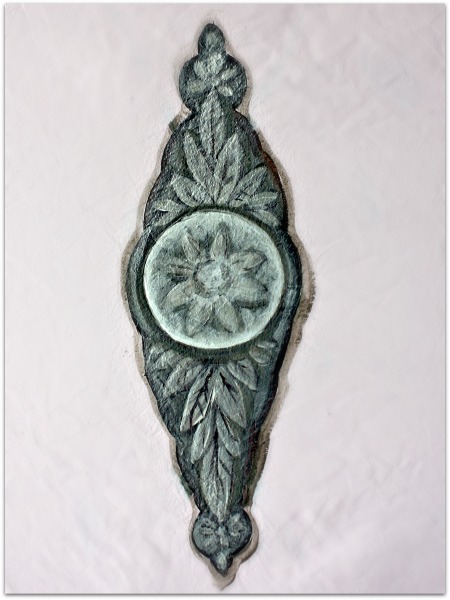
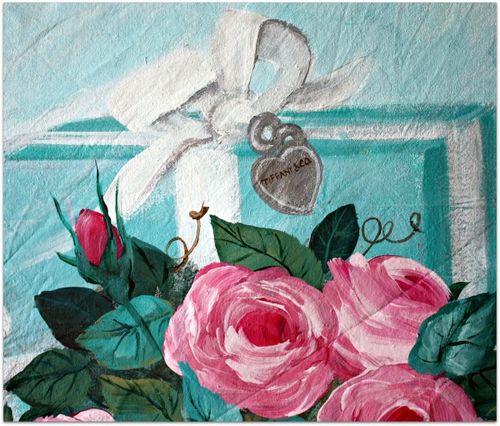
To get the metallic look that I have on the door knob, jewelry, and chandeliers, I painted them all in regular acrylic paint first to get the shadows, highlights, and shapes. Then, I covered that in  metallic paint.

I used the same 2oz craft bottles.  The silver and white metallic paints are very sheer and take a lot of coats to really cover, but that is what I like about them. I can do just one or two coats over my painting and get the metallic shine, but not cover up the details. But because they are sheer, its hard to build up color.  That is why I do the basic shape in opaque paint first.
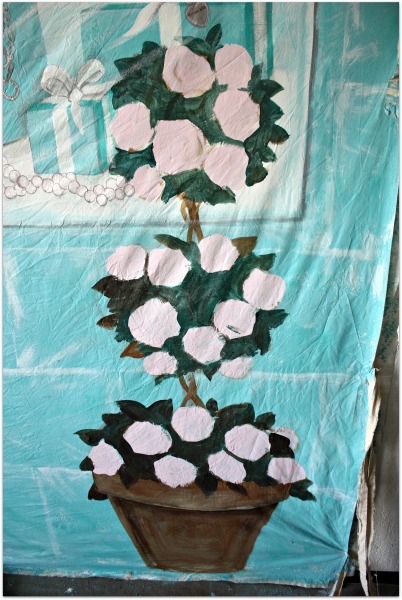
Fairy designers 032
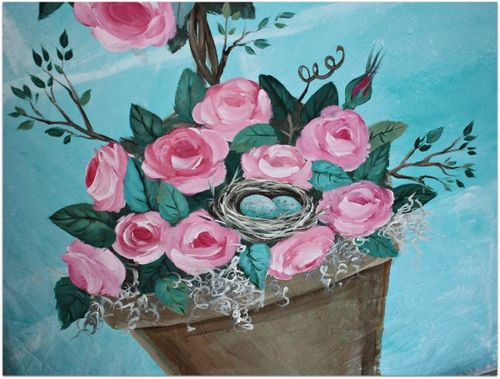
When creating a topiary, I always draw the pot with brown paint first, then sketch three circles, connected by twisted stems.  After that, I block in the basic rose shapes, and color the entire background of the balls dark green mixed with a dark brown.
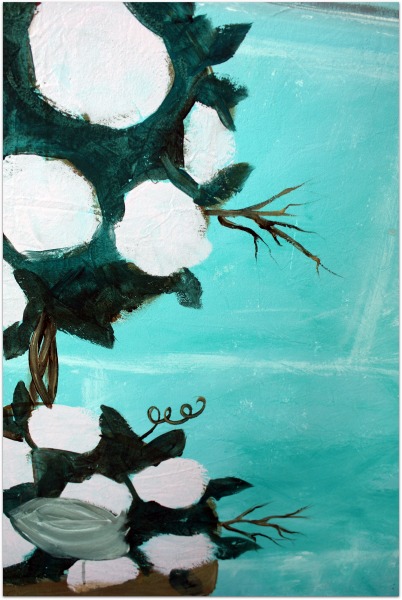
Fairy designers 033
The same principal applies for the foreground as it did for the background. Paint the furthest things first.  I do the sticks and leaves in dark colors, then highlights over that. 
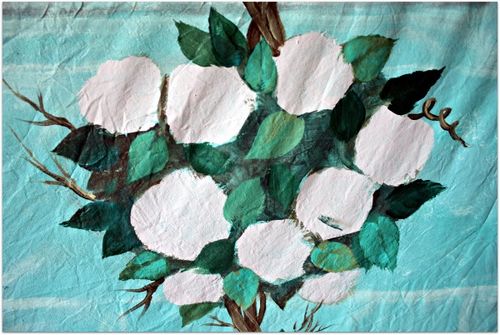
Fairy designers 036
Next comes the leaves from dark to light, adding detail as I go.
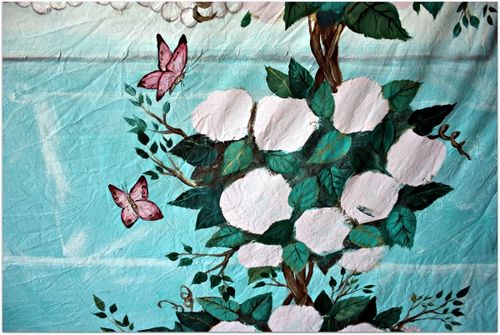
Fairy designers 037
I got side tracked and added a few butterflies!

After painting the pot/sticks/leaves/ then roses, I went back and touched up some of the leaves so that they were covering the roses a little bit here and there.
Finished banner 007

The moss is really easy, just scribbles and swirls with white and gray on a liner brush.  I paint the roses with a 2" flat brush, and the leaves with slightly smaller flat brush, adding veins with a liner brush.

Darker leaves toward the back, lighter in front, gives the illusion of roundness. The roses should face different directions, not all the same.

There is a tutorial on my sidebar with tips on doing a nest.
Finished banner 011
Layering is important. Make sure it looks like there are items in front of each other.

A few twirling tendrils out the side of the topiary soften the painting.
Banner 007

For the lettering, I used pale grey, outlined with dark brown. On the highlight side, I added a line of watered down white, on the shadowed side, a line of aqua a shade darker than the stones.

Next step, I let the paint cure a few days. Yes, it was dry to the touch, water based paints dry fast. But- I wasn't taking any chances of it sticking together when I rolled it up, so I gave it some time.

To mail it without fold marks, I bought cardboard tube mailers. They weren't big enough to put the 8' high mural inside of, or long enough either, so I duct taped 8 foot's worth of them together, and tightly rolled the canvas around it, then took the roll to the UPS store where they have boxes of all sizes and shapes.
April 030

Well, hopefully, when I return from California, I'll have some pictures of my friends and I in front of this storefront! 

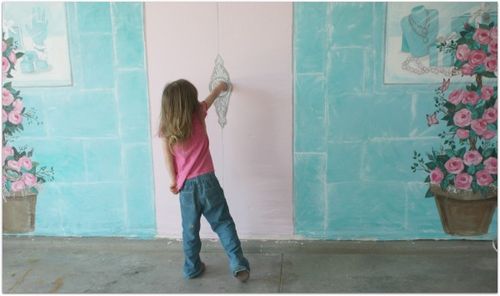
For now, I have pics of my own little model whose imagination turned a painting on the wall into a private play house.  Here she is opening the door.
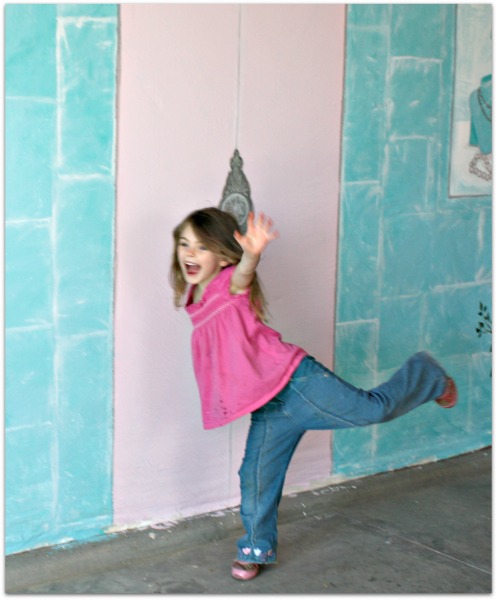
April 020
And jumping out of the door to yell surprise.
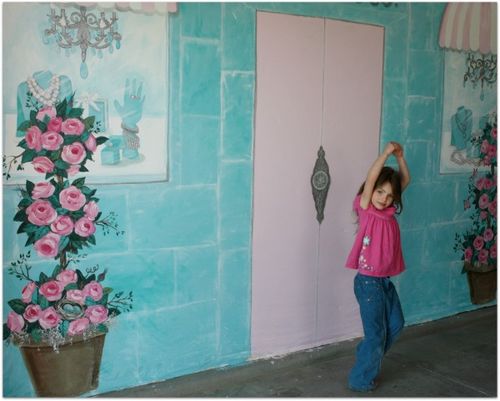
April 024
And dancing through the door.

The pictures I don't have are of her drawing on the door.  Yep, she had some fun with chalk making a picture just like Grammie did. Oh well, it was only chalk and wiped right off, coulda been worse…
The Short cut way to repaint kitchen cabinets with no sanding,stripping, or even removing the doors!

how-to projects, Kitchen remodel, Tutorials


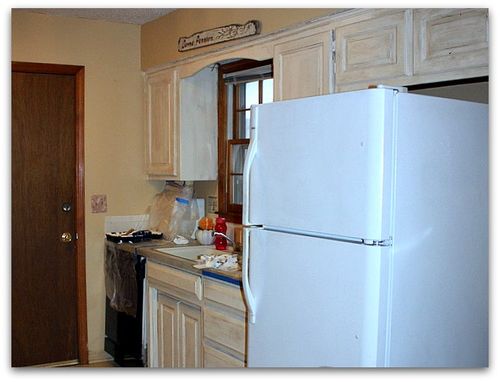
IMG_6839The other Karla and I have been promising Beth we'd help her with her kitchen for about 6 months and finally did it. It only took about 6 hours for the three of us.  6 months, and 6 hours, that is.

Beth had the doors washed, areas taped off and covered where needed.

IMG_6845

So, we got right to it.  The bonding primer was tinted to the paint color, which makes it easier, since primer can be such a blinding white.

ALWAYS USE A BONDING PRIMER.

Not primer for wallpaper.

Not primer for fresh drywall.

Not paint and primer combined.

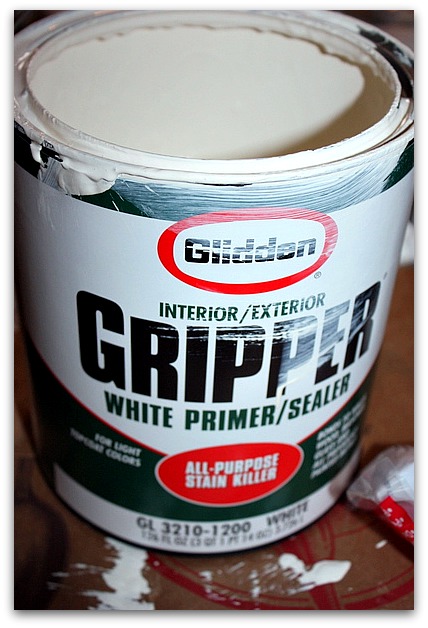
Somewhere on the instructions or label, the can should say something like this " will adhere to glossy surfaces"

You will not need to sand or strip the wood, this primer will be ideal for gripping the wood and giving the surface some "teeth" for the paint to hold on to.

Please note, that primer needs a few days to reach its full strength, and it can be scraped up while fresh.Once it has cured, though, its tough as can be! If you want to distress your finish with sandpaper, please do it very soon after painting.

IMG_6843
We left the doors on, and painted over the hinges. The door pulls were removed first.

We were in a hurry, so really didn't let the doors dry as much as we should have, so I knew that the opening and closing was going to create some cracks in the drying primer on the dark bronze hinges and that might peek out of the paint a bit, but wasn't worried, because I knew we were antiquing the finish when the paint dried and it would all blend in.

Sometimes, its smarter and faster to just go with the imperfections and make them work in your design!

IMG_6846

After priming, we put on about 2 coats of creamy, satin finish paint.  Then went out to lunch while it dried.

IMG_6848
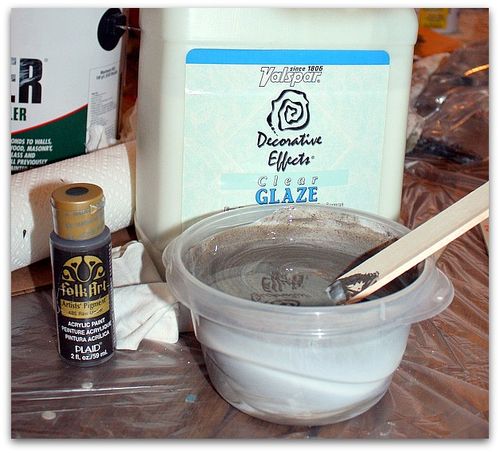
When we got back, we mixed 2 oz of acrylic craft paint into a bowl of about 2 cups of clear glaze.

While the glaze is wet, it looks milky, but it dries clear. Always remember that the mixed paint and glaze will dry on your furniture to the same color of the paint you mixed in.

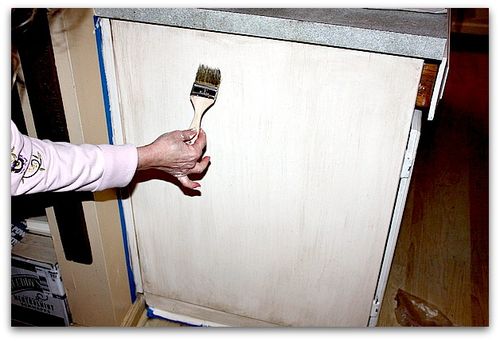
Paint it on, and wipe it off with a clean, damp cotton cloth (an old tee shirt torn up is good), heavier in the corners and indentations.

IMG_6849

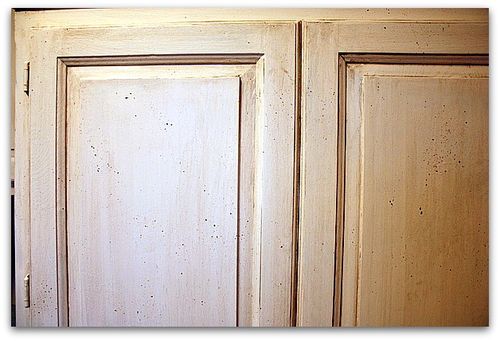
After putting it on and wiping it off so the corners, indentations and edges were darker, we wanted a bit more of it showing, so, we pulled a glaze dipped brush down with the wood grain, to create striation marks.

I use a cheapo, 99cent brush, instead of the specialty faux finish brushes sold to do this with.

If the lines seem too dark, or heavy, go over them again or blot them with your cotton rag.

IMG_6850
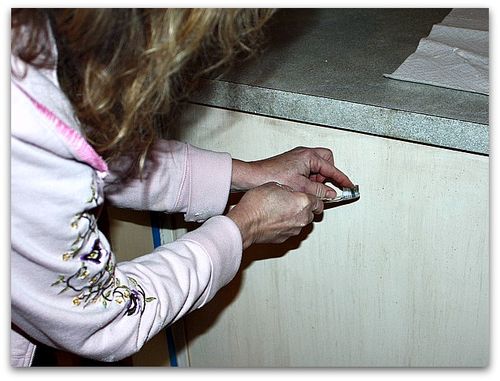
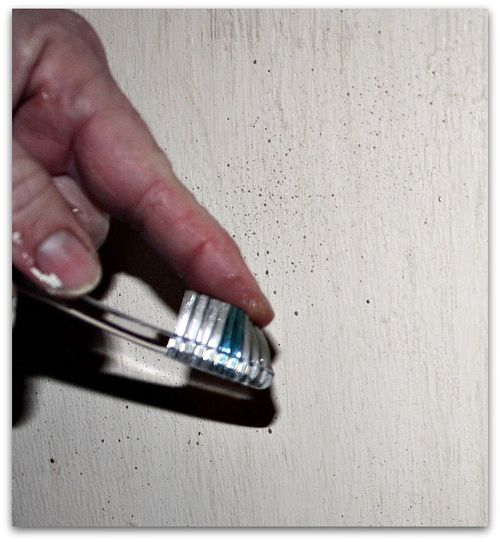
After that, we wanted even more design the to project, and decided to fleck glaze dots all over the surface.

IMG_6852
Its easily done with a toothbrush, and the same glaze used for the faux treatment. The speckles should be random, and not too dark or big, and never drippy.  Blot if needed. And don't get too carried away.

IMG_6855
Ta dah!

The cabinets should get a top coat of poly (which is oil based, smelly and sometimes yellows, but holds up great and is extremely washable) or water based poly, Minwax Polycrylic (which doesn't smell, or yellow and is easier to use, but isn't quite as durable, but still really good).

Beth's sweet husband, Jeff, was volunteered to do the top coat later.

IMG_6856
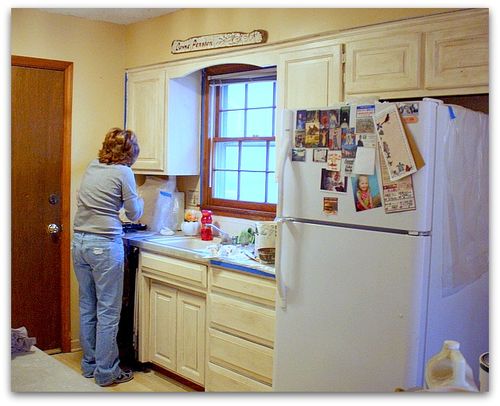
We thought our paint job looked pretty good when done!  But there was still something bugging us.

IMG_6861
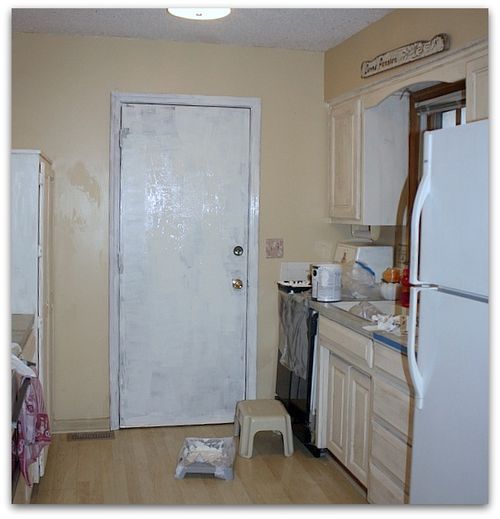
Ta dah, again!  Doesn't the room look better without the busy magnets on the fridge?  This might be controversial (Beth told me not to pick on magnets, some people LOVE them) but I HATE magnet covered fridges.  I know I am in the minority, and a lot of people really enjoy using their fridges as art and photo display. But I always find the clutter distracting for myself. (although I do have to admit, I enjoy looking at all the pictures on fridges when I am visiting someone and thiers is covered)

And another thing that bugs me is dark wood that doesn't really go with the room.  Her door was too dark for the nice, light space.

IMG_6863
I only had 9 minutes till I had to leave, because it was my son's birthday and I had a party to get to. So, I quickly whipped the primer back out and got the door ready for a coat of paint.

Beth said that Jeff would do the paint coat.

Here is what we discussed for the door:

1- paint the door to match the cabinets

2- paint it the base color of the cabinets

3- paint it the wall color

4- paint it the wall color and then do the same faux treatment and glaze that we did on the cabinets over that.

Either choice she makes, its primed and ready to go. And I think the room already looks bigger with the door nice and light, don't you? Which option would you chose? I'm leaning toward #4.


What have I been up to? Painting the furniture to match the Christmas tree, of course.

Hand Painted Furniture, how to's, how-to projects

IMG_6159

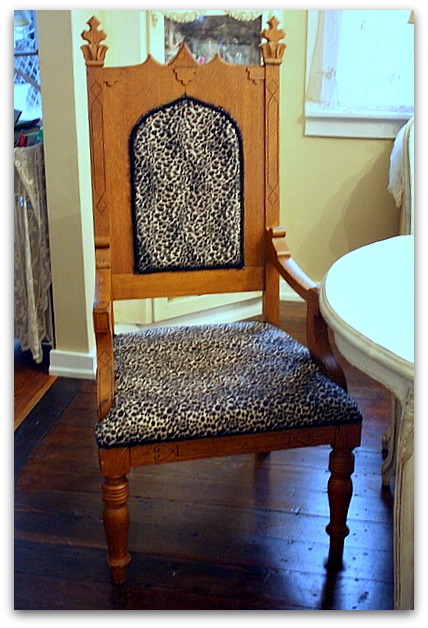
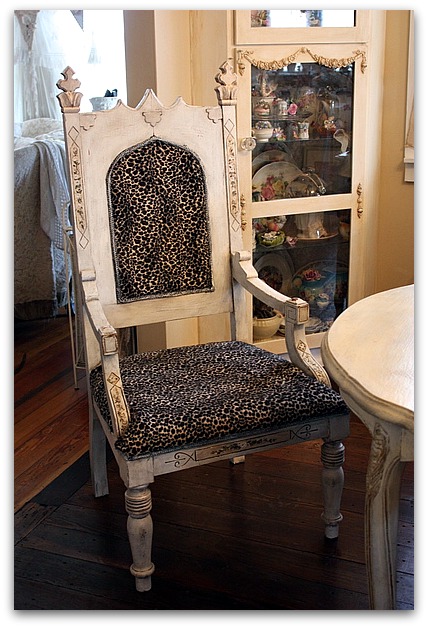
Before I left for CA, I took some time to repaint this oak chair. I have plans to recover it too, but that might wait till after the holidays.  There is only so much time in a day…
 

IMG_6074
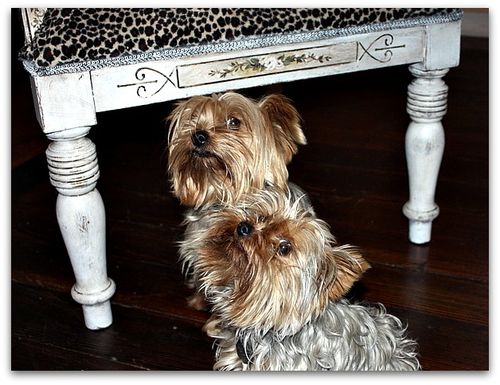
Its a pretty cool chair to start with! We called it "the throne" and I found it at a garage sale for $60.  Someone had recovered it in leopard print.  Its been at my son's for a while, but now that he moved to a Yirt (that is a whole other story) he has no space for it.  And after I had all my Christmas decor up, the dark wood really stood out. 

And who doesn't repaint their furniture to compliment their Christmas tree?

IMG_6147

Since the chair was going to be part of the rest of the dining room table set, I painted it the same way I did the other chairs in there.  Like in this tutorial.

But with no crackle. I didn't want it matchy matchy with the set, I just wanted it to look good together.

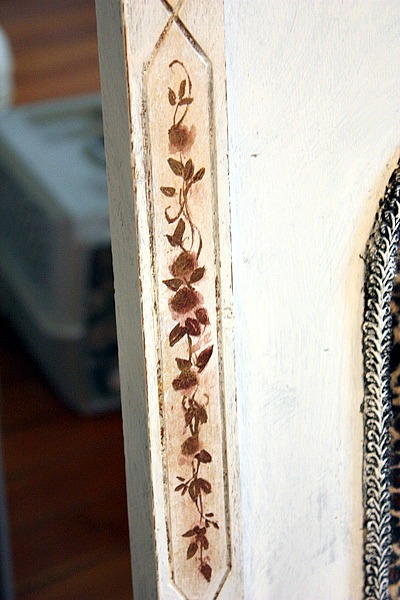
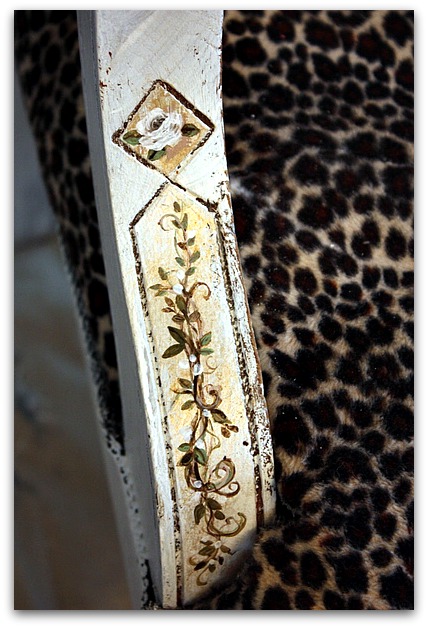
It had some neato designs in the wood that looked to me like they were calling out for hand painted details to be added inside the "frames"

To start, I darkened each of those frames by rubbing a dark brown paint on with a rag, keeping it inside the lines.  Then I dabbed metallic gold over it.

When I paint flowers and vines, I start with dark brown, and kind of draw out the picture, with the flowers just as blobs.  The dark brown is a good base color under the hand painted details and gives some dimension to the flowers.

IMG_6150
The colors I used were sage green, dark brown, light brown, white and cream.

IMG_6156

After the paint dried, I lightly sanded the flowers and vines, then heavily sanded all the edges and corners of the chair.

Over that, I topped it with Minwax dark walnut stain/poly in one.  I don't usually care for oil based products, but they really are pretty and I had a lot left over from doing samples and trying to figure out what color I wanted my floor to be when we remodelled the kitchen.

That stuff goes on kind of tricky.  If you use it, do small areas at a time, and keep plenty of paper towels or soft rags handy.  Brush it on, dabbing the brush deep into details and carvings, and wipe off in the direction of the wood grain.

Remember, just a little bit at a time, it gets tacky fast and doesn't like to be wiped off. 

IMG_6152

I'm much happier with the chair now and I haven't even recovered it yet.  My son is a bit sad, though, he loved it as it was.

PS-

I will be away from home for a few days, but will be checking my email while gone, so please leave a comment if you'd like to win a Cuff Tutorial. I'll be giving a couple more away when I get back.

When I return, I'll get your orders from the Boutque and Etsy out on Monday the 5th.

How to add embellished pieces to painted furniture

how to's, how-to projects, Tutorials

IMG_6146
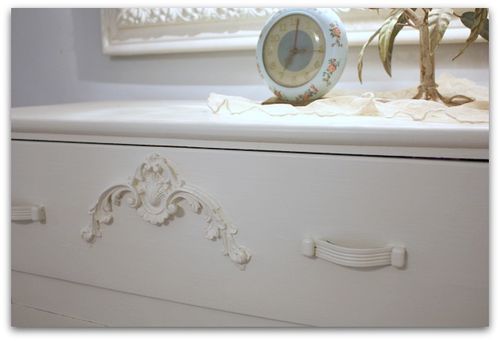
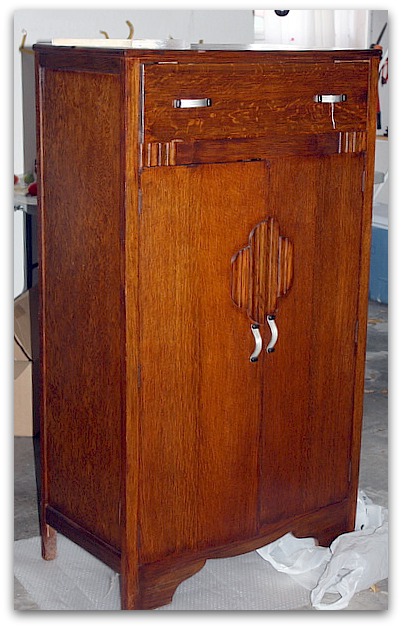
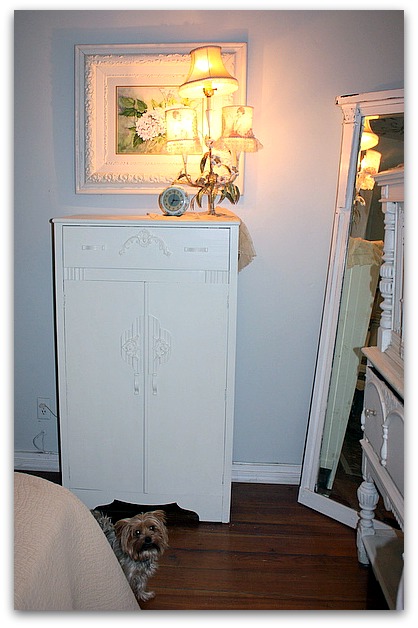
Now that Sugarwings is getting bigger (and so are her clothes), and I have little Dew Drop to dress sometimes too, I needed a bigger space to store the little girl's clothing.  I was lucky to find a cabinet at one of my favorite places, for a great price, but it needed a lot of changes if it wanted to come and live with me.

IMG_6114
Here is how it began, kind of deco.  Which I like, but not for my bedroom.

IMG_6117
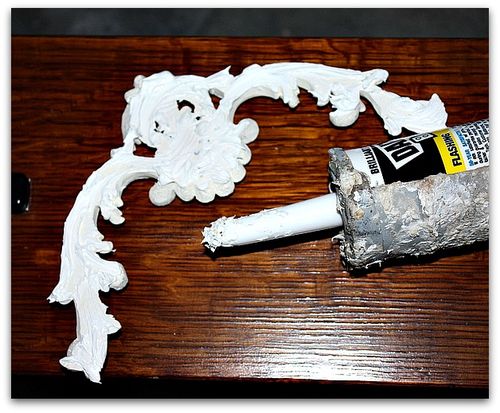
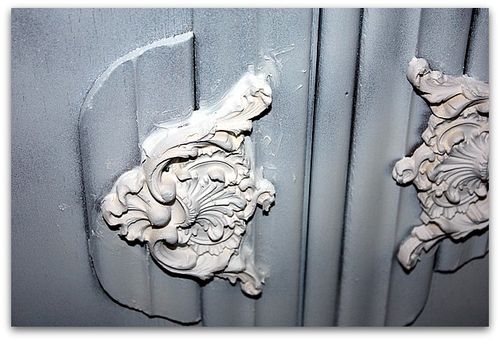
I had some ornate scrolly embellishments in the garage, (you can buy some similar type things at Home Depot, hobby stores, or look online here.) and thought they might help with the transformation.

The trouble with these is attaching them unless you have a nail gun, and even then, they shatter or the wooden ones will split.

I discovered that the easiest thing to do, is to slather the back of the piece with paint-able caulking.

IMG_6116
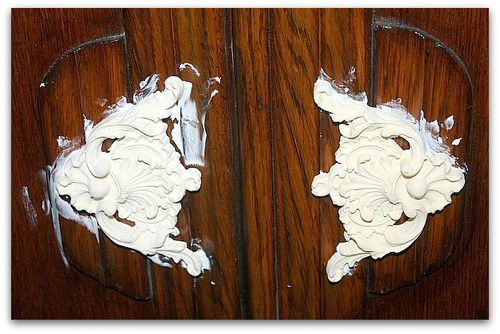
Then, just smoosh it into place.

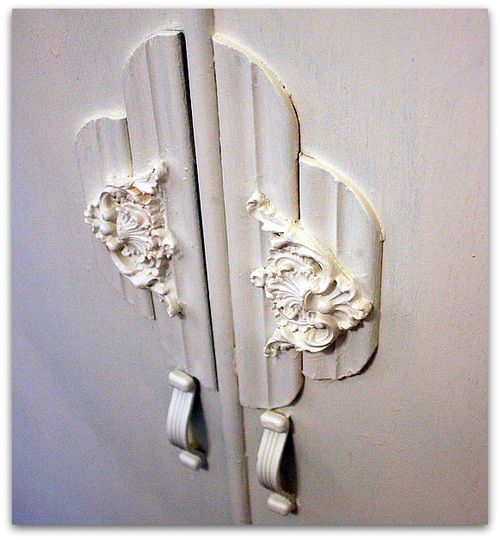
Make sure you have plenty along the edges, so that there is no gap between the piece and the furniture you are applying it to. You want it to look like it was always there, not just glued on.

With this piece, it was a bit more complicated since the area on the doors I added it to had curved wood.  I was able to squirt in extra caulking to fill those holes.

After pushing it into place, some caulking will ooze out the sides. Clean this up with a q-tip.

IMG_6119
After that, prime the piece to get ready to paint it. There are lots of painting tutorials on my sidebar, for different finishes or looks.

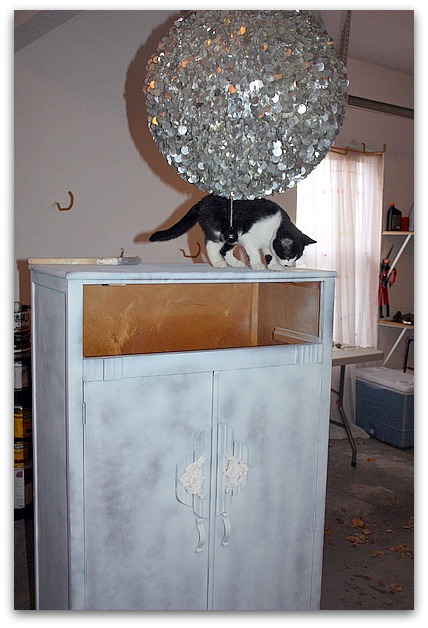
For this, I used my favorite bonding primer, Zinsser Bullseye, spray, in the gold and white can.

IMG_6118
You can see, I didn't use a heavy coat, this is about 3/4 of a can. Its enough to give the surface some tooth to grab the coat of paint that will go over it.

Notice I took out the drawer first?  I painted the drawer separate so it wouldn't stick. And the paint won't run and drip from the scrolly piece and the handles. Its just easier to not have to be as careful if you don't have to be. The same issue exists on the cabinet doors, I'll just had to be extra watchful for drips.

And since I was too lazy to change the hardware, I sprayed right over it.

Yes, that is a disco ball in my garage.  I don't recommend painting under one, because it attracts cats, and it also got in the way of brush strokes.

IMG_6145

The decorations, handles, and all got painted with a coat of Behr satin in a French vanilla color.  Behr is good and heavy and usually does the trick in one coat plus touch ups.

IMG_6144
This was a quick project for me, I didn't wait for the caulking to dry, though you probably should.

IMG_6143
PS-

I will be away from home for a few days, but will be checking my email while gone, so please leave a comment if you'd like to win a Cuff Tutorial. I'll be giving a couple more away when I get back.

When I return, I'll get your orders from the Boutque and Etsy out on Monday the 5th.

Making a kitchen island from odds and ends

antiques/junking, Hand Painted Furniture, how to's, how-to projects, Kitchen remodel, Tutorials


IMG_5619

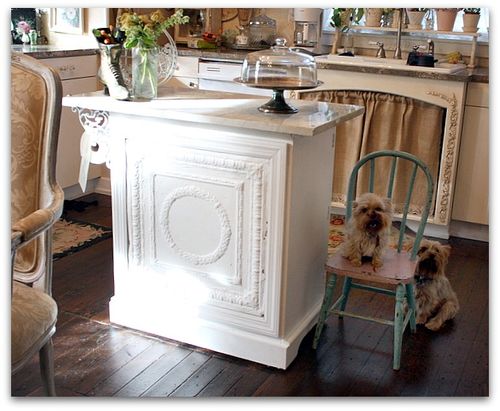
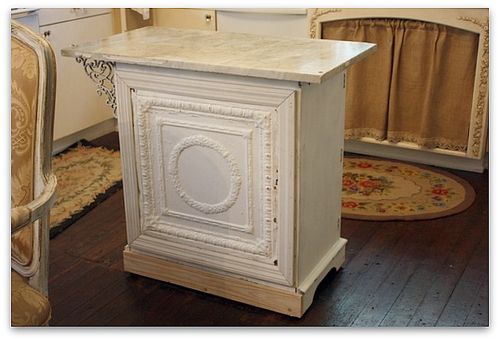
 When I knew we were going to be remodelling our kitchen, I started making plans for a new island. But I didn't want a "new" one, I wanted an old one, of course.  I knew that it couldn't be large, it needed storage space, wheels, and I wanted a granite or marble top.

I couldn't find a piece already like that, so I thought I'd marry an old cabinet with a stone top that I purchased.

Well, after a trip to the local granitorium (I made up that term, but it seems to fit), I realized that a new slab, even for a small piece of furniture was not in my budget after spending a wad of cash on a whole kitchen redo.  At first, I tried to pretend that it was just in the "construction budget" but, I had to force myself to face the truth.  Just because we were spending a few thousand dollars already, it doesn't mean that a few hundred will disappear into it that vast amount like a drop in a bucket.

What it means, is that I had already spent too much and shouldn't spend a few hundred more.

So, I searched for an old piece of stone at antique stores.  I actually found quite a few, for a fraction of the cost of  new (even though all of them are billions ?? of years old, the ones from the granitorium are like "new")

The best piece I found was 28" by 38" and came from the teller's window of an old bank in western KS.  It was only 50 bucks too!

IMG_5272
For a month, I carried those measurements around, hoping to find a piece of furniture to fit them.  I went to flea markets, antique malls, and consignment shops and found some hopefuls, but was being cheap.

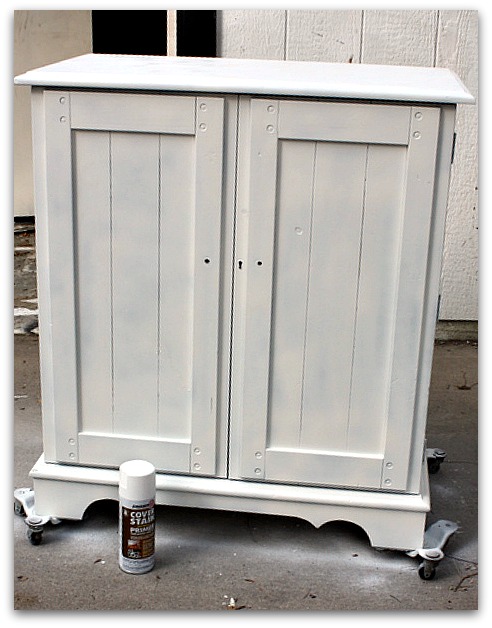
One day, I stopped at our Salvation Army to look for some warm pants for Sugarwings (did I mention that I am cheap?) and found this not so old, but not new Lane TV cabinet.  Its nice, solid wood, and could support the weight of the marble.

Plus, it had a green tag and that was 50% off of green tags day!  I got it for $14.

IMG_2869
That is about how much I spent on spray primer.  This is the BEST kind to use, and its about $7 a can now at Home Depot. But its worth every penny, no matter how cheap I am, because I hate sanding. With this product you do NOT need to sand! 

There are lots of tutorials on my side bar about how I paint, if you want to redo something and need to know some short cuts.

IMG_5273
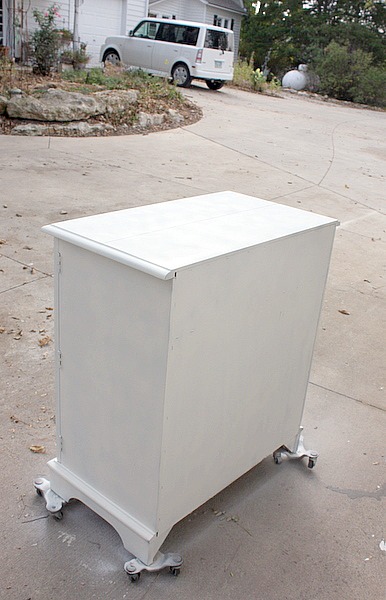
You might notice that I sprayed the top. That was a waste, since I was covering it in marble. 

I also used too heavy of a coat, because I thought I would be using this as the base coat, skipping the paint step, distressing the edges, and just glazing over it. I changed my mind and painted it white, so could have gone with a lighter coat of primer, since I had paint over it after all. 

IMG_5275

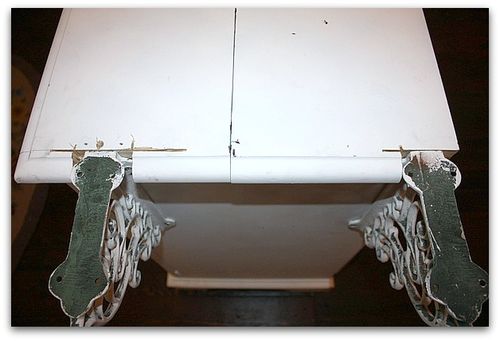
Once I had it primed, there were still some problems. One was that the back was just fiber board, stapled on. The other was that the wheels had no where to attach because of the shape of the bottom of the piece.

Also, the cabinet was a bit smaller than the marble.

While the contractor was here to finish up a few trim details in the new kitchen, I asked him to do a little trim work on this too.I figured that for the small amount I had into it, I could afford to pay him to help me with the hard part of the redo and still be way ahead on this.

IMG_5419

My garage is full of tidbits and doodads. I found a couple of iron brackets and he cut out notches to add them to the side of the cabinet to support the marble that was too long.

IMG_5423
And to cover the fiber board, I added an extra piece of ceiling tile leftover from the ceiling job, then had him trim it out for me so that the rough edges wouldn't snag anyone's pants (or slash anyone's leg, that stuff is sharp!)

We added a block of wood under each corner and screwed the wheels to them.

The marble was attached with liquid nails and set into place.

Then, all I needed was some white paint. I decided it didn't need distressing or a glaze. I kind of liked just the pure white.

IMG_5624
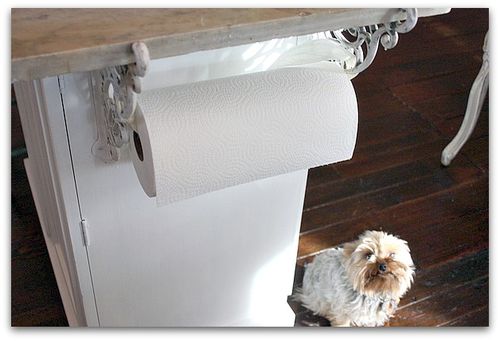
After it was done, I realized that the brackets were perfect to hold a paper towel roll. So far, the roll is just tied up with a ribbon, I'll be looking for a better way to hold it in place.

IMG_5467
Hey, if you are looking for a project for yourself, on a slightly smaller level, my good pal, Mary is doing another glue book class.

A Christmas glue book!

I was with her when she was searching for ephemera to use. We went to a flea mkt together last summer and it was interesting to watch her sift through all the papers, picking and sorting.  She is very knoweldgeable about old paper.

IMG_5470
Mary and Beth were both here for craft day and I got a glimpse of what Mary was making, and I have to say, its a cool class. Button might not look very enthusiastic about it, but he isn't into ephemera like we are.

IMG_5481

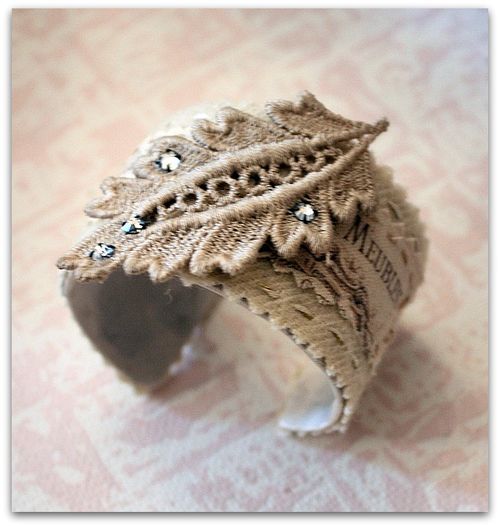
Craft day meant working on my Cuff Bracelet tutorial, and Beth was nice enough to make a cuff for me to show, using my guidlines for the construction. Pretty, huh?  I love craft day!


How to dye crepe paper

how to's, how-to projects, Once upon a dream, Tutorials, vintage paper/collage art, Workshops

IMG_4711
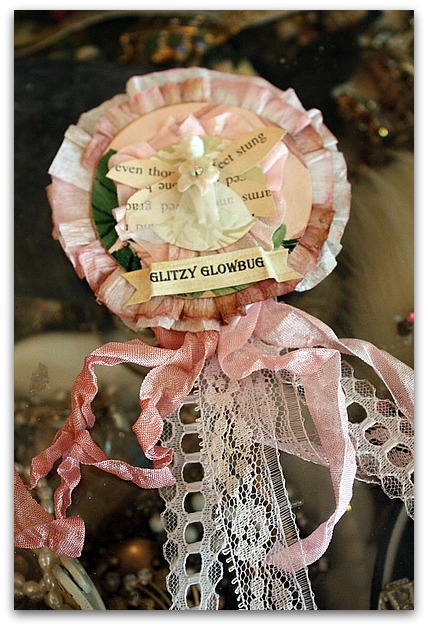
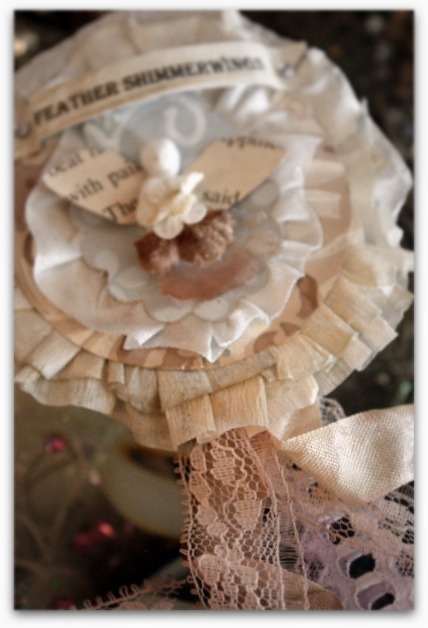
For the welcome night class I am teaching at Once Upon a Dream, I needed a pretty ruffle to top off my Prize Ribbon Sprite brooch.  Plain crepe paper was nice, but I thought it would be better with tinted edges.


IMG_4573

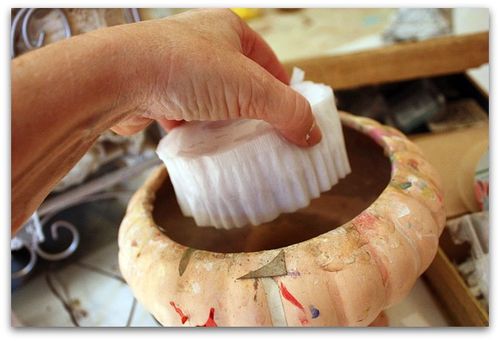
My first step was to dunk the top and bottom of a whole roll of crepe paper into a bowl of water.  I didn't immerse the entire roll, just about 1/4 on each side.

IMG_4574

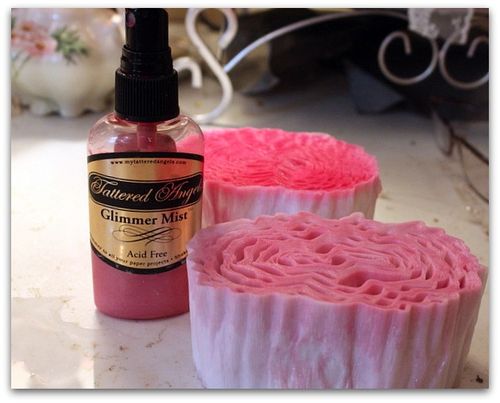
While it was wet, I spritzed the damp edges with Glimmer Mist and let it bleed down into the paper. 

IMG_4576

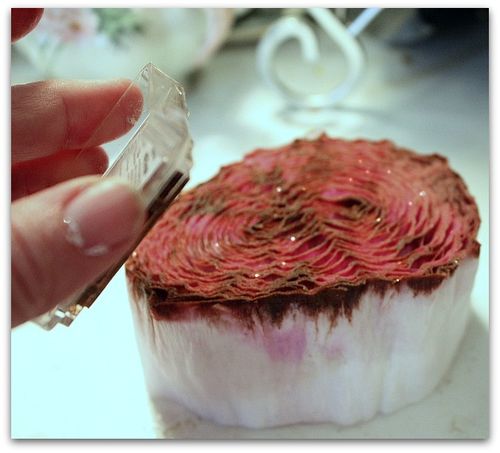
On one side of the roll, I rubbed dark brown ink over the Glimmer Mist for a two toned effect. (Glimmer Mist has a nice sparkle to it!)

IMG_4713 Then, I sat the roll of crepe paper outside on a sunny, breezy day to let it dry. It had to be completely dried out before I could make up my kits.

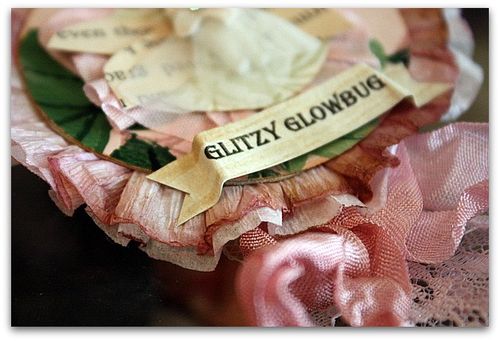
I'm happy with the way it turned out.  I folded a section of the streamer lengthwise and glued it onto the back of the wallpaper medallion to make the ruffle.

IMG_4602

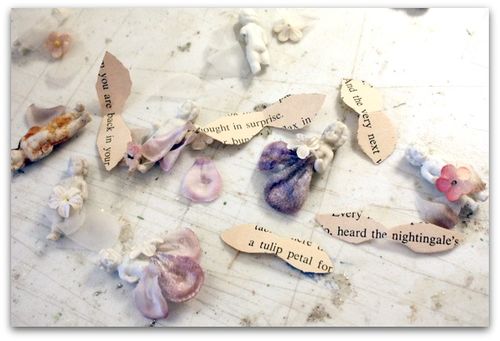
The kits each have a teensy weensy Frozen Charlotte doll, a mini flower for the bodice of her dress, and flower petals for her skirt. The wings are ephemera, and all hand cut. Each flower petal skirt was trimmed up just to fit the little Charlotte it would be glued to.

IMG_4710
Each prize ribbon has a banner with a fairy name on it too. No two kits are just the same. They took me ages to put together since I was matching the dyed ribbons and lace to the flower petals and wallpaper.  Plus trimming all the little petals to fit the dolls. Its a quick class, about an hour. I knew the guests wouldn't have a lot of time to fuss with the project, so I had to make it simple to piece together.

I'll be making up samples of the finished pieces for the class, and when I get home from my wonderful trip, I'll have them for sale in the Boutique. 

I hope all the care I put into the kits shows and that the students enjoy them!

 EDIT- This post was written ahead of time, before I left on my trip. I'll have new posts all week while I am away, but might not get to answer all comments or emails, but I will be reading and enjoying them on my Ipad. Thanks for coming by! I hope to add some "Live" posts from the road too.

Painting furniture with no sanding, some short cut tips

dogs, Dorkies (Yorkshire Terrriers), how to's, how-to projects, paintings, Tutorials

IMG_3997
I've done a few other furniture painting tutorials (you can find them on my side bar, along with a lot of other how-tos), but those were mostly whites, creams, grays.  Not everyone lives with "low color" like I do, a lot of people like some flash. I know my family does, they all think my neutrals are boring. So when I paint something for them, its usually bright and cheerful.

So, I thought I'd give you some tips for using deeper colors.

IMG_3860
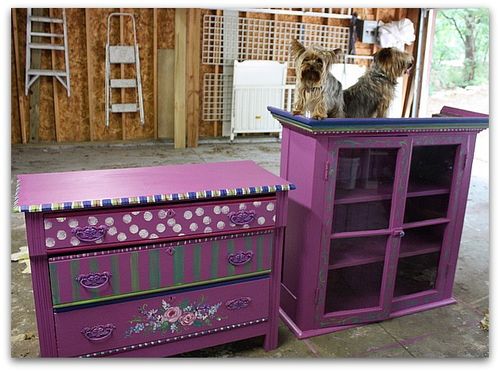
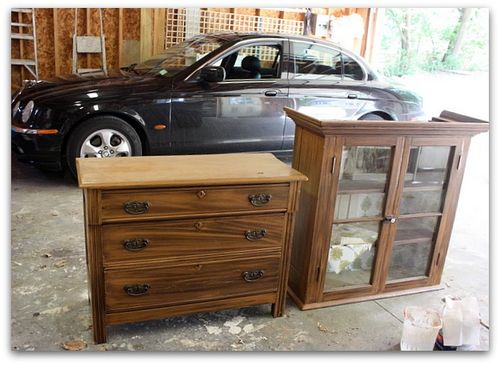
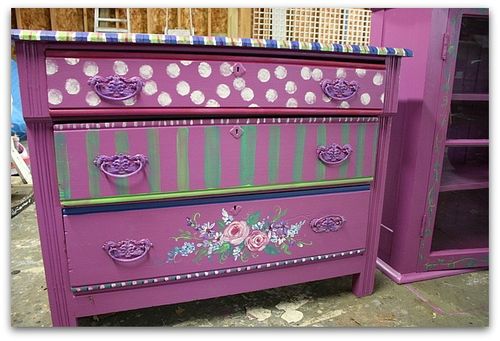
Our Hippy Chick was given this two piece set by her dad, it used to be his mom's.  It looks okay as is, but dull for a  fairy's bedroom, and this was meant to go in Sugarwing's room at her mommy's house.

Its been painted a number of times, looks to me, like the latest was a 1960s antiquing technique.

When I don't know who painted a piece or what they used on it, I always coat it with a BONDING primer, so my own paint will have good adhesion. If I painted it myself and know that it was latex with no poly top coat, I skip the primer and just paint it as is. But since so many things I paint are garage sale or flea market pieces, I have no idea who used what on it and I use primer in case.

IMG_3987
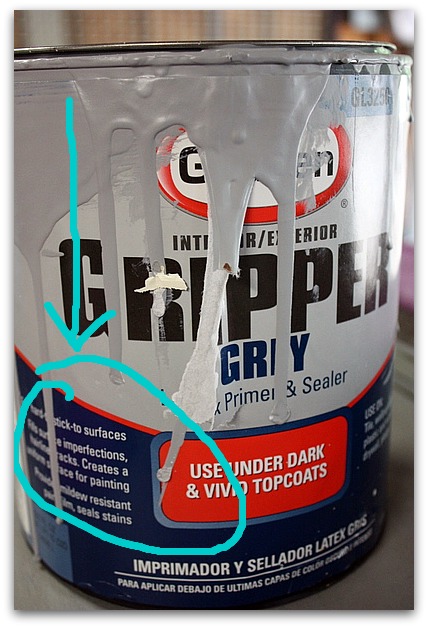
Over the years, I've tried many of the brands of primers.  Currently this is my favorite water clean up one. 

There are gobs of primers out there, be sure that you are using a Bonding primer, that says it will stick to glossy surfaces, do NOT use dry wall primer, that is a completely different thing. Kilz will not work unless you also sand.

I NEVER ever sand or strip the piece before I paint it.  Life is too short!

Now, if you are painting something really tough, like laminate or a high gloss laquer, maybe a quick sanding wouldn't hurt, just to give it some tooth.  But for most furniture, a bonding primer will be just fine with no sanding at all, as long as the piece is clean.

For darker or deeper colors, use a gray undercoat to prime with.  The white one is too glaring and will take more coats to cover it.

IMG_3988
Speaking of coats, use good paint.  Wall-mart paint is cheaper, but you use more because you are going to use more coats. More time, more work, more paint.

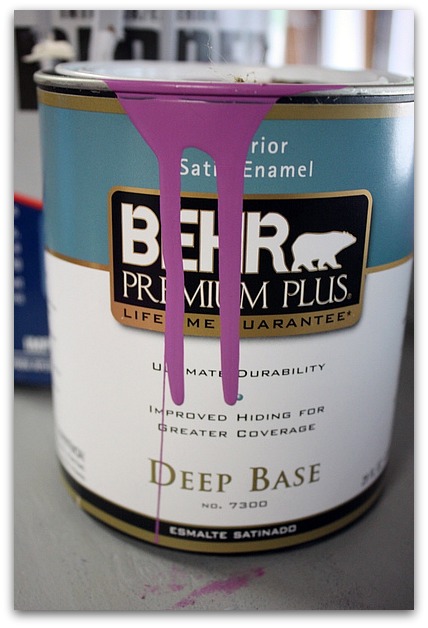
A quality paint saves you quite a bit. This Behr is my fave, it comes in many colors and usually only takes one coat. 

For this, I let Sugarwings pick out the color herself.  Its a Disney shade that is carried by Home Depot.

I chose Satin finish, that should hold up to little fingers and heavy use with no top coat.  This is a good paint that will last.

IMG_4001-1
After cleaning the furniture, decide if you want to change the hardware, if so, you might need to fill in the holes with putty, let dry, sand and then repeat.  After the piece is painted, you drill new holes to match the new hardware.

If keeping the knobs, do you want contrast or do you want to paint over them?  If this was going to be a cream colored piece, I'd have liked the contrast of the aged brass. But for a kid's room, I wanted the pulls to blend in.  So I left them in place and just primed and painted right over them. (when I was all done, I dry brushed another shade over them so they would have a little more interest)

IMG_3989

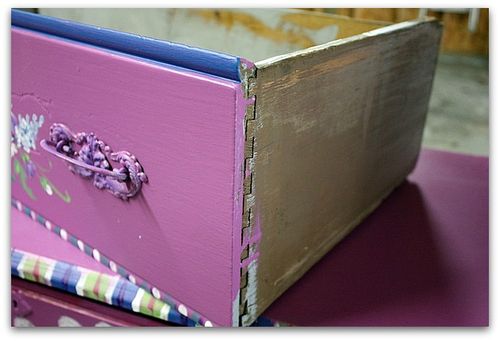
Pull out any drawers, and set them up on their backs to paint. It will save dripping.

IMG_3990
Don't ever paint the sides, or the bottom of the drawers, or they will stick like crazy!  I like to wax the sides of each drawer, for an easy opening and closing.

Also, I paint the interior of each drawer, just to make them feel clean and fresh.

IMG_3998
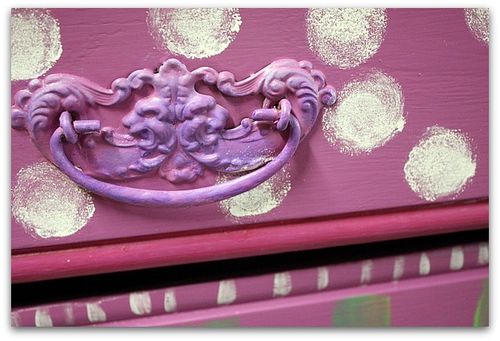
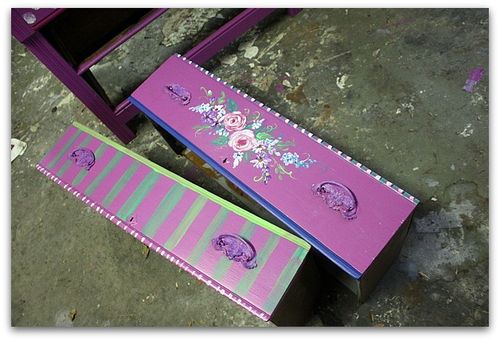
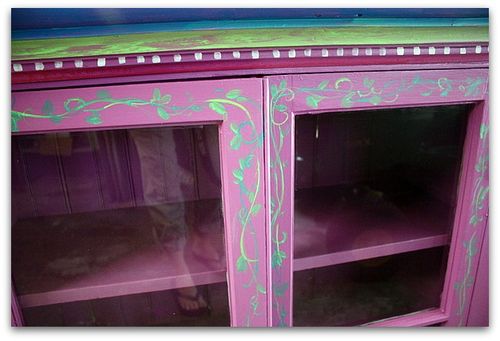
If you are doing decorative work after the paint dries, acrylic craft paint works fine.   I made simple stripes in multiple sizes with different sized brushes, and polka dots with a round sponge.  Then painted some flowers on the bottom drawer, added vines to the doors, and accented the trim with various shades.

IMG_3999 I am not a perfectionist.  I like old furniture to look like old furniture. If its been painted a few times in its life, I like that to show. I don't sand it down before painting, or between coats. If you like the perfectly smooth look, you'll need to sand.

When painting around glass doors, make sure you scrape the glass off with a razor blade within a couple days of doing the job, or the primer will be hard to get off.

If you are painting a two piece set like this, let the paint "cure" for a few days before stacking them.

Any questions? Feel free to contact me.

Tools you'll need:

  • bonding primer
  • quality paint
  • opener
  • drop cloth – unless like me, you don't worry about your workspace floor! You can see mine has seen some painting over the years
  • a wet rag is nice to keep handy
  • paint brush
  • small sponge roller (for big, flat areas, this sure speeds things up)


Scroll to Top