how-to projects

Oh, you are NOT going to paint THAT are you???????????? Yep, and here is how.

Hand Painted Furniture, holiday decor, how to's, how-to projects, redos, show and tell, Tutorials, vintage paper/collage art
IMG_4422

Thanks for all the compliments about my pretty little fairy baby at the Renfest!  I have to agree, she's a cutey.

We had her most of the holiday weekend, along with my mother-in-law here for a few days from Green River, WY.  Chasing Sugarwings kept me busy most of the time, but after she left, I had a day to spend with my husband's mother. She sat at the dining table and embroidered and at first I was up and down doing little chores here and there, and tidying up the place (after Hurricane Sugarwings has blown through, there is a lot of picking up to do).

 
IMG_1378

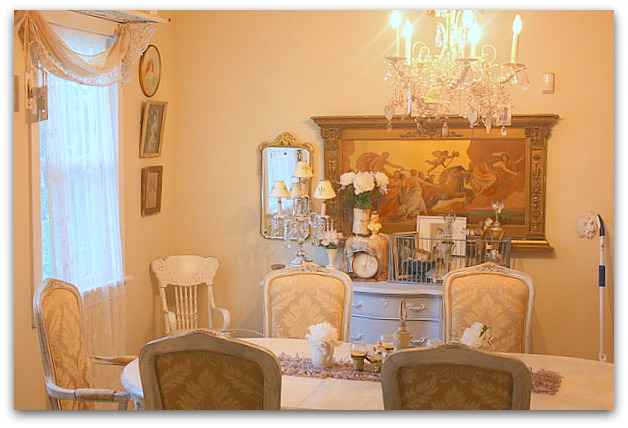
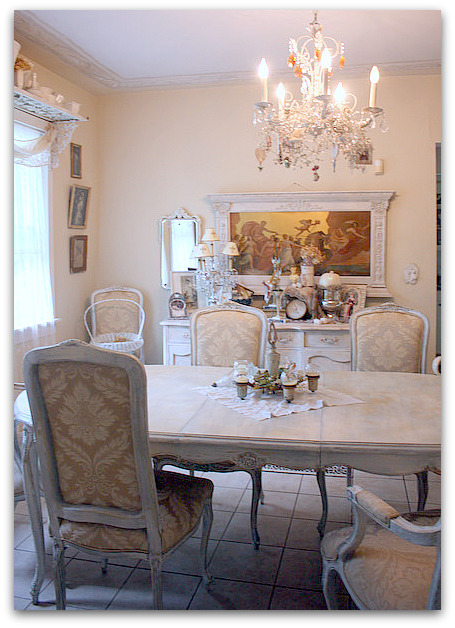
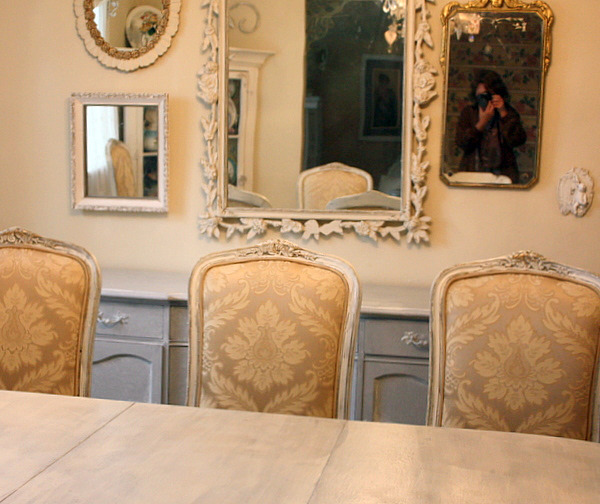
But I did spend a bit of time sitting at the table and the more I sat, the more I stared at the buffet and the painting above it.  The buffet had been maple finish and I painted it gray with a cream glaze over it last spring.  And the picture was one that I have loved for years but always thought about lightening up.
For the last few years, EVERYONE told me not to paint it.  And I rarely leave things as is, but I knew that this frame was worth money the way it was.
But honestly, was I ever going to sell it? No, I've had it for a long time and always plan on keeping it. I figure that I deserve to look at it and enjoy it, without debating whether or not it should be painted.

IMG_4430
I know, there will be gasps of horror. But I'm glad I did it.  And I didn't just slap some white on it, I took my time and made the frame look old. Well, "took my time" is all relative, I guess. I paint fast, I had the buffet, the small mirror frame, and the large, antique frame done in about 3 hours while I chatted with my mother-in-law. 

Here is what I did:

  1. Primer, good bonding primer.  I just tucked some wax paper behind the frame and painted it on the wall right where it hung. The wax paper protected the wall from my brush.
  2. A coat of ivory/bisque eggshell paint
  3. Thick coat of porcelain crackle finish (I worked on the buffet while this dried)
  4. Next, I brushed on and wiped off coffee with cream colored glaze
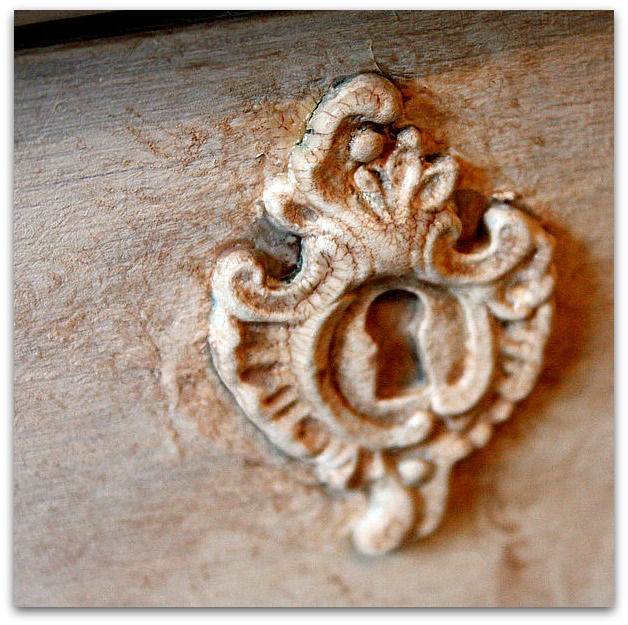
  5. After that dried, I lightly sanded all raised areas.   I was careful to do this lightly with a sanding sponge, because much of the ornamentation was plaster.  I wanted to get down to the gold paint, not the white plaster.
  6. I added another layer of crackle glaze.
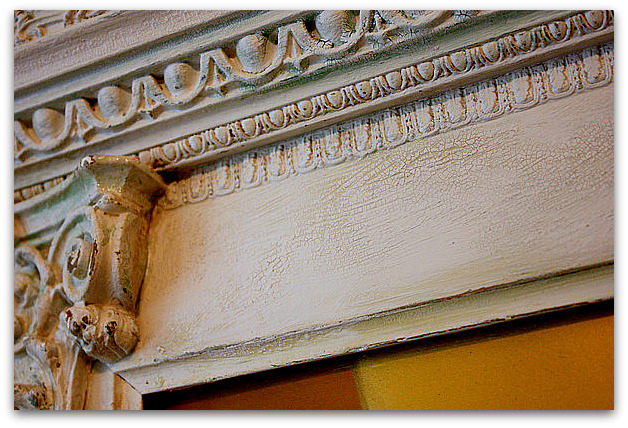
  7. As the crackle glaze dried, it had a chemical reaction with the exposed gold paint and turned a greenish tint, like a copper patina. (this is a trick I discovered accidentally a while back and love to use. Its unpredictable but pretty)
  8. Over this, I  brushed on and rubbed off an ivory glaze and a sepia glaze, randomly putting them over the frame, some over lapping, some spots one color, some spots no glaze.
  9. After it all dried, it was a little too green, so I dry brushed the ivory/bisque colored base paint over the areas that were too vivid.
  10. Then a little more sanding to bring out the dark wood and more of the gold paint underneath.

This was a lot of steps, but I think they paid off, the frame looks like it was out in someone's shed being stored away for years.

The main trick is to not be too perfect.  Nature doesn't age things perfectly.  Sometimes the trick to a good faux finish is to be messy.

I did NOT cover this with clear coat. If I had, there might have been another chemical reaction with the newly sanded spots with gold paint showing through. It would have turned more green after the clear coat dried.

IMG_4436
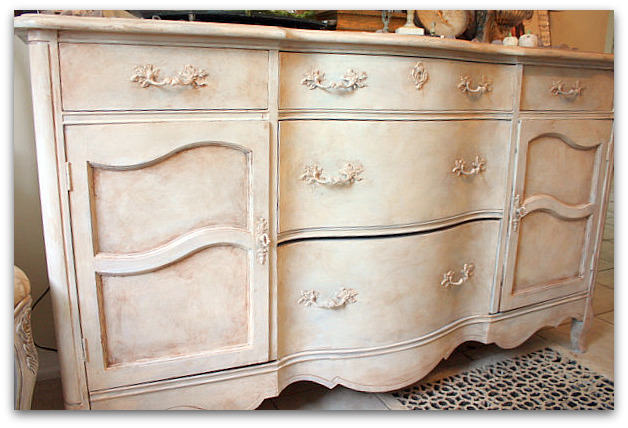
The buffet got a very similar treatment, with a creamy white painted streakily over the existing gray, so the gray showed through.

Then, crackle glaze, and sepia brushed on and wiped off over the crackle, after it dried.

I used the sepia very heavy in corners and edges.

When it was all dry, I used an acrylic clear coat over the entire piece.

IMG_4437

I love crackle.  Its tricky and unpredictable, but wow, when it comes out nice, it is really something.  Don't ever use too much, use it selectively in spots.  Not on every single inch of the piece. And feel free to add another coat or two if needed, and you're not thrilled with the first. (this only applies to porcelain crackle, weathered crackle is a different product.  Read your labels!!)

IMG_4415
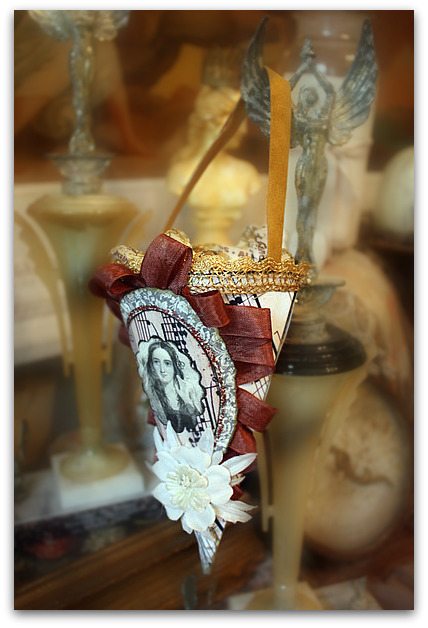
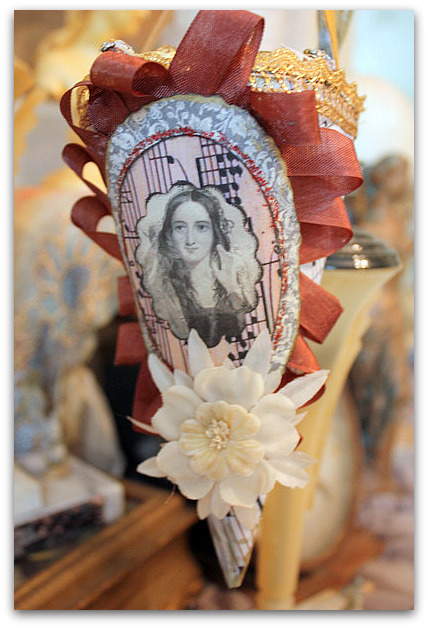
After repainting, I re-foofed the top of the buffet, using some of the projects that I made in the Romantic Gothic Ghosts class. This cone was done from Beth's images and tutorial.  I didn't have a cone handy, so I used an upside down party hat.

I'm so glad that I have the class pretties to display in my "new" dining room for fall! The moody, wistful shades (with NO orange!!) are just what this room needs to look festive and still look like "my" house- not the Halloween party store.

We are adding some little videos, giveaways, and decorating tips to the Gothic Ghost blog.  The posts will be left up as long as I have a Typepad account (and I don't see me leaving any time soon), so you can take the classes at your leisure. But if you want to win any of the prizes, those are time sensitive.  There are still three to give away.  

IMG_4412
Often, I see the beautiful posts up for White Wednesday, but I'm never in time to enter. Well, today seems to be a good fit and timely too. So, I'll be linking with Faded Charm.

White wednesday 2
As much as I love whites, I really should make more of an effort to be a part of it regularly!!

There are so many link parties now a days… Here are more that I joined.  I usually don't get around to it, but they are always fun when I do!

Power of Paint

Transformation Thursday

IMG_4434

Pixies and Pixels

fairies, holiday decor, how-to projects, magazine pictures or articles, Sugarwings, Tutorials, vintage paper/collage art
IMG_3832

Getting ready for this online tutorial has kept me hoppin! But between counting pixels and trying learn how to make pdfs, I took some time off to make a pixie too.

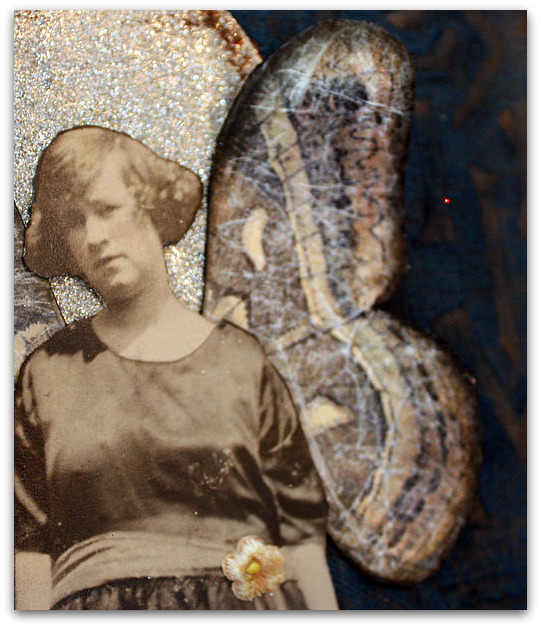
This one is on its way to Somerset, but in it, you can see two tricks that will be taught in my Romantic Gothic Ghost class…. Actually, there are 4 separate things in this picture that I will be giving how-to's for.


IMG_3834

The technique I used in this Sugarwings creation is one of them.

She is also going to Somerset Life today.  I'm always honored to hear from them.

 
IMG_3838

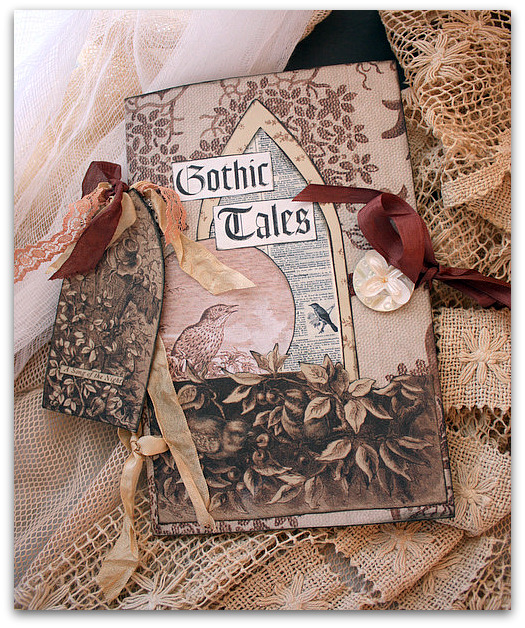
All of my projects for the class involve a Gothic arch, moody colors, and NO ORANGE!  Oh, what a pretty  Halloween it will be this year!

Okay, now back to the hard part.  I can make things like crazy, I actually made a book,  a tag book with 6 original tags, a wall hanging, and a banner with five 8-1/2 x 11 collages for the classes yesterday. Plus two collages to send to Somerset Life.

When I'm on a roll, I can whip stuff out.

Its the pixels that kill me.  Everything I used in all the projects has to be available to the students to click on and print to use themselves.  Now, that is a spooky Halloween for me. 

Oh, the horror of it all!

Craft-a-thon

celebrations, Dorkies (Yorkshire Terrriers), how to's, how-to projects, parties, vintage paper/collage art, yorkies
IMG_1545

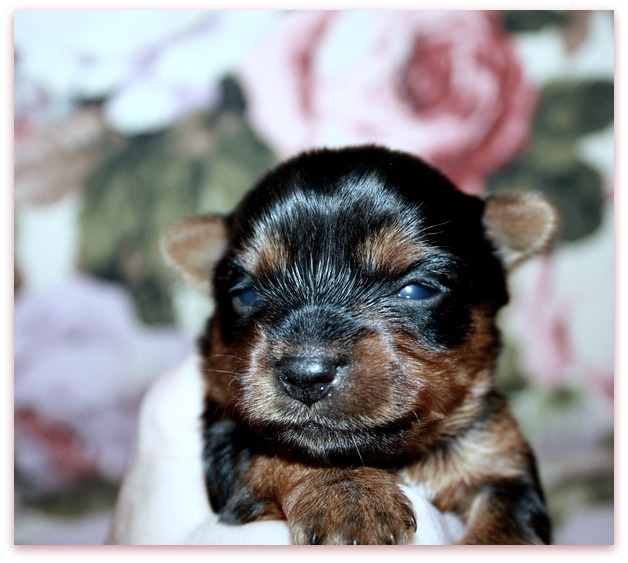
Thank you for all the puppy names you suggested! There were some GREAT ones, and it was hard to chose. But one theme stood out and I went with it. I know I said I'd announce winners today, but  I don't have photos ready yet, so it will have to wait. 

But this photo is a hint.

Also, thanks for all your well wishes for Twinkle's health. She is not happy about being taken from her pups, but the Dr. says no more nursing.  The babies are old enough to eat puppy food, but I do have to get up during the night to give them fresh food, they need to be fed every few hours.

IMG_1420
The only good thing that came of the terrifying 45 minute trip to the vet's office, while Twinkle was near death, was that we decided to keep a puppy.  It was just too frightening to think about breeding her again someday, so we thought we should have one of her babies live with us forever.  

Each of us have our favorite.  So, I'm not sure which one yet.  Sugarwings' vote is for Dorothy, but I have a feeling that she can be swayed.  There are two that I don't think I could live without…. But we already have three dogs, we don't need 5. And that really would just be heading towards the sheriff knocking on the door wearing a gas mask to deal with the stench, and telling me that the county is confiscating my 50 animals that have taken over the home and made it smell so bad that neighbors have complained. (Or so my husband thinks.)

IMG_1550
This tiny girl is one of my choices. The other is the spotted guy. He is just too perfect to let go.  We all have a soft spot for him. 

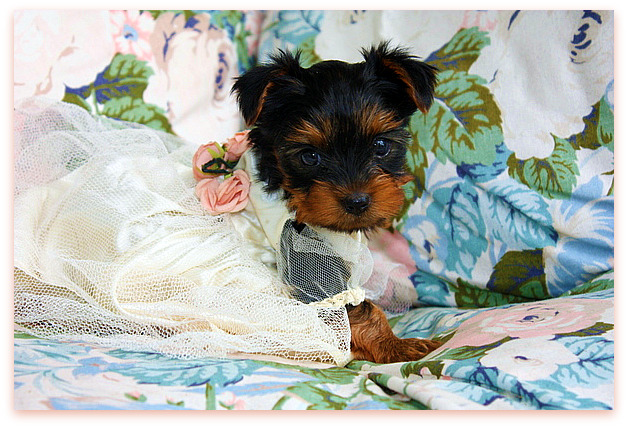
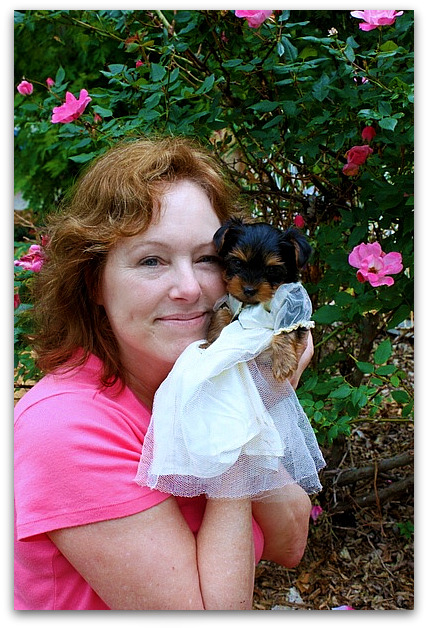
When I came across this dress in the studio, Suzanne and I were giggling like kids and having such fun playing dress up with the pup and taking her photos.  Both of us were  just howling with laughter.  Which describes quite a bit of our Creative Cottage Girls Weekend.  It was a joy to have Suzanne stay here with me, she is an excellent house guest, we never ran out of conversation.


IMG_1419

I'd made up scrap packets for everyone, then sat out lots of other supplies on one of the dining room tables in the front of my studio.  Beth generously brought boxes of fun stuff from her stash too.

IMG_1433
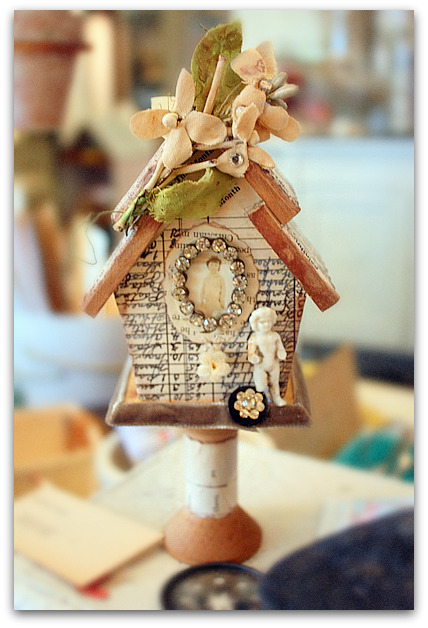
First, we all covered bird houses in vintage papers.  This one is mine, but I think its not quite done yet. Don't you think that Charlotte needs fairy wings?

In February '08, I did a tutorial on blinging out a birdhouse. If you'd like to read it, and try one, I've added it to the list of free tutorials on my side bar. Just click on the "tutorial" flower button to the right and it will take you there.

IMG_1436
Before everyone came, I warned them that I don't craft in a sassy sundress, and that the weekend was just casual and relaxing, we were all there to chat while we made things and just hang out. No classes or group things, everyone was on their own to rifle through supplies and come up with their own creations. 

It seems like every time I see an arty gathering on other blogs, everyone looks like they are going to a wedding instead of a craft-a-thon.  And the tables look too pretty to work at.  Not here, these tables looked like work stations. And I think it was successful because we were all still cutting and gluing and talking long after dinner was over.


IMG_1448-1

There is so much crap good stuff in my studio, that I told everyone not to bring anything, I'd supply it all.

IMG_1435

But my pal Angie brought jewels and Beth brought lots of old pictures and papers.  I was glad, because its so much more inspiring to play with other people's supplies and I had a good time going through what they brought.

IMG_1484
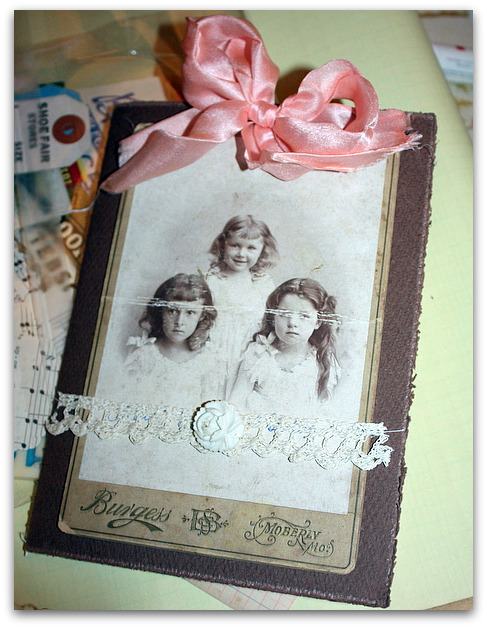
We ended up making not only birdhouses, but tags, and cabinet card note books. Beth had a big box full of the old cabinet cards and showed us how she takes out the photo, adds watercolor paper, then sews it up into a book and embellishes it.

This one is Debbie's.

IMG_1482
And this one is Suzanne's.

IMG_1473
Of course, a big part of the day was playing with the little guys.

IMG_1475
The weather was beautiful, we worked with the doors open all day, and were able to have dinner outside. Debbie brought Pearl, who seemed to enjoy wandering in and out, but she wasn't so sure about the pups.

IMG_1479
Pearl liked to keep her distance as much as possible.  But she warmed up to me and I think we might be friends now.

IMG_1480
After all the running around, the babies were plain old worn out!

I have more pictures of our lunch at Carol's amazing farmhouse, (I felt like I was stepping into the pages of a magazine at her 1860s dreamhouse!!) and shopping at the Curious Sofa.   But for now, I need to go and watch the last episode of Lost before I accidentally hear any details from someone.  I didn't have a chance to see it last night, but its taped and waiting for me. I hear it calling out to me and can't resist another minute.

ps- Hi, Wanda!! It was nice to meet you!!

How to paint and distress furniture

celebrations, Dorkies (Yorkshire Terrriers), family, Hand Painted Furniture, how to's, how-to projects, yorkies
IMG_0730

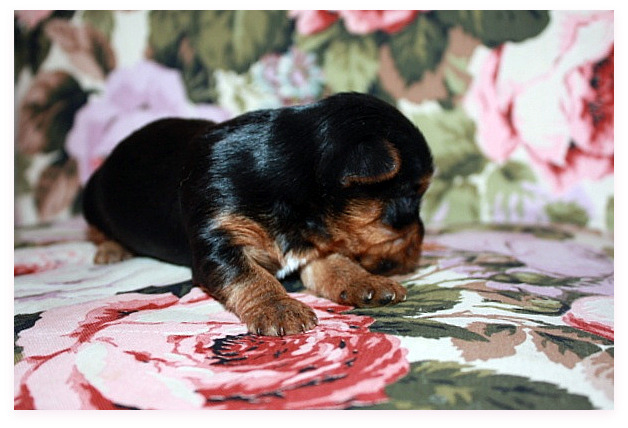
Twinkle's babies are still all curled up in their nest. Even with their eyes opened now, they aren't ready to explore or do much but sleep and eat.

IMG_0728

They are still living in a box in my bathroom at night, and come out to the studio with me during the day.  As soon as they are big enough to need more space, the studio will become their full time home.

IMG_0697
I haven't had a heck of a lot of time in the studio lately, with or without pups.  I've been working on some indoor projects, plus celebrated Earth Day by buying 6 fruit trees to plant in the yard. 

After that, I went with some friends to an Earth Day fashion show, where all the clothes were 2nd hand, redesigned or re-purposed.   To my surprise, Sugarwing's Hippy Chic Mommy was in the show with her hula hoop group of performers.   The whole show was more performance than fashion, really fun to watch, and kind of funky.  

IMG_0720

My big indoor project has taken a big chunk of the weekend, but now is done.  I've repainted my dining table and chairs, along with a buffet to match (kind of).  Its been something I've wanted to do for a long time, but hadn't had a chance to get around to it.

Of course, if I could just snap my fingers and have all the projects done at once, what kind of fun would that be?  Its the journey of redoing and tweaking, and finding just the right piece or color that makes me do it, not really the finished product.  

IMG_0719

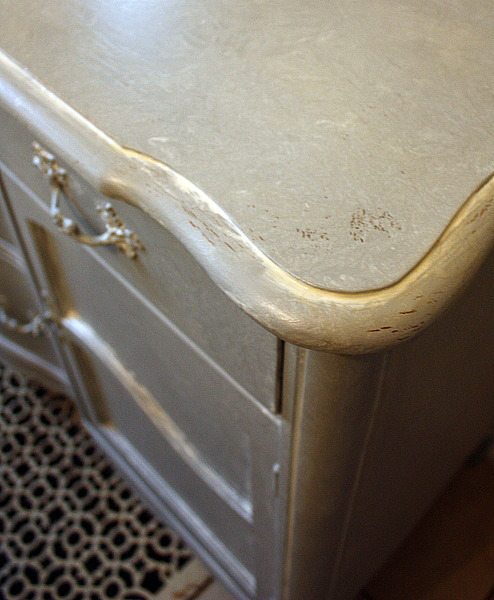
The buffet (hardware and all) got painted with bonding primer tinted gray.  Then white washed with ivory glaze, and that was wiped off with a soft, damp cloth.

Then, I took the cloth with the white glaze on it, wadded it up, and patted the buffet, to make a marbled look.  When dry, I sanded a bit here and there, not much, and clear coated it for protection.

IMG_0672

Here is a little tutorial on how to paint distressed looking furniture:

Please note that the trick to doing this technique is to NOT BE PERFECT.  All the little imperfections are what make the finish interesting.

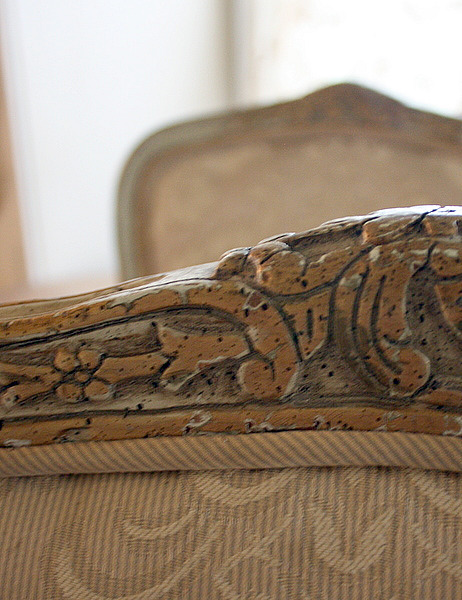
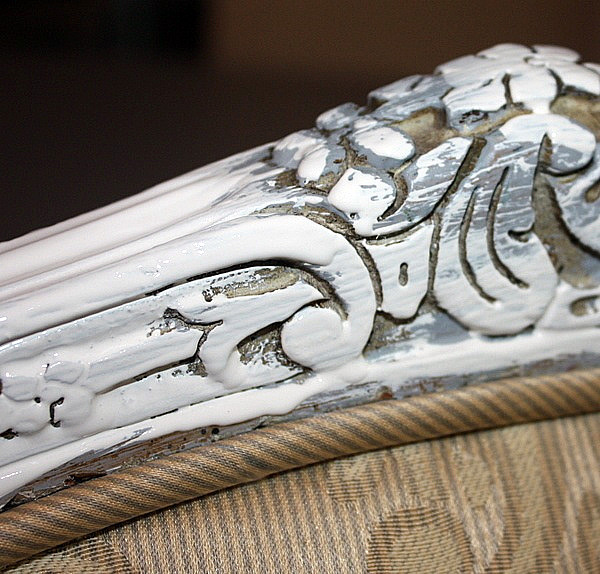
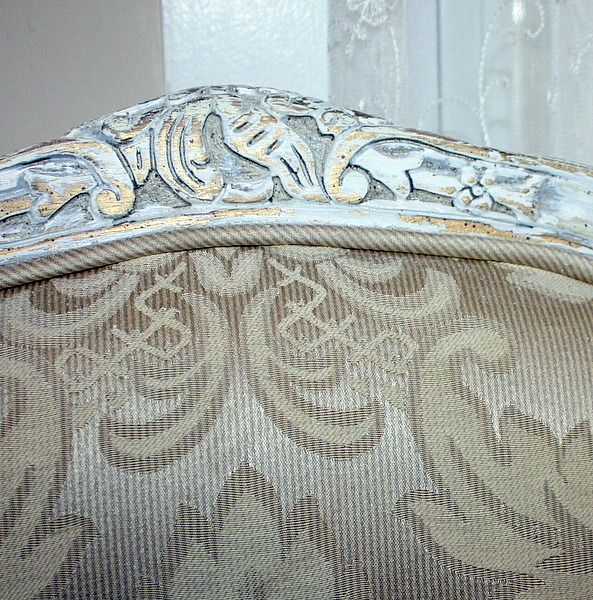
I started with this factory finish from the 60's.  Not bad, but not exactly to my taste.  I wanted an older look and thought this dining set looked dated.

IMG_0676

The first step was to brush on tinted gray bonding primer. I used Glidden Gripper. It came already tinted gray.

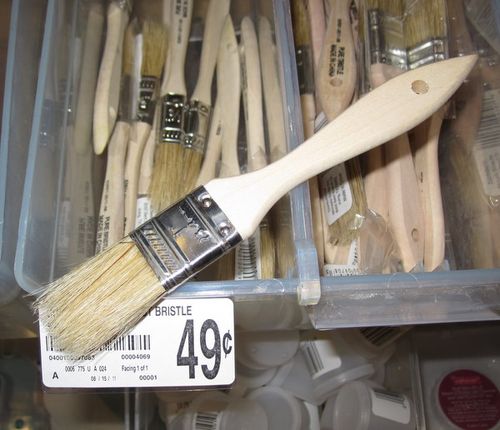
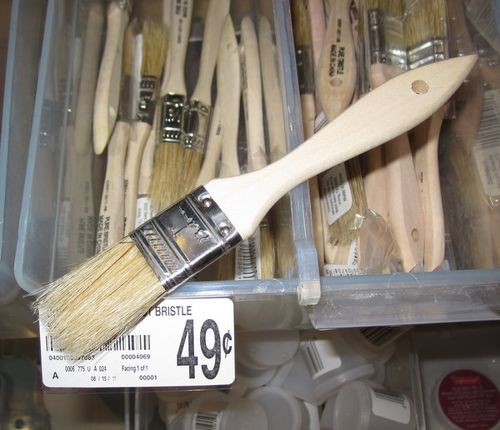
I used a cheapo, flat brush about 2 inches wide.  Kind of bristly and rough. 

The primer was brushed on in a messy way, not covering up the whole surface.

I'd recommend taping off the edges and covering fabric if you don't have a steady hand.  

IMG_0675

Second step same as the first, but with creamy white paint ( I use eggshell finish).  Messy, uneven coverage is the trick!

IMG_0674

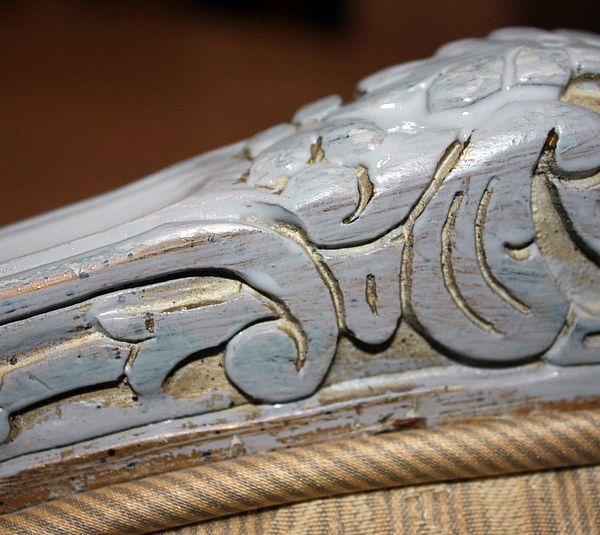
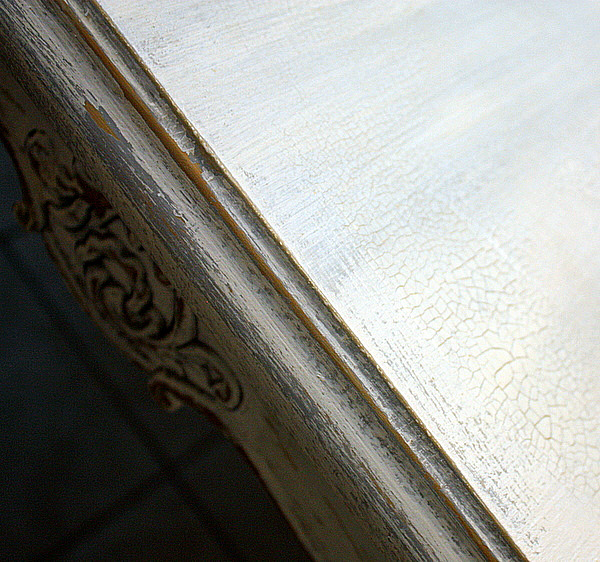
Next, rough it up with sandpaper, as soon as it is dry to the touch.  If you wait too long, you have to sand harder and it takes the paint off to the bare wood. I wanted the original colors of ivory and gold as well as my gray layer to show through.  

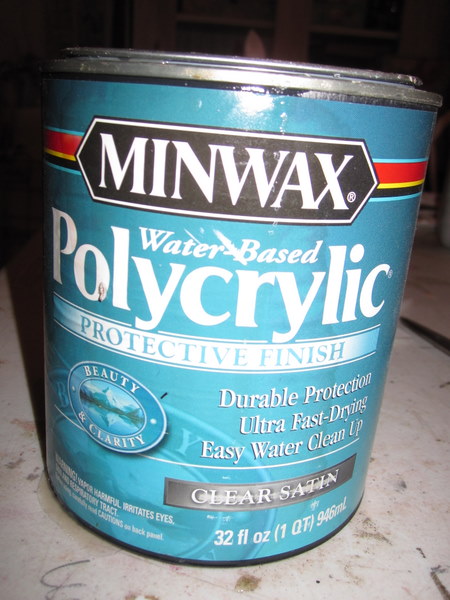
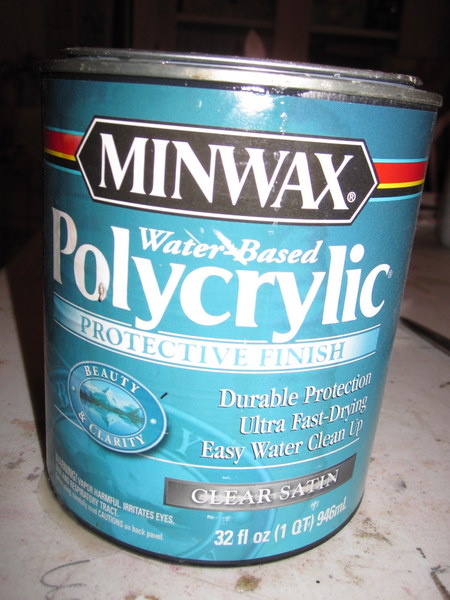
After sanding here and there, cover with a top coat. I like Minwax Polycrylic. Its water based and goes on easy for a durable finish.

IMG_0722

The table was done the exact same way, with one addition. Before putting on the top coat, I brushed it with a heavy coat of porcelain crackle glaze.  Not the entire table top, just random strokes here and there.

I'll be on the look out for new accessories for the room and will have some after pictures to show you once I've finished.  My favorite flea market is this week, so the timing is just right!

IMG_2911 IMG_2910 IMG_2914

Here are some of the supplies that I used. 

Shameless hawking of wares, Artist Class Ala Carte, a mini Tutorial, and prizes!

Etsy Goodies, family, give away, holiday decor, how-to projects, I do tend to run on, don't I?, vintage paper/collage art
Thanksgiving 09 088

I hope you all had a wonderful holiday, with lots to be thankful for yesterday!

We had a smaller than usual group this year, and WAY too much food. I've already made turkey soup from leftovers for supper tonight.  While cleaning up the kitchen and putting away the food, I have a pot simmering on the stove that veggies, turkey, and broth go into.  I throw in a few handfuls of rice, and some seasonings and by the time I'm done with the kitchen clean up, the soup is ready to be cooled and put away for the next day.

Thanksgiving 09 089

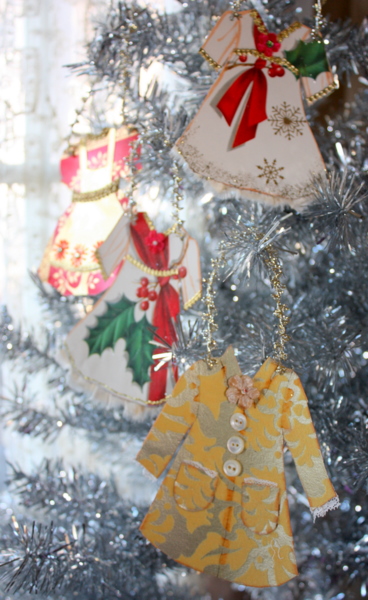
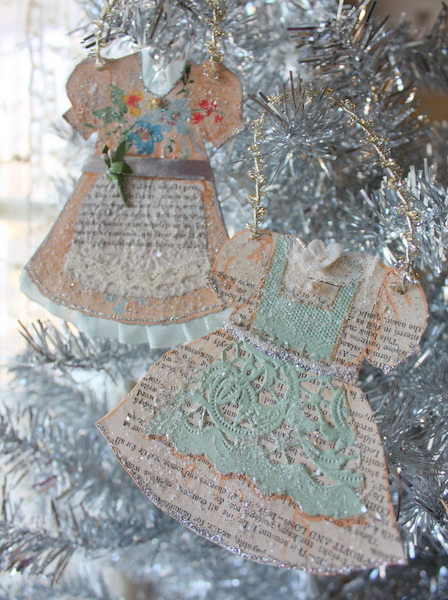
Family brought side dishes, and we had the meal all under control on auto pilot, so while the guys watched football and played pool, some of us made paper doll dresses for our Christmas trees.  We kind of have a family tradition of doing projects together while the turkey roasts. I keep the day low keyed and simple, so we can all enjoy it and not feel pressured or rushed. The meal is all served buffet style right from the stove top, so when its time to eat, all we do is line up.  I can play with glitter and glue right up until its chow time!

Thanksgiving 09 097

This year, I had actual patterns ready for the guests to use, thanks to the tutorial I did for Mary's Artist Class.  I enjoyed seeing how the "class" went in person, and they seemed to like it. 

Artist Class is still available to purchase as a group of 12 projects, with lots of extras (use my Karlascottage code to save $10) and now, Mary is also offering an ala carte menu to pick and chose a few classes here and there too.

Click HERE to order the paper doll tutorial that I did. 

You will receive the dress patterns, the hand drawn doll that the dresses fit, directions, and ephemera to down load and print out to make your creations.  This class, on its own is $15. 

I will be listing some more ephemera kits with extra patterns in my Boutique soon too.  Along with that gorgeous wallpaper that I am slowly, but surely getting cut!!

Thanksgiving 09

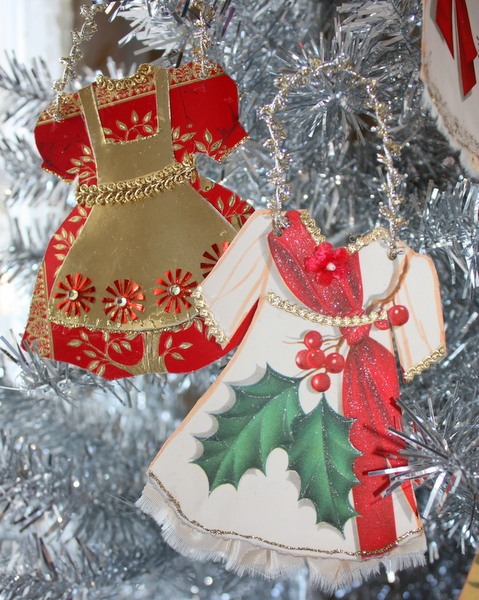
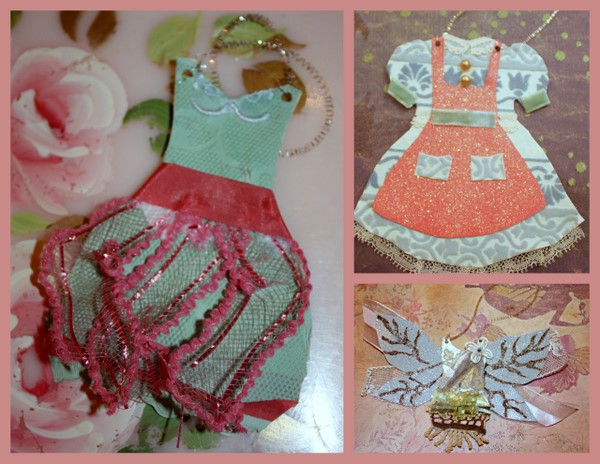
Here are some of the creations that family made yesterday with the patterns. Its great to see the range of styles that some simple patterns can become!

Thanksgiving 09 100

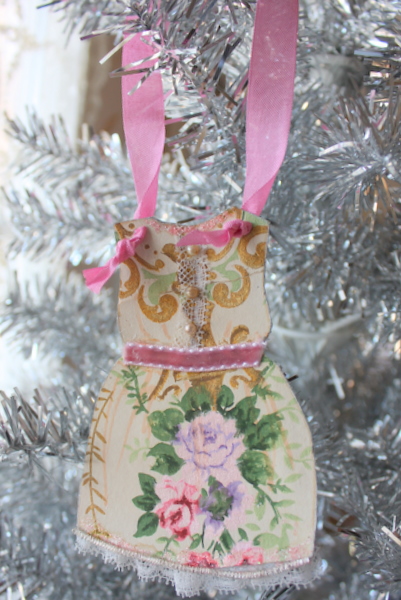
This is one of mine, made from that wallpaper that I'm so far behind on getting packaged to sell!   I've got a few rolls of it cut, but have about 10 more to get through. Thanks for your patience.  I'd planned on doing it today, but when Sugarwings asked me to take her to a movie, how could I say no?  Wallpaper will just have to wait, fairy grand babies take precedence!

Thanksgiving 09 081

If you'd like to make your paper doll dresses into ornaments to hang from the tree, here are some simple steps to do that.

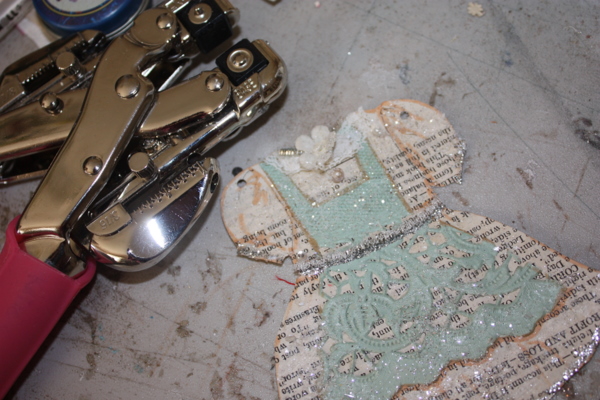
First, punch holes in the shoulders.

Thanksgiving 09 087

Next, select your ribbon.

Thanksgiving 09 084

For holiday sparkle, I chose this vintage tinsel that was a gift from Beth.

Cut about 7-8"

Thanksgiving 09 082

Thread the ribbon through the holes from the front (although, you can tell from the floral dress I made, that I put the knots in the front, that is OK too)

Thanksgiving 09 083

Tie knots on both ends, then trim off any danglies.

To Christmassy-up a couple of these dresses, I added some glitter.  Simply brush your finished dress lightly, with white glue, and sprinkle on glitter, then tap off.  I used the vintage crystal "Diamond Dust" because it has such a pretty shine. Make sure you don't use something metallic or heavy that covers up your work completely! You want to use a transparent glitter and apply in a fine sheen, not thick or gloppy.

The dresses I've shown are available in my Etsy shop for $6 each, if you are interested.

 Doll-1

And now, after what sounds like a lot of hawking of my wares-( but hey, I have to make a living here, don't I??), I have some gifts to announce!

The winner of the original, hand drawn and painted paper doll goes to:

Laurie Jackson

And an ephemera kit for making the dolls goes to:

Sandra Thompson

Novemeber giveaawy 025

And of course, everyone who leaves a comment anytime this month is entered into the

November Giveaway.

While up at Silver Bella, there was a discussion among some friends about giveaways. A lot of people don't care for them and think there are too many.  I know I have a lot, and yes, some of it is just to bribe you guys to leave comments, but that isn't the only reason I do it.

For one thing, I have so MUCH. And I like to share.  I find good deals and I'm able to giveaway pretty things without hurting my pocketbook.

And also, to quote Kurt to Finn on Glee, "I honestly love you". My blog, and blogfriends that I've met through it mean a lot to me.  There are billions and billions of blogs out there for you to visit and I just want to say thanks for you to take the time out to come and see me, and bother to leave a comment. 

So, yes, there will be more giveaways here.  And lots of them.  Its appropriate to say at Thanksgiving time that I have a lot to be thankful for.  So, I just wanted to let you know that!

40 ways to say happy birthday

celebrations, Dorkies (Yorkshire Terrriers), family, Food and Drink, how-to projects
Shan's bday09 028

This morning, we celebrated a friend's birthday with a brunch at my house.  It was a simple meal, organic vanilla yogurt, fresh fruit salad, and Rhodes cinnamon rolls hot out of the the oven, with a birthday candle stuck in them.

Shan's bday09 009

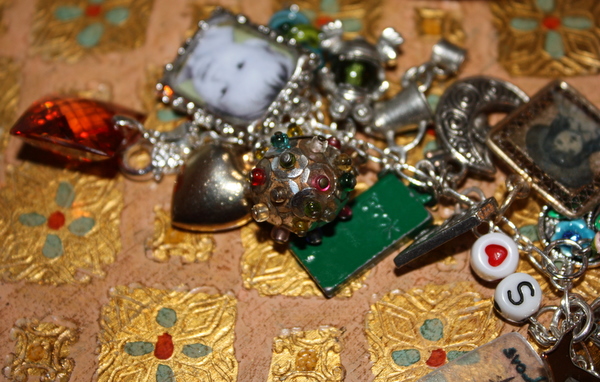
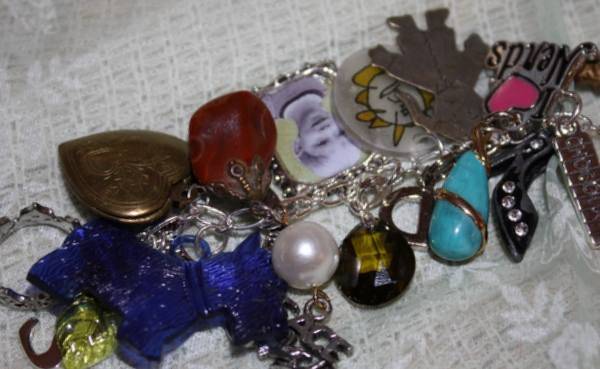
Since she was turning 40, a group of her friends came up with 40 charms for me to make into a bracelet for her.  We've done this for a couple of other pals in our circle on their 40th too.

Shan's bday09 002

Since 8 different people bought, or made the pieces, it really looked like a charm bracelet full of tidbits collected over a lifetime.  Some had special meaning, like her kid's photos, a coffee pot (to symbolize our regular coffee gatherings), a bowling pin (from bowling dates together), her initials, etc.  But some were just cute little things that were "filler". 

Shan's bday09 003

Since she owns two dorkie pups from one of my dog's litters, I really tried to find a Yorky charm for her.  But, one of her dogs is a giant, king sized terrier, that I swear is half golden retriever (we had goldens at the time too, so I really think that is possible…), so I figured that this over-sized blue dog looked enough
like him to work.

To make the charms with her kid's photos:

 I bought frame charms from the craft store, and cut out at plain bit of green paper to fit them (her favorite color).

Then, I found photos of her kids on my computer, edited them to black and white, and emailed them to the copy store with instructions to reduce them so that the faces were just under 3/4" inches.

Color photo copies seem to work better under paper glaze than the pictures I make with my own printer. The ink never runs with photo copies.

I cut out the faces and glued those to the green paper, and covered it all with a layer of paper glaze. Love that stuff! It is self leveling, so you don't have to be perfect with it. You do need to watch it as it dries, though and pop any bubbles that form. (use a pin)

Shan's bday09 024

After it was all assembled, I wrapped the bracelet in a green, vintage hankie and put it into a decorated cone.  The Dollar Tree store was selling packages of these gold or silver cones 6 for a dollar!

They were pretty as is, and make great favor wraps, or small gift packages.  I added a medallion with her initial, and then pinned some festive ribbons to the bottom with vintage brooch that she can take off and wear on her jacket.

Shan's bday09 006

This photo is a bit redundant, since I've already shown you the bracelet, but hey, look at my new lady!!  She is from Rusty Chandelier
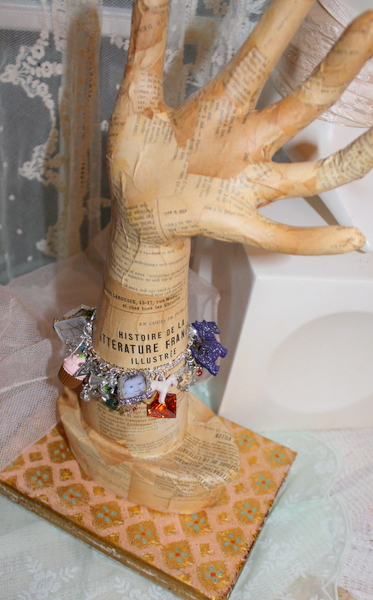
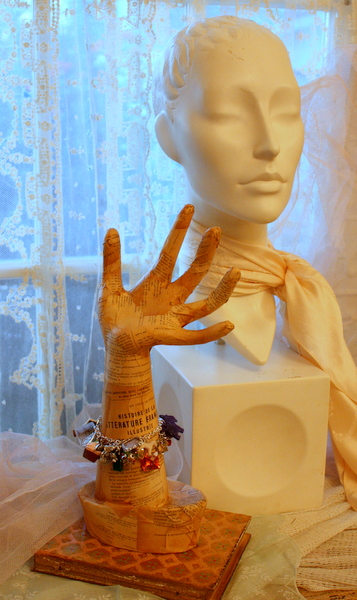
one of the BEST antique malls, EVER.  She isn't named yet, or finished. I am thinking about covering her in old French ephemera like I did the hand that Robin gave to me.

Shan's bday09

Especially since this gift just came in the mail!  Zita sent these French Canadian books to me and the pages are just perfect for redoing the face of my new lady, huh?


She'll be wonderful for selling hats and necklaces, plus will class up my booth a bit!

Shan's bday09 031

Before I get to work on her, I need to go and tidy up after the brunch.  I never mind the after party mess, its usually a time to think about who said what and what funny things came up, and to enjoy the pretty dishes and bowls as I am washing them up. 

Just like picking up after Sugarwings.  Her leavings often give my heart a little tug, like this pile of her favorites set on the stairs waiting to be carried up to her room.

A random rambling and a secret surprise giveaway

family, give away, how to's, how-to projects, the Boutique at Karla's Cottage
Gardening1
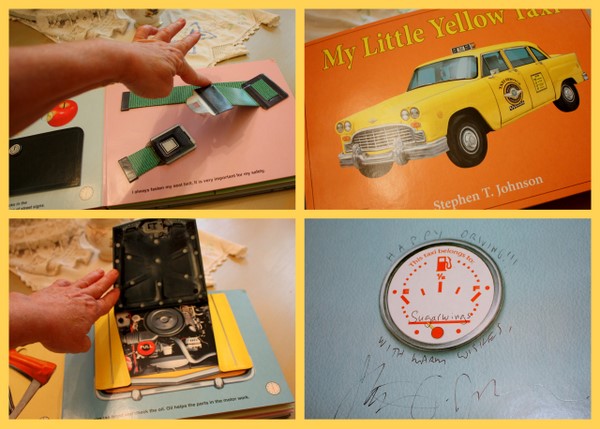
Do you have a favorite children's book author? Mine is Stephen Johnson.  He is a local, Lawrence, KS artist who has done a series of interactive kid's books.  Now he is working on one called "The Princess Purse" and came over to my studio to borrow sparkly things, vintagey boxes, and pretty wallpapers all to use as props. 

Stephen brought this taxi book for Sugarwings as a gift.  She's going to have a whole collection of his books, lucky kid!  His latest is about fire trucks and will be out very soon. You can find it and his others at many major book stores. And they are really cute!

Gardening-1
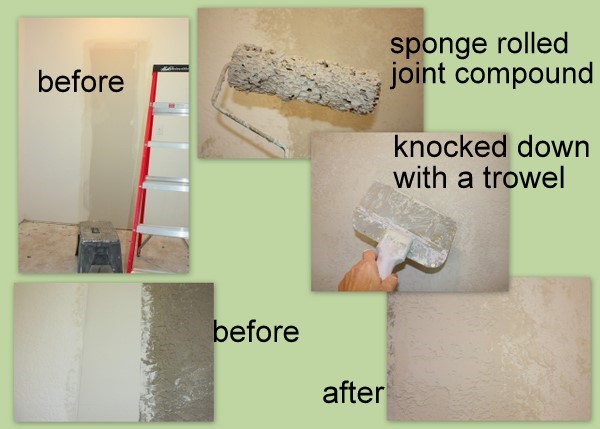
Some of you were asking about the mudding I had to do for the dry wall. Well, we took out a closet and used the space to enlarge my husband's office.  The new dry wall was smooth and the old walls were textured. I had to fake a texture to blend it in.

After the dry wall guy (my sweet brother-in-law) got the walls done, I used a sponge roller (meant for faux finishes) to roll on joint compound. Then, took a trowel and knocked the points and highest spots off of the rolled on mud.

Gardening 053-1
After painting, I think it looks pretty good.

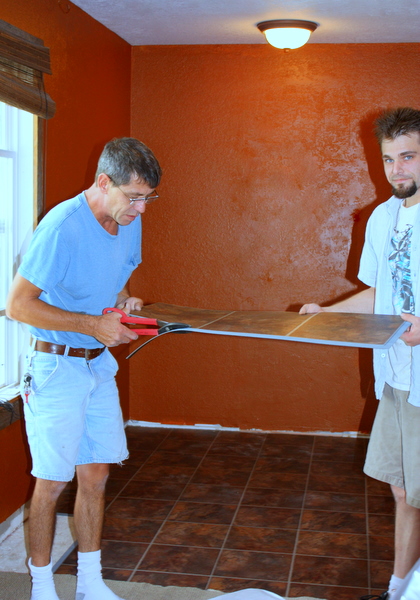
What I don't like, is that Home Depot gave me the wrong box of floor covering!  I had picked out a grayer color that blended well with the existing carpet.  But instead I got this dark sienna, that the guys didn't realize was wrong and installed anyway.  I should have looked in the box myself.  It matches the walls ok, and isn't horrid, it just isn't what I wanted.

When we get the room all put back together, I'll show you some more shots. I'm also redoing Ryan's room, it was his walk in closet we stole to make the office bigger. So I owe him…

Gardening 045-1
Just how hodgepodgy can I make this posting?? I'm flitting about from one thing to another even more than usual!

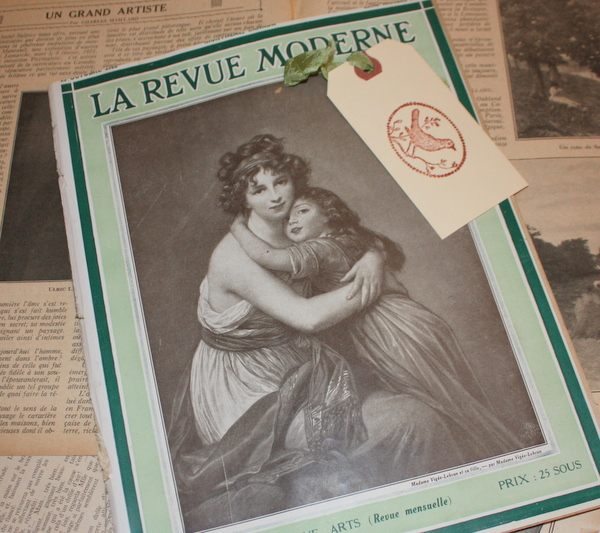
Sweet Zita  offered to mail an old French magazine to me after reading my last post about how I loved working with that kind of paper.  Did I call her sweet Zita? I meant Adorable, Darling, Generous, Magnanimous, Delightful, Kind, Gracious, and Wonderful Zita!!

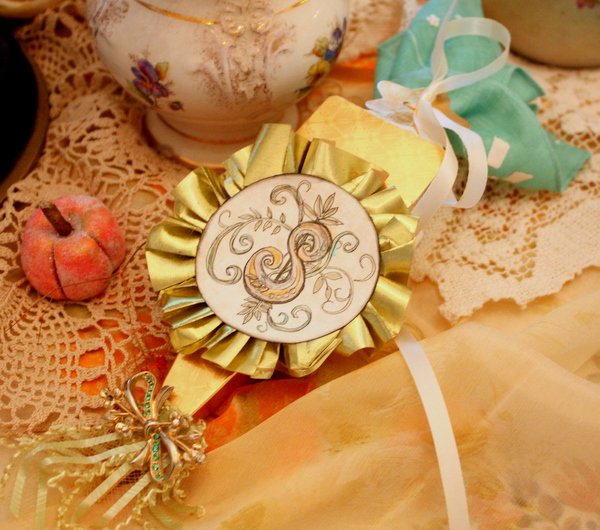
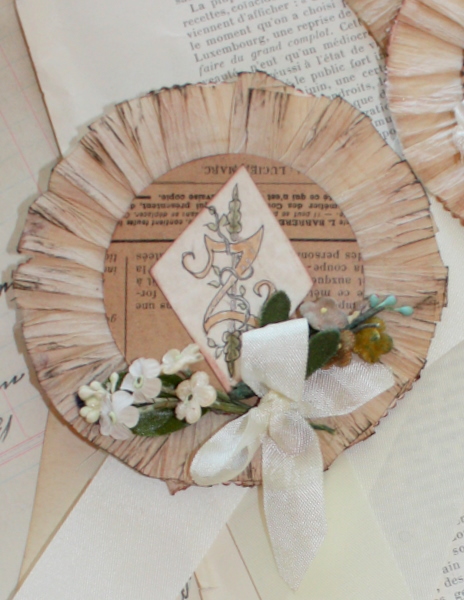
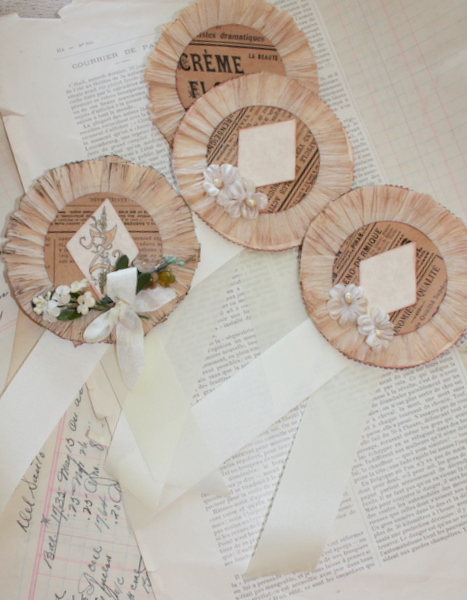
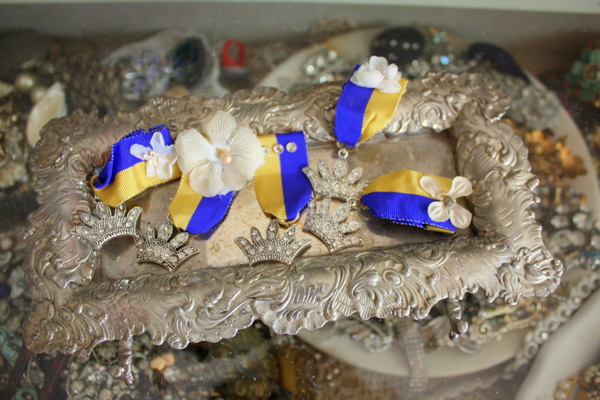
So, I made her one of the prize ribbon medallions that I was using the French ephemera to make.

Gardening 045
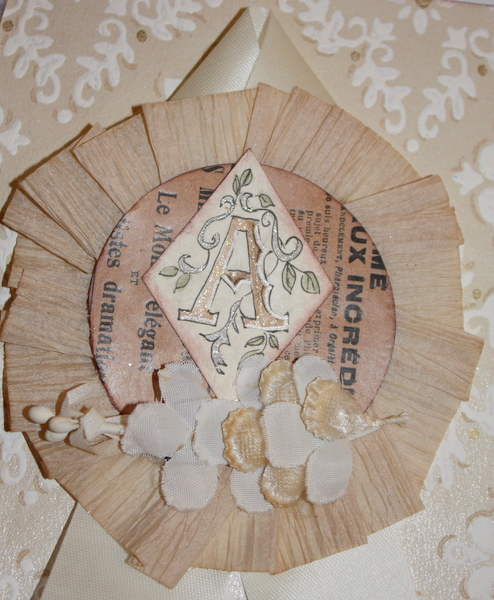
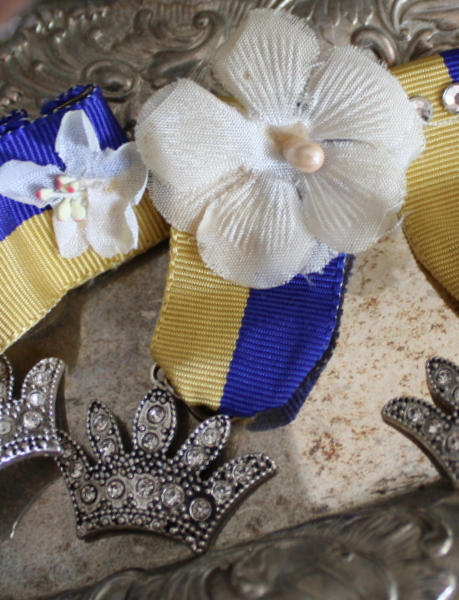
While I was at it, I made up 3 more for the Boutique.  Each is made of vintage ribbon, French paper, millinery flowers, and old crepe paper.  I added parchment cardstock to the back for stability, and also made a small diamond out of it to add your initial to.

The initials are hand drawn, no patterns or stencils.

Gardening 048

No two are exactly alike, but all are the same, if that makes sense. When things are hand made from vintage goods, you get some variation.

I've also added a brooch pin to the back, so the ribbon is ready to pin where ever you'd like to use it. 

Gardening 040

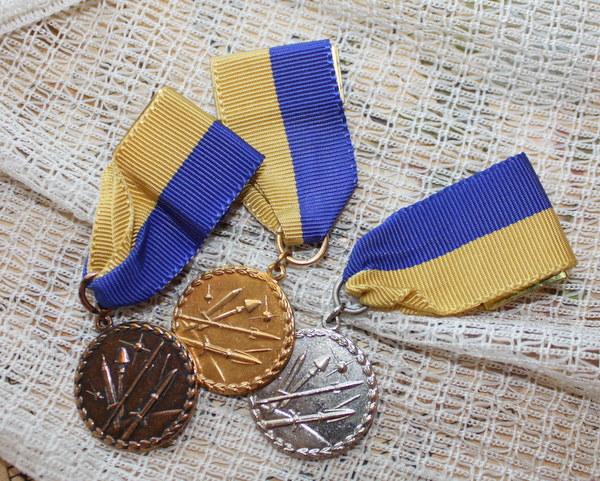
And maybe you can help me with this? I've listed these in the shop as sports medals, but I really am not sure if they are or not. I wondered if they were military medals? They kind of look like track and field prizes to me, especially since there is silver, gold and bronze. I doubt if the Army gives out 1st, 2nd, and 3rd when they award a medal.

Gardening 071
The old ribbons with the pins on the back are great! I used a few to make these crown pins.

Gardening 070
 I took the medals themselves off to save for another project. Maybe a charm bracelet?

Gardening 067
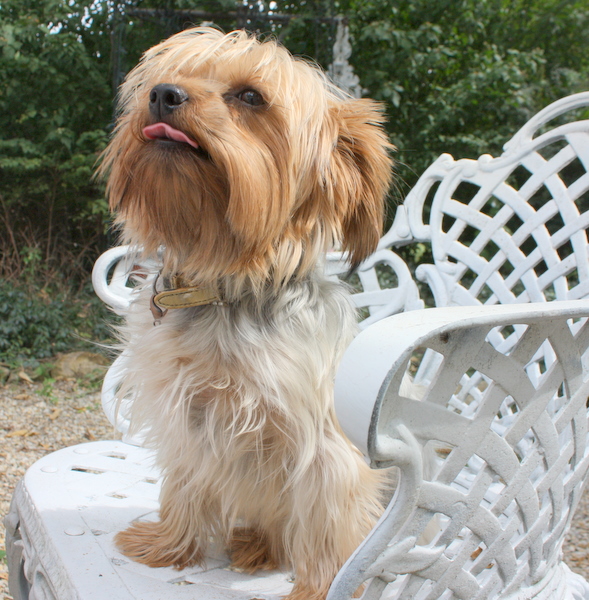
One of the medals could be clipped to Twinkle's collar, she is missing the rhinestone piece that she used to wear.  I could award her a gold medal for being such a good dog. 

Gardening 072
Well, the month of September is more than half over already! You still have plenty of time to ente
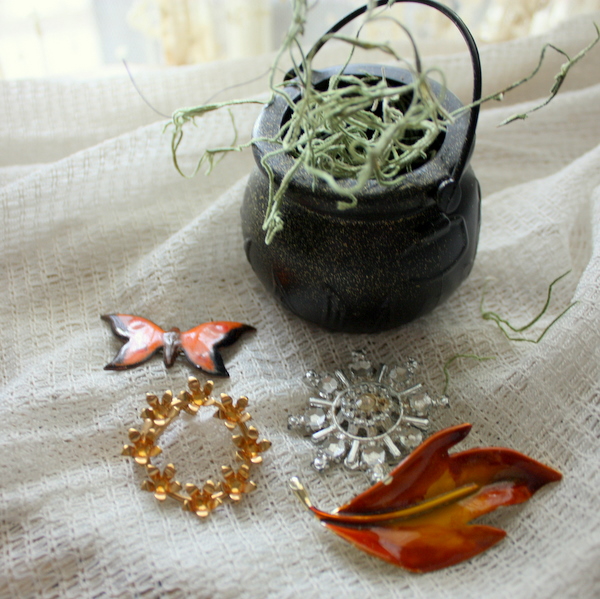
r the giveaway for this month.  The change of seasons has inspired me to fill this little sparkled witch's caldron with brooches.  When fall comes around, I am always looking for cute brooches to wear on my jackets. 

One is an enameled butterfly in fine fall colors. Another is a leaf in the same tones.  To that is a flower petal wreath and a rhinestone pin that reminds me of a snowflake.  I'm not exactly a fall person. I can't enjoy the season without dreading snow that comes soon after.

Leave a comment, any post, all month to enter.  I do enjoy hearing from you, but I know that leaving a comment can be a hassle. I had about 1500 hits yesterday, but only 20-some comments on the post!  I certainly don't leave a comment on every post I read either, especially since I started using Google Reader. It is so easy to zip through one blog after another, that I don't pause to go to the site and comment much. Sorry.

Gardening 074
But- you never know when I'll have a double secret giveaway prize waiting for you!  Ta- da! Here is a little tag book ready to embellish that is going out to my 20,000th comment.

And guess who the 20,000th commenter was??  Remember when I had a prize for 12,000 and my husband was the commenter? Well this time, since Typepad was doing that wierd comment response thing and my replies were going into the comment log, the winner is:

ME

Yep, I win.  So, I went to number 20,001 and the real winner is my pal from Macon, Angela

Gardening 037

This is a tag I made from a French game card to send out to a shopper in the boutique, Melissa. She bought this jewelry from me and I knew this little matching rose needed to go to her.

The thing is, why did I spend extra for FRENCH EPHEMERA, when it is a single letter?? Not a word, no one actually knows it is French, now do they?
Well, I need to go back upstairs to the torture chamber my husband's office and finish painting the walls.  Its a BIG room. 

Before and after

Hand Painted Furniture, how-to projects, Sugarwings, We're having a party

Butterflybanner900title 

Jen is having a make-over open house. Check out her blogfor a list of participating do-it-your-selfers, and join in yourself if you have a re-do you'd like to show.

Steve's new house, Lee Lee's first pants 002 

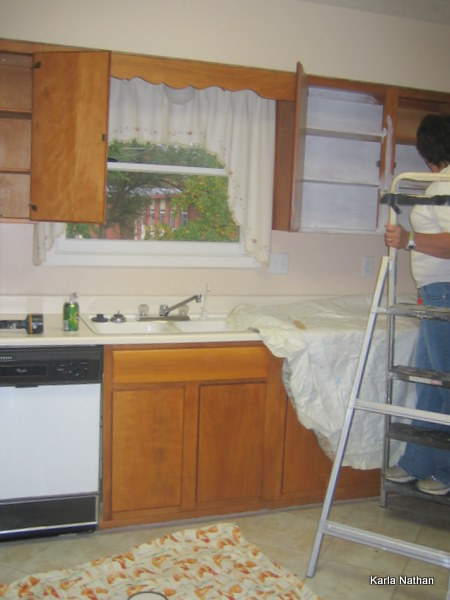
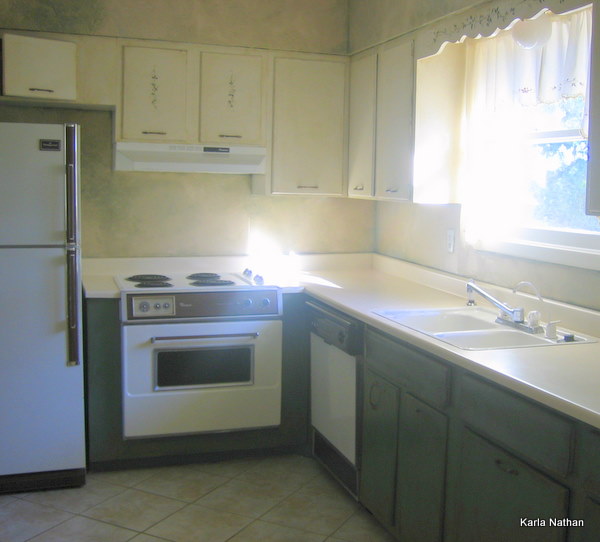
I pulled out some photos of a redo I did a little while back for my sister-in-law, to show the Magic Of Paint.  They bought an older home and didn't have anything left in the budget for remodeling, so we did what we could with paint, most of it from the surplus store where paint is only 5 bucks a gallon.  The primer is the one thing I insisted that they get a specific brand, not just what was available at the surplus store.

I always look for BONDING primer. Make sure the label says, "will adhere to shiny surfaces".  If you do that, and the wood is clean, you don't have to sand.  Water based bonding primer (Gripper from Glidden is my current fave) is all the prep you'll need.

Steve's new house, Lee Lee's first pants 005 

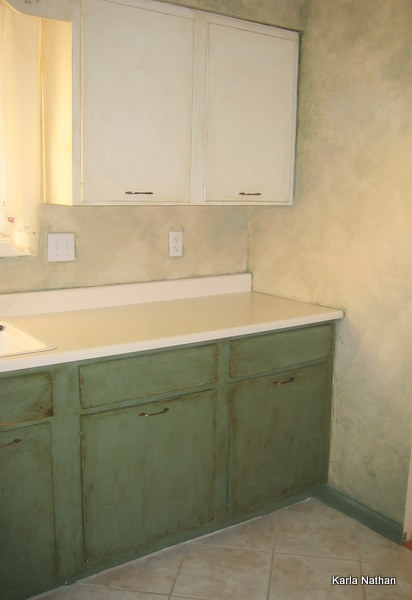
We primed and painted the top cabinets and all the interiors ivory and the bottoms and all the trim in the room a deep sage green.  Then, we beat the cabinet fronts with tools, for dents and dings, to "distress" them. 

After the paint was dry, we mixed Min wax poly/stain combo (in walnut) with a bit of turpentine to thin it, and brushed it on in small areas, then wiped it off (with cut up old tee shirts), for an aging effect.

Steve's new house, Lee Lee's first pants 004 

Oh, and I added some little vines in green on a few of the top doors before the stain-

The walls were already white, so I used the ivory and green to do a faux finish on the walls of the room.  The entire project, walls too, took 3 of us most of one day to do.

Leaving the cabinet doors on and painting right over the hinges makes the job a bit faster and unless you have drop dead gorgeous hardware, why not?  We did remove the handles and reuse those because they weren't bad.

I think the total cost was about $15 for primer, $10 for paint, and $8 for the stain/poly mix to go over the top. 

Yellow brick road 040 

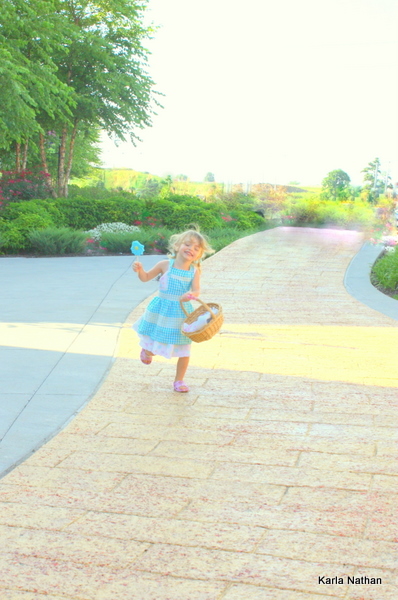
And here is a make over of another kind. This photo of Sugarwings on the Yellow Brick road was edited with Picassa.  I lightened, brightened, and retouched it, then deepened the colors with saturation.

I wanted to make the picture look more like Oz than Kansas.

Yellow brick road 041 

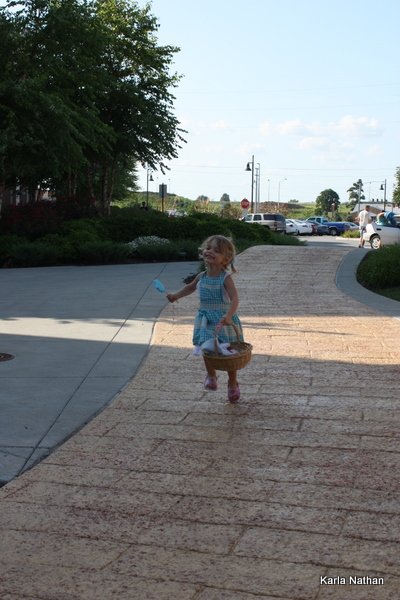
This is how it started out.

(its a picture I took right before the other one, not the same one, but the same conditions). Picassa is easy to use and this only took about 10 minutes to do.   I'm not real good with the retouch button yet, but I'm figuring it out.

Now, I need to go and see some of the other redos that Jen has links to on her blog. I love before and afters!


How to paint furniture (the short cut way)

antiques/junking, Hand Painted Furniture, how to's, how-to projects

Cabinet redo 073 

For years, I had an antique furniture painting business and painted hundreds of pieces of furniture. I spent a lot of time figuring out an easier way to do it.

This tutorial is for painting old furniture and keeping an old feel to it, with NO sanding and NO stripping. Ugh, who wants to work that hard? 

Birthday 09 051 

Of course, having an assistant helps.

Cabinet redo 041 

Since this cabinet had glass doors, I covered the glass with newspaper before starting, and set up the piece in an area where I could spray paint and not worry about the mess. 

Cabinet redo 043 

Old furniture comes with many defects time has added to its finish. Personally, that is what I love about it.  If I wanted something to look new, I'd buy a brand new piece. I want my antiques to keep their flavor!  So, I don't want to sand away any alligatoring of the old varnish, or any other interesting bits on it.

By using a bonding spray, you do not need to sand or strip the furniture and you preserve those crackly spots in the varnish.

Cabinet redo 044 

This BONDING primer (bonding is the key word, here, it will stick to any clean surface without sanding) covers the old varnish, but doesn't change the look of the finish underneath. SHAKE WELL or you'll get a bumpy grainy finish.

Cabinet redo 045 

Spray away. 

We've already skipped sanding, and now here is where another short cut comes in.

  If you plan on painting the piece with a brush after priming, you can leave it the way this cabinet looks right now, kind of shadowy, that is good enough coverage for the paint to adhere. 

But, if you are going to do what I do and skip the step where you brush on paint, then you need to use plenty of spray primer.

It took me 2-1/2 cans for this piece.  After it was at the shadowy point in this photo, I sprayed over any darker areas and made sure there was good coverage.

Cabinet redo 046 

Did I mention how much it helps to have assistants?  I gave this one an empty can to help with.  I'm glad it was empty, because she tried to spray paint the world with it.  If she ever gets hold of a full can, I might be in trouble.

Cabinet redo 049

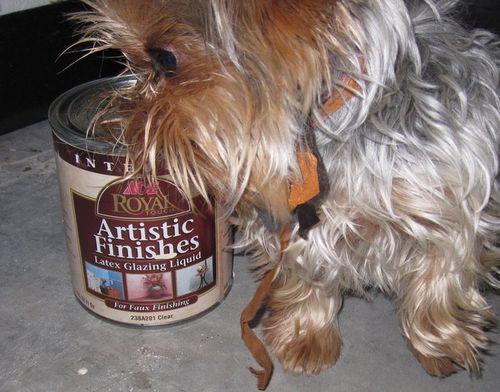
Primer MUST NOT be left without a top coat. But, who says you have to use just plain paint over it?? I use water based glaze, which is mixed with latex paint.  It covers the primer just like paint would, but is semi-transparent, depending upon how much color you add.

You can buy it pre-mixed like this kind, which is handy for large projects, but can be pricey. 

Cabinet redo 051 

Or you can buy glaze by the can, and mix your own color.  I use those cheapo 2 oz craft bottles of acrylic paint. There are a ton of color choices that way.

Cabinet redo 053 

This is really too much for the cabinet, but I liked this color and wanted to make extra to store for something else.  It never hurts to make up a bit extra, because you'd hate to run out in the middle of glazing your furniture.

I'd say 2 cups of glaze and 1 ounce of craft paint (any color, any brand) is plenty.

IMG_2910

I love these cheap-o brushes, they a good for getting down into the crevaces.

Cabinet redo 054 

The color I chose was a dark brown.  Notice how it looks more like chocolate milk after it is brushed on?  Well, that is because the glaze is milky.  But you have to remember that the glaze will dry CLEAR.  So the color of the small acrylic craft paint  you chose is what you end up with, not the milky version it is while still wet!!

Cabinet redo 055 

Start at the top and work on one small area at a time.  Paint the colored glaze on thickly, and get it down into all grooves.  After one section is painted, wipe it off with a wet, soft rag.

I use old tee shirts, and keep a bucket of warm water nearby for rinsing. Not that warm water is better than cold, but it just feels better when you wring the rag out.

And rinse often!!  Your rag will fill with glaze fast. If you don't keep rinsing and wringing it out, you'll have a soppy mess and will just be pushing the glaze around, not removing it.

Cabinet redo 057 

Don't worry about perfection.  Some areas will be more heavily glazed than others, that makes for an interesting finish. And if you were lucky enough to have a piece of furniture with lots of crackled finish to start with, then the glaze will really look nice when it settles into those cracks!

Cabinet redo 065 

While the glass is still covered with paper, spray a can of satin finish clear coat over the project to seal it. 

IMG_2911

Or you can brush on a water based top coat.

After you take off the newspaper and tape, you might have to scrape a little paint off the window here and there with a razor blade, if you tape as badly as I do.

I chose not to paint the interior of mine, instead I lined it with vintage wallpaper.

HINTS

  • You can skip the paint step, IF- you are fine with using bright white as your base color under the glaze. Spray primer doesn't come in tinted colors.  You can also use paint on bonding primer, and have it tinted, or use the gray it comes in, and that can be your base coat.
  • You MUST cover every inch of the primed areas with painted on glaze! Primer is not meant to be left uncovered.  But glaze is quicker and easier to brush on than paint, because you are just slopping it on heavy and will be wiping it off.
  • Top coats are important, for durability. You can quickly spray one, or brush it on. If I am brushing it on, I like to use Min-Wax Polycrylic.  It is water based, no smell.
  • Make sure the piece is clean before you paint it.   Wipe it down with a damp cloth, and if it is greasy use Windex.
  • Only use BONDING  primer!!  Be sure the label says something like "will stick to glossy surfaces".  I buy this brand at Home Depot.  If I am brushing on primer instead, I use "The Gripper" by Glidden.
  • Primer can be painted over soon after using it, but sometimes it takes days to "cure".  So, if you have painted something with an extremely high gloss finish, try to leave it set and don't mess with it for 3 or 4 days.  The finish hardens, and won't scrape up after that.
  • Its nice to paint the inside of drawers, for a clean finish, but NEVER, ever paint the sides of the drawers, on the outside, or the bottoms.  They must be kept clear of paint so the drawers won't stick.  For an old, sticky piece, wax the outside of the drawers for a good slide.
  • If you get over spray on the glass, like I did, scrape it off right away, or it just gets harder to do. Bonding primer bonds!
  • If you have plans to "distress" the piece, by roughing the edges up with sand paper, do it before your top coat.  And don't wait too long, like I mentioned before bonding primer bonds!  When the furniture is dry, sand away, but don't wait days and days or you'll have trouble sanding through the primer to the wood underneath.


It was pointed out to me that spray paint is dangerous to inhale and I didn't mention safety precautions.  Please, use proper ventalation!  I use the garage, but am right inside the open double doors.  Also, the baby only was playing with an empty can, she was not actually involved with spraying or breathing in the spray.  I treasure each and every one of her brain cells!

A mini tutorial just in time for May Day and Mother’s Day

flowers, how-to projects, Miss Frenchie's

April in paris 204 

For some reason, I didn't do much shopping at Miss Frenchie's myself.  I missed out on some great items, and am kicking myself about some vintage lace curtain panels thatDebbie had.  I guess that when I go to a show, I am in a selling mode, not a buying one.

There were a few little souveniers I picked up for myself, though. One of these great "Miss Frenchie's April in Paris" candles from Debbie, and from Beth, this Eiffel tower.  I might glitter it up. When I get caught up.  If that can ever happen. 

April in paris 199 

Part of getting caught up was cleaning up around the house a bit, (with me away 4 days in a row, and life going on without me to pick up after it, the house got a little – no a lot- messy). And I have neglected my yard getting ready for this sale, so I took a couple hours today to tidy up and hit dandelions with Round Up. I adore that stuff. I should own stock in the company I use so much of it.

The bundles of pansies and violas that I used as props at the sale needed to be potted, so I planted them, and used the moss I'd had for the sale too.

April in paris 030 

People at the sale seemed to be taken with the bundles of pansies, and I got a lot of inquiries about them. So,  I thought I'd do a mini tutorial for you. With May Day and Mother's Day both around the corner, these are a handy and inexpensive little gift.

Start with a 4 pack of bedding plants and try to get a good one, with lots of blooms on it.

Remove from the pots and soak the roots in water.  (you can add root starter if you'd like)

April in paris 031 

Wrap the wet root ball in a paper napkin.

April in paris 036 

Wrap the wet napkin-ed roots in a piece of Saran Wrap, making sure you have it covered well, so it won't leak.

April in paris 038 

Select paper to tie up the plant in. I used pages torn from an old book titled "Art in Every Day Life" because I liked seeing those words across the top of the package.

You could use scrapbook paper, lace paper doilies, gift wrap, just about anything you'd like.

April in paris 034 

I chose a wide, ivory ribbon to tie around my plants.  Raffia, rickrack, lots of things would work.

April in paris 039 

Since I was going to a show and needed greenery for my tables, I made up quite a few of these.  There was no leakage, and 5 days later they were still in good shape to plant.

These bundles look so pretty and it is a nice presentation that takes little time or money.  Sometimes, I add one to a gift bag to stick out of the top.  Its like a bouquet with a bonus, because they can be planted later and enjoyed for a long time! 

April in paris 190

Scroll to Top