how-to projects

Lighten up! (or how to paint a chandelier)

Chandeliers, Dorkies (Yorkshire Terrriers), how-to projects, Miss Frenchie's

Banner painting 004 

Yesterday was  a junking day, and a really good one at that.  We all bought stuff we loved and at good prices, you just can't beat that! One of my purchases was this $58 brass chandelier. I needed one to light up my space at the upcoming Miss Frenchie's sale. 

Today was definitely a perfect springtime day!  70's and sunny, and not too much of that Kansas wind.  So, I took advantage of the sun, and took this chandy outside for a do-over.

Here's how:

1- Wipe off the dust, if it is really dirty, use Windex.

2- Now, this might sound like odd advice, but it really is smart and works. I've painted dozens of chandeliers and have found that this is the easiest way to go- screw burnt out light bulbs into the sockets before painting!  That keeps the paint from getting into them, and is much simpler than using tape to cover the sockets.  Really.

3- Spray with a BONDING primer.  The label MUST say "bonding" or "will adhere to shiny surfaces."

Banner painting 005

4- Spray into all the  nooks and crannies, let dry, turn over and spray that side.  You will probably need to turn it around at least 3 or 4 times to get every angle. 

5- Double check and see if you missed any spots!

Banner painting 014 

6- Mix a deep brown paint (acrylic craft paint, like Apple Barrell or Delta) with some clear glaze.

7- Dab on the brown with a small, soft  brush, doing one area at a time. Make sure you get it deep into all the cracks.

Banner painting 015

8-Lightly wipe away paint with a wet rag, leaving it in the recesses.

Banner painting 016 

9- Repeat all over and all around the light.  Just like when you sprayed the primer, turn it every direction and make sure you didn't miss any spots. 

10- Go for an uneven, messy kind of finish, darker in some places than in others.  You don't want it to look like it was done perfectly at a factory!

Banner painting 012   

11- When dry, spray with a poly clear coat.  And remember about flipping it over and going for every angle!

Banner painting 017

12- Add crystals, I prefer to use different sizes, not all uniform.  If some of the holes are plugged with paint, poke through with a toothpick or small nail to clear it out.

Ta Da!  Only 12 steps to a whole new look! 

Banner painting 022

And please note, I didn't use just any spray paint. If you do that, the glaze will wipe off. It has to be a BONDING PRIMER for the water based glaze to stick!!!

Nesting (how to paint a bird’s nest)

Dorkies (Yorkshire Terrriers), how-to projects, paintings, swaps, yorkies


Trinket, who always is thinking and is happy to hang out on her own 

The babies are starting to leave me.  Today, little Glitter went to her new home, she is living now with a reader of this blog who happens to be in Kansas City.  Glitter was the pensive pup, who was always happy to watch a while before joining in the rough housing with the other girls.  Micah, the tiny little firecracker who had the most energy of all, is with her new family too.  Tinker Bella has gone to live with Teddy's family. 

Millie, who always runs to me first

  There are still 3 little furry bundles of joy to keep me company while I work in the studio, but not for  much longer.  Its going to be quiet around here after they go…

Nesting 018

Today, I've been busy at work in the studio painting drawer pulls.  I had a boxful, some from Beth,some that I harvested from dressers when I fixed them up and changed out the handles to glass knobs.  The first step in the redo was to prime them with a can of Zinzer spray primer. Then, I painted them white with acrylic craft paint. 

Nesting 002 

Are you up for a how-to? I thought I show you the steps in painting a nest.  First, start with a nest shape blob in dark brown.

Nesting 003 

Next, add two vaguely egg shaped blue blobs.

Nesting 004 

Add white highlights to the eggs.

Nesting 007 

Switch to a thin, liner brush and outline the eggs in the same dark brown used for the back ground of the nest.

Nesting 008 

Now, switch back to a small, round brush and load it with yellow and tan.

Nesting 010 

Add some of the yellow tan color, in lines that follow the shape of the nest.

Nesting 012 

Repeat with a layer of olive green.

Nesting 013 

This is all about the layers. Let each previous layer peek through the next.  Don't go at this with a heavy hand, let your layers of color build up, just as a bird would have built it with layers of sticks.

Now is time to switch back to the thin, liner brush.  Using the dark brown, follow the shape of the nest again with your strokes. This time, be a little messy, with "twigs" sticking out all around.

Nesting 015 

Repeat the last step with white or ivory.

Nesting 016 

Fine tune the nest by outlining some strokes with the dark brown on a liner brush, here and there as needed

To finish, brush on a water based clear coat, or spray with a can of poly. I prefer the brushed on method myself.  It might look like this was a lot of steps, but really, it goes fast and unsure, shaky lines make even better twigs than perfect lines! So give it a try, a nest is a simple thing to paint.

Should a poor sewer who hates to even try, attempt a Magnolia Pearl inspired slip cover on a RECLINER? While taking muscle relaxers for a strained back??

Books, how to's, how-to projects, redos

Chair redo 014 

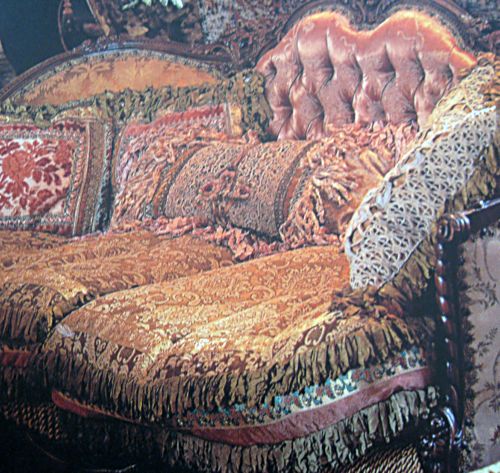
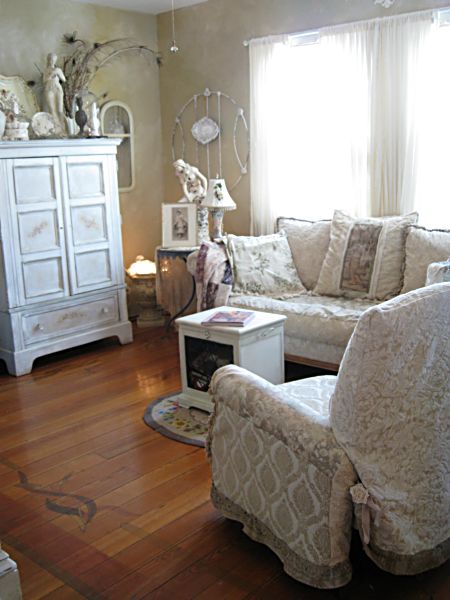
Have you read the Magnolia Pearl book? Beth gave it to me for Christmas and I have been obsessed with the photos.  Now, not all are to my taste exactly (I think old rugs on the walls in the kitchen is just gross and dusty and musty)but I love the idea of it all.  But in MY colors.  Still, just look at this sofa. I was inspired by the opulence of it all, and have always loved the crazy quilt layering of fabrics when I make slipcovers.

Chair redo 016 

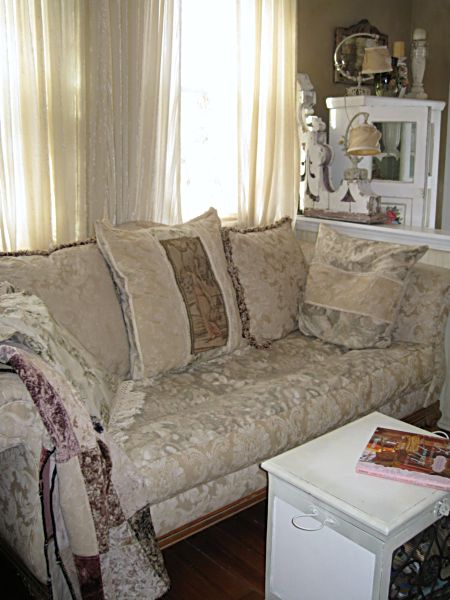
My sofa could use a bit of the embellishments I spied in the book.  I have a good start with the mixed fabrics already.  If I added a few velvets and trims, I'd be close. Well, close enough for my house.   I have to consider that it is climbed on by two year olds and dorkies, plus we use the sofa for real life, not for display!!!  All of my fabrics need to be washable.

Chair redo 032 

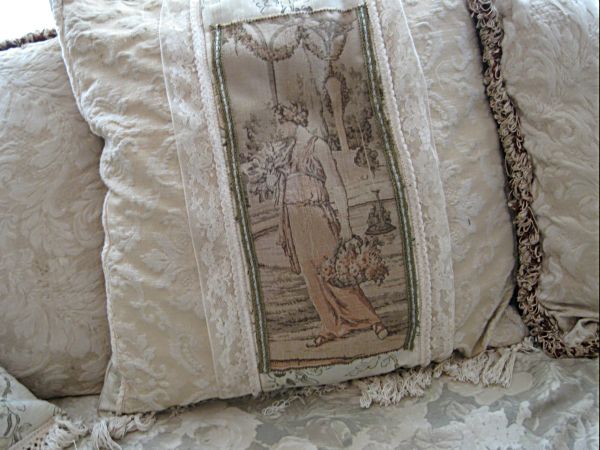
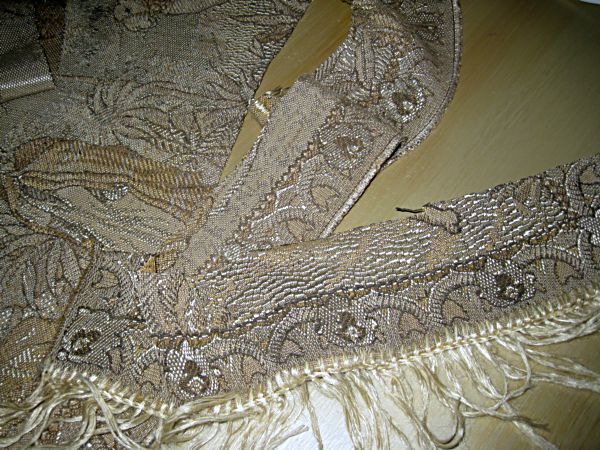
One element I really enjoyed from the book was the use of old textiles.  So, I cut up a tapestry I'd found at an antique mall years ago and added a section to the center pillow of the couch.

Chair redo 010 

Another one, got cut up for ruffles on the chair that I decided to recover in a Magnolia Pearl-ISH way. This tapestry's design wasn't as pretty as the Grecian ladies on the other runner, this one was elephants and guys in turbans.  But I loved the over all look of the fabric itself, it really shows its age.

Chair redo 

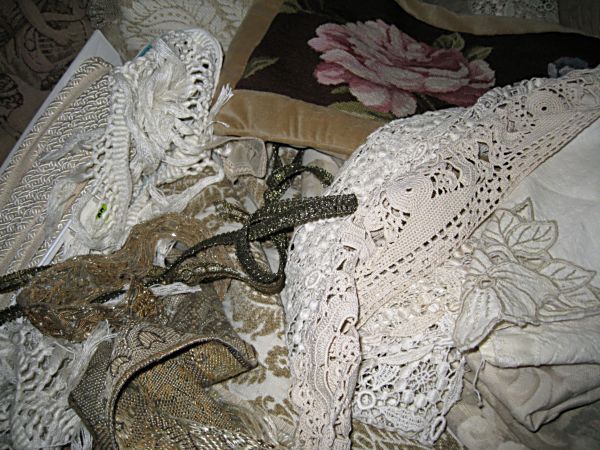
The next step was to gather up piles of remnants and trims and doilies and whatever else I had lurking in the linen cabinet in my studio.  I wasn't exactly sure how and where I'd use it all, and actually didn't end up usingmost of the bits and pieces. But it was good to have a pile to look through, hold up to the chair and pick from.  Nothing was planned out, this chair just came together from the inspiration of what I'd seen in the Magnolia Pearl book and what was left over from other projects or laying around the studio.

Chair redo 001   

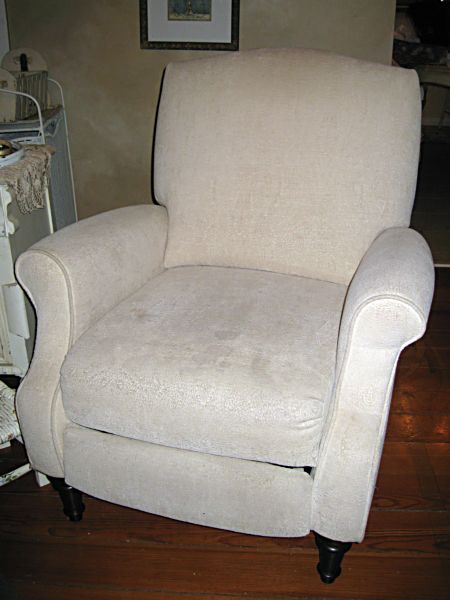
If a furniture store ever sells you an insurance package for light colored fabrics, please read the fine print.  I liked this oyster white velvet, but was worried about dirt showing. So, for an extra $35, I got a guarantee.  Any stain or dirt that got on the chair would be cleaned off by the company or else I'd get the chair recovered free.

Sounded good.  But it wasn't.  The fine print says it covers everything in the world but normal dirt.  So, the chair got a bit funky and no matter how I cleaned it, it always looked smudgy. The oyster white slowly became mucky gray.   I daydreamed about recovering it.

A local seamstress was going to make a slipcover for me, but she decided not to, she said recliners are too hard to do.

So, of course, I figured I could do it myself. Even though, if you sat near me in the sewing segment of Silver Bella, you would know from the constant complaints I spouted, I HATE to sew.  Hate it. And am a novice.

Chair redo 006   

Since  I was house bound, while babysitting new puppies and their poor little, over worked mommy, I thought a project that I could do in the newborn's nursery (my dining room) would keep me busy.  I'd strained my back at the gym and was on muscle relaxers so wasn't quite in my right mind either.

You  know, I kind of thought when I started working on the chair, that it would make a good How-To for the blog.  Until I got going on it, then realized, it was just too hard to explain, since I was making it up as I went along.

Chair redo 003 

But here are some helpful tips if you feel like making yourself bonkers by trying to make slipcovers for a recliner from a hodge podge of fabrics:

  • gather up lots of materials to play with.  What you think you are going to use, might not work, you need plenty of odds and ends to choose from
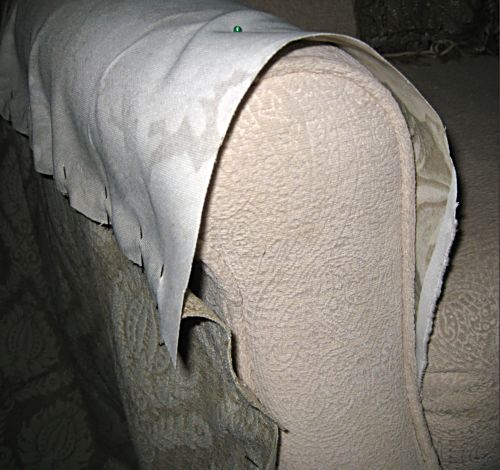
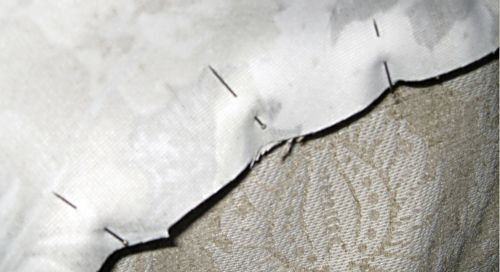
  • lay out your fabrics right side up to judge where you want them, then flip them over inside out to pin.  I pinned mine where I wanted it, then trimmed the fabric around the pins
  • have all your pin heads face the same direction!
  • don't sew over any pins, unless you really enjoy changing needles on the machine
  • keep the sewing machine manual handy in case you need to change needles
  • those pearl pins are easier than regular straight pins.  Especially the bright colored ones, they show up better and you hit less of them with the sewing machine needle
  • eye balling is easier than measuring.  No one will be using  a tape measure on your chair when they come to visit, so if you think it looks pretty good, you should trust yourself enough to go with that.
  • it doesn't have to be perfect.  A slouchy look has a lot of room for errors. 
  • throw in some unexpected textiles for fun
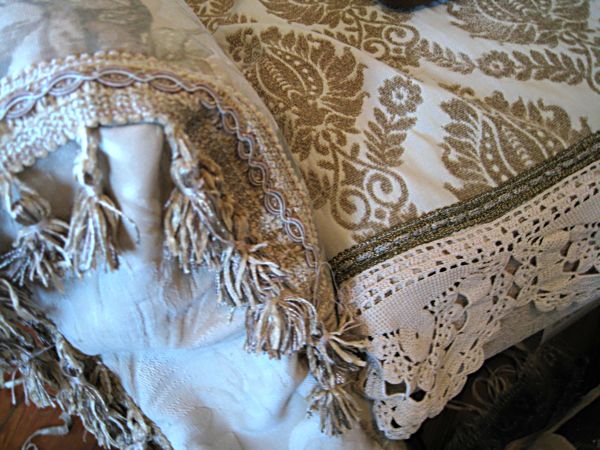
  • fringes and trims can cover up crooked seams pretty good
  • if you don't have any muscle relaxers, try  a glass of wine before starting the project

Chair redo 012 

The "sleeves" of my chair were terribly twisty. But the fringe saved them.

Chair redo 021 

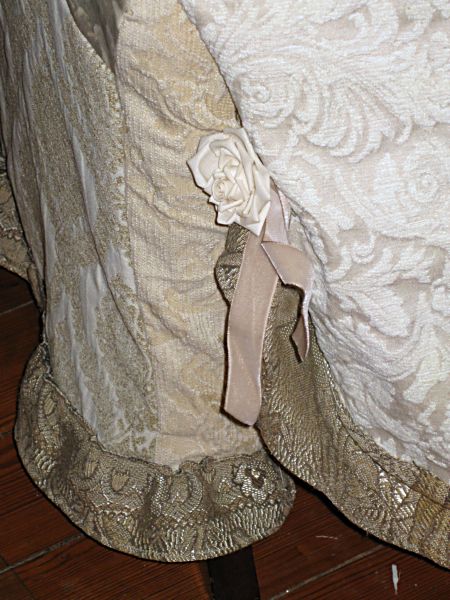
 The back side should be interesting too! This is the side that faces the newborn's nursery (my dining room).  I gathered up the ruffle with some old taupe velvet ribbon and roses that I pulled off an old hat (I have a few of those around).

If you decide to cover a recliner, you need to remember that it MOVES.  The cover has to be done in pieces, not all one throw like a regular chair.  I made the "'sleeves" first, then attached them with upholstery screws, to the inside of the arms.  Then, the seat is simply a hemmed and trimmed piece of fabric that is tucked in around the sides, not attached to anything.  The piece over the back, is made like  a pillow case, that slips over it.  And the foot rest cover is screwed down too.  Buy extra upholstery screws, you will need more than you think!

Chair redo 023 

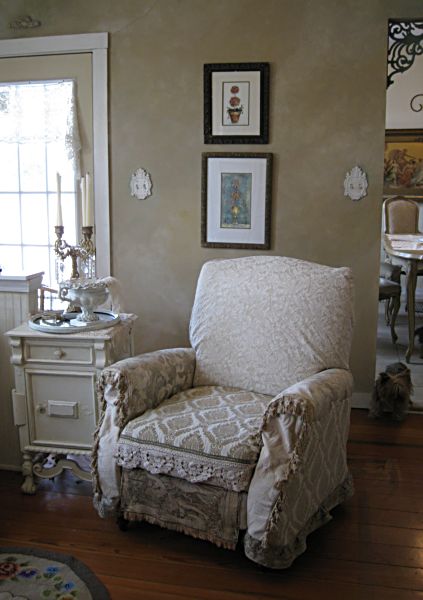
Well, not exactly Magnolia Pearl, but it is at least Pearl-ish.  Of course, the chair itself is the wrong style, not antique and not ornate.  But it is comfy and I like a soft recliner for reading in.  I call this my Grammy Gypsy Chair.

Chair redo 019 

Hopefully, the busy fabrics won't show dirt the way the original one did.  And, I can always take it apart and wash any section that gets dirty, if needed.

Chair redo 034 

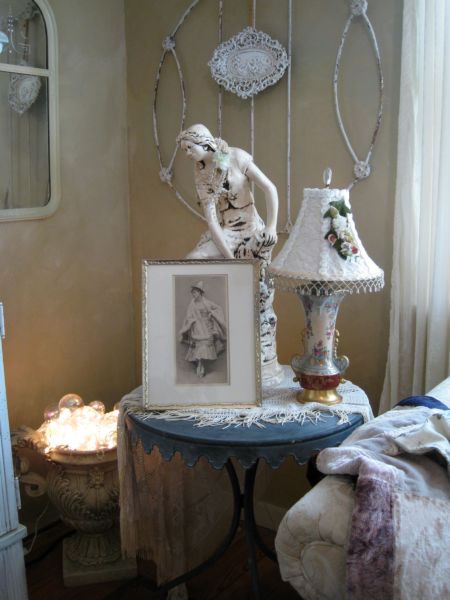
While cleaning up the room, I was ready for some more changes, and added this iron piece to the wall. (I'd had it up in the guest room, but now that Sugarwing's Daddy lives up there, he prefers his Hippy Tie Dye to my antique decor, so I took it down).  Notice that I still have Christmas lights in the urn in the corner? I am calling it a winter decoration, instead of a Christmas one and keeping them there for a while. I enjoy the glow.  And the vintage photo of the WhiteWitch that I had up for Halloween is back as a pretty lady dressed for Mardi Gras instead.  That sounds better than "the Clash of the Holidays"!

January always makes me want to redo a bit. I guess it is being cooped up indoors, and staring at the same stuff over and over and getting tired of it.  Also, taking down all the glitz of the Christmas decorations, makes the home seem dull with out them.

Or maybe it is just the muscle relaxers.

A winner for December, 10 resolutions and a good start on #9

collections, fairies, give away, how to's, how-to projects, vintage paper/collage art

Wallpapered soffit 039 

Happy New Year! We had a quiet evening, reading princess stories to our little fairy princess. I cooked up a pot of Cajun styled shrimp and veggies with tomatoes I froze from our garden and we stayed in for the evening. Yes, very tame, but very pleasant. I had time to think about the past year and the new one that starts today, and come up with a few resolutions.

1- just like last year, I want to USE the good stuff in my artwork, not  hoarde it! This is a hard thing to make myself do, and even though I kept the resolution last year, I think I need to make it again this year so I don't backslide.

2- paint more, and incorporate hand painting into my collage work.  I made this one last year too, and kept it on a so-so basis.  I could do better on it this year.

3- complain less, act more.  I guess I mean, that instead of complaining, I should DO something about what bothers me.

4- say NO sometimes.  Ooooh, that is a really tough one for me. 

5- expect more from my sons and not treat them like kids.  I find myself irritated and picking up after my grown sons and nagging at them like a mom, instead of talking to them like a fellow adult who shares the same home.

6- draw more.   Kind of like the Paint More resolution, but not really.  I love to paint, drawing can be hard work.

7- don't watch as much junk on TV.  I should rent DVDs of full seasons of good TV shows, not just watch whatever crap happens to be on.  (You did notice that I didn't say I was going to watch any less TV, that would be impossible for me!)

8- shall I be a bit cliche and say I'll lose that 10 lbs that I found this year?  I'm not much of a dieter, so I guess not. Maybe I should say I will go for walks with Sugarwings and Twinkle more, take the baby to the indoor pool, and plan to add another section of garden to my yard? That should be good for getting rid of a few pounds over the year. 

9- more how- tos on my blog. I like doing them and I think people enjoy reading them.

10- spend less time browsing blogs and keep up my paperwork better.  (like that one has a snowball's chance in hell)

Wallpapered soffit 038  

Did you make any resolutions for the year? Good luck with them if so. 

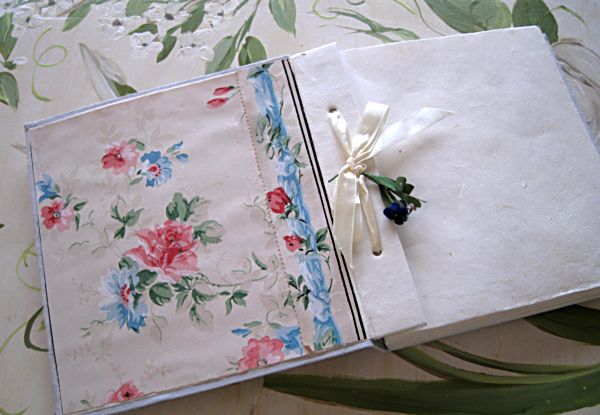
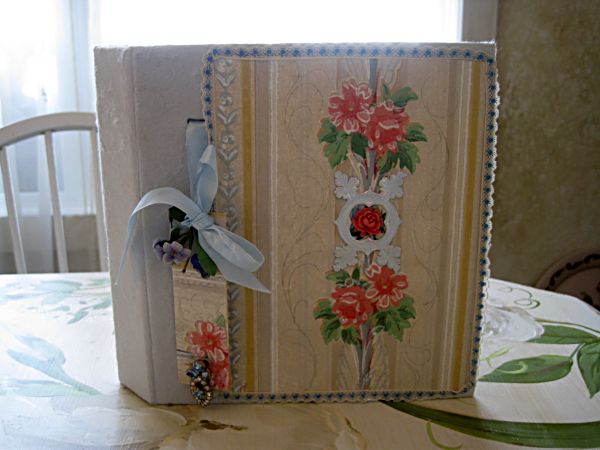
Now, onto the Surprise Giveaway for December- ta da! It is a photo album, or scrap book, or art journal, or whatever you want it to be, Kathryn,because you are the winner for December.

Today starts a new giveaway for January.  I'm not sure yet what it will be, but all comments still count for the drawing.

Wallpapered soffit 037


Remember the project I mentioned yesterday, that I wasn't sure I had time to do? Well, between the couple hours I had while waiting for Sugarwings to come over to play and her afternoon nap time later, I ended up with plenty of time to get it done!

Wallpapered soffit 002 

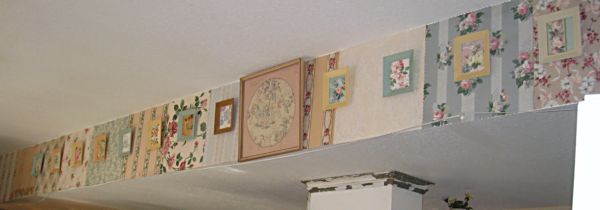
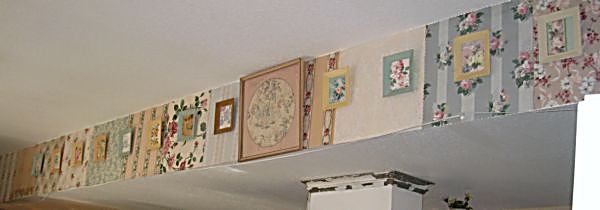
All year long, I have been saying I want to do something special with my best wallpapers so I can always have them out to see and enjoy. So, I decided that I could not let the year end without finally accomplishing the task.  Here is a how-to, if you want to do something similar.

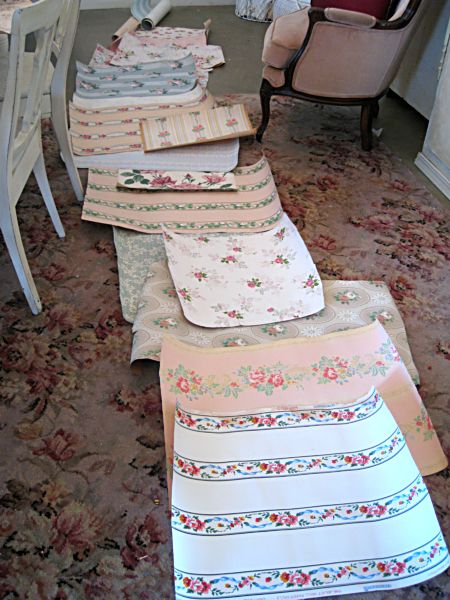
1- I cut (not measured to fit, I just cut off a large bit of each) and ironed a few pieces of the prettiest papers I had on hand, then laid them out on the floor in a pleasing pattern. Trying to balance the colors, and not have all the blue ones together or the rose patterned ones next to each other.

Wallpapered soffit 003 

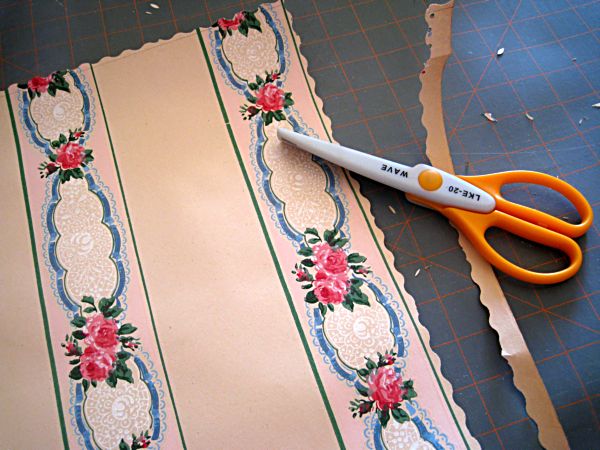
2- My technique was far from perfect. I measured the soffit length (17 1/2") then cut each paper to that, with scalloped edge scissors.  I didn't want to have to act like a professional wallpaper-er, and cut exactly with exacto knives and match patterns. I wanted it free and easy and quick, (remember, I was very short on time, with that baby coming over to play and 2008 coming to an end!).

I figured that if the edges were scalloped, and not perfect, it would be charming (and easy to do!).  And I discovered that my measuring was a bit off here and there, but that didn't bother me at all. I liked it that some were a little longer, some shorter. 

Wallpapered soffit 006 

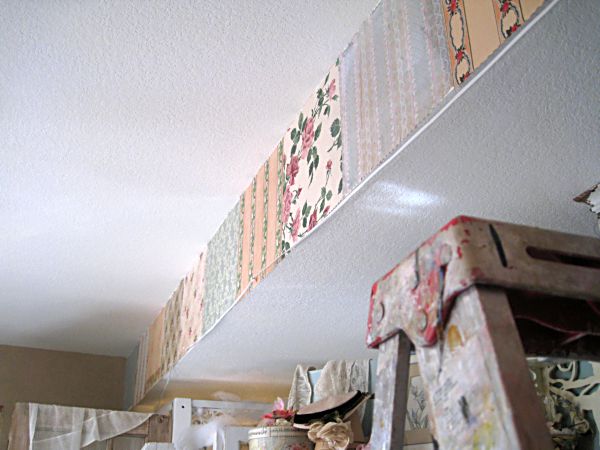
3- Wallpaper paste was applied to the back of each square with a wide paint brush, then the square was slapped up on the wall and smoothed down with a wet wash rag. Now, sometimes old papers are hand painted, so you have to be careful not to wash off or smear the paint.

4- The first square was lined up in the corner, the second overlapped it and was pasted up next to it. Now, I am sure that the proper way to do this is to use  a plum bob and straight edge, but I was eye balling the patterns of the paper to make sure they all seemed straight. If one was looking a little crooked, I just slid it over a bit while the glue was still wet.

Wallpapered soffit 037 

My plan was to use the bigger patterned pieces (in the width they came in, I didn't cut them all the same) on the wall.  Then, with the little vintage frames that Beth gave me, I hung the smaller patterned pieces over it.

Wallpapered soffit 035  

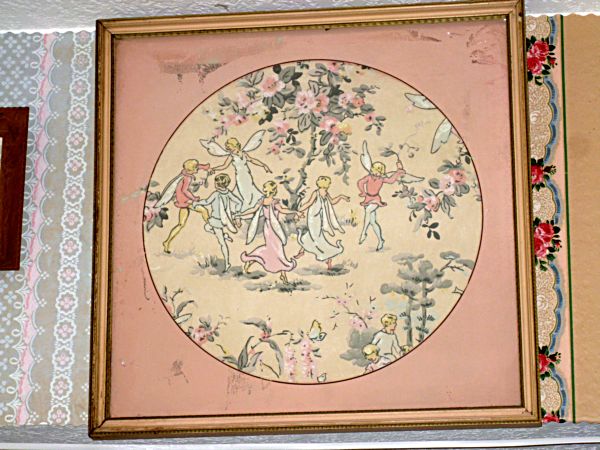
My all time favorite wallpaper went in the center of the wall in a large frame.  

Wallpapered soffit 014 

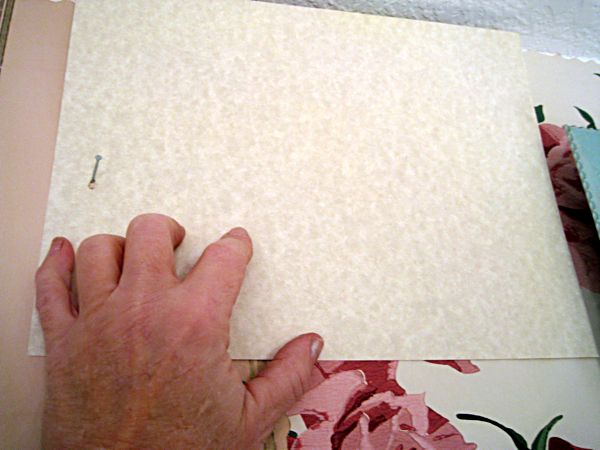
Of course, I didn't measure the wall to find the center, once again I eyeballed it.  But I wanted the small frames to be even, so instead of doing complicated math, I hung the first small frame to the side of the large, center one, and then marked the spot where the nail went on a piece of paper.

After that, all I had to do was hang a picture, then hold up the piece of paper to mark the distance to the next nail. I nailed right through the paper to save time, no pencils or measuring, just a piece of paper, a hammer and nail.

At this point, Sugarwings was up from her nap, so it was her job to hand me the hammer and the next frame. 

Wallpapered soffit 036 

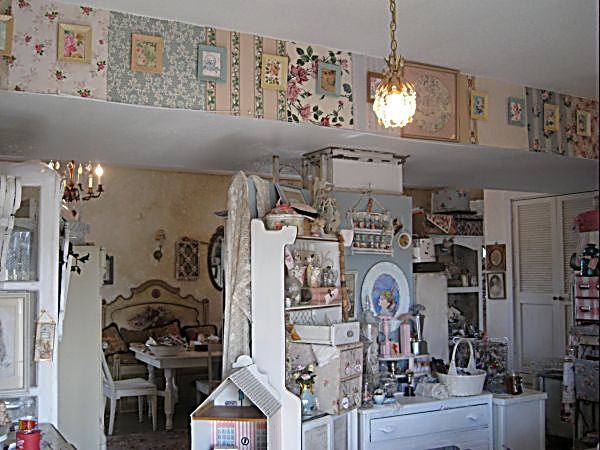
My studio is pretty, uhm, busy, but I like it this way!  And I know that 2009 is starting off right, with a beautiful view of my favorite papers to keep me inspired while I create.

A “Family Tree” How-to

Dorkies (Yorkshire Terrriers), family, Food and Drink, holiday decor, how to's, how-to projects, Sugarwings


Xmas stars 044 

Did you have a wonderful Thanksgiving feast?  Sugarwings and her sweet little Pixie Pie cousin sure did. But in hindsight, this idea of using the baby's craft table for their dining wasn't the best. It was a food free-for-all, with two little toddlers up and down and knocking each other over and dumping plates. I can already see that at Christmas dinner we'll be using a duo of high chairs instead.Xmas stars 066 

At my house, we craft before and after holiday dinners.  I prepped the meal way ahead of time, making mashed potatoes in the crock pot, and had noodles slowly simmering on the stove all day, while the green bean casserole (from scratch, no canned soup) and turkey were ready to pop in the oven when the time came.

  Xmas stars 068 

 Guests brought side dishes made at home, so we had time to play instead of slaving away in the kitchen!  The guys were watching the game and playing pool, so we went to the studio and started cutting and gluing.

Xmas stars 070 

We were making the Christmas stars in two sizes, large for tree toppers and smaller ones for ornaments. Or wouldn't they be cute clipped to a ribbon and made into a garland?Xmas stars 061 

We decided to use family photos on the ornaments, so we dressed the cousins up in their Christmas gowns and snapped a few quick pics of them to print out onto silver, holographic paper.

Xmas stars 071 

I wish the photos showed how pretty this shiny paper is.

A lot of you asked for how-tos for this Christmas star, so I thought this would be a good day for it. If you have a houseful of family together for the holiday weekend, this is a fun project you can all do together. Take photos of each other for the centers of the stars and you can make a "family tree" for Christmas.Xmas stars 001 

Card stock works best. I wanted a vintage image, so copied this sheet music onto parchment colored card stock. You can use scrapbook paper, or heck, even plain card stock, what ever colors you like for a background.Xmas stars 002

Cut a piece of paper in half lengthwise and then fold both pieces in accordion pleats.

Xmas stars 005 

Then do a second piece to match.

Xmas stars 003 

Staple all four pleated sections together.

Xmas stars 004 

I suppose that for a tidier look, you could use glue, if you had an issue with not wanting staples to show. But if you do, you'll be wishing you were an octopus. I quickly switched to staples, after starting out using glue.

Xmas stars 011 

This is what it should look like.

Xmas stars 014 

You will need to cut 2 pieces of card stock to fit the back and the front of the star to hold it in place.  Any shape, any paper that pleases you for your design.

Xmas stars 016 

For this tree topper, I used plain white on the back.

Xmas stars 017

For the front, I used flocked wallpaper glued onto the card stock, then cut into an oval.  After gluing, weight the paper down for minute or two till it sticks good.

Xmas stars 021 

That is a good time to take a break for a quick cuddle with someone furry and cute.

Xmas stars 025 

After the glue dries, you can trim the edges to get a star shape.  Then with a paint brush (or fingers, like I use) add glue to the clipped edges and sprinkle with glitter.

At this point, it is ready to decorate however you'd like. Streaming ribbons, photos, flowers, sparkly things, whatever suits you.

Xmas stars 028 

If you think you'd rather make the smaller size, instead of the tree toppers, use one piece cut into 4 equal strips lengthwise instead of 2 pages cut in two strips.

Xmas stars 026


Xmas stars 033 

And if you'd like extra sparkly edges, use Stickles as the glue that you add glitter to. (by the way, Stickles is now available at Hobby Lobby!!!)


Etsy sales 307 

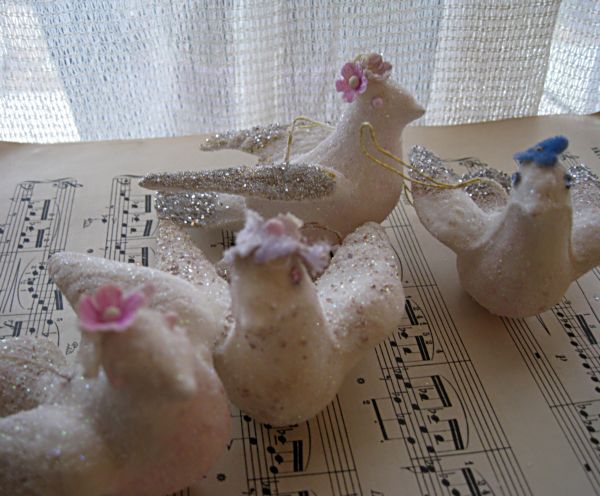
There are actually some new things listed on my Etsy site. Some hand dyed bottle brush trees (more to come) and I am about to list some glittering vintaeg doves that I do-dadded up.Xmas stars 073 

Old flowers 005 

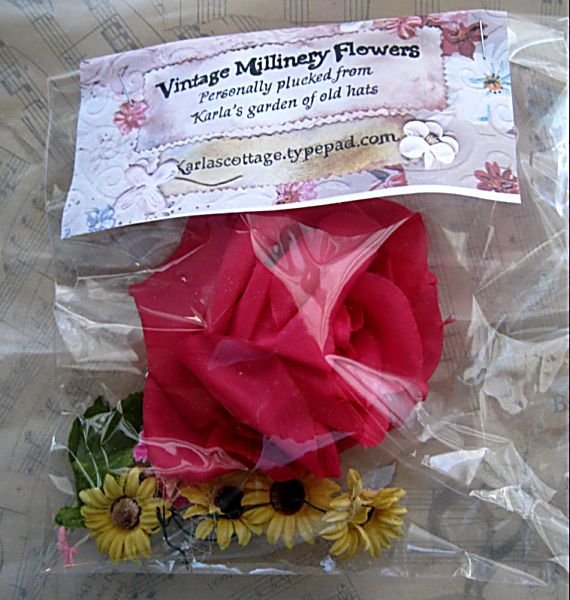
There are also some of my flower packs listed. If you need a specific color that isn't listed yet, just ask.  I might have it!

Old flowers 015  You also have a couple more days to enter the giveaway for November. Good luck!

Blingy Bella Bags

how-to projects, Silver Bella

Img_7701_2 I’ve still been crowing around.

Img_7703

Did you read this post from Beth?

She got a deal on these plain bags,and gave me a good deal to buy a stack of them from her.

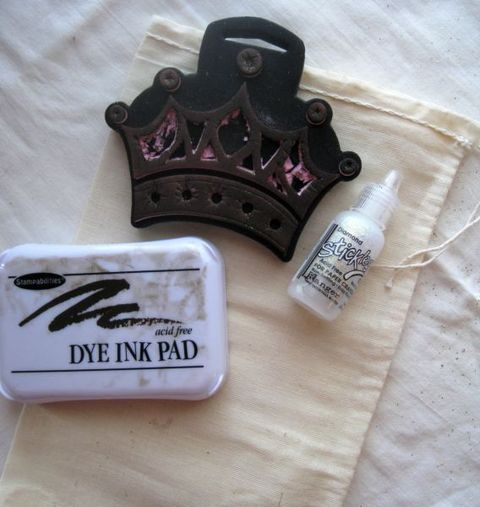
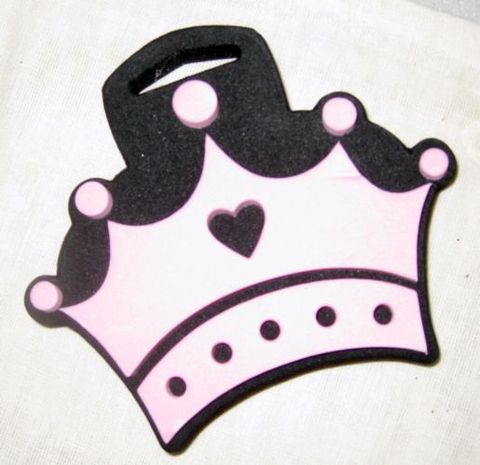
I wanted to dood them up for Silver Bella, so searched high and low for crown stamp I liked.  I checked Ebay, Hobby Lobby, and Michaels,  and none of them had what I wanted. I wish my town had a scrap booking store…Img_7690

So, I ended up buying  a princess style wall stamp and restyling it with an exacto knife to make it a bit more grown up looking.Img_7698

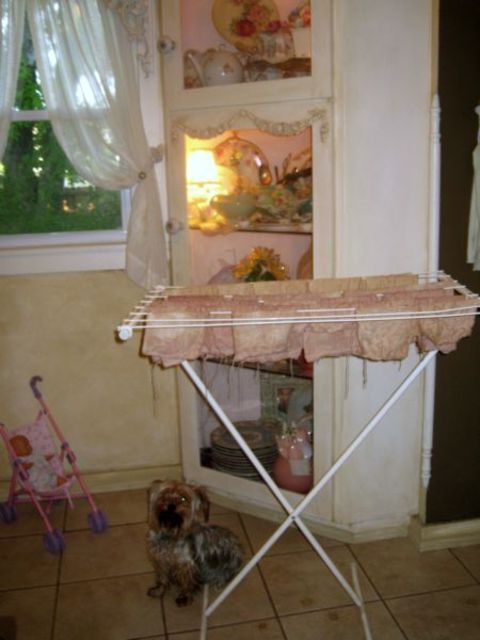
Then, I tried dying a couple of the bags in my left over morning coffee. But it wasn’t a rich enough color.

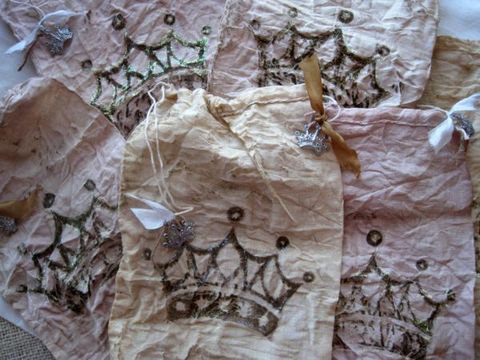
So, I took a handful of regular teabags and added a couple cranberry ones too and added them to the coffee. There was only about 2 cups left so it was very concentrated.  I then soaked the sacks in that mixture.Img_7702

The cranberry bags have a very slight pink tint to them that I really like.

After they dried overnight, I stamped the crown on and outlined it in Stickles (the world’s best glitter invention), and smeared the lines a bit with my finger.Img_7688

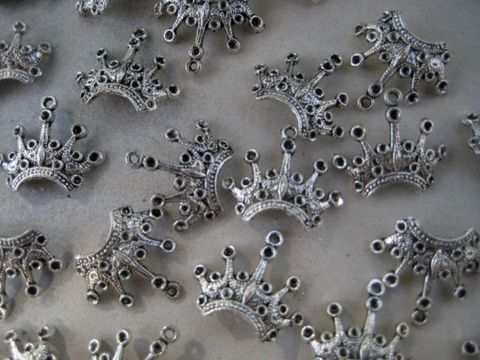
Looking for crowns I liked has not gone well recently. I found these charms on Ebay, but wasn’t thrilled with them.Img_7689

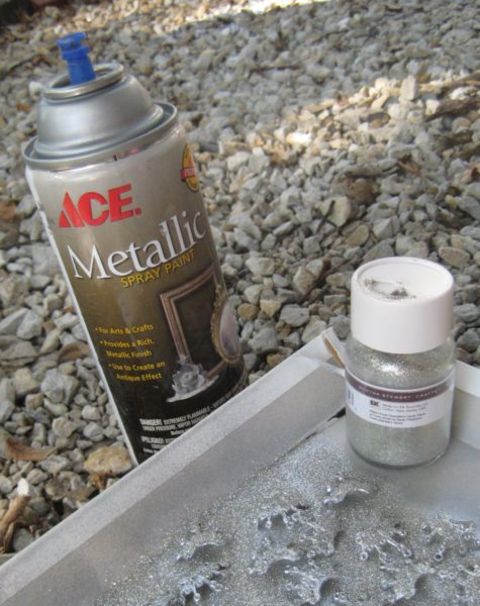
But with silver metallic spray paint and some Martha Stewart white gold glitter, I like them better!

These wouldn’t be appropriate for jewelry, but glittered up like this, they are just the right touch for my Bella Bags.

A dark and stormy day, but a bright and cheerful redo

how-to projects, redos

Bedroom_redo_003 Slight change of plans…. Sorry, I wasn’t able to get the flickr photos of the 100 birthday cards for Caroline’s 100th birthday done today.

It stormed all day and the light simply wasn’t good enough to take decent photos of the cards.

Bedroom_redo_004 So, instead, I painted my bedroom that soft, dreamy grey/blue/green color that I bought to match my new vintage-ish bedspread.

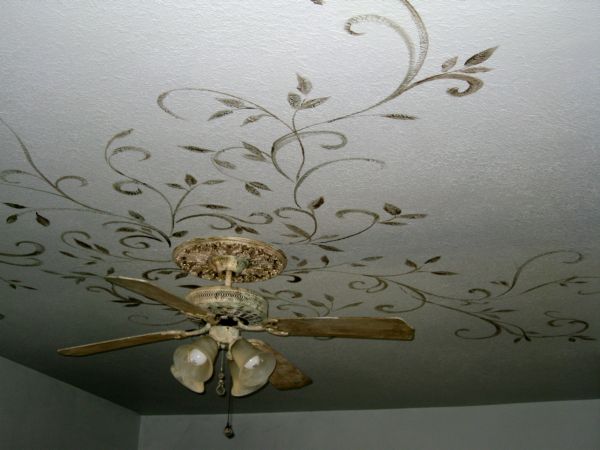
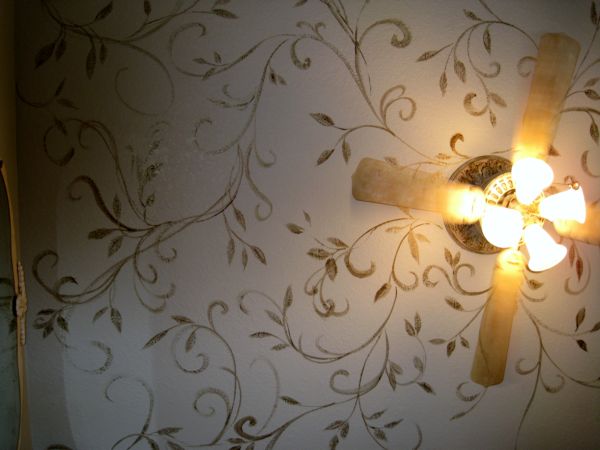
I painted the ceiling the same color, then accented it with free hand vines, swirls and leaves done in sepia and bronze.

Tomorrow  I’ll take more photos of the space when the light is better and the room is put back.

This photo was taken when I layed on the floor and looked up. This will be my view when I lay in my bed at night.  The paint is a bit metalic, so when light hits it, it has a nice sparkle. I think I will like it.

There wasn’t quite enough paint to coat the bath area too, so I’ll need to go back to Home Depot tomorrow before I can complete the room. Drat it. I hate to leave a project over night.Bedroom_redo_007 

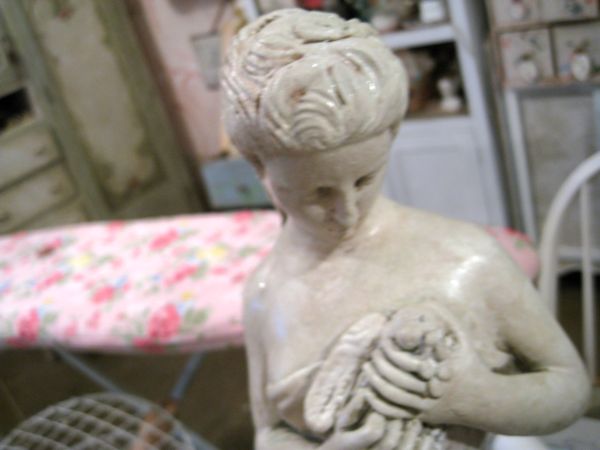
While I had the metallic paint and sepia colored glazes left over on my palette, I decided to glaze the goddess statue I bought at the flea market the other day.Bedroom_redo_006

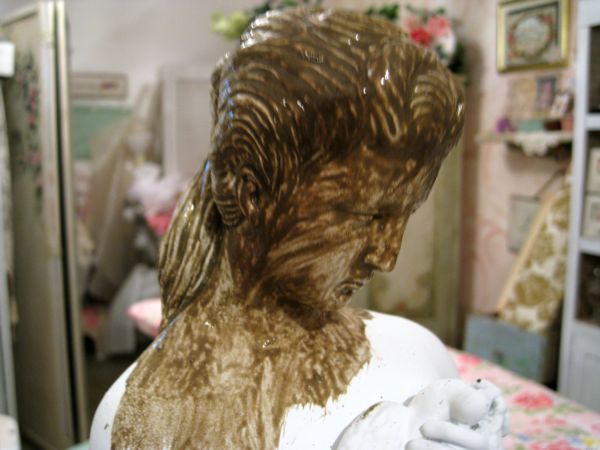
She was already base coated with spray primer in white.  I then painted the dark glazes into the crevices and covered the entire piece.Bedroom_redo_008

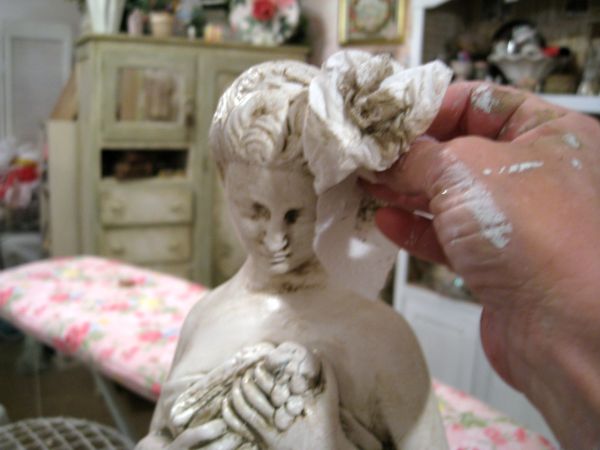
Normally, I use a torn cotton tee shirt for glazes, but all I had handy was paper towels and I was too impatient to go in the house and find a shirt to cut up.

I don’t recommend using paper towels to wipe up wet glaze, it gets a bit shreddy.  But it worked.

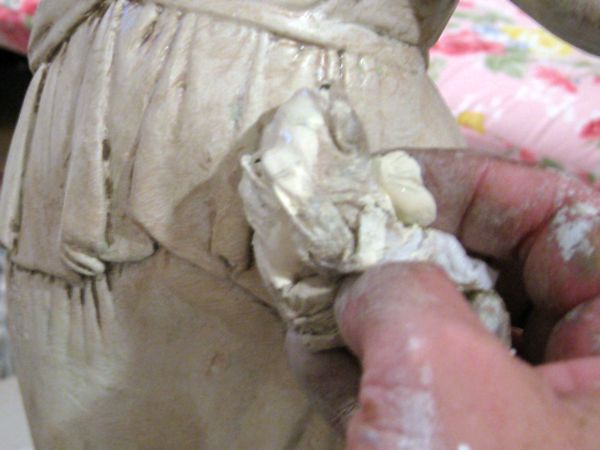
I wiped off the glaze, leaving it in the deeper places.Bedroom_redo_009

The goddess was pretty good at that point, but I decided I wanted her more stone like.

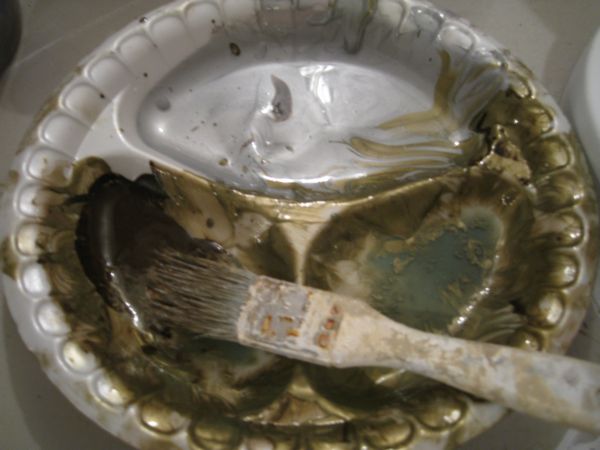
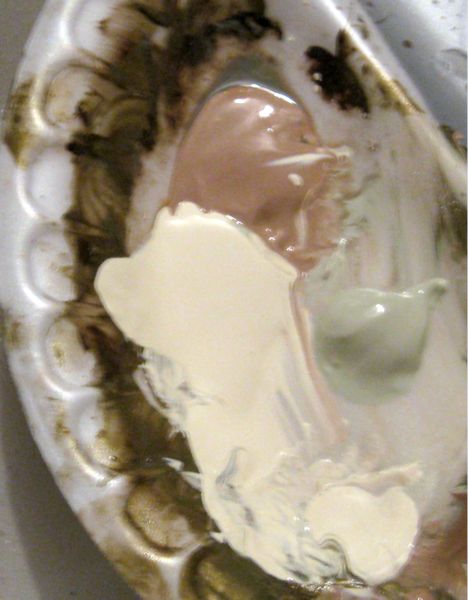
So, I put some moss, mink brown, and ivory on my plate and dabbed it onto the statue.Bedroom_redo_010

I was using the same shredded paper towel to do the dabbing, and mixing the paint on the statue as I went along.

I dipped the disintegrating paper towel into all three colors at once and dabbed and smooshed it on the raised surfaces, leaving the previous dark glaze down in the crevices.Bedroom_redo_013

Isn’t she pretty? All she needs now is a crown, and to be placed in my newly painted room.

I’m afraid I missed my window of opportunity to take pictures of the birthday cards for a few days.  I heard from Fifi and she needs the article I am supposed to write for Romantic Country.

So, I need to take care of some business and get that article done in the next day or two, plus put my bedroom back together. I’ll get the photos done soon, and tell you when the flickr site is updated. 

Greetings! A mini tutorial on making some greeting cards with vintage papers

family, how-to projects, paintings, vintage paper/collage art

Bookclub_057 My baby brother-in-law, Randy, has started making cards and has been asking for a bit of advice.

I offered to send him a box of goodies to use, and he said he didn’t know what to do with pages from an old book or vintage wallpaper.

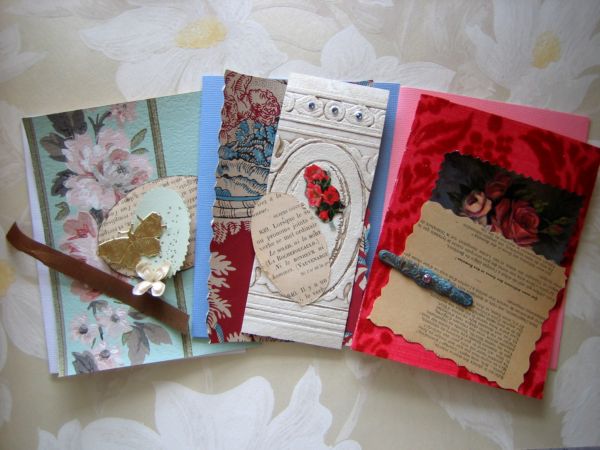
So, I am making these cards with some how to’s for him to follow along with when he gets his package of vintage delights in the mail from me.Bookclub_036

(All of these cards have been created with pre-made linen cards from Michaels.)

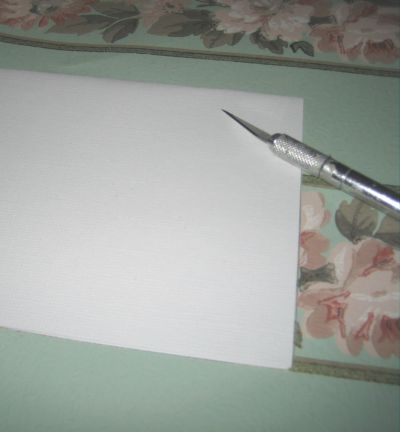
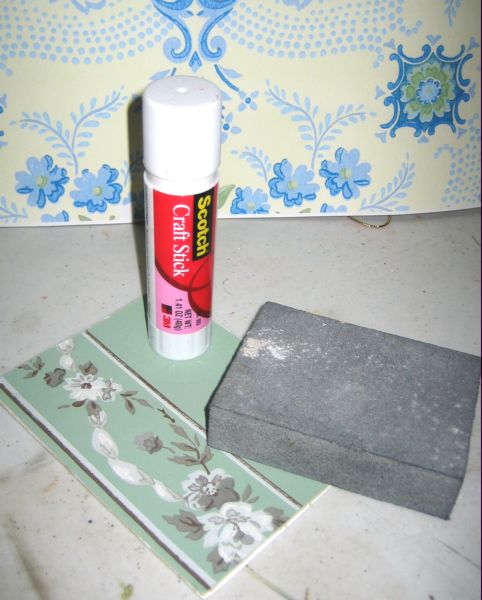
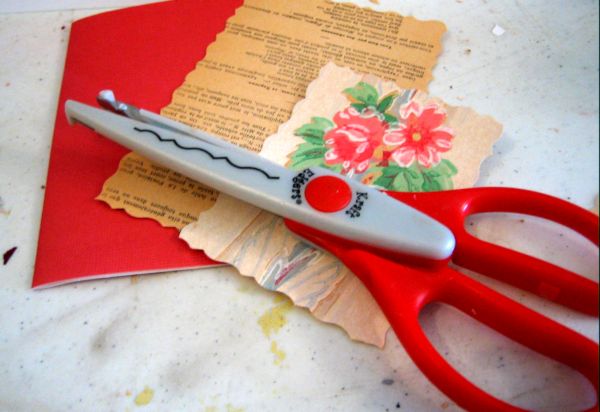
The first one is on a white card. I started by laying the card onto the wallpaper and cutting out a piece to fit with an exacto knife. Bookclub_040

The piece of wallpaper was then attached to the card with a glue stick.Bookclub_037_2

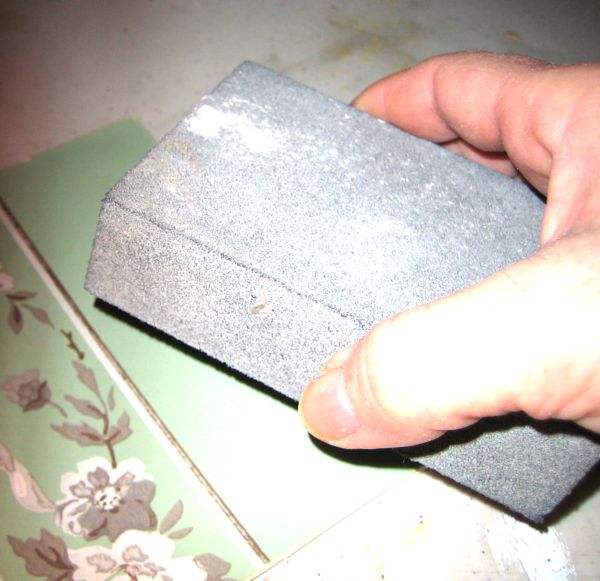
After the glue dried, I sanded the edges with the sponge sanding block, for a smooth finish.Bookclub_042

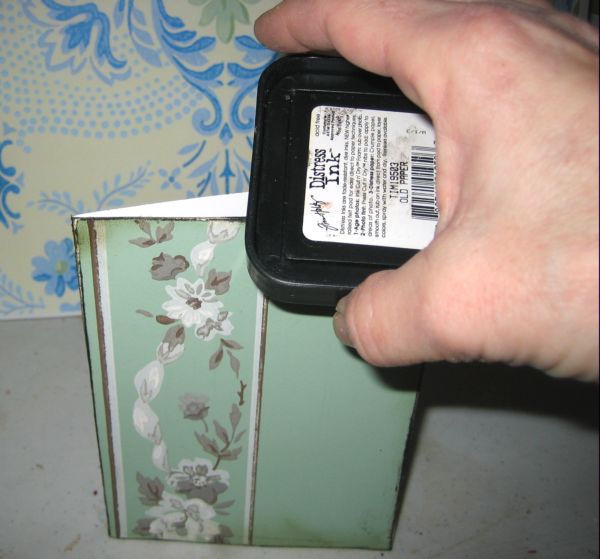
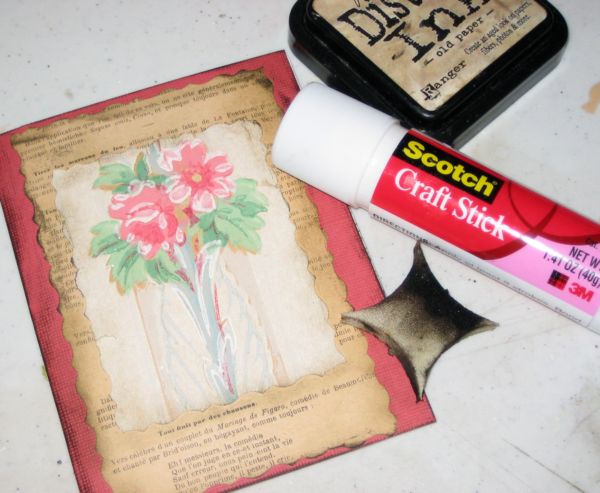
As if vintage wallpaper isn’t old enough… I ‘aged’ the sanded edges with the side of my ink pad.  This color is distressed walnut.Bookclub_045

After the base of the card is ready, then the fun part happens!  Time to embellish-

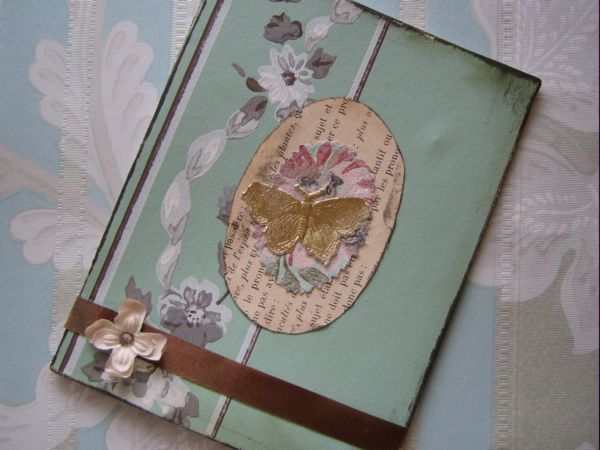
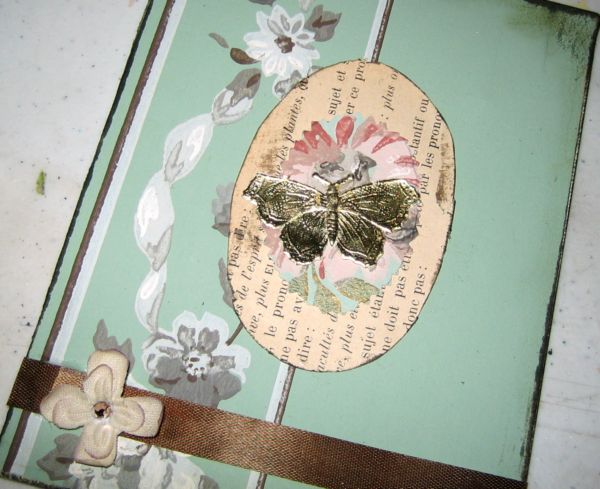
I cut an oval from a page torn out of a 1917 book with French text, and inked the edges with the walnut ink, then added a smaller oval of a coordinating wallpaper to the center and to that added a gold foil butterfly. Bookclub_046

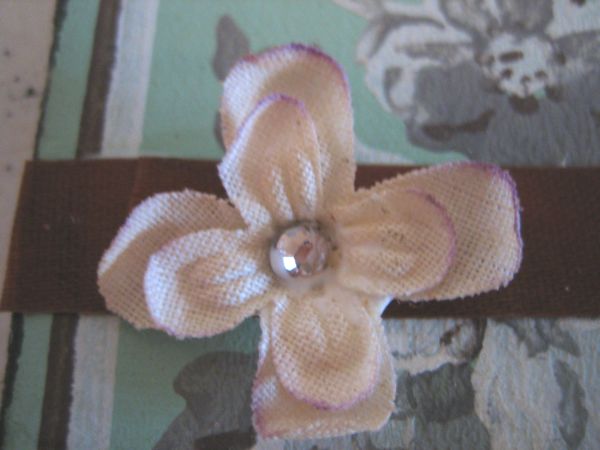
Some old brown ribbon and a single bloom of an old millinery flower are arranged across the bottom.  I glued a crystal rhinestone (I only use glass ones, never plastic) to the center.

Right now these stones are on clearance at Hancock Fabrics for 75% off.Bookclub_047

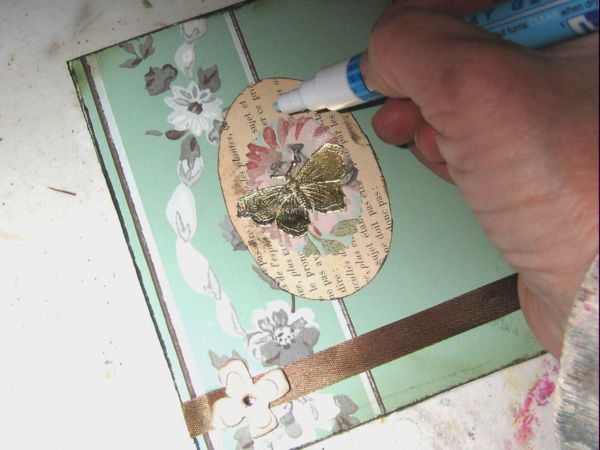
For a touch more sparkle, I’ve used a Martha Stewart glue pen to draw dots around the small oval of wallpaper.Bookclub_048

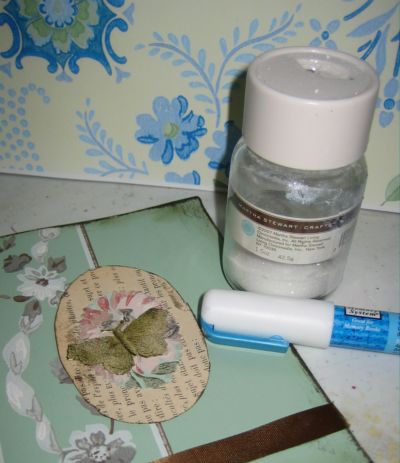
I then dusted my favorite glitter over the glue.

As much as I hate to make Martha even more wealthy than she already is, I just HAVE to buy her glitter. It really is so good to work with!  I use the fine ones, for a sheer look.Bookclub_056

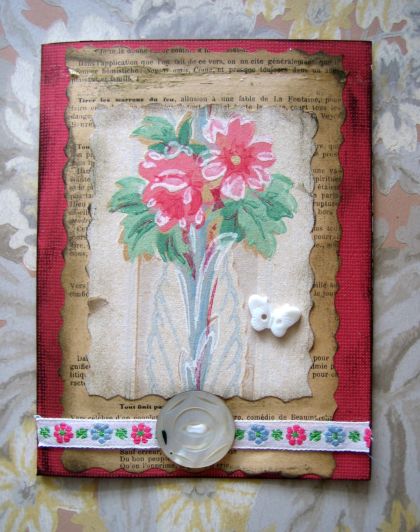
This card starts with a reddish-pink, kind of an azalea color, paper as its base.Bookclub_050

Decorative scissors were used to cut out the French book page and the vintage wallpaper.Bookclub_053

After gluing down the papers, I once again inked the edges.  This time, I blended the ink a bit with a cosmetic sponge.

These old papers can be very fragile, so do this gently.

To finish, I added a snip of embroidered old ribbon, a mother of pearl button, and a teeny butterfly shaped button.

(Randy grows a butterfly garden, so the flowers and butterflies are some of his favorite things)Bookclub_058

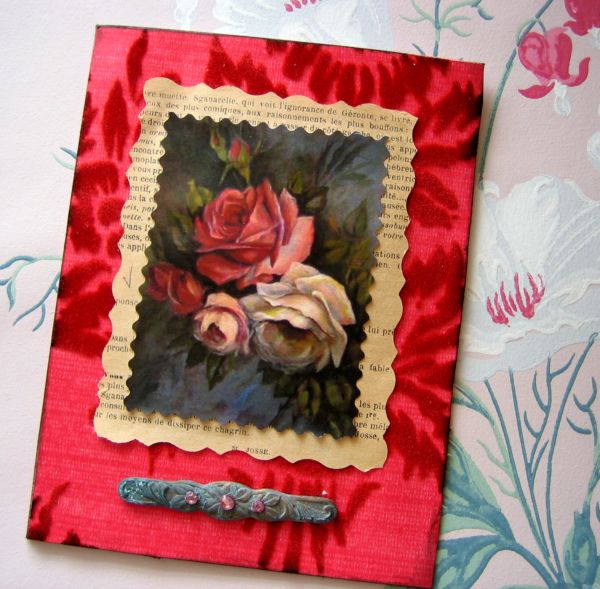
Beautiful, beautiful, beautiful, old red flocked wallpaper that I got from Allissa is glued on to a warm pink card for this one, traced with an exacto knife and inked on the edges the same way the first card was done.

After, I used 2 different decorative scissors to cut out the French book page, and a color copy of one of my own paintings.

At the bottom is a brass charm accented with 3 pink crystals.

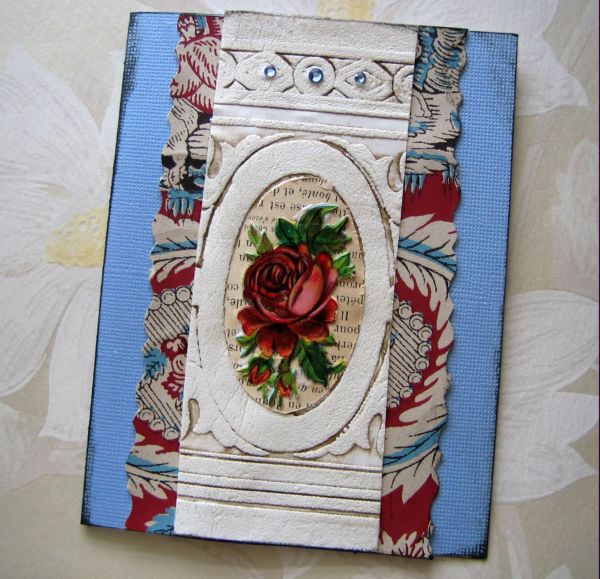
Bookclub_059 One last how-to for Randy, this card has a pretty cornflower blue base.

To it, I added a strip of wallpaper cut with decorative scissors, and a piece of anaglypta wallpaper that I have aged with an umber glaze.

After the wallpaper was glued into place, I inked the edges with the side of the walnut ink pad.

In the center is an oval of the French book pages, and a German die cut.

To finish it off and add some glitz, three little crystals in the same blue are glued to the border of the anaglypta paper.Bookclub_060

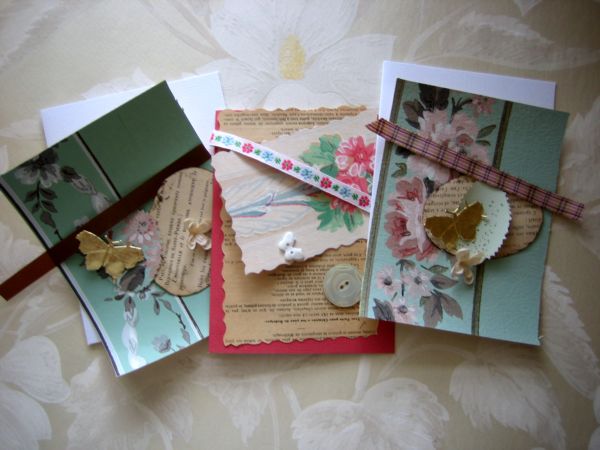
While I was making these examples for Randy, I thought he’d appreciate a kit for each one. While I was at it, I made a little extra.

I had enough bits to make two kits of three cards each.

Everything I used to make my own is in the kit and ready to be glued and mailed out to someone special (Mother’s Day is coming up, before you know it)Bookclub_061

The pieces are already cut with decorative scissors, all you will need to complete the cards is:

glue

ink

glitter

glue pen

exacto knife

If you are interested, email or leave a comment.  Each 3 card  kit is $12, including postage. (unless overseas)Fl_trip_07_041

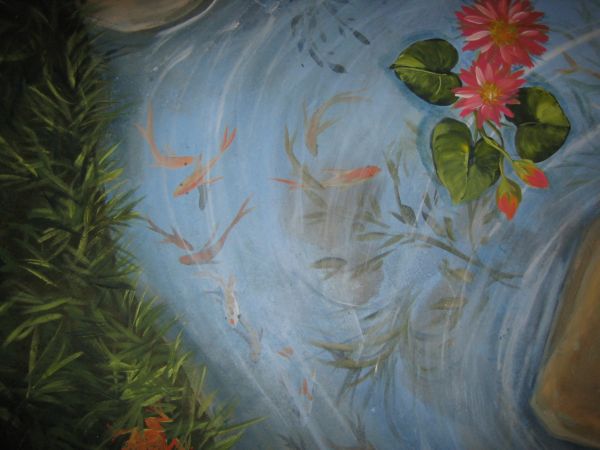
The last time I went to visit Randy, he and I painted the floor of his craft room to look like a pond.

I wish I could be back there in his colorful room and make cards with him, but isn’t the Internet great? I hope he reads this and feels like I am there with him.Fl_trip_07_015

I love you baby brother!!

Short cuts and tips on blinging up a birdhouse

Etsy Goodies, give away, holiday decor, how-to projects, parties, swaps, vintage paper/collage art, We're having a party

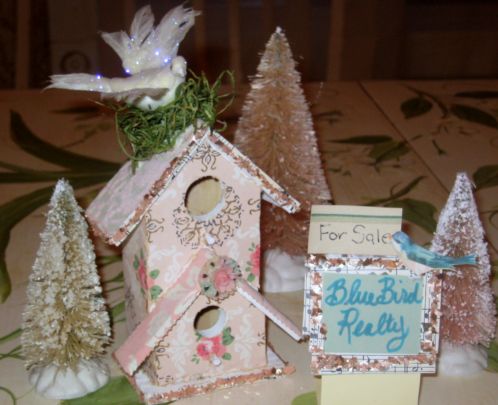
Beth and I are having a party.  A self swapping, self linking "What do you LOVE about your Birdie’s home?" party.   Details are HEREBirdhouse_015 And we hope you can all join us and show off your own birdhouses. Either something you have made by hand, or just a favorite of yours on display in your home or gardens.

I’ll be giving one of my own away today, if you leave a comment on this post, and will give a 2nd away the day of our party, Thursday March 27th.

And if you’d like to make one, and could use some tips, here are a few things I learned while decking out a few birdhouses.

First thing I noticed, was that my hands look awful in these photos.  Oh well, as  grandma,  I am getting used to things like that. Wrinkling up old skin, knobby knuckles, saggy neck.  Back to birdhouses, and away from old lady skin issues (which I could go on forever about, and you really don’t want to hear).Birdhouse_004

I’ve bought houses in an assortment of sizes and shapes.  Some from the craft departments of Wal-Mart, Hobby Lobby and Michaels in unfinished wood or paper mache, some already painted and with cool shapes in the garden department at Hobby Lobby.

All are smaller, some mini, none made for outdoors, they are for decorative purposes only. 

The prices have ranged from 67 cents to about $5 at the most.

Birdhouse_074 A minor buffing up with a sanding block will take off any rough edges.Birdhouse_005_3

And I discovered that the homes were much easier to decoupage onto if you don’t have to worry about crevices and corners and edges.

So, I base coated all the cracks, and up under the eaves, the perching post, and the inside of the hole as well as any other spots that looked like it would be hard to cover in papers.

No reason to paint the entire piece, since most of it will be covered up.Birdhouse_073_2

Although, for this one, I purposely painted all of it, just so there would be some contrast for the photos I was taking of the steps.

And notice that I didn’t sand the edges first? I wanted you to see the rough wood, it shows up better on the blue house, look inside the hole at the jagged edges.  A quick little twist of the sanding block inside that will knock those bits down pretty smooth.Birdhouse_077

Here is a short cut I came up with for making the houses go more quickly.  I have been making a LOT of houses, so speedy tips help me a lot.

I used glitter paint to draw lines across old sheet music. You could also use plain glue or glitter glue.Birdhouse_081

I sprinkled glitter over the lines.Birdhouse_085

Next, I used a paint brush to spread the rows of glitter out a bit flatter.Birdhouse_099

With decorative scissors, I cut narrow strips of sheet music, just perfectly sized for gluing onto the edges of the roof or around the base of a bird house.Birdhouse_063

Birdhouse_086 For this house, I decided to glitter the painted roof. I used the same glitter paint that I used on the sheet music. 

It was brushed on after the paint was dry, and then I sprinkled more glitter over it while it was still wet.

After all my prep work was done, I gathered up my supplies.  I looked around to find colors and tidbits I wanted to work with. 

Go ahead and pull out extras, you are never sure how much you will end up using, but having a pile to chose from, already selected, and in the chosen palette not only saves time, but is an inspiration for the project.Birdhouse_088

You will need:

a sanding block (or sand paper)

an exacto knife (and be generous with yourself- replace the blades as needed!! It really does make a difference to have a fresh blade)

glue (I always store mine upside down so it flows better)

a Popsicle stick or something similar to burnish paper down with

scissors

goodies to add to the house

Birdhouse_092 Here is a point where you might want to make a pattern. I just go ahead and use my wallpaper.  I fit it to one side of the wood at a time, bending and creasing to show myself where to snip it with the scissors.Birdhouse_093

You can also trim it with your exacto knife.

If you are making more than one birdhouse of the same design, or have a limited amount of old paper and don’t want to waste any, it might be a good idea to make a pattern this way and then using the pattern to cut out your chosen papers.Birdhouse_091

I poke the perching post through the paper, then trim around it with the exacto knife. 

After the paper is cut, I liberally add glue to the house.Birdhouse_095   Attach the paper, and using my exacto knife, poke a hole into the area where I think the house’s hole should be.

I then saw with the exacto knife to the edge, and around the hole to cut it out.

Wooden Popsicle sticks or coffee stirrers are great for rubbing the paper down.

Once the glue is dry, I lightly sand the edges with the sanding block again, being careful to not tear the paper.  Birdhouse_098_2

Now we get to the fun part.  Decorate it!  Baubles and buttons  and doodads and glitter and stripes of coordinating papers.  Old jewelry, ribbons, lace, what ever makes your bird joyous.

Birdhouse_071_3

I have a few more houses to foof myself.  One is actually a little Swiss music/jewelry box that I got for a quarter at a garage sale.  But of course, this decopauge technique will work on all sort of different things, not just bird houses.

Another suggestion I have to offer is, that whether you use scrap booking paper, vintage papers, or whatever you decide, the papers do seem to look better with a smaller print, or an over all pattern. The smaller the house you cover, the smaller the print you should try to use.

If you have any questions, feel free to ask.  My husband is leaving to go back East and I am going to be lonely. So any question is welcome, I could use the company! 

I hope you’ll make a few and join the party on the 27th!  Bird Feel free to add this button to your blog so people will know you are participating.

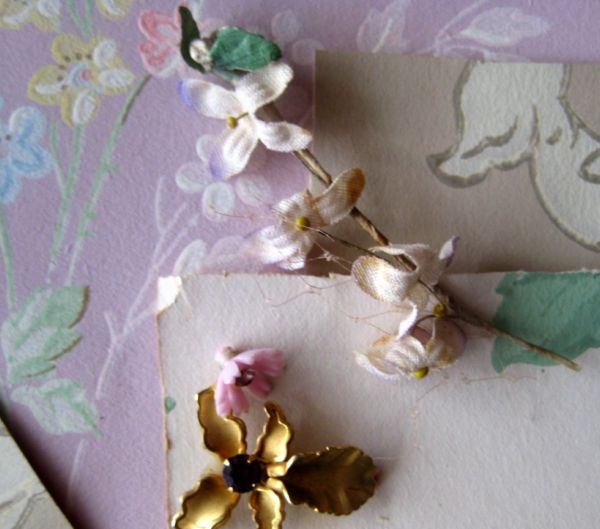
I’ll be adding bling kits to my Etsy shop and fill them with fun bits and pieces to work with if you need supplies to make a house. 

And remember, I will give away one of my creations to someone who comments on this posting, plus another to someone who leaves a comment on our party day.

St_pat_6  And if you would like to be in my St Pats tag swap, you have until March 5th to send me two tags and I will send out two tags to you from another swapper.    Email or comment to ask for details.

One thing I love about blogland, is all the holiday decor! I haven’t gotten into decorating for every holiday like this since my boys were toddlers! Most years, I totally ignore St. Pats or Easter as far as setting out pretties or making things for them.

I haven’t seen much about St Pats in blogworld, we have all jumped ahead to Easter.  But Easter seems early this year, so I can see why.

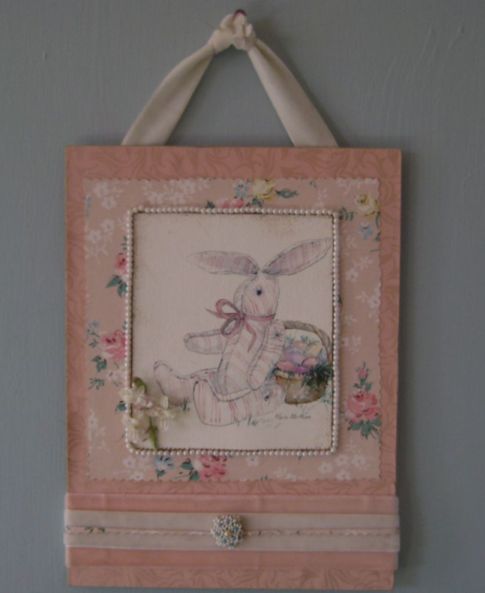
Speaking of Easter, W_folder_104  My pink bunny watercolor is finished and hanging in my studio, although hopefully not for long, I have it in my Etsy shop now.  This is an original watercolor I have added to a  vintage wallpaper base, then dooded up with some of my favorite pretties.
Have fun blinging out that birdhouse!

Edit, added on:

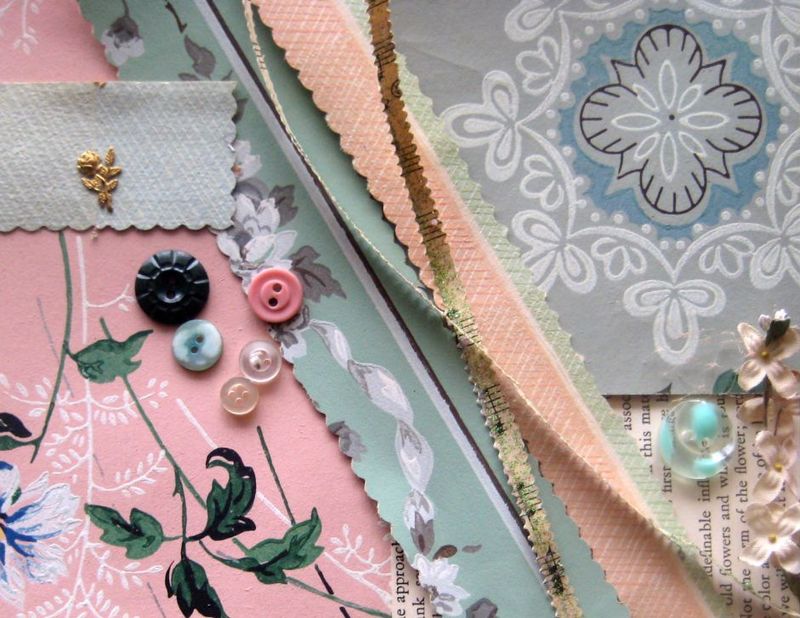
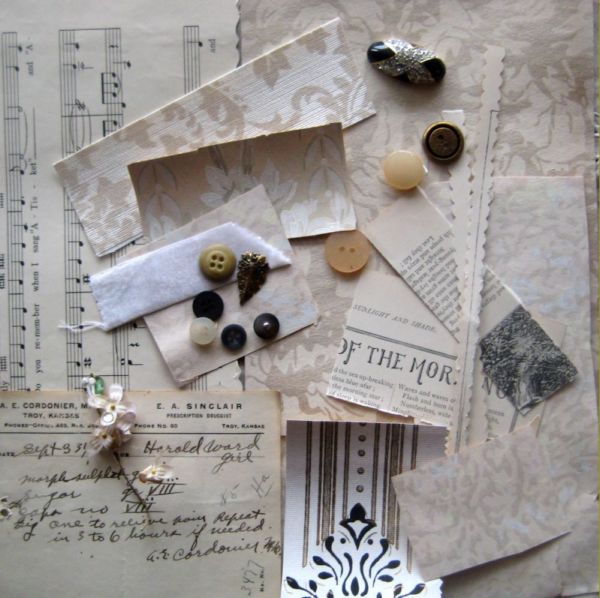
Here are some highlights of the $10 Cottage Collage Birdhouse Bling Kits I added to Etsy today.  More coming, no two are alike and they take a while to photograph and list!!Birdhouse_121 Birdhouse_127
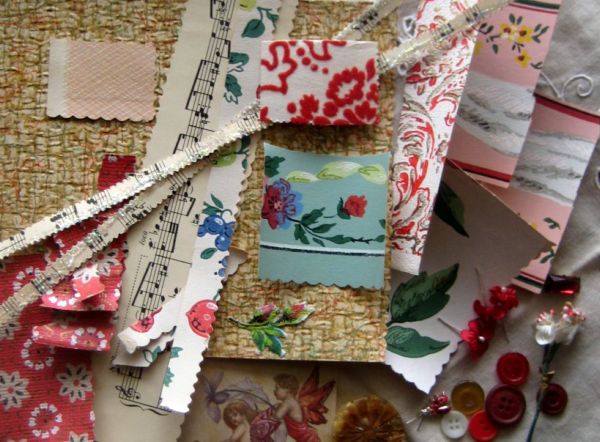
Keep in mind that these kits would be pretty used in many projects, not just a birdhouse, and that there is more in a kit than is needed to finish a small house. Birdhouse_136 Birdhouse_147
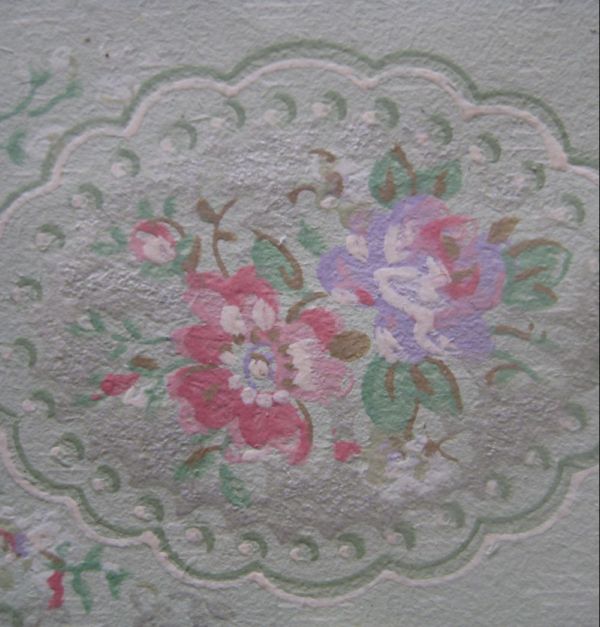
Birdhouse_155

Bling your Birdhouse Day, or “What do your LOVE about your Birdie’s home?”

celebrations, Etsy Goodies, how-to projects, swaps, vintage paper/collage art

Birdhouse_059 The dates are set for our upcoming party!  It will be self-linking and self swapping.Birdhouse_060

Beth and I will co-hostess the day and hope you can all join us.  If you aren’t a crafter and don’t have a hand decorated birdhouse to share, feel free to show pictures of a favorite birdhouse in your home or gardens.Birdhouse_062

The mini birdhouses I have used are 99 cents at Michaels or Hobby Lobby.  Wooden, or paper, or chipboard, they have a lot to chose from for under $3.Birdhouse_063

I’ve enjoyed hosting "What do you LOVE about your home?" and "What do you love about your Holiday Home?". Now for spring, I thought that "What do you love about your Birdie’s Home?" would be a welcome party.

Bling_bird_button Beth will makde up this button, feel free to post it on your site if you want to participate.
And, as promised, here are the dates and the information about the events.  Hope to see you and all your feathered friends there!
Celebrate Spring with Beth and Karla for their

“Bling your Birdhouse” Challenge!

(Other wise known as “What do you LOVE about your birdie’s home?”)

This is a SELF-linking and SELF-swapping challenge.

Show photos on your blog of a birdhouse you have embellished, in any way your artistic heart desires.  If you aren’t an artist, you can share pictures of your favorite bird’s happy home.

Leave a comment with Beth or Karla (or both) on THURSDAY MARCH 27TH.  Both artists will be showing their own blingy birdhouses that day. This is where the “self linking” comes in.   Make sure that your URL is in the comment so everyone can come to visit and admire your birdie’s home after reading your comment.   

If you want to buy/sell/or trade your creation with another artist, make sure you include that info in your post.  This is where the “self swapping” comes in. If you are up for a swap, want to sell the house, or simply want to keep and enjoy it yourself, let everyone know.

Want some help with ideas for birdhouse décor? Bling kits will be for sale at Karla’s Etsy Shop and at Beth’s too.  They will be filled with fun vintage touches to make your bird’s abode something really special.

And for a tutorial before the big day, join Karla on her blog Monday February 25TH.  She’ll take you through the steps on a couple of different birdhouse styles.  Also check out Beth’s blog posting HERE for photos of a Shabby Chic neighborhood she has designed for her feathered friends.

Scroll to Top