how to’s

Extreme Cabin Fever and MORE Zero Dollar Decorating

antiques/junking, collections, fairies, housework, how to's, paintings
Repairs 069

The weather just keeps getting worse.  Luckily, I escaped for an afternoon on Tuesday to go see my pal Carol, of Raised in Cotton.  If I hadn't gotten a little break from being housebound, I'd be bouncing off the walls instead of just repainting them!

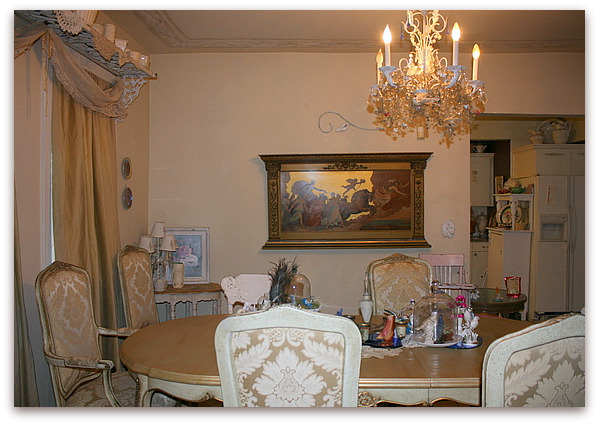
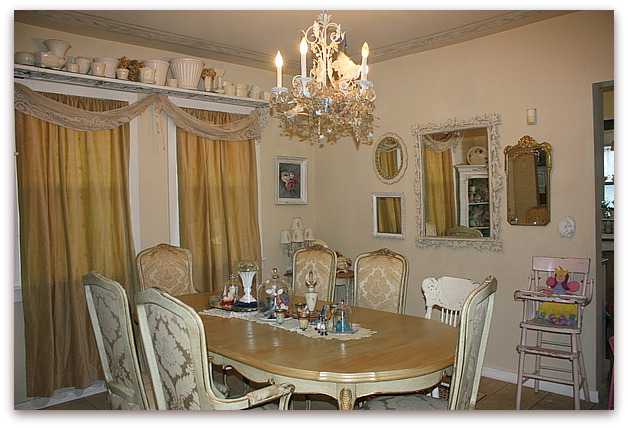
Its colder and there has been more snow, so even though it was cold on Tuesday, it was the best day to get out. I couldn't go anywhere today no matter how much I might want to.  So, I've been working away on my Zero Dollar Decorating to stay sane.  I touched up all the paint on the dining room walls, and repainted the base boards with a quick brush of glossy white. 

Repairs 115

Then, I brightened the room up with a wall of mirrors that I shopped for from the bedroom and studio.  The picture in the glorious gold frame went into the bedroom to replace the large mirror. 

Repairs 075


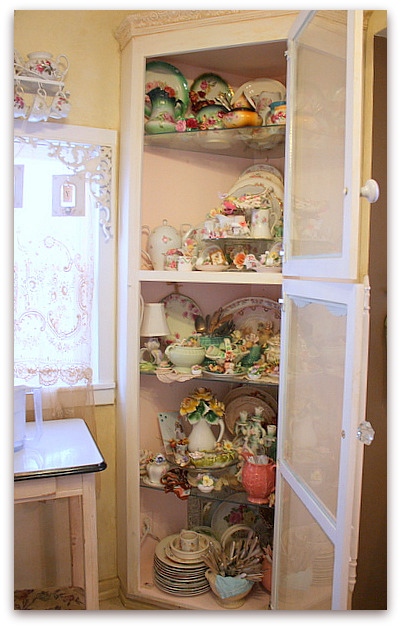
Next, I tackled the corner cabinet in the kitchen. It had been painted pink inside like the other cabinets that I redid earlier. Plus, I hadn't rearranged anything in it for years.  It looked pretty cute when I set it up, ages ago, but over time, it got cluttery and too much as I'd stick treasures in here and there after hitting garage sales.

My kitchen is getting a de-rose-ing.  I told Beth I was deflowering it and she said that maybe that wasn't the best term to use.  

I still LOVE roses and all my little pretties, so this is more of a shuffle, some went to the dining room, and some to the studio, and some will be listed to sell in the Boutique, if I ever get back to work. 

This weather has affected me mentally.  I seem to be in some weird limbo, waiting for my real life to get back on track.  Extreme cold weather always sets me off like that.  Its an odd sort of cabin fever, I start hating staring at the same walls and want to change them and everything inside them.  Combine that with the post Christmas let down, and weeks of these horrid temperatures, instead of just days of it, like we are used to in Kansas, and I have gone berserk from it!

(Or berserker,if you are a Kevin Smith fan)

Repairs 082

Sorry, didn't mean to run on with my weather complaints.  Back to the photos….

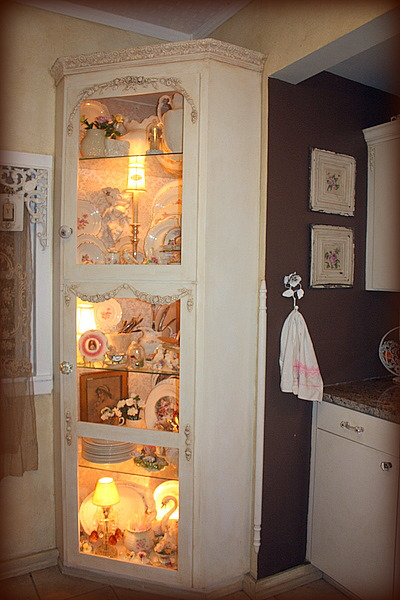
Here is the after.

Repairs 085
 

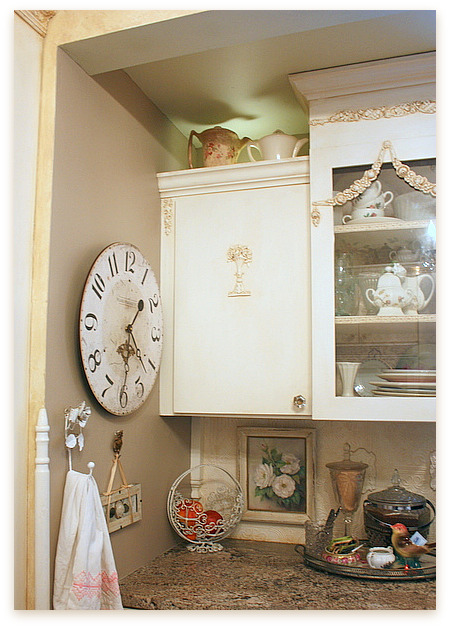
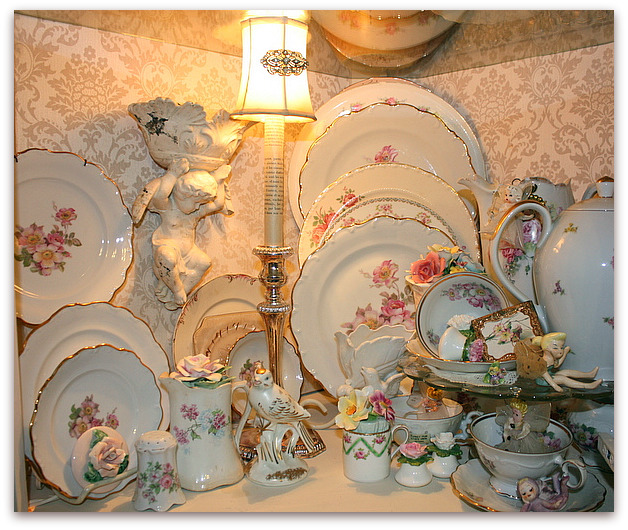
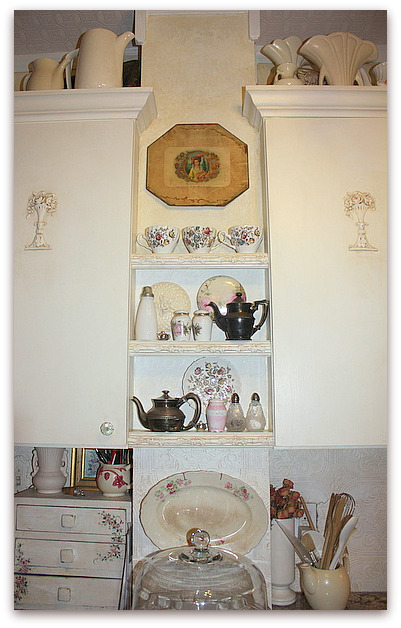
It is still nice and rosy, but is toned down and cleaned up.  The sides are covered in the tone on tone silk wallpaper that I had in my stash. Funny, it is the first vintage wallpaper I have ever bought, and I got it 20 years ago to cover the walls of my dining room and never used it. I'd stuck it away in the closet and found it a couple years ago when I realized that old wallpaper was a wonderful art supply.   And now, here it is, used on my home after all. 

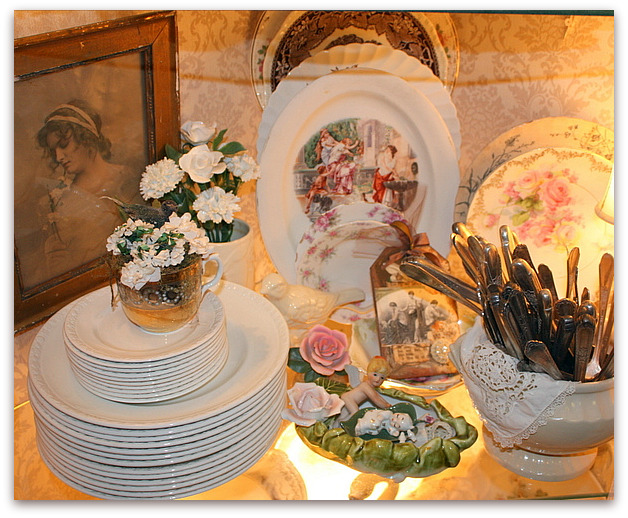
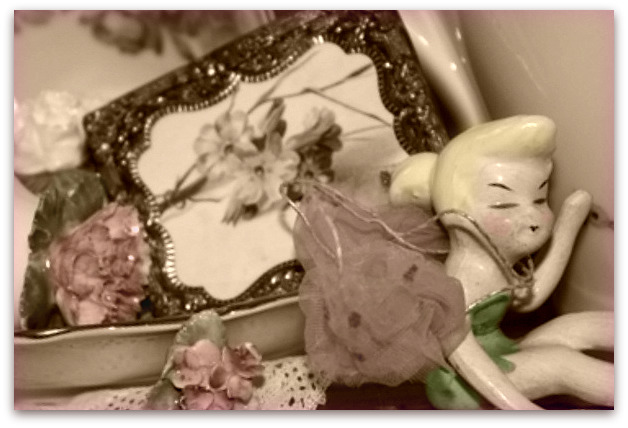
I like to mix my china cabinet shelves up a bit and display more than just china.  A framed old print (that I tried to sale at Miss Frenchies and Silverbella, but no one wanted! I'm glad now- sometimes I think that my home is full of nothing but things that I bought to sell and got stuck with), an old Haeger pot filled with silverware, ready to set out for a buffet, a collage I did at Silver Bella, and of course, some fairies and birdies.

Repairs 090-1
For me, fairies and flowers in with the dishes makes for a much more interesting look.

Repairs 088

The wallpaper is stapled up, instead of glued. Because I know that I am fickle. It doesn't look perfect, but with so much in the cabinet, who can tell?

Its just background.  A nice, neutral, but pretty background!

Repairs 089 

The plates in the back corner are on a stair shaped stand, which is just what I need for my love of layering.  I also like to hang things on the cabinet walls, pictures, cherubs, plates, etc.  

Adding cake stands helps with layering too.  I try for a variety of heights, and make lots of groupings instead of just lining up a matching set of plates.  When my mom died, my sister got her set of Wild Rose dishes, and instead of keeping it for herself, she broke up the set and gave each of us a place setting.  Mine is on this shelf, with a lot of other pale pink rosey dishes.

I went for an over all sense of "white", even though other colors were used as accents.
 

Repairs 080

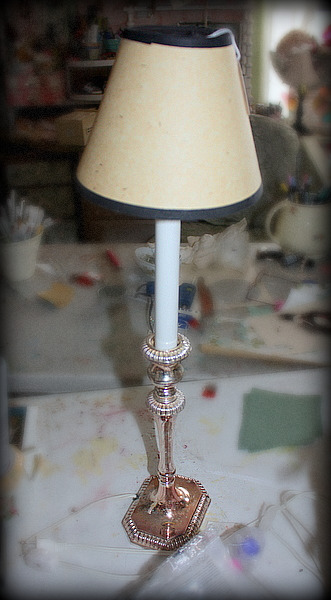
The lamp on that shelf was a quick project. I got it for 50% off of $5 at one of my favorite antiquing joints a while back and it was out in my studio waiting to see what it would become.  Well, it didn't take much to transform it.  In under 5 minutes, it had a whole new look.

1-  switched the shade to an older one that I'd picked up at a garage sale a few years back.

2-  pinned a rhinestone brooch to the shade

3-  cut a page from a vintage French text book to fit the body of the lamp

4-  drizzled glue on the book page, then rolled it around the lamp and burnished it down with my fingers

I really doubt that it took more than 2 or 3 minutes to do.

Repairs 107-1
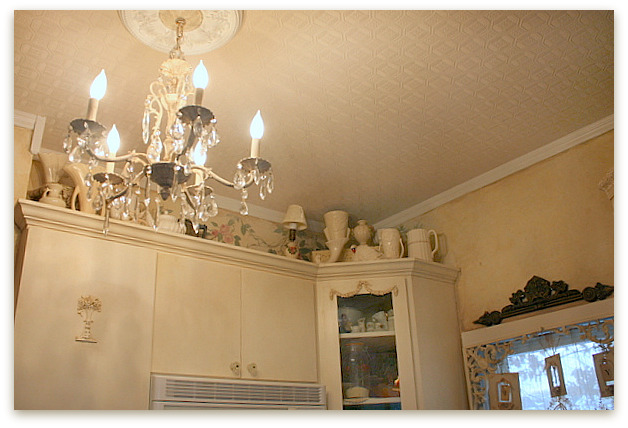
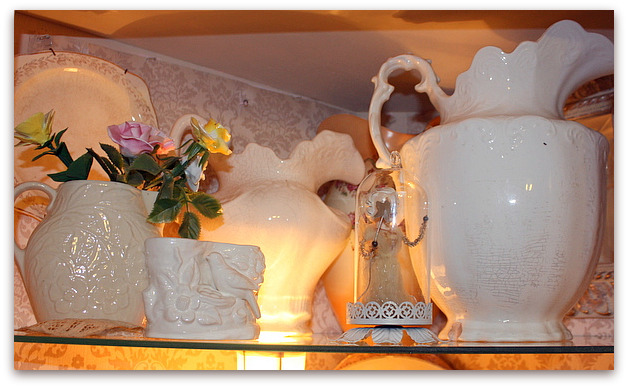
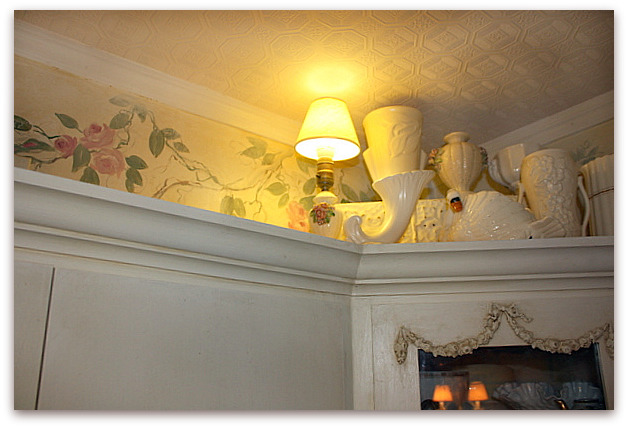
After the corner cabinet, I tacked the cabinet tops.  Over the years, I'd collected tea pots, and over the years, as my tastes have changed, I edited the collection.  My last redo had mostly rose patterned tea pots lined up on the cabinets.  This time, I got rid of most of them, except a few plain white ones (I guess you can't see them in this photo, they are at the other end). I wanted to go very neutral and have much less up above.  Now you can see the vines I'd painted on the wall years ago. I'd had so much crap up there, those were hidden.

They were also hidden by filth. Ugh, it was NASTY up there.  All pottery got popped into the dishwasher, and I tried to clean the walls, and ceiling (yes, I told you I was going  stir crazy with cabin fever- I WAS WASHING CEILINGS!!) but the greasy, dusty coating that was on everything was too awful to come off with my environmentally safe Windex.  I had to use elbow grease and baking soda with a pot scrubber. And we are not people who fry much of anything. Where does all that grease come from??? 

That grease was another reason to put much, much less junk up there!

Repairs 108

In this photo you can see a couple of the white pots that made the cut.  I redid the narrow shelves between the cabinets too.  I'd had decorated bottles, rosy shakers, and green depression glass there before.

Well, I could run on and on and on, telling you about my shuffling and reshuffling. I've been at it nonstop. You know how you take something from one room to another, then you have to redo to cover the hole that you made when you first moved that piece? Yep, that is the vortex that I have fallen into. 

I switched the dining room picture with the mirror from the bedroom, and then had to dig around and find a different bedspread that matched better in there.   Lots of those kinds of problems came up. But I am getting a new look with the same old stuff from other rooms, closets, or out in the studio, and keeping myself semi-safe from the ravages of cabin fever.

Repairs 110
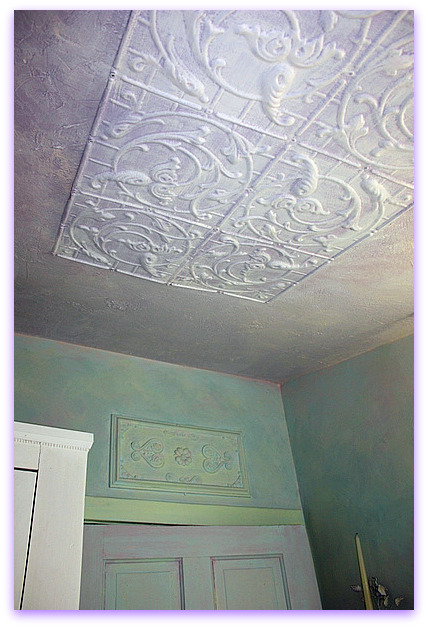
And I am getting lots of little problems solved.  Like this ceiling tin that was covering the bad patch job. It has new screws, is up tightly, and now I've got it faux finished to match the ceiling.

At this rate, my New Years's resolution for 2010 will be completed before January is even over. And not in the typical way, where you give up. I'll run out of things to fix or redo around the house!!

There is more I want to do while I am trapped here in the house, but I think I am at the end of what I can do with with I have, and keep it Zero Dollar.   I need a gallon of paint and some hardware before I go any further, and both cars and all three trucks are stuck in the driveway.

But today, I have Sugarwings.  We've been climbing up and down the ladder that is in the kitchen and sitting in the dark closet playing with flashlights. 

Now, its time to go and bake muffins, so I'd better run.

Baby Bella

fairies, how to's, Silver Bella, Travel
IMG_5886

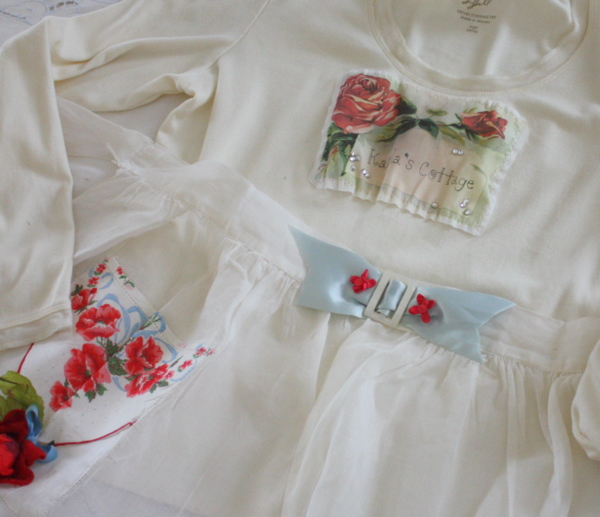
At Silver Bella vendor night, the theme will be Night Of 100 Aprons, or something along those lines. I know that I need an apron!  So, I pulled this one from my Boutique and doctored a shirt to wear with it. 

To make the shirt, I scanned a post card, and used the Picassa editing retouch tool to remove the "Happy Birthday" from the picture.

Then, I wrote in my blog title, and printed it onto printable fabric from the craft store.

When I cut it out, I left raw edges that will fray when I wash the shirt.  I sewed it onto a long sleeve, J. Jill, tee shirt that used to be my favorite, until I dribbled coffee all over myself while wearing it. 

To get the picture on the shirt just right, I wore it while doing the pinning.  The tee shirt was stretchy and the cotton piece was not, so pinning it on while the shirt was stretched over my chest was the way to go.

After sewing it on, it looked a little puckery, but that is fine, because it leaves room to expand for boobs. 

I'm looking forward to a comfy night in a tee shirt and jeans, last year was a much more dressed up theme, Prom Dresses.

IMG_5924

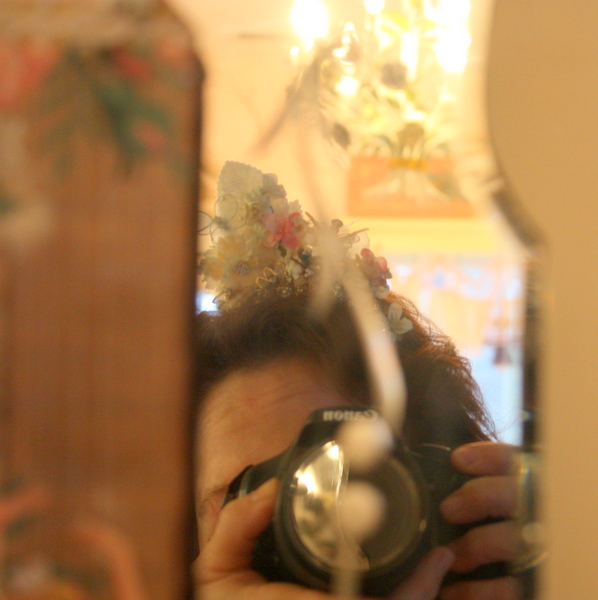
Of course, I'll still be wearing a tiara! It wouldn't be Silver Bella without a chance to wear my crown.

IMG_5925

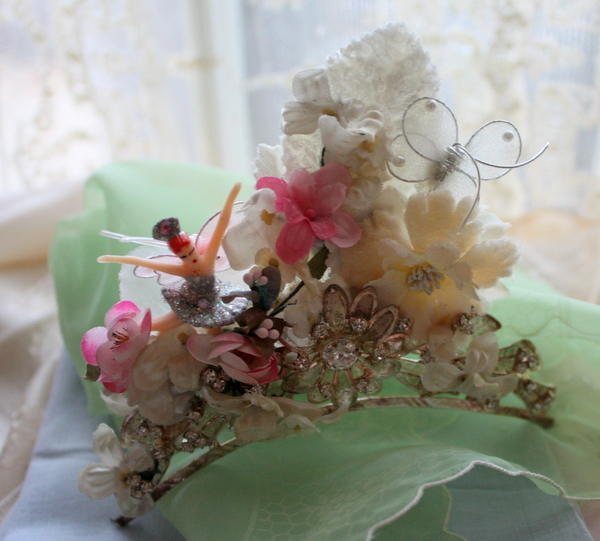
This one is similar to my own tiara, but is one that I just finished, to take along to sell in my booth. 

IMG_5897

And what else do I have packed for the trip?  A new outfit for Sugarwings. Yep, I'm bringing the fairy grand baby!  Actually, her Daddy and my Handsome Husband are bringing her, they are coming up to help me set up my booth, and using the trip as an excuse to go and stay at our favorite Omaha hotel with the water park that Sugarwings loves to play at.

We have plans for breakfast on Saturday with Beth, since she is coming up to Omaha just for vendor night to sell her great stuff. I was afraid we'd be so busy I wouldn't even see her, so we made plans to meet up and enjoy the Embassy Suite's free breakfast together.

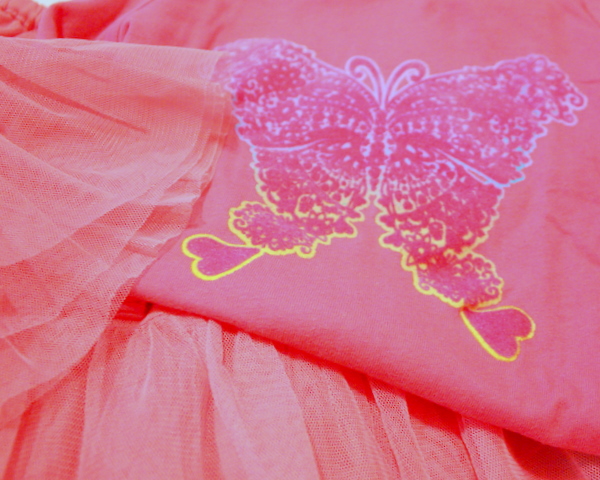
 I splurged and got a new outfit for the fairy baby, since we have a breakfast date.  Even though the frothy skirt and flocked butterfly shirt are from Old Navy, and not real costly, it was still sticker shock to me!! I buy all of her clothes at garage sales and Goodwill or get hand me downs from cute little Bethany.

But when I saw this pink concoction of froth, I had to have this skirt! She'll be an adorable Baby Bella.  I think she'll need a crown too…

IMG_5901

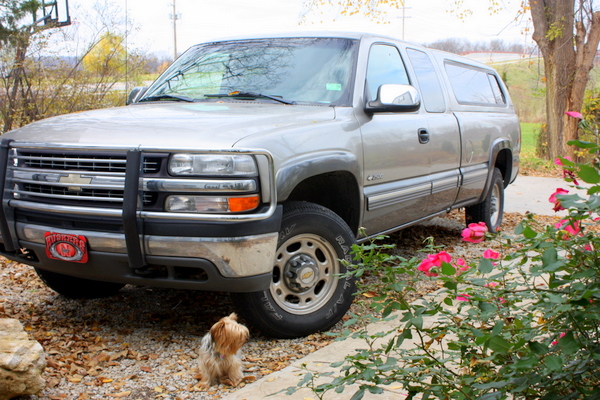
My goods are finished and all packed up. I've borrowed my brother-in-law's big ole truck again for the road to Omaha.  We own three farm trucks ourselves, but not a single one with a topper.  And a 3 hour drive in the Midwest in November can't be counted on to be rain or snow free.  Luckily, my sweetie of an in-law is generous with his vehicle so I don't have to rent something.

IMG_5921

Speaking of sweethearts,look what Stephanie

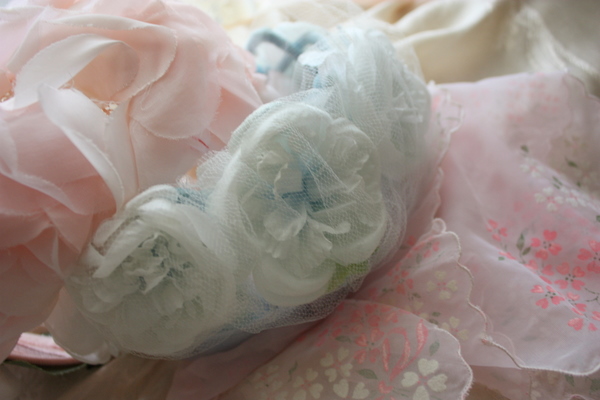
sent to me! Roses, roses, roses! Just out of the kindness of her heart.  So, I will share with you.  For my November Giveaway, I'll add a pretty millinery rose to the bundle of vintage trims. Thanks, Stephanie!!

I will be away from my computer till I return, but will do some pre-posting, so please check back.  I'm sorry I won't be able to return comments, but will read them all when I get back, and each will count toward the millinery rose topped bundle of old trims!

A random rambling and a secret surprise giveaway

family, give away, how to's, how-to projects, the Boutique at Karla's Cottage
Gardening1
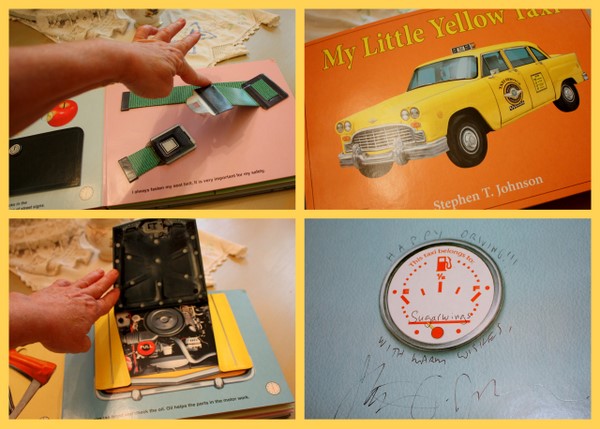
Do you have a favorite children's book author? Mine is Stephen Johnson.  He is a local, Lawrence, KS artist who has done a series of interactive kid's books.  Now he is working on one called "The Princess Purse" and came over to my studio to borrow sparkly things, vintagey boxes, and pretty wallpapers all to use as props. 

Stephen brought this taxi book for Sugarwings as a gift.  She's going to have a whole collection of his books, lucky kid!  His latest is about fire trucks and will be out very soon. You can find it and his others at many major book stores. And they are really cute!

Gardening-1
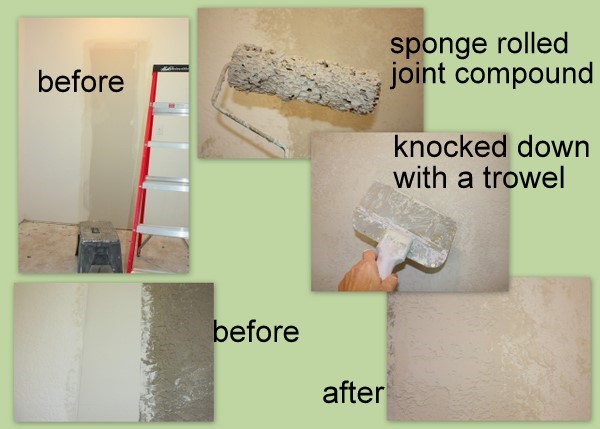
Some of you were asking about the mudding I had to do for the dry wall. Well, we took out a closet and used the space to enlarge my husband's office.  The new dry wall was smooth and the old walls were textured. I had to fake a texture to blend it in.

After the dry wall guy (my sweet brother-in-law) got the walls done, I used a sponge roller (meant for faux finishes) to roll on joint compound. Then, took a trowel and knocked the points and highest spots off of the rolled on mud.

Gardening 053-1
After painting, I think it looks pretty good.

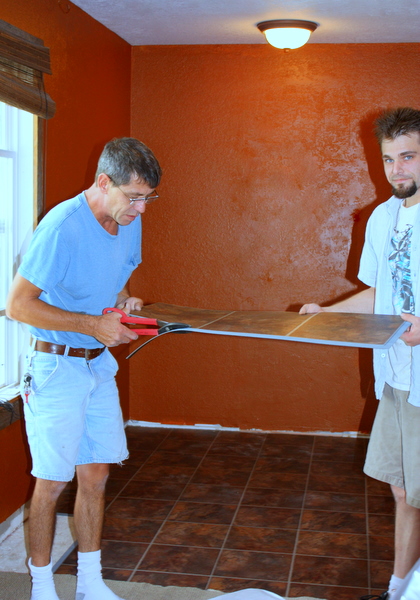
What I don't like, is that Home Depot gave me the wrong box of floor covering!  I had picked out a grayer color that blended well with the existing carpet.  But instead I got this dark sienna, that the guys didn't realize was wrong and installed anyway.  I should have looked in the box myself.  It matches the walls ok, and isn't horrid, it just isn't what I wanted.

When we get the room all put back together, I'll show you some more shots. I'm also redoing Ryan's room, it was his walk in closet we stole to make the office bigger. So I owe him…

Gardening 045-1
Just how hodgepodgy can I make this posting?? I'm flitting about from one thing to another even more than usual!

Sweet Zita  offered to mail an old French magazine to me after reading my last post about how I loved working with that kind of paper.  Did I call her sweet Zita? I meant Adorable, Darling, Generous, Magnanimous, Delightful, Kind, Gracious, and Wonderful Zita!!

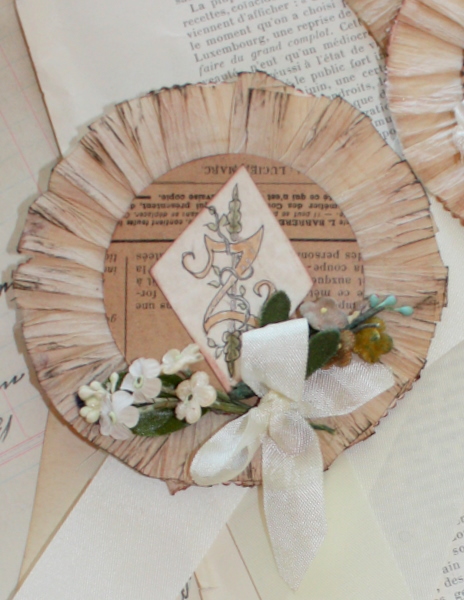
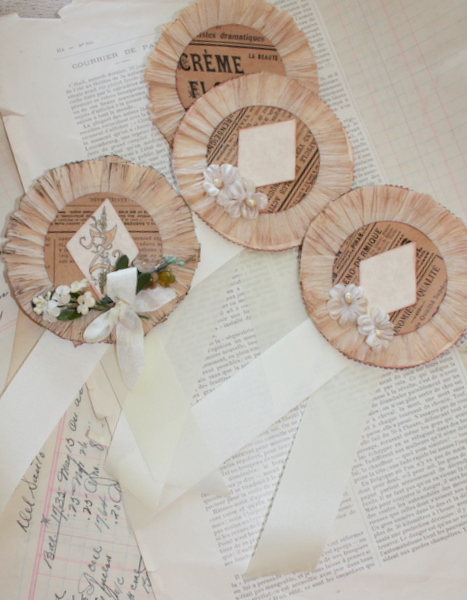
So, I made her one of the prize ribbon medallions that I was using the French ephemera to make.

Gardening 045
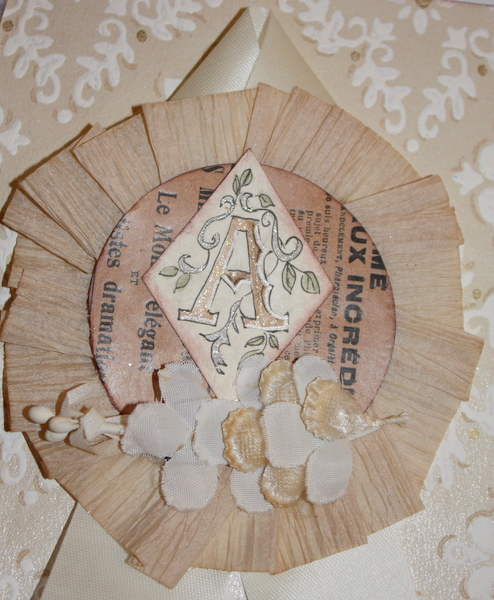
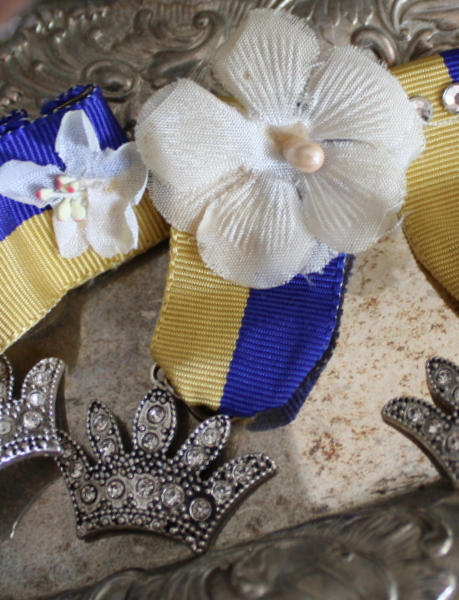
While I was at it, I made up 3 more for the Boutique.  Each is made of vintage ribbon, French paper, millinery flowers, and old crepe paper.  I added parchment cardstock to the back for stability, and also made a small diamond out of it to add your initial to.

The initials are hand drawn, no patterns or stencils.

Gardening 048

No two are exactly alike, but all are the same, if that makes sense. When things are hand made from vintage goods, you get some variation.

I've also added a brooch pin to the back, so the ribbon is ready to pin where ever you'd like to use it. 

Gardening 040

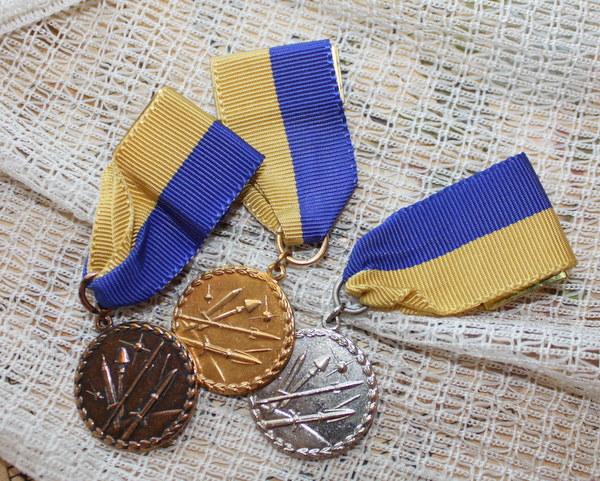
And maybe you can help me with this? I've listed these in the shop as sports medals, but I really am not sure if they are or not. I wondered if they were military medals? They kind of look like track and field prizes to me, especially since there is silver, gold and bronze. I doubt if the Army gives out 1st, 2nd, and 3rd when they award a medal.

Gardening 071
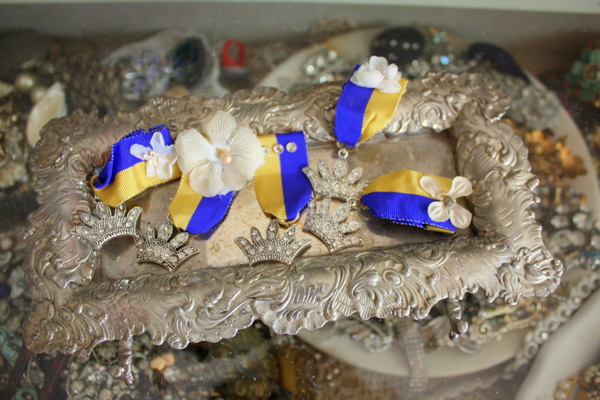
The old ribbons with the pins on the back are great! I used a few to make these crown pins.

Gardening 070
 I took the medals themselves off to save for another project. Maybe a charm bracelet?

Gardening 067
One of the medals could be clipped to Twinkle's collar, she is missing the rhinestone piece that she used to wear.  I could award her a gold medal for being such a good dog. 

Gardening 072
Well, the month of September is more than half over already! You still have plenty of time to ente
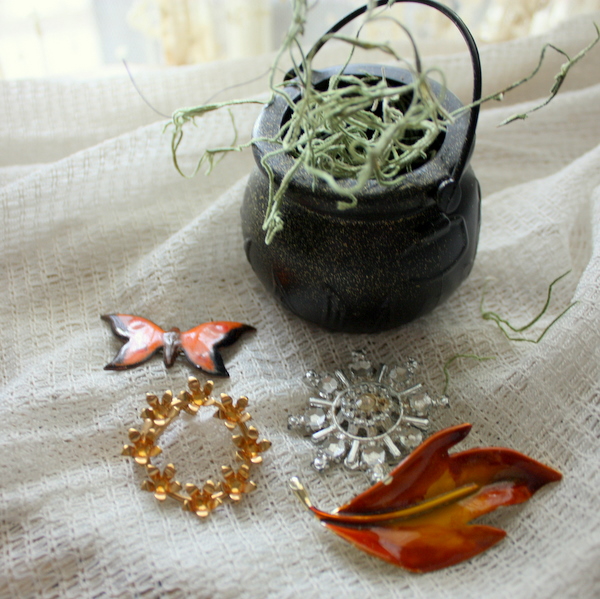
r the giveaway for this month.  The change of seasons has inspired me to fill this little sparkled witch's caldron with brooches.  When fall comes around, I am always looking for cute brooches to wear on my jackets. 

One is an enameled butterfly in fine fall colors. Another is a leaf in the same tones.  To that is a flower petal wreath and a rhinestone pin that reminds me of a snowflake.  I'm not exactly a fall person. I can't enjoy the season without dreading snow that comes soon after.

Leave a comment, any post, all month to enter.  I do enjoy hearing from you, but I know that leaving a comment can be a hassle. I had about 1500 hits yesterday, but only 20-some comments on the post!  I certainly don't leave a comment on every post I read either, especially since I started using Google Reader. It is so easy to zip through one blog after another, that I don't pause to go to the site and comment much. Sorry.

Gardening 074
But- you never know when I'll have a double secret giveaway prize waiting for you!  Ta- da! Here is a little tag book ready to embellish that is going out to my 20,000th comment.

And guess who the 20,000th commenter was??  Remember when I had a prize for 12,000 and my husband was the commenter? Well this time, since Typepad was doing that wierd comment response thing and my replies were going into the comment log, the winner is:

ME

Yep, I win.  So, I went to number 20,001 and the real winner is my pal from Macon, Angela

Gardening 037

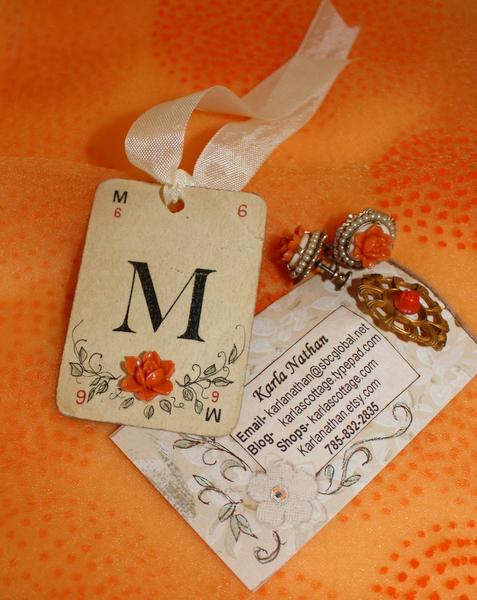
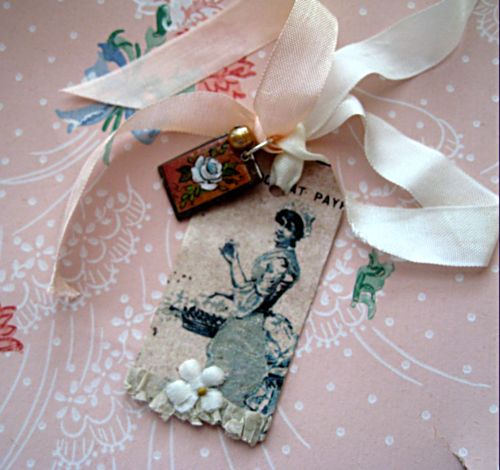
This is a tag I made from a French game card to send out to a shopper in the boutique, Melissa. She bought this jewelry from me and I knew this little matching rose needed to go to her.

The thing is, why did I spend extra for FRENCH EPHEMERA, when it is a single letter?? Not a word, no one actually knows it is French, now do they?
Well, I need to go back upstairs to the torture chamber my husband's office and finish painting the walls.  Its a BIG room. 

Back Pain Relief Recipe

antiques/junking, how to's, show and tell, vintage paper/collage art

Saturday 002 

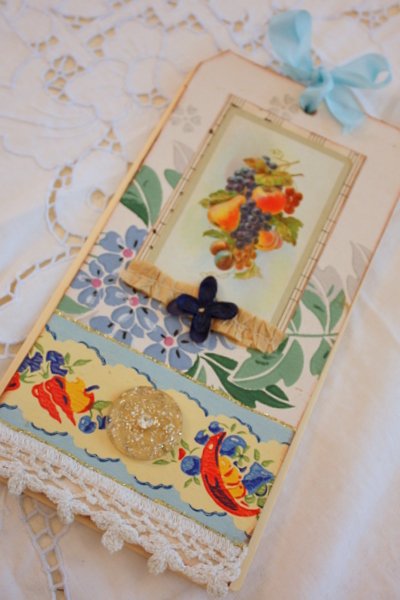
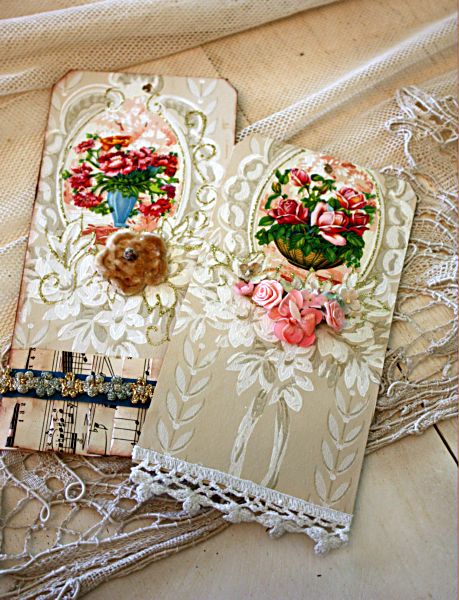
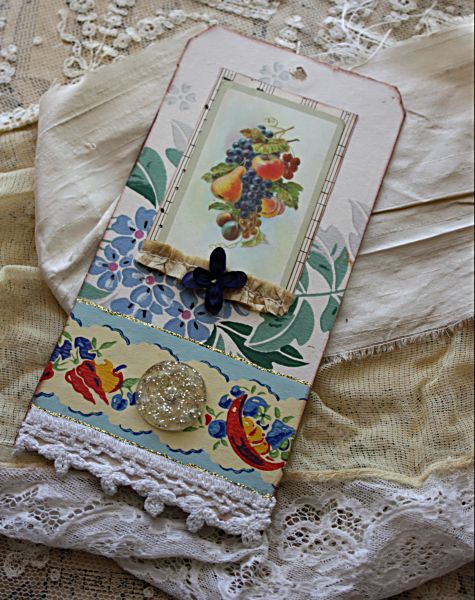
Before I hurt my back this week while on vacation, I started a few tags.  I was thinking about making some tag books, but decided that these wouldn't fit into the binder with all the 3-D stuff on them, I'll need to add doodads after binding the tags, not before.

Saturday 003 

These colors are a bit different from what I usually pick out.  Beth and I have a Wallpaper Pact, when one of us scores some vintage paper, we share with the other.  She gave me the border that I used across the bottom, and if went perfectly with a playing card I got in the En Le Jardin swap.

When my back cooperates and I can sit at my desk again, I'll be adding ribbons to these and calling them finished. Then, I'll start over on the tag books. So, this batch isn't exactly a waste of time.  I just about always finish what I start and make it work somehow.

Saturday 006 

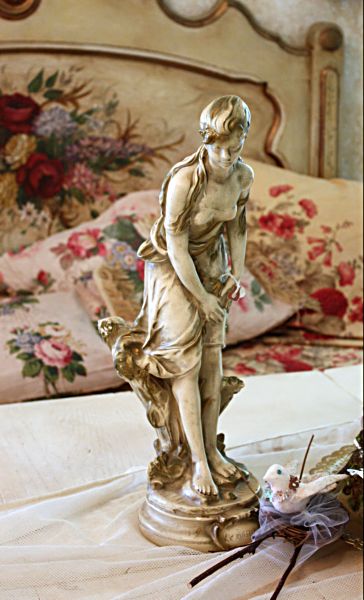
This is the statue that I bought from Carol.  For now, she is gracing one of the dining room tables in my studio. I might bring her into the living room later on.   I already have a couple in there now, and I do think a collection makes more impact when it is grouped together, but on the other hand, I like having my favorite things all around me.  So, maybe she'll stay out here in the studio to keep me company while I work.

Saturday 007 

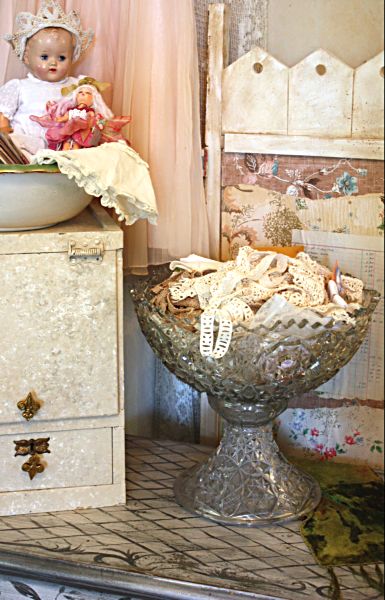
Last Saturday, at the world's greatest estate sale, I found this punch bowl. I've been wanting one forever, but didn't want to spend much. This one is cracked, so it was cheap, only 5 bucks. I don't mind the crack, since I am using it for something that won't leak, not punch.

Saturday 013 

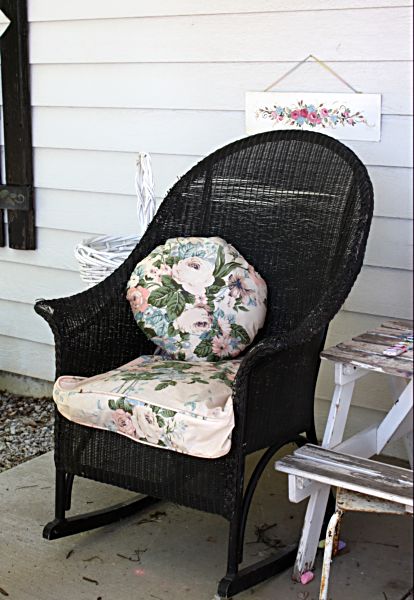
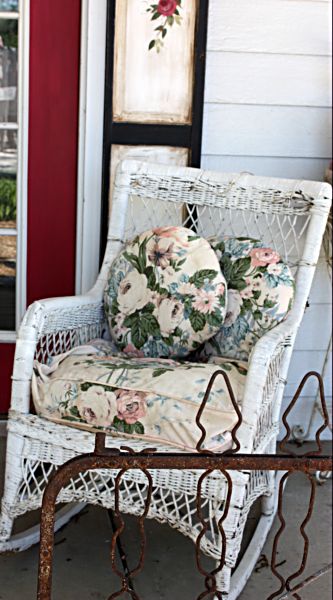
There was also a giant box of cushion sized slip covers at the sale, and they were only $7.50!  I immediately put some on my porch furniture.  The rest got washed up and look even better. The pink background shows up a lot prettier when it isn't dirty.  I'm not quite sure what I'll do with the rest of them, its gorgeous fabric, some of the prettiest that I have found.  And while it isn't old-old, it is older. Hmm, does that make sense to you?  Not antiquey old like bark cloth, but not made all that recently either.

Saturday 015 

There were a few round pillows in the box too.  And I almost didn't buy any of it, I wasn't sure if the size was something I could use, but Beth told me that the fabric was worth a lot more than $7 to have for cutting up.  She's right, I'm glad I listened.

Notice these photos are focused only on the chairs? I've not done any planting and my porch looks desolate and lonely without flowers!   Of course, with a sore back, I won't be doing much gardening this weekend, so it might be a while before I get plants set out.

Toys 005 

Years ago, I fell off a pony and fractured a couple of vertebrae.  Now, I wasn't thrown from a horse, I just carelessly slid off the back of a small pony.  Like a klutz, nothing dramatic about it.

I had a few surgeries, cortisone epidurals, lots of rest.  But, I was in bad shape for a LONG time, till I finally found a Dr. who got me to physical therapy.  Since then, I've controlled the back problems by sort of keeping in shape. Not the kind where I look good, but the kind where I stay flexible and can move. 

There is also a routine I go through if my back gets sore and it usually works in a day or two, I no longer have months of pain like before.  My trouble now, is that my back went out on me while on vacation and I didn't follow my recipe for healing, since, not only was I staying at a hotel, we were sightseeing and hauling around a 2-1/2 year old.

Here is what I usually do, and am doing now. It doesn't work as well if you don't do it right when injured, but it still helps:

Back Pain Relief Recipe

Equal parts of rest, laying and sitting. Do not stay in one position too long.

Equal amounts of ice and heat, taking turns with each.

Walking and stretching in small amounts to start with, then building up to more.  DO NOT rest too much, you have to MOVE or you'll cramp up.

And last, anti-inflamatories and muscle relaxers.  I use Ibuprofen and Skelaxion, neither make me drowsy.

You will also need a stack of movies to watch.  I'm going to go watch Diary of the Dead, it seems fitting, since I have the zombie shuffle walk going on right now.

Giveaway2009

And for now, I have probably sat too long at the computer, I need to walk and stretch. But before I go, I'll tell you the winner of the Cottage Charm giveaway, my May prize. Thanks, Kim, for hosting this annual event!

Sparks 09 086 

And the winner is:

Jenny


By the way,Beth is having a fantastic giveaway full of Victorian scrap! Go enter before its closed!!

How to paint furniture (the short cut way)

antiques/junking, Hand Painted Furniture, how to's, how-to projects

Cabinet redo 073 

For years, I had an antique furniture painting business and painted hundreds of pieces of furniture. I spent a lot of time figuring out an easier way to do it.

This tutorial is for painting old furniture and keeping an old feel to it, with NO sanding and NO stripping. Ugh, who wants to work that hard? 

Birthday 09 051 

Of course, having an assistant helps.

Cabinet redo 041 

Since this cabinet had glass doors, I covered the glass with newspaper before starting, and set up the piece in an area where I could spray paint and not worry about the mess. 

Cabinet redo 043 

Old furniture comes with many defects time has added to its finish. Personally, that is what I love about it.  If I wanted something to look new, I'd buy a brand new piece. I want my antiques to keep their flavor!  So, I don't want to sand away any alligatoring of the old varnish, or any other interesting bits on it.

By using a bonding spray, you do not need to sand or strip the furniture and you preserve those crackly spots in the varnish.

Cabinet redo 044 

This BONDING primer (bonding is the key word, here, it will stick to any clean surface without sanding) covers the old varnish, but doesn't change the look of the finish underneath. SHAKE WELL or you'll get a bumpy grainy finish.

Cabinet redo 045 

Spray away. 

We've already skipped sanding, and now here is where another short cut comes in.

  If you plan on painting the piece with a brush after priming, you can leave it the way this cabinet looks right now, kind of shadowy, that is good enough coverage for the paint to adhere. 

But, if you are going to do what I do and skip the step where you brush on paint, then you need to use plenty of spray primer.

It took me 2-1/2 cans for this piece.  After it was at the shadowy point in this photo, I sprayed over any darker areas and made sure there was good coverage.

Cabinet redo 046 

Did I mention how much it helps to have assistants?  I gave this one an empty can to help with.  I'm glad it was empty, because she tried to spray paint the world with it.  If she ever gets hold of a full can, I might be in trouble.

Cabinet redo 049

Primer MUST NOT be left without a top coat. But, who says you have to use just plain paint over it?? I use water based glaze, which is mixed with latex paint.  It covers the primer just like paint would, but is semi-transparent, depending upon how much color you add.

You can buy it pre-mixed like this kind, which is handy for large projects, but can be pricey. 

Cabinet redo 051 

Or you can buy glaze by the can, and mix your own color.  I use those cheapo 2 oz craft bottles of acrylic paint. There are a ton of color choices that way.

Cabinet redo 053 

This is really too much for the cabinet, but I liked this color and wanted to make extra to store for something else.  It never hurts to make up a bit extra, because you'd hate to run out in the middle of glazing your furniture.

I'd say 2 cups of glaze and 1 ounce of craft paint (any color, any brand) is plenty.

IMG_2910

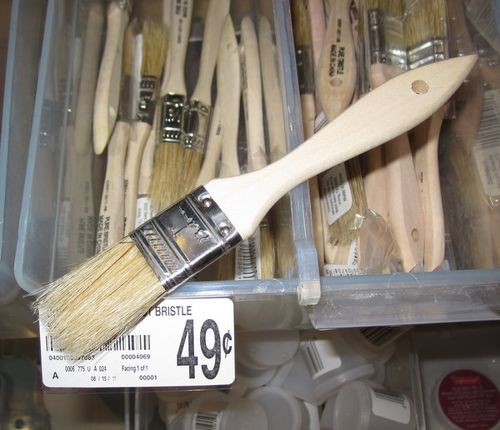
I love these cheap-o brushes, they a good for getting down into the crevaces.

Cabinet redo 054 

The color I chose was a dark brown.  Notice how it looks more like chocolate milk after it is brushed on?  Well, that is because the glaze is milky.  But you have to remember that the glaze will dry CLEAR.  So the color of the small acrylic craft paint  you chose is what you end up with, not the milky version it is while still wet!!

Cabinet redo 055 

Start at the top and work on one small area at a time.  Paint the colored glaze on thickly, and get it down into all grooves.  After one section is painted, wipe it off with a wet, soft rag.

I use old tee shirts, and keep a bucket of warm water nearby for rinsing. Not that warm water is better than cold, but it just feels better when you wring the rag out.

And rinse often!!  Your rag will fill with glaze fast. If you don't keep rinsing and wringing it out, you'll have a soppy mess and will just be pushing the glaze around, not removing it.

Cabinet redo 057 

Don't worry about perfection.  Some areas will be more heavily glazed than others, that makes for an interesting finish. And if you were lucky enough to have a piece of furniture with lots of crackled finish to start with, then the glaze will really look nice when it settles into those cracks!

Cabinet redo 065 

While the glass is still covered with paper, spray a can of satin finish clear coat over the project to seal it. 

IMG_2911

Or you can brush on a water based top coat.

After you take off the newspaper and tape, you might have to scrape a little paint off the window here and there with a razor blade, if you tape as badly as I do.

I chose not to paint the interior of mine, instead I lined it with vintage wallpaper.

HINTS

  • You can skip the paint step, IF- you are fine with using bright white as your base color under the glaze. Spray primer doesn't come in tinted colors.  You can also use paint on bonding primer, and have it tinted, or use the gray it comes in, and that can be your base coat.
  • You MUST cover every inch of the primed areas with painted on glaze! Primer is not meant to be left uncovered.  But glaze is quicker and easier to brush on than paint, because you are just slopping it on heavy and will be wiping it off.
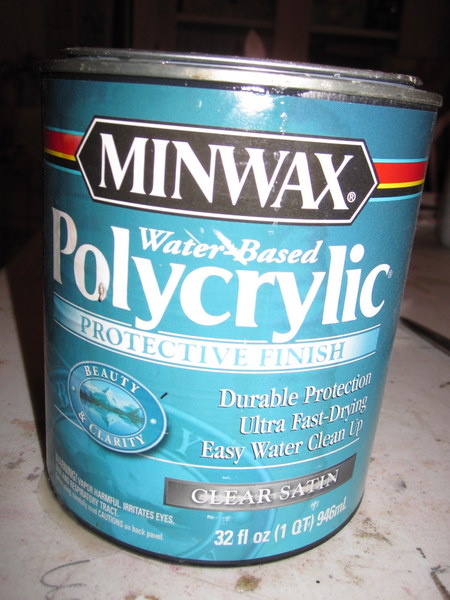
  • Top coats are important, for durability. You can quickly spray one, or brush it on. If I am brushing it on, I like to use Min-Wax Polycrylic.  It is water based, no smell.
  • Make sure the piece is clean before you paint it.   Wipe it down with a damp cloth, and if it is greasy use Windex.
  • Only use BONDING  primer!!  Be sure the label says something like "will stick to glossy surfaces".  I buy this brand at Home Depot.  If I am brushing on primer instead, I use "The Gripper" by Glidden.
  • Primer can be painted over soon after using it, but sometimes it takes days to "cure".  So, if you have painted something with an extremely high gloss finish, try to leave it set and don't mess with it for 3 or 4 days.  The finish hardens, and won't scrape up after that.
  • Its nice to paint the inside of drawers, for a clean finish, but NEVER, ever paint the sides of the drawers, on the outside, or the bottoms.  They must be kept clear of paint so the drawers won't stick.  For an old, sticky piece, wax the outside of the drawers for a good slide.
  • If you get over spray on the glass, like I did, scrape it off right away, or it just gets harder to do. Bonding primer bonds!
  • If you have plans to "distress" the piece, by roughing the edges up with sand paper, do it before your top coat.  And don't wait too long, like I mentioned before bonding primer bonds!  When the furniture is dry, sand away, but don't wait days and days or you'll have trouble sanding through the primer to the wood underneath.


It was pointed out to me that spray paint is dangerous to inhale and I didn't mention safety precautions.  Please, use proper ventalation!  I use the garage, but am right inside the open double doors.  Also, the baby only was playing with an empty can, she was not actually involved with spraying or breathing in the spray.  I treasure each and every one of her brain cells!

Ahhh, that’s better!

housework, how to's, magazine pictures or articles, Miss Frenchie's, paintings, the Boutique at Karla's Cottage

Studio cleaining 061

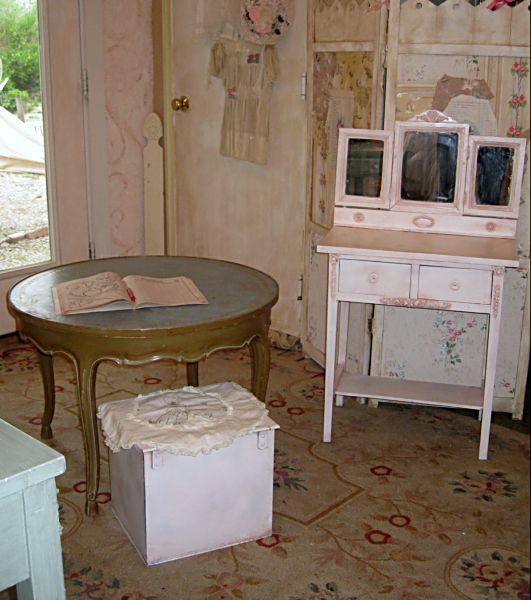
Today, I made time for a little more sprucing in the studio.  I repainted Sugarwing's old milk box seat and her little vanity.

Both were done in my short cut style.  I use spray bonding primer in white, then brush on/wipe off glaze (pink for the fairy grand baby), let dry and spray varnish.  How simple and quick is that? No sanding and not much time involved.

Spray primer (Zinzer Bulls-eye, bonding primer) adheres to anything.  And, is meant to be under paint, so you can't leave it as is. But I skip the whole painting step and go straight to glaze, then top coat it and it really does well that way, plus saves time.  Which I never have enough of!

Studio cleaining 060 

To me, this is a big improvement in the room.  There is so much going on in here anyway, that having the furniture more tone on tone is much more soothing.

Studio cleaining 068 

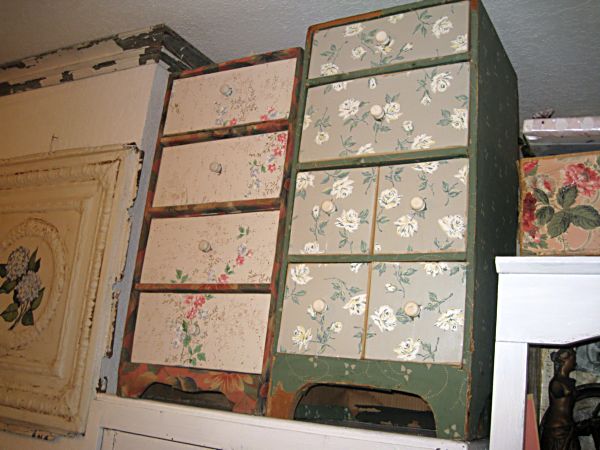
Lightening up these two chests with wallpaper on the drawers helps too.

Studio cleaining 066 

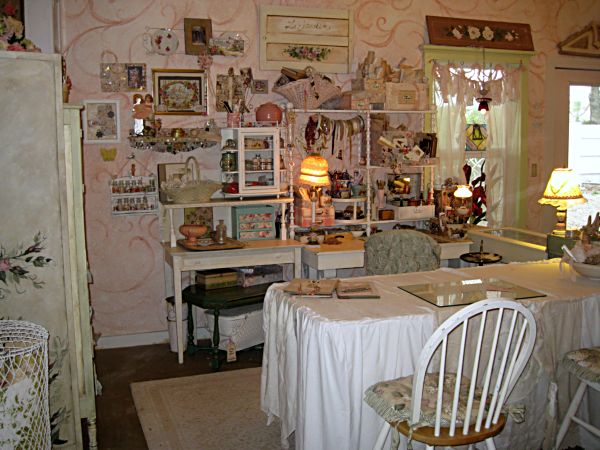
Who am I kidding? This room is crazy busy no matter what I do!!

But, its fun for me to have all the things I love around.  Some people make inspiration boards to hang over their workspace, I use the whole room as one.

Studio cleaining 062 

The canvas mural I painted for my booth at Miss Frenchie's was bothering me too. I had hung it in the closet area behind the folding screen, but I prefer the plain white wall there.  With just a bit of the mural peeking over the doors, it seemed kind of messy. And I get plenty of messiness with projects strewn all over, I didn't need any faux messes.

Studio cleaining 056 

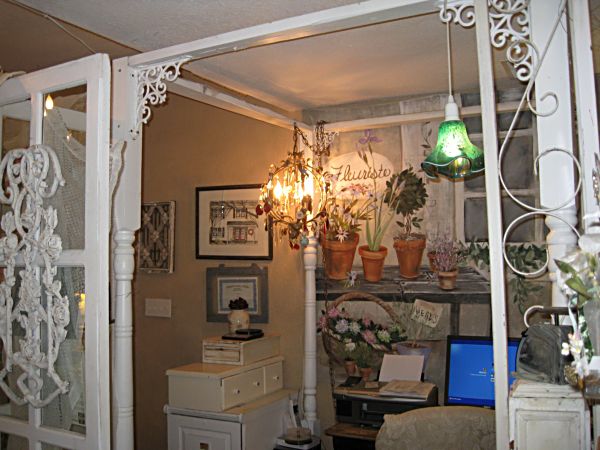
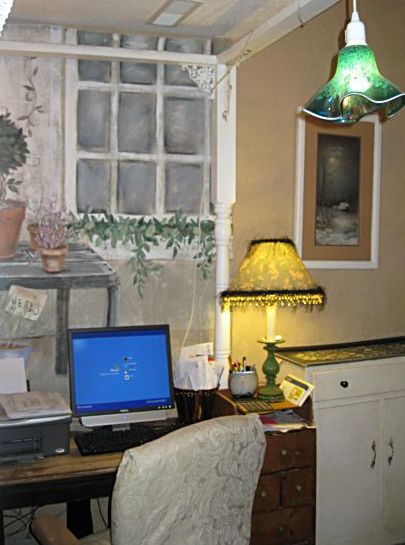
But I was able to find a space for it that fit better.  Here it is hanging in my computer gazebo area.  The studio is one big room, and I have it divided up with doors, screens, large pieces of furniture, and yes, a gazebo.

My son and I made it really simply with 4 porch columns, decorative iron brackets, and two by fours. 

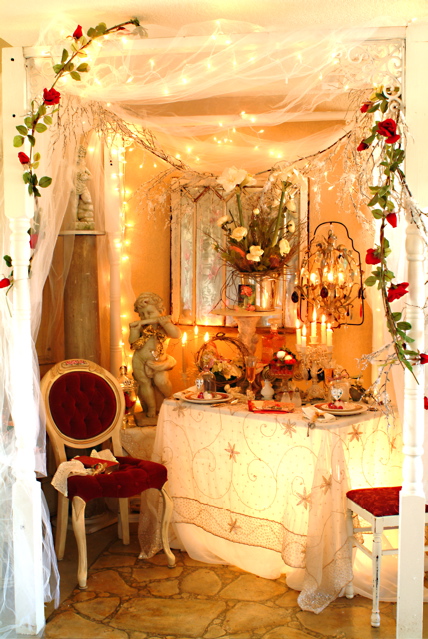
Valentine8 

We built the structure as a display area when I used to have antique sales at my home and used my studio as a showroom.  This photo was taken by Diane Guthrie for Romantic Country magazine.

I loved the twinkle lights and tulle, but the lights burnt out and the tulle got all dusty and full of spiders, so it is gone now.

Studio cleaining 058 

Having the French market scene above my computer will be a fun memento of a great weekend at Miss Frenchie's.

Unless it drives me crazy staring at my own work and I do nothing but pick out the flaws in it…. Of course, there used to be a mirror there before the mural. And I have to tell you, there were plenty more flaws to pick out there.

Studio cleaining 064 

Ahh, yes, I think I'm going to like it here.   Spring cleaning and a fresh start has made me excited to get back to work.

Studio cleaining 070 

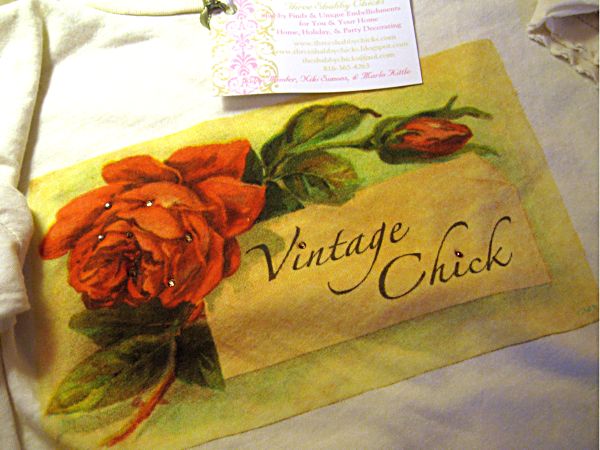
Too bad I am such a pig when I work, or I could wear this new tee from Robin and match my studio! 

Storage room and leftovers to sell 038 

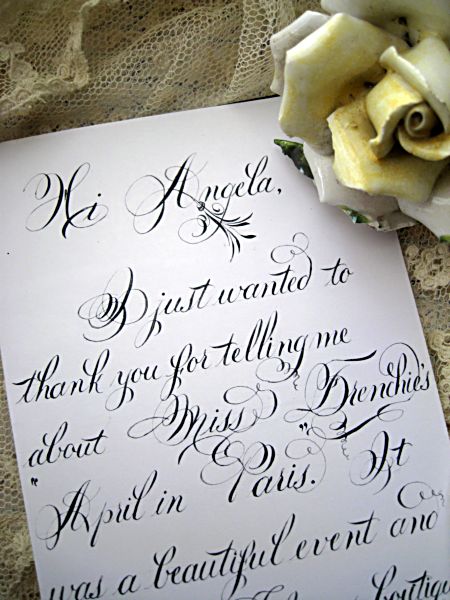
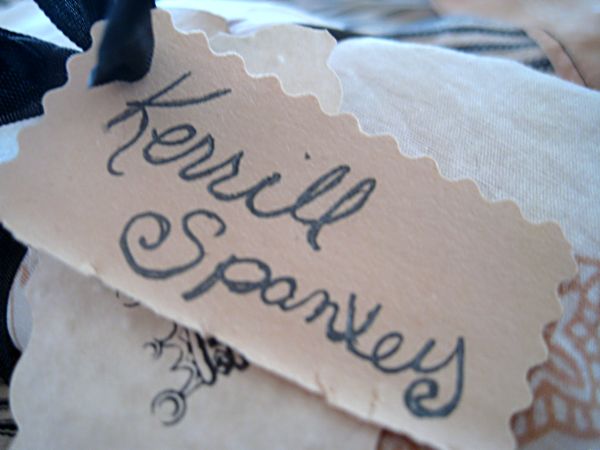
And isn't this just the sweetest thing?  A guest at Miss Frenchie's sent this lovely note to my friend, Angie, for telling her about our sale!

First of all, what a thoughtful thing to do, and second- I want to write like that! I wish I could do calligraphy!!!!!!!!!!! Especially this pretty.

Copy of storage room and leftovers to sell 048 Copy of storage room and leftovers to sell 052 Copy of storage room and leftovers to sell 055

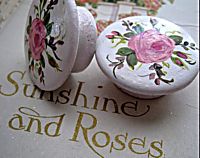
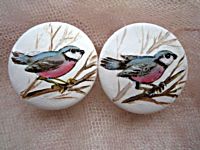
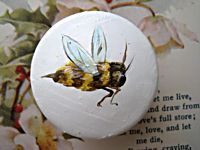
Remember these?  When I was prepping for the sale, I made up LOTS of extra inventory to list in my Boutique. Slowly but surely, I hope to get stuff listed there. I did add a few of these knobs and some of my watch necklaces. 

Storage room and leftovers to sell 020  

A few odds and ends of craft supplies have been added too. Not many yet, I really need to get myself back to working instead of playing dress up with my studio. 

EDIT- Tour more redos at this Make Over Open House:

Make-over_Open_House

http://sanctuaryart.blogspot.com/2009/04/welcome-to-make-over-open-house.html

Making it Girly

antiques/junking, how to's, Miss Frenchie's

Apron 002 

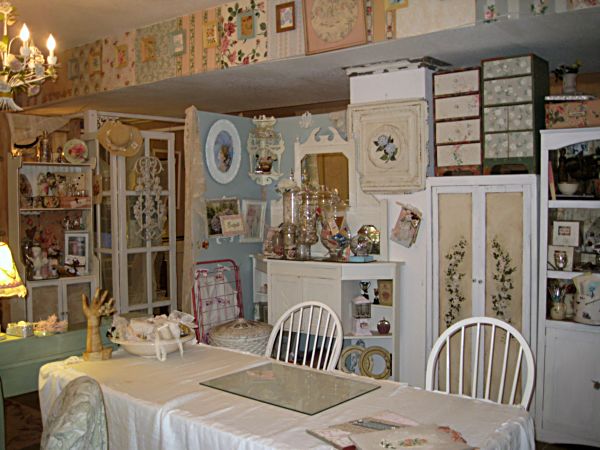
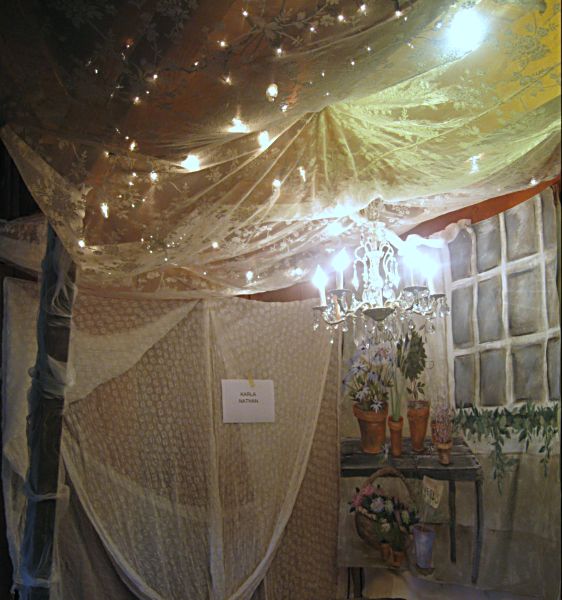
Today, I got a head start on my booth at the Miss Frenchie's sale.  I went in to help Debbie and Carol tape out the booths, and decorate, and ended up staying and hanging my lights and drapes.  The building is a dark, rough wood barn, so I wanted to make my spot a bit more girly.  Hmm, I think I might have got it. Lots of lace, and cheesecloth and mini white lights are at least a good start! Tomorrow, it will feel good to have this part done, and I'll be able to throw on my table cloths  and start piling up the crap.

Well, I wish it was that easy…. there is still the hauling all the heavy boxes in from the big, red, redneck truck and figuring out just where it should all fit.

Apron 005 

Getting ready early is sure the way to go. I was thrilled with having so much ready weeks in advance.  Yes, I still have some little things here and there that need done, but I'd say 90% of it was tagged and bagged before I went to DC.  Wait a minute, isn't tagged and bagged what detectives on TV say when they have a body to wrap up?

Apron 006 

Since I was mostly ready pretty early, I was able to hang out and make tags last night while I watched American Idol (I can't decide if I am a Gokey fan or an Adam fan, I really like them both).

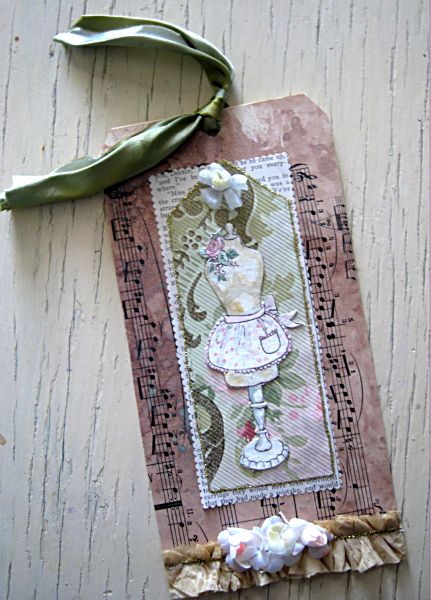
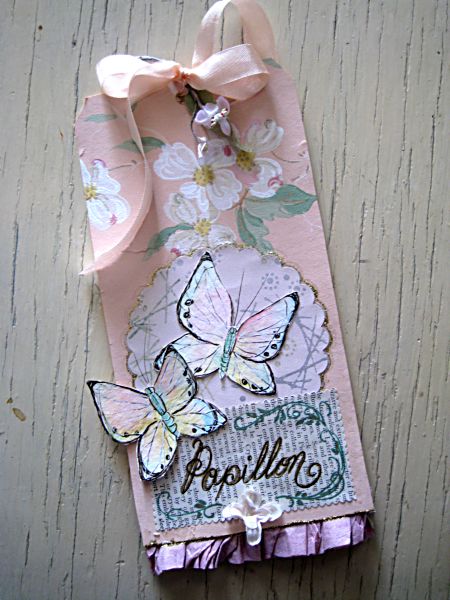
Here is the process for this tag-

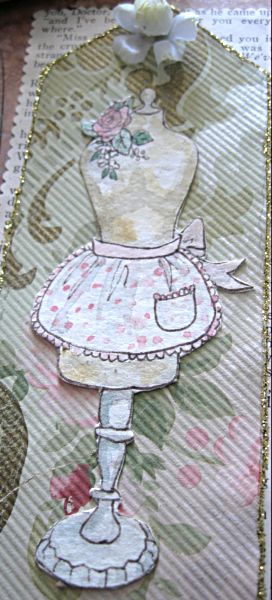
I drew the dress form on heavy watercolor paper in brown ink, then added a wash of paint.

Next, I glued the cut out dress form onto my favorite wallpaper ( a gift from Heather)

That was glued to a page from an old sewing magazine (a gift from Barb)

Next, I glued all of that to some vintage sheet music that I had sprayed with chocolate Glimmer Mist, and glued all of it to a 4" x 8" shipping tag, and trimmed the edges.

The bottom is trimmed with a sewn ruffle of pattern paper, and highlighted with gold Stickles (love that stuff, I don't know why I don't use it more often)

More Stickles was used around the wallpaper piece, I tied a silk ribbon to the top and glued on some old millinery blooms.

Apron 008 

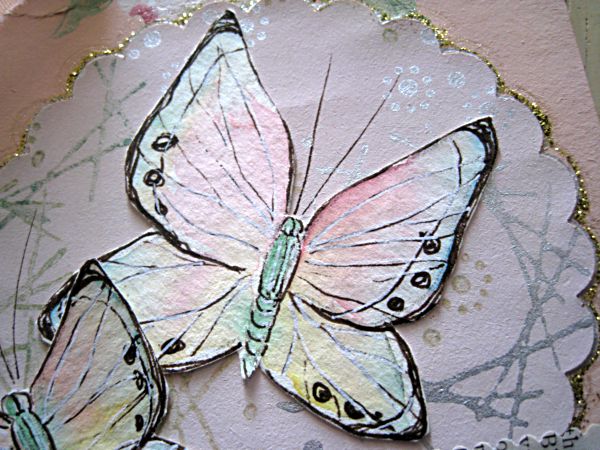
This one uses hand painted butterflies cut out from that heavy watercolor paper too. That just might be my new favorite trick.  I did the same thing, with the hat that I painted for the piece I posted about last time.

Apron 010 

My goal is to paint more. I just adore doing collage work, but have realized lately that I miss painting. So, I'm going to try to mix the two elements more.

Apron 009 

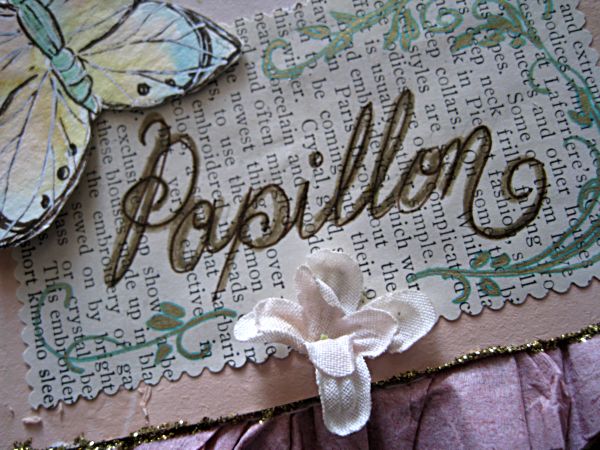
And since I am feeling Frenchie this weekend, I wrote "butterflies" in French on the tag.

This one is a thank you gift for Stephanie who co-hosted the apron swap withHeather.  Butterflies have a special meaning to her, so I hope she'll like this.  The tag with the old hat goes to Heather and the dress form is for my buddy, Beth, because without her, I never would have finished that apron!

Apron 012 

Well, like I said, I have a few little things left to do to get ready for the sale this weekend.  I need to add a bulb to this GREAT lamp. Which I just might keep…..

Banner painting 023 

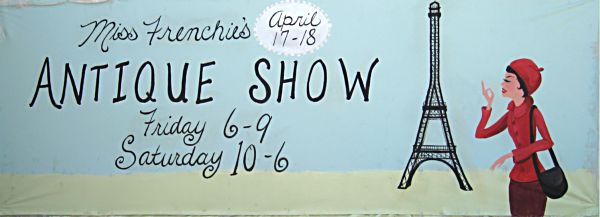
If you are in the area, or wanting to take a road trip to come and see us, come on by Miss Frenchie's sale this weekend! Make sure you come by and introduce yourself. I'll be the one under the lace awning straight back on the left, by the bakery.

That Sewing Blog

give away, how to's, jewelry, Sugarwings, the Boutique at Karla's Cottage

Dorothy skirt 012 

Yep, I sewed some more.  Hmm. Something weird is going on here.

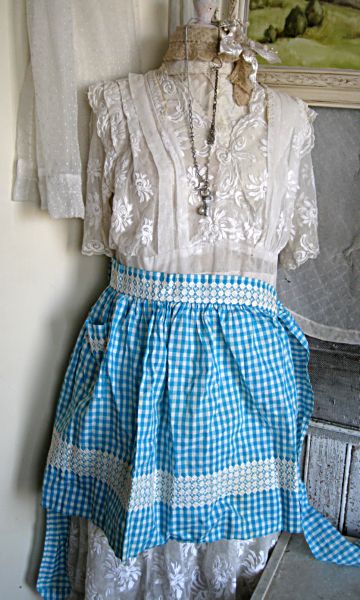
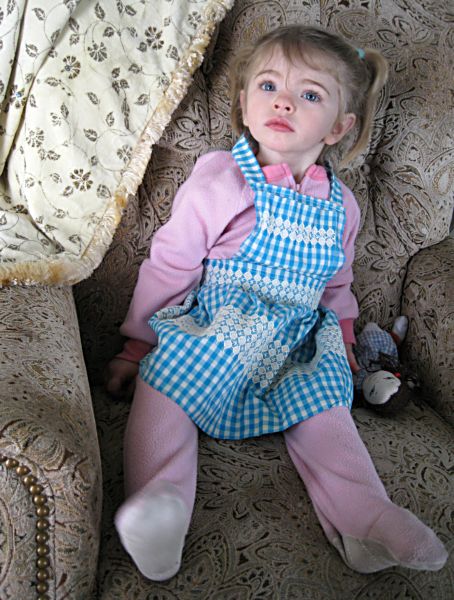
While going through my stash of old aprons for a swap I joined (details later, I only have a short time before the baby gets up and we start our day) I came across this gingham check one.  Sugarwings is Dorothy's biggest fan, sings all the songs from the Wizard of Oz, and sleeps with a Dorothy doll.  So, when she saw this, she wanted to wear it and "be Dorothy".

Dorothy skirt 014 

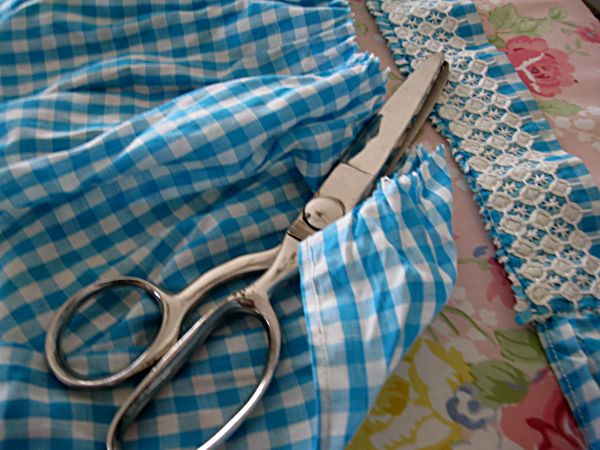
Whats a Grammy to do? I had no choice, it was sewing time again!  That apron was way too big for her as is.  So, I cut off the waist band and tie first, with pinking shears Beth left over here. I need a pair of those, they really are wonderful to work with.

But no, I don't!!! What am I saying??? NO MORE SEWING, I do not need more sewing supplies.  What does it man when I start wanting my very own pair of pinking shears???

Dorothy skirt 015 

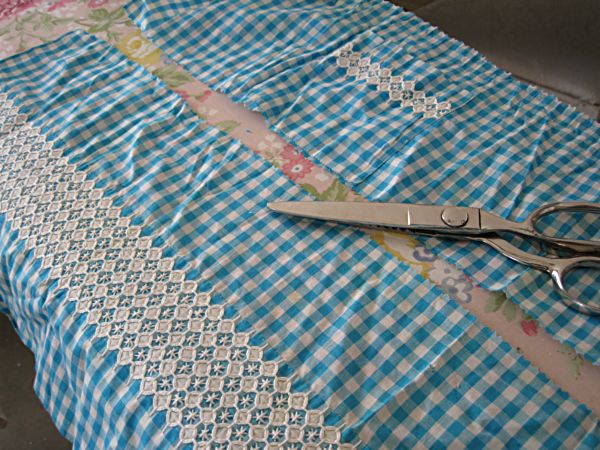
After cutting off the waist band, I cut the skirt part almost in half and sewed the waist band and tie back on. Then cut around the pocket, and used that square as the bib of the pinafore, sewed to the top of the replaced waist band. To that, I sewed scraps that I had cut into straps to go around her neck.  That was the most simple way to do it, to attach straps that just tied behind her neck like a halter.

Dorothy skirt 026 

Sugarwings was pretty happy with the outcome.  Of course, she isn't a big critic, anything she sees that is gingham sparks her imagination and transforms her into Dorothy. The other day she found a pair of pink gingham shorts that were about 5 sizes too large for her (in the hand-me-down box of things she will grow into someday) and was wearing them on her head, dancing around and singing Over the Rainbow.  Apparently any scrap of gingham will do to "be Dorothy" as she calls it.   

Dorothy skirt 028 

The short cut pinafore didn't take long to make, and I spent the rest of the day piddling around getting a few (not many) things listed in the Boutique.

Dorothy skirt 030 

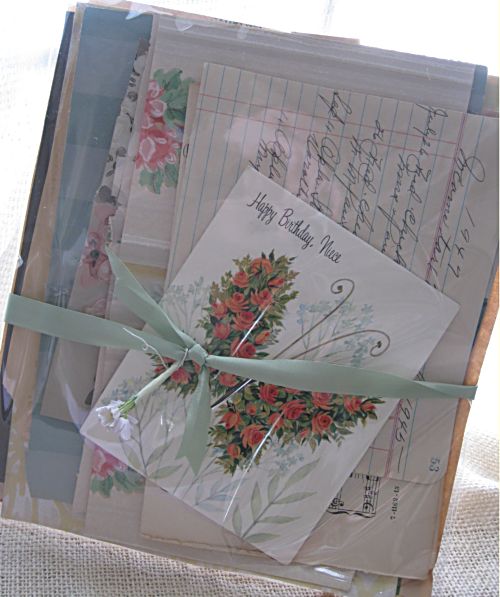
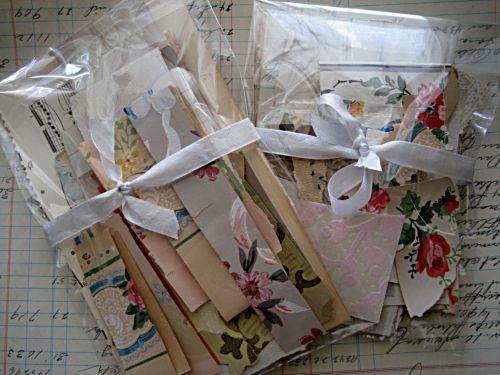
Here is something you might like.  As I work on a collage project, I can't bear to toss the scraps of vintage papers. I keep a box near my desk, trim the bits up and save them.  Its handy to flip through the box for small projects, so I don't have to cut into a large sheet of old wallpaper if I am making something like a tag or greeting card. 

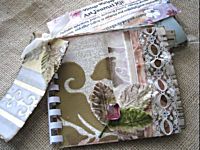
I thought some of you might like having a scrap back of ephemera too, so wrapped up a couple of mixed bags with bits from what I made my journals from last week.  They are $6 each, and I have two listed.
Copy of dorothy skirt 005  Copy of dorothy skirt 001 

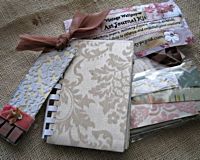
There are also some wallpaper journal kits, and folders listed.  The journals will be in the next Somerset Life and the folders were in an issue last year. 

Brunch 045 

Thanks for all of your kind comments about the necklace that I have offered as the March Giveaway prize. Its one that I made. This week, I have made a ton of jewelry and will show some photos later. I also came up with the PERFECT display idea for selling the jewels and was cackling out loud with glee last night after the fairy grand baby went to sleep and I was able to tag all the earrings that I made.

But for now, I have to run, I hear some one stirring over the baby monitor.

Frenchie Friends

how to's, Miss Frenchie's, paintings

Fariy%20dust 

Isn't that cute?  I told Beth that I would love to be able to add text to pictures of ephemera and use it in my posts, but am way too computer illiterate.  She whipped up this one and a few others for me. When she comes back on Tuesday for us to work on table clothes again, I hope to have her show me how this is done.   It would look good to post my words on ledger paper, or maybe something rosy? At least sometimes, not all the time, I tend to have an awful lot going on anyway.

Ms frenchie 004 

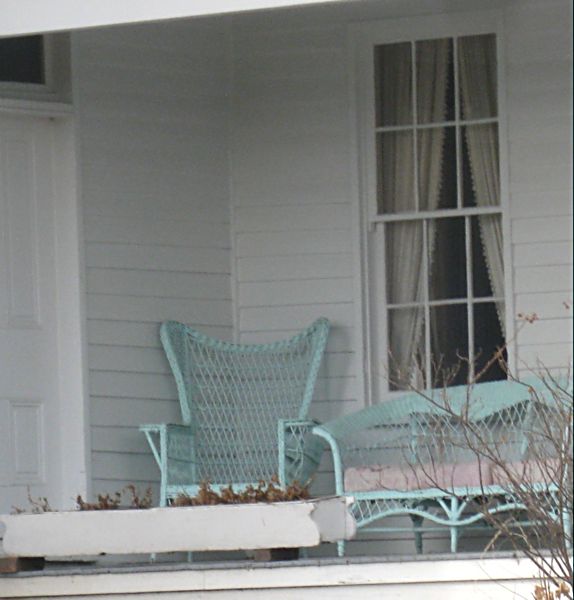
A lot going on, with busy elements in my blog design as well as in real life.  Maybe that is why I was so drawn to this wintry, isolated porch yesterday.  Its solitude was inviting.

The porch is on the back of the historical home, the Alexander Majors House, where we are planning our next Miss Frenchie's Brocante.

Bannertemplate

I met some of the Frenchie gals there yesterday for a planning session. My job in prepping for the show is to make the signs, here is a sample of the banner I will be painting for the outside of the building, so people can see it and find us more easily.

I'm also planning on painting some "murals to go" as backdrops for my booth.

Ms frenchie 027 

Not exactly like this, but along these lines.  A French farmers market scene with lots of flowers.

Ms frenchie 028 

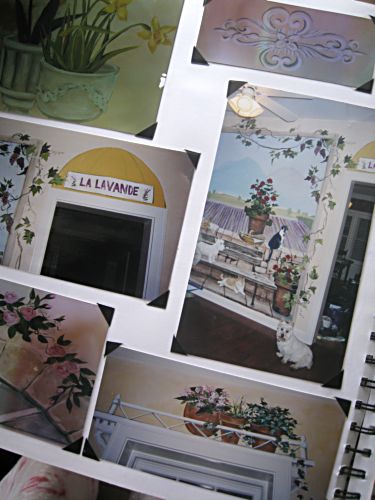
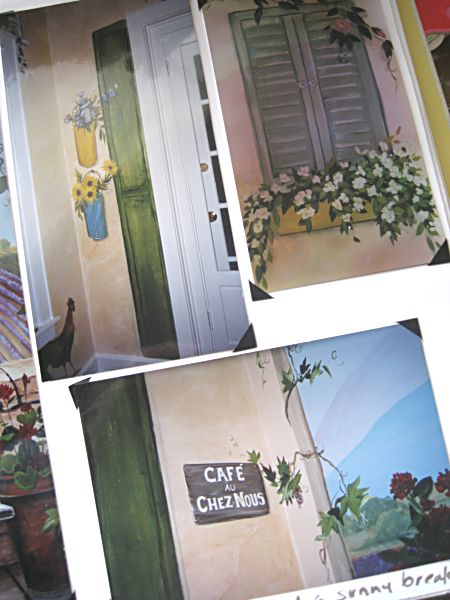
These photos are from my scrap book of murals. This is a dining room in  a private home, but the French Market theme was a popular one and I used it in some restaurants and hotels too.  I think for Miss Frenchie's I will tone down the colors and have even thought about doing the scene in just washes of brown with a hint of color like old photos that have been tinted.

Ms frenchie 001 

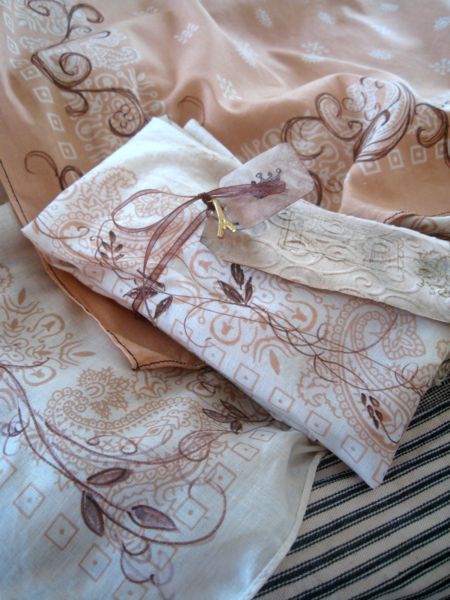
I'm also planning on painting some natural canvas market umbrellas with a simple vine in sepia  like I did on these hankies.

If you are a follower of Curious Sofa Diaries, you probably remember this post. (and if you are not, you should be!! Debbie Dousenberry is the queen of style)

Ms frenchie 002 

Since I was meeting Debbie and Carol at the Miss Frenchie's site, I thought I'd take some thing to Deb as a thank you for all the hard work she is putting in for the show.  She mentioned that she liked bandannas that were soft and aged, since I didn't have any like that on hand, I faked it.

Brand new, black and white bandannas from Target were what  I had. So, I soaked them in hot water and a cup of bleach for most of the day. 

If you are like me and have darker hair that you pay way too much to a beautician to kind of keep blond, then you know how dark colors when bleached, can turn orange.  (I've had the brassy orange highlights more than once) And that is exactly what the black in the fabric did at first. The trick is to not take it out too soon.  I left it soaking about 8 hours and toward the end, the color lightened up to what I wanted.

Then, it looked too new and clean.  So I dunked the cloth into my leftover coffee, let it dry, ironed it and then drew on it with a brown fabric marker.

Ms frenchie 003 

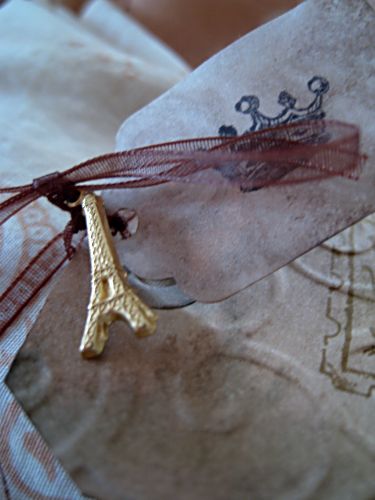
I had been baking yesterday, so I wrapped up home made granola and cookies and tucked them into the bandannas and then tied on some Eiffel Tower and crown stamped tags. 

As a joke, I misspelled Carol Spinksi as far out as I could, because we've been dealing with Travelocity and Air Tran to try to fix a misspelling I did of her name when I booked flights for the two of us.  On the reservation, I wrote "Spinsky" instead of "Spinksi".  And the airlines have NOT been helpful or friendly or anything good about this.  At first they tried to say she wouldn't be allowed to fly at all on that ticket and it was non-refundable!

Anyone else ever have this problem?

Ms frenchie 015 

After measuring spaces at the Frenchie Barn, we decided we needed a treat.  So, Carol, Julieand I went to visit our newest Miss Frenchie pals at Natasha's Mullberry & Mott.

Ms frenchie 019 

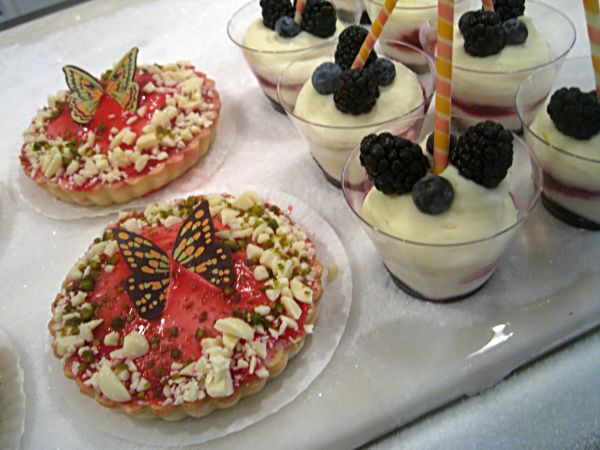
This beautiful bakery is packing up goodies to bring to the sale on April 17th.

Ms frenchie 008 

And I could be in trouble! Their spot will be right next to mine.  All weekend, this is the kind of stuff that I will be staring at.

Ms frenchie 024 

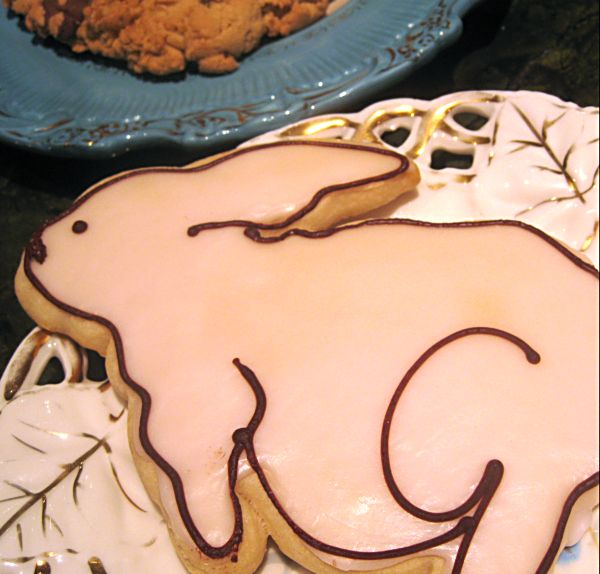
I just hope they don't bring any macaroons, all three of us decided that they were the best ever and I know I couldn't resist.  The bunnies were pretty wonderful too.  We got different varieties and shared a little of each. I immediately called Dibbs on the bunnie's ears.  The ears are always the best part, of any Easter goody.

Ms frenchie 026 
Lets see, I have about 5 weeks or so between now and Miss Frenchie's. Two banners to paint, two murals to paint, stuff to make yet, and lots to tag.  During that time I need to do taxes (ugh) and take a trip to DC, plus of course, all those Sugarwing days I'll have.

Maybe I should go and get to work instead of hanging out on the computer?

I'll leave you with some more delectable goody pics from the bakery, and I am off to get some thing made.

Ms frenchie 020 

Ms frenchie 023 

Ms frenchie 022 

Ms frenchie 021 

Ms frenchie 018 

Ms frenchie 013

Sew what?

Books, how to's

6a00d8345159d669e2011168a26b3c970c-500wi 

In my last post, I mentioned that Bethwas having a giveaway. But I didn't tell you what a GOOD one it was!! She is offering a book by Amy Barickman of Vintage Workshop and Indygo Junction as the prize.  Amy is another reason to be proud to be from the Kansas City area, she is just one of many of our local girls with talent.

500 038 

Beth and I came very close to finishing our table clothes on Tuesday. I made 2 and almost completed a third, but ran out of the right fabrics.  I could have whipped up something that would work, but Beth says she has two more old embroidered pillow cases I can have as part of the skirt.  And that sounds perfect.

Plus, Beth needs time to finish her 2nd cloth. So, instead of my normal way of doing things, which is work on it till its done, then clean up the mess, I decided to LET IT SIT FOR  A WEEK!!!!!!!!!!!  Not easy, I tell you.  But, I'm doing it.  All the sewing stuff is set up in the studio along with a nearly finished table skirt that is calling out to me every time I walk by it. 

But I am being patient.  Which I rarely am.  And I took advantage of having the sewing stuff set up and made pillow cases for my bench.

500 033 

It was a quick stitch thing, since I hate to sew.  Instead of tailored pillows, I took the existing (on sale for $4 each at Hobby Lobby 3 years ago) pillows and made little cases to slide them into.  I sat the pillow on the fabric, cut out around it, then straight stitched up the sides and sewed fringe onto the open ends.  

The cushion on the seat got a similar treatment, but no fringe. It is just left open in the back where no one can see it. If this was a cushion that got more use, I'd sew on ribbons to tie it shut, but it won't be getting butts scooting around on it daily like it would if it was in a dining room or kitchen.  People only sit there to eat a few times a year.

All of this was done on a whim, sloppy and quick, (isn't that something Bobby Lee says on MadTV?)  but it sure makes me happy, because I never liked the original cushions and pillows. I'd had them on the bench for a design house it was in.  But the cushion was made by a professional and seemed to nice too change even though it was dark and not me.

But this is!! Sloppy, quick,  Casual and FLOWERED!!

500 036

Once I had the bench all flowery, I decided that I needed some in my wallpaper frames.  So, I added German die cuts to some of the frames with vintage stick pins.

500 037 

And while this frame probably would fit in better if I'd taken the time to paint it white instead of pink, its kind of growing on me like this.

500 048 

For this flocked gold paper, I wanted something really special, but was out of small frames.  So, I glued some of the world's prettiest wallpaper (from either Heather or Natasha, we shared scraps of our finds that we bought on our trip to wallpaper heaven with Andrea) to a circle I had cut out of foam core poster board.  I edged the edges in gold ink and hung it from a ribbon.

500 050 

This one is something I had hanging in another part of the studio.  Its a vintage rose print (I definitely wanted all the flowers to be roses) on satin, not paper.  I had wrapped toile fabric around the mat board and popped it into a white frame.  If I was doing it just for this project, I'd have used wallpaper instead of fabric, but this is just fine and sometimes, just fine is enough.

500 051 

My Mom had a sewing room that I adored, even though I hated sewing (still do). I could play with her ribbons and stacks of fabric for hours. And I am talking about when I was in my 40s, not as a little kid. 

She was a gifted seamstress and made her own patterns.  But she measured and took pride in her stitches.  If I had to do it that way, I'd never thread a needle again. I like to sew the way the mice and blue birds did when they made Cinderella's dress.  They didn't take a lot of time with it, used what was  laying around and just whipped up something pretty!

Scroll to Top