how to’s

Quick fix for scuffed up kid’s shoes

how to's

IMG_7854
It seems like finding high quality kids' shoes isn't easy.  And there are so many cute, inexpensive options, that I found myself buying a new pair every time we had plans for going somewhere because the girls' shoes looked bad and couldn't be polished.

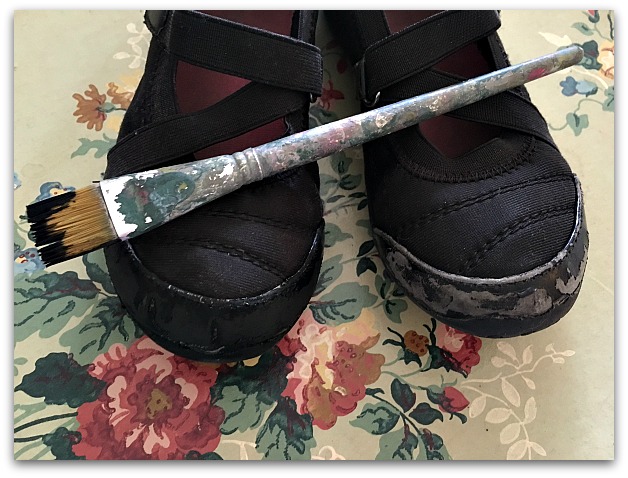
But it seemed wasteful.  So, I thought I'd try paint on these faux patent leather ones and it worked out pretty good. I used the Martha Stewart high gloss.
Shoes 011

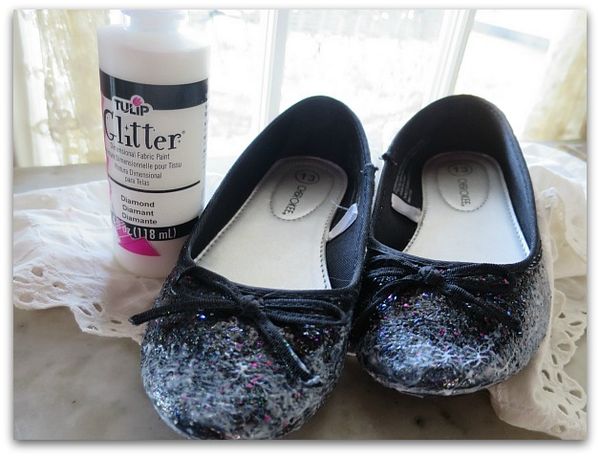
Well, I should've taken a before snap of this pair, but if you have a little girl around, I'm sure you've seen how fast these cute, glitter covered ballet flats get ruined. 

Sugarwings is especially rough on her shoes.  The toes are often scraped up in a day or two.  But I've discovered that they are easy to fix, just add more glitter. 

I don't use the kind you sprinkle over glue, that can be flakey and messy. I've found that the glitter that comes in liquid form is best.  Stickles brand, or generic, it comes in any color you could ever want (including the shade we repair Ruby Slippers with, very necessary around here!)

Shoes 012

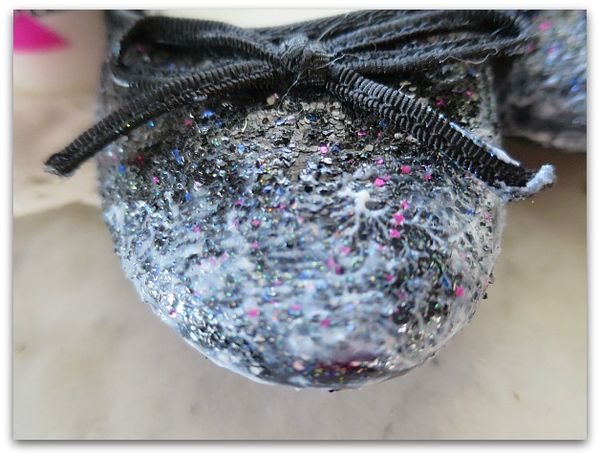
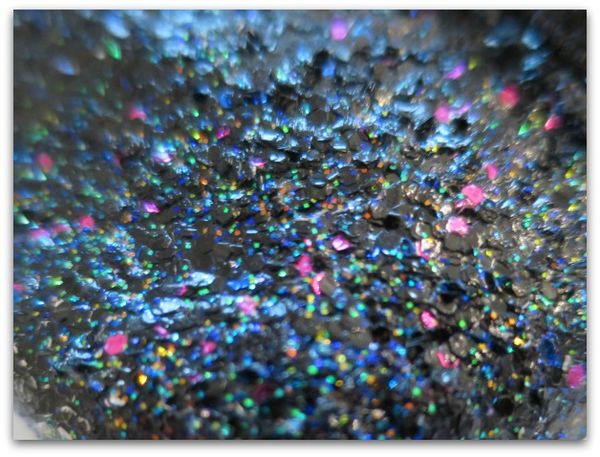
This is something that takes moments to do. Smear it on with fingertips or a brush and then set it aside to dry. It goes on white, then dries clear with sparkling flakes.

Shoes 015

Tah- dah!

And as it scrapes off again, you can easily add more. 

Of course, the best thing ever, is a good pair of nice, leather shoes that can be polished.  But my grand fairies adore those sparkle covered, inexpensive shoes from Target.  I'm just kicking myself because I spent too much money replacing them instead of re-glittering them for so long.  I should've thought of this years ago. 

Adult Coloring tips for the Downton Abbey art journal

drawing, how to's, swaps, Television, Tutorials

Coloring page downton sisters 040

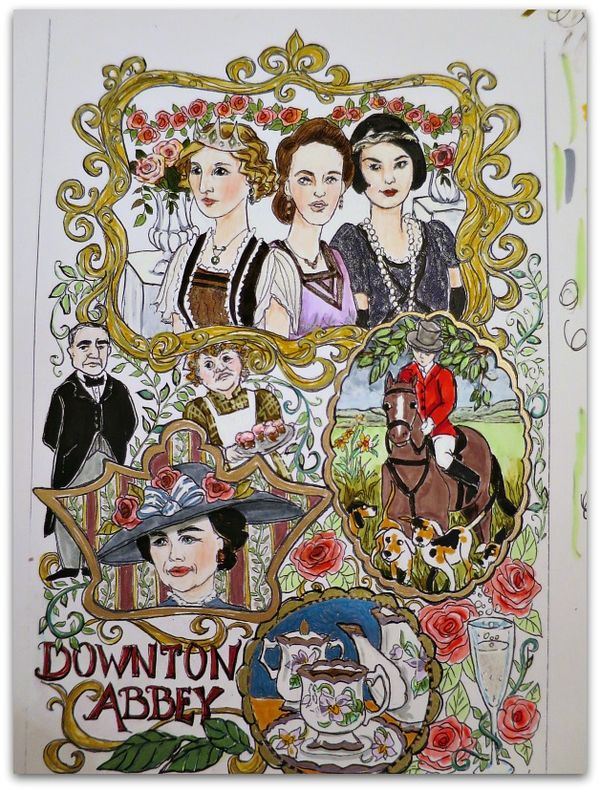
The second coloring page promised for the Farewell to Downton art journal swap is finally ready. It was something I thought I'd do on a couple of different trips, and I'd travelled with my drawing tools, but never opened them.  Once I got back to the comfort of my studio, I was able to make time to get some drawing done.

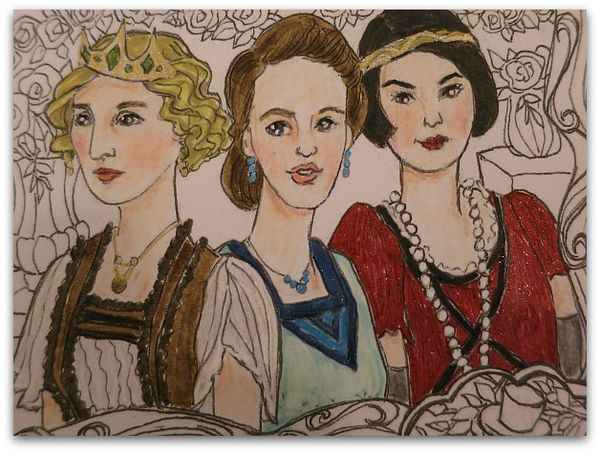
Here is one version of it colored in.

Coloring page downton sisters 041

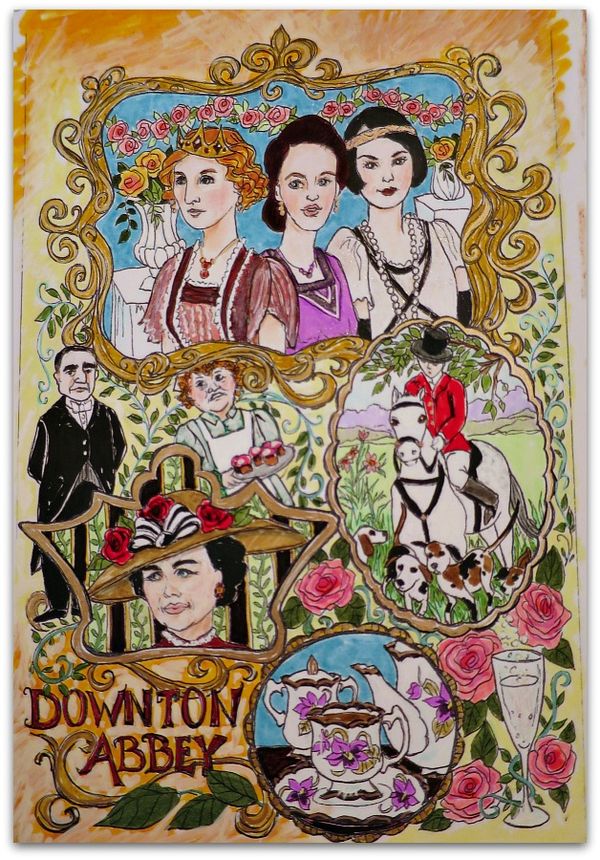
And here is one more.  

There will be two different coloring pages included in the journal each participant will receive, and they will be loose pages. If you want to, feel free to scan them, make multiple copies and try different looks yourself.

Coloring page downton sisters 020

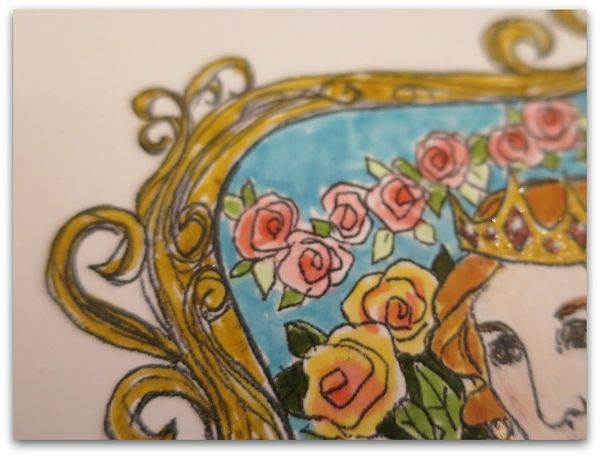
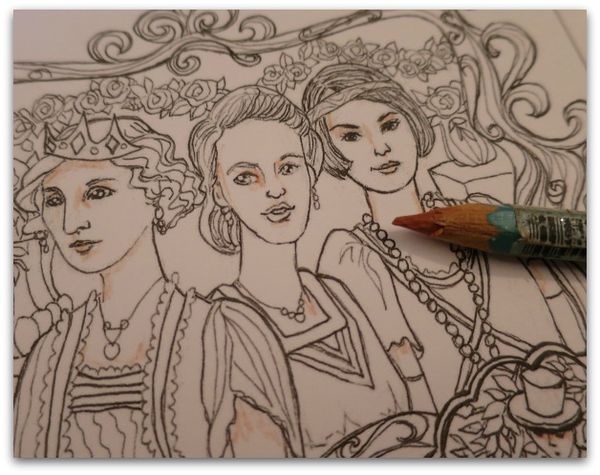
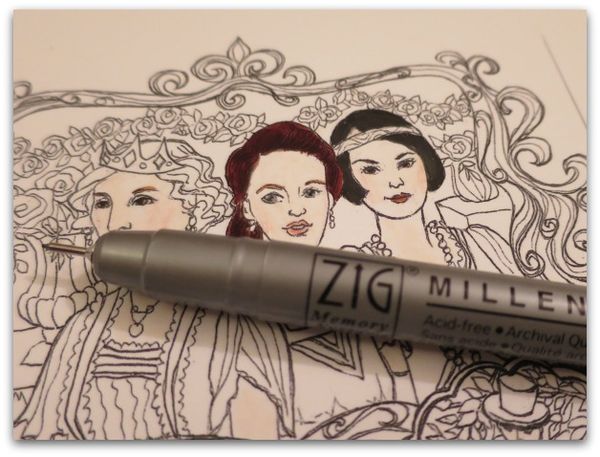
I thought I'd show a few in progress pictures of the pages I did.  For the frame at the top of the picture, I used a gold glitter as a base.

Over that, I highlighted with a gold metallic pen. (not shown in this photo)

Coloring page downton sisters 022

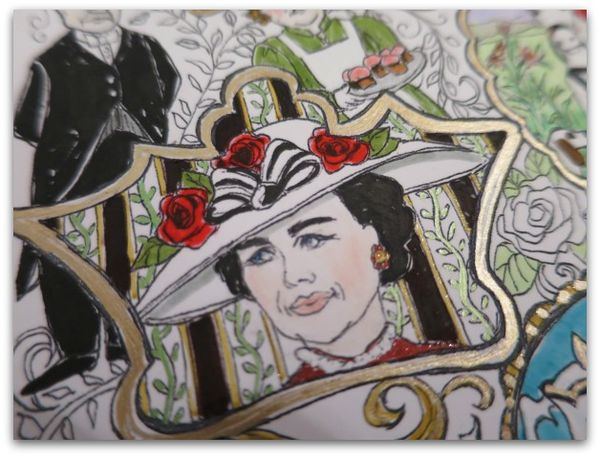
 On this frame, I used the gold pen only.

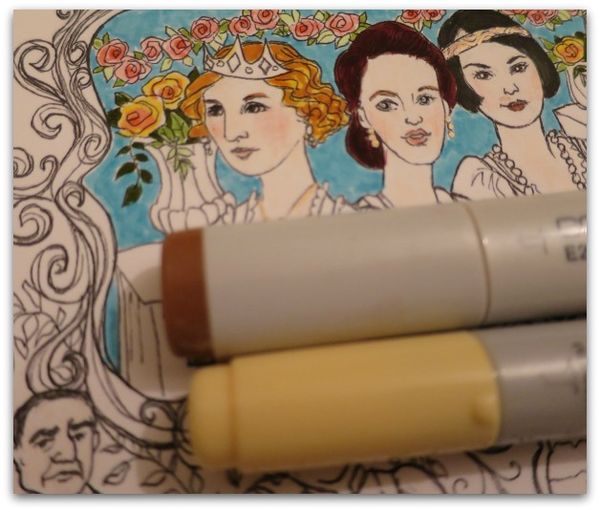
For me, a mix of metallic ink, glitter markers or ink, opaque white ink, markers, and a black liner pen to go over the drawing after it is colored all used together make the page more arty looking than just colored.  

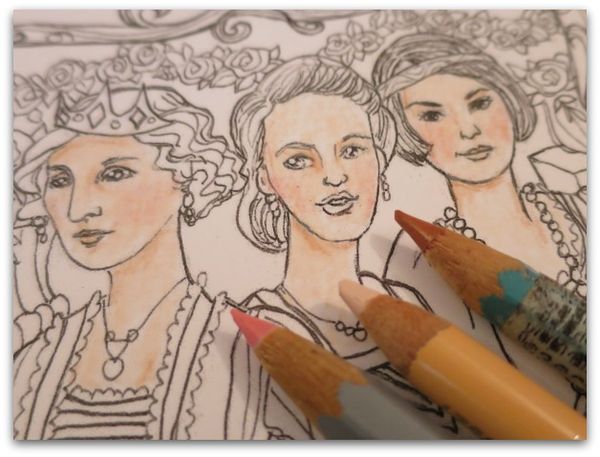
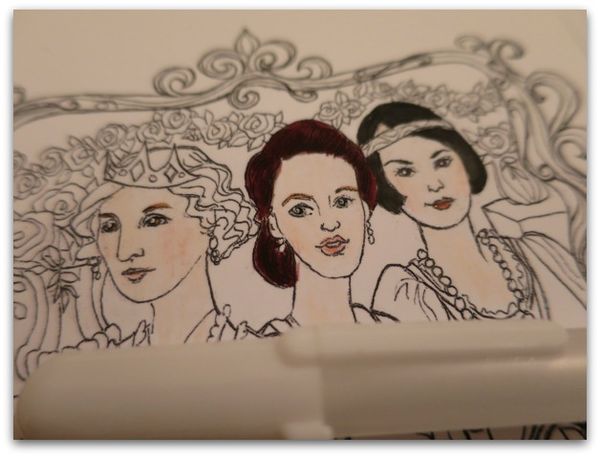
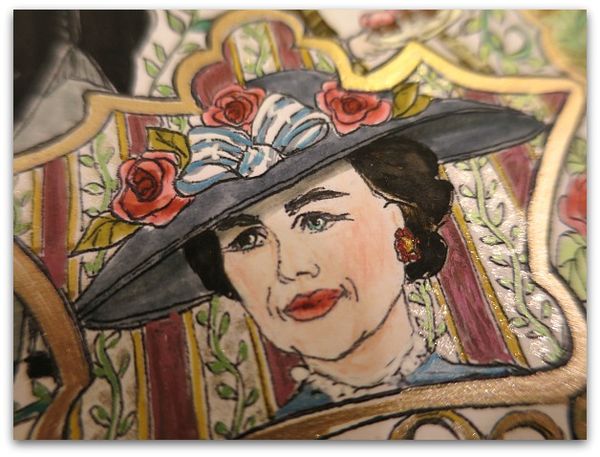
And I think that colored pencils make the faces much prettier than markers do.  It is a softer look for skin tones.

Coloring page downton sisters 027

For these sisters, I used a tan/brownish, a peach and a pink.

Coloring page downton sisters 026

The darkest color went where you'd see a shadow.

You can find more tips for faces here.

Coloring page downton sisters 018

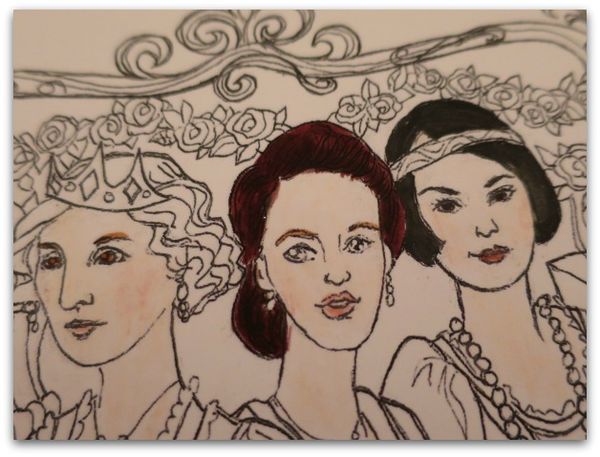
For pretty hair, I like to use at least two colors.  The lighter the hair, the more important this is, like on Edith's head. But even Lady Mary got a dark brown with a black marker over it.

Coloring page downton sisters 015

When I color in the eyes, I can lose some of the drawing, so it needs to be added back in.

Coloring page downton sisters 016 Coloring page downton sisters 017

First with a black detail pen to redo the pupils, then with a white opaque pen to add the highlights.

Coloring page downton sisters 029

Much better after those details are added to the eyes.

Coloring page downton sisters 037

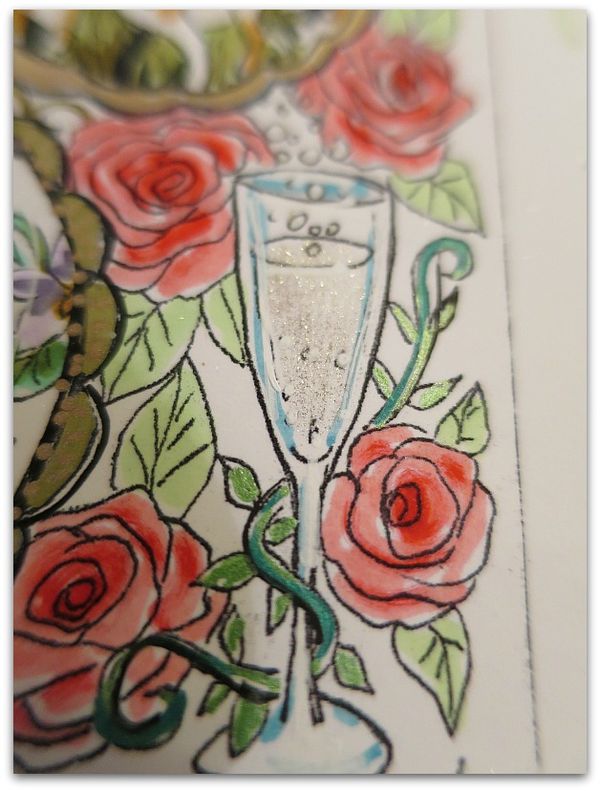
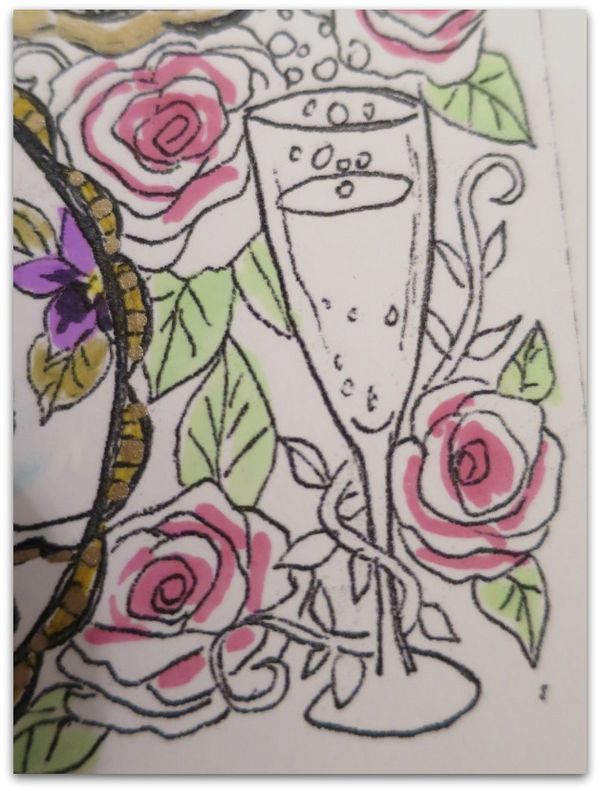
The champagne glass was done with the world's best pen, Gelly Roll Stardust Glitter, in clear. That was used on just the wine and the bubbles, then I shadowed the glass with light blue and highlighted it and the bubbles with opaque white.

Coloring page downton sisters 024

These larger roses got a teensy bit more detail than the roses at the top of the page. All were done as I described in this post, But for these, I was more careful with where the darker colors went.

 Instead of just blobbing the rose color onto the center of the flowers, I tried to find the shadows on the inside of the petals.  Still, it was a quick process, and not a lot of care went into it, blending over the dark color with a softer pink, then adding one more dark tone to the very center evens it out and makes it pretty, without trying to be too perfect.

Coloring page downton sisters 039

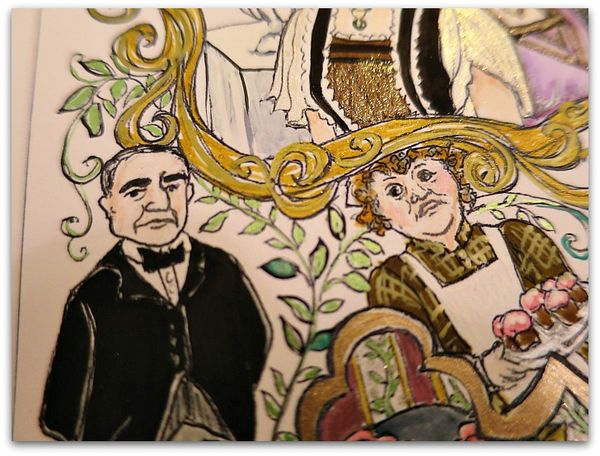
For myself, the most complicated part of this page was the black on black of Carson's uniform.  You could get around this by using gray if you'd rather. Black marker tends to cover up the entire suit and you end up with a big, black blob if you aren't careful. 

To avoid this, either use gray marker, or black pencils, or do as I did, and only draw with your black marker up to the very edge of the lines, leaving a margin of white.

Coloring page downton sisters 035

Leaving some white showing throughout the drawing is very important. If you saturate every tiny bit of the paper with color, it will look flat and dead. Going back and adding highlights with a white opaque pen is good to do, and sparkles of glitter help too. 

But, with this kind of coloring, leaving some white, really makes the page look better. You can be precise like I had to be with Carson's suit, or you can just have "skips" in your marker lines.  Or purposely leave areas the white of the paper as a color choice.

Coloring page downton sisters 030

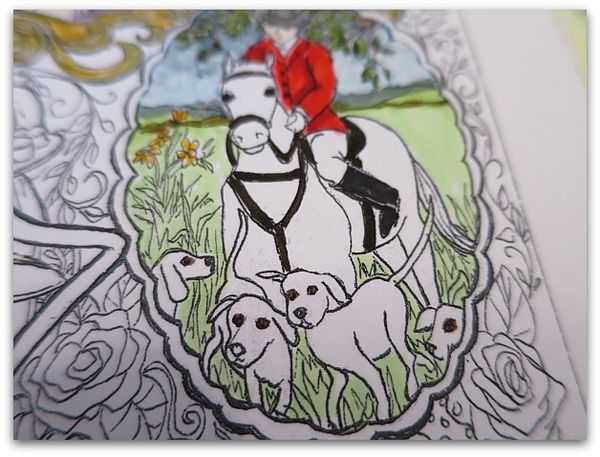
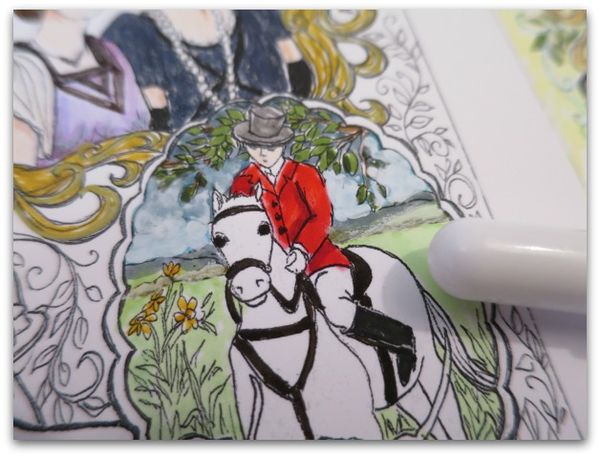
In the fox hunt scene, try to remember that colors in the distance fade and are softer than in the foreground. (at this point, the foreground is just background colors, I added deeper tones to the grass later on)

My distance colors were too dark, and tried to fix it with a white opaque marker.


Coloring page downton sisters 031

That helped a little.  But it would have looked better if I'd just remembered that hills and trees far away would be pastel colors.

Coloring page downton sisters 032

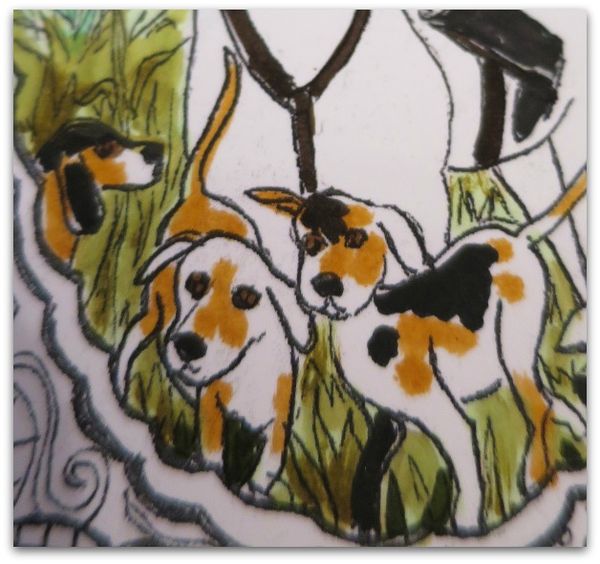
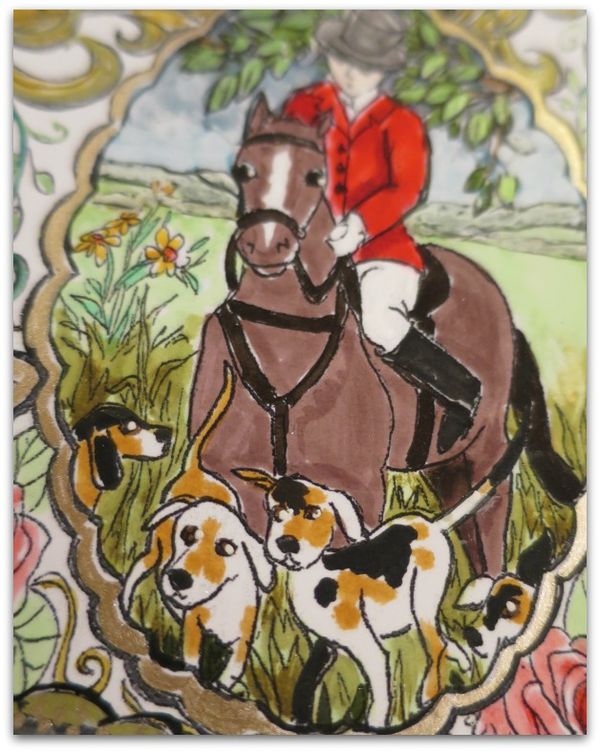
For the hunting dogs, I added random spots.

Coloring page downton sisters 036

Oh, and don't forget that the animals' eyes will need a white highlight after coloring them.  

Also, the horse can be a danger zone for becoming a big blob, like Carson's suit.  To avoid this, don't try to do a black horse unless you go with brown boots and tackle.  I kind of like the horse I left white the best.

Trying different looks was addicting, I've colored about four of these now.  If you are in the swap, I hope you will scan your black and white drawing before adding color, so you will be able to print more to color and play with.


Coloring tips for pretty roses

drawing, how to's, swaps

Dowager 021

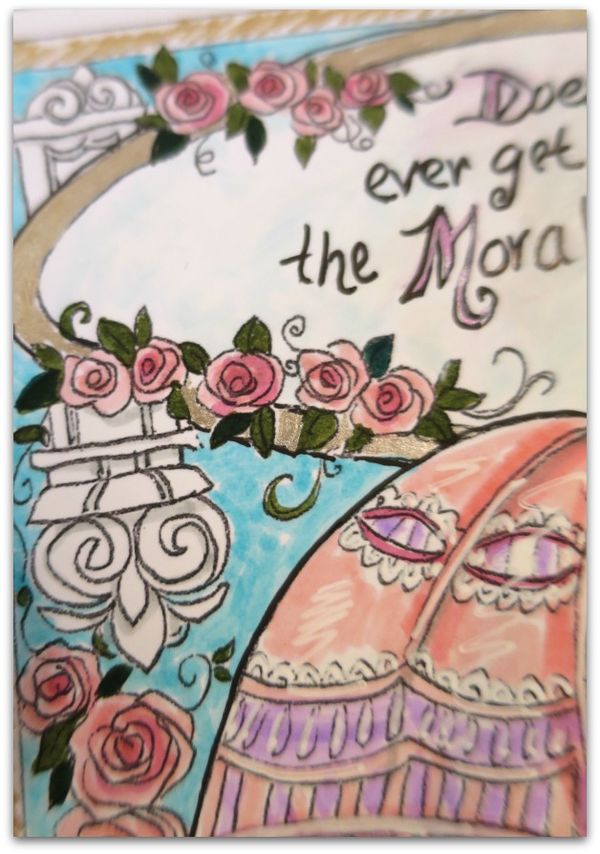
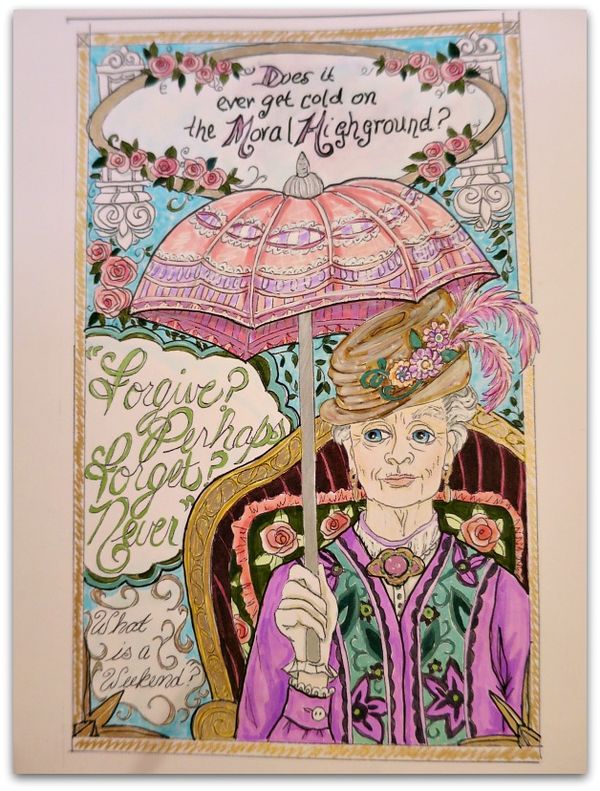
The Dowager's coloring page in our "Farewell to Downton" Art Journal Swap has swags of roses around the banner at the top.  There are also some on the pillow of her chair.  Here are some tips for tinting them. 

First rule:  

Do NOT feel like you have to color inside of the lines!

Be free and easy with your colors, don't try to be perfect.  

Dowager 015

See what I mean?

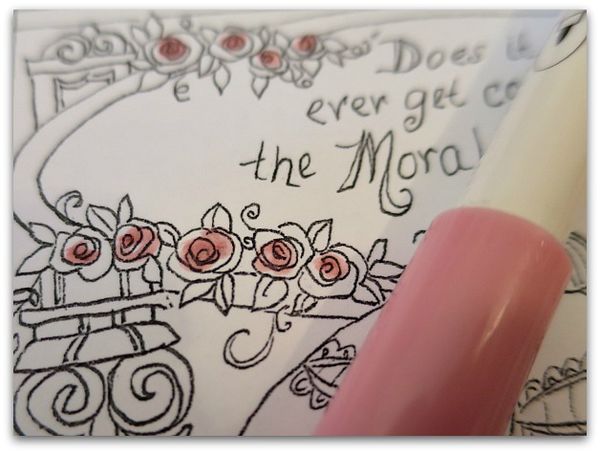
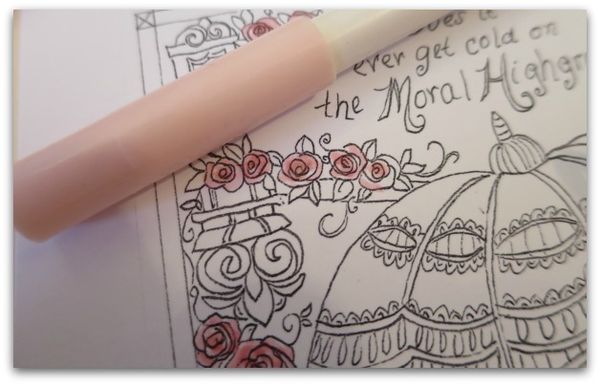
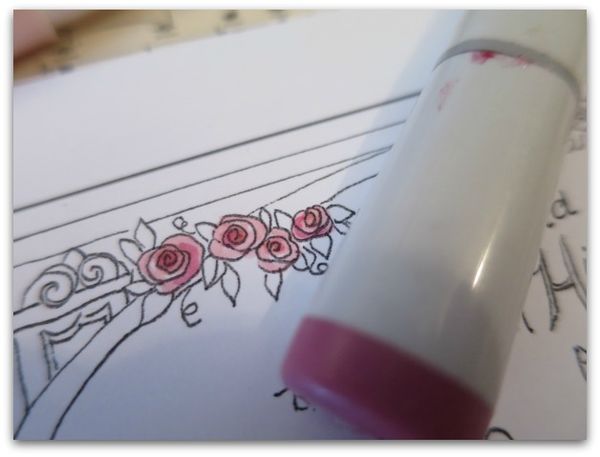
I take a medium pink, and kind of messily add color to the centers of the flowers.

Dowager 016

Then, fill them in with a light pink.  Notice how some white of the paper still shows through?  Those little "skips" add sparkle and life to the page.

Now, you can be really arty and make sure the skips are intentional and placed exactly where a highlight would hit the petals.  Or, you can just be scribbly and not color the full petal in, either way, you get a pretty feel.

Dowager 017

Over the two lighter pinks, I like to dot a dollop of darker pink into the centers of the blooms.

For my leaves, I have only used two colors of green, my typical way of doing these things is to use three tones.  But this worked too.  Color all the leaves the lightest color of green that you are using, Then add a darker tone to some of the leaves. If you'd like, add a third darker shade to some other ones.

Dowager 020

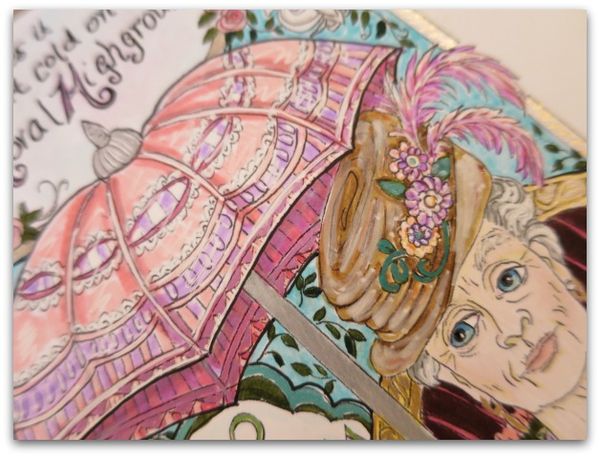
One thing all of my finished pages have is highlights done with a white opaque pen, like you see on the umbrella and on the feathers.  

I also like to use a white opaque marker to soften and blend, like over the brown of the hat. 

Metallic pens add dimension, and are even prettier if done over a previously colored area. The umbrella handle is grey marker with silver ink over it.

And one more thing that makes a picture look complete, I have re-outlined some of it in black ink again.  Not the whole thing, some lines are left soft.  Here, I drew around the outside of the umbrella, but not all the small details.  Also, around the top banner and words, not the flowers, around the outside of the chair, and her jacket, again not the small details.

Dowager 019

If you'd like to do your own, these pictures are included in the Farewell to Downton swap.  Details here.

Speaking of Downton, I'm off to meet Beth and have yet another Downton adventure! This one is with Deb Hodge, who I have always admired and wanted to meet. We are attending her retreat on Coronado Island.  But first, I'm spending some Cali time with Sugarwings and my handsome husband. Please do sign up for the swap, and I'll catch up with the lists and record keeping when I return.  

Elf shoes

holiday decor, how to's

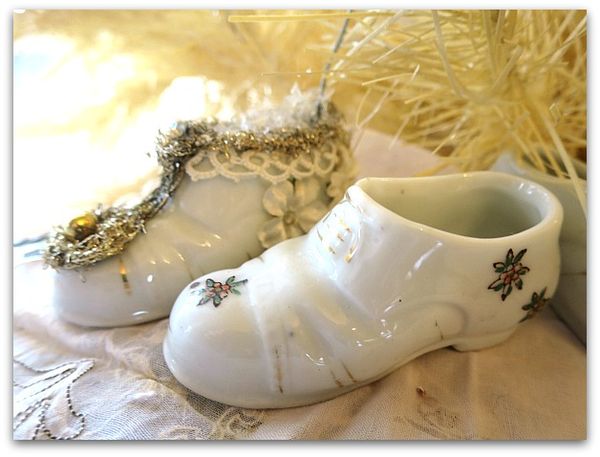
Chinashoes 002

Beth and Karla came over to visit for a much needed afternoon of laughter and crafters last week.  Beth stitched, Karla did some crochet, and I worked on these elfin booties.

Chinashoes 001

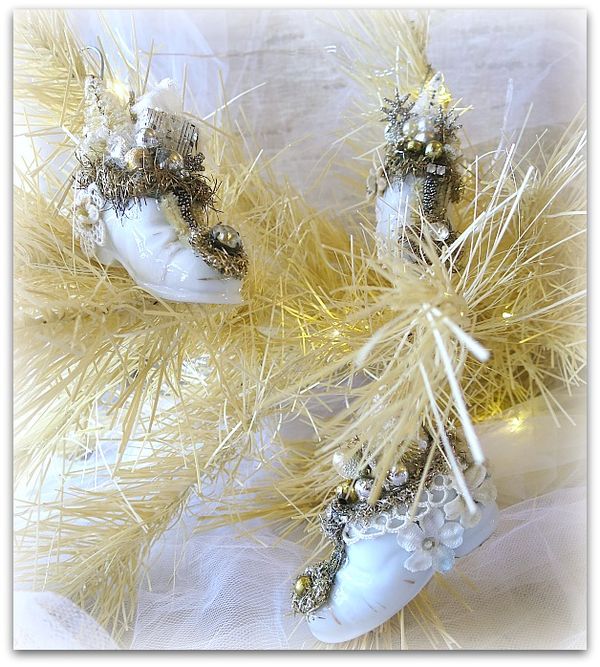
They started out as tiny, Made in Japan porcelain shoes. I didn't care for the orange flowers on them, but liked the shoes themselves, so thought I'd cover up the flowers somehow.

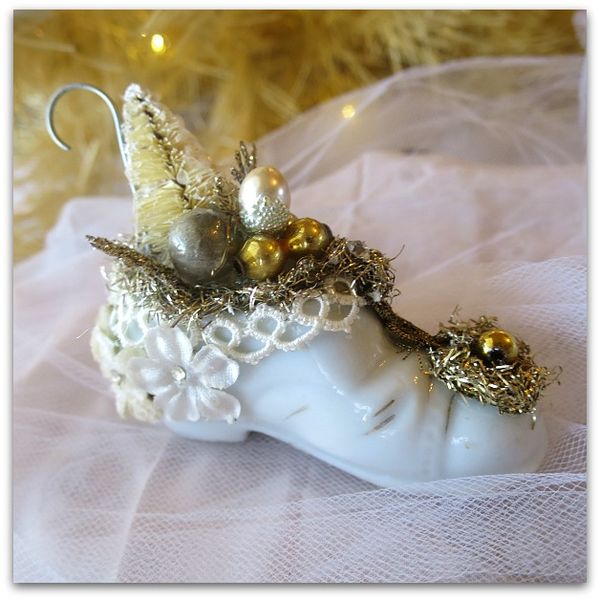
That became a whole makeover from sole to top.  The toughest part was making them into something that could hang on a tree.  While they would be sweet sitting around on a table top, I really wanted them to be tree ornaments.

So, I took a long wire, twisted it to fill the bottom of the inside of the shoe, then flooded it with glue.  Over that, I stuffed the shoes with fiberfil, and topped it with mica flakes.

Chinashoes 003

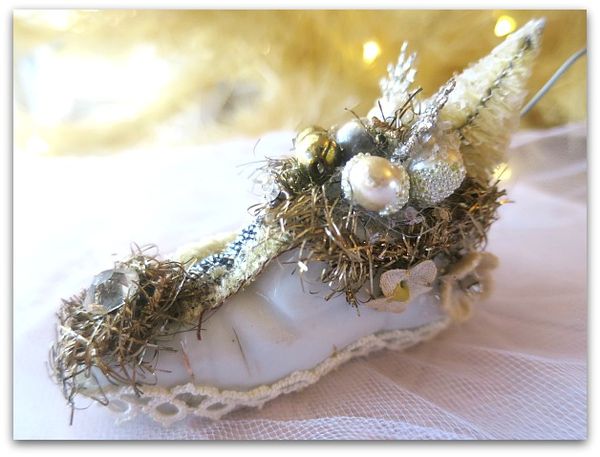
After the structural part was finished, I could get on with fun parts- the foofing!

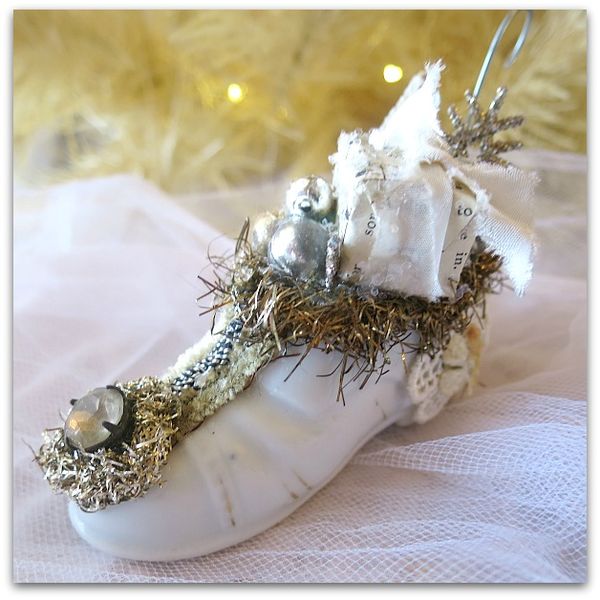
Chinashoes 005

And the filling. This one has a tiny, wrapped gift.

Chinashoes 007

Each is just a little different.

They are $12 each and you can find them here.

Chinashoes 009

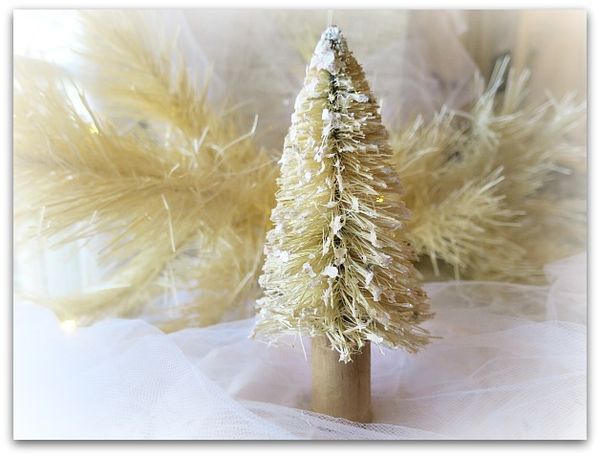
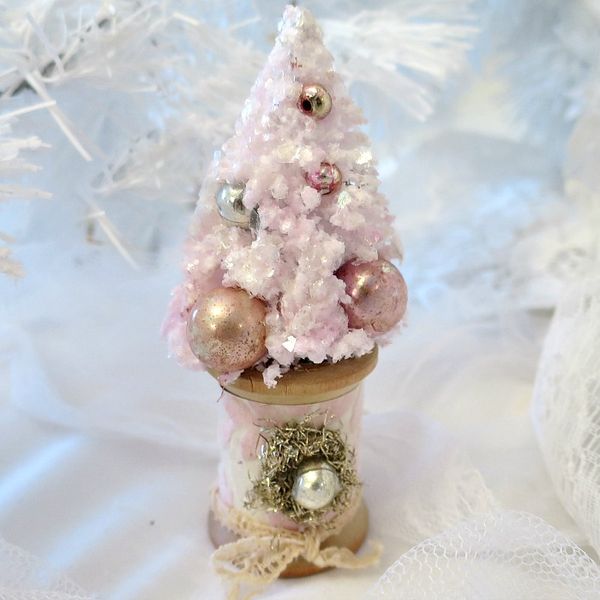
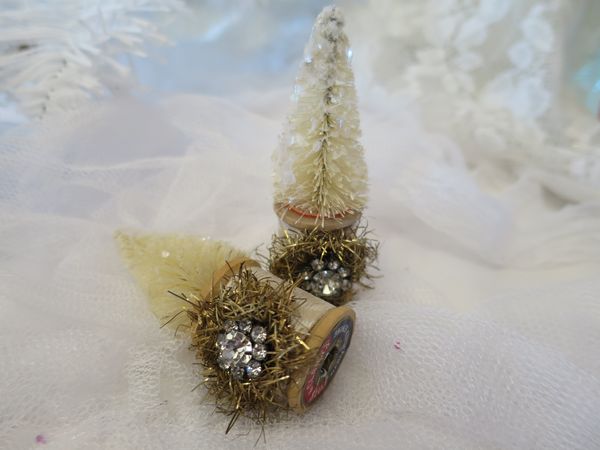
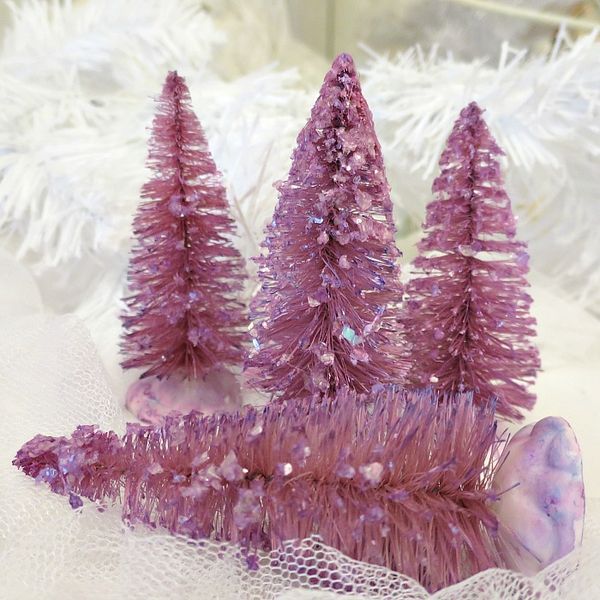
I've also started glittering and dyeing trees. This might be my preferred look for this year.  The tree itself is a natural tone and sits on a simple, vintage, wooden spool.

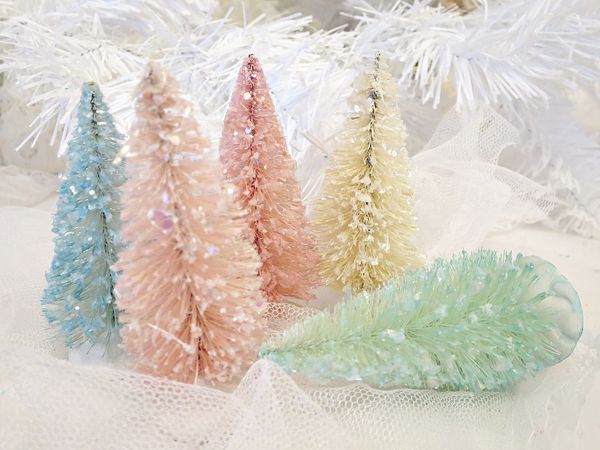
So far, it is the only one I have listed on Etsy in this color. More to come, I hope… there are some whites and pastels and I do have a table full that needs organizing, photographing, and listing.  

But for now? I'm off to the grocery store to fill my car with ingredients to fix a feast for our big gathering on Thursday.  I've got some helpers chipping in on the cooking, but there are some special tidbits I have in mind to make too. 

I hope your planning is going well, too.  Have a good holiday week!


How to paint cabinets with NO PAINT and NO SANDING at all, and some Venetian Plaster tricks

cottage, how to's, Kitchen remodel, paintings

IMG_4867

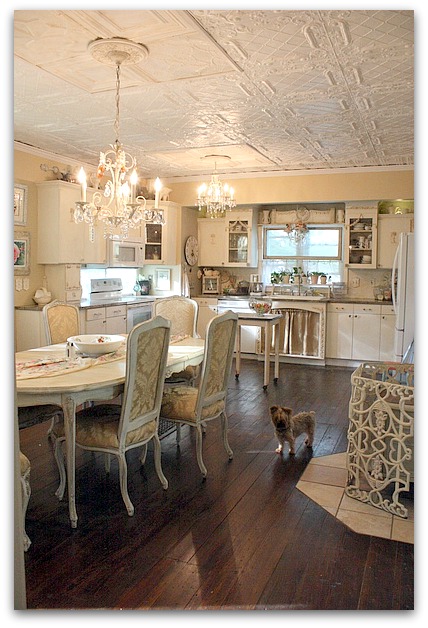
I've been redoing my kitchen recently. Here is a before photo, which isn't bad. But- this was a couple years ago and there has been some wear that required touch ups.  The swags on the glass cabinet fronts had been knocked off, and those two cabinets had to be sanded down after taking off the cracked remnants of the trim.  I no longer had the same paint color, plus, those cabinets hadn't been repainted in a long, long time.

I've been jonesing for an all white look.  (hmm, does that term age me?  "Jonesing" might be something we said back in the 70s) For years, I've loved that look, but have never had it in my own house.  I tend to go cream, tan, or ivory when I decorate. But I've been drawn to photos of pure white rooms and always wanted one of my own.
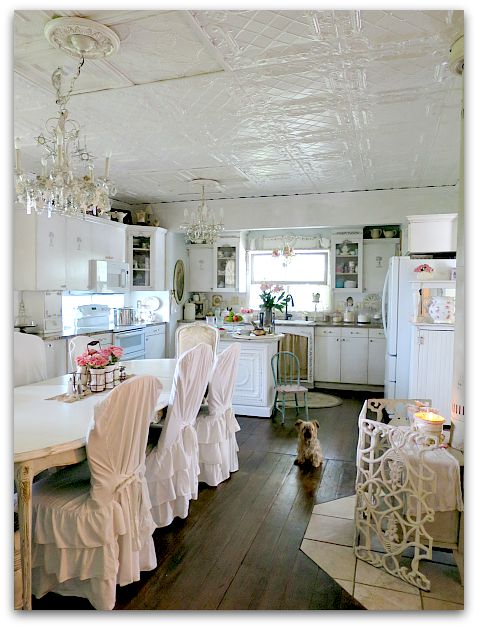
Kitchen plaster 020

And I got it!

Kinda.

 And I really, really do love it. I kept quite a bit of the ivories and creams, because I still love them, and like the mix. But the overall effect of the room is pure white. Especially in photos.  In real life, you can see more of the textures and tones, and the room feels a bit warmer than the pictures show. 

But still white.
Kitchen plaster 027

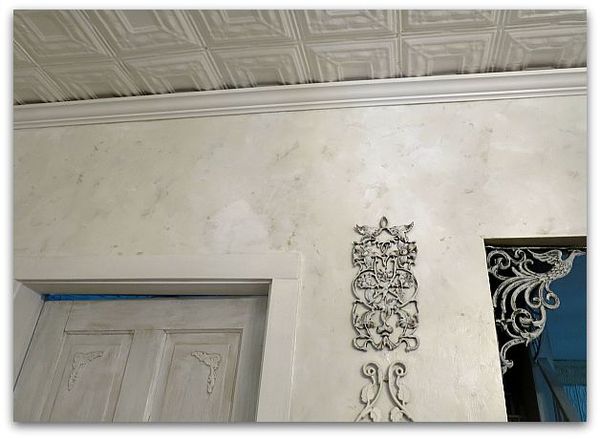
To pull off white without the room looking stark, I felt like textures were important. The ceiling is already quite texturey from the vintage ceiling tiles, and the doors are dry brushed with 4-5 different whites and creams. (Which happened at first by me touching up paint every year or so, and dry brushing over smudges and finger marks with a different paint that was already on the door. I liked it so much, I just dry brush various whites onto it when I repaint periodically- a happy accident that turned into an "I meant to do that" situation.

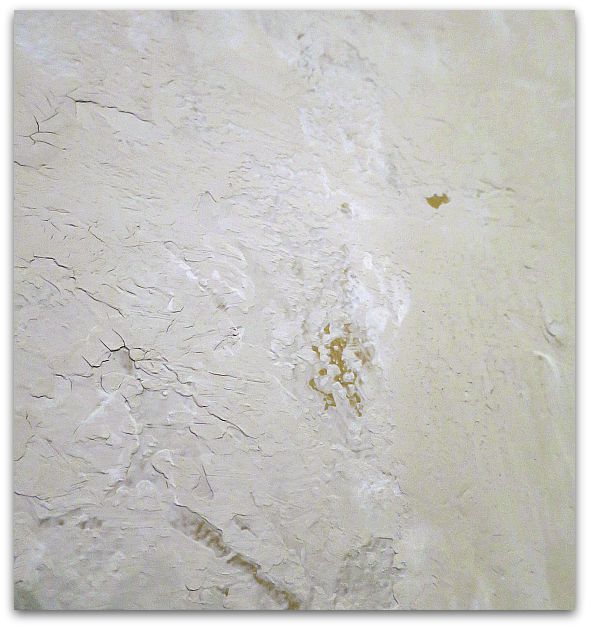
And for the walls, I used Venetian Plaster by Behr instead of just paint.  
Kitchen plaster 001

The walls were already kind of a tan, which made a good background color that I let peek through in some spots.  But the plaster color chart didn't sport any choices that I liked, it was pretty limited. So, I went  with plain, untinted, as is, plaster straight out of the can.
Kitchen plaster 004

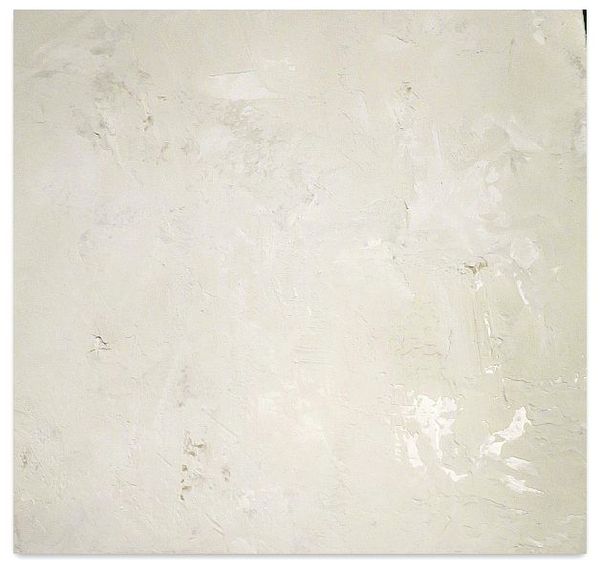
Trouble is, it was a tad bit gray, not as bright as I wanted.  I fixed that by using Behr pure white paint along with it.

I scooped out about two cups of plaster into a paint tray, and poured approximately 3/4 cup of white paint over it.  Next, I took a 6" wide, plastic dry wall or putty knife thing and troweled the mixture onto the wall. It mixed as I troweled, with some areas more white, some more gray, some both.
Kitchen plaster 031

This is NOT what the directions say to do.

But it worked for me.  I went around the room 3 times, doing this.  I also didn't let it dry as long as the directions said, or hold my trowel at the same angle that was suggested.  I didn't burnish it either.

I held the blade pretty flat against the wall each time, the coats I made were thinner, which is probably why I needed three instead of the recommended two. (If I could do much math, I'd tell you the angle)

It was looking like there were tracks in it from the edges of the knife, so I took my red handled Tim Holtz scissors that I love so much, and that will cut through everything, and trimmed the edges of the blade to a curved shape.
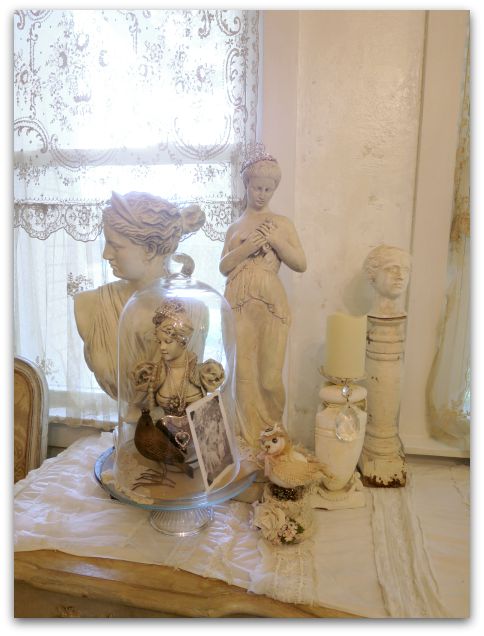
  Kitchen plaster 028

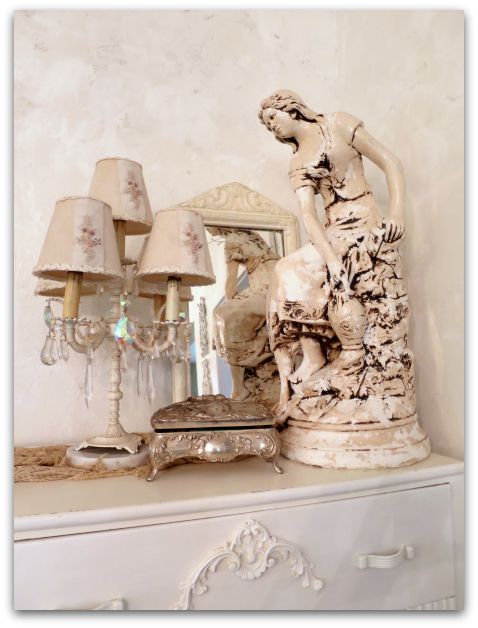
Over the top, I put three coats of Minwax Polycrylic clear coat (water based- satin). I used three because I like the depth that gives the plaster.  I was hoping for a marble-y effect.  

I think that the layers of subtle colors on the wall give the room the light, bright, white feel I was hoping for, but still blend well with my ivory curtains and whatnots around the room.
Kitchen plaster 006

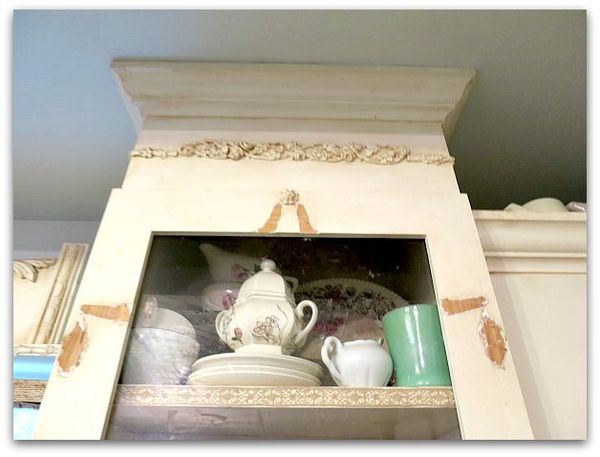
After the 3 top coats on the wall, I started in on the cabinets. The broken swag embellishments had to be pried off, then the wood sanded down.
Kitchen plaster 009

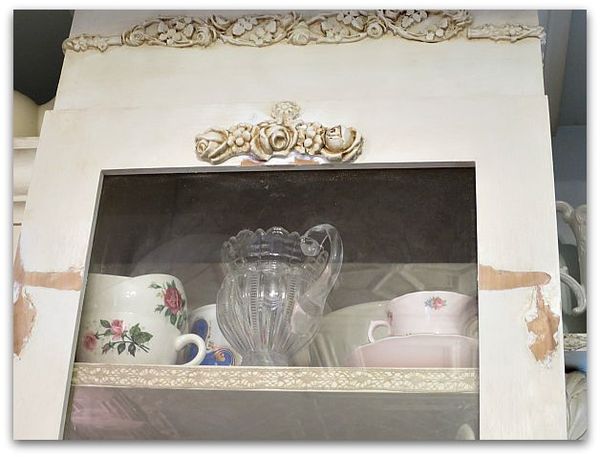
I salvaged the roses from the center of two of the swags to glue to the top of the glass.  
Kitchen plaster 012

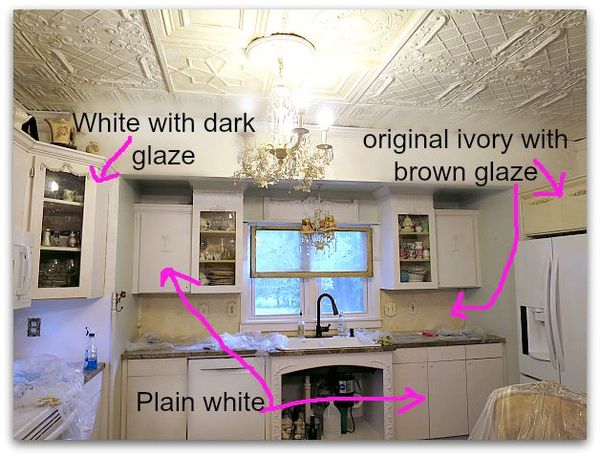
Here is an in progress picture.  Some of the cabinets painted white, some stained, some as is.

Next, I painted them with bonding primer.  I didn't want to sand the existing paint, and if you use a primer that says "will adhere to glossy surfaces" or "bonding" you don't need to sand.  Even over oil based paint, like I had used on the cabinets originally.  Very much like in this tutorial, but with a brush, not a spray can. Kind of like we primed cabinets in this post.

It took two coats of primer to get a good cover.  I used one of those small rollers meant for smooth surfaces.

I sincerely loved the white, white, white look of the primer.  BUT- I knew that I couldn't live with that level of cleanliness, too many people worked in my kitchen, too many big meals were prepared there.  Too many splashes down the fronts of the cabinets. Now, I'm not saying I'm a pig, I do wipe the doors off regularly, but not every ten minutes.

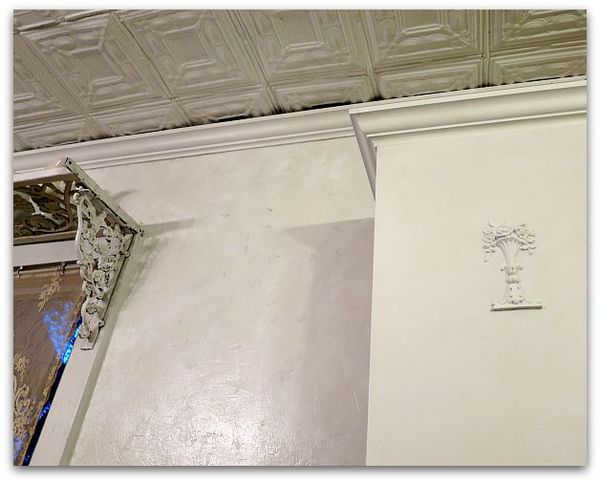
So, I decided to add a dark glaze.  If done right, it wouldn't take away from the whiteness, it would just accentuate the rose embellishments and help hide smears that happen as we work in the room.
Kitchen plaster 010

This picture is of a primed door.

Since I decided to use a glaze and a  water based clear coat, I decided that I didn't need to do the painting step.

You CANNOT use primer alone and leave it! It is meant to be used under paint. But- glaze is a form of paint, and water based clear coats really aren't that different either. 
Cabinet 004

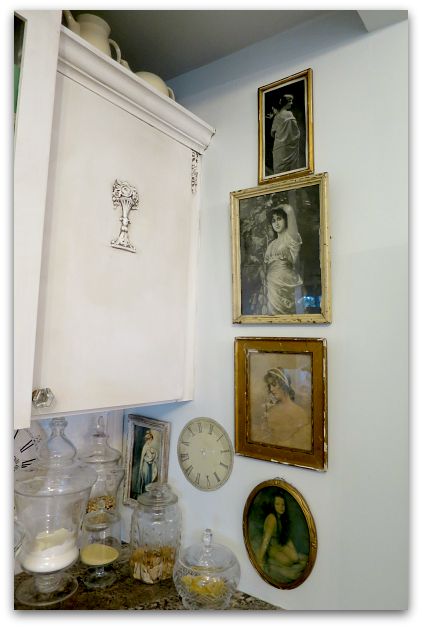
But then, instead of tinted glaze, I kind of experimented and used Martha Stewart wood stain (water based) because it was on clearance at Michaels and because I liked the dark, dark walnut color of it. I thought that it would look great with the granite countertops, and could be used directly from the bottle, no mixing like I'd have to do with glaze and paint. 
Cabinet 003

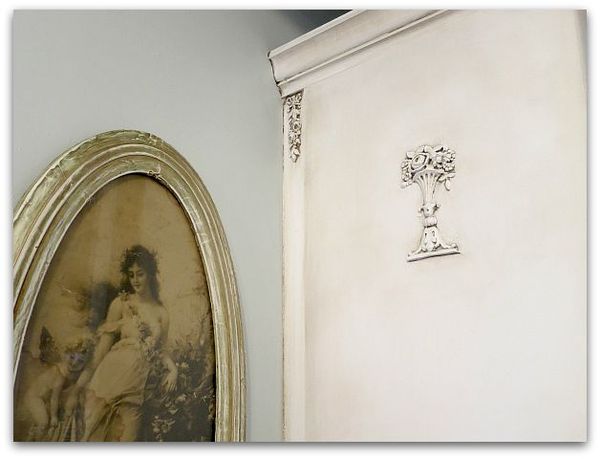
I discovered that glaze might be easier, the wood stain had a learning curve.  The trick is to work in very small areas at a time.

First, I brushed the deep color into the embellishments, and wiped it off with a damp rag. Then I buffed it with a dry rag.   After that, I ran a brush full of color all the way around the edges of the door, and blended it with the wet, then the dry, soft rags again, working the color from the outside toward the inside.

If I got it too heavy, or if it dried too quickly for me to get the blended look that I wanted, I found that a wet, Magic Eraser was perfect for lightening up any mistakes!

The crown molding was simple, brush color onto a couple feet, wipe, and keep going.
Cabinet 002

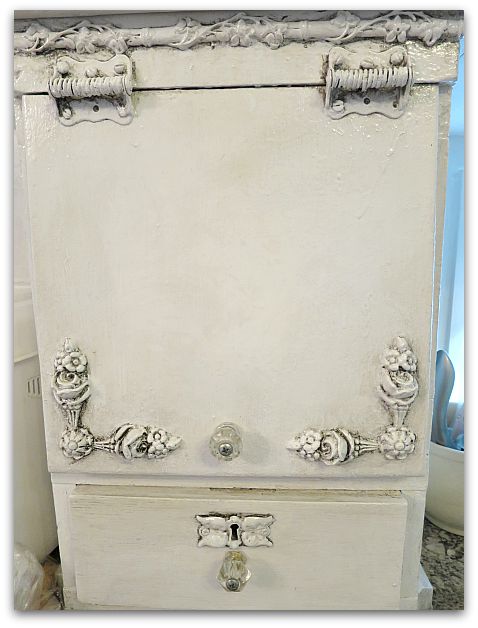
These new tones actually match my countertops much better than what I originally had used. Because I'd painted the ivory oil based paint and a coffee with cream color glaze onto the cabinets to match a granite sample that I'd picked out when the kitchen was first remodeled. 

Then, the granite was cut wrong! And we had to pick another similar piece, which wasn't nearly as golden as what I'd first had.

So, for years, I kept thinking I'd redo the paint job, and am just now doing it. And I am so pleased that I did.
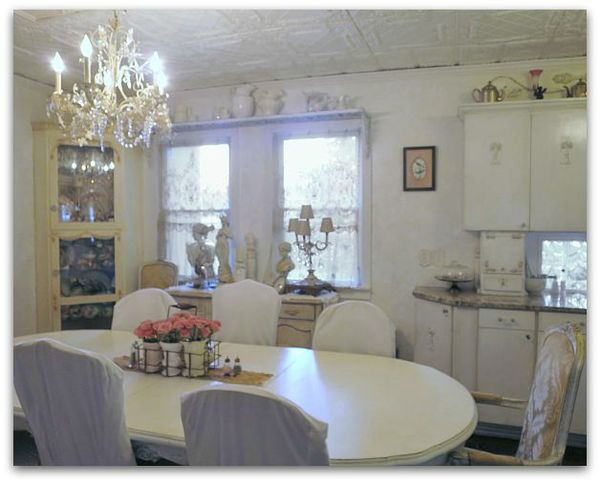
Kitchen plaster 026

For now, I've left the corner cabinet as it was.

Let's not say that 3 solid days of troweling on plaster, climbing up and down ladders, and twisting around to get into the corners of the cabinets along the ceiling, were too much for an old broad and I was too tired to tackle one more cabinet.

Let's just say that the contrast is nice, and that it kind of ties the mixes of whites together, ok?
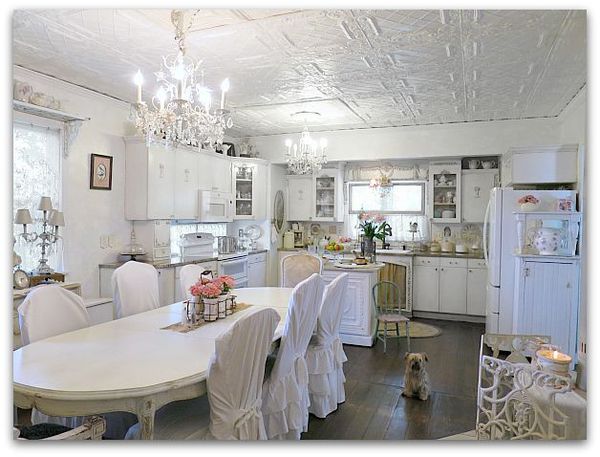
Kitchen plaster 016

I used a semi gloss clear coat on the finished cabinets for durability. If I didn't have such a high traffic kitchen, I'd have gone with satin, because I like that better. But I'd rather it repelled messes. The higher the gloss the more durable a surface is. 
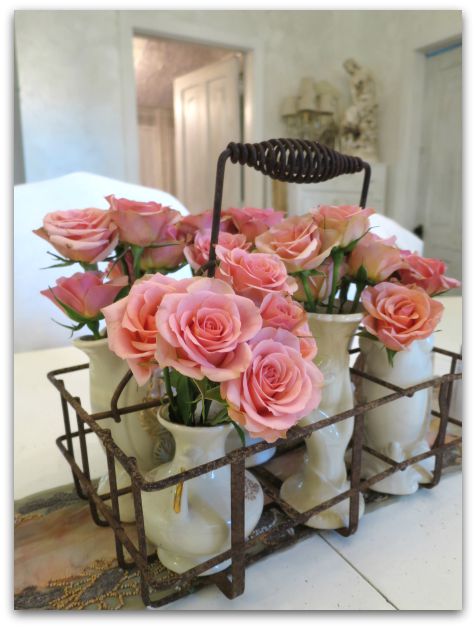
Kitchen plaster 029

I've always said that with neutral tones in the basics of a room, you can change the look with just a few accessories. I think this will be even more true with these clear whites.  And I do like changes. This room can stay white on white, or with a few red accents can have a totally different look for the holidays, still keeping that romantic, serene feeling that I wanted. 

Yep, I think I'm loving this!
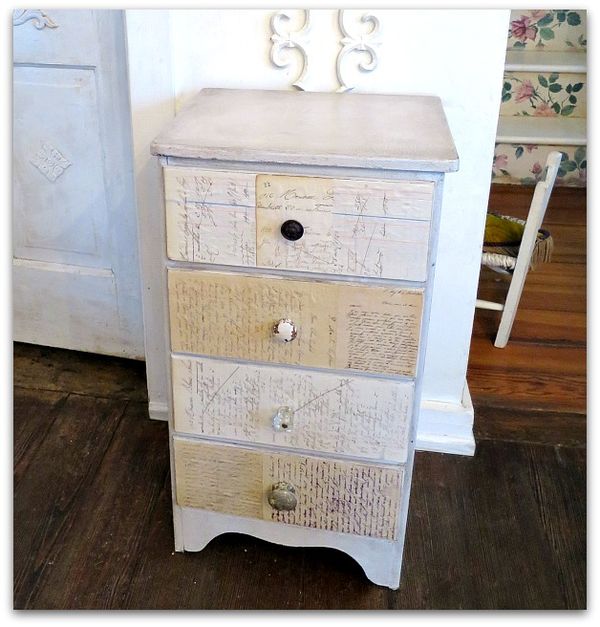
 

Aging a picture with crackle

Hand painted, Hand Painted Furniture, hand painted signs, how to's, how-to projects, paintings

1

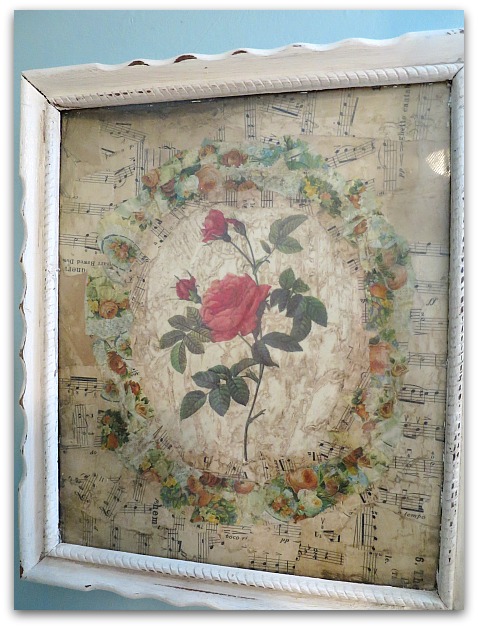
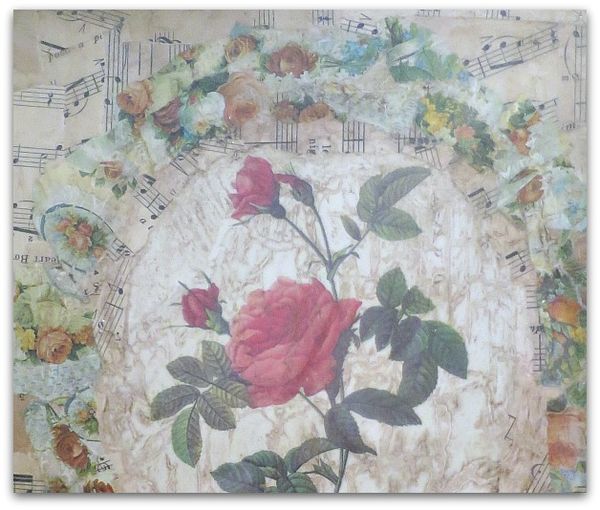
I was asked about this picture in my new guest room, so thought I'd give a quick how-to.

First, find a botanical, or other picture you like. Glue it to a canvas.

Next, tear and collage old papers around it. I chose a background of sheet music with an oval "frame" of roses torn out of old wrapping paper.   All are rough, torn edges, different shapes, and glued down with white school glue.

Pinkbathroom 004

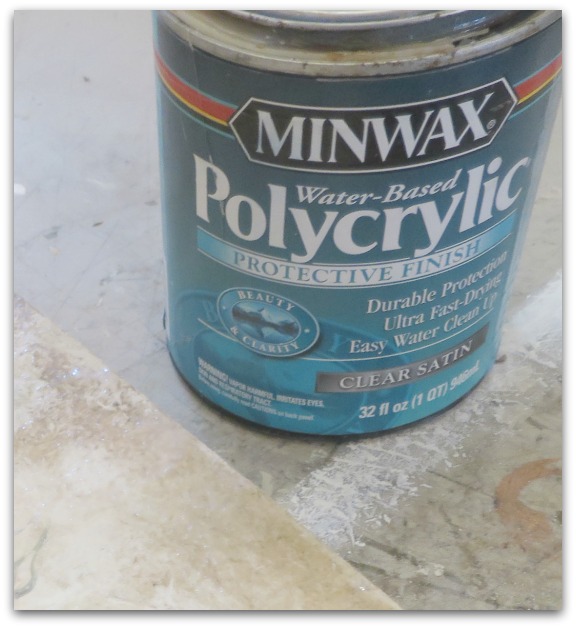
When dry, I clear coated it with water based Polycrylic from Minwax.

Pinkbathroom 003

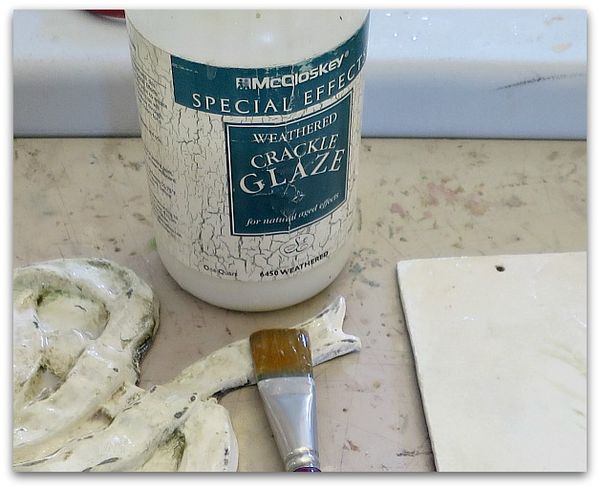
I let that dry, then brushed on a weathered crackle finish by McClosky.  

After that dried, another coat of Polycrylic went on.

The next day, I wiped on a sepia tinted glaze, let it settle into the cracks made by the weather crackle, and wiped it off. 

Cottageguestroom 016

Weathered crackle finish usually is applied over paint, then a second coat of paint is used over it to create a crackled paint finish. 

But, water based clear coat is much like paint without color, and creates the same effect.  But this way it is tone on tone, and clear. So, adding the sepia glaze shows off the crackle and ages any paper or canvas you do this over.

CrackleFinishCanvas2

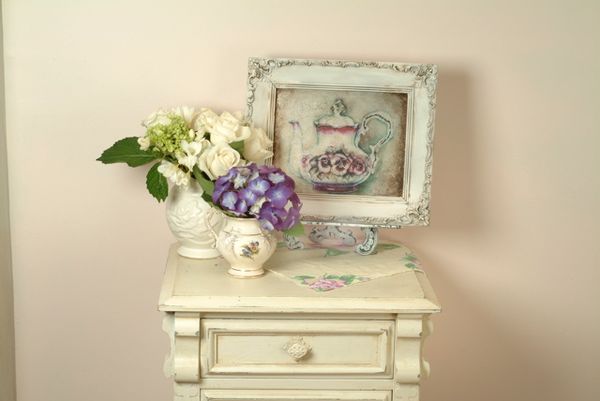
Here is a picture I used this technique on years ago for a Romantic Country article. The teapot is a photo copy of one of my original watercolors. 

For this one, I glazed over it after it was in a white frame, concentrating the sepia tone heavily in the corners, and also using it on the frame too.

Photo (4)

 I sincerely hate the look of crackle applied as it is supposed to be used, it is soooooooo fake. But I love it to use in aging a picture. And in aging other things too. The trick, to me, is to keep it tone on tone, to add texture.

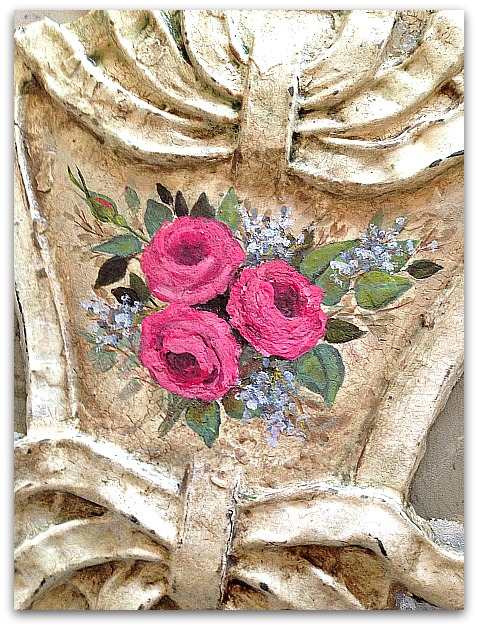
Here, I took an old piece of scrolly metal. It was antique, but it was not painted and I didn't want the paint I added to look too new. 

So, I painted the piece white, did the crackle, then a clear coat, then the glaze. Over that, I did the hand painted roses.

984271_10153011057194477_3476767174569364117_n

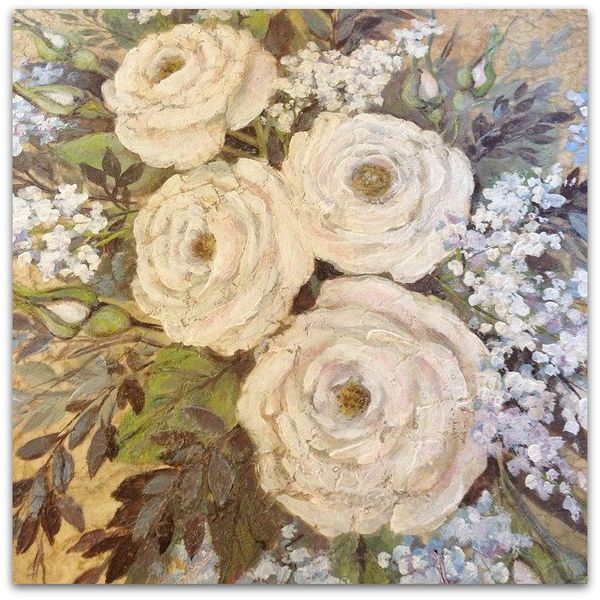
Same technique was used here on this canvas before painting roses.

Instant age for a brand new painting!

Sparkly, happy, rainbow feet- a Pinterest fail, but still fun

how to's, Sugarwings

Rcchristmas 001

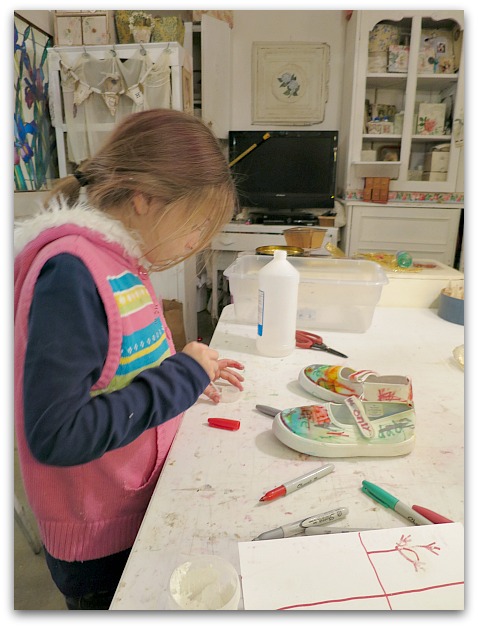
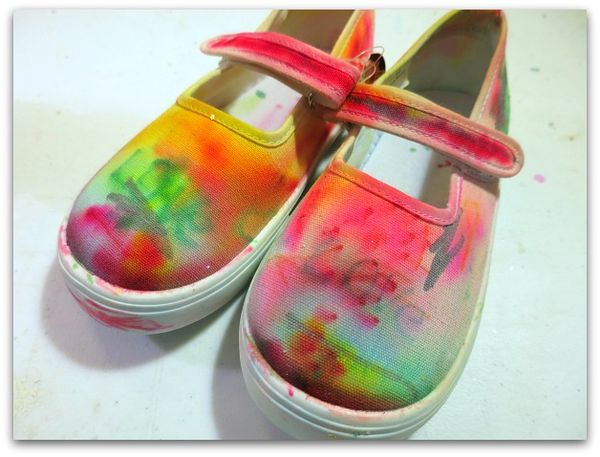
At the end of the summer, I found these canvas Mary Janes in the clearance bin at a craft store for a couple bucks. I kept thinking I'd turn them into something arty and wonderful, but realized that Sugarwings was going to outgrow them before I got around to it.

So, I turned them over to her. I'd seen a Pinterest pic of a tee shirt rainbow done with Sharpies and alcohol, so thought we'd try that.

Rcchristmas 003

It was a big deal for her, because she isn't usually allowed near a Sharpie. Permanent markers and 8 year olds rarely are a good mix.

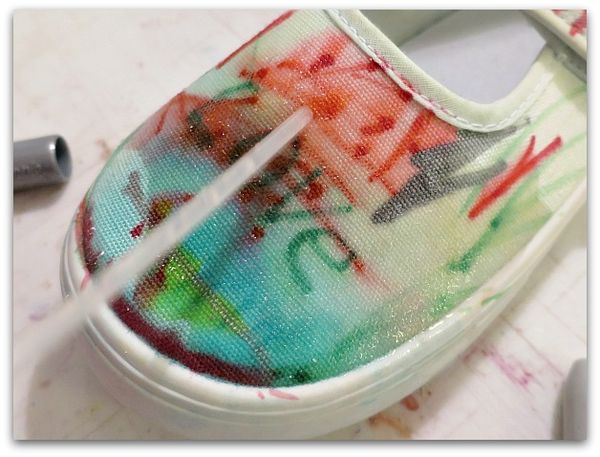
We used a dropper for the rubbing alcohol, and it only took about a 1/4 cup or less for both shoes. We realized that the marker wasn't bleeding as much as we liked, so we scribbled in more yellow here and there. Yellow is a nice color for blending when you are creating a rainbow effect. 

The silver marker did nothing. No bleeding at all.  Maybe it faded a bit, but it wasn't the best color to use for a tie dye look.

Rcchristmas 005

But it was nice for her lettering, the words, "Love" both stayed legible, but the pink hearts melted away.

I washed them alone  in the machine with hot, sudsy water and they a bit faded. I just hope they didn't shrink.  Kids' feet grow fast, and I've had these around a while. It would be too bad if they were already too small.

Still, it was a fun project, and I think we will try it on some other things.  One problem we did have was with the alcohol burning a small ouchie on her hand, so she asked me to handle the dropper for her. I doubt if a band aid would prevent that, but gloves might for next time.

Now, we probably need to add some glitter fabric paint before she wears these, doncha think?

How to make miniature book Christmas ornaments

holiday decor, how to's, how-to projects, vintage paper/collage art, We're having a party

Bookclub 054

As promised, here is the mini lesson on making mini book ornies.

Bookclub 027

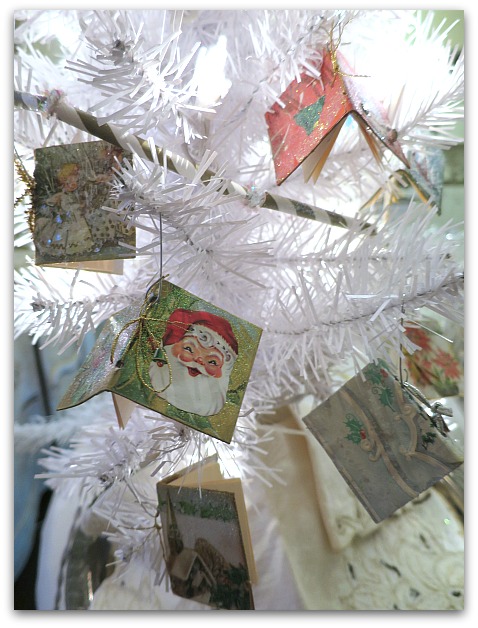
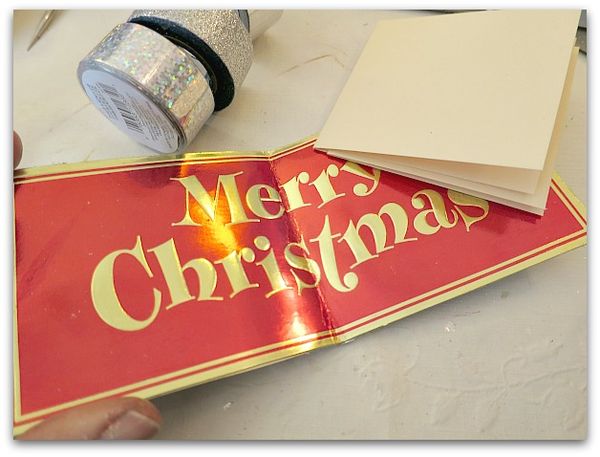
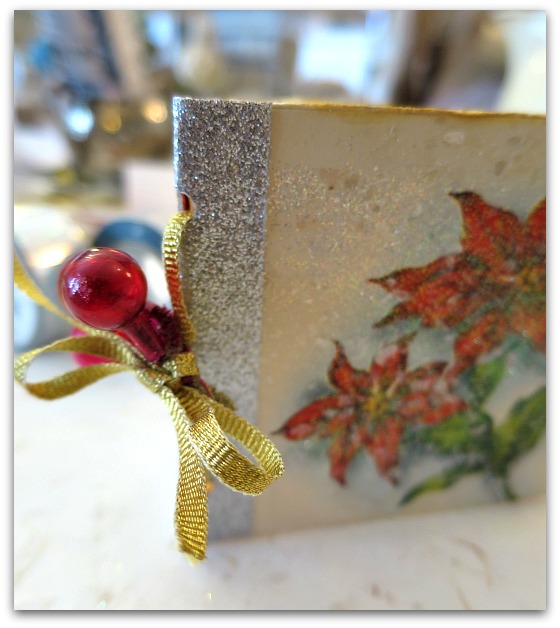
I used paper cut from vintage Christmas cards glued over chipboard for my covers, and card stock for the pages.  If your old holiday cards are sturdy enough, you could probably cut the covers directly from them and skip the whole gluing process.

Bookclub 032

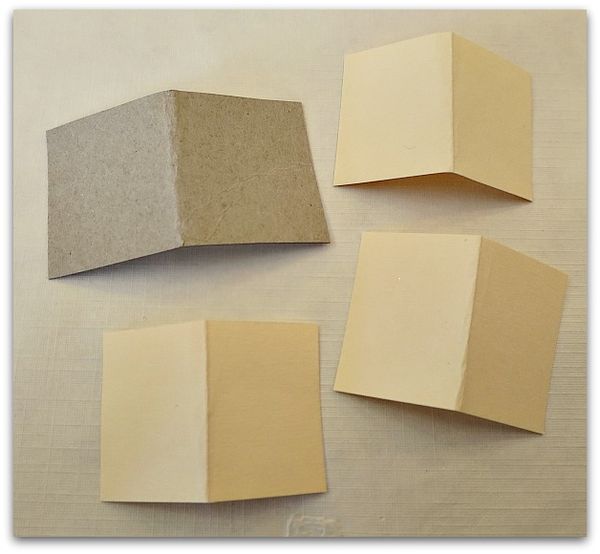
First step- cut out the cover material, fold in half.  Cut out three pieces of card stock slightly smaller than the cover, fold in half. (Any size you want to use works fine, most of mine are under 2", this one made from a card is larger)  

Glue decorative paper to the cover. The backside of mine was white, but if yours isn't, cover both sides.  This is a good time of year to save up chipboard,some pieces that I used were folded up inside a new shirt.  Stores often use it chipboard to hold the shape of folded garments. So, as you are opening gifts, don't forget to salvage the packaging materials!  (you could also cut up  a cereal box)
Add glitter, ink, etc, to your taste.  Don't add any 3D elements yet, though, embellish to your heart's content after the book is assembled.

Bookclub 031

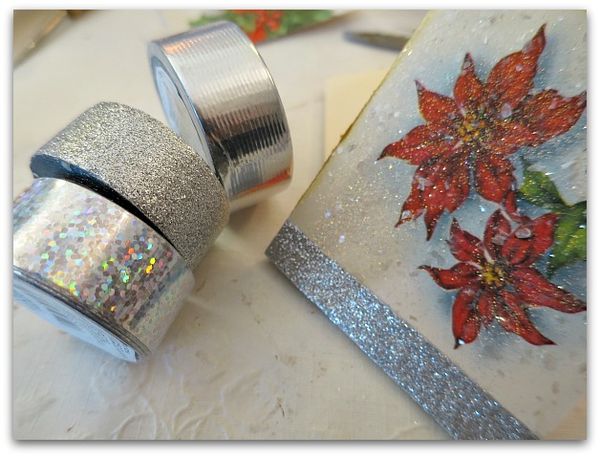
To make the folded and decorated chipboard look like a real book, a piece of decorative tape, as faux binding can be pretty.

Bookclub 028

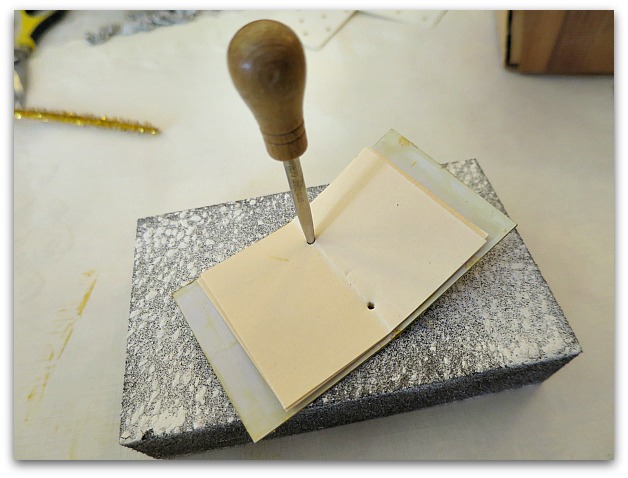
Put your three card stock pieces inside your cover, line them up, and punch two holes along the fold.

Bookclub 033

Tie the pages into the cover with whatever you think looks nice.  Here, I've used vintage ribbon.

Bookclub 030

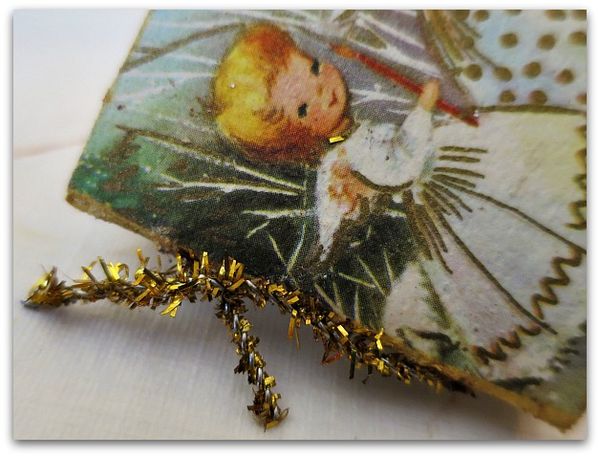
For a festive look, I like to use metallic pipe cleaners too.  But first, I vintage them up a bit.

Bookclub 029

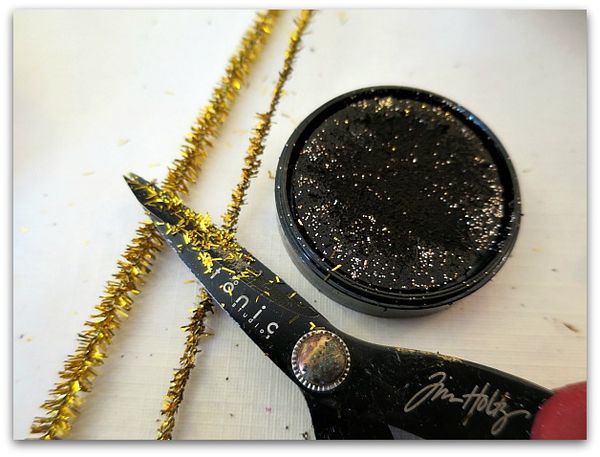
Give them a haircut and rub the newly styled piece onto a brown ink pad for a tarnished finish.

Bookclub 078

Next, add a hook (to whatever you tied the book together with) and hang it up.

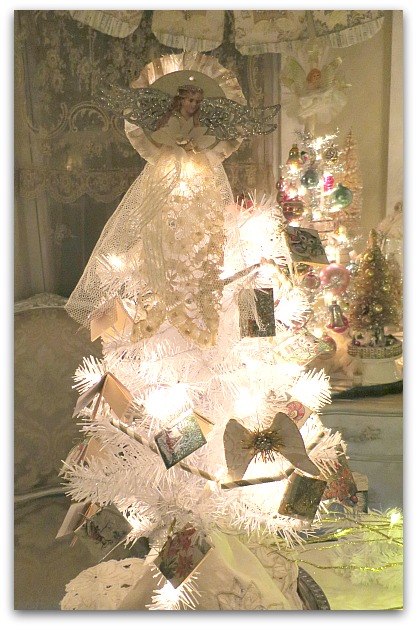
I used these as favors and to decorate with for my book club holiday party.  I think it would be fun to start a tradition of passing around a tiny book at Christmas dinner to have each person write a small message, or just sign their names.  Date it, and hang it on the tree each year.

If you'd like to make some bigger books in different styles, I have a tutorial available here.

Ornieparty 032

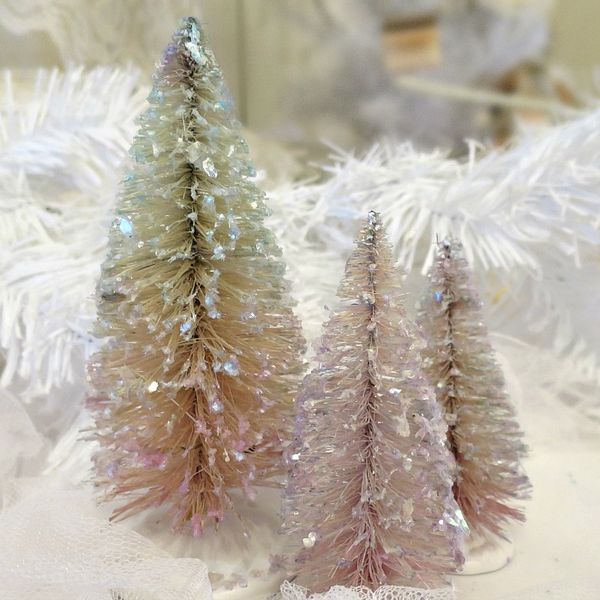
I'll leave you with some photos of what is new in the Etsy shop, it has been a busy Christmas tree season for me.  I just now got around to adding some decorated ones.

Ornieparty 039

Normally, I do get them out earlier…. But it has been quite a holiday season for me. Very fun, very busy!
Bfast santa 045

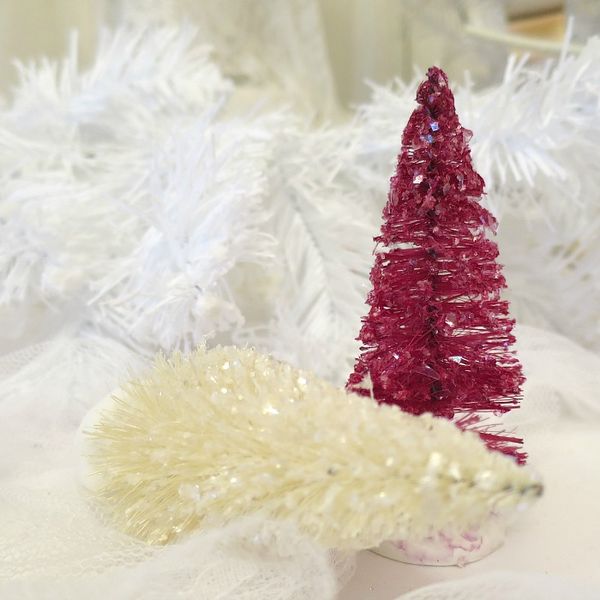
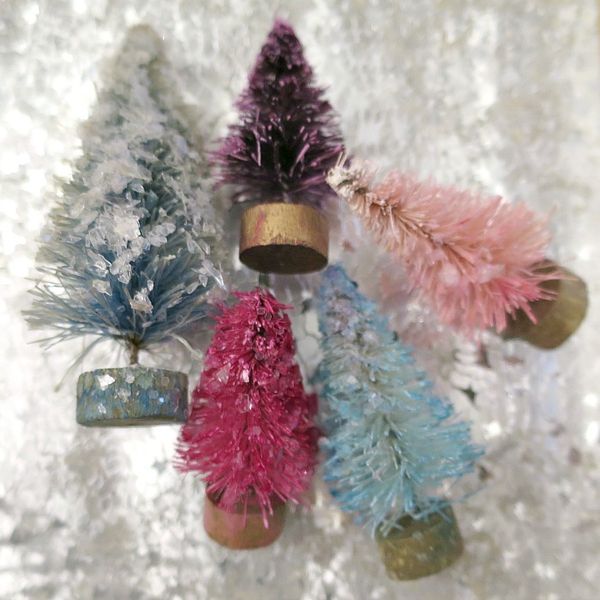
I have some extra bright trees this year, thanks to Sugarwings. She and I had a dying party the other day.  

Bfast santa 048

And we got creative with our colors.

Bfast santa 050

Bfast santa 052

Bfast santa 054


Big, Fat, Travel Journal and how-to’s- Part Two and some digital photo vacation tips

Books, family, guncles, how to's, photography, Travel

Photobook 011

Where were we? Oh yes, in the middle of the travel journal.  This book is made the way I did the Nature's Blessing Journals for the swap, and there are directions on how to make these type of books from scratch in my online tutorial, here.

In the tutorial, are  ideas on finishing pages too, if you'd like more details to make one of your own.

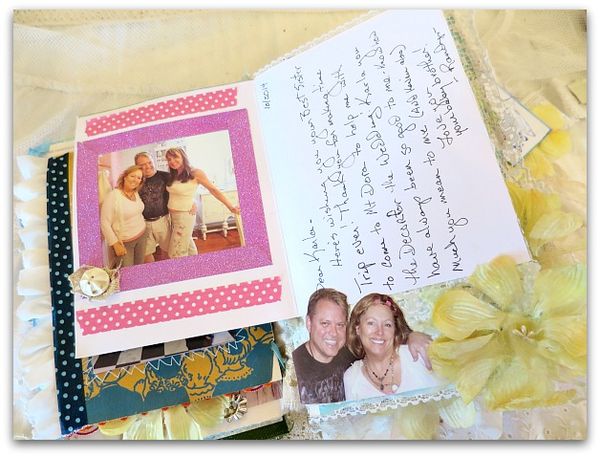
This page is showing the inside of a card that Guncle Randy made for me. So I added pictures to it from our Bachelor Party Craft Day.

The polka dot and glitter tape borders are from the dollar bin at Target, what a deal!

Photobook 012

Here it is with the card that he made for me closed.  Greeting cards are great to add to journals and scrapbooks, you glue down the back and can add to the inside of them.

Photobook 021

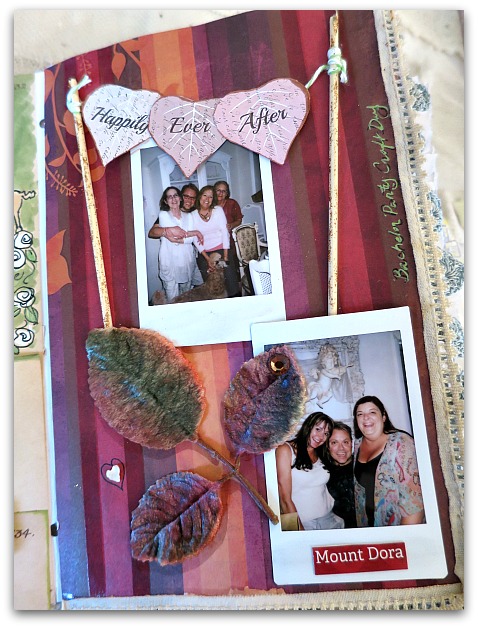
During our craft day in Mt Dora, we worked on Randy's wedding decor. So I used some of the fall toned paper from the projects to make this page. Over it, is a leaf (outlined in brown marker for a shadow effect) from the velvet hat he bought,  instant photos from that day, a heart shaped shell I found on the beach,  and one of the mini garlands we were making for his centerpieces.

I tied a bit of baker's twine to the two little wooden skewer sticks, glued them down, then glued the garland pieces right on to the string.  For the centerpiece, I punched holes in the leaves with words and tied them to the string, but this way seemed to be a better fit for the book.

The words, "Mount Dora" were cut out of a brochure we picked up.

Photobook 022

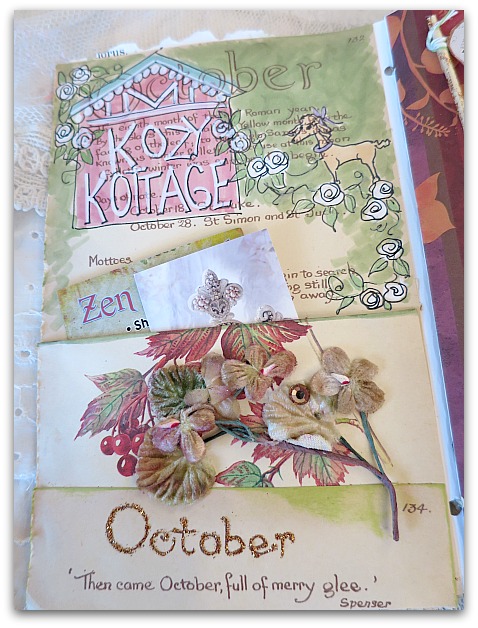
On the adjacent page, I used an October book page from a garden journal to make a background and pocket. I inked the edges in green, and highlighted "October" with Stickles glitter.

With Tim Holtz Distress markers, I drew a pink cottage and Karen's sweet poodle. I like those markers for this kind of work, because you can still see through them to the text below.  For detail, I used a black ink pen and opaque white  marker.

The pocket is perfect for business cards I gathered while shopping downtown.

Photobook 013

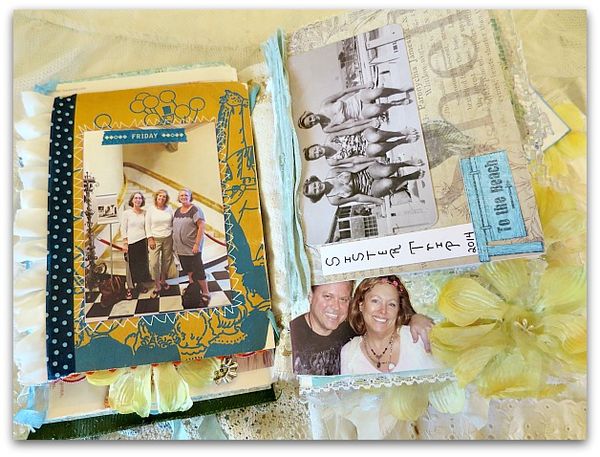
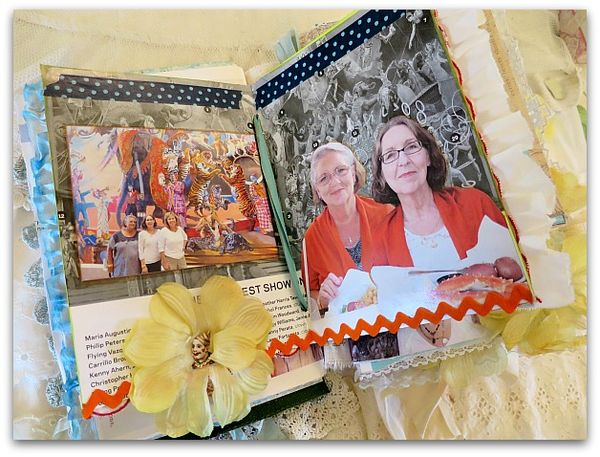
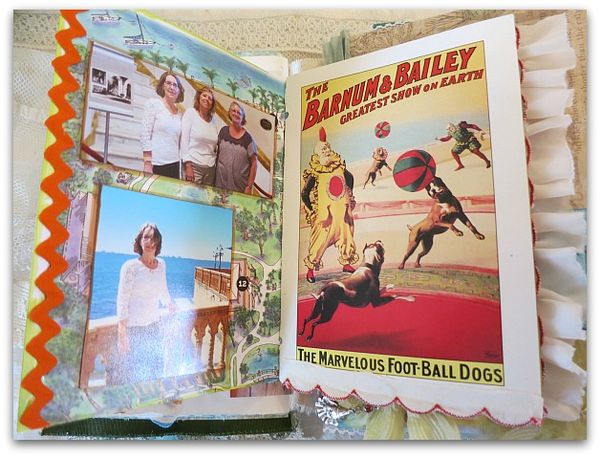
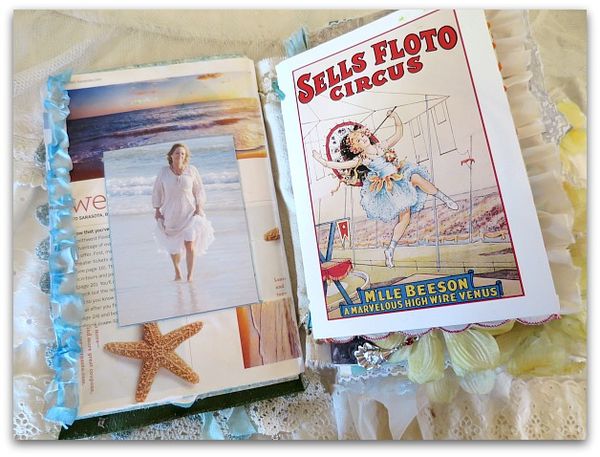
Another way to use greeting cards, is to punch holes in them and tie them directly into the book itself, instead of gluing them down to the pages.  At the Ringling Bros. museum, I picked up a couple circus cards and tied them into my journal.  I covered the inside with brochure pages from the museum, added photos, and colorful rick rack trim.

I thought the polka dot tape was festive and circus-y too.

The sunshine yellow flower got a clown face center.

Books 007

I thought that the outside of the card was plenty cute, and left it as it was. A few ruffles was all it needed.  Not every bit of the book needs to be covered. 

On the opposite page, I used the museum grounds map as a background for photos. The pictures are outlined with brown to make them stand out a bit.

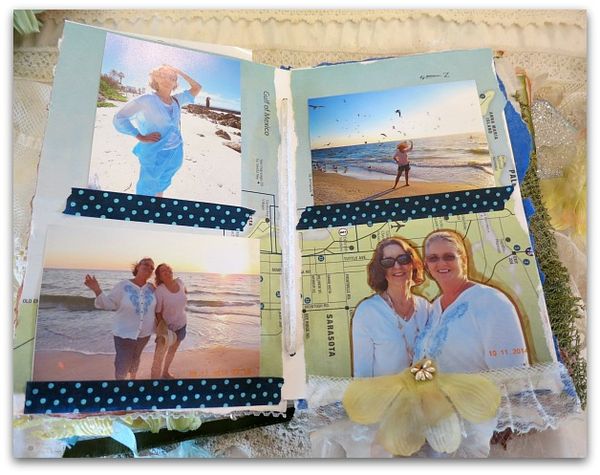
Books 005

This is a map of the coast, with a few photos, accented with polka dot tape.  I cut the figures out of one picture and shadowed them by outlining with the brown marker.  And added a ruffle and a half flower to the bottom.  

When I do the backgrounds, I like torn edges, and keep it all a little rough, not perfectly cut.  I also like to have lots of peek-a-boo bits like the ruffle and flower petals.

Books 008

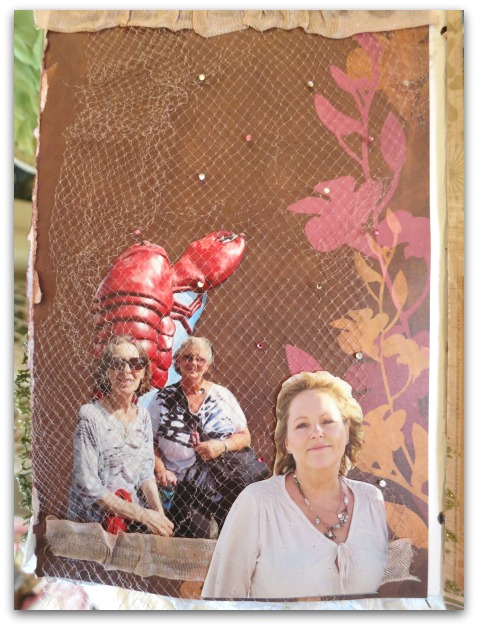
This one was fun.  Bobbie and Sissy were posed in front of a giant lobster, and I slipped their cut out silhouettes under a netting from an old hat, and added my picture over it for dimension.

The netting is held down at the top and bottom with a piece of glued down ribbon.

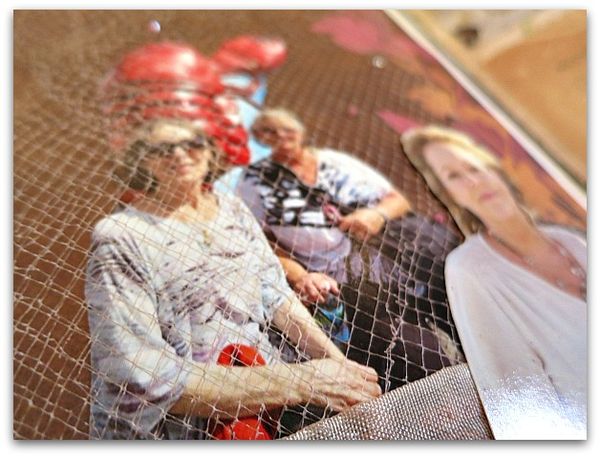
Books 009

Here is a close up to see the details.

I might have liked this one better if I'd used a blue background, but I layered it back at the hotel room, then when I got home and went through the photos, these are the ones I thought would be cute on this page. Brown is okay, and since it wasn't planned ahead, I had to make it work. But if I had it to do over again, I'd have used blue.

Photobook 014

Sometimes it is nice to have some simple pages, like this travel brochure page with a ruffled ribbon and a single outlined photo, then an unadorned greeting card from the circus.

Photobook 018

Here, I have folded a piece of paper in half, and glued down the back of it. Ribbons are glued to the front and back to make a tie, and charms we found at a Sarasota bead shop are added to the ends of the ribbons.

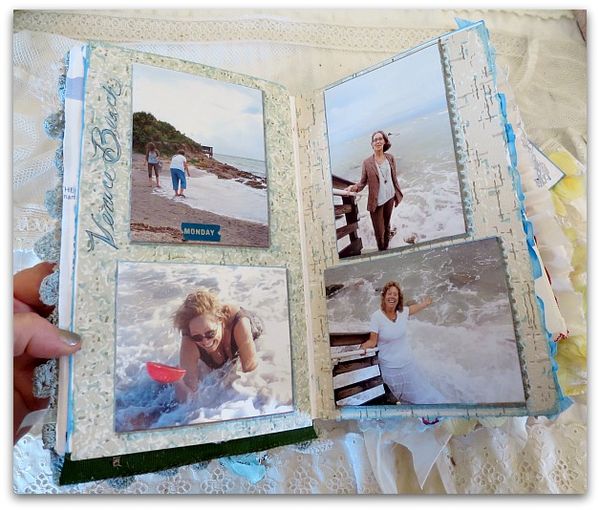
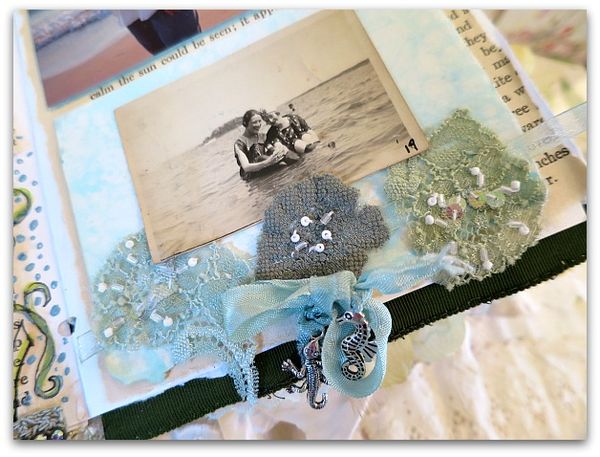
I bought a vintage photo album at a junk shop and the beach pictures from it were the perfect addition to many of  my pages.  One is used here with lace medallions as trim.

Photobook 019

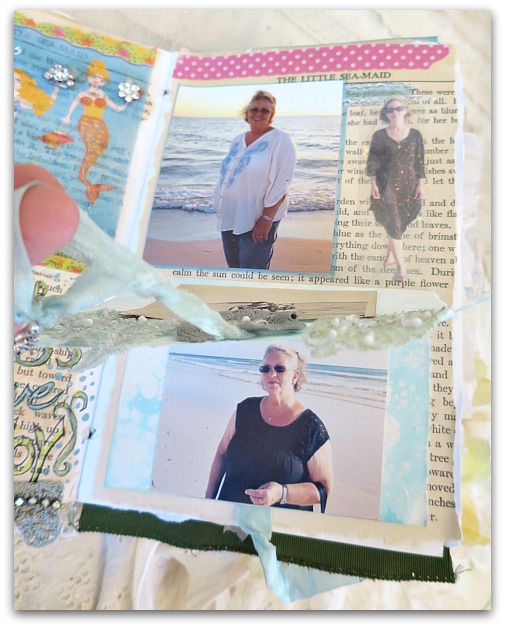
When the folded blue paper is untied and opened,you can see the picture inside.

Another full photo with a beach view is above it, and is outlined with blue.  The figure next to it is cut out for variation.   I find it more interesting to have different shapes and sizes of pictures than to show the same beach background over and over, exactly the same behind each person.

Now, I just love beaches to death, but for the sake of the art journal, this layout is a little more interesting than a row of same size, same background pictures.

A stip of polka dot tape makes a simple, and easy border. With a marker and white opaque ink, I've highlighted the words, "sea princesses" that I saw in the text of the old paper that I was using.

Photobook 023

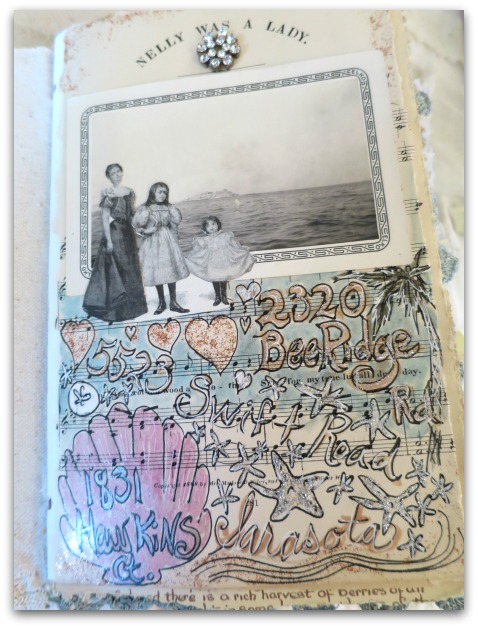
One afternoon of our trip was spent driving around and looking up past addresses of our Great Grandma Nellie, Great Aunt Caroline, and Grandma Smith.  

When I saw this sheet music with Nellie in the title, I knew I wanted to use it for this day. I added a vintage ocean picture, and cut out three girls from very old magazine to glue over it, then wrote the addresses we'd looked up on the rest of the paper.  

 I doodled shells, and hearts around the words, and then added some glitter and a rhinestone.

Photobook 004

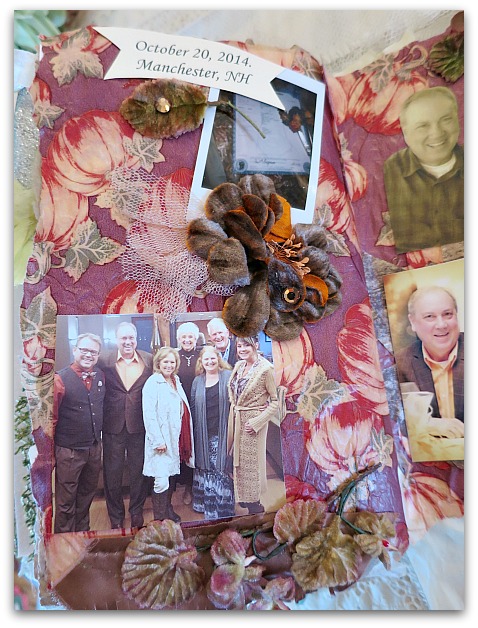
Part of my trip included a flight from Florida to New Hampshire for the Guncles wedding. While it makes an odd color palette for the book ( sunny beach tones and fall hues) it was even weirder to pack the suitcases for both climates.

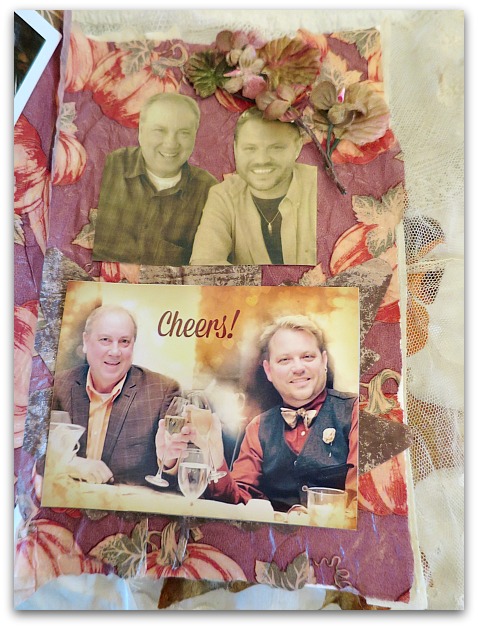
Here, I have some pumpkin themed tissue paper crumpled up and glued down as a background, and over that, I've added photos and some velvet flowers from a hat Randy found while we were out shopping in Mt. Dora.

Photobook 005

The adjacent page matches, and has a banner cut out of the wedding announcement.

Nbjgifts 027

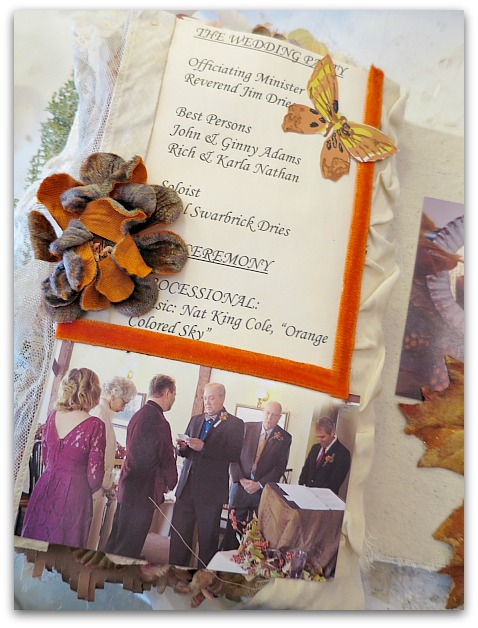
A photo from the ceremony is layered over the program, with some lace trim, and orange velvet ribbon, topped off with more blooms and an autumn butterfly.

Photobook 015

This page is a plain, wallpaper backdrop, with four fun photos. I left all four of them intact, but notice that I did cut them to slightly different sizes? Each is outlined in ink to make them stand out a bit, and one page has some doodles down the side of the pictures.

 Here are some tips I follow for digital photos while on vacation:

  • Pack your battery charger!
  • If you are using your camera phone, edit the pics with something like the Snapseed ap before posting them. Crop, brighten and sharpen for better photos.  
  • For your phone or camera both, DELETE all noticeably bad pictures daily. Blurry, unfocused, bad angles, snaps should   be cleaned out to save space, and to save time when you are ready to upload to your computer at home.
  • I email myself the photos I want to keep from my phone, then open them on my computer when I get home.  I then delete most of the photos from the phone, so that I don't have so many on there that I can't find the faves that I want to see.
  • Take a lot more photos than you think you will need.  This will give you more to chose from.  
  • When you get back home and upload, be selective with the pictures.  If you've taken hundreds, narrow it down to dozens. Really.  I know it is hard, but honestly, you will enjoy having the best ones to keep and you don't need so many duplicates.  Pretend you are at an optician's exam.  Remember how the Dr. will ask, "This one? Or this one?"  With multiple photos of the same scene, clean out by comparing them one at a time, to chose the best couple from the multitudes.
  • But watch out for hidden goodies!  If you have a group shot and one person has made a face, another has her eyes closed, and a third is drop dead gorgeous, consider cropping the picture to be a close up beauty shot of just the stand out person. 
  • Here is a big one for me, I tend to tilt my camera a lot. So, I have to be careful to straighten each picture before cropping.  Its very distracting to see the ocean in the background sliding away to the side of the picture.  A straight horizon line with water is very important.  Same with ceilings and walls for indoor shots.  
  • After straightening, figure out what needs cropped. Crop some pics in close, and leave the backgrounds in others.  You'll want variety.  But if there is a big expanse of ceiling showing, ten feet of driveway in front of your subjects, or a plain, boring wall, get rid of it. Keep backgrounds that are attractive, or tell a story about where you are. But if the backdrop is unnecessary, crop and focus on the subject of the picture.
  • I like Picmonkey for my editing. The site is self explanatory and easy to use. 
  • When editing, use Tooth Whitening sparingly.  Yes, make the subject more attractive, but don't make them look unnatural. Same with Eye Bright.  And while I'm sure everyone would appreciate less wrinkles, please don't iron out the faces to look like the person is one of those bad, "After" pictures in a spread on plastic surgery gone wrong.
  • My favorite use for Wrinkle Remover is to blur backgrounds to really make the foreground pop.
  • If there is a glaring color that stands out in the background, like an orange sign peeking through a pretty tree scene or a bright blue shirt on someone walking by in the distance, I go to Eye Color, and chose gray to draw over the bright color and tone it down.  I don't want the veiwer's eye to be led to something that stands out and distracts from the subject of the photo.
  • If you are planning on using the pics in a scrapbook like I did, make sure you leave room for cutting them down to various sizes after they are printed. If you overly crop, and then print them all the same size, you have no space left to cut them down to make some smaller for the album. And I think that the albums look much more interesting with a mix of sizes.

***************************************************************************************************************************

Rwc2014

ps- Want to come to my cottage studio for a Christmas class? I have two available, how to see you here!
Fall leaves wedding centerpiece how-to

celebrations, family, free images, guncles, how to's

Books 061

This is a big week for me. I'm away with my sisses on a trip to Sarasota to relax on the beach for an entire week of sister time.  From there, I'll be flying directly to New Hampshire to meet up with my husband and attend his brother's wedding.

Books 059

We are both standing up with the couple and I am  thrilled! I've never been in a wedding, and this one is extra special.  The guncles had a commitment ceremony 15 years ago, and have been an ideal couple, deeply in love and devoted to each other.  

But in Florida, their ceremony isn't recognized.  So we are all flying to NH where it is legal for them to wed, and I am double thrilled to be a part of it.

Books 058

I'm helping with the decorations, here is a prototype of a centerpiece that I have mailed to the guncles to approve. And while I'm in Florida, my sisses and I will have a bachelor party/craft day with Randy at sweet Karen's Kozy Kottage in Mt. Dora to create the rest of the decorations for the wedding.

Books 054

The plan so far, will be to get some fall vines from the hobby store, sponge paint them gold and add glitter,  to make a few centerpieces and a garland for the mantle in the room they are renting for the event.  

The day of the party, we will add some fresh flowers to the arrangements.

Books 062

We have 10 of these tins to use to make a banner to hang from the garland. I added a K to this one as an example, but I don't know what we will be spelling yet.

Books 060

I thought of using the light weight, paper mache boxes to hold the floral arrangements because they have to be mailed.   These would cost a fraction of what it would cost to ship vases. Plus, Randy adores photos, so this is a way to use photos in the decor.  He has already made up place cards utilizing pictures of the attendees, so this will look nice with those on the table.

The boxes are decoupaged in old, French text, then glittered in a sheer crystal glitter. Over that, I've added a fall colored scrapbook paper framed out in Dresden foil and holding cut out picture of the guncles and their beloved pets.

The leaves are stuck in oasis foam, and there are two small skewers, painted gold holding up the mini banner, "Happily Ever After" printed on heart shaped leaves covering chipboard.

Happily ever after


Here they are if you'd like to use them for a project too.  Click on the image to open in a larger window and save that to your computer to print.

When I get back, I'll have pictures of the finished decor, along with the happy couple too, of course!

 ps-

Art journal

I'm out of town now, but the tutorial is still available for purchase, if you are interested in making an art journal  


Scroll to Top