how to’s

Collaged Cell Phone case

how to's

Craft day with caroldebamy 062
Last spring, I bought a camera that I just love. I think it takes wonderful photos, and it slips into my jeans pocket, it's light and compact.

But in November it broke, for no reason. I sent it into Cannon for a repair and without a receipt, they still fixed it for free.

I was thrilled to get it back and working again. Its a Cannon S100 and does photos every bit as good as my Rebel, without all the bulk of that heavy piece.  But now its broken again!! I mailed it back to Cannon, and hope it is home in time for my dream of a lifetime trip to Hawaii next week.

Just in case it isn't, I did an ATT&T upgrade and got an IPhone 5 for a great price, and I am so glad that I did, it takes nice, sharp photos. Not as good as my little S100, but much better than the early IPhone that I had.  It felt very decedant to get a new phone when I had a perfectly working phone already, and I'm still a little guilty about it all.  But, if we are splurging on a trip like this, I want pictures!  And I made myself feel better by giving my old phone to my son, whose phone was broken.


393091_10151312495769477_167894778_n

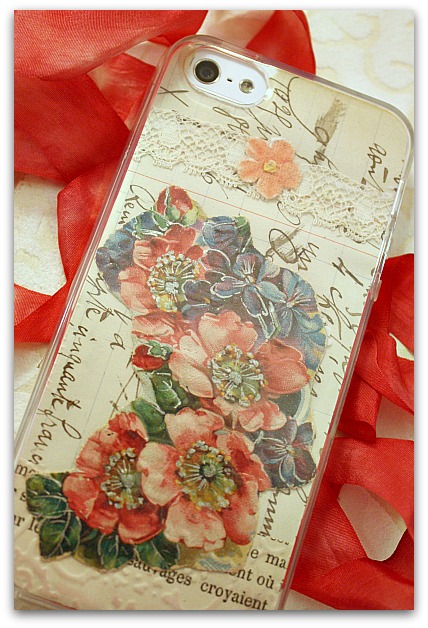
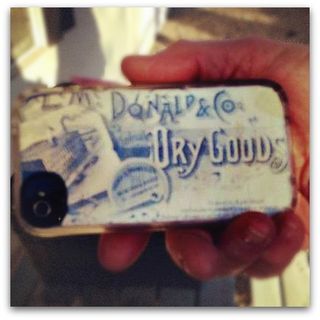
Debbie was here for craft day, and we both had clear cases for our phones.  We took some of the papers we were working with and lined the cases for a custom look.  The top one is mine, bottom is hers.

I'll have more pics of our craft day projects later.

HOW TO: 

Easy peasy-  I layed out my case over the paper I wanted as a background, and traced it. Since the case was clear, it was easy to position.

I trimmed along the inside of the drawn traced line, since it was traced around the outside of the phone, I knew I needed the paper to cut a bit smaller to fit inside.

Once it was cut, I placed it inside to check fit, and traced around the camera hole.  I thought about using an exacto blade to cut out the piece for the eye of the camera while the paper was inside the case, but then decided against it, in case I slipped and sliced the silicone.  So, I settled for tracing, then took the paper out, and cut it with the exacto knife with the case safely out of the way.

After the background (French ledger paper) was cut, I laid it out and positioned embossed text across the bottom, flowers cut from an old post card in the middle and a strip of lace across the top. Over the lace, I added a tiny, flat velvet millinery flower.

And of course, I was too impatient to wait for it to dry, so I put it back together with the glue wet.  You can see a white blog along the top of the flower.

Debbie chose a piece of paper that was cool as is, a receipt from the 1800s from a dry goods store.  She just traced it, cut it out and popped it in.


Craft day with caroldebamy 001

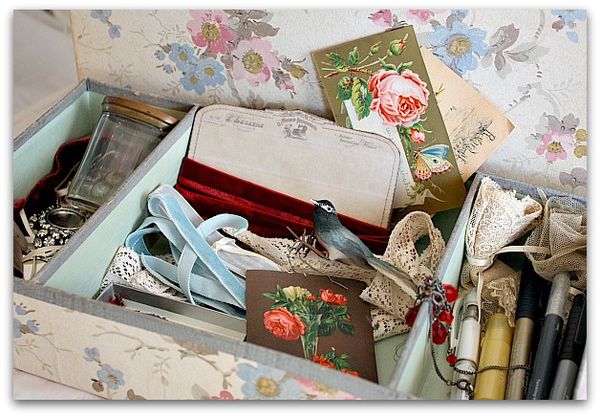
Poor Beth has had pneumonia and couldn't make it to craft day, she was missed.  She and I got together a week or so ago to have a junking day and lunch after a delayed  Christmas gift exchange (look at all the goodies she stuffed into this old wallpaper covered box for me!).  But, that was the day her cold began and we barely made it through the first part of the day we'd planned, and cancelled the junking part.

She and I need a do over day to hang out and play. 

A person can only go so long between friend get togethers. Luckily, I had craft day today and book club tonight to hold me over.  So, I can give her time to feel better before I coerce her into a play date with me again. 

How to Create a fairy garden and some mini terrariums

flowers, how to's

Xmas 2012 064
Its snowy and blowy outside as I write this, and to cheer up some winter blahs, I've added some fresh greens to my home.  Sugarwings helped me with it, and while we were at it, we made a few to give as gifts too.

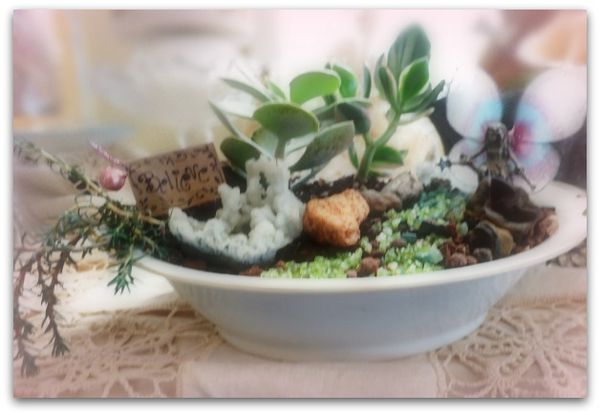
This one is in an antique serving bowl.  When making an indoor fairy garden or a terrarium, you can use pretty dishes or bowls and not worry about drainage holes, like you'd need to for an outdoor planter.  Just use proper layers and the plants should be fine.


Xmas 2012 058

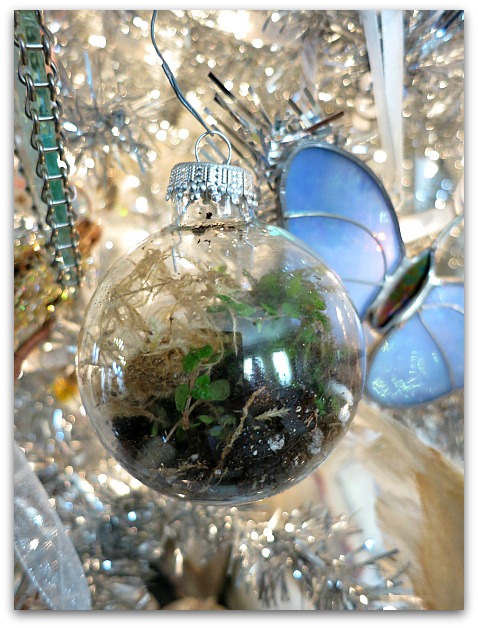
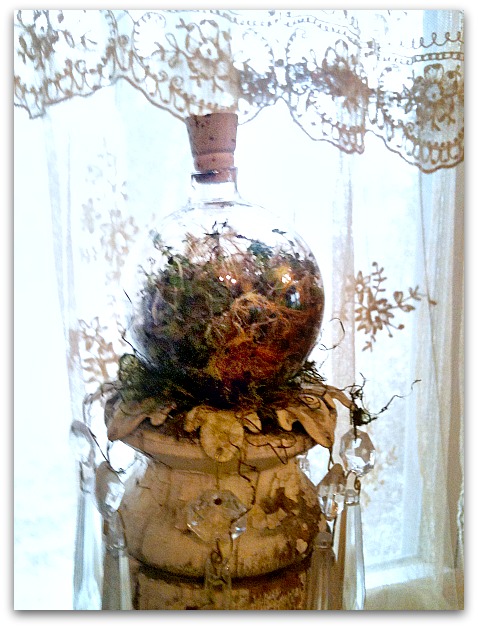
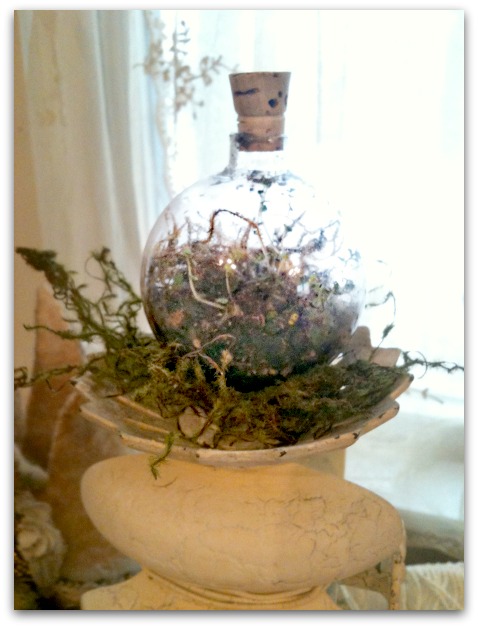
We filled quite a few of these glass ornaments.


Photo

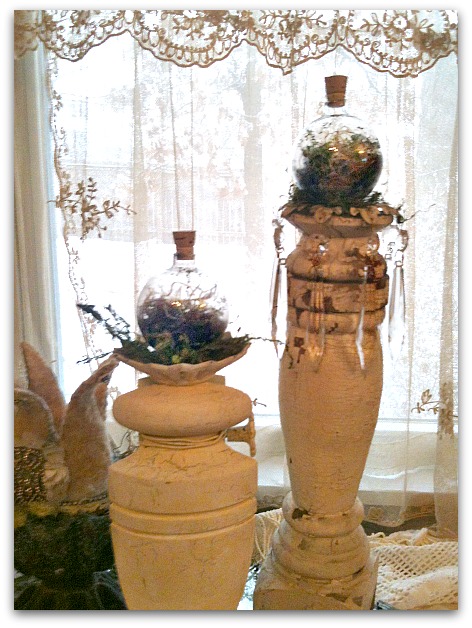
After the holiday, I took the ornies off the tree, pulled off the top, and exchanged it for a cork.  Then, set the balls on top of candle sticks.


C

Maybe you can see through the glass and tell what I mean about layers?


Photosss

Here is how you layer:

1- small rocks for drainage

2- charcoal for keeping the water filtered and fresh

3- soil for a growing medium (use soil meant for the type of plants you chose)

4- plants, with roots down in the soil, then a bit more soil over it

5- moss to keep in moisture


Cccc

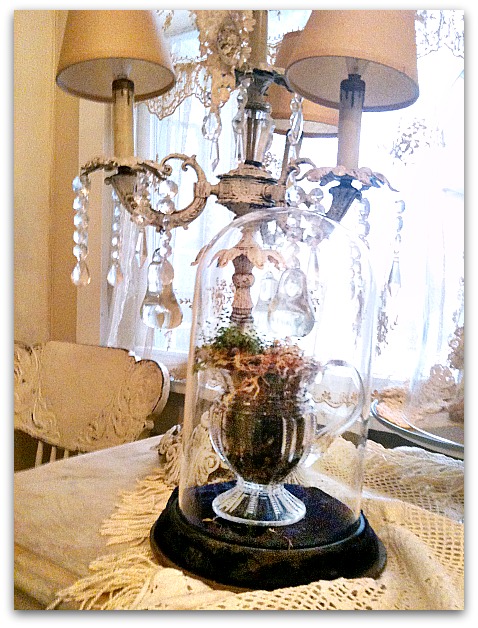
A crystal creamer was properly layered and planted with baby's tears.  That is the same plant I used in the balls too.  This one is perched under a vintage dome with a tattered velvet base.


Xmas 2012 060

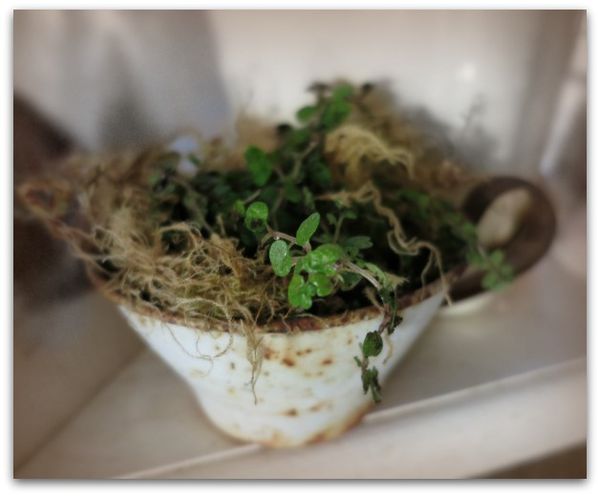
Sadly, this one didn't live, I thought the rusted metal tea cup was cute. But it wasn't under glass. I think the baby's tears are too delicate for the dry January air in my house without a  covering to hold in the moisture.


16716_10151283558104477_940082518_n

If you are planting succulents, use a cactus soil over the rocks and charcoal. 

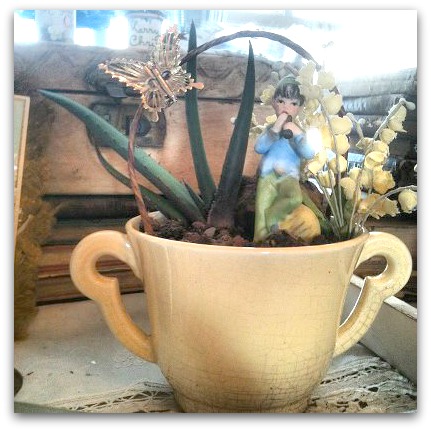
In this one, I added a wrapped wire "garden arch" and pinned a vintage butterfly brooch to it.  Below the arch is the plant and an old fairy figurine. 

It's accented with millinery blooms that match the sugar bowl it's planted in.  The top of the cactus soil is sprinkled with rose quartz chips.

 
Xmas 2012 063

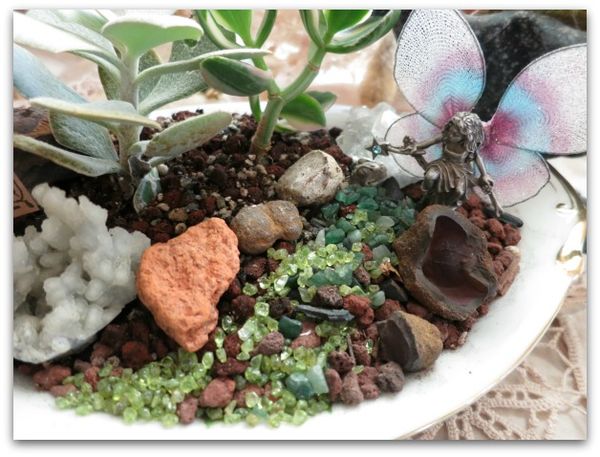
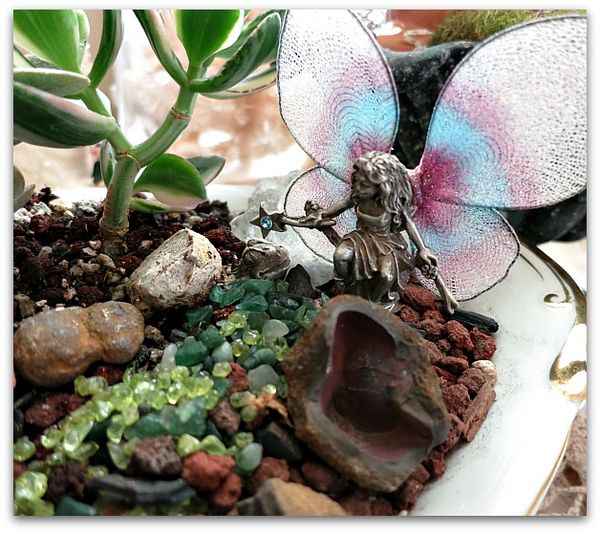
 When making a fairy garden, keep scale in mind. Use small plants that compliment any little figurine you add to the mix.  Also, try to create a scene with the rocks and plants, like the pathway leading to the pewter fairy in this bowl.

Xmas 2012 061
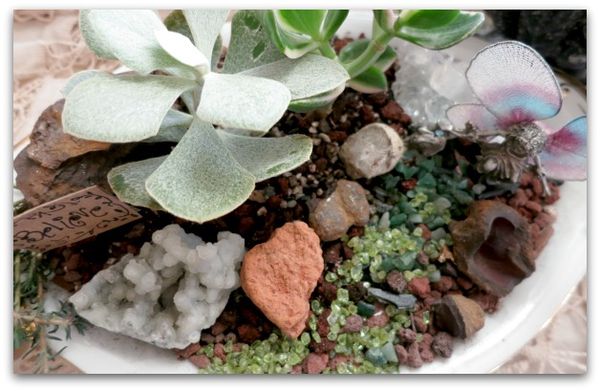
I found some great crystals at a rock shop to use in this one since it was a gift for someone special. Sugarwings and I also gathered up some pretty stones from the yard, but I wanted a few meaningful chunks in there too.

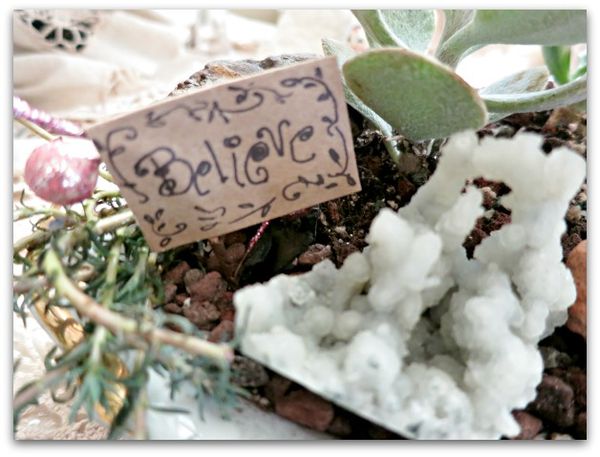
The sign is a bit of brown grocery bag.  I cut out a large square, folded and glued it in half, then did that a second time, so that it was sturdy.  The second time, I glued it over a bent wire that was stuck into the dirt after writing the message.

Xmas 2012 062
Something I noticed while assembling this, was that the cactus soil is very loose and dry.  The pieces and plants wobble around easily, since the dirt isn't compact, it doesn't anchor anything very well. So I had to wedge a rock over the base of the fairy to keep her from toppling over. 

Behind her, is an extra pretty crystal to help keep her in place too, and her base is buried in the sandy, rocky dirt.

Xmas 2012 065
The pathway is made up of peridot and moss agate chips. Sugarwings chose these and sprinkled them over the top of the soil to make the walkway for our fairy.

Tiny bottles of semi precious stones can be found at rock shops for $1 each. I used two for this garden path. 

Mixed media with watercolor tips and tricks

dogs, Dorkies (Yorkshire Terrriers), drawing, free images, holiday decor, how to's

Santa
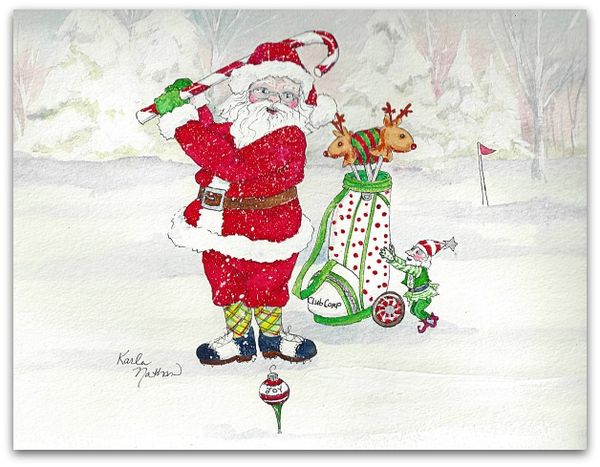
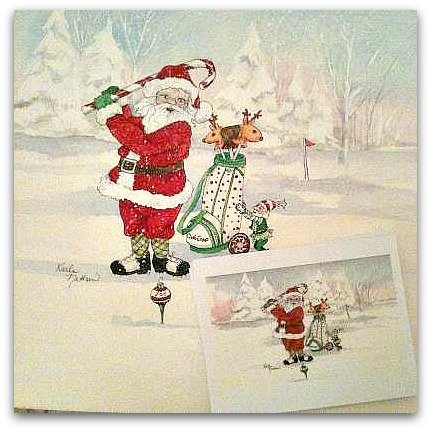
Well, the holiday season is winding down, time for getting on with the New Year.  If you aren't all Santa-ed out, I've got some how tos for the painting I used as our Christmas card this year. 


Xmas 2012 001

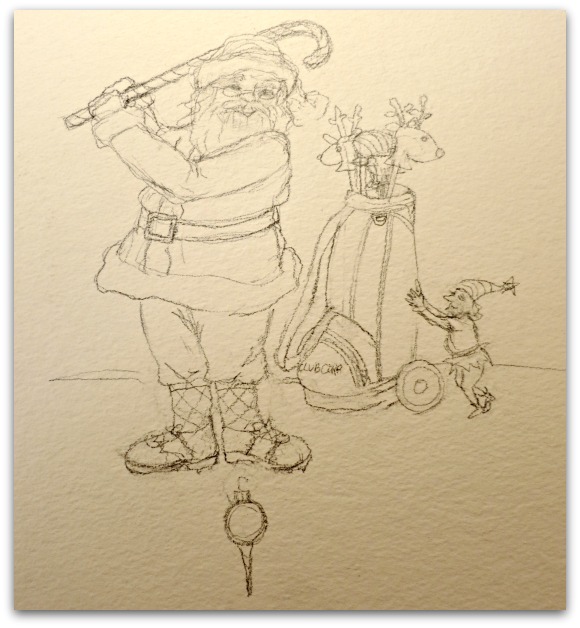
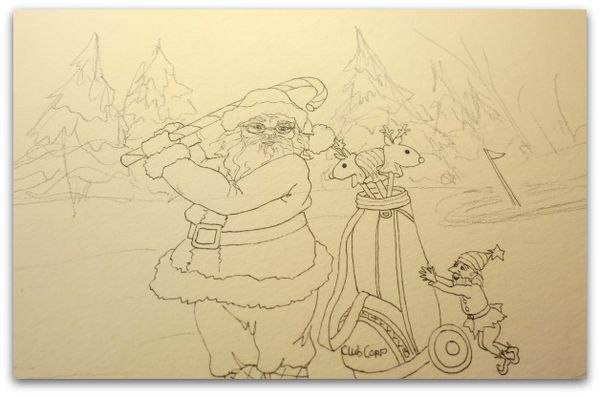
First step is the drawing, in pencil on watercolor paper.


Xmas 2012 003

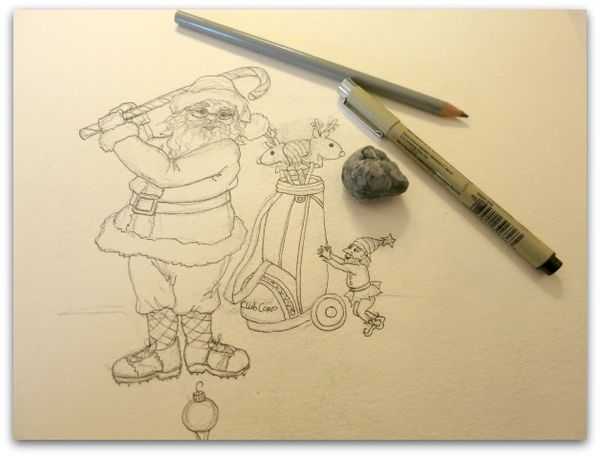
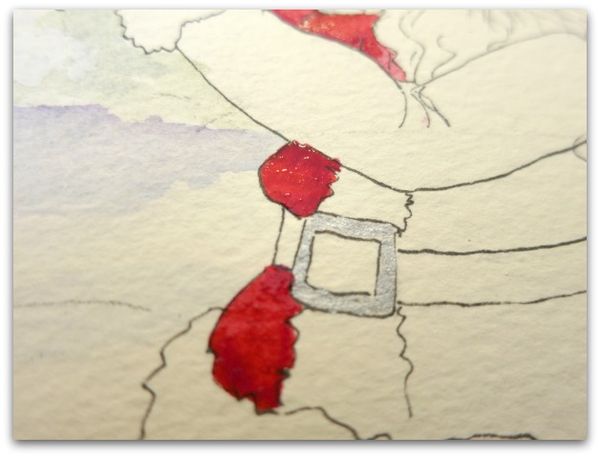
Second, I draw with ink over my sketch, then erase the pencil marks.


Xmas 2012 004

Since I want the background to have a soft, faraway look, I don't draw it in ink, only pencil.


Xmas 2012 005

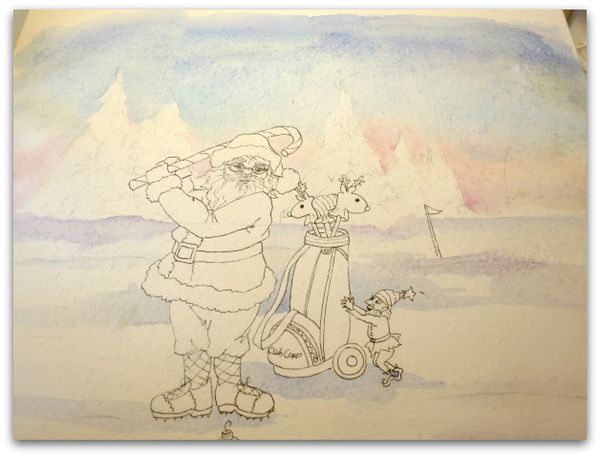
Next, I wash in the sky and shadows of the snow, carefully keeping the drawing in the foreground clean and dry.  Keep in mind that the color is deeper at the top, and gets lighter toward the horizon line, along with a touch of blush tone above the ground and trees.


Xmas 2012 006

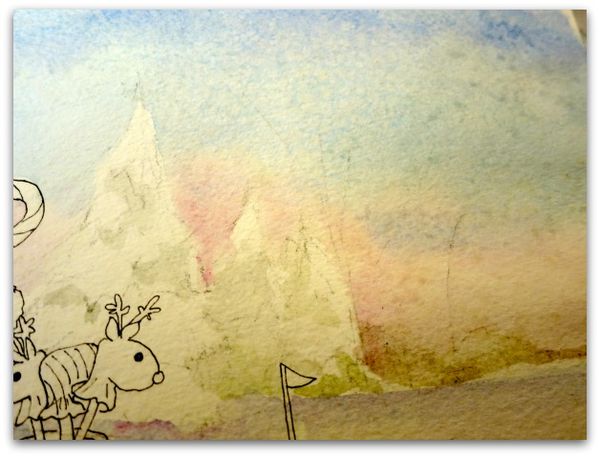
Before the sky dries, I add color to the tree line and a bit to the shadows of the pines. 

When the sky is starting to dry, and the paper shows a slight sheen of dampness, I sprinkle salt lightly over it. 

As the paint finishes drying, the salt absorbs moisture, along with that, color. It makes a pretty snow speckled look.

I let dry completely and brush off salt before proceeding any further.


Xmas 2012 007

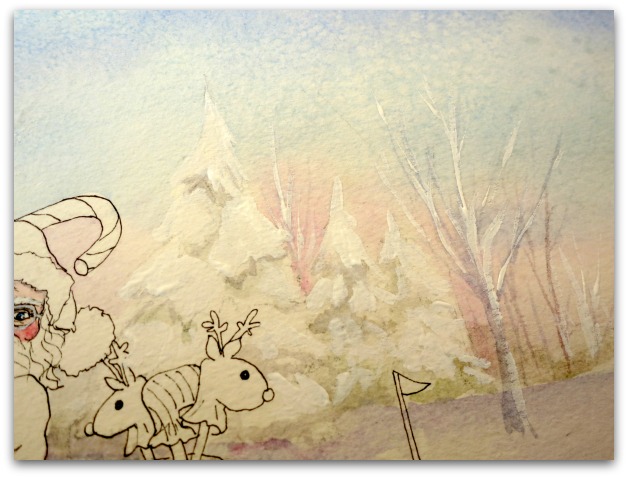
Here is where the watercolor cheating comes in, by adding white paint. (so I just call the painting, "mixed media")  First, I paint in the bare branch trees, with faded browns and purples. Never deep or harsh or bright colors for a background, they have to look faded and distant.

I do save the white of the bare paper, as you should in watercolor, but I really like a touch of pure white over it for even more depth. I use white acrylic paint for snow and highlights.


Xmas 2012 009

Next, the foreground gets painted.  When working with watercolors, the trick is in knowing that the color flows wherever the paper is wet. You have to be careful to paint small areas at a time, with drawings like this, and not do adjacent areas until the first section dries.  So, I wet a segment, such as this part of the jacket, and drop in bright red.  While still wet, I add darker red along the shadowed areas.

I would do the other side of the jacket, waiting for that to dry before painting the sleeve or belt, since they are right next to what I just painted. If I were to paint the belt right away, the red paint would run right into it, as well as some of the black flowing into the red, where that was still wet.  Water pulls the color.

Black is always more interesting if you mix it yourself, using a dark brown and dark blue, never use black watercolor paint.


200100_10151276028889477_468205560_n

When the painting is done, I dip a wet brush into white acrylic paint and flick it over the picture for more snow.

I take my finished paintings to a copy shop and have them shrunk down and printed four per page to make into Christmas cards.

The trick then is to get them signed and mailed…. I am afraid I didn't send a single Christmas card this year!! After all this work.


Xmas 2012 031

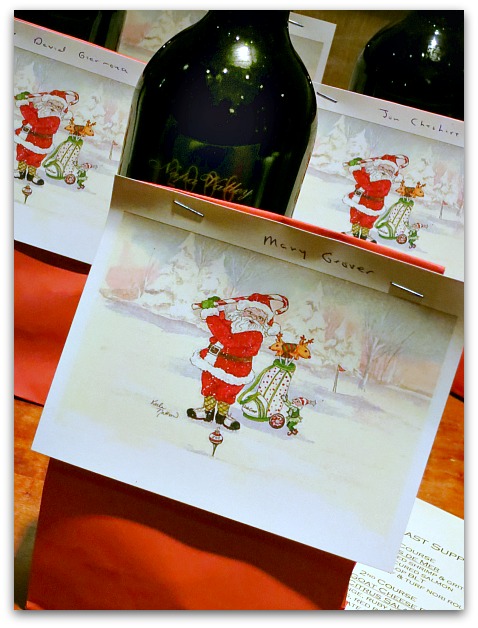
My husband did send some out to his co-workers and we used a few on bags of home made candy that we gave away along with a bottle of wine to some friends.


167467_10151280131709477_1304308695_n

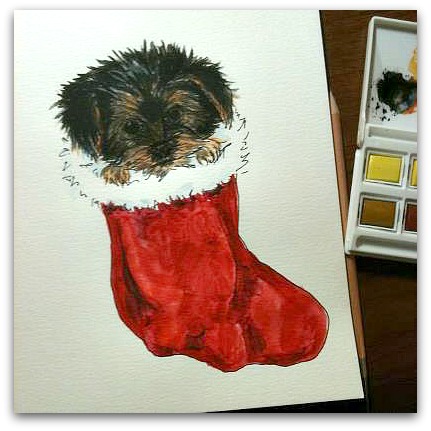
My husband works in the golf industry, so likes the club swinging Santa. I was more into puppies for this season.  After Twinkle's nine babies in August, I thought a pup was a good theme for family cards.  But once again, I didn't get these mailed either.

At least the cards got made.  Maybe I can add hearts and call it a Valentine? No, I think I just missed the boat this season and am out of the time window to mail anything this Christmassy.

Patterns0002
Let's call this a belated Christmas card from me to you. You can click on the image to open in a larger window, save to your computer and print it.

How to hand dye ribbon

holiday decor, how to's, how-to projects

Jars 021
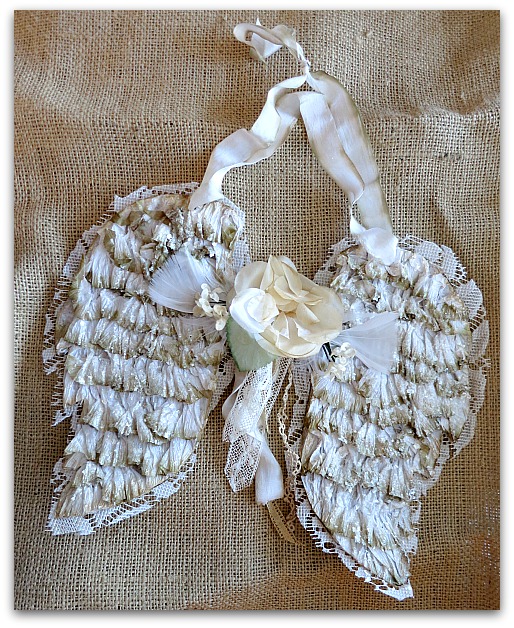
The angel wings tutorial that Dawn is selling are still inspiring me to create some wings of my own!  Her instructions are a bit different than what I do, if I am creating something I like to make sure it looks like I did it, not like someone else's design.    But the original idea is all Dawn.

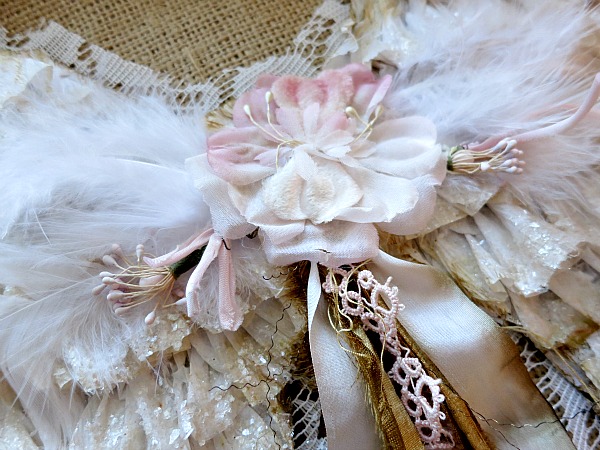
So, I draw my own pattern, and no two pair are exactly the same, each is cut out differently.  I also used dyed crepe paper for the ruffles and added vintage millinery (of course!!)


Jars 024

The backs are covered with sheet music and then lace cut from old curtains, so that it peeks out from behind. 

This pair is in the Boutique, the other two sold as a custom order.  I made up three pair for her to chose from and she picked two of them, that was a nice feeling!


Jars 027

The dangling silk ribbons are hand dyed, the same way I did the crepe paper. Here is how I did it:


Trees and wreathsfor etsy 001

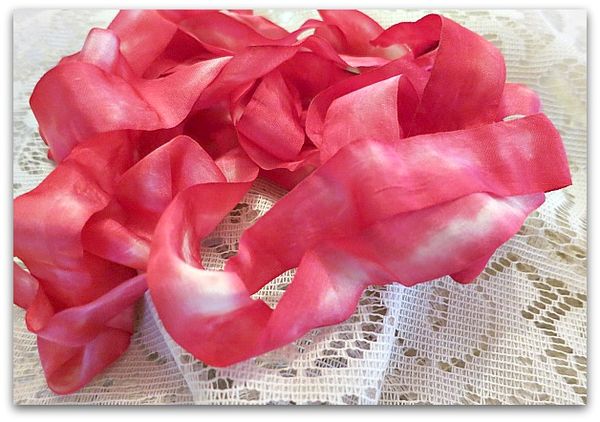
The ribbon pictured on the wreath is silk, and was dipped in coffee and then spritzed with Glimmer Mist in a dark brown color. This ribbon is satin, and I dyed it rosey in a similar manner.

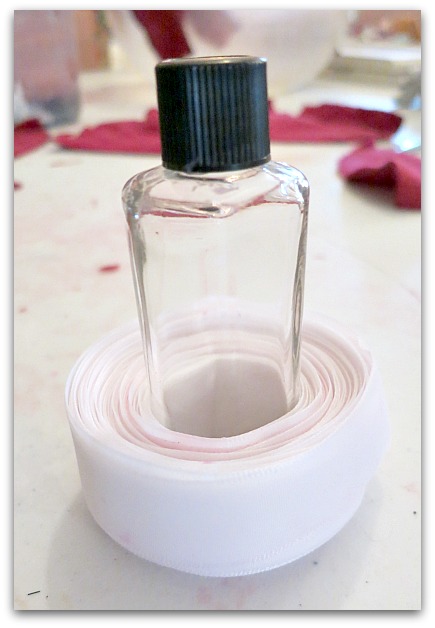
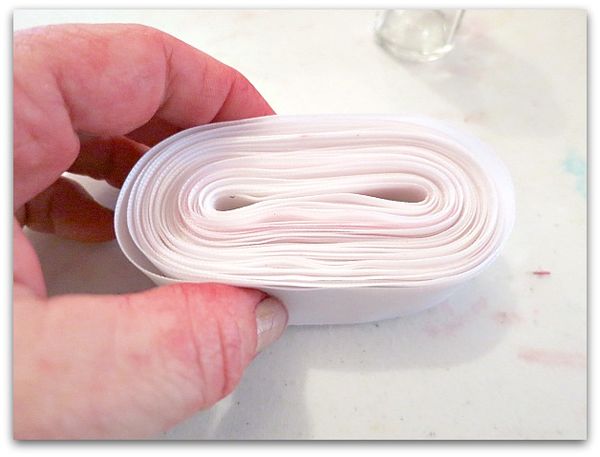
First, I cut off a length from the roll, and to get the edges even, I wrapped it around a small bottle.


Trees and wreathsfor etsy 002

I pulled it off the bottle, and dipped it into water.  The white ribbon is a little pink at the moment because I am a slob, and my hands were all dye-ey and a mess, some red from my hands leached into the water.  But that was okay since I was dying it anyway.

(some snowy cotton trim for a Santa hat that I was working with later, should have been treated more carefully. Pink snow isn't what I was going for)


Trees and wreathsfor etsy 003

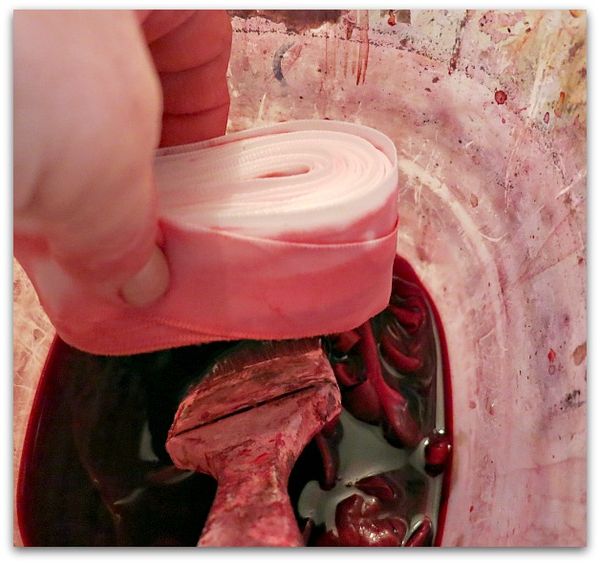
The wet ribbon gets dipped into the dye about half way or so. I dipped it a little deeper this time, I wanted more color than white for the final result.

I used paste food coloring heavily added to hot water, which means its not washable.  If you are coloring ribbon for sewing clothing or something else that will be washed, use Rit or fiber reactive dye.

(ugh, this looks more like a Halloween photo than a Christmas one, that dye is gorey!!)


Trees and wreathsfor etsy 004

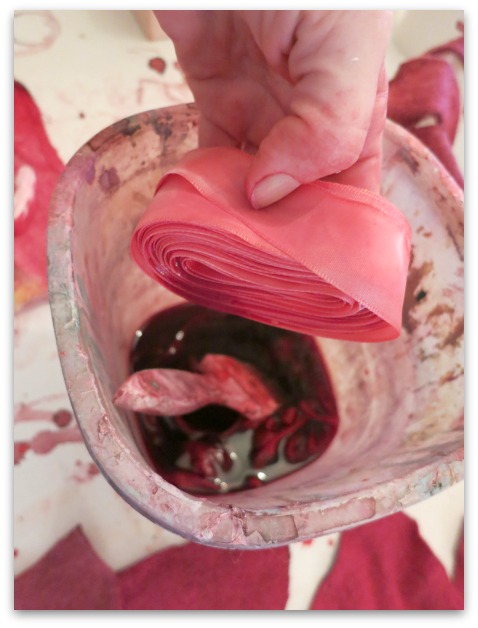
Next, I dipped the other side. 


Trees and wreathsfor etsy 007

The hard part is to let the ribbon set for a couple of days till it dries. It needs to be left alone till all the moisture is gone.

Now, the outside of the roll is all dyed , but the interior is a nice variegated color, where the dye doesn't seep all the way to the center.


Jars 020

You can see the principle in practice more clearly in the crepe paper, since I dipped my ribbon so deeply into the rose colored dye.  For the crepe paper, I just dipped the edges in.  Since the rolls are wet to start with, the moisture pulls the dye toward the center.  The deeper you dip the roll into the color, and the longer you leave it in, the stronger and wider the result will be.

Stockings and wings 002
I've added angel wings to the Boutique.

Stockings and wings 005
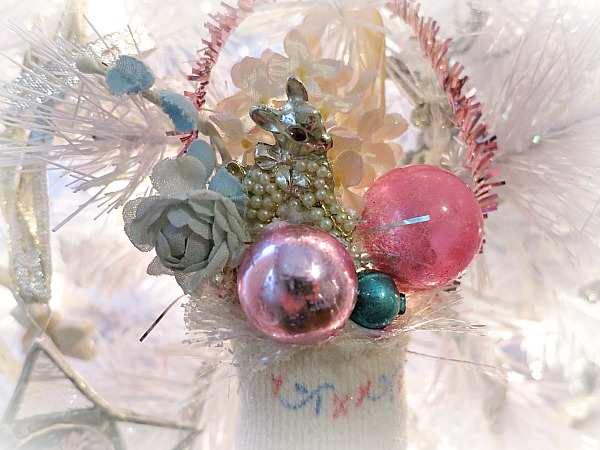
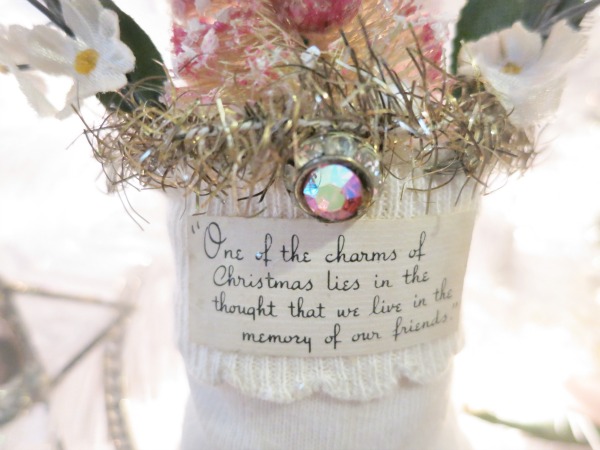
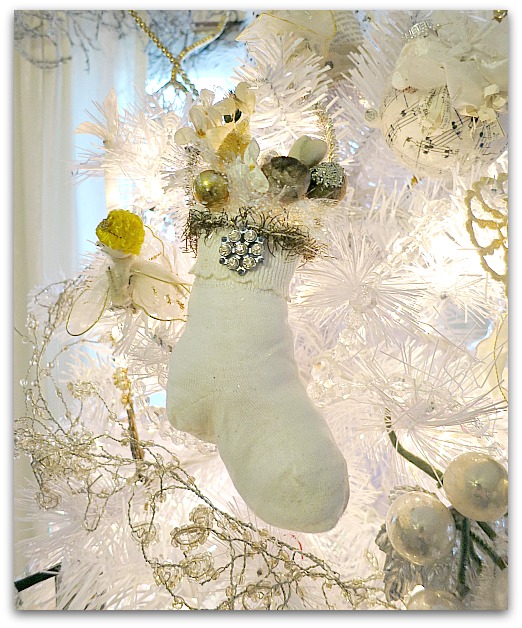
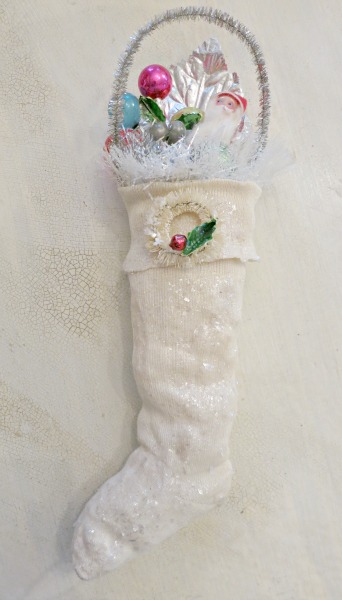
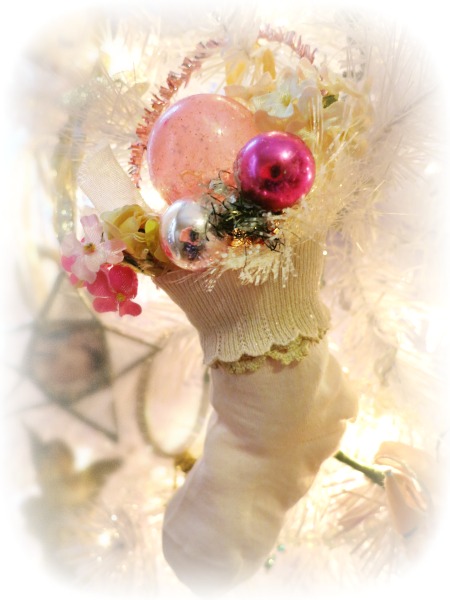
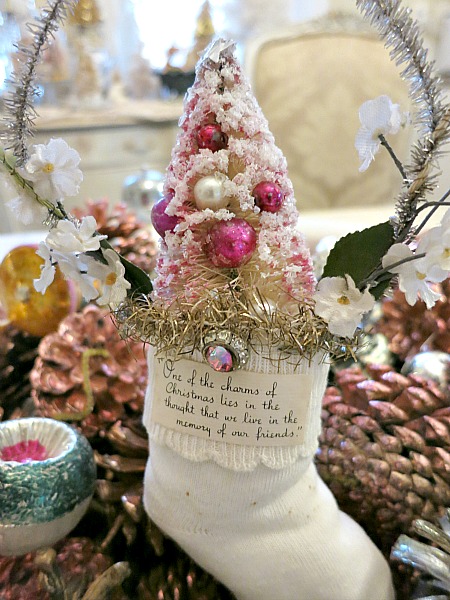
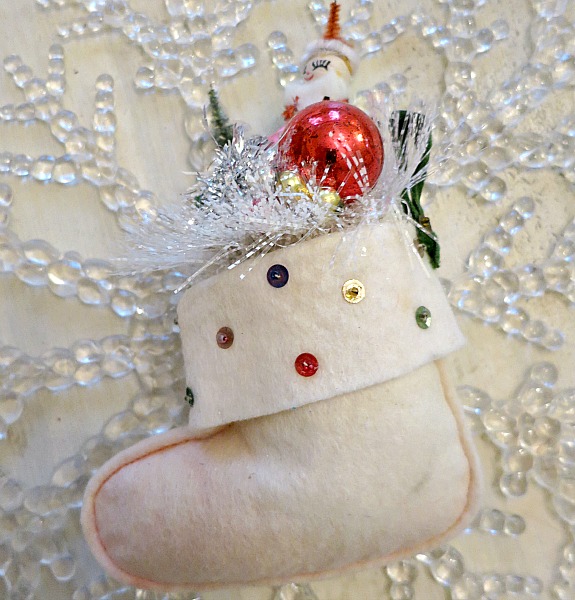
Along with stockings made from vintage sockies.

Stockings and wings 009

Stuffed and filled with vintage pretties.

Stockings and wings 013
Stockings and wings 016
Stockings and wings 017
Stockings and wings 020
This one has mica flakes, the others do not. If you order one and would like mica flakes added, I'd be happy to at no extra charge. Its a quick little thing to do.

Stockings and wings 019
Stockings and wings 033
Stockings and wings 026

How to decorate vintage apothecary and canning jars for Christmas

holiday decor, how to's

Xmashouse 011
 I like the look of jars decorated for the holidays. But, I also like to use the jars in my kitchen and around the house for various things, so didn't want to tie up a jar forever just to set it out for a couple of weeks for Christmas.

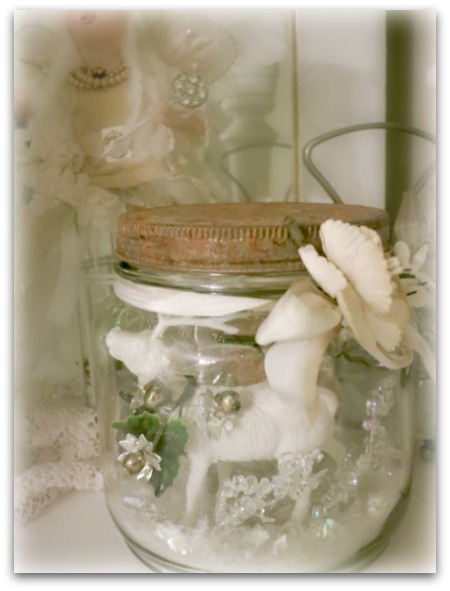
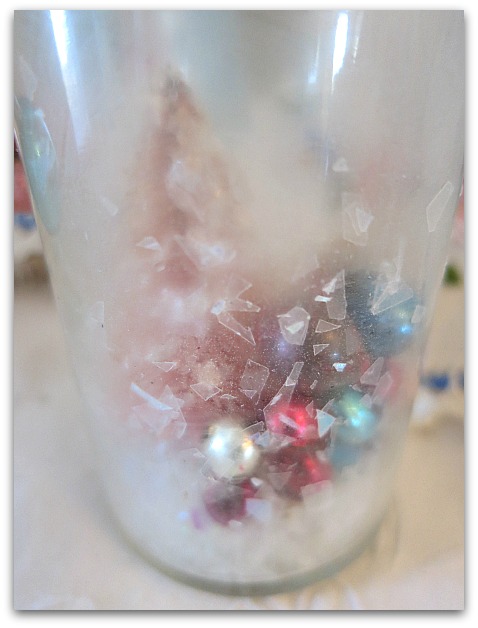
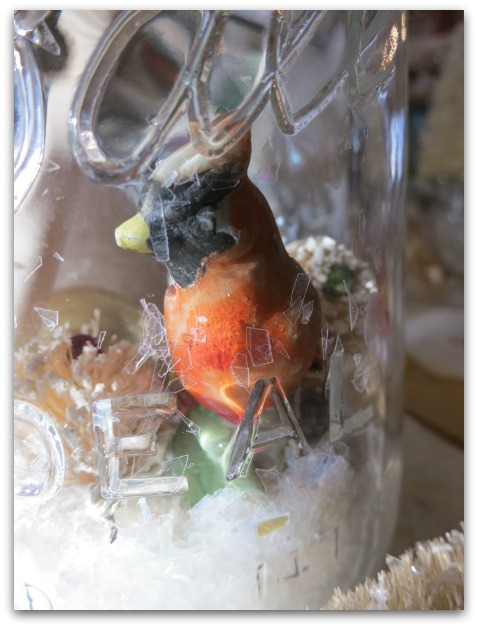
My solution was to do some temporary displays, no glue, just pop some pretties in and add fake snow.


Xmashouse 022

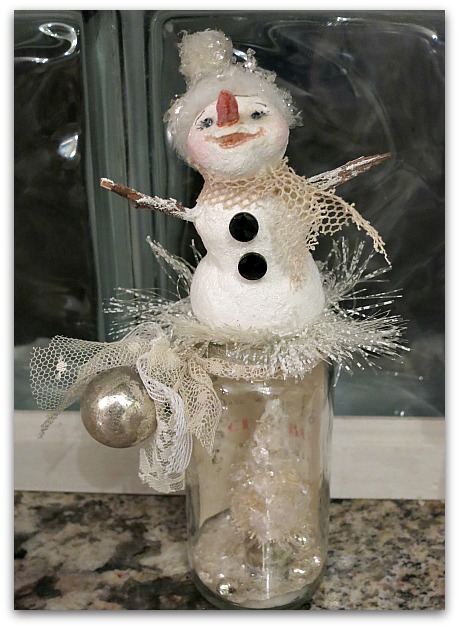
I make a lot of jars that are permanent decorations too, like this paper clay snowman on top of an old spice jar.

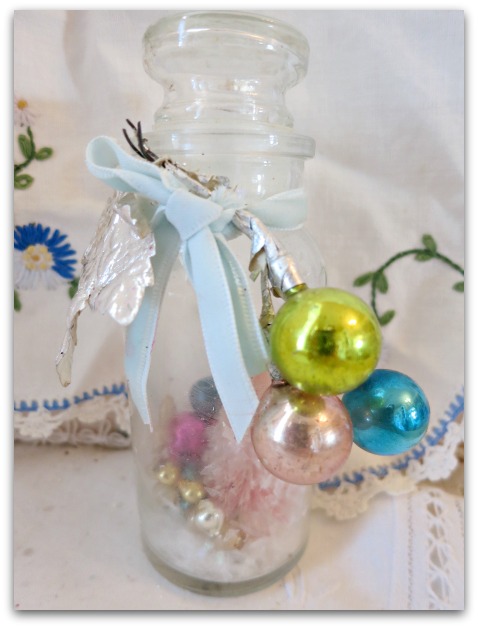
When I do that, I use a very sturdy glue. I start by drizzling the glue into the bottom of the bottle, and then stick my main pieces in, and over that, I sprinkle mica flakes and add mini mercury glass beads.  (mica flakes are nicer for a piece that you want to last forever, I only use the Hobby Lobby fake snow for the temp jars)


Bototle brushtrees 116
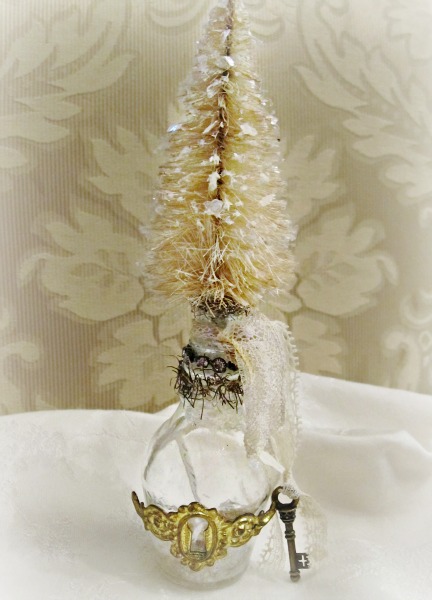
If you are doing a permanent bottle or jar, its also important to make sure the lid (whatever you use for that) is attached securely too, like this bottle brush tree topped bottle.


Jars 014

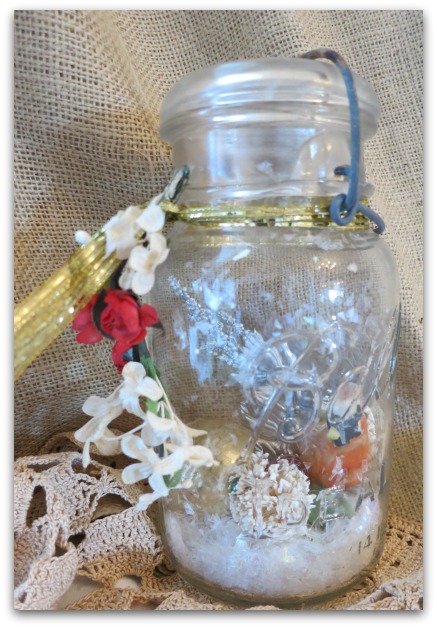
But since I wanted to re-use my old canning jars, I didn't use any glue.  These jars have been handy for so many things already, besides just leftovers, they have been vases for fresh flowers and center pieces for our family reunion.


Jars 009
Jars 010

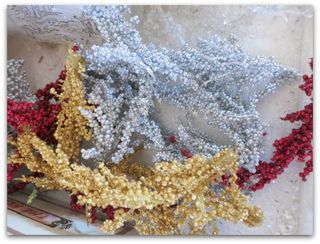
So, I gathered up some supplies, branches cut up from sparkly picks found at Michael's 70% off holiday craft aisle, and some fake snow from Hobby Lobby's 50% off shelf.


Jars 011

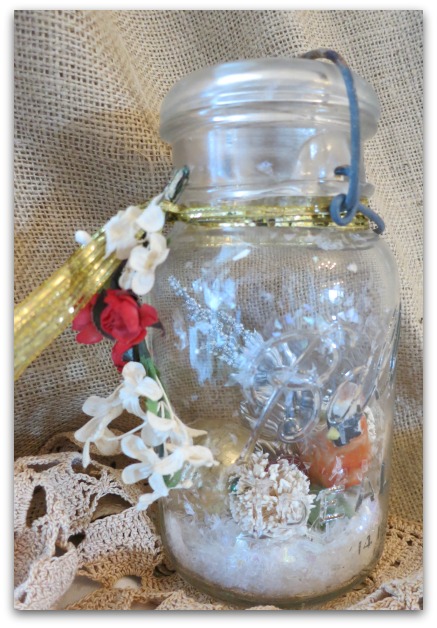
First, I plopped in a branch for height in the back, then added a figurine to the front.  After that, I poured in the fake snow.

A dowel rod was good for moving pieces around to get them to where I liked them.

After the main pieces were in place, I dropped in some mini shiny brites and a bottle brush ball from an old corsage.


Jars 014

Then, I tied an old ribbon to the top and added some millinery.


Jars 029

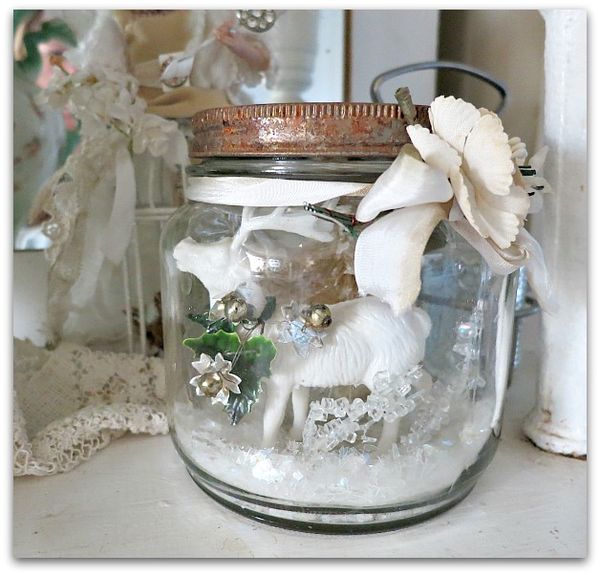
This one was done the same way, a branch in the back first, then the figurine, a deer that I added some holly to. It got a bottle brush tree too.

Next, the snow, another frosty branch for in front of the deer, and a bow with millinery on the rim.


Jars 017

This one is even more simple. Its a small apothecary jar, with a pink bottle brush tree, fake snow, and a handful of little mercury glass beads.

Part of an old Christmas corsage is tied to the top.


Xmashouse 039

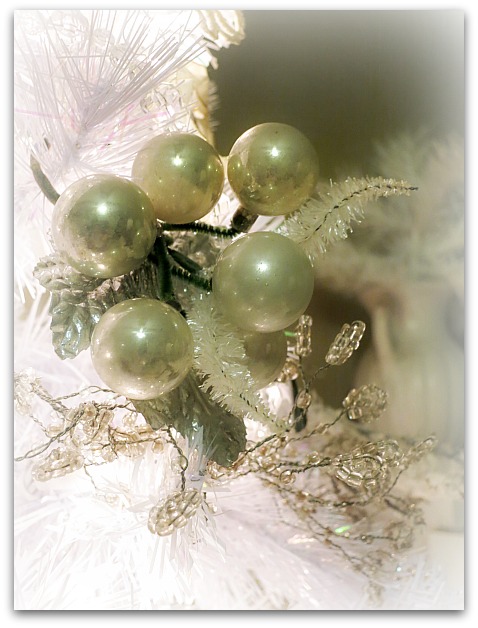
I can never get enough of those old corsages!  They can be tucked into the tree, dropped into a jar, tied onto a lamp shade, or worn on your coat. 


Shine 037

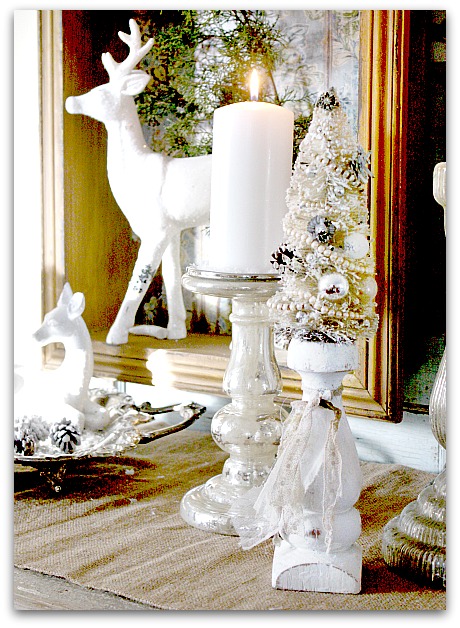
I cut one up to decorate this bottle brush tree glued to a wooden painted candle stick for Carol.


Jars 001
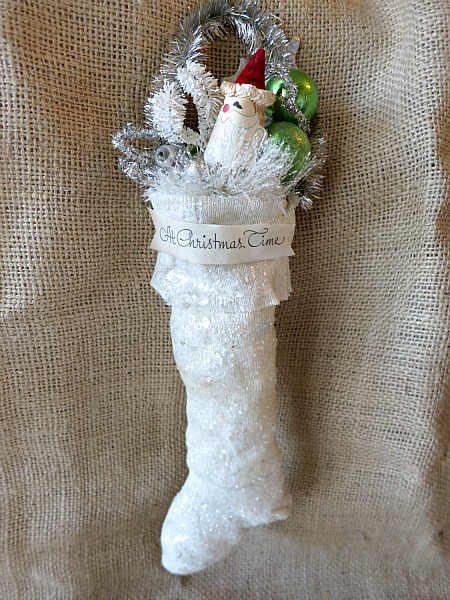
Parts of an old corsage were used to make this stocking from a vintage baby sock.


Jars 018

Old corsages are a great source for the little beads I like to use too. I also buy garlands of beads to take apart when I find them at a good price.


Jars 013

One thing to beware of if you are making temporary jarfuls of holiday cheer, is to keep them out of reach of curious fingers. Kids will want to shake them like a snow globe and even adults can be enticed into picking them up to get a closer look. 

Which means, its not a display anymore, its a jumble.

Of course, no real damage is done, it's easy to poke a stick down in the jar and move things back into position again. 

For me, it was a very quick project just dumping in some stuff on my desk and poking it around with a stick till I liked the look and adding a bow.  I used chipped, junky, or plastic figurines in my jars, but under glass, they look so much more special!


How to decorate your chandelier for Christmas

holiday decor, how to's

Shine 083
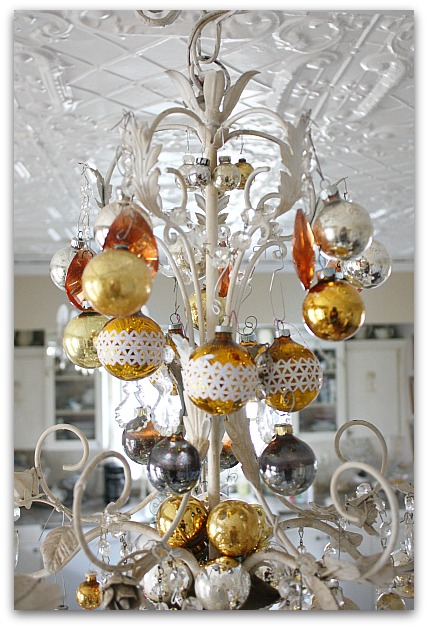
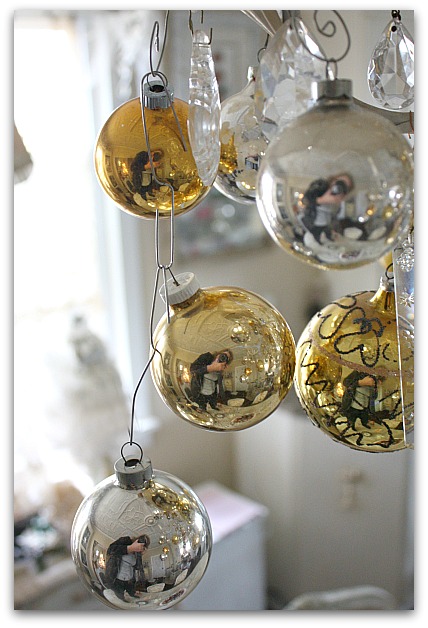
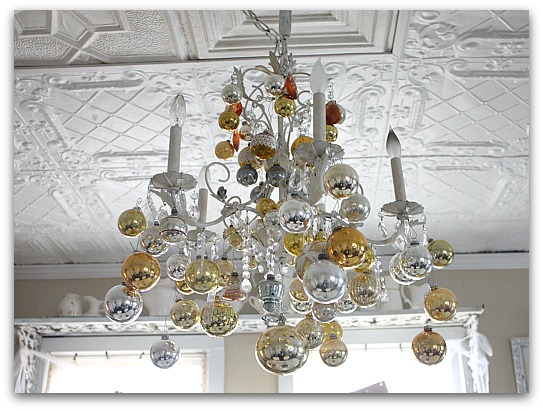
This year, I was going to keep things simple, and not add Shiny Brites to my chandelier.

But after so many years of adding baubles to the dining room light, the room looked empty without it.  And really, its not that much work to do if I pay attention to what goes where. In the past, I have added, stepped back, observed, removed, rearranged, added, and on and on.

That had to end.  This time, I planned out the steps and didn't add the balls randomly and have to redo as I went along. 


Shine 084

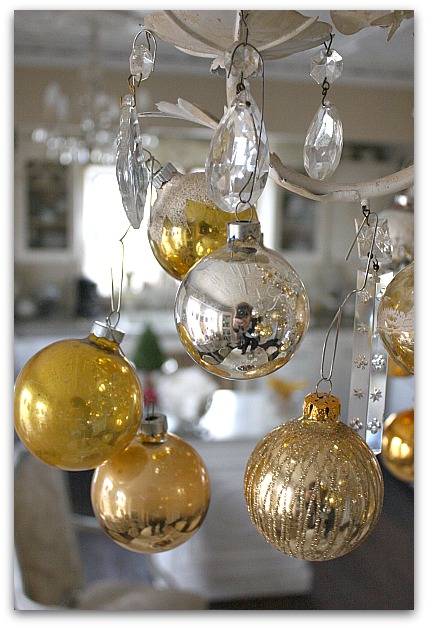
The trick was balance, so I sorted my silver and gold balls according to size.   Then, I put them in piles of 5, since my chandy has 5 arms.

Specialty balls like bells or bell shaped ornaments went into a pile together too.


Shine 074

Next, turn off the light, those bulbs are hot! 

Then, gather a pile of paper clips or ornament hooks. Yes, it would probably be prettier if all my hooks matched, but honestly, you don't notice the paper clips unless you are standing on the table like I am with the camera.  And paper clips are nice to use, because you can open them up, so that they are twice as long, to get some good dangle length. 

Of course, if you have patience and don't mind snipping and tying, fishing wire would be invisible and you can cut it in any length.

I started with the tiny balls at the very top.  I chose to leave my amberish crystals up, but changing them to clear might have been good too.

The center of the light fixture had a cup, or bowl that I filled with smaller balls.


Shine 075

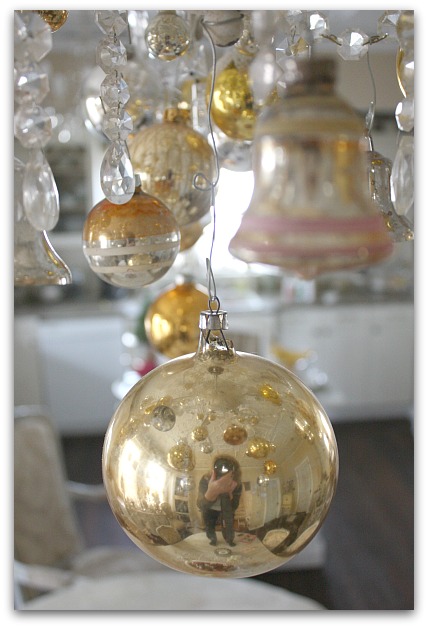
Yes, that is me reflected in each ball.  Standing on the dining room table. Sugarwings enjoys looking up at the balls and seeing herself reflected dozens of times while she eats dinner.

I started at the top of the chandelier, working my way around the five arms, with a similar shape, size, and color ball on each arm.


Shine 076

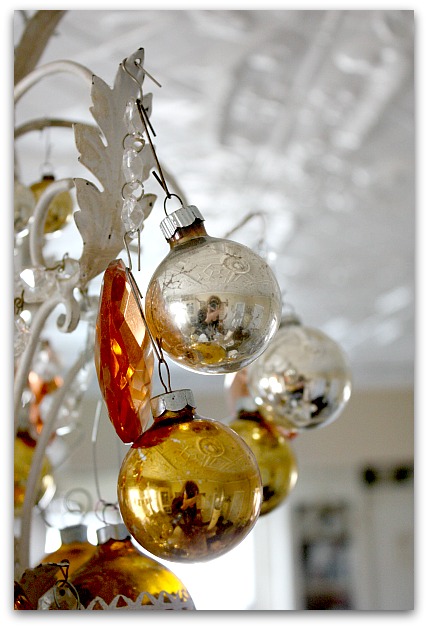
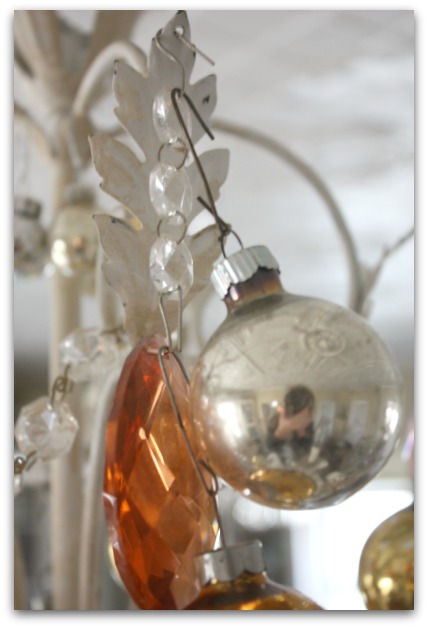
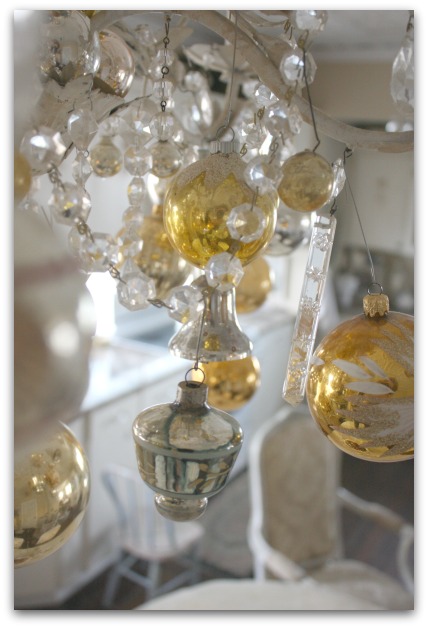
For layers, I hooked balls to the metal of the arm, and also to the crystals hanging from it.


Shine 077

I opened up paper clips to make them twice as long, to hang some of the balls. 


Shine 078

On the bottom, around the outside I hung ornaments from each other, three linked together from opened paper clips.


Shine 079

At the base of the light, I hung five speciality ornaments in a ring, then from the very center, a really large ball.  I opened up the paper clip to wrap it around the tip of the chandy, since there was no where to put a hook through. And I wanted the large ball dead center.


Shine 080

Some ornaments were hung from the crystal chain too.


Shine 081

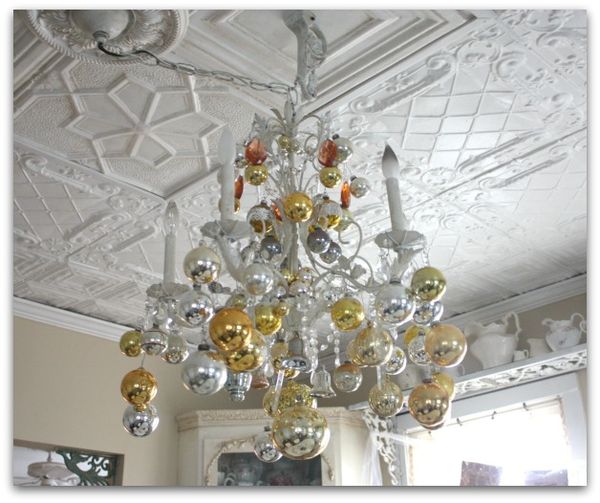
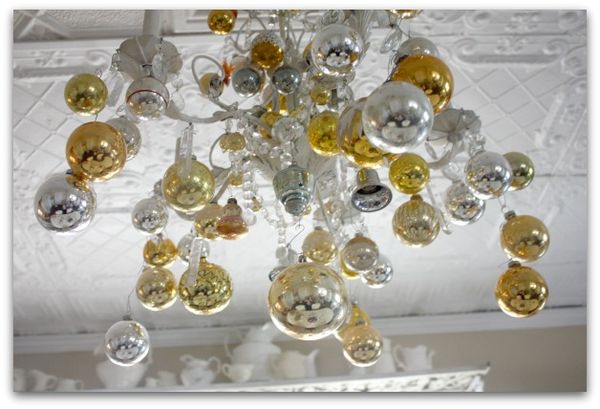
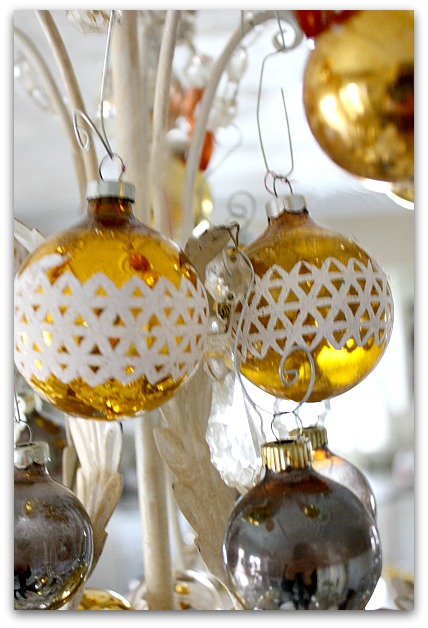
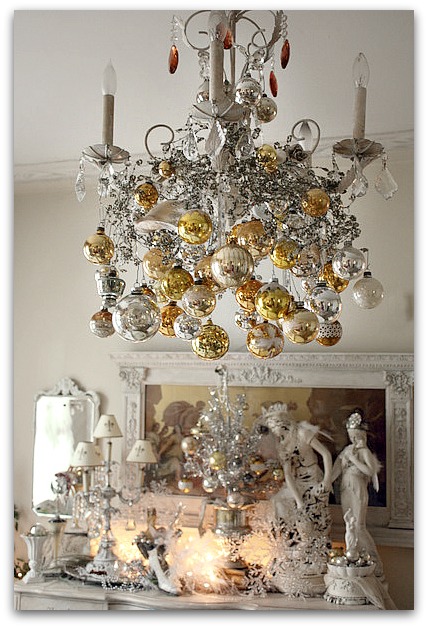
Mine is covered in a mix of balls, but all within the same palette of vintage silver and gold. 


Shine 082

Ta dah!

See what I mean about the paper clips not really showing? I'm sure that fishing line would be ideal design wise, but I'm all for short cuts and this was much quicker.


6a00d83451ead569e20147e068aa70970b-800wi

This is last year's completed light.  I used a garland of beaded wire and hung them all over it as well as the crystals and arms of the chandelier.  These hang down from ball to ball, linked with open paper clips.

That is a look that I really love, but that beaded wire was a nightmare, it tangled on everything.  I ended up taking the ornies off after the holidays and leaving the beading up for months, calling it "winter decor" instead of dealing with untangling it.


6a00d83451ead569e2013488b8db18970c-800wi

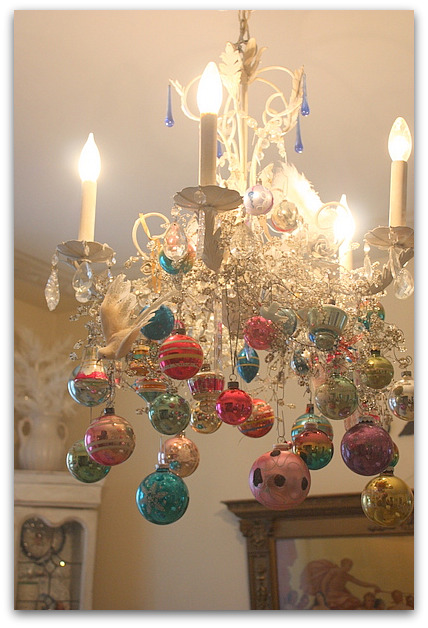
Here is the light a few years ago, with multi-colored vintage balls.  You can see that in some places I have used up to 3 or 4 paper clips to hang some of them. I was going for a very random look, and was happy with it, but its funny how much longer this takes than to actually count out matching sized ones in groups of five like I did it this season.


526352_10151241189499477_595629040_n

My goal was to keep it quick to put up and to take down. I'd say it took me about an hour this time.   Any time I can get something pretty done and save time doing it is much appreciated here at the holidays!


Decorataed treesss 001
I'll  leave you with some photos of some new items in the Boutique and on Etsy.


Decorataed treesss 008
Decorataed treesss 011
Decorataed treesss 002
Jewelstyesss 031

Decorating a family reunion on a budget

celebrations, family, Food and Drink, holiday decor, how to's

For the Faery Book Swappers-

Since the 1st is a holiday weekend, its ok to wait till Tuesday to mail your packages. And please note that it will take me a couple of weeks to make that many books and get them mailed back to you!
Downey dinner 12 009
My Daddy came from a large family, and every year, we gather at our "Downey Dinner" to reconnect.  The 9 siblings take turns hosting, and as the family grows older and parents are passing on, it falls to the cousins to take over hosting duties for the pitch in meal.

This year was my dad's turn, so my sisses and I took over as co-hosts.

Of course, I felt like we needed to foof it up a bit! But we didn't want to spend much on top of our share of the costs that we already had (plates, cutlery, beverages, meat, and the hall rental). 


Downey house

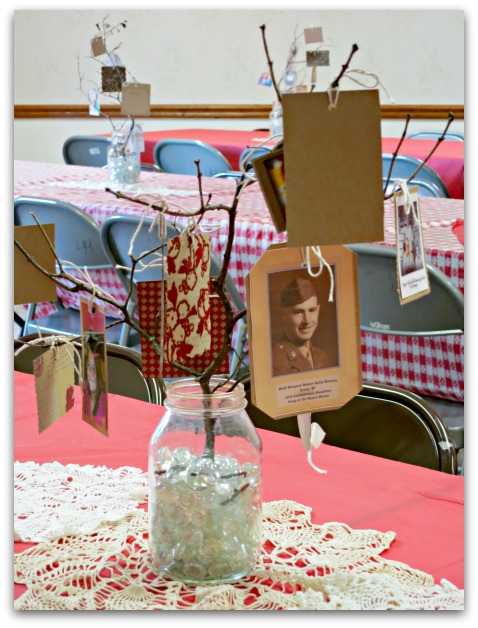
The Downeys are from Southern Indiana farm stock.  All nine kids grew up in this little house.  So, I thought the theme for the reunion should be kind of down home and country.  I chose red and white table cloths from the dollar store, and collected some old canning jars from garage sales.

My niece had a boxful of clear marbles, and we poured a few into each canning jar to weight them down, and then sat the jars on doilies (from my stash) in the centers of the tables.

Downey dinner 12 013

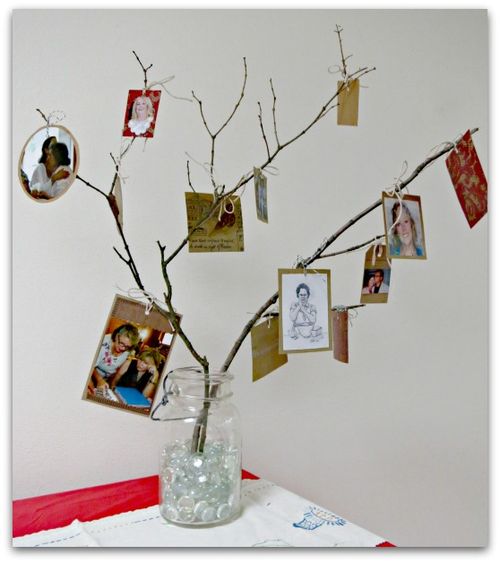
At Michaels, I found a scrapbook tablet in just the right colors, called "Recollections"  in paper sack brown, sepia, and red.  There was a touch of forrest green too.  It featured love letters and memorabilia, some birds and other pretty little bits to cut out and use as embellishments for our project. It was a little fancier than I wanted, I'd hoped for calico or checks, but these colors were just right, so I went for it.

We decided to make the centerpieces be Family Trees.  So, we printed off a pile of pictures in different sizes and started cutting them out, and gluing them to shapes we'd cut from the scrapbook paper. We tried to make sure that all nine sibling's families were represented in the mix.

Then, we walked around to find some branches in Bobbie Sue's yard and discovered that the lilac bushes had branches that worked perfectly.  Lots of branchy little arms to tie pictures to.

Next, we punched holes and tied strings to the photos, and they were ready to tie to the sticks.

Downey dinner 12 036

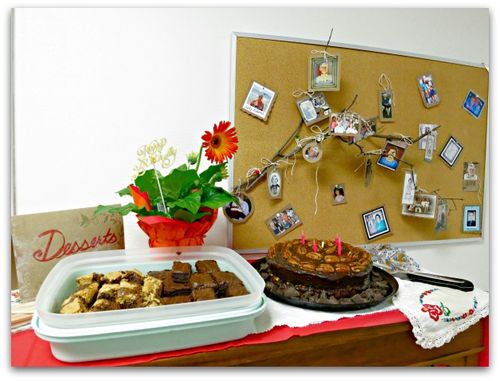
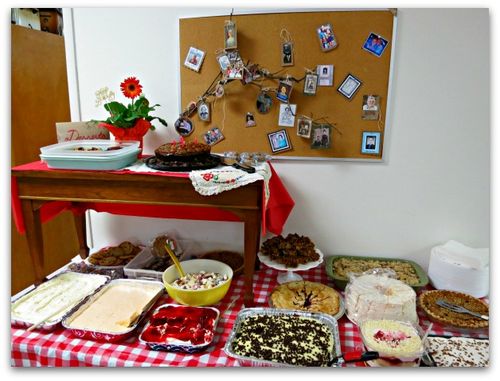
We got a little carried away with the photos and made extra, so we took everything off the bulletin board in the rented hall and I added a branch and pictures to that too.

Downey dinner 12 053

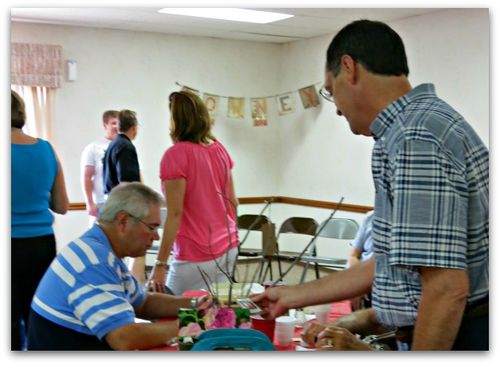
After the meal, we announced that everyone could pluck photos from the trees to keep.  And when the party was over and clean up time came, there were none left, so I think that everyone enjoyed them. 

Downey dinner 12 049

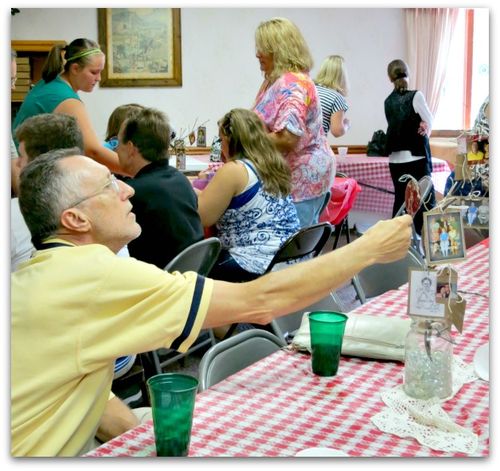
The Family Trees were a little tall for centerpieces, and I expected to see people moving them aside, but it didn't look like they were much of a problem.  And people spent a lot of time looking at them, and there was some extra mingling with everyone going from table to table to check out the variety of snapshots.

Downey dinner 12 051

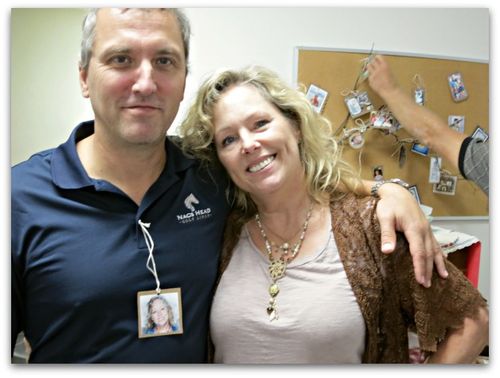
My romantic, sweetheart had tied a picture of me from the trees, to his
shirt.  He now has it on his computer bag and carried it through the
airport that way on his business trip.

Downey dinner 12 023

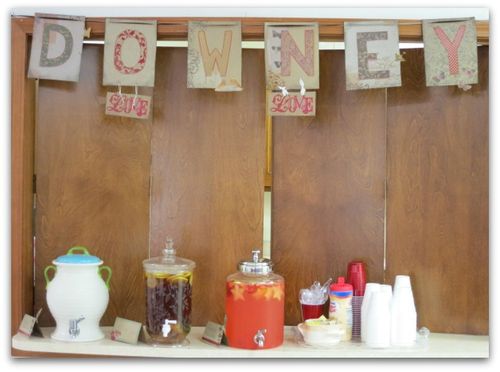
There was plenty of paper left, after making the photo trees, so I decided to make a banner to hang up by the kitchen.

Downey dinner 12 027

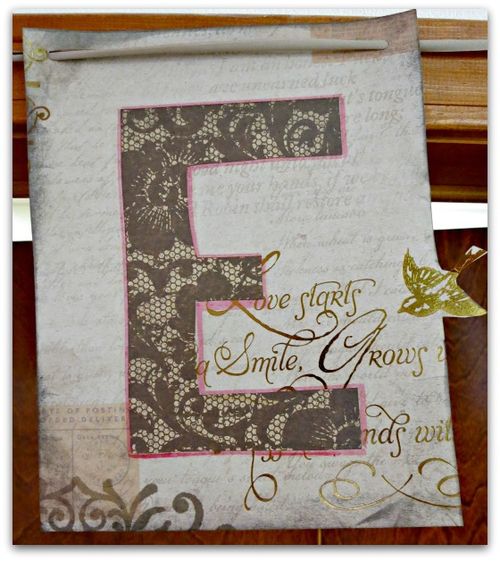
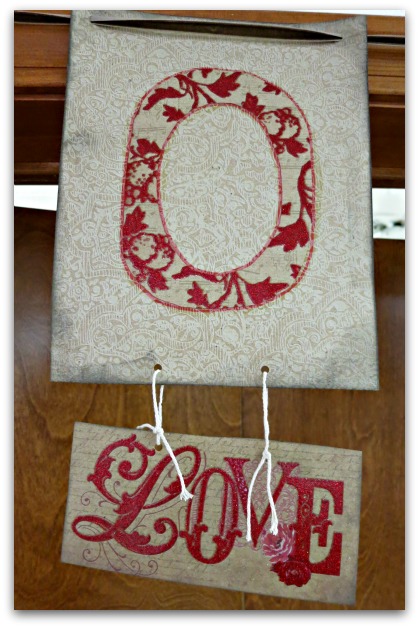
It was a fast and simple project, I cut out 6 large rectangles from paper that looked like it would make a good background, and inked the edges.  When there was something pretty on the page like the bird in this one, I cut around it, so it stood out from the side.

Next, I took some of the darker pages and cut out the letters, glued them down and drew around them with red marker.

Two holes were punched in the top and a length of ribbon was run through all the letters.

Downey dinner 12 029

I made the letters free hand. It wasn't a planned project and I was in a hurry.  They are far from perfect, but they did the job. 

In the tablet, there were some pages that had this glittery, red "love" on them, so I cut a couple of those out to hang below two of the letters.

Downey dinner 12 031

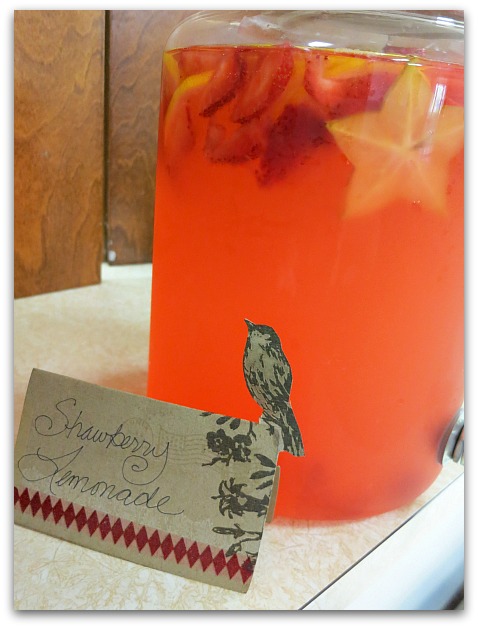
I used more scraps to make signs for the beverages.  This paper practically decorated itself, all I had to do was cut this out, fold it and write the words on it.

(a sliced star fruit and some fresh strawberries prettied up the jug of lemonade)

Downey dinner 12 035

We took an idea from the Clampetts and covered the pool table to use as a buffet for the salads and main dishes.  The desserts had a separate table.  I knew a lot of treats were coming, so I washed off the piano bench (cleaning the legs and under part extra good) and set it on the table to make more space.  And this photo was taken early on, by the time all the goodies arrived, this dessert buffet was full to the brim!

Downey dinner 12 033

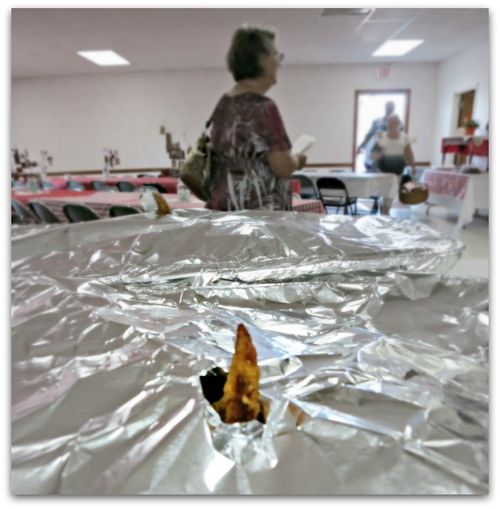
This is just something I thought was funny, yes, I know, weird picture. It looks like the fried chicken is trying to escape from the foil covering it! (or maybe its just waving to the guests as they arrive?)

But you can kind of see the room behind the franken-chicken, and see the red and white tables with the Family Trees on them.

The hall was a nice space, and the perfect size.  There were some gorgeous antiques around the room and many of the framed pieces on the walls were attractive. The ones that were not pretty, or old, we took down for the day. I preferred plain white walls to pink and blue wreaths on the wall with our red and white decor.
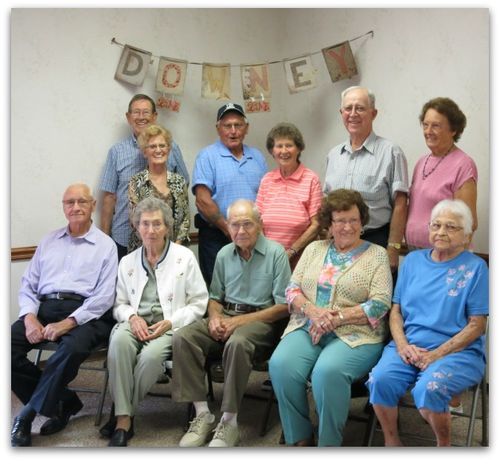

Downey dinner 12 046

After eating, we shoved some tables out of the way and set up a corner for group pictures, and I moved the banner over there to hang as a backdrop.

Actually, I didn't move it, I had the Bumbles do it.  Whats a Bumble? Remember the animated Christmas special, Rudolf? At the end, the abominable snowman, who Cornelias calls a Bumble, puts the star on the top of the tree. Whenever I need a tall person to reach something for me, I call them my "Bumble".


Downey dinner 12 070

My sisses and I had a good time co-hostessing the bash.  It was just too bad it was such a quick trip, my husband and I packed up and drove 8-1/2 hours back home as soon as the room was cleaned up, so we could get back to the newborn puppies.
Sparks12 017

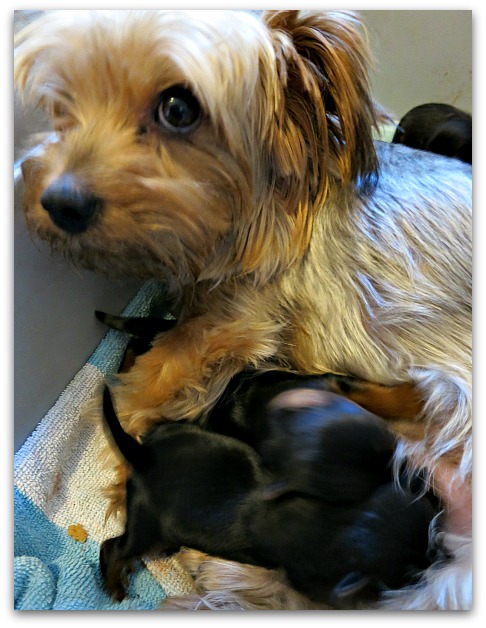
I'm glad my sisters are coming out for Romantic Gothic Ghosts!  That will make up for having our sister time cut short due to Twinkle's over active birth of nine tiny Yorkies.  When they get here, those pups will be running around under foot and will be such fun to play with.

Downey dinner 12 003

I bought the $19 scrapbook paper with my 40% off coupon, spent $4 on canning jars, and $15 on table cloths.  We had the string, ribbon, doilies, clear marbles, and glue already.  The only other cost was printing the photos. We did a combo of some from the computer and 11 cent prints from Walgreens. 

We didn't have to spend a lot of time on the decor, besides cutting and gluing photos. And we like to have a craft day when we get together any how, so that part was fun. 

It was a fast and cheap way to decorate for a family gathering!
More fairy collage how to’s

fairies, how to's, swaps

Fairypage 061

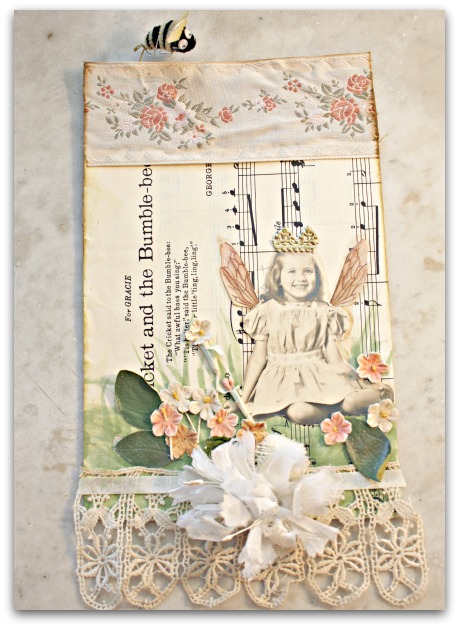
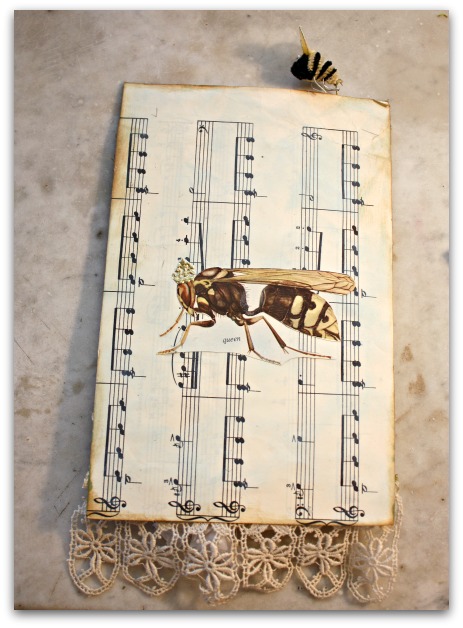
This card stock page is covered on both sides in sheet music titled the Cricket and the Bumble Bee.

To that I added embroidered ribbon across the top and crocheted lace to the bottom. I've cut a girl from an old photo and gave her bumble bee wings from an old book about insects.

Fairypage 063
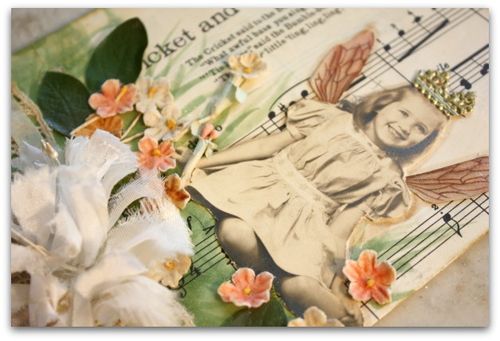
With markers,  I  drew grass for her to sit in, and glued little flowers and leaves around the grass.  She is outlined with a Tim Holtz distress marker to make her stand out a bit, and is topped with a crown of German foil.

It doesn't show up in the picture, but she is rubbed with glittery ink too, for a subtle sparkle.

Fairypage 062
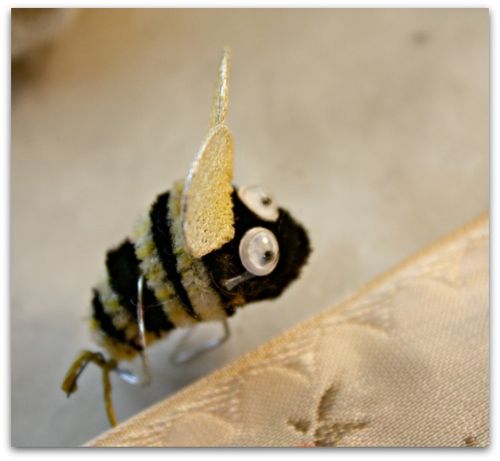
At the very top of the page, I've added a bumble bee on a wire.  It looks cute from the front or the back and I can't wait to see it peeking out the top of someone's book!!!
Fairypage 065
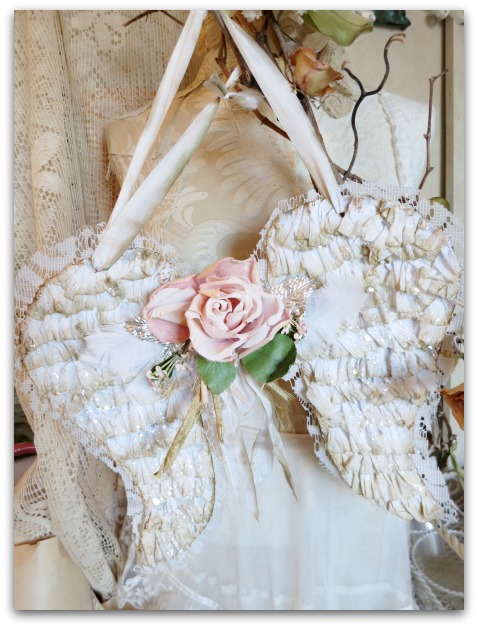
Once again, the back is simple.  I've inked the edges (front side also), then glued down a large bee cut from my insect book.  And of course, the Queen Bee needed a crown!!

Fairy page collage how tos, Plus some answers to questions about the swaps

fairies, how to's, swaps, vintage paper/collage art

Fairypage 054
These fairy pages are too much fun!

I know I only need 8 to swap, but I wanted some extra in case they were needed. Sometimes the count is slightly off in a swap, or someone sends the wrong amount, or I plain old screw it up somehow and its just handy to have a stack of extras to add to a book just in case.

(I'm an artist, not a mathematician!! I try hard, but numbers sometimes are painful for me)

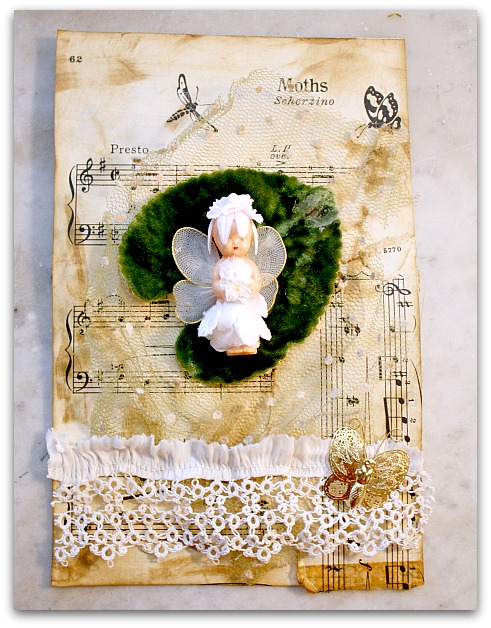
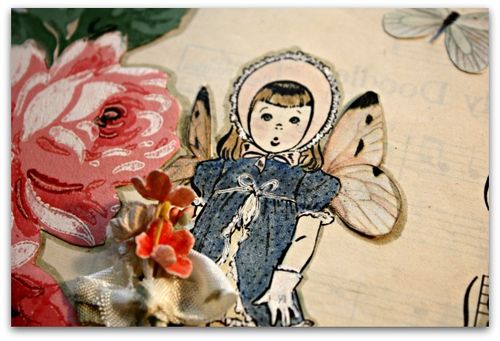
This page is covered in "Moths" sheet music, then inked all over with 3 similar inks, darkening the edges even more than the rest of the page.

Next, I glued down some old hat netting. 

Then, I added a fairy dress made up of flower petals to a vintage baby doll.  Her wings are a sheer butterfly.

I started to glue her down directly to the netting, but she looked washed out, so I dug through my drawer full of millinery leaves and found a big, velvet one.

Fairypage 056
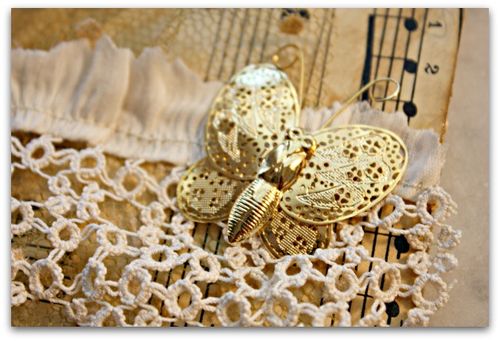
The page is finished by gluing trim cut from an old garment to the bottom and topping that with a butterfly brooch.

Fairypage 058
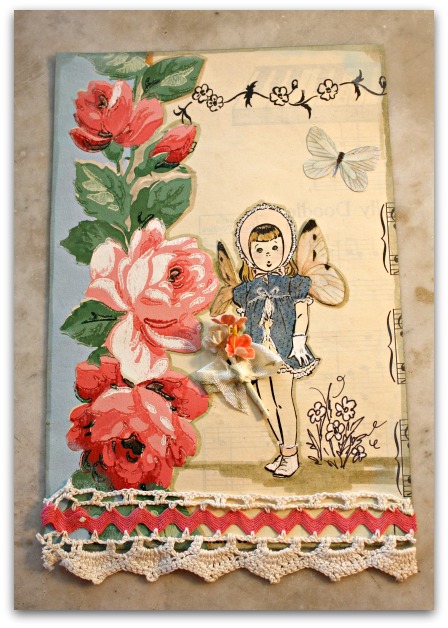
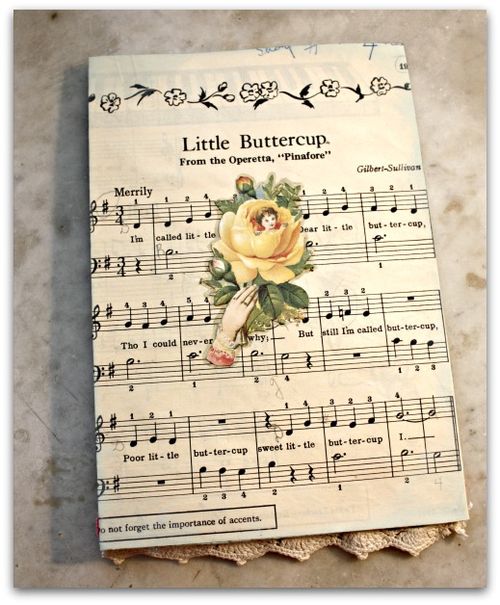
Here is another done with sheet music.  This one is "Little Buttercup", and the words are on the back, I'll show that picture too.

I wrapped the sheet music around both sides of the page, and then lined one side with an old wallpaper bordered, and trimmed the bottom with zig zag chrocheted edging.

Next, I colored the little girl on the sheet music with markers, and gave her butterfly wings cut from an old book about insects. I drew in some flowers next to her, similar to the ones on the border of the sheet music.

Fairypage 059

To make her stand out, I outlined the body and wings with a Tim Holtz Distress Ink marker. I used the same marker around the wallpaper border. She still didn't "pop" as much as I'd like, so I used white ink to embellish the details of her dress, gloves, socks, and shoes.

From the bug book, I cut another butterfly out and glued it above the girl.  Then glued a posy of millinery blooms to her hand.

Fairypage 060
The back is simple, a Victorian calling card was added to the middle of the page, and I inked the edges in a soft blue.

I do need to sign the back. Please make sure you sign your pages too! Everyone will want to know whose pages they received.

Fairypage 046
I'll leave you with some pictures of what is new in the Boutique. 

Fairypage 022And in my next posts I will have more "how tos" about the other pages I've done.

Fairypage 002

Its not too late to join the swap.  Click on the button to the right of my post for details.  You have all summer to make the eight pages. Well, its kind of 16, with the backs, but the backs can be very, very simple, just pretty paper only, no designs.

Amber Bl Crtyer
People have asked me if their pages all need to be the same.  No, of course not! They go to 8 different people, so do them however you like.

Fairypage 013
Another question I get a lot is: can there be things sticking over the edges of the page? 

Oh yes! Lace, trim, ribbons, whatever, all look pretty dangling from the book!  And the size guidelines don't have to be exactly perfect, just in that ballpark size.  An inch smaller or larger will be ok.  I am folding card stock in half to use, so mine are pretty much the same, except for trailing trims.

Fairypage 029
You can be more creative than I've been and use other materials besides card stock. Just make sure that the page will hold up in the book. Paper that is too thin, might tear at the hole punch.  But fabric, metal, cardboard, burlap, all sorts of things will be acceptable replacements for cardstock. (to see an example, look at what Cheryl did with her birdhouses here)

There are great tag examples and a little bit about how I process the pages as they arrive in this old post too.

Fairypage 035
In the past, I have been blown away by the imaginations of swappers when the bounty starts flowing in my mailbox.  I am dumbfounded by what some of you are capable of and shake my head wondering why I never thought of doing something like that.

Fairypage 026
Another question I get is about 3D items. YES, YES! they add a lot of interest. Just make sure there is nothing thick along the left side, I'm still not sure how I'll be putting the books together, maybe just one punch in the upper left corner like here, or two or more rings like here.

I'll have to put a few together and see how I like the look of them either way.

I've got cute, woodland fairy charms to tie on, and will add some ribbons and lace too.  The books will be bound with rings, so the owners can always open them up to add more pages if they would like too.

Hope to see you in the swap! We are up to 80 swappers so far.  Man, I have my work cut out for myself, don't i????

How to trap fruit flies

Food and Drink, Hens, how to's

Progress 021
Thanks for your comments about my friend's place in Omaha. I sure would recommend it if you need a place to stay when in Nebraska!

Talking about wine reminded me about this little trick to get rid of fruit flies.  This year has been awful for the horrid little pests.  I discovered that they really love wine, more than anything and every evening when my husband poured a glass of his (purely medicinal-ha ha) red he'd end up with floaters.

So, instead of throwing out this bottle when I was done, I left about 2" of wine in the bottom, and covered the top with Saran Wrap, and taped it down tightly.

With a toothpick, I punched some tiny holes.

The insidious creatures can't resist the wine, fly in the tiny holes, and then get stuck. I don't know if its that they drink so much, they are too drunk to get out, of if they get fatter while in there, or if they find their way in by scent but aren't led out that way. 

Whatever reason, it works.  Of course, I could tidy up the plastic wrap and make the bottle look nicer, or use a better bottle of wine, not a $5 one from Trader Joes.  But I still think this looks better than fruit flies on the bowl of produce I have sitting out!!

But you don't want to make it too attractive, it would be awful to mistakenly pour this into your wine glass!

Strohms 073
Now, if I could just get the chigger problem under control outside.  The hens don't seem to be making a dent in my daily itch quotient.  But they do pick grasshoppers off my begonias.

Scroll to Top