how to’s

Pools Of Light

how to's, jewelry, paintings, vintage paper/collage art

Kecias visit 024
My sissy is a vintage jewelry expert.  She collects a wide variety of beautiful pieces and I've learned an appreciation about the subject from shopping with her or looking through her vast, luscious piles and stacked boxes of precious pretties.

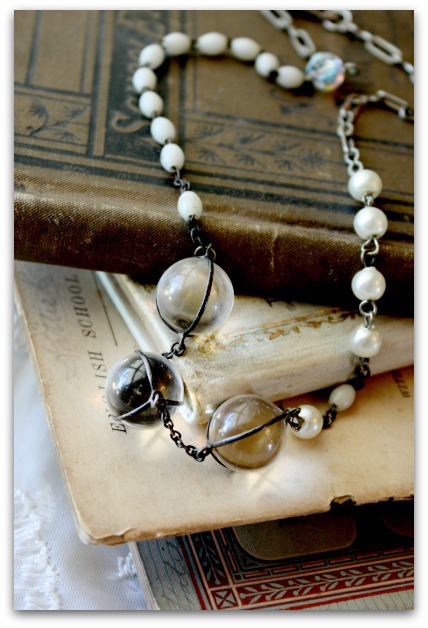
I've long admired her "Pool of Light" beads, without really knowing what they were,thinking  just pretty little crystal ball type dangles.

Kecias visit 013
So, when Beth had some junk jewelry for sale and had some of these little marble thingies in it, I was quick to snap them up to make my own necklace with.

Then I did some research about the balls, here is one thing I found:

For thousands of years this optically clear quartz has been used as gemstones because of its enchanting ability to absorb and affect light in the way that it does. Images viewed through genuine rock crystal balls appear to be reversed or upside down. They are brilliant, luminous and will be a conversation piece wherever worn. These literal works of art are finely crafted and are from turn of the century.

I  also found out that they were very expensive.  And felt a bit guilty about buying them from her for a couple bucks.  But I'd already made a necklace for myself, and one for a birthday coming up for some one else. 

And I did NOT want to take off my necklace!!

Kecias visit 025
So, I made a necklace for Beth too, using pieces I thought she'd like, including an old luggage tag from the Santa Fe railroad.

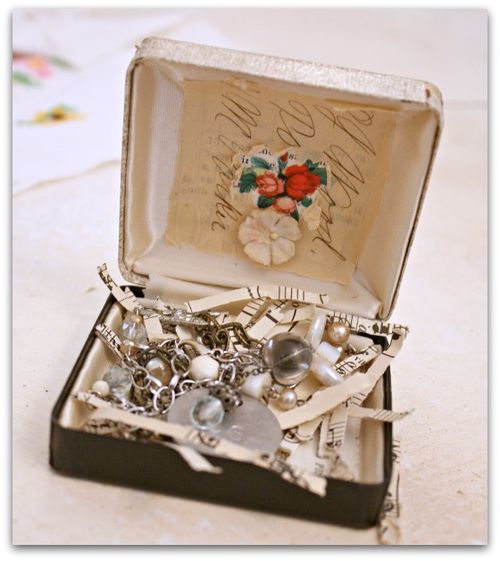
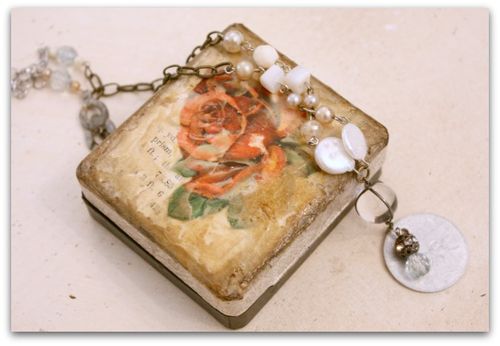
And that didn't seem like enough, so I foofed up a box for her too.  Its an old jewelry box, and to the top, I added text that included the word "prism" (seemed fitting) and a die cut rose. Over that, I smeared modelling paste, let that dry and added ink.

To the interior, I glued text to the inside lid, and a tiny die cut rose over that. 

Next, I layered hand writing from a ledger page, that had been waxed, so had a nice, transparent quality, and scraped it away from the rose under it, and glued a teensy millinery posey under that.

Kecias visit 009
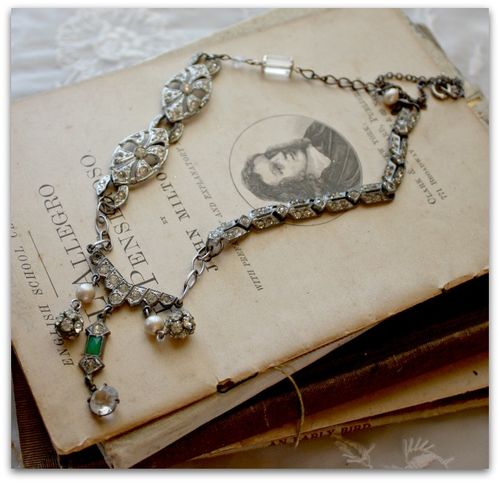
While my jewelry tools were out, I made this necklace too, as well as some earrings for a pal.

Its inspiring to have beautiful baubles to work with, so I was on a roll.

Kecia 022

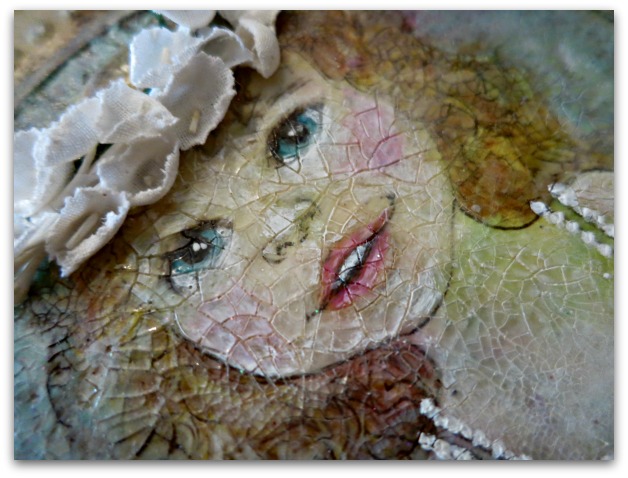
I did a bit of painting that day, too. I'm not done with this one, I'm adding some 3d wings to her too.

  For sale 61 075

Last day to enter the drawing for the bird themed collage! Drawing is Saturday.

For sale june 14 014
I'll leave you with some photos of newer listings in the Boutique.

Angel Crepe Floral
For sale june 14 021
For sale june 14 018

Raleigh 091

How to make a hand painted banner on canvas and tips on painting a rose topiary

flowers, hand painted signs, how to's, how-to projects, paintings, Travel, Tutorials

Banner 001

Here is a little break from Birdsong talk!

I've spent a lot of years painting murals, I travelled around the country and painted quite a few hotels, day care centers, and even a casino, as well as people's homes.    But the scaffolding and ladders really got to me, so I moved on to other things. 

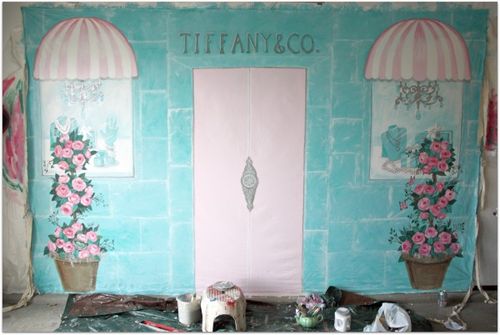
Every once in a while I'll get to do one again and always enjoy the opportunity. Especially a canvas one that I can work on in my own space and take my time on.  This one was sent to my pal, Kim, for her Tiffany's event, where I am at right now.  (I've pre-posted this)

While this isn't exactly what the front of a real Tiffany's shop looks like, it is just right for the ladies attending Kim's party! Whimsical, fun, and pretty.

!cid_tie_8CEB029EE824472_6AC_D916

Kim wanted something more light hearted than the cold stone of the original building in NY. 
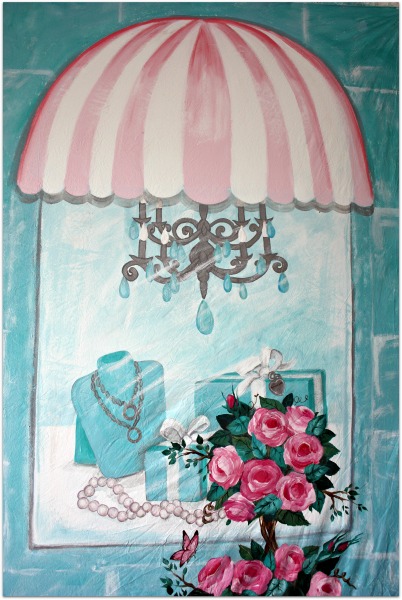
Finished banner 013

So, we took a few liberties with our design. 

My painting is all free hand..  I just paint as I go.  My lines aren't perfectly straight, but I think that adds to the whimsy and suits my style.

Plus, I know that I could NEVER do straight lines, so I don't even try! But since this was so architectural, I used a level to help out with the door and window shapes.

!cid_tie_8CEB185855D263D_9D4_24421
Here is the inspiration that Kim sent to me.  I used the fanciful nature of this with the stone front of the real building, along with the colors she asked for to come up with the banner design.
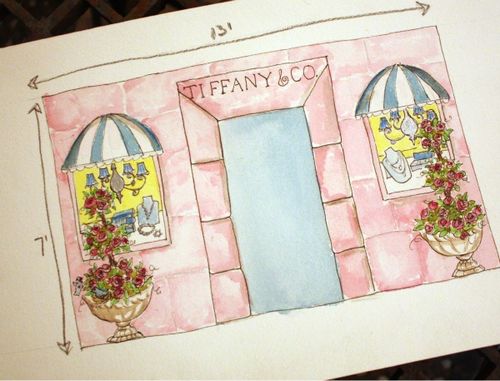
Banner 009
Here is my basic sketch for the idea.  We decided to flip the color scheme, so more of the Tiffany Blue would show. The canvas is being used as a backdrop for a photo booth, and with people standing in the middle, not much of the door itself would show.
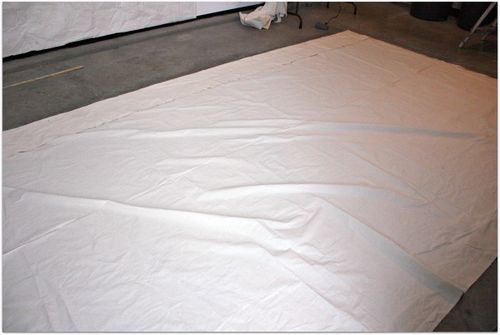
Chicken coop building 063

My first step was getting the canvas ready. I like to paint on drop cloths, but this picture was larger than most seamless dropcloths are.  I found fabric big enough to avoid seams at Darhma Trading Co.

I washed and dried mine hoping to remove the fold marks that way. MAN, WAS THAT A MISTAKE!  It came out of the dryer looking like a wadded up piece of paper.  I had to IRON the whole thing, and 13 x 8' is a lot to man handle over an ironing board.

  I'd say, iron the folds only, don't do it the way I did! 

After struggling with the ironing board till I was  steaming myself,  I laid it out on the floor to cut and pin.  After carefully measuring and cutting, I hemmed the two sides on my sewing machine, and then laid it back out on the floor to pin the rod pocket at the top. I measured and cut it in a way that let me keep the hemline at the bottom as is, no sewing.

By the way, it helps to have a second set of hands to wrangle the fabric and help feed it into the sewing machine, this was a big job and even this lightweight canvas feels weighty when you are trying to sew it due to its size.

Another tip I have is to use duct tape to hold the hem in place along with the pins.  It helped me.

If you are going to hang it with grommets, add these later. We didn't want the ropes to stand out much, so didn't want to use grommets this time.  I cut up strips of the fabric I had trimmed off, and sewed them in half for added strength.  Then zig zagged them to the back of the cloth at regular intervals.

While this will hang from a pole in the rod pocket, I was worried that it would blow or sway in the breeze, so the straps of fabric sewns the the painting's sides can be tied to the structure, and will help secure it and keep it in place.
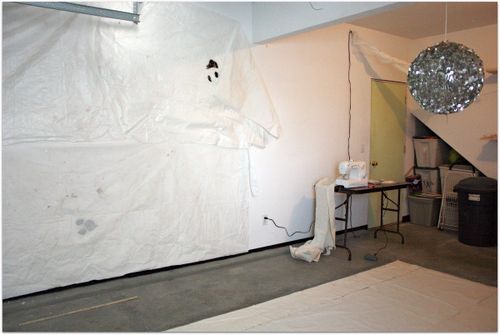
Chicken coop building 064
To do the artwork, I needed a large wall space, so I cleaned out my garage and covered one wall with drop cloths. Then, nailed the canvas up over it. (my drop cloths have also been used previously to make Halloween party ghosts, see the faces on them?)

(yes, I have a giant, sequinned disco ball hanging in my garage, it tells me where to stop my car when I pull in. I've seen people use tennis balls in the same manner but that doesn't seem to be as much fun)
Banner and baskets 018
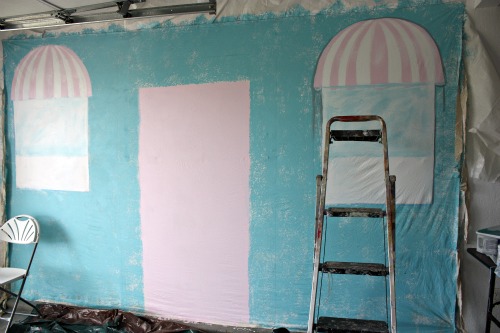
First step was to prime. 

I'm picky about primers, and know its important to use the right one for the job. In this case, a cheap, dry wall primer was fine. And I was glad I used it, because the fabric was thirsty and soaked it right up.

After it was primed and dry, I drew the door, and window with chalk and blocked in the colors.

For a large painting like this, quarts of latex wall paint in flat or eggshell works best for back grounds.

I used a sponge roller brush for the "stone"

To create the awnings, I marked the center of the top of each window, then tied a ribbon to a pencil.  The ribbon was cut to the length from the center of the window to the edge of it.  I held the ribbon at the mid spot, put the pencil on the corner of the window, and while holding the ribbon in place, drew the arc to the other corner.
Banner progress 001
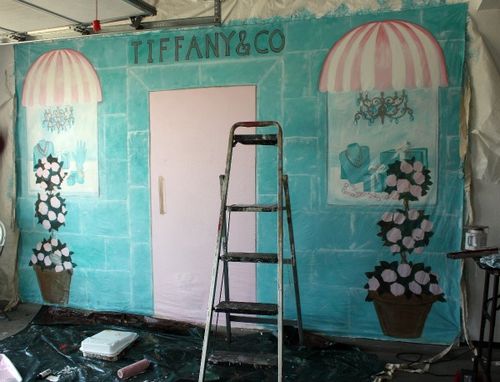
For depth, I dry brushed a darker aqua over the sponge rolled base color, then did the same, lightly with white. I used white to create the mortar lines too.  The mortar lines are drawn on with a sponge dipped in the white paint.  I didn't want a sharp line that I might have got from a brush.

Next, I finished the window paintings and awnings.  Always work from the background out.  Nearer things are last to paint.

The two topiaries are my foreground, so I blocked those colors in after the windows were done.

Notice the Tiffanys sign? I stupidly painted it too high, over the rod pocket, so painted over it to redo.  Which really isn't a big deal. Its only paint. It can be changed till you get it right.  You might notice my doorknob is different in this picture than in the finished one too.  After I roughed this in, I didn't like  it, and a swath of pink paint over it erased the plain door knob quickly.
Fairy designers 035

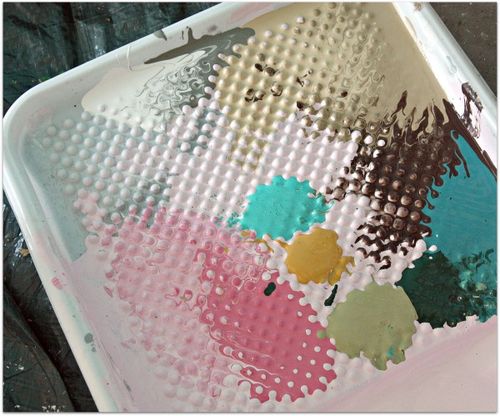
For the detail work, I used 2oz bottles of acrylic craft paint.
Finished banner 005
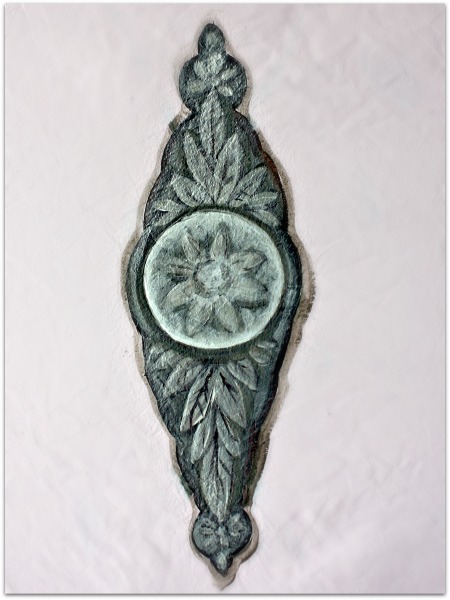
To get the metallic look that I have on the door knob, jewelry, and chandeliers, I painted them all in regular acrylic paint first to get the shadows, highlights, and shapes. Then, I covered that in  metallic paint.

I used the same 2oz craft bottles.  The silver and white metallic paints are very sheer and take a lot of coats to really cover, but that is what I like about them. I can do just one or two coats over my painting and get the metallic shine, but not cover up the details. But because they are sheer, its hard to build up color.  That is why I do the basic shape in opaque paint first.
Fairy designers 032
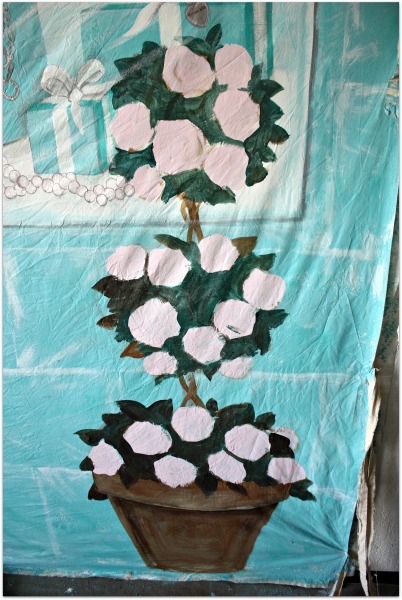
When creating a topiary, I always draw the pot with brown paint first, then sketch three circles, connected by twisted stems.  After that, I block in the basic rose shapes, and color the entire background of the balls dark green mixed with a dark brown.
Fairy designers 033
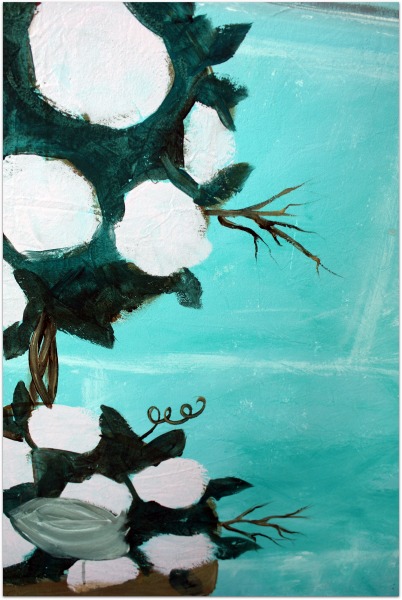
The same principal applies for the foreground as it did for the background. Paint the furthest things first.  I do the sticks and leaves in dark colors, then highlights over that. 
Fairy designers 036
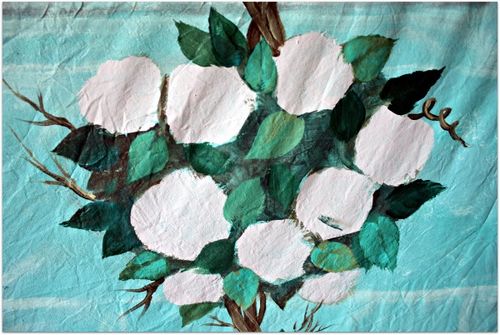
Next comes the leaves from dark to light, adding detail as I go.
Fairy designers 037
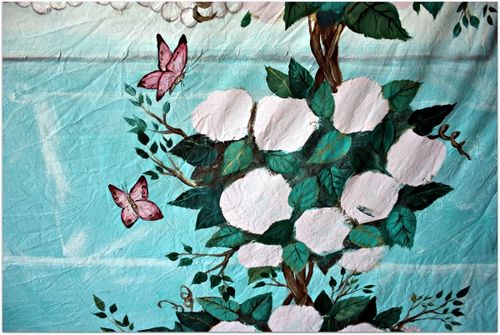
I got side tracked and added a few butterflies!

After painting the pot/sticks/leaves/ then roses, I went back and touched up some of the leaves so that they were covering the roses a little bit here and there.
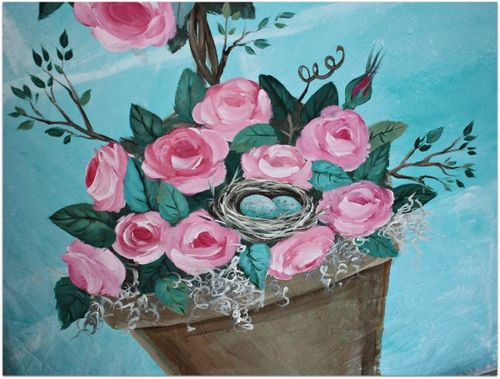
Finished banner 007

The moss is really easy, just scribbles and swirls with white and gray on a liner brush.  I paint the roses with a 2" flat brush, and the leaves with slightly smaller flat brush, adding veins with a liner brush.

Darker leaves toward the back, lighter in front, gives the illusion of roundness. The roses should face different directions, not all the same.

There is a tutorial on my sidebar with tips on doing a nest.
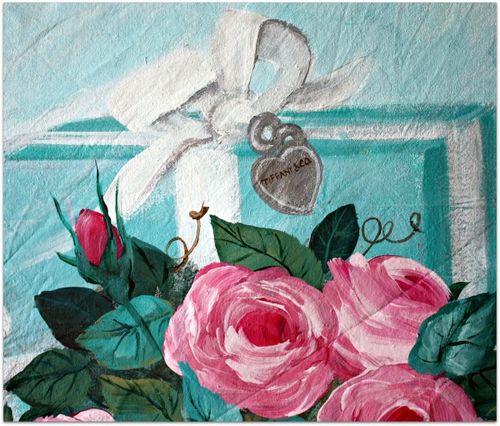
Finished banner 011
Layering is important. Make sure it looks like there are items in front of each other.

A few twirling tendrils out the side of the topiary soften the painting.
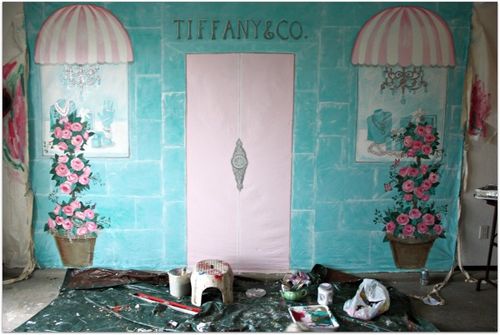
Banner 007

For the lettering, I used pale grey, outlined with dark brown. On the highlight side, I added a line of watered down white, on the shadowed side, a line of aqua a shade darker than the stones.

Next step, I let the paint cure a few days. Yes, it was dry to the touch, water based paints dry fast. But- I wasn't taking any chances of it sticking together when I rolled it up, so I gave it some time.

To mail it without fold marks, I bought cardboard tube mailers. They weren't big enough to put the 8' high mural inside of, or long enough either, so I duct taped 8 foot's worth of them together, and tightly rolled the canvas around it, then took the roll to the UPS store where they have boxes of all sizes and shapes.
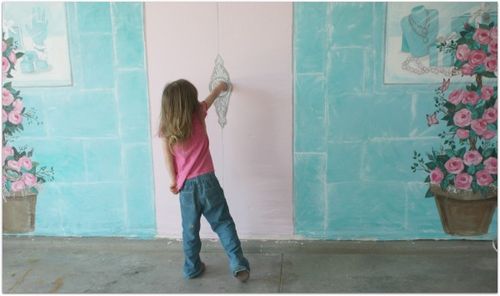
April 030

Well, hopefully, when I return from California, I'll have some pictures of my friends and I in front of this storefront! 

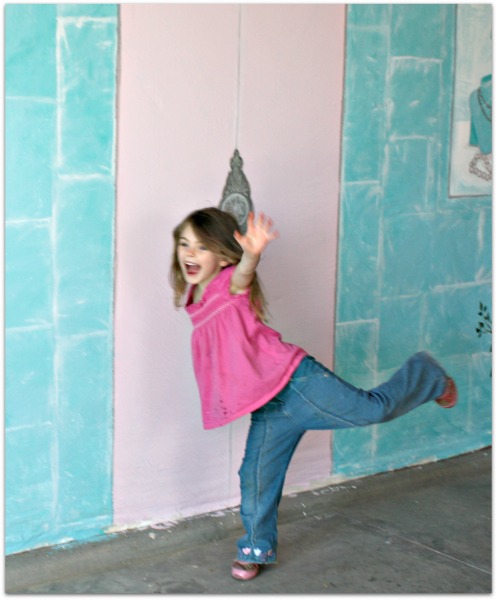
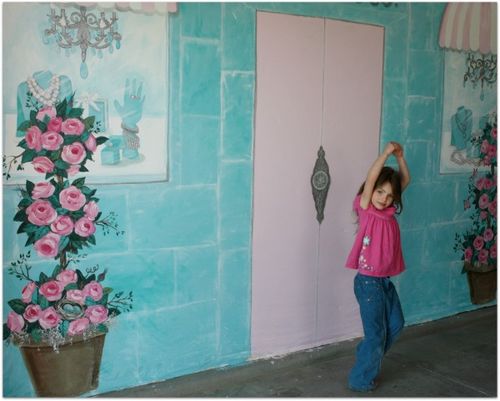
For now, I have pics of my own little model whose imagination turned a painting on the wall into a private play house.  Here she is opening the door.
April 020
And jumping out of the door to yell surprise.
April 024
And dancing through the door.

The pictures I don't have are of her drawing on the door.  Yep, she had some fun with chalk making a picture just like Grammie did. Oh well, it was only chalk and wiped right off, coulda been worse…
Birdie Bed Banner

cottage, how to's, vintage paper/collage art

IMG_7384
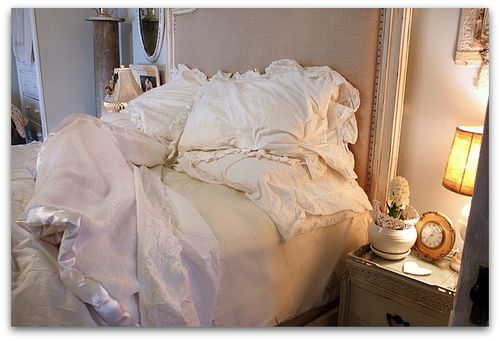
Everyday, I am loving our new, plush, lush, cozy bed more and more.  Its hard to pull myself out of it every morning and I find that its pretty nice to lay there, sip my coffee and check emails on my IPad instead of heading over to the cold studio, turning on the heat and reading my emails while waiting for the room to warm up. Especially this week, I've had a kidney infection and that extra laying around time in the morning has been welcome.

As a matter of fact, I stayed tucked in all day on the 29th, and got good and rested up.  At least it was an extra bonus day on the calander so, I don't consider it a real day off.

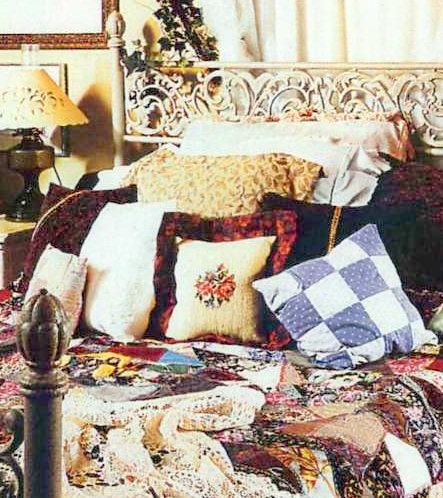
Img009
(years and years ago, from Country Almanac- by the way, the stylist pulled pillows from all over the house to pile into this picture and I never thought they matched)

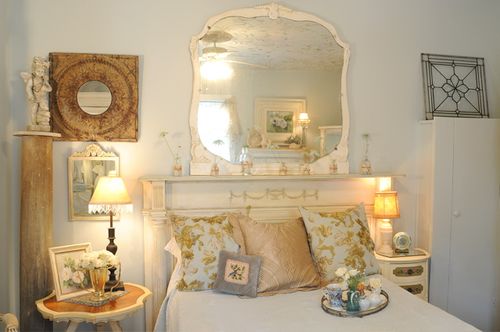
We've never had a head board that we could actually lean against while sitting up in bed and reading or watching TV before. I've always gone for found objects, cool junk, or vintage iron headboards in the past. 

RB2
(before this new bed, I used a mantel as a head board)

Even with a stack of pillows, all of  my previous beds were not good for leaning against.

IMG_7008
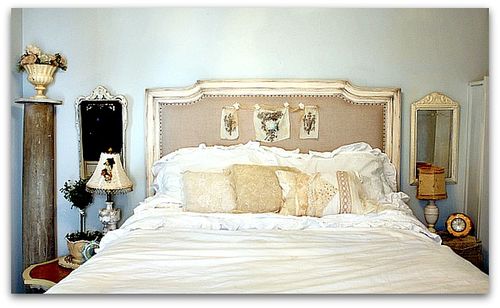
Our padded head board with soft pillows against it has completely won me over.  But I thought the vast expanse of linen was a little too plain for my taste, no matter how nice it was to lean on.

IMG_7386
It kind of reminded me of an inspiration board, so I thought I'd turn it into one.  But I didn't want anything to ruin its comfiness factor.

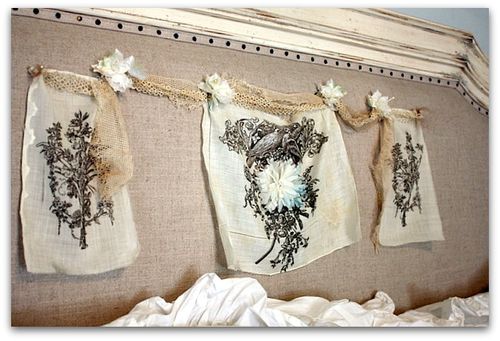
 I decided to print some vintage pictures onto some soft, old, lawn hankies, and simply pin them up with pearl topped pins.  The linen covered padding is nice and tight, and deep, so the pins went straight down in, and I don't have to worry about them poking into my skull.  That would certainly have taken away most of the comfiness.

I pinned a few soft flowers and some lace up between the pictures to make it look like a banner.

Images to copy3

In my stash, I have zillions of old pictures and books, but I wasn't in the mood to sift through it all till I found just the right ones.  So, I made a quick visit to the Graphics Fairy and grabbed a couple of pretty drawings of birds and roses.  I had to do a little bit of editing to get them just as I liked, but not much. This is two pieces that I edited together.  As the kids from Glee would say, its a "mash up" of images.

Beth prints on fabric all the time, I'd never tried it this way. I've used purchased sheets of canvas, but its expensive and I didn't want it stiff like the stuff I've bought before.  She sent me home with the materials I needed and it was every bit as easy as she said it would be. I practiced on a couple of other pieces before I pulled out the vintage, embroidered hankies. 

Frenchornroses-graphicsfairy003-1

First, I ironed the hankies, then pressed one onto a full page Avery label, and smoothed it out.  A hankie isn't quite the same shape, so I trimmed the edges really good. My worry was that something would tangle up inside the printer and it would be all screwed up like the bobbin part of my sewing machine is right now.  But that is another project story and one that didn't turn out as nice as this one did.  You don't want to hear about it, and I don't want to think about it.  I'm avoiding that sewing machine, with its giant web of thread.

Anyway, I smoothed the hankie onto the sticky backing of the label, trimmed it up, and slid it through the printer, no problems.

You can't really tell from the photos, but the cloth has some pretty little hand done touches to it.

IMG_7381

So far, they seem to stay in place, even with pillows bunched up against them while I'm reading and enjoying my coffee.  I purposely hung them a little tousled and messy, so if they ended up that way it would look natural.

And the whole room feels serene, not busy like previous incarnations of the space.

IMG_7246
PS- thanks to all of you who have purchased my Three Wire Workshops!  (nest, crown, and wreath) Its selling well, and I appreciate that. 


and another PS- notice the Google Friend Connector is missing from my side bar? Yep, they are no longer working on Typepad blogs as of March 1st. If you want more information on how to follow a blog, Marianne has done some homework and explains it all very well here.

She also has a good tutorial on using Google Reader here

and here.

I have asked Hope, who designed my blog, to add a connect button for all of these various ways to follow a blog for me.  She'll be doing that soon.

And the cupboard was bare

Dew Drop, how to's

IMG_6824
Thanks to those of you who shopped in my stores over the holidays and the New Year clearance sales.  I was torn up about Sugarwing's arm and losing my dog, among other issues, so I was not paying proper attention to the shops and decided just to let them clear out so I could start over. 

And the clearance sale did just that for me! wow.  This is one of the cabinets I store most of my tidbits in after listing them, and as you can see, it is down to bare bones. I've got piles of new things ready to photograph and add to the shops, but for now, its just down to a few basics that I keep in stock and not many other items.  Etsy is completely empty and there are only 5 pages in the Boutique, compared to the 14-15 I had rockin for the holidays. There were multiples of all the millinery packs, and now each one is the last of its kind, all the others sold.(But I have more to come, if I can snap out of my doldrums and get out the camera)

Did I say, THANK YOU??  I appreciate you coming here to shop with me, I know that the web is huge and there are tons of choices bombarding you everytime you look around.  I try to make my packages extra pretty to let you know that I'm glad you came  by and visited my store.

I have not made a dent in the pile of new items left to stock so far. I did restock the Charlottes, because that was easy, I just renewed the existing listing. For the other goodies, I'll have to take photos, edit, and list them one by one. But I promise, there is some gooooood stuff comin!

IMG_6815
That is, if I can get myself in gear.  I'm just not feeling it right now.  Typical winter blahs maybe, but the weather has been far from blustery and blah.

Sparkle is missed, that is for sure. I'm sad about that. 

And there have been some other issues family wise that are getting to me.  Just enough to sap my creativity.

IMG_6817

In the meantime, I'm making myself do little crafty things.  Just enough to keep me from hibernating with a book and avoiding the world around me.

Last night, we had the family over for soft fish tacos (broiled cod, red & green peppers, and onion, drizzled with olive oil, lime juice, chilli powder and sea salt then wrapped in sun dried tomato tortillas and topped with white cheese and heirloom tomatoes).  On the side, we had fresh guacamole.  So, I had about 5 avacodo peels.  And I hate to waste anything, so I made dye.

The peels were boiled in about 4 cups of water, then left to sit over night.  Today, I dipped ribbon and lace in the water.

Avocado peels make a beautiful, old pink, not a bright one.  It looks like the color of vintage silk slips.

IMG_6820
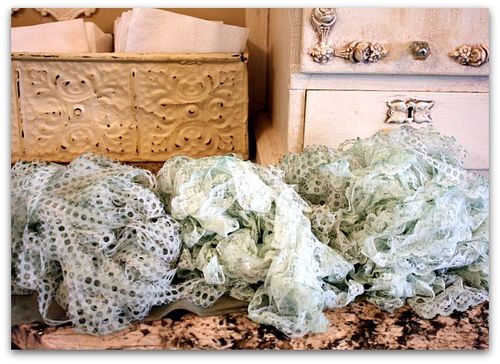
After about 3/4 of the dye water was soaked up, I added leftover coffee and dyed some more lace with that color.

IMG_6816
Then, when that second batch was about gone, I poured in more water and added a few drops of blue food coloring.

What a pretty robin's egg color it makes!  These ribbons will be perfect for tying up some little somethings for Birdsong in April, isn't it the perfect springtime color?

Birdsong Two is almost full, we have space for 5 people.  Its really nice that so many people from last year returned and a couple are bringing friends.  That means a lot to me, that so many ladies who were at our first party want to come to our second.  That's probably enough to cheer me up right there, if I wasn't in such a blah, contrary mood, I'd be dancing around with joy just thinking about it.

IMG_6823
I don't think there is anything wrong with letting myself feel a bit down now and then. Life is about contrast, there has to be some down to the ups. 

So….

I'll roll with it. I acknowledge that I'm down, and let myself mope a bit but not waller in it. 

I'll try to do little crafty projects until I'm back to feeling arty again and I really want to make something.

I'll indulge myself a bit.

I'll  make a list of why I'm sad, face it, honor and understand it.  To bury the sadness just plants a seed to grow depression.  


Here is my list, it does help to write it all down and get it out of my head.  I see what I can face, what is trivial, what is just part of life, and what really deserves attention.  If not, its all some amorphous blob of doom over my head that I can't define.

  1.  My dog died
  2. Seeing Sugarwings and my husband hurt shook me up, even though I know they are fine now, I'm still reacting.
  3. Post holiday let down
  4. I worry about my kids
  5. its winter!
  6. Picnik is closing, and I love that site, and use it daily!!
  7. Ryan's car broke down
  8. Sometimes I get treated like a doormat
  9. I worry about my kids
  10. Christmas cookies are stuck to my butt.
  11. I miss my sisters, the older we get the further away they seem
  12. Taxes are lurking
  13. My studio is knee deep in clutter and I don't want to deal with it
  14. I worry about my kids
  15. Its winter.
  16. I need a nap
  17. I'm always behind, can't quite catch up

IMG_6776
See, its not like I have giant, looming issues. Life is really pretty durn good around here andI know that I'm lucky. But for now, I'm going to take the rest of the day off the read a book and rest up a bit. Mabye an afternoon movie too…
I could do a "good things" list that would be thousands of times longer than my bad things list. But I won't for now, I'm going to roll with the downess a bit and then get on with the good stuff.

Short Cut layered Fudge with Belguim Chocolate

Food and Drink, holiday decor, how to's

IMG_6362
For more than 30 Christmasses I've been making short cut fudge, the same way every year. But in the last few, I've noticed that it wasn't going as well as it used to. I blame the products, I think that they have changed gradually and just aren't as good.  Nestle Toll House Chips just weren't working the way they used to over the years when I made up batches and batches of treats.

I think that they maybe aren't as pure as they were decades ago. I wonder if more paraffin has been added to keep the costs down?

Anyway, I believe that you don't get good results without good ingredients, so when I bake, I Use the Good Stuff, just like when I create in the studio.

IMG_6360
Now, I've switched to only Belguim chips, and the results are worth it!

Here is how I make them:

One and one half bag of chips plus one can of sweetened condensed milk (I use low fat, yes, I know its still a sugary, fudgy concoction, but  I think every little bit helps, and if it tastes good, go ahead and cut out a little bit of fat when you can!)

Warm the milk in a pan, then add chips. 

Melt the chips.

With a mixer, beat on high speed for way, way longer than you think you should have to! The fudge will lose its sheen and get thick, then you'll know its time to pour it into a greased pan.

I make about 3 batches at once, so you can double or triple the recipe, easily,

IMG_6364
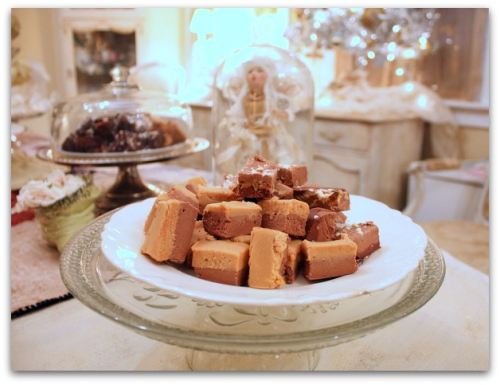
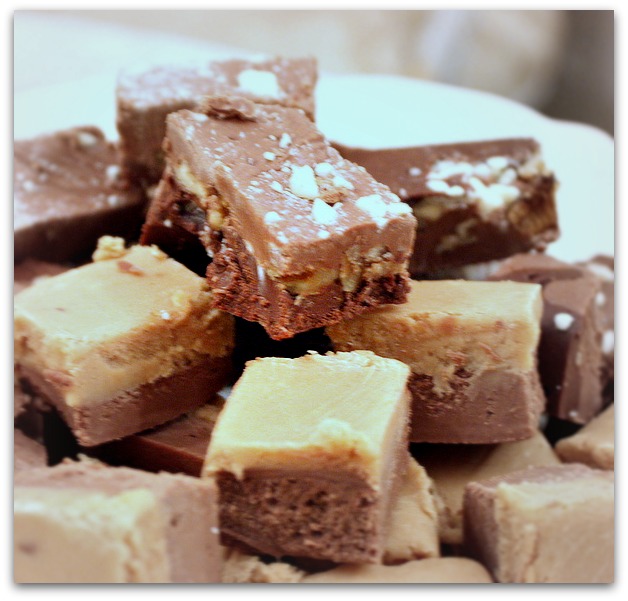
Here is what makes it extra special-  buy dark,white, and milk chocolate, as well as Reece's peanut butter chips and make multi fudge flavor layers.

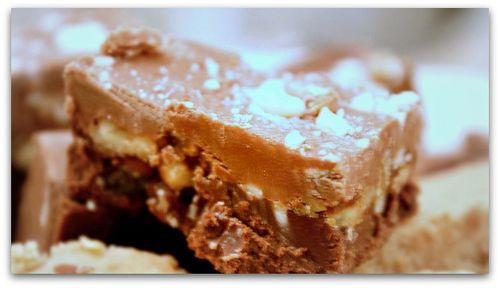
This one is dark on the bottom, sprinkled with pecans, and ground white chips (I dump them in a blender to chop them up). After that, there is a layer of milk chocolate fudge that is again sprinkled with more white chocolate crumbs.

There is also peanut butter layered with dark chocolate picutured here.

The layers look impressive, but its an easy and tasty trick.

Fudge
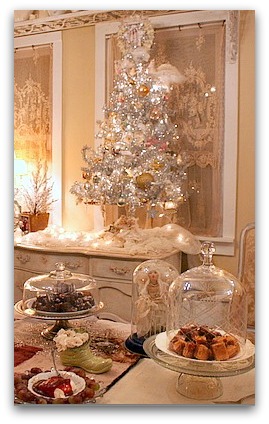
Of course, presentation is important.  Doesn't everything look better under glass?

IMG_6405

Please remember that I am having a giveaway, of a special surprise

Just leave a comment between now and Christmas, all posts, any posts, as often as you'd like.

What have I been up to? Painting the furniture to match the Christmas tree, of course.

Hand Painted Furniture, how to's, how-to projects

IMG_6159

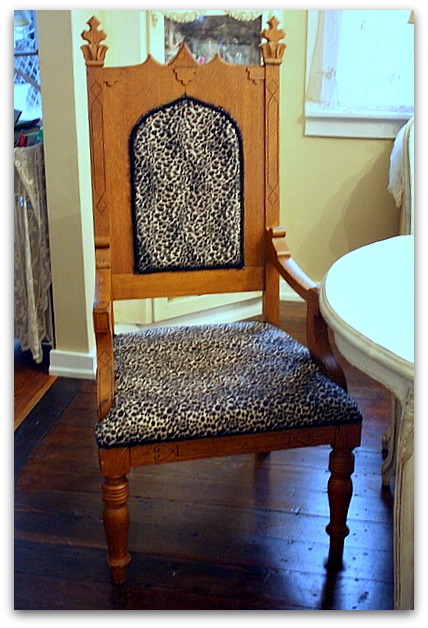
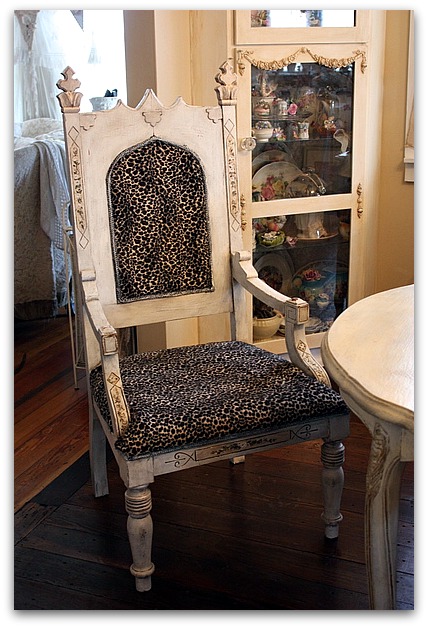
Before I left for CA, I took some time to repaint this oak chair. I have plans to recover it too, but that might wait till after the holidays.  There is only so much time in a day…
 

IMG_6074
Its a pretty cool chair to start with! We called it "the throne" and I found it at a garage sale for $60.  Someone had recovered it in leopard print.  Its been at my son's for a while, but now that he moved to a Yirt (that is a whole other story) he has no space for it.  And after I had all my Christmas decor up, the dark wood really stood out. 

And who doesn't repaint their furniture to compliment their Christmas tree?

IMG_6147

Since the chair was going to be part of the rest of the dining room table set, I painted it the same way I did the other chairs in there.  Like in this tutorial.

But with no crackle. I didn't want it matchy matchy with the set, I just wanted it to look good together.

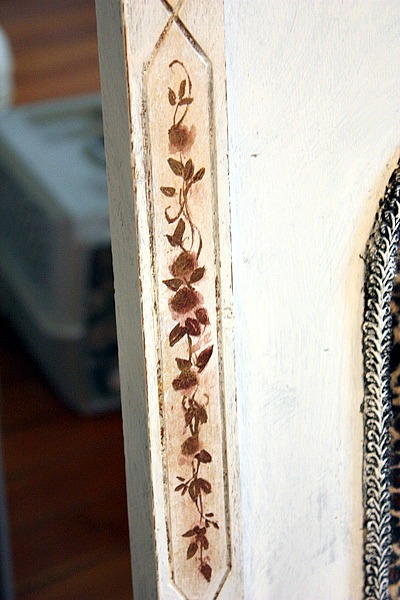
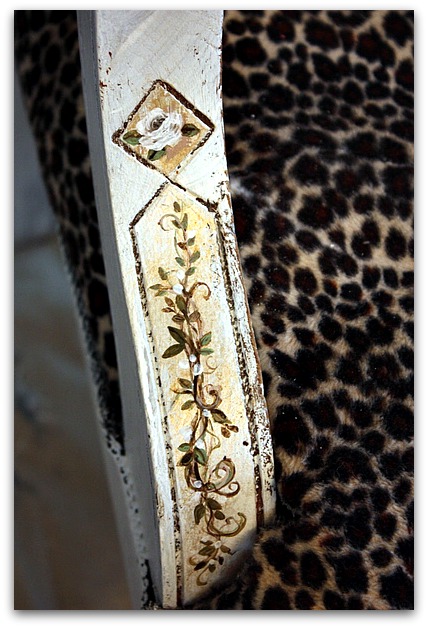
It had some neato designs in the wood that looked to me like they were calling out for hand painted details to be added inside the "frames"

To start, I darkened each of those frames by rubbing a dark brown paint on with a rag, keeping it inside the lines.  Then I dabbed metallic gold over it.

When I paint flowers and vines, I start with dark brown, and kind of draw out the picture, with the flowers just as blobs.  The dark brown is a good base color under the hand painted details and gives some dimension to the flowers.

IMG_6150
The colors I used were sage green, dark brown, light brown, white and cream.

IMG_6156

After the paint dried, I lightly sanded the flowers and vines, then heavily sanded all the edges and corners of the chair.

Over that, I topped it with Minwax dark walnut stain/poly in one.  I don't usually care for oil based products, but they really are pretty and I had a lot left over from doing samples and trying to figure out what color I wanted my floor to be when we remodelled the kitchen.

That stuff goes on kind of tricky.  If you use it, do small areas at a time, and keep plenty of paper towels or soft rags handy.  Brush it on, dabbing the brush deep into details and carvings, and wipe off in the direction of the wood grain.

Remember, just a little bit at a time, it gets tacky fast and doesn't like to be wiped off. 

IMG_6152

I'm much happier with the chair now and I haven't even recovered it yet.  My son is a bit sad, though, he loved it as it was.

PS-

I will be away from home for a few days, but will be checking my email while gone, so please leave a comment if you'd like to win a Cuff Tutorial. I'll be giving a couple more away when I get back.

When I return, I'll get your orders from the Boutque and Etsy out on Monday the 5th.

How to add embellished pieces to painted furniture

how to's, how-to projects, Tutorials

IMG_6146
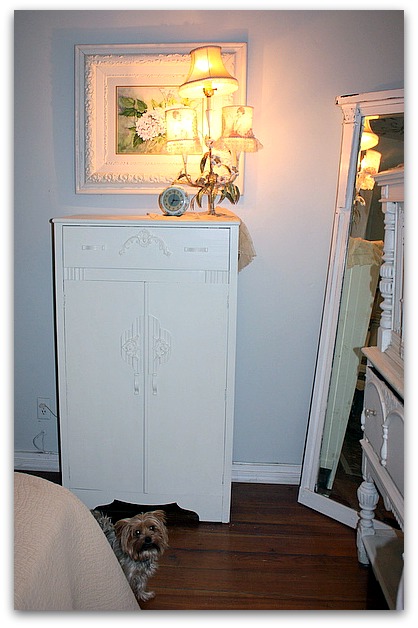
Now that Sugarwings is getting bigger (and so are her clothes), and I have little Dew Drop to dress sometimes too, I needed a bigger space to store the little girl's clothing.  I was lucky to find a cabinet at one of my favorite places, for a great price, but it needed a lot of changes if it wanted to come and live with me.

IMG_6114
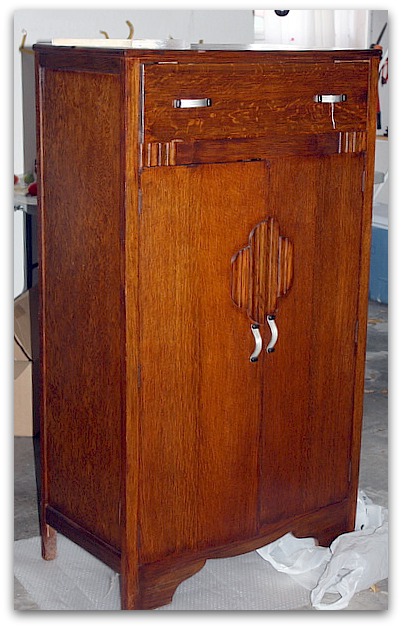
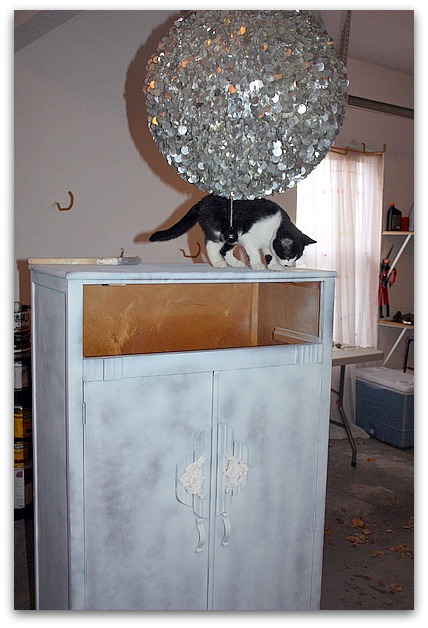
Here is how it began, kind of deco.  Which I like, but not for my bedroom.

IMG_6117
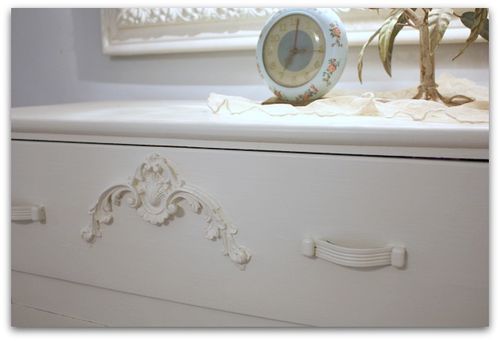
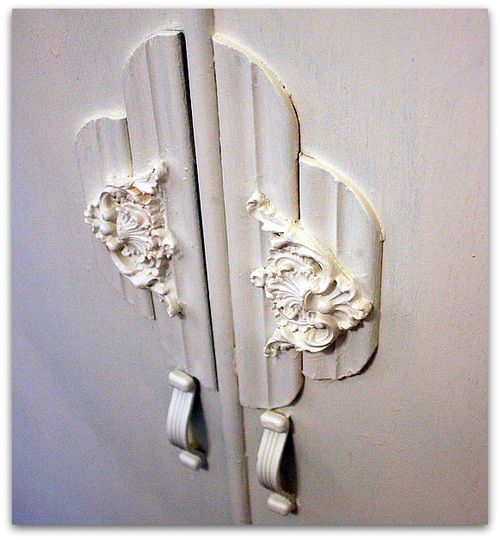
I had some ornate scrolly embellishments in the garage, (you can buy some similar type things at Home Depot, hobby stores, or look online here.) and thought they might help with the transformation.

The trouble with these is attaching them unless you have a nail gun, and even then, they shatter or the wooden ones will split.

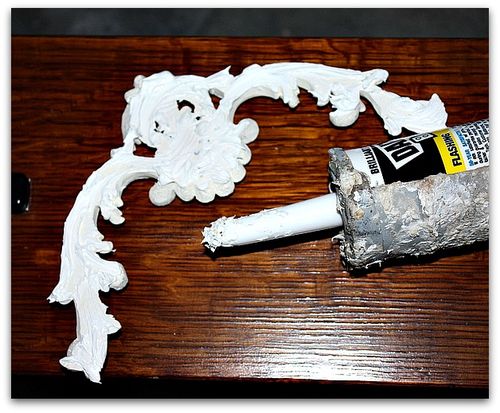
I discovered that the easiest thing to do, is to slather the back of the piece with paint-able caulking.

IMG_6116
Then, just smoosh it into place.

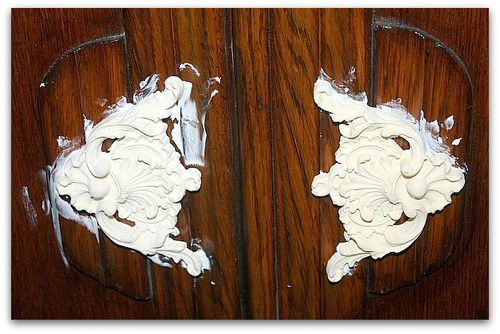
Make sure you have plenty along the edges, so that there is no gap between the piece and the furniture you are applying it to. You want it to look like it was always there, not just glued on.

With this piece, it was a bit more complicated since the area on the doors I added it to had curved wood.  I was able to squirt in extra caulking to fill those holes.

After pushing it into place, some caulking will ooze out the sides. Clean this up with a q-tip.

IMG_6119
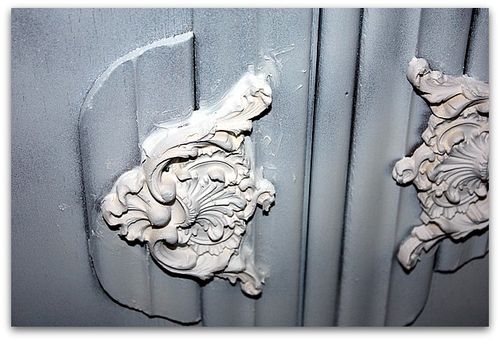
After that, prime the piece to get ready to paint it. There are lots of painting tutorials on my sidebar, for different finishes or looks.

For this, I used my favorite bonding primer, Zinsser Bullseye, spray, in the gold and white can.

IMG_6118
You can see, I didn't use a heavy coat, this is about 3/4 of a can. Its enough to give the surface some tooth to grab the coat of paint that will go over it.

Notice I took out the drawer first?  I painted the drawer separate so it wouldn't stick. And the paint won't run and drip from the scrolly piece and the handles. Its just easier to not have to be as careful if you don't have to be. The same issue exists on the cabinet doors, I'll just had to be extra watchful for drips.

And since I was too lazy to change the hardware, I sprayed right over it.

Yes, that is a disco ball in my garage.  I don't recommend painting under one, because it attracts cats, and it also got in the way of brush strokes.

IMG_6145

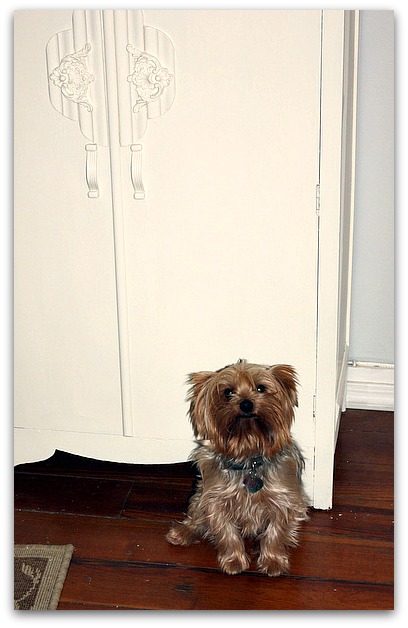
The decorations, handles, and all got painted with a coat of Behr satin in a French vanilla color.  Behr is good and heavy and usually does the trick in one coat plus touch ups.

IMG_6144
This was a quick project for me, I didn't wait for the caulking to dry, though you probably should.

IMG_6143
PS-

I will be away from home for a few days, but will be checking my email while gone, so please leave a comment if you'd like to win a Cuff Tutorial. I'll be giving a couple more away when I get back.

When I return, I'll get your orders from the Boutque and Etsy out on Monday the 5th.

A tree top Christmas Party with Little Edy and a giveaway

give away, holiday decor, how to's, jewelry, redos

IMG_6004
My new, white Christmas tree is up and ready to be decorated!  I'll be away for 2 weekends in Dec. and I am a little sad about missing out on tree time.   I wanted plenty of time to enjoy the holiday decor, so my plan is to have the  halls decked before Thanksgiving. But I needed a new topper, since I  have two trees this year and plan on using my other tree in the newly remodelled kitchen this year.

IMG_5996
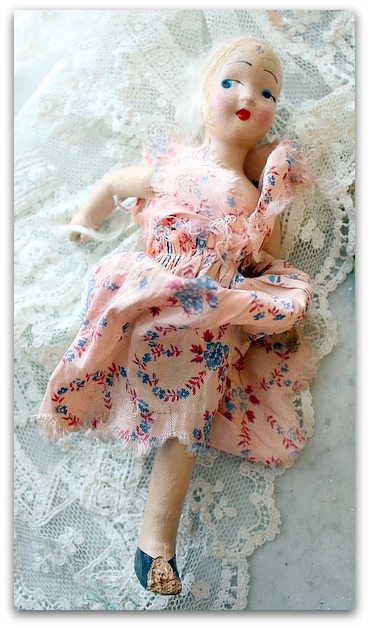
While tidying up Sugarwing's room, I came across this little doll who had seen much better days. Either my fairy grand baby has the same tendencies to hang onto things that need refurbished, or she is the cause of the need for refurbishment…

This doll kind of has a Little Edy/Grey Gardens look about her, doesn't she?

IMG_5998
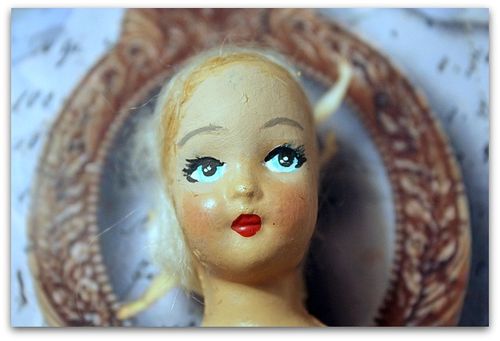
The first thing I did was repaint her eyes and brows.

IMG_5999
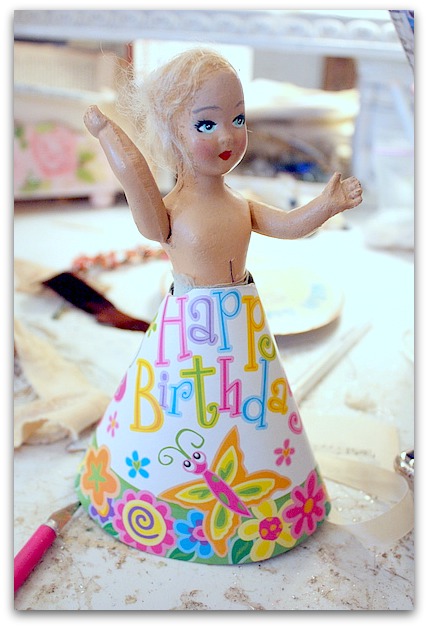
Then, I popped her into a party hat with the point cut off.  At this point she doesn't look like she is going to any kind of party I want to attend.  But there is still work to be done.

The party hat is a perfect skirt base for her, its sturdy and I can slide it right over the top of the tree.

IMG_6000
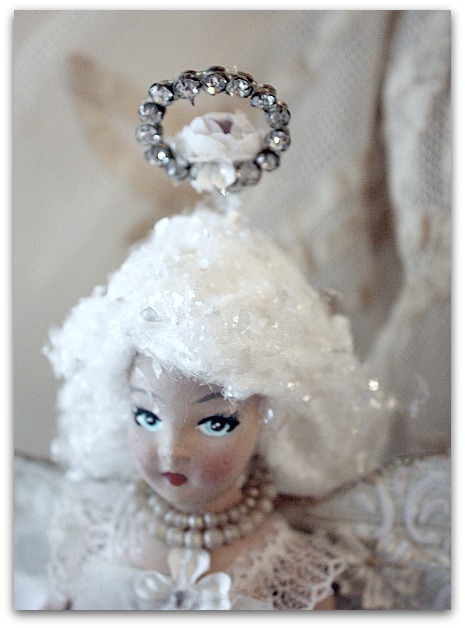
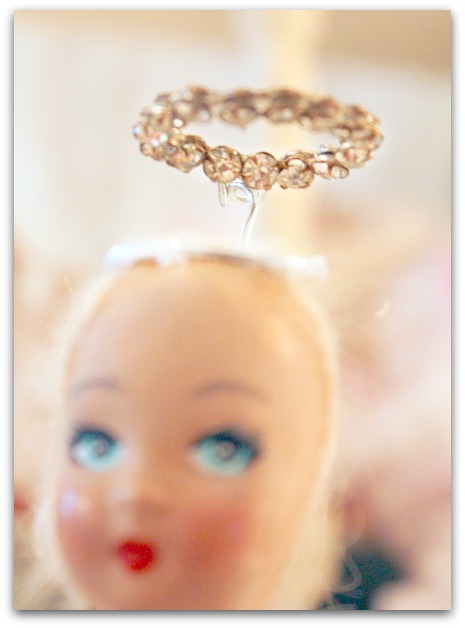
 I wanted a halo that stood up from her head, so I made a wire ring to hold it.  The ring fits around her noggin, and was glued into place before gluing yarn hair over it.  The halo itself is a vintage, circle, rhinestone brooch.

To keep the halo standing straight up, I glopped on a bunch of glue where it is wrapped with the wire. That needed covered up, so I added a white millinery bloom over the glue blob.

IMG_6003
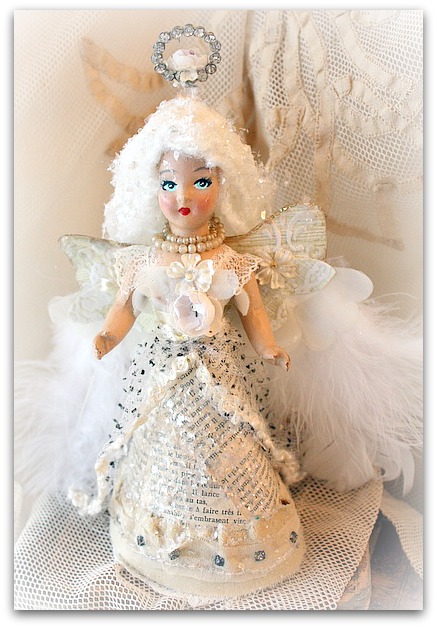
Her dress is made up of vintage papers, trims, and lace that I glued to her body and the party hat, no sewing for me. The wings are feathers and flocked wallpaper, and she is decked out in some millinery and jewels.

When she heads up to the top of the tree, I'll get a photo of her in her new home.  That is if I ever get caught up and get that tree decorated…  Right now, its up, the lights are on and its naked as a jaybird.  But still festive!  I'm happy just to have it there waiting for me.   I've wanted a white tree for the past few years, my old one turned yellow and I hadn't found a reasonable priced one to replace it with.

The yellow was not a good "patina-ed with age look" it was a "did a dog pee on your tree?" look.  It had to go. 

IMG_5991
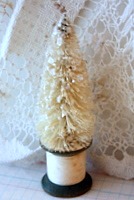
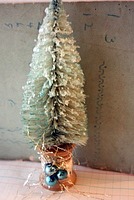
My life is full of white trees right now. I've been bleaching and glittering more batches of bottle brush trees this week.  I thought I had plenty of them done, but needed another couple of sinkfuls to fill some special orders.  Plus, I like to have plenty to play with and decorate myself too!

  IMG_6020-1 IMG_6022-1 IMG_6017-1 IMG_5961-1

Can you have too many? So far, the answer is no, and I seem to have a LOT of them.

IMG_6034

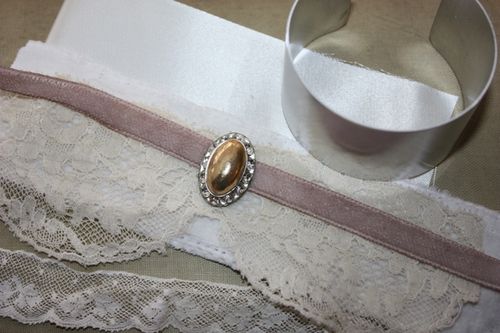
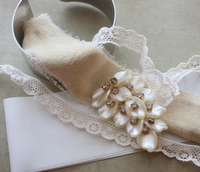
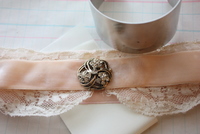
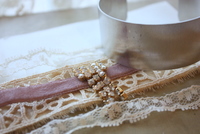
And finally, I made up some cuff bracelet kits.

IMG_6024-1 IMG_6027-1 IMG_6036-1

All filled with lacey, velvety, vintagey goodies.

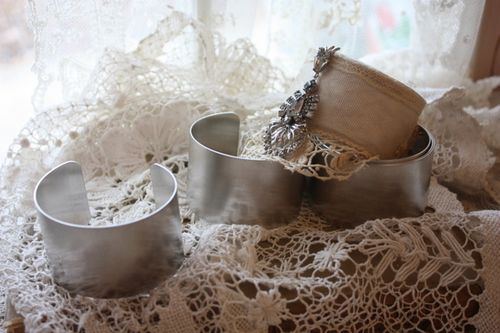
These are priced separate from my Cuff Tutorial. Previous kits included the price of the online lesson, but with these kits, you need to either purchase the $6 class separately or use put them together in your own way. The kits come with the aluminum blanks and all the trims and bits you need to make a bracelet according to my directions in the class.

IMG_6037

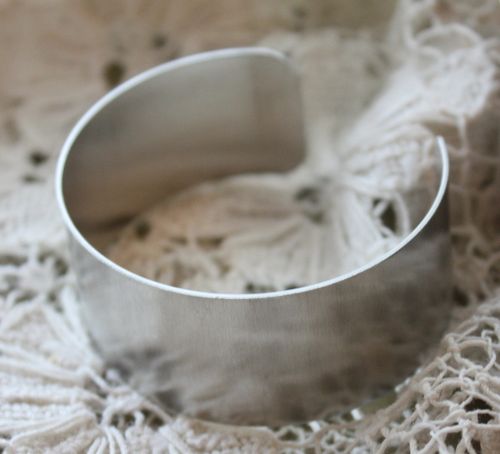
There are also plain cuffs for sale for you to use if you don't want a whole kit.

IMG_6040

They are stocked in the Boutique in two sizes, 1 inch and 1-1/2 inch. 

IMG_6016

I hope you have a happy holiday weekend planned.  We are going all local/free range/ organic this year, and even roasting our own pumpkin to make the pies. I've never done that before, so I might need to have a frozen pie as a back up… If you have any tips, please let me know!

Happy Thanksgiving!

PS- as a Thanksgiving treat (because I'm thankful you read my blog and buy my stuff and I can pretend this is a real job) I'll give away 2 Cuff Tutorials.  Please leave a comment letting me know if you are interested. 

ps- Have you visited Amy? She makes the best stuff from nothing.  She is having a link party and I joined it today.

Snowy little friends

fairies, how to's, redos

IMG_5824
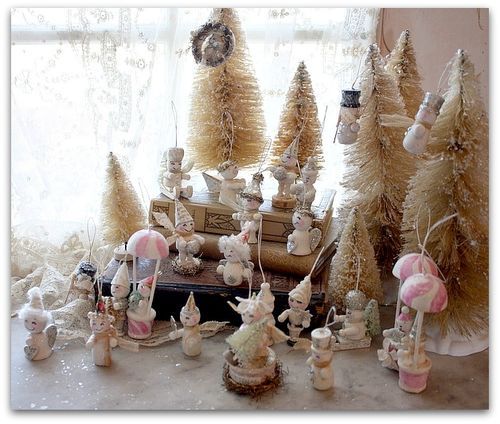
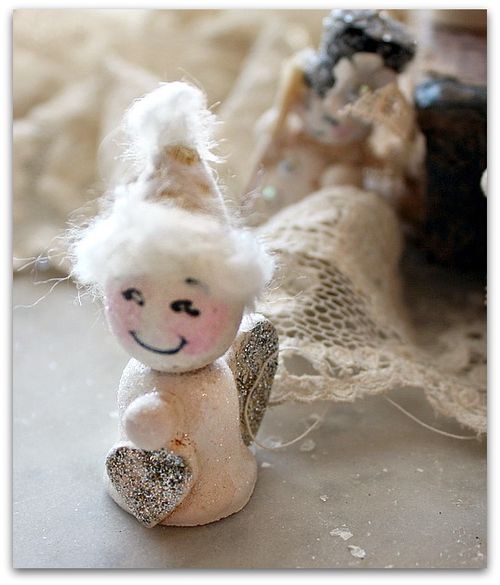
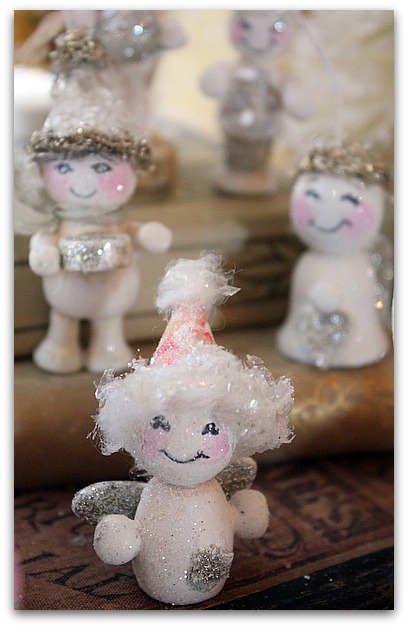
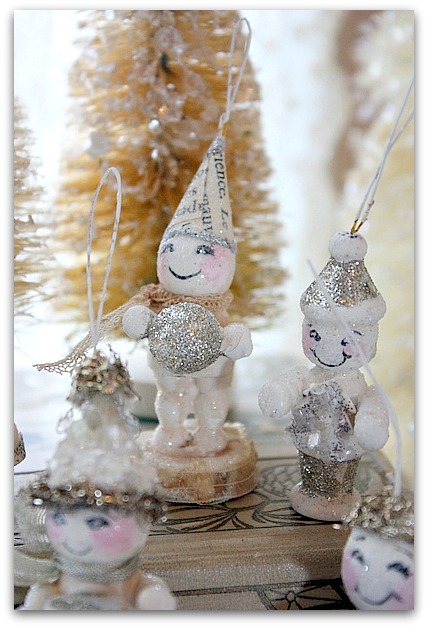
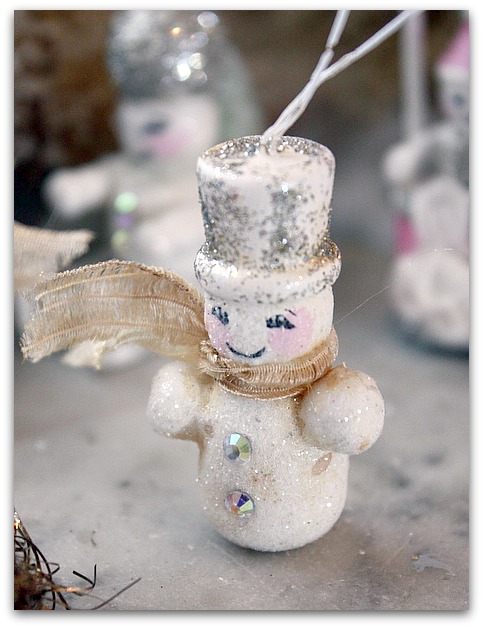
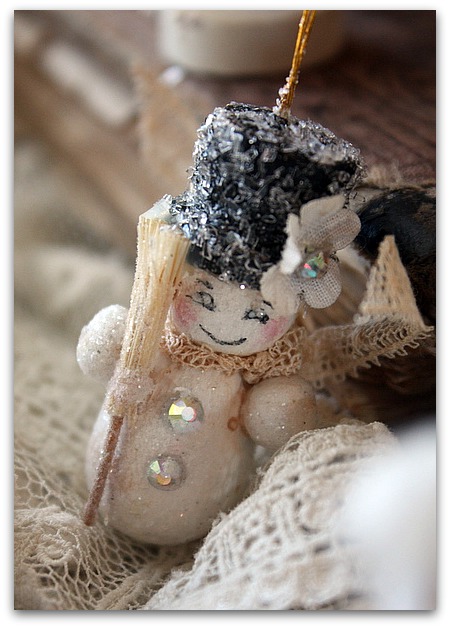
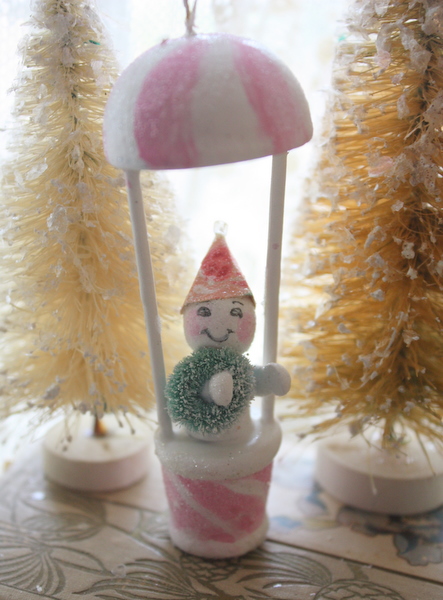
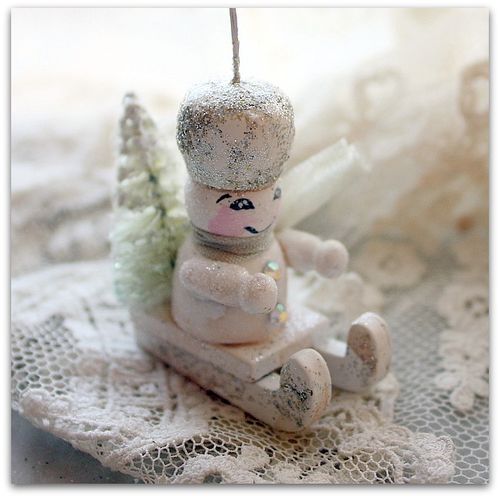
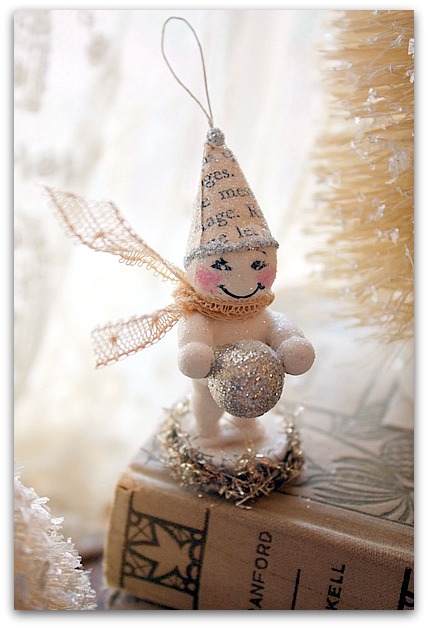
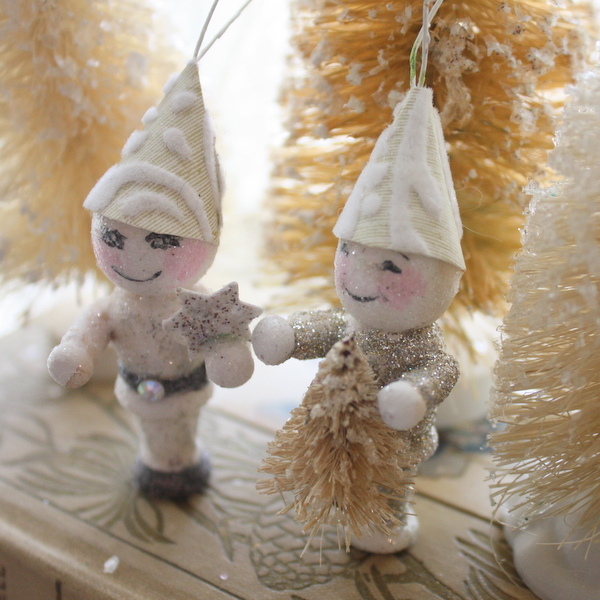
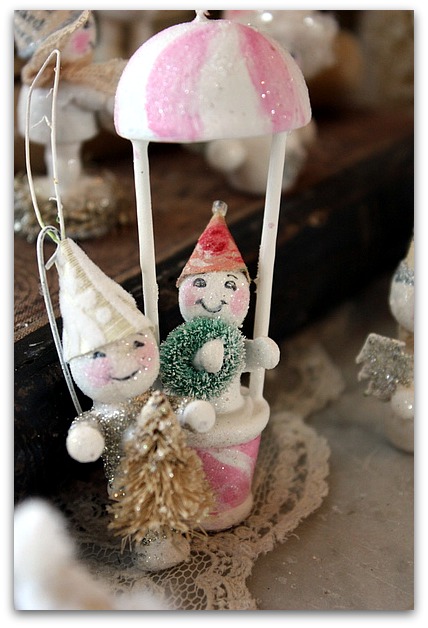
Aren't these guys cute?  I had other things to do, but couldn't help myself, I was drawn to making them.  Yes, I have kits to assemble for the cuff tutorial, and trees to photograph for the Etsy store.  But do you blame me for being distracted from my chores? I had such fun transforming these little wooden ornies.

140

I forgot to get a photo of them first, but found this one online to show you kinda how they started out. They are those semi-vintage (late sixties or so) wooden people from Germany that are painted bright colors.

IMG_5825
When I was shopping with my sisses in Indiana, I found a big bag full of these and debated whether I should buy them or not.

IMG_5826
Because they do start out garish in too shiny, primary colors.

IMG_5827
IMG_5828
But the shapes were so cute, I knew that they had some potential.

IMG_5830
And I just love to take on a whole bunch of something. Little things that get me on a roll, and I can experiment and decorate each one a little different.  I tend to to a whole bunch of most things that I do. 

IMG_5831

Each of these was basically done the same, it was the tiny details that differed.

IMG_5833
First, I sprayed them with Zinsser Bullseye Bonding Primer, then glazed them with a mink brown paint.

IMG_5861

Then, I painted the faces, and added some pink detail on a few of the people.

IMG_5843
After that, they got a coat of glitter. 

IMG_5837
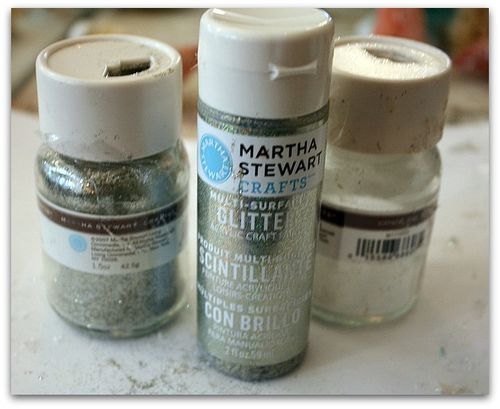
Which reminds me, have you tried Martha's new glitter paint? Well, I love most of what she makes, especially her fine glitter. But this paint isn't worth it, even with the Michael's 40% coupon.  Its too thin, and to get the coverage that they show in the store on the sample you need at least 4, probably more, coats of paint. Who has time for that??? It dries slow and if you try to recoat it too soon, it just smears.

IMG_5851
So, while the thin, glittery paint was still wet, I sprinkled it with Martha's regular glitter, for a more solid coat of shimmer.

IMG_5860

Once they had the clear and white gold glitters where I wanted them, I added some mica here and there.

IMG_5868

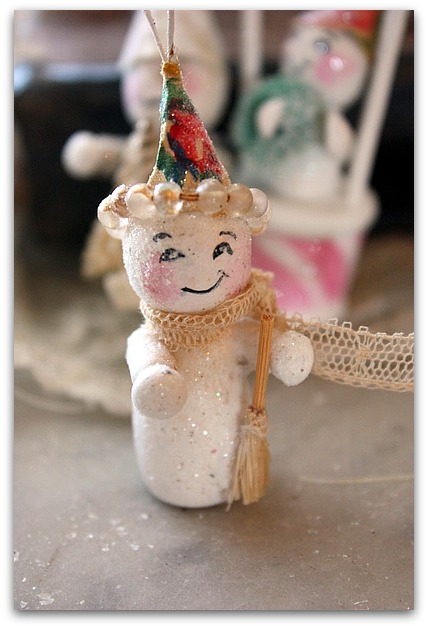
That is when the fun part started!  I got to add beads, crystals, scarves, teensy weensy little hats made of ephemera, and other sweet pretties.

IMG_5867

Aren't they the happiest little guys? I already miss working on them. I saved a few for Sugarwings and I to work on together, but for the most part I'm finished with them. 

Most are for sale ($6 a piece) some in the Boutique and some in the Etsy shop.  I've kept a few for myself or for tying onto Christmas presents too.

Making a kitchen island from odds and ends

antiques/junking, Hand Painted Furniture, how to's, how-to projects, Kitchen remodel, Tutorials


IMG_5619

 When I knew we were going to be remodelling our kitchen, I started making plans for a new island. But I didn't want a "new" one, I wanted an old one, of course.  I knew that it couldn't be large, it needed storage space, wheels, and I wanted a granite or marble top.

I couldn't find a piece already like that, so I thought I'd marry an old cabinet with a stone top that I purchased.

Well, after a trip to the local granitorium (I made up that term, but it seems to fit), I realized that a new slab, even for a small piece of furniture was not in my budget after spending a wad of cash on a whole kitchen redo.  At first, I tried to pretend that it was just in the "construction budget" but, I had to force myself to face the truth.  Just because we were spending a few thousand dollars already, it doesn't mean that a few hundred will disappear into it that vast amount like a drop in a bucket.

What it means, is that I had already spent too much and shouldn't spend a few hundred more.

So, I searched for an old piece of stone at antique stores.  I actually found quite a few, for a fraction of the cost of  new (even though all of them are billions ?? of years old, the ones from the granitorium are like "new")

The best piece I found was 28" by 38" and came from the teller's window of an old bank in western KS.  It was only 50 bucks too!

IMG_5272
For a month, I carried those measurements around, hoping to find a piece of furniture to fit them.  I went to flea markets, antique malls, and consignment shops and found some hopefuls, but was being cheap.

One day, I stopped at our Salvation Army to look for some warm pants for Sugarwings (did I mention that I am cheap?) and found this not so old, but not new Lane TV cabinet.  Its nice, solid wood, and could support the weight of the marble.

Plus, it had a green tag and that was 50% off of green tags day!  I got it for $14.

IMG_2869
That is about how much I spent on spray primer.  This is the BEST kind to use, and its about $7 a can now at Home Depot. But its worth every penny, no matter how cheap I am, because I hate sanding. With this product you do NOT need to sand! 

There are lots of tutorials on my side bar about how I paint, if you want to redo something and need to know some short cuts.

IMG_5273
You might notice that I sprayed the top. That was a waste, since I was covering it in marble. 

I also used too heavy of a coat, because I thought I would be using this as the base coat, skipping the paint step, distressing the edges, and just glazing over it. I changed my mind and painted it white, so could have gone with a lighter coat of primer, since I had paint over it after all. 

IMG_5275

Once I had it primed, there were still some problems. One was that the back was just fiber board, stapled on. The other was that the wheels had no where to attach because of the shape of the bottom of the piece.

Also, the cabinet was a bit smaller than the marble.

While the contractor was here to finish up a few trim details in the new kitchen, I asked him to do a little trim work on this too.I figured that for the small amount I had into it, I could afford to pay him to help me with the hard part of the redo and still be way ahead on this.

IMG_5419

My garage is full of tidbits and doodads. I found a couple of iron brackets and he cut out notches to add them to the side of the cabinet to support the marble that was too long.

IMG_5423
And to cover the fiber board, I added an extra piece of ceiling tile leftover from the ceiling job, then had him trim it out for me so that the rough edges wouldn't snag anyone's pants (or slash anyone's leg, that stuff is sharp!)

We added a block of wood under each corner and screwed the wheels to them.

The marble was attached with liquid nails and set into place.

Then, all I needed was some white paint. I decided it didn't need distressing or a glaze. I kind of liked just the pure white.

IMG_5624
After it was done, I realized that the brackets were perfect to hold a paper towel roll. So far, the roll is just tied up with a ribbon, I'll be looking for a better way to hold it in place.

IMG_5467
Hey, if you are looking for a project for yourself, on a slightly smaller level, my good pal, Mary is doing another glue book class.

A Christmas glue book!

I was with her when she was searching for ephemera to use. We went to a flea mkt together last summer and it was interesting to watch her sift through all the papers, picking and sorting.  She is very knoweldgeable about old paper.

IMG_5470
Mary and Beth were both here for craft day and I got a glimpse of what Mary was making, and I have to say, its a cool class. Button might not look very enthusiastic about it, but he isn't into ephemera like we are.

IMG_5481

Craft day meant working on my Cuff Bracelet tutorial, and Beth was nice enough to make a cuff for me to show, using my guidlines for the construction. Pretty, huh?  I love craft day!


Scroll to Top