how to’s

How to dye crepe paper

how to's, how-to projects, Once upon a dream, Tutorials, vintage paper/collage art, Workshops

IMG_4711
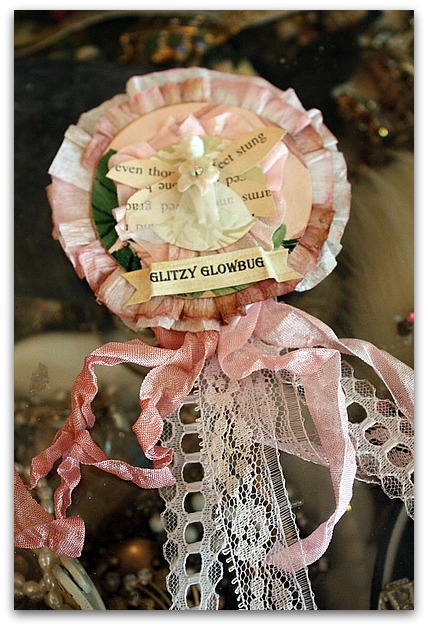
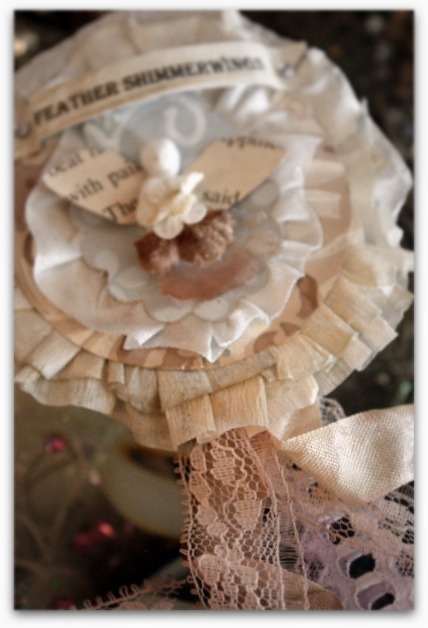
For the welcome night class I am teaching at Once Upon a Dream, I needed a pretty ruffle to top off my Prize Ribbon Sprite brooch.  Plain crepe paper was nice, but I thought it would be better with tinted edges.


IMG_4573

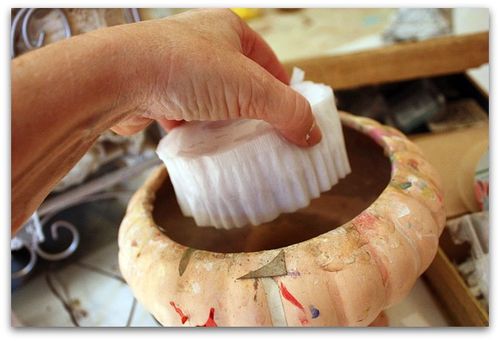
My first step was to dunk the top and bottom of a whole roll of crepe paper into a bowl of water.  I didn't immerse the entire roll, just about 1/4 on each side.

IMG_4574

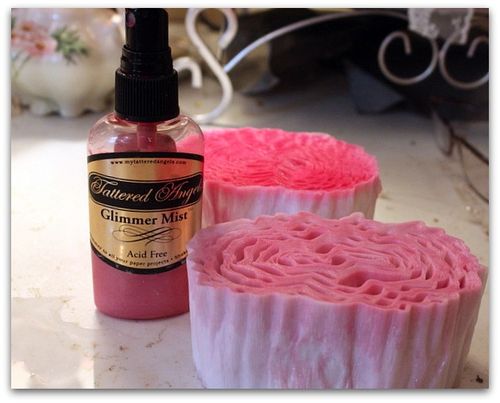
While it was wet, I spritzed the damp edges with Glimmer Mist and let it bleed down into the paper. 

IMG_4576

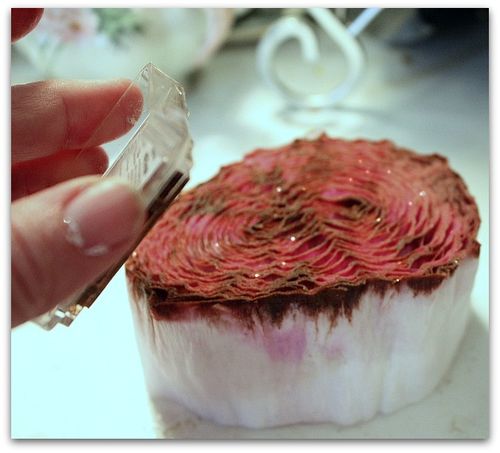
On one side of the roll, I rubbed dark brown ink over the Glimmer Mist for a two toned effect. (Glimmer Mist has a nice sparkle to it!)

IMG_4713 Then, I sat the roll of crepe paper outside on a sunny, breezy day to let it dry. It had to be completely dried out before I could make up my kits.

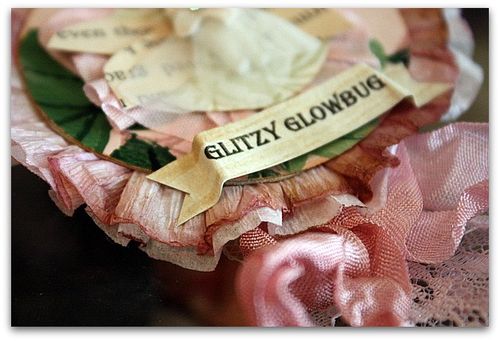
I'm happy with the way it turned out.  I folded a section of the streamer lengthwise and glued it onto the back of the wallpaper medallion to make the ruffle.

IMG_4602

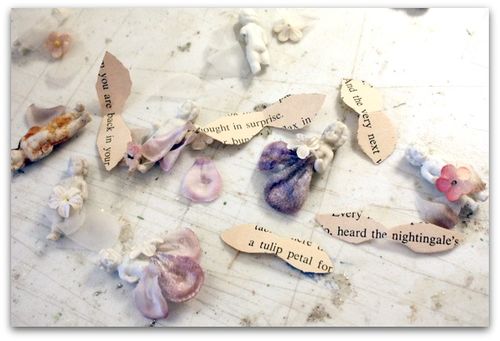
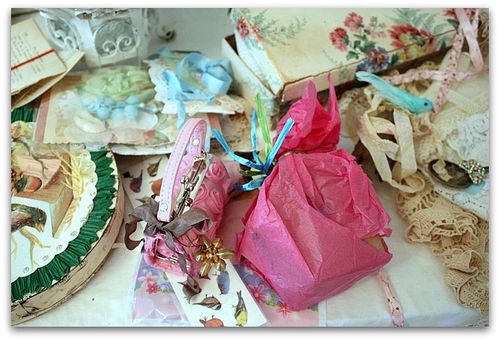
The kits each have a teensy weensy Frozen Charlotte doll, a mini flower for the bodice of her dress, and flower petals for her skirt. The wings are ephemera, and all hand cut. Each flower petal skirt was trimmed up just to fit the little Charlotte it would be glued to.

IMG_4710
Each prize ribbon has a banner with a fairy name on it too. No two kits are just the same. They took me ages to put together since I was matching the dyed ribbons and lace to the flower petals and wallpaper.  Plus trimming all the little petals to fit the dolls. Its a quick class, about an hour. I knew the guests wouldn't have a lot of time to fuss with the project, so I had to make it simple to piece together.

I'll be making up samples of the finished pieces for the class, and when I get home from my wonderful trip, I'll have them for sale in the Boutique. 

I hope all the care I put into the kits shows and that the students enjoy them!

 EDIT- This post was written ahead of time, before I left on my trip. I'll have new posts all week while I am away, but might not get to answer all comments or emails, but I will be reading and enjoying them on my Ipad. Thanks for coming by! I hope to add some "Live" posts from the road too.
It all started with a mouse

hand painted signs, housework, how to's, redos

IMG_4053
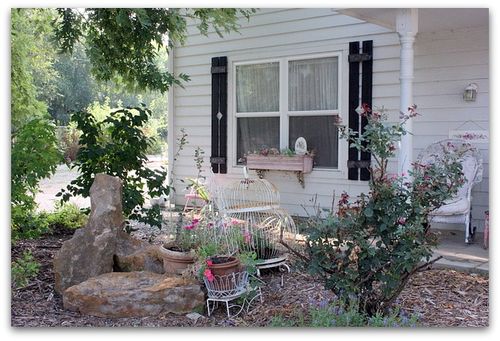
Do you ever just put up with stuff around the house and let it bug you each time you look at it, till it gets to the point that you just don't look at it any more?  I never used to, but in the last couple of years, my house has been neglected. 

IMG_4058
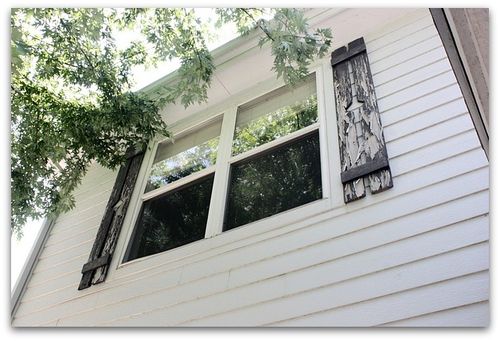
See what I mean? All of our shutters were peeling,  the worst were up on the 2nd floor, so I just never looked up.  But when the ones right by the front door started to get worse and worse, it became hard to avert my eyes.  

Then, we were invaded by mice.  Yes, what do mice have to do with shutters?  Well, I guess these nasty little poo droppers just seriously got my attention, and when I started to clean up after them, I got kick started into a deep cleaning mode and went berserk over all of my house, including those peeling shutters.

  I moved all the furniture, cleaned behind it, and then did a couple switcharoos with a few doodads and some stuff on the wall in my bedroom.  That got me thinking how much I always hated the curtains in the bathroom, so I whipped up a new set with scraps and lace.  I then ended up buying a new spread, and a couple of rugs for my bedroom and sewed some pillows to match.  While I was rug shopping, I finally picked up some paint to redo the breezeway and these shutters.

IMG_4093

Its been a crazy couple of days, but worth it.   I think that since our remodel plans have been up in the air for so many months, I've been just letting stuff slide, thinking I'd take care of it all at the same time, after the remodelling. But then, I realized how hard it is to live with the mess of ripping out walls, and thought, I should have some areas that were all done and nice to make myself feel better while living through the horror of having half a kitchen.

IMG_4059
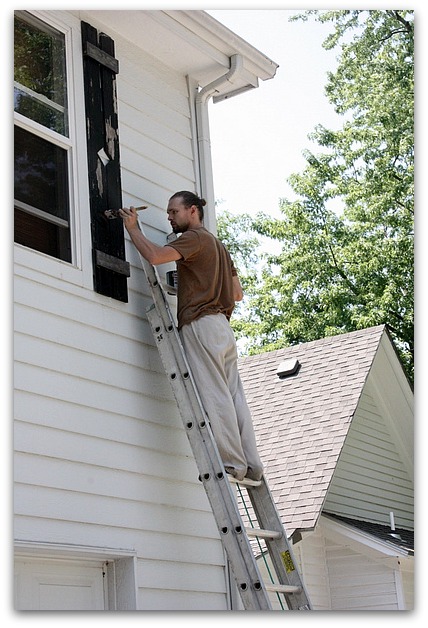
 Sugarwing's Daddy dropped by while I was scraping the ground level shutters and offered to do the higher ones for me.  I have a terrible fear of heights and was going to just continue with my policy of never looking up when I pulled into the driveway. 

IMG_4056
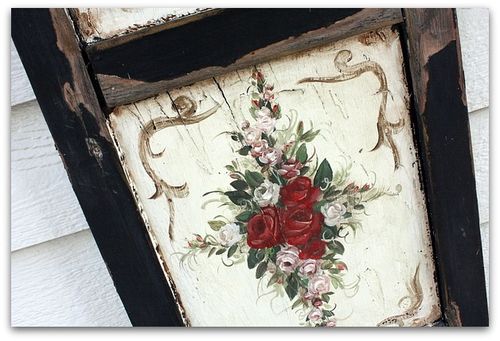
This kind of peeling is fine.  This is an old shutter that I have hanging on the wall of the house for decoration by the back door of the studio.  When I bought it to paint roses on, the peeling paint was one of the things that drew me to it.

IMG_4050
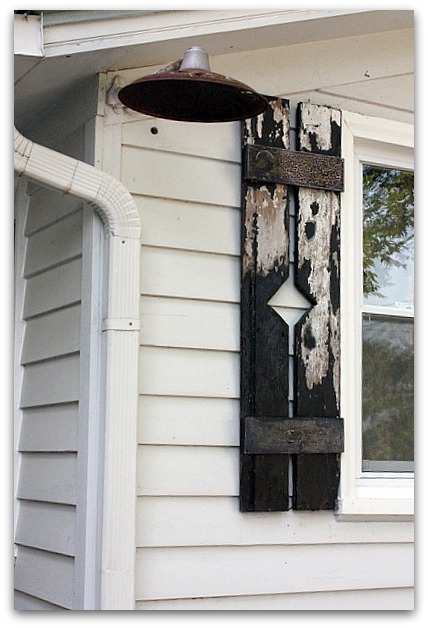
But this is a whole different story.  This just looks like no one loves the house. 

Years ago, I made these shutters myself.  We'd taken down an old garage and saved the wood. I cut two pieces the length of the window, marked a triangle shaped notch in each, cut it out with a jig saw, then lined the notches up to form a diamond and screwed small boards across them.  It was simple, and free to do, since I already had all of the wood.

I know they aren't perfectly straight, but for me, the old wood and simplicity of them compliments our old house and helps make the new addition fit in with the older half of the house.

More redo pictures to come! 
And in case you were wondering, I think all of the mice are caught.  Twinkle helped, she is a good hunter.

Painting furniture with no sanding, some short cut tips

dogs, Dorkies (Yorkshire Terrriers), how to's, how-to projects, paintings, Tutorials

IMG_3997
I've done a few other furniture painting tutorials (you can find them on my side bar, along with a lot of other how-tos), but those were mostly whites, creams, grays.  Not everyone lives with "low color" like I do, a lot of people like some flash. I know my family does, they all think my neutrals are boring. So when I paint something for them, its usually bright and cheerful.

So, I thought I'd give you some tips for using deeper colors.

IMG_3860
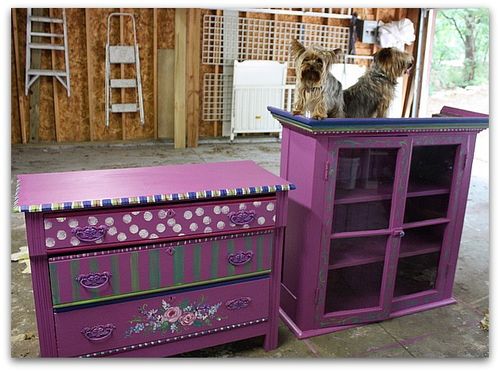
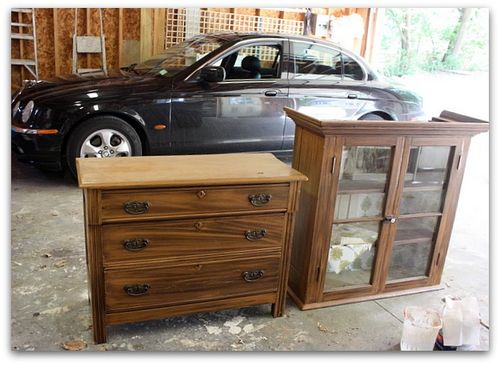
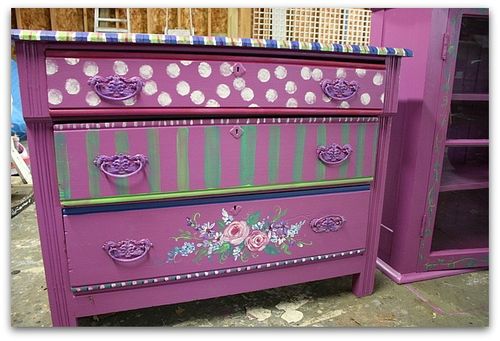
Our Hippy Chick was given this two piece set by her dad, it used to be his mom's.  It looks okay as is, but dull for a  fairy's bedroom, and this was meant to go in Sugarwing's room at her mommy's house.

Its been painted a number of times, looks to me, like the latest was a 1960s antiquing technique.

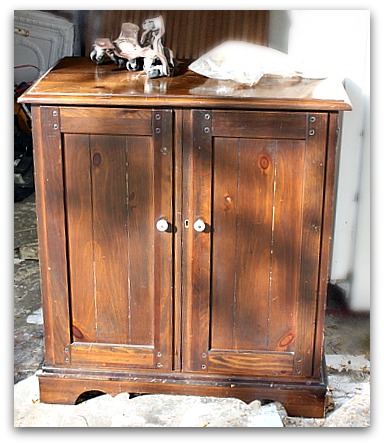
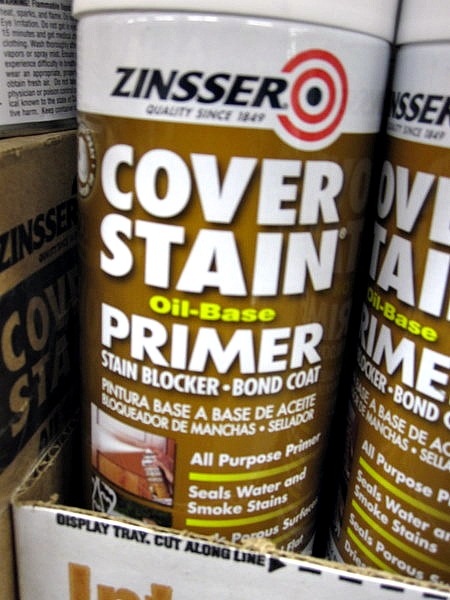
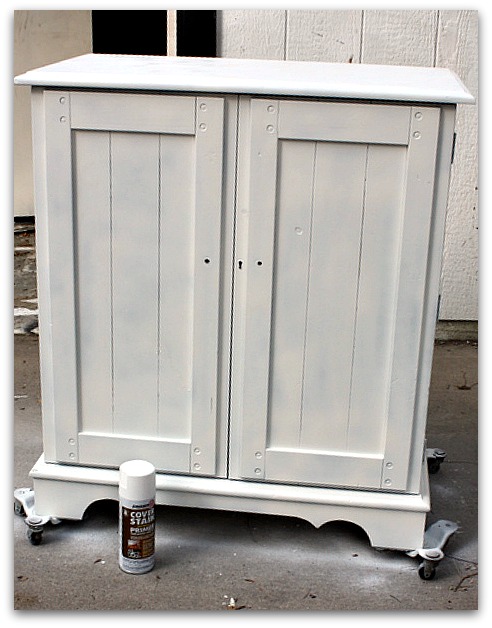
When I don't know who painted a piece or what they used on it, I always coat it with a BONDING primer, so my own paint will have good adhesion. If I painted it myself and know that it was latex with no poly top coat, I skip the primer and just paint it as is. But since so many things I paint are garage sale or flea market pieces, I have no idea who used what on it and I use primer in case.

IMG_3987
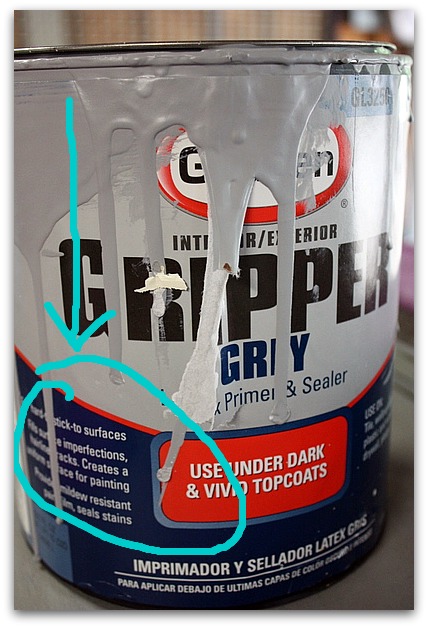
Over the years, I've tried many of the brands of primers.  Currently this is my favorite water clean up one. 

There are gobs of primers out there, be sure that you are using a Bonding primer, that says it will stick to glossy surfaces, do NOT use dry wall primer, that is a completely different thing. Kilz will not work unless you also sand.

I NEVER ever sand or strip the piece before I paint it.  Life is too short!

Now, if you are painting something really tough, like laminate or a high gloss laquer, maybe a quick sanding wouldn't hurt, just to give it some tooth.  But for most furniture, a bonding primer will be just fine with no sanding at all, as long as the piece is clean.

For darker or deeper colors, use a gray undercoat to prime with.  The white one is too glaring and will take more coats to cover it.

IMG_3988
Speaking of coats, use good paint.  Wall-mart paint is cheaper, but you use more because you are going to use more coats. More time, more work, more paint.

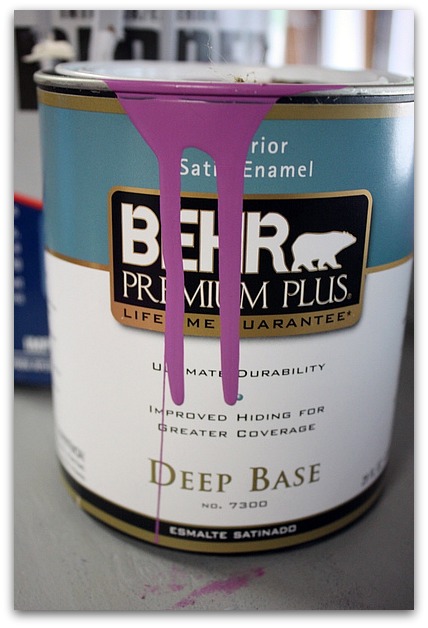
A quality paint saves you quite a bit. This Behr is my fave, it comes in many colors and usually only takes one coat. 

For this, I let Sugarwings pick out the color herself.  Its a Disney shade that is carried by Home Depot.

I chose Satin finish, that should hold up to little fingers and heavy use with no top coat.  This is a good paint that will last.

IMG_4001-1
After cleaning the furniture, decide if you want to change the hardware, if so, you might need to fill in the holes with putty, let dry, sand and then repeat.  After the piece is painted, you drill new holes to match the new hardware.

If keeping the knobs, do you want contrast or do you want to paint over them?  If this was going to be a cream colored piece, I'd have liked the contrast of the aged brass. But for a kid's room, I wanted the pulls to blend in.  So I left them in place and just primed and painted right over them. (when I was all done, I dry brushed another shade over them so they would have a little more interest)

IMG_3989

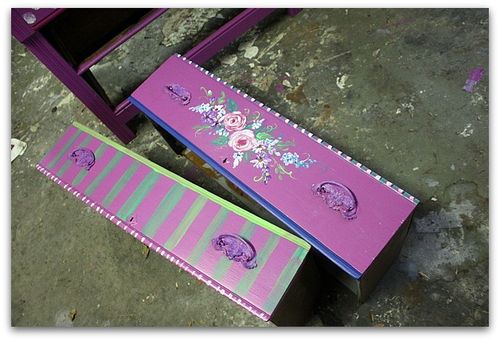
Pull out any drawers, and set them up on their backs to paint. It will save dripping.

IMG_3990
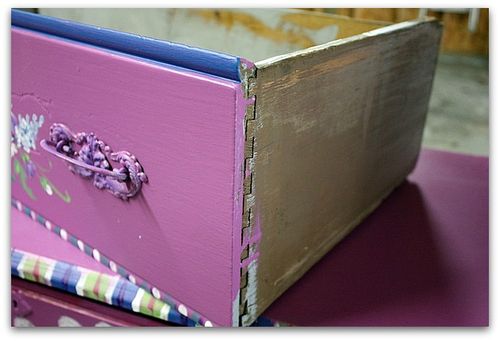
Don't ever paint the sides, or the bottom of the drawers, or they will stick like crazy!  I like to wax the sides of each drawer, for an easy opening and closing.

Also, I paint the interior of each drawer, just to make them feel clean and fresh.

IMG_3998
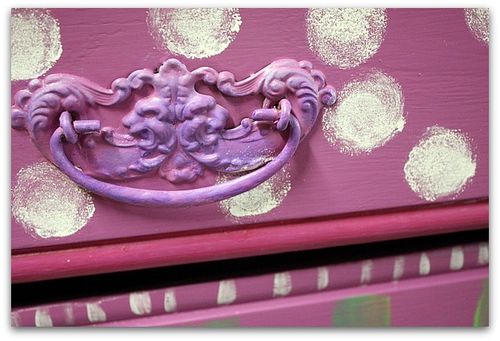
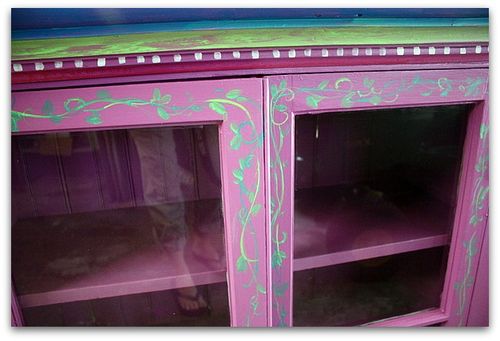
If you are doing decorative work after the paint dries, acrylic craft paint works fine.   I made simple stripes in multiple sizes with different sized brushes, and polka dots with a round sponge.  Then painted some flowers on the bottom drawer, added vines to the doors, and accented the trim with various shades.

IMG_3999 I am not a perfectionist.  I like old furniture to look like old furniture. If its been painted a few times in its life, I like that to show. I don't sand it down before painting, or between coats. If you like the perfectly smooth look, you'll need to sand.

When painting around glass doors, make sure you scrape the glass off with a razor blade within a couple days of doing the job, or the primer will be hard to get off.

If you are painting a two piece set like this, let the paint "cure" for a few days before stacking them.

Any questions? Feel free to contact me.

Tools you'll need:

  • bonding primer
  • quality paint
  • opener
  • drop cloth – unless like me, you don't worry about your workspace floor! You can see mine has seen some painting over the years
  • a wet rag is nice to keep handy
  • paint brush
  • small sponge roller (for big, flat areas, this sure speeds things up)


Fantasy Photo Editing tips and short cuts with Picnik part two

fairies, family, how to's, how-to projects, photography

B & F
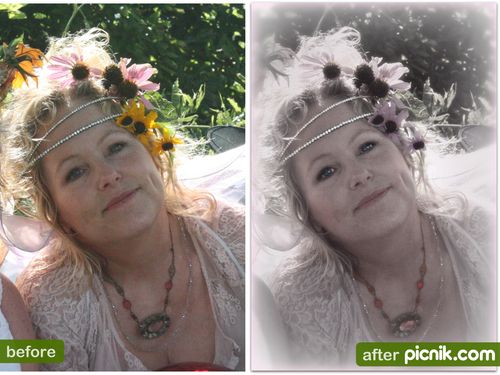
On this photo, I wanted softer colors and an over all, dreamier, softer look.  (at 53 years old, I can use all the soft effects available for my skin!!)

IMG_3543
 So, I skipped all the fixes on Edit and went straight to Create.  I turned the whole picture Black and White, under Effects at about 20%. Before applying it, I erased the black and white from the eyes and jewelry.

IMG_3543
Next, I used Eye Bright on all of the jewelry and the eyes.

Then, under Eye Color, I used the full strength gray to take away the yellow in the flowers, applied it, and tinted them to match the other colors with a purple Eye Color, faded.

  IMG_3543
Under touch up, I used Blush, in a skin tone on the skin, and faded it away, then did the same with a pink Blush on the cheeks and lips.  I added a bit of faded blue to the iris with Eye Color.

IMG_3543
One of my favorite tools for faces is under Seasonal, Valentines Day. Its "Heart's Desire" and gives the whole photo a pink tint, with blurred edges. I applied it with its largest size at 53%.

IMG_3543
Finally, I used Matte (Effects) in two layers, a pale pink full size, but faded a bit, then a darker pink very small and faded over that. To finish, I added a grey drop shadow.

Fantasy Photo Editing tips and short cuts with Picnik

fairies, family, how to's, how-to projects, photography


  Kisses

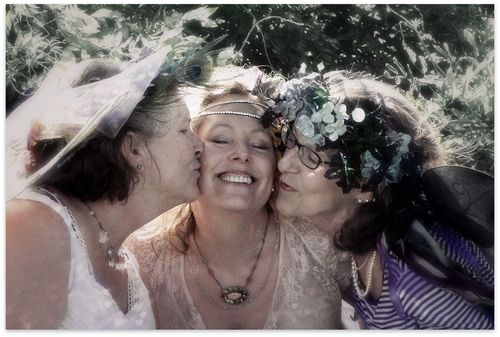
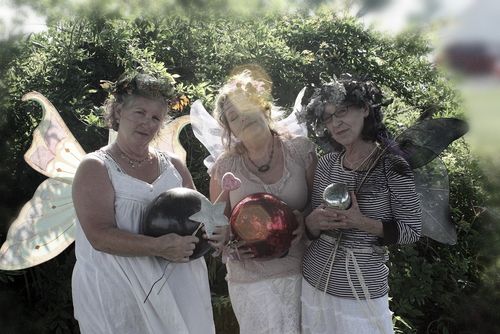
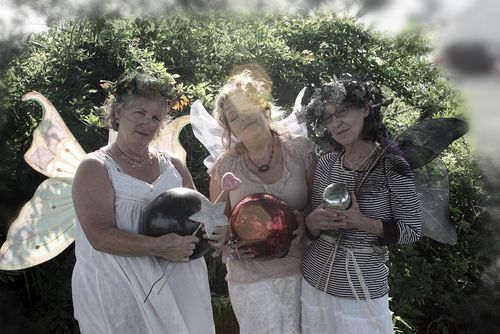
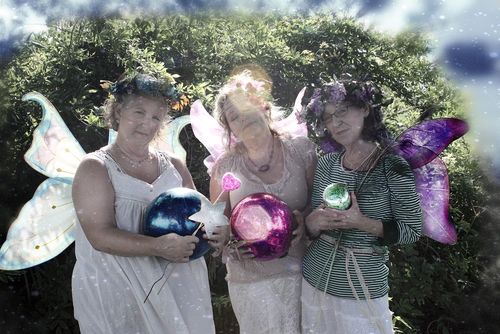
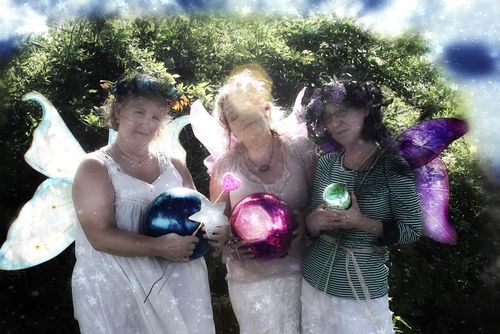
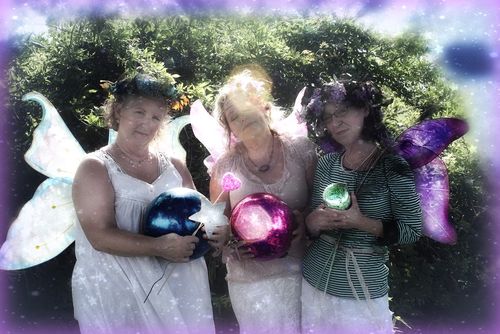
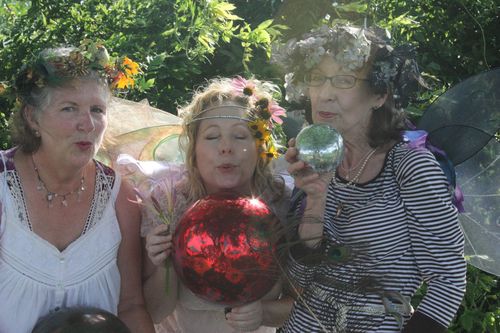
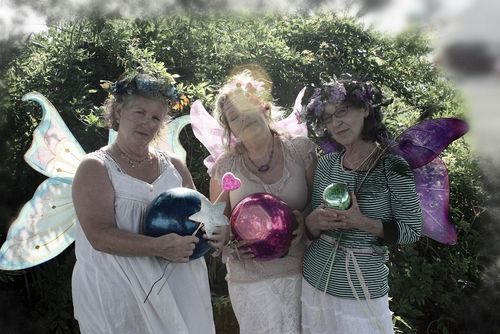
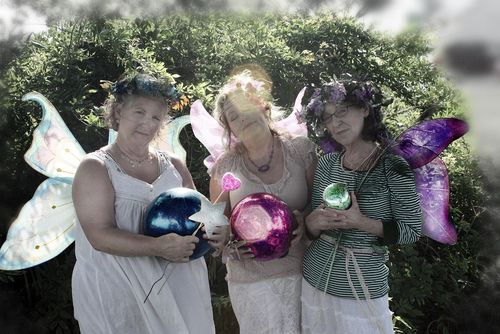
While I was in Indiana, my sisses indulged me and we played Fairy Dress up. Bobbie Sue's husband used my camera to get some photos, and as cute as they were, I thought they could use some added magic. (By the way, my sister lives on a highway and we were in her front yard wearing our fairy gear. Its good to have family that likes to have fun and doesn't get embarrassed when cars drive by and honk when we are being silly)

Here is how I did it, if you are interested. I use only Picnik, which is free. But some of my choices are from the premium selections, so they cost $24 a year. Much cheaper than buying Photo Shop, quick, easy and simple.  I can't figure out Photo Shop myself, and Picnik is so self explanatory its easy to learn.

I don't spend much time per photo either, never more than 5 minutes each. I take a lot of pictures, and enjoy editing them, so don't have a lot of time to spend on each, or I'd never get anything else done if I didn't keep it quick.

 Click on any photo to see it in a bigger window.

(for the picture of me flying, I tilted it, with Rotate to make it look like I was flying off, the other steps are similar to the ones below)


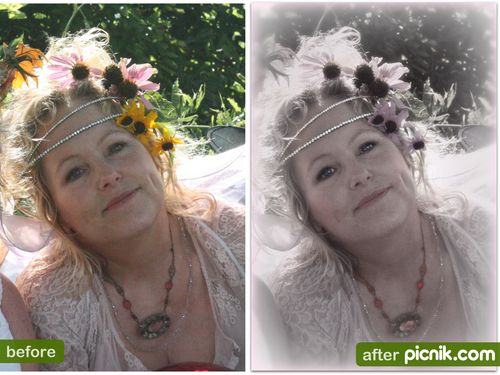
  Before and after

First, go to "Edit" and auto fix, then slightly sharpen. Next I do auto colors, and then cut the saturation in half.

Example

Go to the "Create" section and in there, find "Touch Up"

I use Wrinkle Remover to get rid of the red car in the background. It took three applications to get enough strength of the blur to cover it.  I ran a circle of Wrinkle Remover all around the edges of the photo to make it match too.

Example

I clicked on the gray eye under Eye Color and used that all around where I'd blurred the edges.  You can only do one color at a time. Save each and move on to the next.

   Example
Eye Color was used again to tint all the magic wands, wings, orbs, and hair embellishments, as well as the wings.  After tinting, I faded the colors by sliding the bar till I liked the strength of the color.

Over that, I used Eye Bright, then lightened it a great deal, so the wings and orbs had a bit of a glow.

Example
But that wasn't quite dramatic enough, so I used Eye Bright at full strength on the lightening on the orbs and highlights of the wings one more time.

To make the fairie's skin glow more, I used Dodging, still under the category of Touch Up.

   Exmple

Over the blurred background, I did a faded blue Eye Color, then went to the Featured section and added a solar layer, and faded it down.

Example
Next, I used Ortonish under Editing, and faded it half way. Over that is Bokah Stars from Fourth of July under Seasonal. I like to make the stars tiny, and do two or three layers of them, in different sizes.

Example

To finish, I used Matte under Effects, in blue first, then faded, and over that, pink, faded and smaller.

IMG_3572
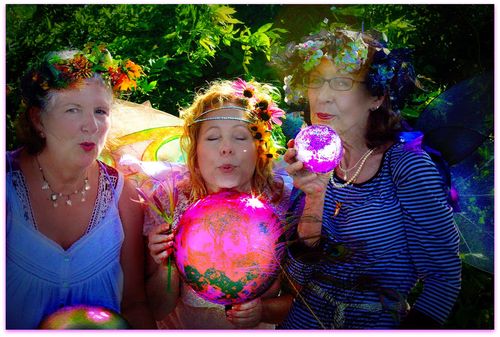
This picture has nice light coming through over my shoulders, so I decided to accent that.

Blowing fairy dust
I made it really colorful, not my typical style, but fun and fairy-ish.

Here are the steps:

  • Auto Fix
  • Sharpen
  • tint orbs pink with Eye Color
  • lighten and brighten orbs and wings with Eye Bright
  • Eye Bright full strength on all jewelry and again on the orbs
  • full Saturation (under Effects), before applying, I erased the Saturation from all skin tones
  • Lomo-ish (under Effects) to darken the edges and make the center glow
  • Eye Bright on wings and around the orbs
  • Dodging to lighten the faces
  • Drop Shadow in pink

B & F

For my next post, I'll show you some softer colors and ideas.

How to make a magic mirror

dogs, Dorkies (Yorkshire Terrriers), how to's, how-to projects

IMG_3400
Sugarwings has a birthday coming up. And the next day, she starts kindergarten. 

Oh my. 

How did she get to be 5 so fast? I can't believe she will be in school.

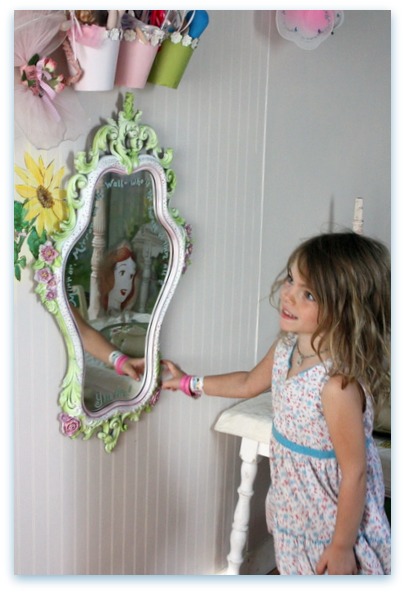
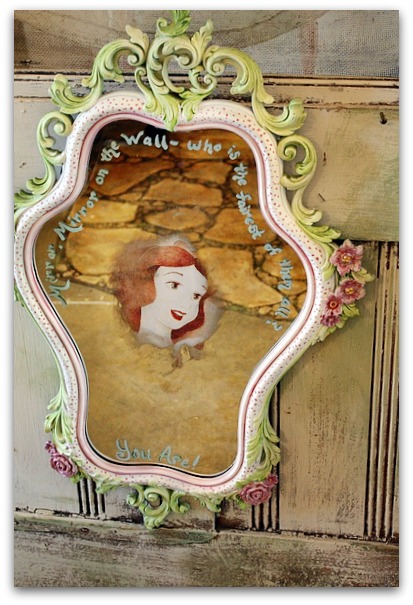
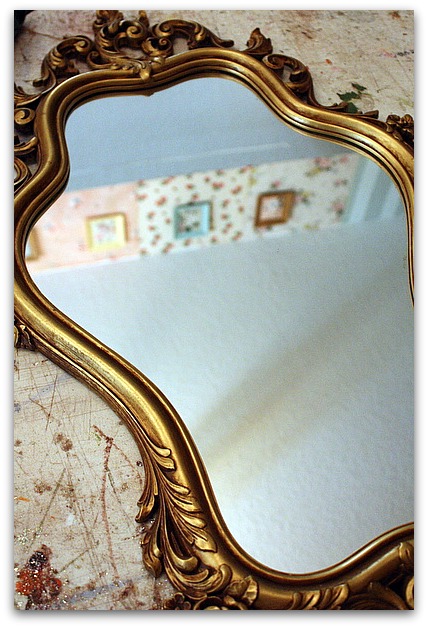
I wanted to get her something special for her 5th birthday, so when my friend gave me a mirror that didn't sell in her garage sale, it inspired me to create this magic mirror for the birthday girl.

IMG_3342
Now, the evil queen's mirror really was more glam and golden than what I came up with, it was actually more like the way this mirror started out.  But I was going for light and cheery, more Snow White than her stepmama.

IMG_3343
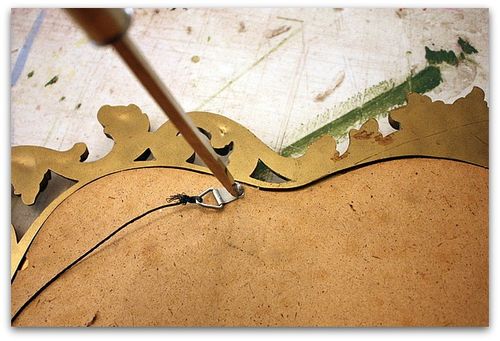
So, I took the back off, and removed the mirror, and painted the frame.

IMG_3348
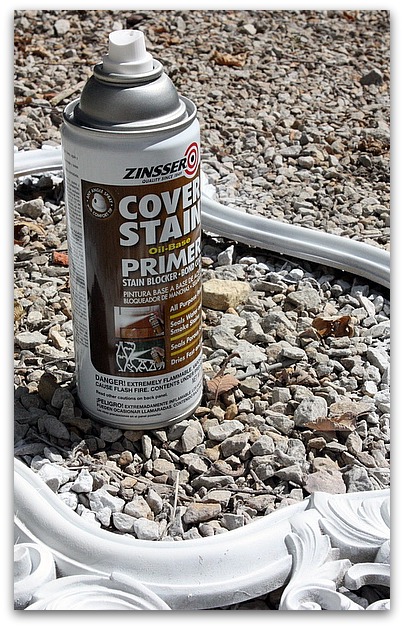
I used the spray, bonding primer that I love, and always use.  It goes on like a dream (shake it well!)

IMG_3392
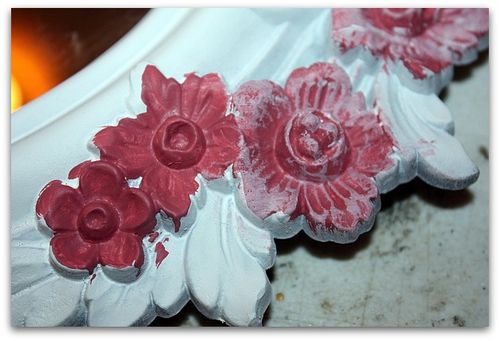
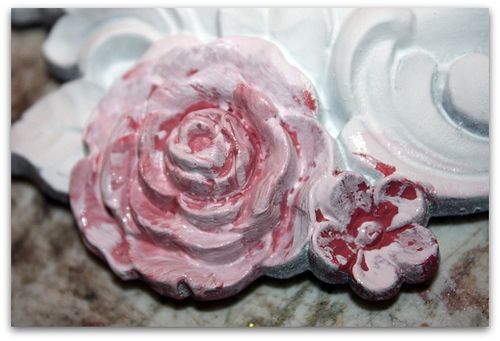
Over that, I used acrylic craft paint to do a base coat of deep pink on the flowers, then dry brushed some lighter pink over that.

IMG_3393

It looks a bit messy, but its all about the layers.  This is a quick process, you don't have to be an artist to smoosh some colors onto 3D flowers like these.

And messy is good.  You don't need to be precise.

IMG_3394
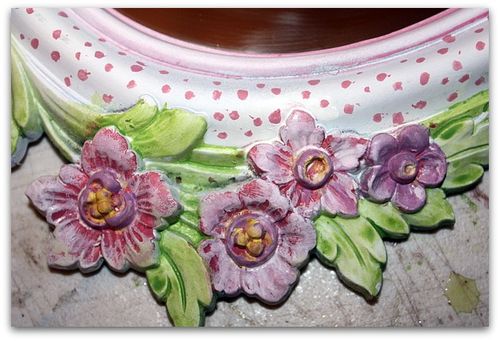
Like I said, its all about the layers. I used dark pink, then light pink, then some yellow in the centers, and purple around the centers. On a couple flowers, I did even more purple. 

Over all but the yellow, I brushed another coat of light pink.

Each layer is messy and fast.

Then, I got my brush extra wet, and brushed green onto the scrolls and leaves, wiping off a bit here and there with a paper towel.

I did the same with pink on the inner rim, then made polka dots by dipping the wooden end of the paint brush into the paint and spotting it on.

(if I was doing a mirror like this for myself, not for a child, I would distress the raised areas with sand paper, then glaze over it with a brown color and wipe it off)

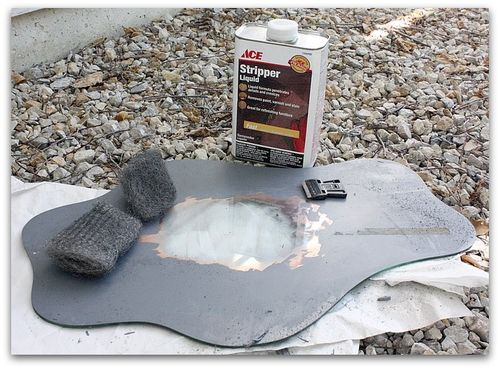
IMG_3345 After that, I tackled the mirror.  A glop of paint remover/stripper went right in the center and I let it sit for about 15 minutes, then scraped at it with a razor blade (while wearing gloves)

Then, I scrubbed at it with the stripper on my steel wool pad.

When done, I sprayed it with the garden hose to clean off the stripper.

IMG_3402
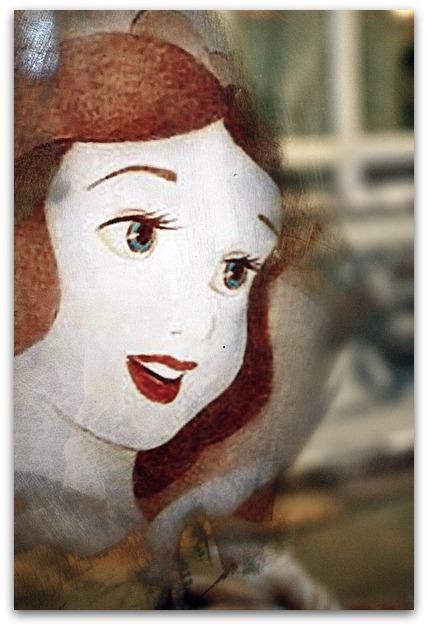
Then, I downloaded a picture of Snow White from Google Images and tinted it sepia.  She is usually wearing red, yellow and blue, which was too bright for this project and Sugarwing's bedroom.

So, I printed it on matt photo paper, and added a touch of blue to the eyes and dark pink to the lips with markers.

After that, I taped it to the back of the mirror so that it peeks through the clear spot on the glass, and replaced the back on the mirror.

IMG_3404
Around the top, I wrote, "Mirror, mirror on  the wall- who is the fairest of them all?" and at the bottom, wrote, "You Are"

This was done in a waterbased craft paint meant for glass. Read the labels of the bottles at your craft store if you want to paint on glass or a  mirror.  You want to make sure that it holds up to cleaning.  Regular acrylic paint will wash off.

Once I give this to my fairy baby for her special day, I'll get a photo of her looking into it. 

But for now, shhhh! Its a surprise!!

Hosting a tag swap

bird song art event, Books, how to's, swaps

IMG_3111
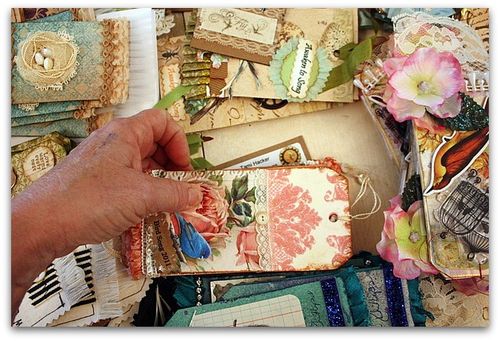
The tag books are starting to come together.  Well, sorta. I have about a dozen or so made up.  Thats a start!  Its been such fun to open them all and see the talent inside the avalanche of mail.  And here and there, I come across a sweet treat like this extreme goodie pile from Sharon, and that makes it even more fun. Like a treasure hunt. Its all I can do to be polite and gently unwrap everything and be organized with the tags, and stop myself from being like a kid at Christmas ripping into pressies!

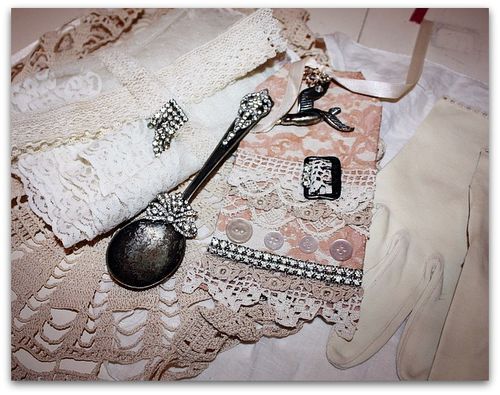
   IMG_3102 And look at these beauties from Rebecca!  There is the perfect spot for that spoon in my kitchen cabinet.

I thought you might enjoy a rundown on the process of the whole swap. I am NOT an organized person by nature and I have to be very strict with myself to make sure it all runs well.  I have lots of steps each package goes through and I have to concentrate while doing them, so I don't screw up. 

It starts with the sign ups, as people email their info to me, I add it to a word doc on my computer, when it is full, I alphabetize it and print it out.

IMG_3115
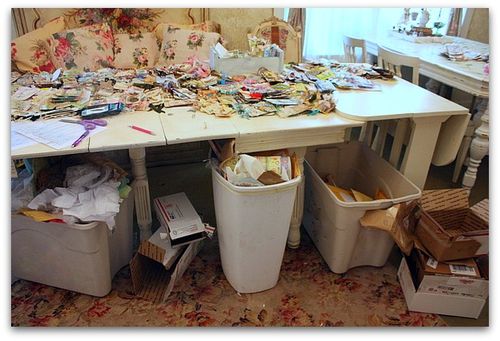
 No packages get opened till the swap begins. They trickle in a few at a time for weeks, then as the deadline approaches, they arrive in a daily mountain on my porch.  The mail lady doesn't even knock any more, she just stacks them on the chairs in front of my studio.

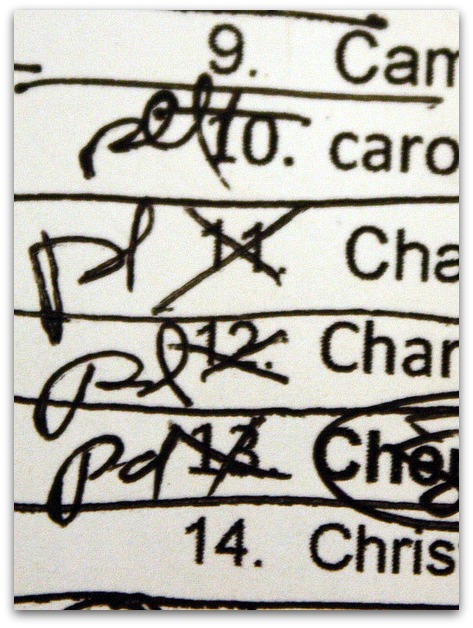
Here is a snippet of the list, as I open a box I mark it delivered, and paid.

IMG_3114 Everyone was asked to send their mailing address on a separate piece of paper. If they forget, I cut it from the return address on the box.

I arrange each person's pile of tags with their info underneath.  I don't use these as the mailing label, they are just to keep me straight on whose tags I am dealing with and whose books have been made.

When the books are done, I make pay pal labels.  It costs more and takes a lot  more time than just taping down the label they sent in and having the mail man add the postage, but this way I can track each package, just in case we need to trace it. 

It would also be quicker to just make books willy nilly, without knowing who each one goes to. This might sound silly and time consuming. but I like to know who is getting the book I made, and I enjoy looking at the artist's tag and trying to make a book of other tags that I think she'll like.

It probably doesn't even show, but it matters to me.  I make the books with love.

I try not to send the artist her own tags back, but sometimes it happens, especially with later tags when there aren't as many to chose from.  In the beginning, with billions on the tables, its easier.  As I compile the books, I mark each off the list.

IMG_3116
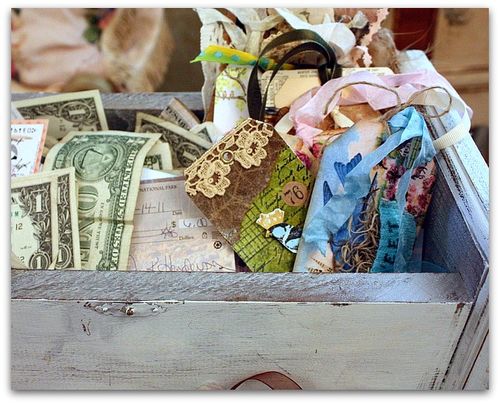
Cash and checks go in this box, with the tags that were sent to me as gifts.  I think that my personal swap book is going to be extra fat and gorgeous this time!!!!!!!!  There must be 30 tags in there.  How lucky am I to get so much cool art for myself?

IMG_3117
Tags that look pretty together get stacked near each other as I open the boxes, so as I make the books, I gather the tags from the area surrounding the artist's own tag. A more left brain person would probably put the tags out in the order they come in and work from first to last.  I go by color and style instead.

Hey, I have to make it fun and interesting to me, or I'd go crazy! This is hours and hours of work. I know I could do it more simply, but I want to do it right. Each book of tags has to look good together.  I'm not going to put a wild colored one in a book with all muted colors.  The wild colored one will go with a selection of other colorful and fun tags.

While I am unpacking, I sort and recycle.  Pretty ribbons, tissue, and wrappings get saved in one tub, and another fills up with bubble mailers.  Boxes get stacked and saved, too.  I can always tell when it is time for another swap, when my packing materials get low!  I'd like to say that I am saving the earth, but honestly, I'm just cheap.

  IMG_3118 As I go through the packages, I have to force myself to stay on task, and put all the gifties aside for later. But all I want to do is PLAY with them!  Its hard to not open and peek inside the gifts for Sugarwings too. I get as excited as she does about them.  And when I get art supplies, it takes a lot of self control to not go sit down and make something right then and there. You know how tempting new supplies are.

IMG_3120
There are too many to make to wait till all are here before I start the assembly.  It will take me a couple of weeks to get them all made and shipped.

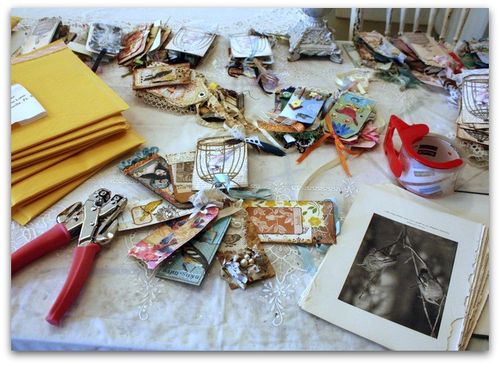
My workspace has a stack of fresh, new padded envelopes, lots of lace and ribbon, a crop-o-dile to punch holes for the people who forgot or made them too small (about 1 in 6), pretty bird paper of some kind to wrap the books in, and tape to add their label to the envelope.

I'll make up a dozen or so loose books, then sit and tie them all, and stuff then slip the envelopes into a basket by my side. When its full, I go and make labels.  After the label is made, I mark that person off the list as shipped.

It helps to break the job up this way, bringing a dozen or so to completion before making more. Selecting the tags for each book is the fun part, if I did it all at once, then the tying and labelling would feel like punishment.  I like to know that I can get up and go make more choices as soon as I finish my stack of envelopes. 

IMG_3082
I will be working on these for quite a while, so if you haven't sent yours yet, don't waste money by overnighting them! Please email me and I'll let you know whether you have time to get them in.

Thanks so much to all of you who sent your artwork in to me to enjoy and play with. I'll do my best not to drool on it.  And I'll try to keep plugging away at these books and not get too sidetracked by how pretty the tags are.  Just don't make them too sparkly or shiny, because I get mesmerized pretty easy by shiny things.

And thanks to those of you who sent my little fairy grand child some tidbits. I've given her a couple of them, and might throw a tea party and let her open the rest then.

  IMG_6722

The winner of my mini dress form online workshop is Debbie Jullieret.

I think I'll do another giveaway. The prize is a  dress form tutorial.  If you have already purchased one of the $15 classes,  (thank you!!), then I'll send you a kit of vintage goodies instead if I draw your name.

Another redo with the guncles, a mini greenhouse with “aged” pots

guncles, how to's

  IMG_2312
Randy and I worked on a lot of different things while I visited.  One thing he wanted to do was arrange his new terrarium, and pot some flowers to put in it.

We had an idea to decorate the terra cotta pots with some old paper and photos. The smaller pots are covered with pages from old books then rubbed with aging inks, and the largest got covered in photos and paint.

 
IMG_2282
After Randy glued vintage pictures all the way around the pot, I dabbed at the terra cotta with three different Tim Holtz crackle paints,  in mossy green, white and cream onto the areas between the photos. 

It is a haphazard, messy process, where I didn't try to be too precise about where the paint went. Some areas of the pot are left bare, some of the paint is heavier than in other spots, and some of it got on the photos.

When that dried, I rubbed the paint and the pictures with a dark ink pad, a mossy one, and an ivory one, and blotted it with a baby wipe to blend the inks.

  IMG_2273
Of course, the mini green house was so cool anything would have looked good in it! But I think that the aged pots added a nice touch.  (he bought it at Pottery Barn)

IMG_2307
When we were done, I thought it needed just a little bit more, so I made this little caged fairy to nestle down in the moss.  Its really tiny, about 3" tall.

The little girl in the photo I cut up, is holding a puppy, which was appropriate for Randy and Kevin's house, they are quite the dog lovers.

IMG_2271
Gosh, I wish I had one of these, nice, huh?  (Randy is pretty cute too) It looks great in their sun-room.  I think the plants will thrive in it.

IMG_2164
Please leave a comment if you want a chance to win one of my Mini Dress Form online workshops

IMG_2169

If you have already purchased the $15 class, and you win, I'll send you a kit of vintage materials to make your dolled up dress form.

Frog Princes and Guncles

fairies, family, guncles, how to's

IMG_2177
Have you seen the little papermache creatures at Michael's in the dollar bins?

IMG_2159

That is where I picked up this frog.  All he needed was a kiss to be turned into a Froggy Fairy Prince!  (well that, and some ephemera, glitter, glue, and a crown)

IMG_2172
The best part about him, though, is his eyes.  I had a vintage Easter bunny that Agnes Rosebud thought was hers to play with, so it was missing a couple of its not-so-lucky rabbit's feet. I popped the eyes out of it and added them to this frog after decoupaging it in old text. (I'll be watching out for trashed dolls at flea markets and garage sales just to harvest the eyes from.  Kind of creepy, but worth it, these eyeballs really made the whole project)

Next, I used pink chalk to make blush for his cheeks, and rosy up his tummy, and drew his grin with a brown marker.

Over that, he got a generous helping of clear glitter.

IMG_2174
I made his wings with the patterns I drew for the Mini Dress Form tutorial. (see, there are LOTS of things in the class that you will use for other stuff too, not just the dress forms!!)

To get the wings shaped the way I wanted them, I made two pair, back to back and sandwiched wire in between.  That way, I could bend them around like this.  I inked the edges of them and added glitter to the rims.  For dimension, I cut the top half of the set of wings off of the bottom half, then layered them on top of each other.

I also used a brown ink pad to accent the frog's body. Probably should have thought of that before the glitter instead of after, but it was still ok.

His crown is a snip of screen that I cut to fit, and added sparklies and millinery to, then glued on.

IMG_8733

This lil froggy guy will be winging his way to the Guncle's house with me.  I'm off to Florida to celebrate Guncle Randy's birthday. Sugarwings wanted to go too, but I told her I didn't have a plane ticket for her.

She said, that we could go to the movie theater, they sell tickets! Then she could come too. She loves visiting her Guncles (gay uncles) and the beautiful beach they live near.  Plus, she knows how fun those guys are.  I'll miss her, but this weekend is all planned for grown ups.  I promised to take her to the beach and to see the Guncles another time.

I'll be in heaven this weekend-

  • great food (they are the BEST cooks, and always have fresh seafood)
  • a weekend long craft-a-thon
  • champagne!
  • show tunes to sing along with
  • non-stop laughter
  • and the most beautiful fairy garden to sit in

(this was pre-posted, I am away from my computer right now, and all orders from my Boutique will be shipped out on Wed. the 29th.  I'll be reading comments, but might not get to answer them all. )

Scroll to Top