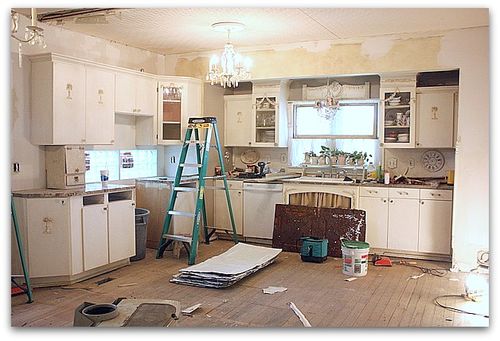
Kitchen remodel

The Short cut way to repaint kitchen cabinets with no sanding,stripping, or even removing the doors!

how-to projects, Kitchen remodel, Tutorials
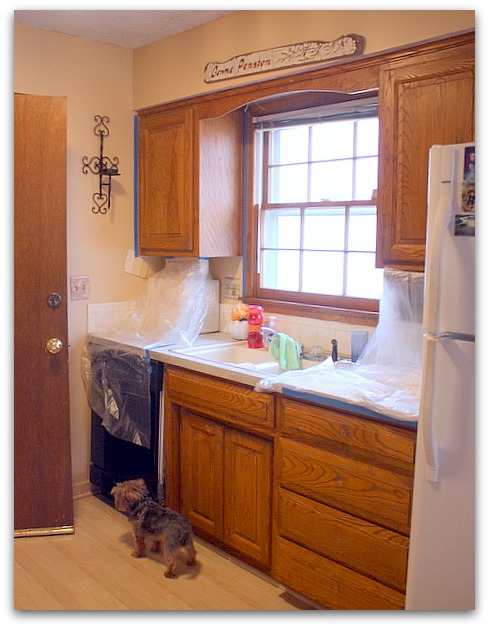


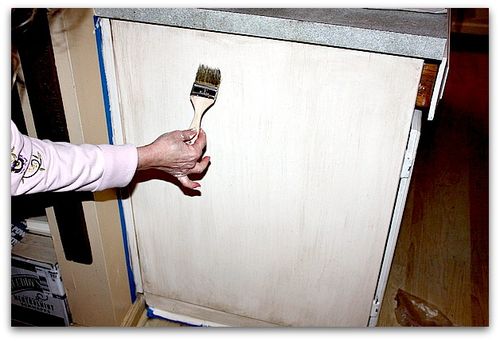
IMG_6839The other Karla and I have been promising Beth we'd help her with her kitchen for about 6 months and finally did it. It only took about 6 hours for the three of us.  6 months, and 6 hours, that is.

Beth had the doors washed, areas taped off and covered where needed.

IMG_6845

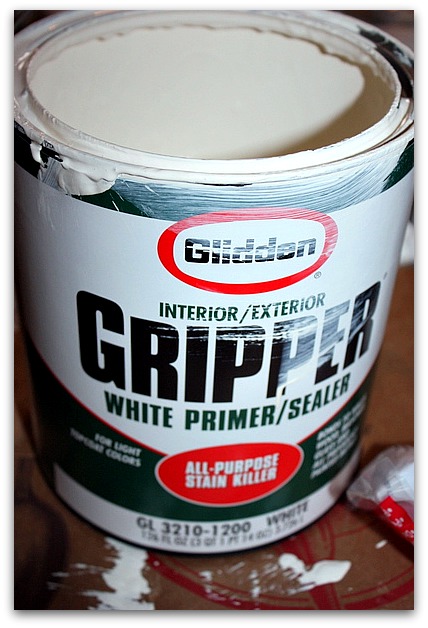
So, we got right to it.  The bonding primer was tinted to the paint color, which makes it easier, since primer can be such a blinding white.

ALWAYS USE A BONDING PRIMER.

Not primer for wallpaper.

Not primer for fresh drywall.

Not paint and primer combined.

Somewhere on the instructions or label, the can should say something like this " will adhere to glossy surfaces"

You will not need to sand or strip the wood, this primer will be ideal for gripping the wood and giving the surface some "teeth" for the paint to hold on to.

Please note, that primer needs a few days to reach its full strength, and it can be scraped up while fresh.Once it has cured, though, its tough as can be! If you want to distress your finish with sandpaper, please do it very soon after painting.
IMG_6843
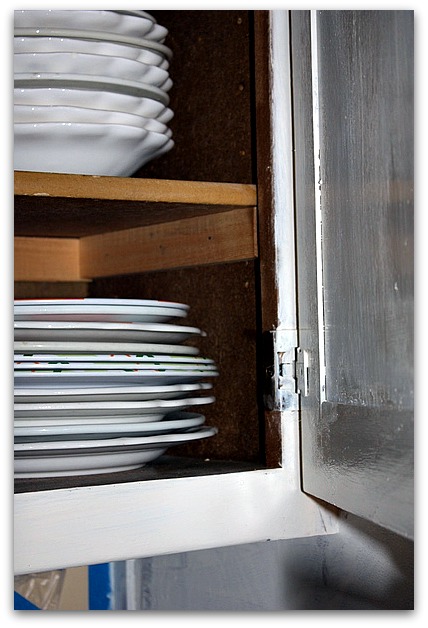
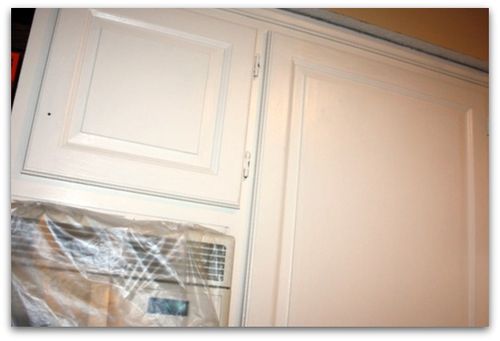
We left the doors on, and painted over the hinges. The door pulls were removed first.

We were in a hurry, so really didn't let the doors dry as much as we should have, so I knew that the opening and closing was going to create some cracks in the drying primer on the dark bronze hinges and that might peek out of the paint a bit, but wasn't worried, because I knew we were antiquing the finish when the paint dried and it would all blend in.

Sometimes, its smarter and faster to just go with the imperfections and make them work in your design!

IMG_6846

After priming, we put on about 2 coats of creamy, satin finish paint.  Then went out to lunch while it dried.
IMG_6848
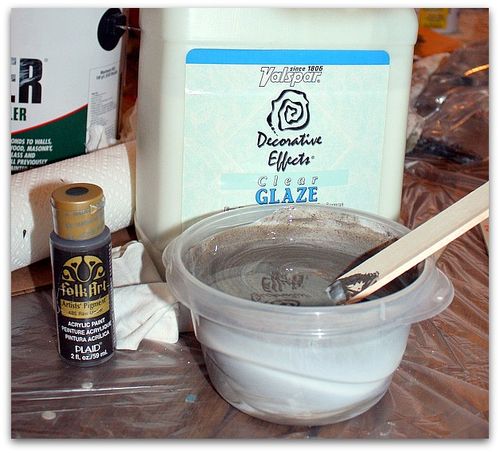
When we got back, we mixed 2 oz of acrylic craft paint into a bowl of about 2 cups of clear glaze.

While the glaze is wet, it looks milky, but it dries clear. Always remember that the mixed paint and glaze will dry on your furniture to the same color of the paint you mixed in.

Paint it on, and wipe it off with a clean, damp cotton cloth (an old tee shirt torn up is good), heavier in the corners and indentations.

IMG_6849

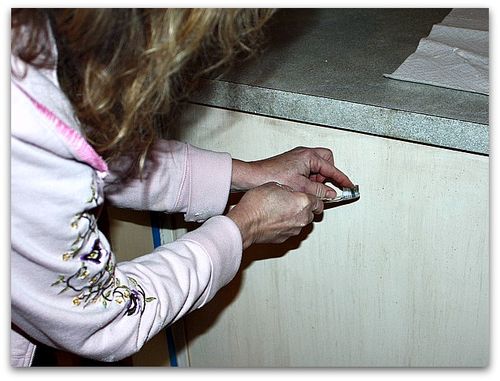
After putting it on and wiping it off so the corners, indentations and edges were darker, we wanted a bit more of it showing, so, we pulled a glaze dipped brush down with the wood grain, to create striation marks.

I use a cheapo, 99cent brush, instead of the specialty faux finish brushes sold to do this with.

If the lines seem too dark, or heavy, go over them again or blot them with your cotton rag.
IMG_6850
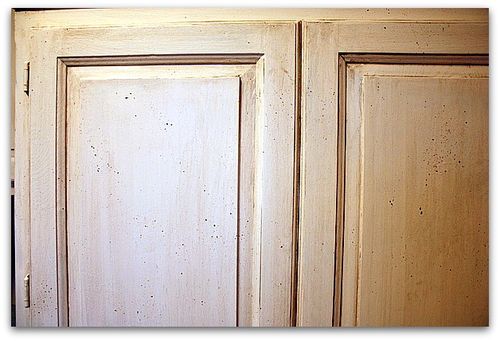
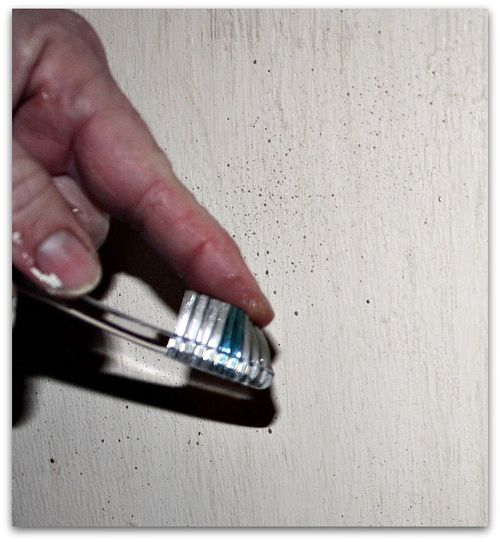
After that, we wanted even more design the to project, and decided to fleck glaze dots all over the surface.
IMG_6852
Its easily done with a toothbrush, and the same glaze used for the faux treatment. The speckles should be random, and not too dark or big, and never drippy.  Blot if needed. And don't get too carried away.

IMG_6855
Ta dah!

The cabinets should get a top coat of poly (which is oil based, smelly and sometimes yellows, but holds up great and is extremely washable) or water based poly, Minwax Polycrylic (which doesn't smell, or yellow and is easier to use, but isn't quite as durable, but still really good).

Beth's sweet husband, Jeff, was volunteered to do the top coat later.
IMG_6856
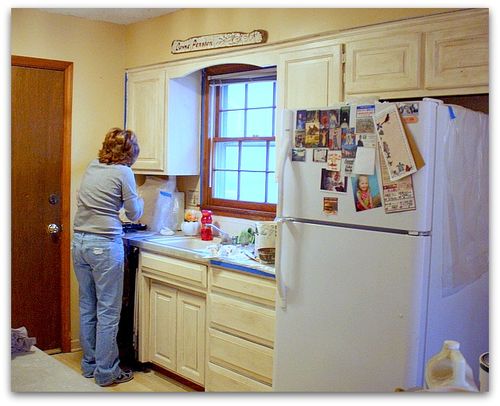
We thought our paint job looked pretty good when done!  But there was still something bugging us.
IMG_6861
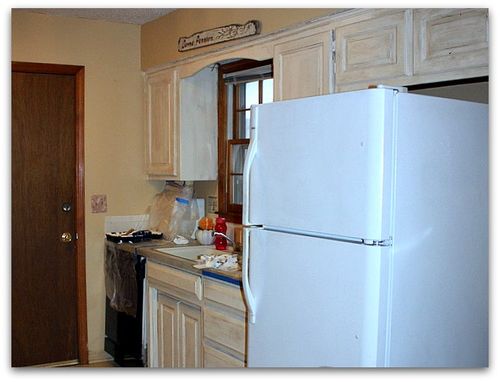
Ta dah, again!  Doesn't the room look better without the busy magnets on the fridge?  This might be controversial (Beth told me not to pick on magnets, some people LOVE them) but I HATE magnet covered fridges.  I know I am in the minority, and a lot of people really enjoy using their fridges as art and photo display. But I always find the clutter distracting for myself. (although I do have to admit, I enjoy looking at all the pictures on fridges when I am visiting someone and thiers is covered)

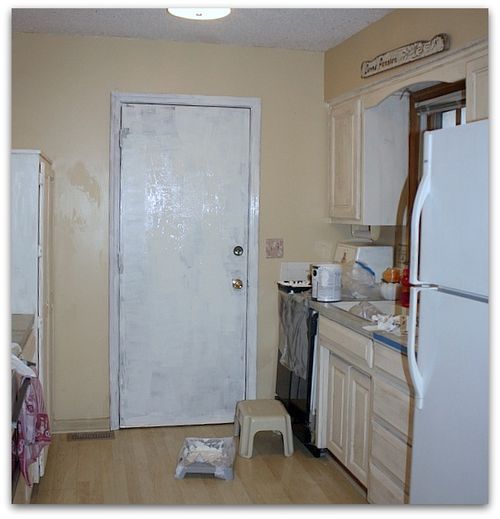
And another thing that bugs me is dark wood that doesn't really go with the room.  Her door was too dark for the nice, light space.
IMG_6863
I only had 9 minutes till I had to leave, because it was my son's birthday and I had a party to get to. So, I quickly whipped the primer back out and got the door ready for a coat of paint.

Beth said that Jeff would do the paint coat.

Here is what we discussed for the door:

1- paint the door to match the cabinets

2- paint it the base color of the cabinets

3- paint it the wall color

4- paint it the wall color and then do the same faux treatment and glaze that we did on the cabinets over that.

Either choice she makes, its primed and ready to go. And I think the room already looks bigger with the door nice and light, don't you? Which option would you chose? I'm leaning toward #4.


Book club holiday party gifts and decor and treats

Books, celebrations, Food and Drink, holiday decor, Kitchen remodel

IMG_6394

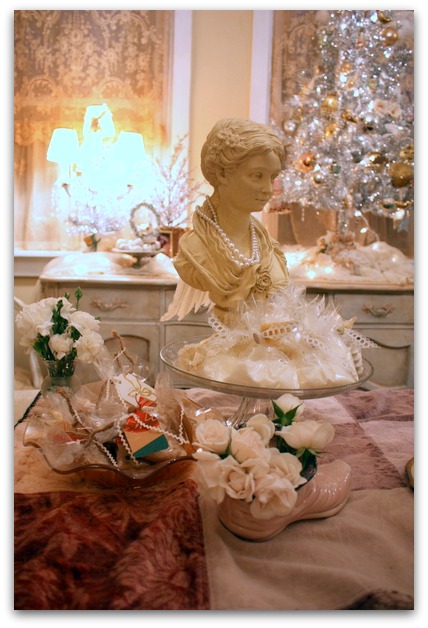
Last Monday, I hosted our annual book club holiday gathering.

IMG_6390

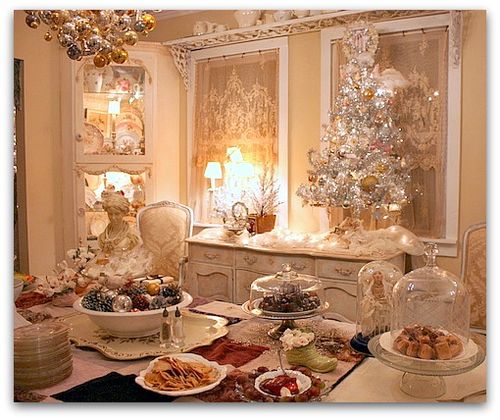
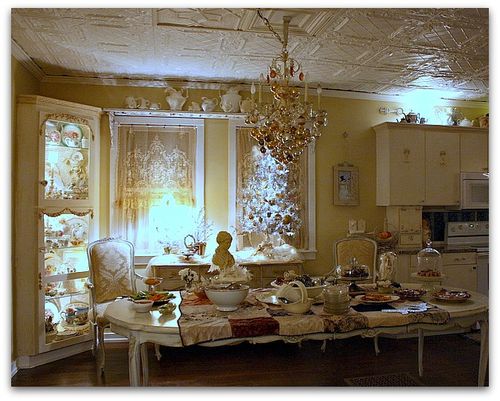
All of the dining table chairs were moved into the living room for the guests to gather in a circle and the dining room table was covered in a vintage velvet quilt and filled with goodies.

IMG_6388
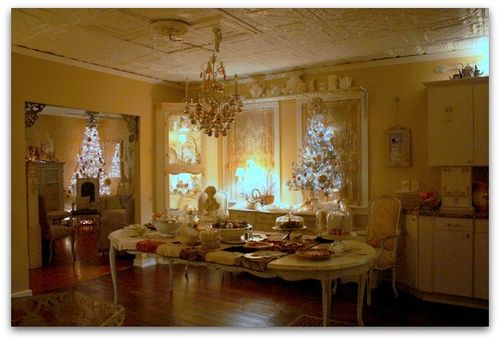
If I didn't have old lady eyes and needed the over head lights on, I'd keep my house lit with ambient lighting instead! I love the glow of all the small lamps tucked around the room.  And of course the Christmas trees add a beautiful glow to it all too.

IMG_6357
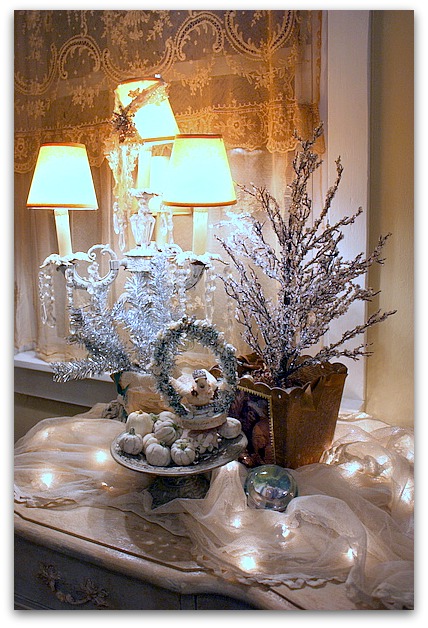
December is the perfect time to add lots of little mini lights.  I love to use them under old lace curtains on the buffet.

IMG_6407
The fairy lights add a nice twinkle to everything sitting near them.

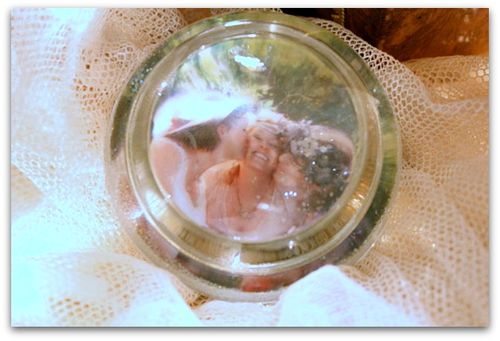
This little paper weight was a gift from my sisters.  Bobbie Sue added a photo of the three of us to an old paper weight that Sissy had. She made 3, so we each got one.

IMG_6356
For book club, we all wrapped up a book we'd enjoyed that year for a trade.  I got extremely lucky! There was a book I'd read in my 20s that I LOVED and wanted to re-read. I've looked for it for 30 years, but didn't remember the author's name or title.  And it showed up that night at the swap!!! Its from 1978 and is called "The Mirror". 

The book I gave away that night was "Room" and its very disturbing, so I wrapped it extra nice and added a brooch to the package.

IMG_6384
The night before guests came, my son's Gypsy Beloved helped me make some gifts. We whipped up goats milk bath salts with a vanilla rose oil scent, and some brown sugar scrub too. 

Sorry, no real recipe, I kind of made it up as I went along. But each are sooooo easy to make, I'll give you the ingredients if you want to wing it:

Bath salts:

Box of powdered milk (goat or otherwise)

epsom salts (whole bag)

cup or so of sea salt

scented oil to your own taste


Sugar scrub:

Half pound of brown sugar

Full bag of epsom salts

cup of sea salt

about 2 cups of coconut oil

about a half cup of glycerin

scented oil to your own tasteIMG_6378
The scrub is great for rough, dry, winter skin.  And the milk bath is really relaxing. I use both regularly.

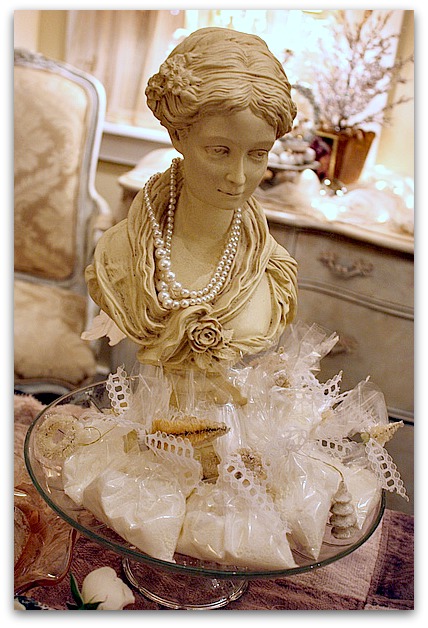
I wrapped them all in small plastic bags sold at Michaels in the cake decorating aisle, and tied up the bath salts with white lace and a mini bleached tree or wreath. The sugar scrub got wrapped the same way, but tied with rick rack and a tag made from an old Shiny Brite box.

IMG_6400
 

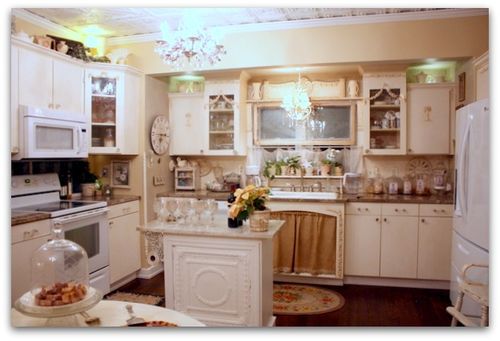
It was wonderful to have my new, big kitchen to host a party in.  I can't begin to tell you how much I love that room. 

The treats that night were pumpkin cheesecake, fudge, german chocolate brownies, pumpkin muffins, a veggie tray, pita chips, flax seed chips and salsa.

IMG_6403
And of course wine!

I hope that your holiday has been filled with special occasions and more to come.  Its a festive season, and I can't get enough of it.

IMG_6733
And please don't forget, I'm picking a winner of a Holiday Surprise gift. 

Just leave a comment between now and Christmas to enter.

Making a kitchen island from odds and ends

antiques/junking, Hand Painted Furniture, how to's, how-to projects, Kitchen remodel, Tutorials


IMG_5619

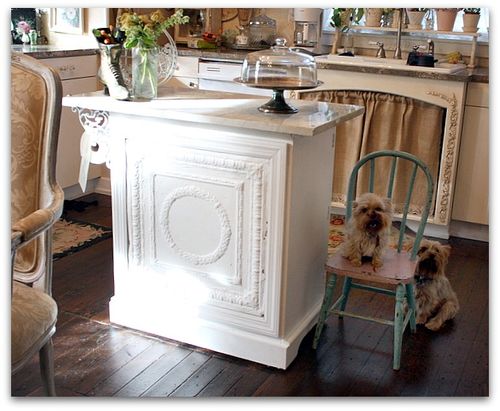
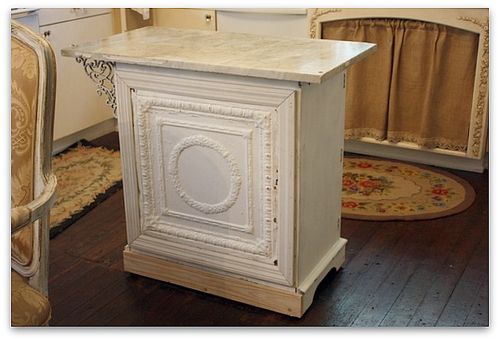
 When I knew we were going to be remodelling our kitchen, I started making plans for a new island. But I didn't want a "new" one, I wanted an old one, of course.  I knew that it couldn't be large, it needed storage space, wheels, and I wanted a granite or marble top.

I couldn't find a piece already like that, so I thought I'd marry an old cabinet with a stone top that I purchased.

Well, after a trip to the local granitorium (I made up that term, but it seems to fit), I realized that a new slab, even for a small piece of furniture was not in my budget after spending a wad of cash on a whole kitchen redo.  At first, I tried to pretend that it was just in the "construction budget" but, I had to force myself to face the truth.  Just because we were spending a few thousand dollars already, it doesn't mean that a few hundred will disappear into it that vast amount like a drop in a bucket.

What it means, is that I had already spent too much and shouldn't spend a few hundred more.

So, I searched for an old piece of stone at antique stores.  I actually found quite a few, for a fraction of the cost of  new (even though all of them are billions ?? of years old, the ones from the granitorium are like "new")

The best piece I found was 28" by 38" and came from the teller's window of an old bank in western KS.  It was only 50 bucks too!

IMG_5272
For a month, I carried those measurements around, hoping to find a piece of furniture to fit them.  I went to flea markets, antique malls, and consignment shops and found some hopefuls, but was being cheap.

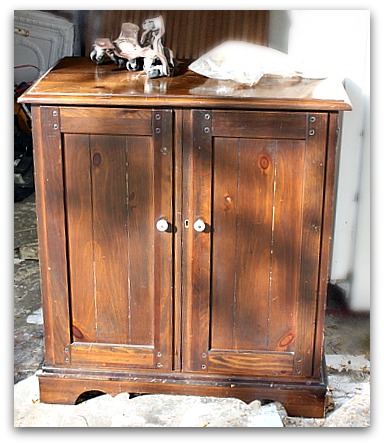
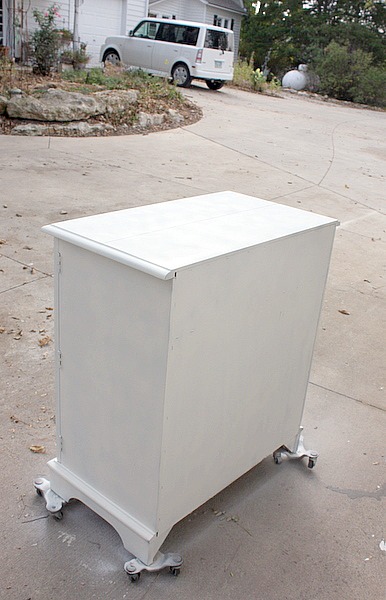
One day, I stopped at our Salvation Army to look for some warm pants for Sugarwings (did I mention that I am cheap?) and found this not so old, but not new Lane TV cabinet.  Its nice, solid wood, and could support the weight of the marble.

Plus, it had a green tag and that was 50% off of green tags day!  I got it for $14.
IMG_2869
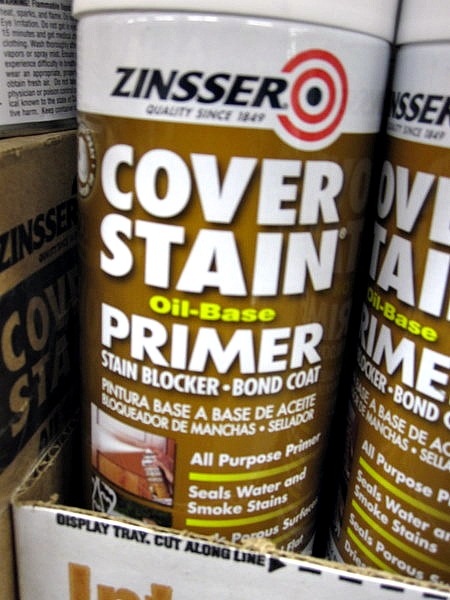
That is about how much I spent on spray primer.  This is the BEST kind to use, and its about $7 a can now at Home Depot. But its worth every penny, no matter how cheap I am, because I hate sanding. With this product you do NOT need to sand! 
There are lots of tutorials on my side bar about how I paint, if you want to redo something and need to know some short cuts.

IMG_5273
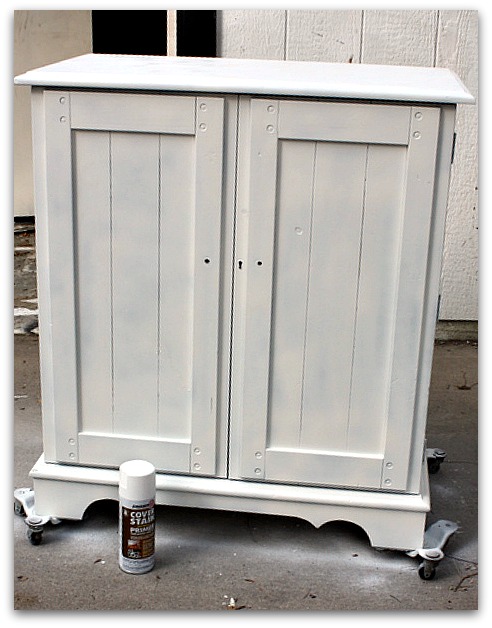
You might notice that I sprayed the top. That was a waste, since I was covering it in marble. 

I also used too heavy of a coat, because I thought I would be using this as the base coat, skipping the paint step, distressing the edges, and just glazing over it. I changed my mind and painted it white, so could have gone with a lighter coat of primer, since I had paint over it after all. 

IMG_5275

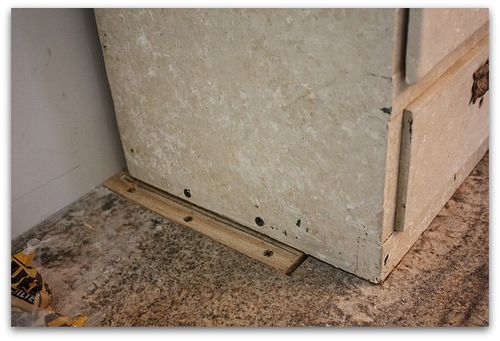
Once I had it primed, there were still some problems. One was that the back was just fiber board, stapled on. The other was that the wheels had no where to attach because of the shape of the bottom of the piece.

Also, the cabinet was a bit smaller than the marble.

While the contractor was here to finish up a few trim details in the new kitchen, I asked him to do a little trim work on this too.I figured that for the small amount I had into it, I could afford to pay him to help me with the hard part of the redo and still be way ahead on this.

IMG_5419

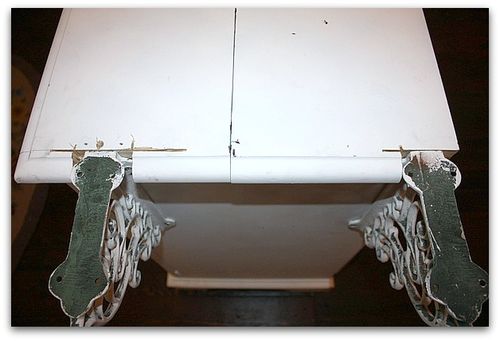
My garage is full of tidbits and doodads. I found a couple of iron brackets and he cut out notches to add them to the side of the cabinet to support the marble that was too long.

IMG_5423
And to cover the fiber board, I added an extra piece of ceiling tile leftover from the ceiling job, then had him trim it out for me so that the rough edges wouldn't snag anyone's pants (or slash anyone's leg, that stuff is sharp!)

We added a block of wood under each corner and screwed the wheels to them.

The marble was attached with liquid nails and set into place.

Then, all I needed was some white paint. I decided it didn't need distressing or a glaze. I kind of liked just the pure white.

IMG_5624
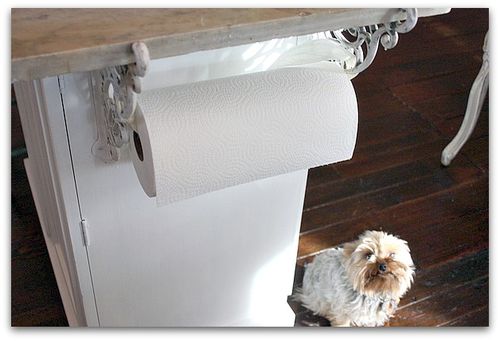
After it was done, I realized that the brackets were perfect to hold a paper towel roll. So far, the roll is just tied up with a ribbon, I'll be looking for a better way to hold it in place.

IMG_5467
Hey, if you are looking for a project for yourself, on a slightly smaller level, my good pal, Mary is doing another glue book class.

A Christmas glue book!

I was with her when she was searching for ephemera to use. We went to a flea mkt together last summer and it was interesting to watch her sift through all the papers, picking and sorting.  She is very knoweldgeable about old paper.

IMG_5470
Mary and Beth were both here for craft day and I got a glimpse of what Mary was making, and I have to say, its a cool class. Button might not look very enthusiastic about it, but he isn't into ephemera like we are.

IMG_5481

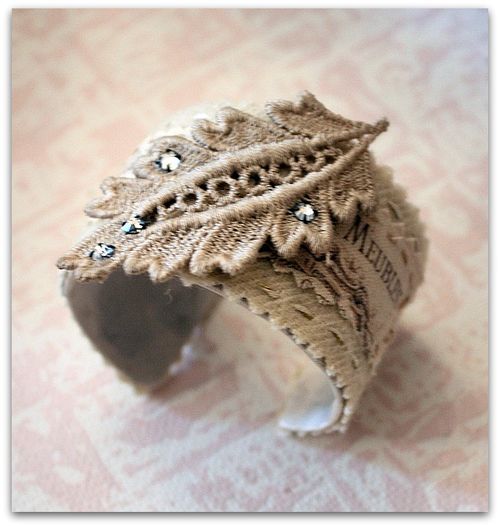
Craft day meant working on my Cuff Bracelet tutorial, and Beth was nice enough to make a cuff for me to show, using my guidlines for the construction. Pretty, huh?  I love craft day!


Romantic Cottage White Shabby Chic Farmhouse Vintage Kitchen remodel before and after

Kitchen remodel

IMG_4867
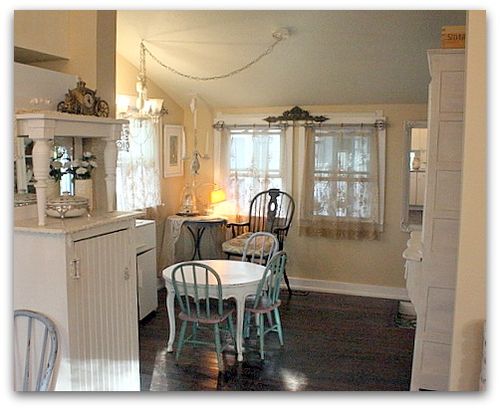
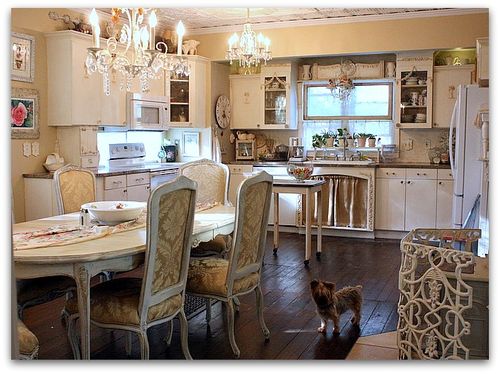
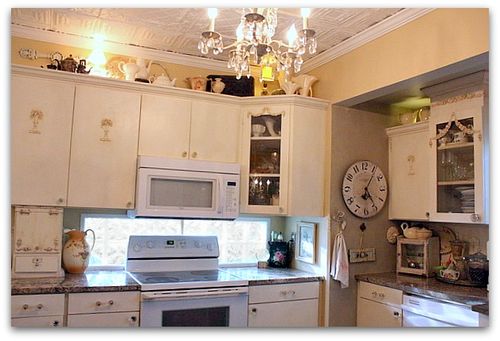
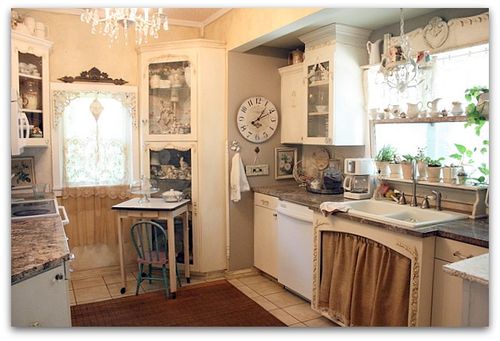
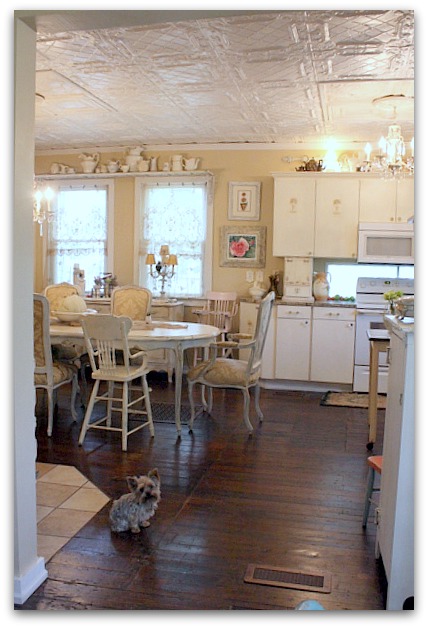
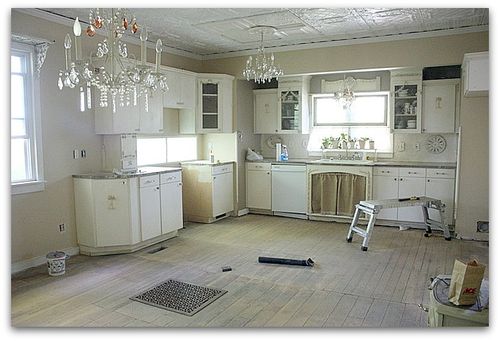
Since the remodelling began, I've been showing bits and pieces here and there, but haven't posted a completely finished view of the room. So, here are some pictures of the mostly done space.

IMG_4870

there are a few things left to do. This dark chair by the window needs fixed up. I got it for $3 at a garage sale recently. (this is the mud room, the main entrance to the house from the breezeway)

IMG_4868
I still need an island, and found a piece at the Salvation Army to redo. And the chandelier over the table needs to be hung so that it hangs over the center of the table.  I'm missing a light switch cover. 

IMG_4878
The best part is the floor!!!!!  (I do have some rugs, but had to wait a few weeks to set them out so the top coat on the wood would cure)

IMG_4879
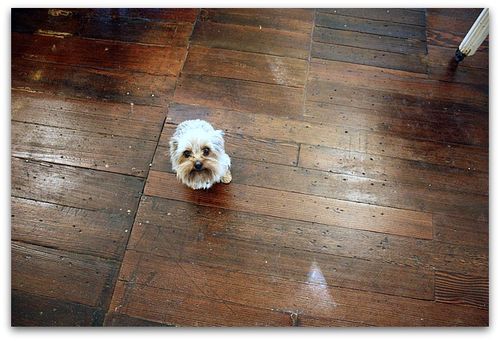
I had hoped for a more even, cocoa brown, but love this dark color the stain turned out.  After all of my trials of stains, it didn't even matter, because the spot under the fridge and stove where I was experimenting was a different wood than the rest of the floor anyway.  The house was built on whatever wood was growing nearby, and all took the stain a little differently.  

But its all perfectly beat up, and wonderfully distressed, and exactly what I had hoped for.  We got lucky, when we started tearing out the layers and layers from years of linoleum and vinyl, we could have found a big mess. Instead just a few areas needed fixed, and it all worked out better than I could have hoped.

IMG_4877
The glass block back splash (only about $150 from Home Depot's online store) is really pretty with the sun coming through. 

IMG_4900

There had been a regular window on this wall previously, and I was hating the thought of losing that light.  This was a last minute idea to fix that and it is one of my favorite parts of the room.

(wooden spoons are kept in the pitcher)
IMG_4365
This is the same spot before, you can see the window that we lost.

IMG_4367

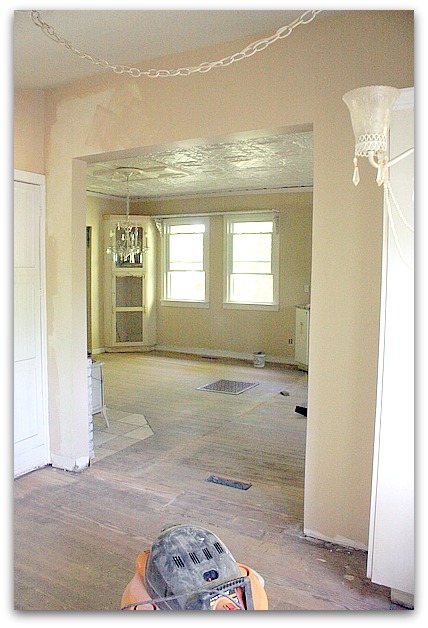
And here is a before shot while the wall was still between the two rooms.

IMG_4881
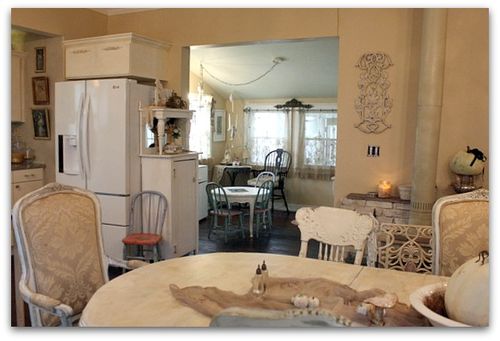
The buffet is now under the dining room windows, and I moved the corner cabinet over to this side of the room.

IMG_4364-1

This is a before of the same angle.

My son keeps teasing me because despite the flooring, ceiling, and wall changes, everything is just the same. I kept the color of the walls a toasty tone, the cabinets didn't get repainted, I reused all the stuff in the room. 

IMG_4903
Mostly because now, even more than before, our house is very open and you can see from one room into the next. If I'd changed the colors too dramatically I'd have had to redo all of it.

IMG_4888
And I like my stuff.  And did I mention that I am cheap?  I tried to keep costs as low as possible by reusing what I had.  If you only buy what you love, and shop for unique things with a timeless feel, I think you can get away with shuffling it around and giving yourself updates by reusing your pretties in different ways.

I like to use lots of neutral colors, so there is a soothing background in my home. Its easy to mix and match that way. And if I need a splash of color, I can add accessories here and there.

The big painting that was in the dining room, is now in the living room.

IMG_4889

And now the dining room curtains are in the living room too.  The living room curtains might become a shower curtain later on…

IMG_4363

This is another before shot, looking into the kitchen from the mud room.

IMG_5257
Same angle, without the wall.

IMG_5262
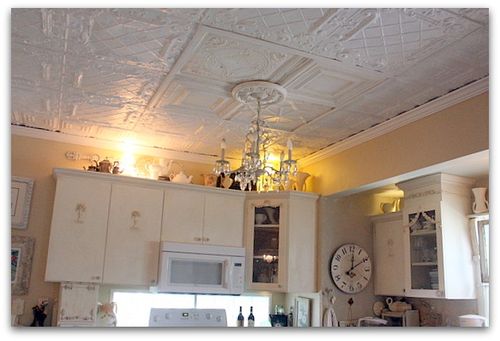
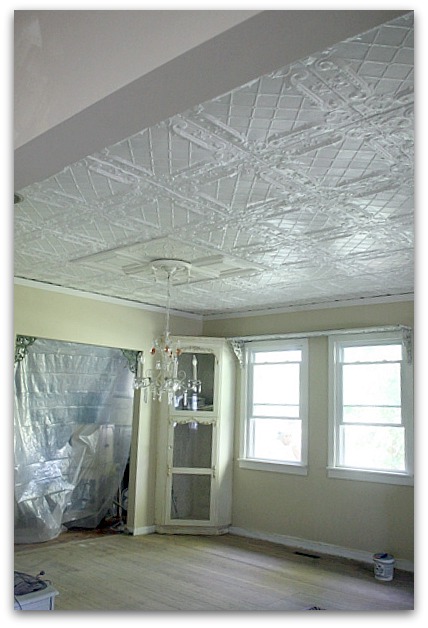
I can't get enough of the ceiling!

IMG_5259
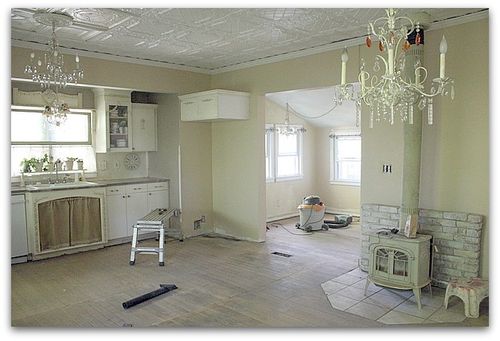
We took out the wall between the kitchen and dining room, but added a small wall between the kitchen and mud room. Our fridge is now turned to face the kitchen with its back to the new wall, this has been a good change, and is much more functional than before.

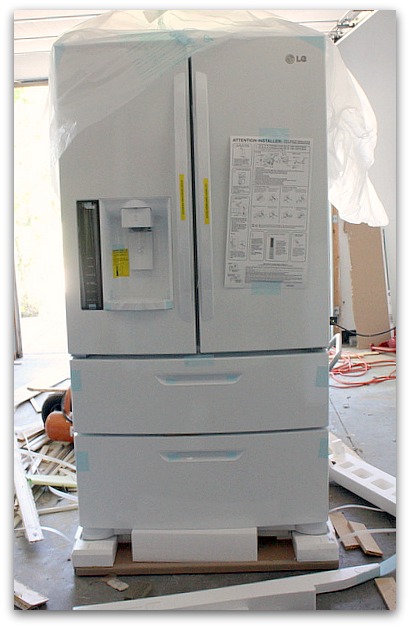
We really like the new fridge with the double drawers on the bottom for the freezer but- it has a teensy little ice maker. I didn't notice that before… I might get a smaller freezer to keep in the garage too.

I'm also going  to try to wean myself from the habit of cooking way, way too much, then freezing some for later. Because months later we just throw it away. 

IMG_4902

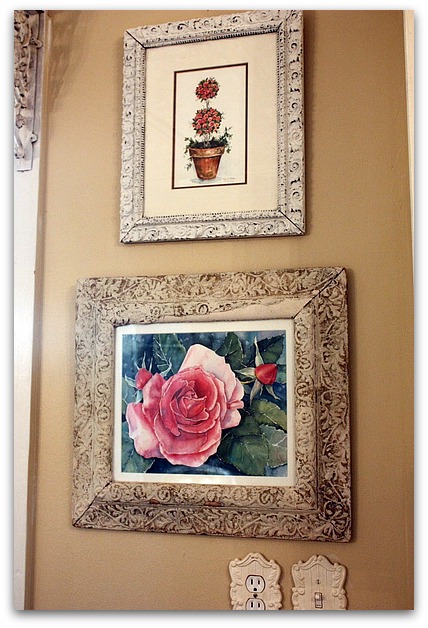
These are two watercolors I did years ago. One was hanging in the mud room, the other in the living room, now I've moved them to the kitchen for a spot of pink in my creams and taupes.

IMG_4884
While the room is mostly neutral, there are still lots of roses and pinks in all the smaller details.

IMG_4885
And there are still whimsical pieces scattered about too.

IMG_4886
Believe it or not, I really did scale waaaayyyyy back and didn't put all my pretties back out again.

IMG_4887
But I kept all  my special favorites, and some things are tucked away to rotate back in with seasonal changes.  Somehow, having one big space made me feel like the clutter was too much.  I had to pull some things down off the wall and pack some more stuff up after I thought I was done. I felt better after those changes.

IMG_4912
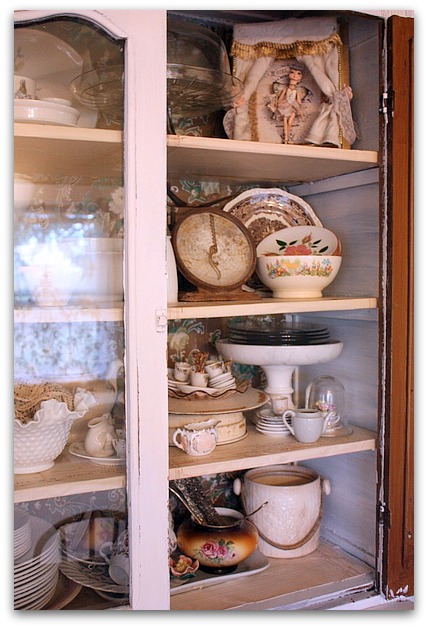
I did away with some stuff, and tried to be more practical with others. A lot of the dishes in the step back cabinet in the mud room are things that I use a lot, and they were hard to get to in the regular cabinets buried and stacked up out of reach. Now they are behind glass, easy to find, easy to grab when I need something.

I guess what I am saying is that I put the more decorative, less useful stuff away in the harder to reach places or got rid of it, and instead gave myself easy access to things that are practical.

Best of all, the contractor was great to work with, and the job went fast, and came out under budget. He still has a few loose ends to tie up and will be back for those, but I am over the moon, thrilled with the job he did and my new space!  Sometimes I just like to sit and look at it.  And pinch myself. 

I'm  linking today to Cindy's show and tell.

IMG_6722

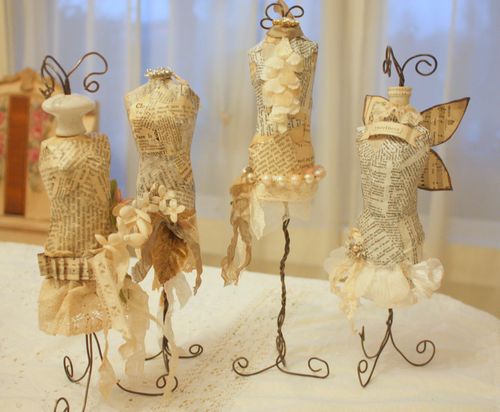
PS- I have FINALLY added some more dress form kits to the Boutique.  They are neutral, like these examples, with French text, old German sheet music, some flowers, ruffled crepe, sparkly bits, lace, pearls, and buttons. Plus everything else you need to build your dress form. Half have wooden spools, the other half comes with porcelain insulators.

IMG_7709

Just in case you are ready to start making some Christmas angel dress forms. If you order a kit (which comes with online directions) please let me know if you want a packet of mica flakes to go with it to embellish an angel. I'll throw it in for you.

Also- if you have already paid for the online class, please let me know, and I'll refund that amount from the cost of the kit. edit- one kit is left, it has a wooden spool topper

And another PS- Pixie Pie is home from the hospital and recovering nicely! Thanks for all your care and concern. We were very worried about our little sweet heart. Her best buddy, Sugarwings has been talking nonstop about her and waking up with nightmares about her cousin being sick. I'm so glad she is better, it was pretty scary to think of her so ill.

A few painting projects, a mini tutorial, and some more dust

Kitchen remodel, paintings

IMG_4736
The guys are done!! All the cute workmen are gone, and now the kitchen is all done. Well, kinda. I am painting and caulking trim, touching up walls, and unpacking.  The contractor was just wonderful, please contact me if you are local and need his number. I'd recommend him highly.  His crew was on time, hardworking, polite, helpful and skilled.  Plus it all came in under budget, and we got some other repairs done along the way.

And when he was done, he offered to move all the furniture back in for me!  I took him up on this big cabinet that I fixed up to go in the mud room.

IMG_4743
But the rest of it is all buried under this mess of stuff that needs unpacked and put away.

IMG_4744

And all of that is buried under a heavy coat of dust. I'll be busy for a while…

IMG_4562
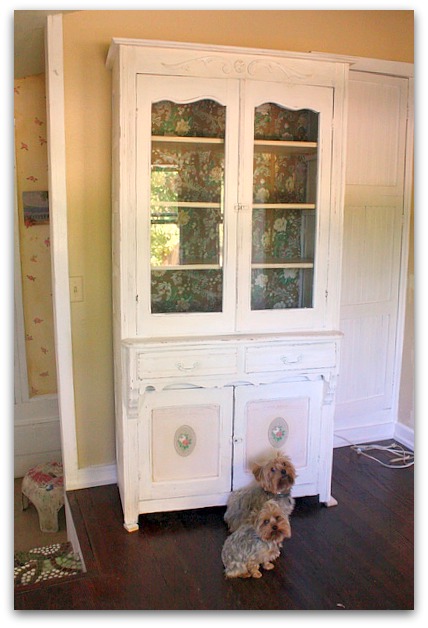
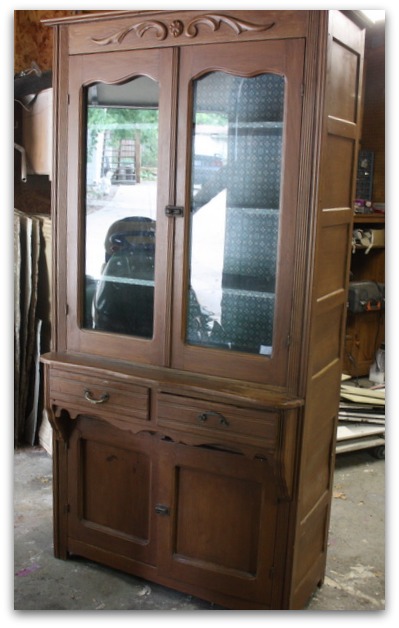
Here is a before photo of the step back cabinet that I repainted for the mud room. I traded the white corner cabinet that used to be in the dining room to my sister-in-law for it.   The inside was already covered in nice, old wallpaper, but the color was a bit off for my room.

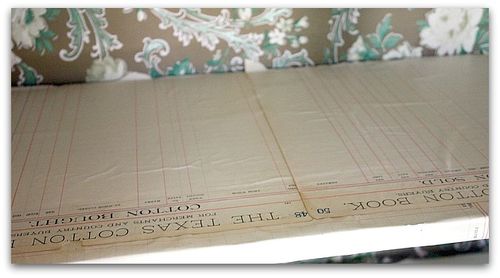
IMG_4735 Sadly, it was glued on and I couldn't pull it off to save it.  I had to cover over the green wallpaper with another pattern from my stash that matched the room better.  On the shelves, I used some ledger paper that I bought at Roundtop.

IMG_4738
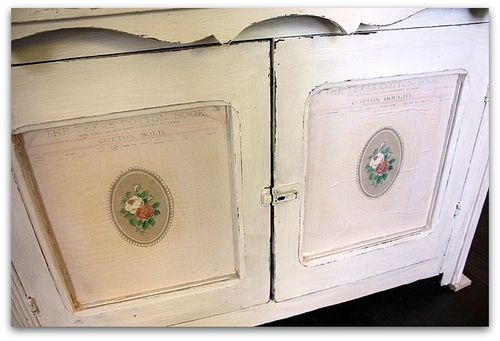
More of the Texas ledger paper was used on the doors, with a medallion of roses from another wallpaper over it.

To paint the piece, I used the technique on my side bar under tutorials.  I brushed on Glidden Gripper primer (bonding) in white, right over the finish as is, no sanding.  Over that, I brushed on a creamy, toast colored glaze, and wiped it off.  Then, I used a rough grit sandpaper to age and distress. 

IMG_4732
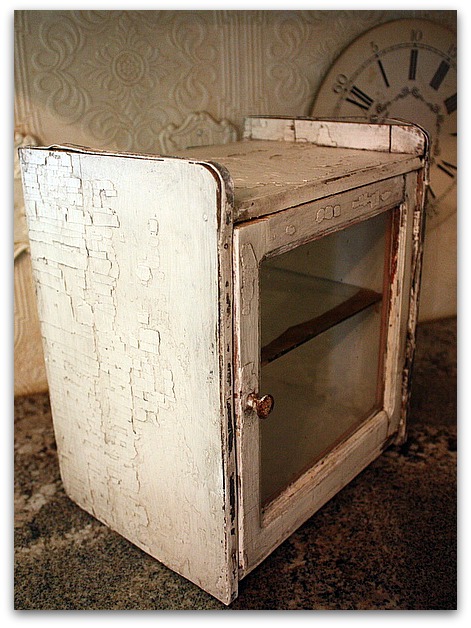
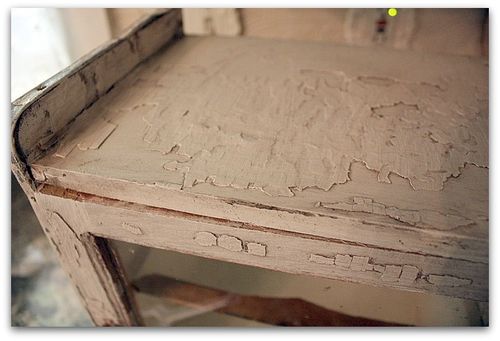
Lately, I've been on a bit of a redo roll. I found this little cabinet at one of my favorite antique malls (4 Corners) and touched it up to match the kitchen. I loved the chippiness of it, but it was red, yellow and white, which just wouldn't work. (sorry, no before pics- Bad Blogger!!)

I didn't want to lose the chippy look, but it was really bad, a lot was falling off in chunks, so I roughed it up and got the loose bits off.

Then, I painted it with the white primer.

IMG_4733

 Over that, instead of glaze, I used Minwax poly/stain combined. I have a ton of colors now, since I was trying to find just the right color for my floor and bought multiple small cans to sample.

I brushed on the poly/stain, wiped it off and then let it set outside to dry, since poly is smelly.  I think that this will be enough to seal it and keep more paint from chipping off. I gave the interior a clean coat of plain creamy white paint.

I think I'll use it to house our sprinkle collection.  Sugarwings and I love to bake, and we have a lot of sprinkles, so it will be fun to have those on display in the new kitchen. I can put them into pretty bottles and fill this cabinet up.   It might get some spices in it too.

IMG_4739
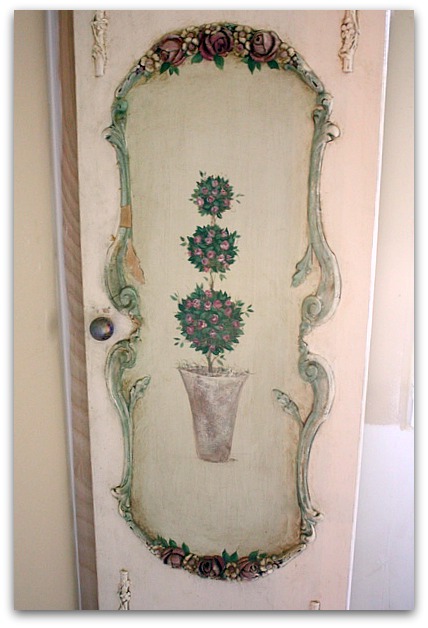
Some of you asked to see a close up of the rose topiary cabinet.  It was built by Sugarwings' Daddy, along with all of my other cabinets, and I added the same embellishments to it. You can find them here.

On this one, I added color to them instead of leaving them the color of the cabinet itself.  I used a few different ones to form an oval frame, then painted the topiary inside.  A little piece of the frame got cracked off and needs repair, and I still have to finish painting the trim around it.

IMG_4746
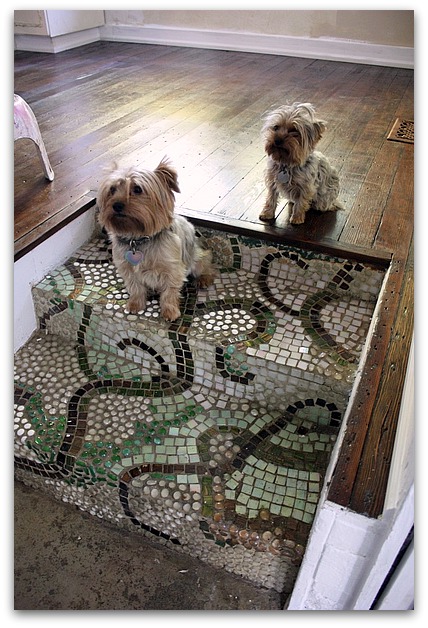
There are lots of little touch ups to do around the room.  The top edge of my mosaic steps needs to be redone, since some of the tiles had to come off to rip out the old floor to get to the wood underneath.  This will be the last thing I do. First, I just need to get stuff painted and clean so I can get the room functional and back to normal.

Sugarwings and I need to get to baking and use some of those sprinkles!


More little remodeling glitches

Kitchen remodel

IMG_4723
There is still a lot to do on the kitchen, but the end is sooooo close I can almost grasp it! All the cabinets are cleaned and ready to refill, the floor is in the process of being top coated and we are staying off of it for a few days, so all production is halted while waiting.  I also need to finish some of the wall paint, repaint the pipe on the wood stove with high heat paint, and then paint and caulk all the baseboard and crown moldings.

Not to mention putting everything back in the room and getting to the fun, foofing part!

I'd hoped to caulk and paint the crown before the floor got done, but we've had lots of time with the little grandfairies, and have let that be a priority.

It'll get done. But those sprites won't always be tiny and here to cuddle with us.

IMG_4615
While I am waiting to get back into the room, I'll work on these vintage curtains that I found this summer on my drive to Indy at a shop along I70.  They were only $12 a panel, and will be a nice shot of color in my tone on tone kitchen. I only have two panels, so they will hang on the big window by the dining table only.  I need to let the hem out and remove the pleats so I can hang them on a rod.  I hate needlework, but this is mostly just ripping out, then a quick sewing machine hem, so I think I'll survive.

(the roses in the curtains are more deep pink than they seem in the photo)

IMG_2739
 

Remember my dilemma with stain colors?  Well, I tried. But- the color I chose just wasn't destined to be. Trouble is, old houses like ours were often built with whatever trees were growing nearby.  We have discovered that the floor is cedar, walnut, pine, yellow pine, fir, and who knows what. Our floor is a mutt.  And the stain took differently on different types of wood. Its over all, a gorgeous, dark tone and I love it because it is so unique.

It was important to me that the new space was a contrast from the adjoining rooms, because I was afraid that if I tried to match them, it would fail and look close, but not close enough.  So, I think this stain accomplished the contrast that I needed.

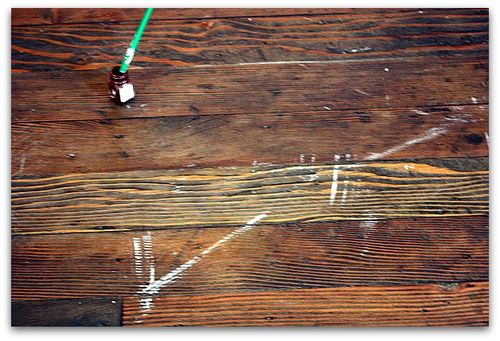
IMG_4722 As much as I loved the dings and dents and scratches and other distressed marks throughout the floor, I did NOT love these scrapes of paint here and there. They didn't show up until after the stain was on.

So, I bought some model car paint and touched up the scratches with a tiny brush.

    IMG_4728

I think it worked well. The scratch marks were in front of the cabinet with the hand painted rose topiary on it. Not there now!  There were some here and there around the room, and I'm so glad that I fixed them even though it set us back an extra day on completion of the room, we had to wait for the oil paint to dry over night before the top coats were added.

  I'd never have been able to live with those glaring marks.

IMG_4688

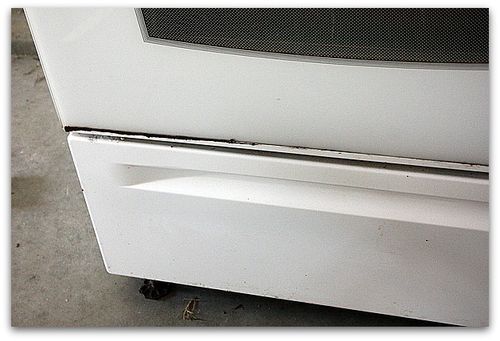
This is another place that needs my help. Our stove will be sitting on the far wall and will be facing the door way, so you'll see it when you first walk in.  Its not an old stove, works great and I don't want to replace it. But, it has this dark rust line along the bottom of the door.  Today, I plan on sanding and repainting it with white appliance paint. I'll let you know how it turns out.

IMG_4687
Our biggest splurge for the redo is this new fridge!  I'm so excited to get it installed.  Those double freezer drawers will be wonderful for sorting and being organized. 

IMG_4699
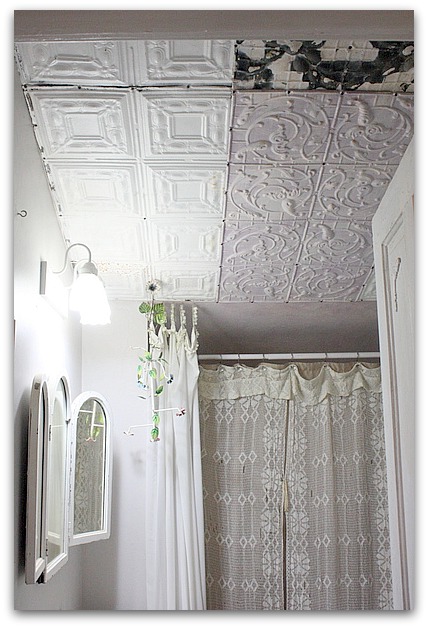
And looky here!  The guys had enough scraps of tile to cover my guest bath ceiling.  Or as Sugarwings calls it, her bathroom. She gallantly offers the room to others to use, but makes sure they know it is hers.

I had the guys stop the tins at the edge of the tub.  I was kind of worried about rusty drips on people's heads while they showered.

IMG_4692 (the hole is where the fan goes- this is looking up at the slanted ceiling from the tub)

Screws will need to be painted, but I'm not sure if I'll paint the tiles. The mismatch look is something I love. I wonder if that comes from growing up with a mother who is a quilter?  I love patchwork styles.  That might be why I love to set my table with a variety of floral patterned dishes too.  They remind me of the look of vintage quilt fabrics.

Fairy Dust and Sawdust

Kitchen remodel

IMG_4678
Just in case you are sick of remodelling photos, I thought I'd throw in this picture of our happy little Fairy Girl. She is doing well in her Montessori PreK classes and I've been lucky enough to have her staying with us part of this week.  We've been camping out in my bedroom, cooking on the grill and eating dinner outside.  What perfect weather to be without a kitchen!  We've spent all of our time outdoors.

See that ribbon in her hands? She has learned to tie knots and now everything she sees has potential for being tied together. Her #1 hobby is now tying long rows of knots in anything she can.

IMG_4700
We're on the home stretch with the kitchen now.

IMG_4701
Thanks for all your input on floor colors.

IMG_4703
I chickened out on staining the floor myself. For one thing, just testing the samples gave me a headache from the fumes. For another, I was worried that I would screw it up.  I've had a talk with the expert floor guy and he assures me that he can achieve a darker brown that won't be red and that will not cover all the cool old distressing. 

We are still under budget, so I didn't feel bad about having someone who knows what he is doing finish the floors instead of me.

IMG_4704
I had considered painting the floors, but decided to go low maintainence instead. A nice brown, the color of dirt will hide a lot!

By the way- that plastic does NOT hold back the sawdust and mess. The rooms beyond the curtain got a heavy duty coat of the stuff.  All the way up the stairs. I feel like it will take a lifetime to clean it all up.

While the floors are being finished, Sugarwings, Mayara,the dogs, my husband and I will be camping out in his office. We all want to escape from the fumes.  There will be a couple of days when we can't go in the house much. But there was no way we were going to turn down time with our little fairies just because we had a few minor inconveniences like a ripped up house and deadly fumes. 

IMG_4711 When I am not shovelling up sawdust or squirting gallons of caulk into cracks and crevices, or babysitting fairies, I've been making my kits for Once Upon A Dream.

I've pre-written a post with directions on how to dye crepe paper like I did for these Prize Ribbon Sprites.   It will be up while I am away at Jenn's event. I'll be gone about 10 days, I'm stopping to see my sisses on the way home, since I am driving to Asheville.   While I'm gone, I'll still have posts popping up every couple of days.  I'll also have my Ipad with me and might do some "live" posts from it.


The ugly side of the cottage

dogs, Dorkies (Yorkshire Terrriers), housework, Kitchen remodel

IMG_4707
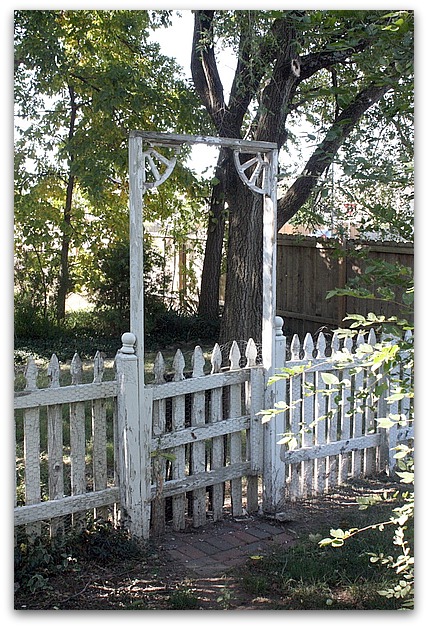
We rarely use our front yard.  No one even uses the front door to get to the house, I think it has now officially become the back door.   The ex-front yard is just for the Dorkies to play in now.  And it tends to get neglected, see how back the picket fence needs painting? I try to call it "charming" but its really just ignored and peeling.

But since Agnes Rosebud is so tiny, we've had to line the fence with chicken wire to keep her in, which makes it extra hard to paint. All that would have to come down before I could scrape the peeling paint off. So, I think I'll stick with fooling myself that it is charming and rustic.

IMG_4706
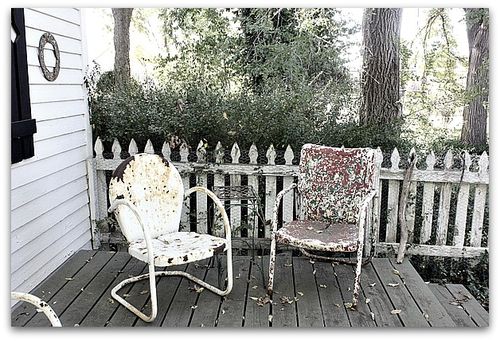
Same thing with the deck out there too.  I don't even attempt to keep flowers planted there, I know they'd just be dried up and forgotton.  This could be a cute area, but if no one ever sees it, does it matter?

I've learned over the years that sometimes, you have to pick your battles.   There is only so much time in the day.

IMG_4572
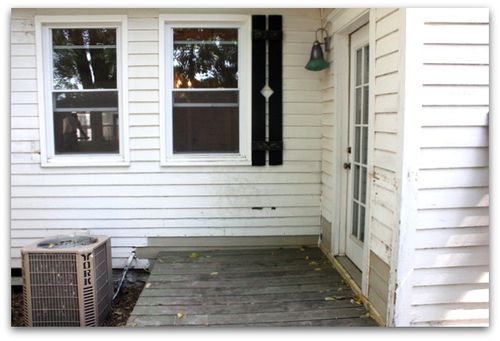
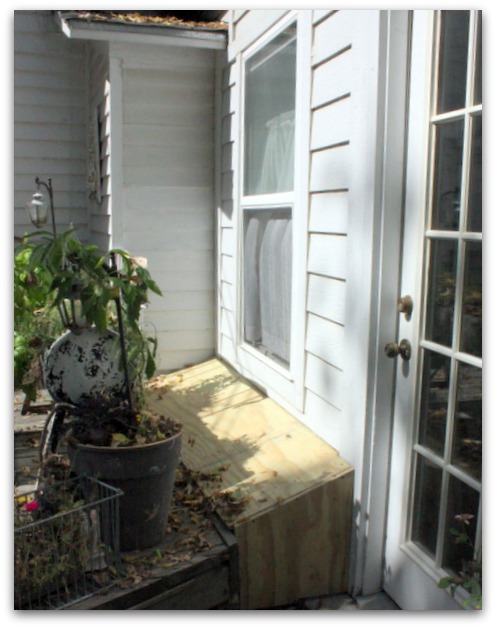
But this was way beyond ignoring.  This was some major repair work that needed to be done, not just cosmetic stuff.  Our ex-front door way was rotting away.   While we were having other stuff done, we decided to have the guys repair this too.  We are getting better guttering, and had this siding ripped off, flashing installed under it, and then replaced.

  IMG_4718

See, better already! Now, I need to repaint this corner of the house, and my son is rebuilding the dog door area.  We have ordered an energy efficient one that should help our problem with drafts (and snow blowing in on blizzardy days!)

IMG_4714

This is another problem area that the guys handled for us. A weird gap between the new addition and the deck, that leaked water into the breezeway.  More for me to paint….

Sorry, these aren't all that interesting are they?  I shouldn't show the ugly side of the cottage.   But its there.  Every house has issues of some sort and the older the house, the more there are. It felt good to have a crew here working on stuff and fixing problems.  Repairs are  not as glamorous as remodelling, but probably are even more important!


Some Kitchen Remodel problem areas and a mini how to for glaze

Kitchen remodel


IMG_4657
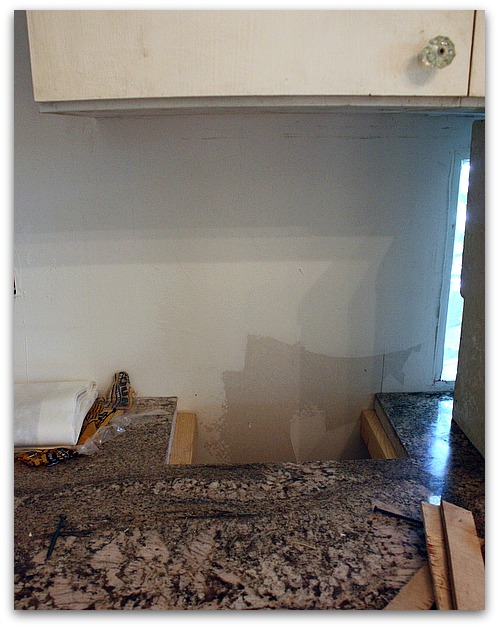
We have tried to be as cost efficient as possible with this kitchen redo.  We have reused all the cabinets and countertops, just moved them to the other side of the room.  One problem that we came across was that previously, the cabinets were built around a flue that ran through the attic to the basement.

IMG_4647
The flue was no longer needed, but the granite was cut to fit around it. And we weren't about to pay to redo the counter tops and toss out my 6 year old granite!  (actually, I think that the granite is thousands of years old, but it has only been with me for a few of those years)

IMG_4649
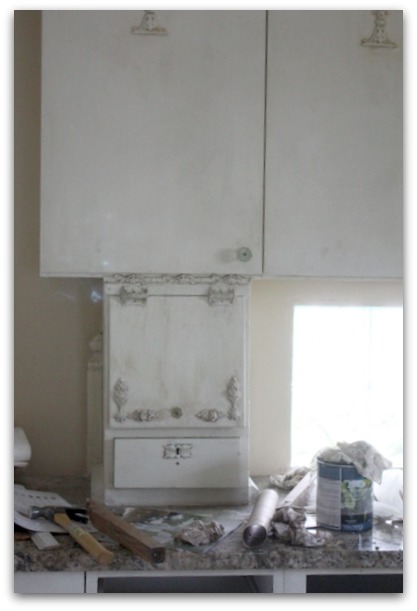
I searched antique malls, flea markets, and everywhere I could think, for something that would fit over the hole.  This little cabinet out in my studio was as close as I came, but still was a tad short. I found it years ago at the very first auction I ever went to. It was $2.

IMG_4658

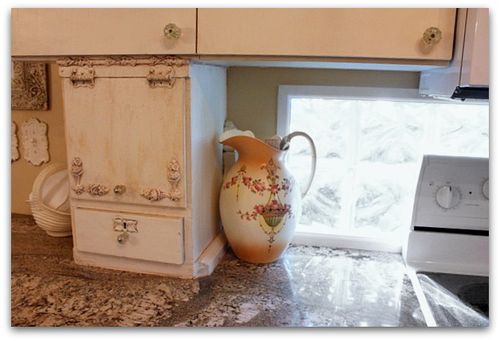
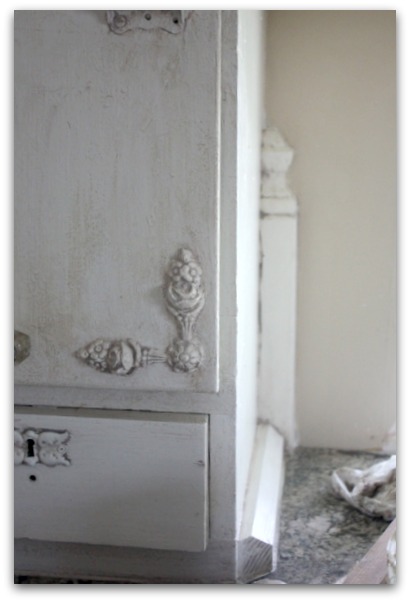
Easy fix!  A bit of trim, some nails, glue, and calking, and you'd never know the cabinet was not always there.  I added some decorative trim and painted it to match the rest of the cabinets, and now only need another glass knob to finish it off.

I added some leftover trim from when we first installed the cabinets.  The embellishments are made of glue. When they are fresh (made to order from the manufacturer) you can just steam them and stick them on, then paint or stain. When they are old, like these, they need to be glued and calked into place.

These come in ANY and every style you can imagine. You can find them here. 

I especially love the rosey ones.  They aren't cheap, but are unique and cost less than wooden trims.  I spent under $400 when our cabinets were being built, and have a bag left over, plus have used them on lots and lots of other pieces over the years. I over bought for the project, but have loved to have the baggie full of rosey bits and other trims to use here and there.  A few pieces in the right spots can really elevate a dresser or buffet.

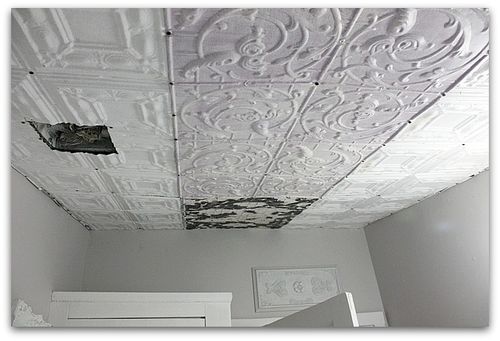
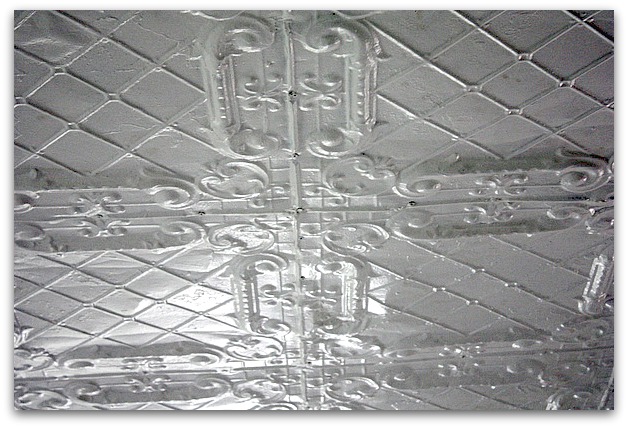
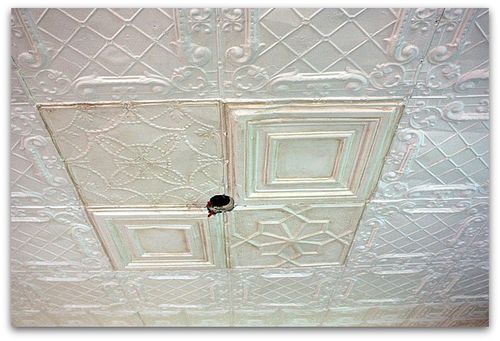
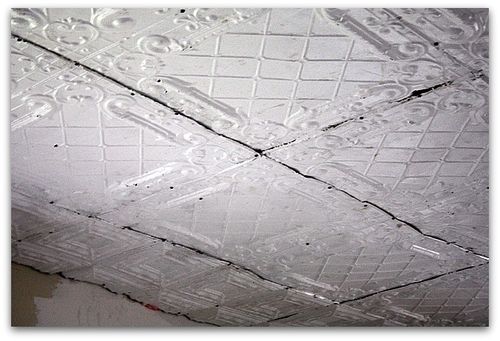
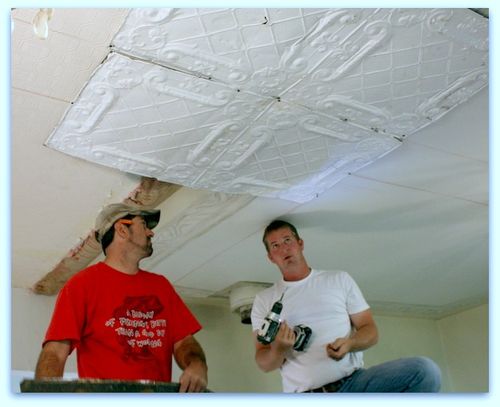
IMG_4652 One of the best things about the redo is the new (old) ceilng covering. Trouble was, I couldn't find enough old tins to do the whole job. I had 20 of two different patterns. One we used all around the perimiter of the room, and this one we filled in with.

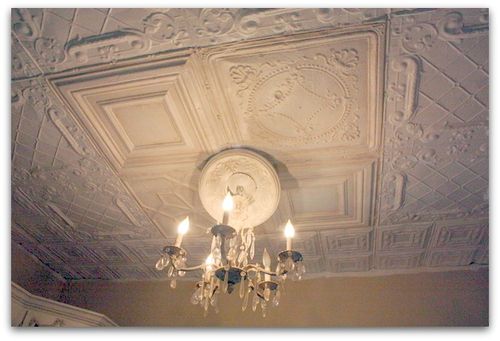
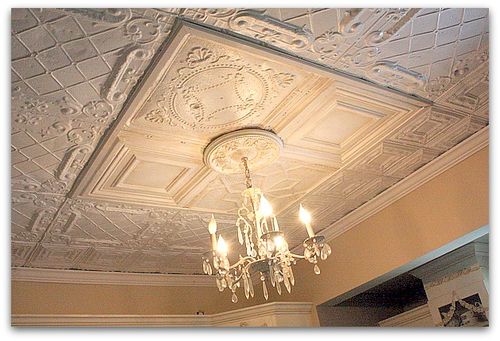
IMG_4653 There weren't quite enough to do the center of the room with the same tiles. There were enough from the border to fill in the center, but I didn't want to do that. Instead, I raided my stash in the garage and found a few odds and ends of different patterns of tin and we patchworked 4 of those around each chandelier.

IMG_4665
To make it look  like that was a design choice, not an, "Oh my gosh, I'm out of matching tins, grab those over there for me to fill in with" mess up, I glazed the 8 oddball ones to match the chandeliers they hung over. I wanted to accentuate the odd tiles.

IMG_4663
In this photo, the chandelier isn't completely re-installed, but can you see where I am going with it?  I found all the 2' x 4' tins for $20 each, and have enough remnants to do the bathroom too.  The installation was $800 for both rooms, so not bad for the complete transformation they give the kitchen.  Plus, they cover up the fact that one room had a 3" higher ceiling than the other.

Some of the tins were in pretty bad shape and needed a lot of calking to hide it.  The rust will start to peek through all the white satin paint, but I am kinda looking forward to that.

IMG_4690
Here is a photo with it almost done. The guys put up a narrow trim piece around the 4 squares and I still need to calk and paint the trim.  I'm thinking I'll paint it the same color as the wall, since that is the base color I used for the glazing.

IMG_4659
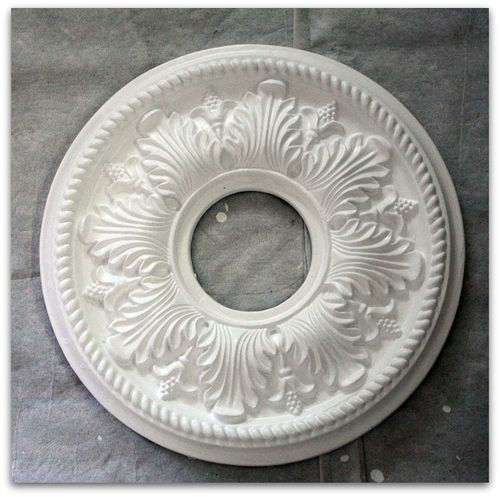
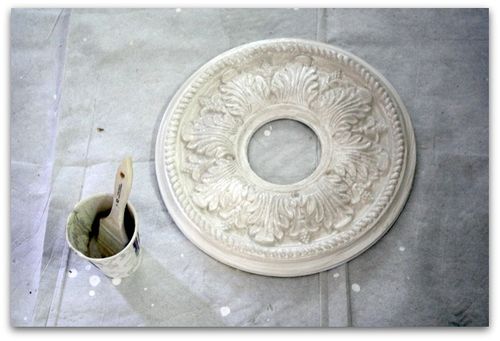
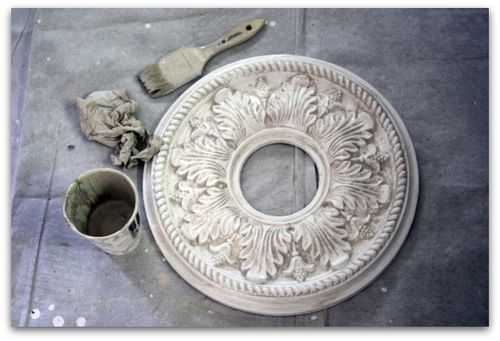
I also bought 2 of these $26  medallions from Home Depot to place over the chandeliers and glazed them to match. Here is how:

First I painted them white.

IMG_4660
Next, I smeared the tinted glaze all over the piece, making sure to get it down into the cracks and crevices.

IMG_4661
When I glaze something, I usually use a cheapo brush. I want one that I can force into the nooks and crannys and not worry about ruining.

Afterwards, a quick wipe of the highpoints with a dry paper towel and it was done.

I did the same technique on the 4 tins above each light fixture and also on the little cabinet I used to cover the hole in the granite.

IMG_4651
Glazing 8 tiles over head didn't seem like a big deal after spending more than 12 hours calking all the seems and painting all the screws white. Here is a before shot of the seems.

Remodelling ain't for sissies.  Unless you have an unlimited budget and can pay someone else to do it all.   We have a great contractor and crew working on the room, but I'm trying to save money where I can. I'll be staining the floors myself, and have already repainted the front of the exterior of  the  house where they had to reside the area that used to be a window.

We are on the home stretch now!  Its starting to look like home again. That is, under about 6" of old sawdust and drywall powder, I can sort of see a homey place developing.

Your flooring input please?

Kitchen remodel

IMG_4617
My kitchen is not done yet, but I am already loving it! I'm head over heels about the new configuration.

IMG_4625
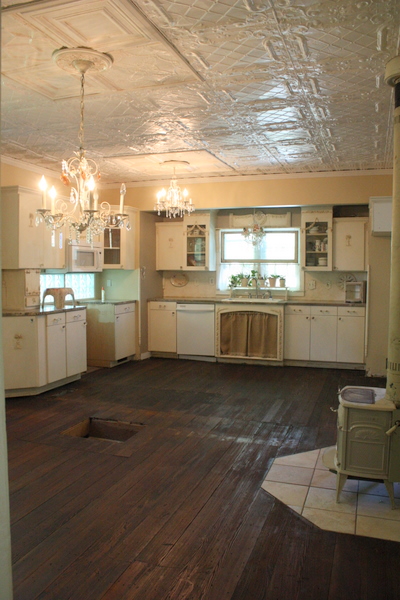
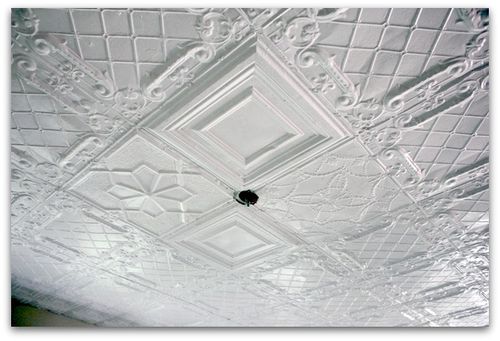
The ceiling tiles make me feel like I am inside a white wedding cake.

IMG_4628
Aren't they pretty!?  I have to caulk and touch up the paint on each one yet, but they already look good.

IMG_4627
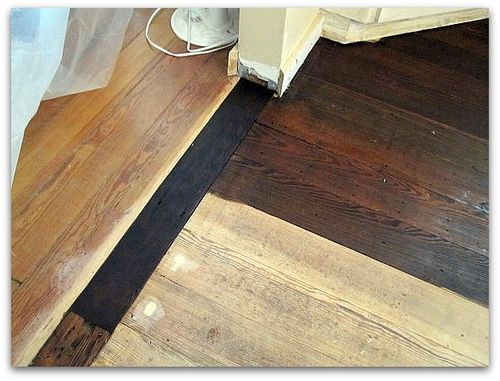
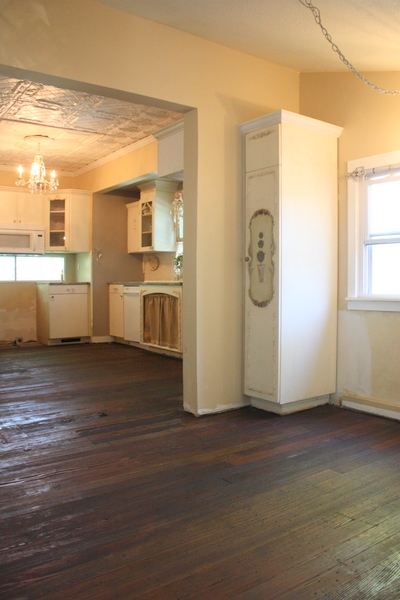
Now, to find the right stain for my distressed old floor.  The wood adjoining this room is the same floor, with a clear coat years ago. I'm afraid that whatever I do won't match it just right, so I want a contrast instead.  So, a clear coat is out.  Plus the old yellow heart pine tends to go orangey, and I'd rather stay away from that.

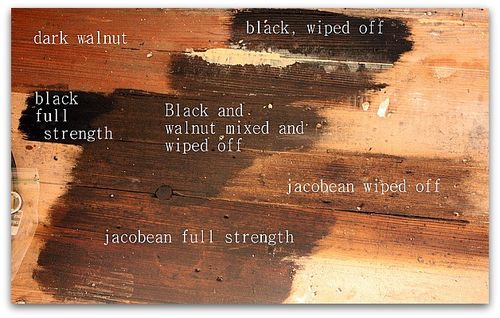
So, I tried dark walnut stain. That went red, but the grain looked pretty.

I'm great with mixing paint colors, but working with stain and wood fillers is a tricky thing. They morph on you as they dry and they interact with the wood itself and change colors.

I thought a gray/black tone would counteract the orangey-ness of the pine, but all it did was mask the wood entirely. I'd like the cool, old beat up areas to show through, not be covered.  I didn't spend hours sanding out the stains just to cover up the wood completely.

The color I think will be just perfect is Jacobean, diluted with thinner and wiped on with a cloth. When put on full strength with a brush, its just too much.

Now, back to experimenting with putties.   I've found that mixing in the sawdust helps tint the color to match the wood, but I'm still not happy with the end product. Luckily I have the area under the fridge and stove to play with.

What do you think? Any advice on colors, stains, or putty?

Scroll to Top