redos

What an improvement!

cottage, family, redos

Rcxmas day 050

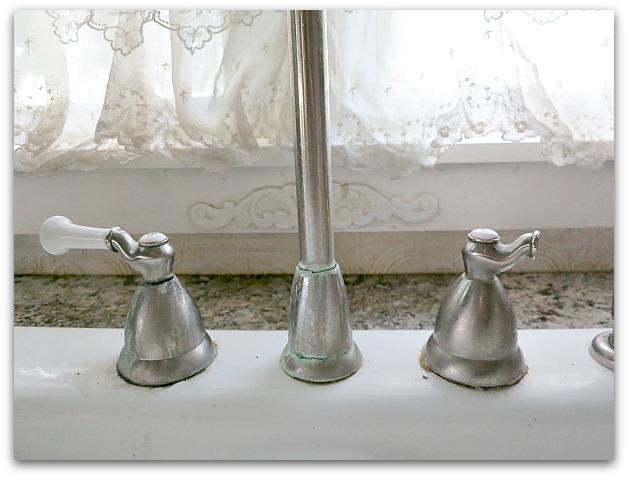
Not too long ago, the handle of the kitchen sink faucet broke off in my hand.  The sink wasn't even that old, maybe 8-9 years or so.Luckily, I have a very handy son, who was able to replace it for me.

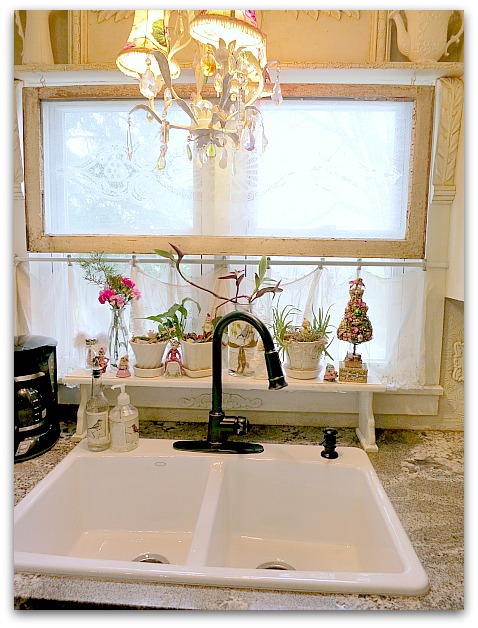
A small redo can be just as messy as a big one, I had to clear the counter and remove everything under the sink, and all those bottles, jars, canisters and other things were piled up on the dining table.  So, while he was at it, I had him go ahead and replace the sink too. 

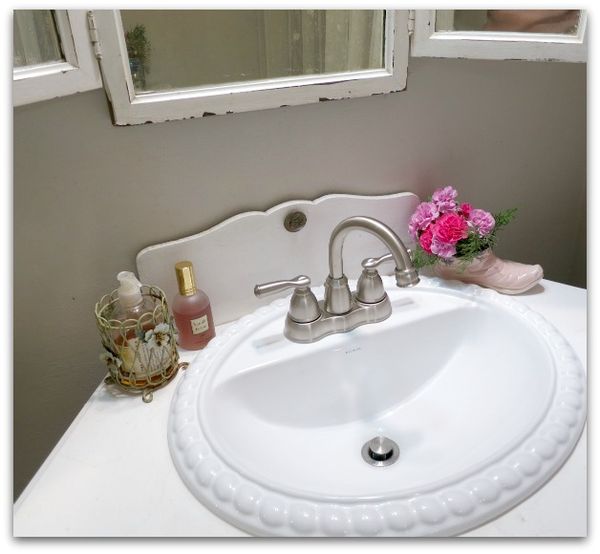
AND the bathroom sink, AND ucky looking faucet in there too!

My boy was here working, his tools were out, and the kitchen was pretty much wrecked for the day anyway.  It was a good time to go for it and replace it all at once. 

Cleanuprrc 013

With the well water we have, there is no amount of scrubbing that will keep the build up away.  So, things age fast around here.

(funny, out in the studio, I spend a lot of time patina-ing and distressing stuff to make it look older, but I'm not as fond of my appliances and such getting old and distressed)

Redos 025

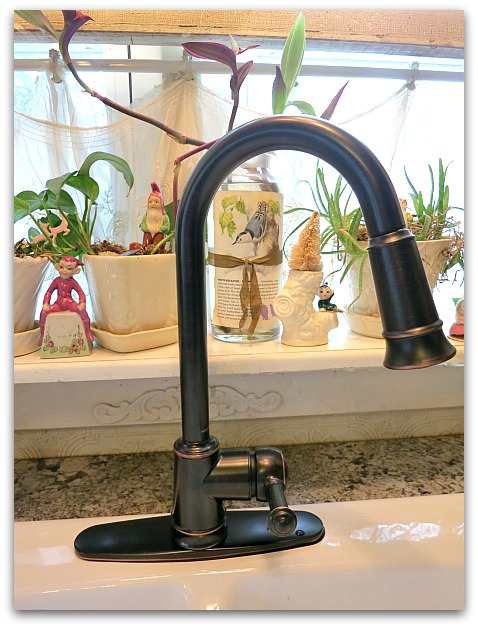
I went for a deeper sink, and it is wonderful.  I also upgraded the spigot.  So, the costs were blossoming….

Redos 027

But so worth it!  Adam did a great job, and while we spent a bit on materials, he did all the work on the "love donation" fee schedule, so that balanced the costs. 

Rcxmas day 043

I think I'm going to like the dark, rich color of the new faucet too.  It looks good with the dark floors in the kitchen.

Redos 026

Seems like I spend a lot of time at that sink, washing, chopping, cleaning.  And it's soooo nice to have it all new and improved.  Thanks, son!!


Antique bookshelf makeover to a flat screen TV cabinet with no sanding and no painting just primer and glaze

antiques/junking, bird song art event, cottage, Hand Painted Furniture, how-to projects, redos

Girls room redo 031

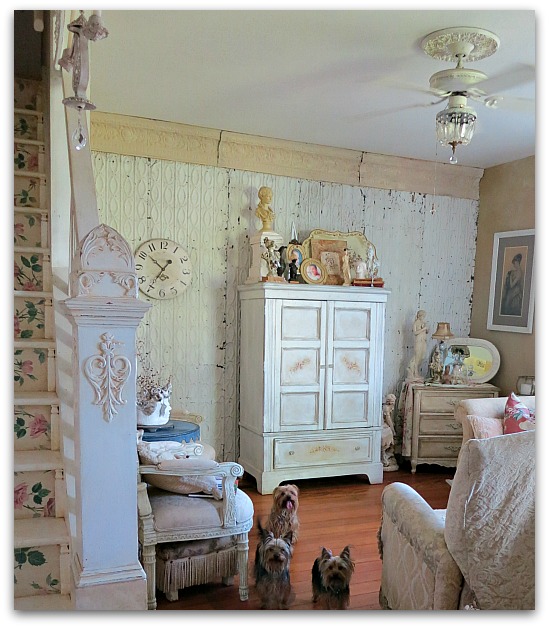
When we were updating to a new flat screen TV, I knew I'd have to lose the cabinet we'd used for the older set that we had.

Tin wall 003

Our living room is pretty small, and the armoire we kept the TV in wasn't all that big, but it was kinda bulky and seemed to take up a lot of space. But it wouldn't be wide enough for a newer set.

It is one of the few brand new pieces of furniture that live in my home, it was bought to fit the TV, and looked way too new, so I repainted, and aged it, then added glass knobs the day it was delivered.

I searched everywhere for a cabinet that would fit a new 50" flat screen and still have doors.  Our TV is on a  LOT, but when it isn't, I don't like to see the big, black hole that it makes in my white on white decor.  But when I looked at new cabinets, I was told that the door span would have to be so wide to accommodate a large set that it made the cabinets top heavy and dangerous.  So, most TVs go onto a wall, a mantle, or a flat surface.

Birdsong 3 weekend 044

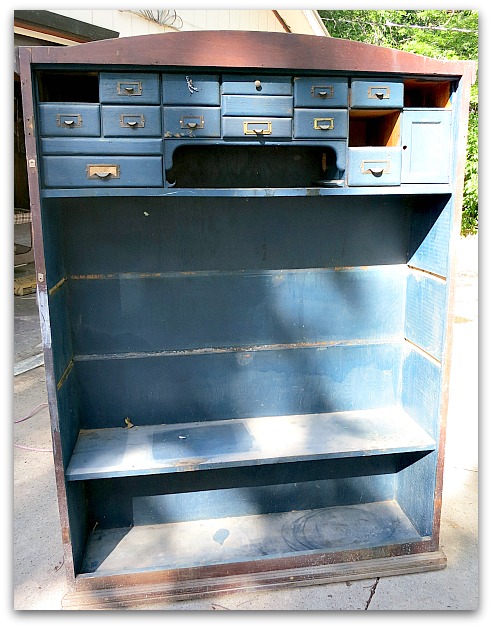
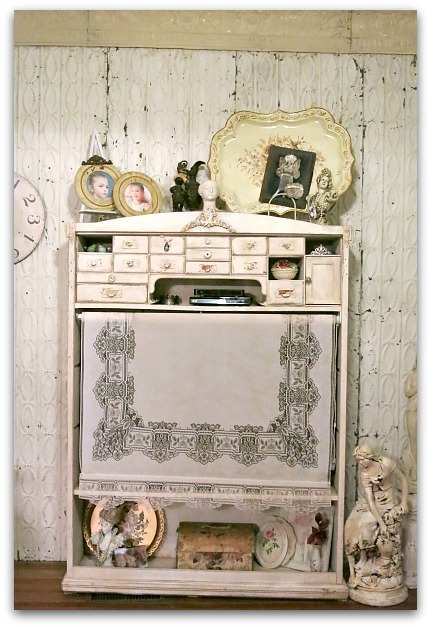
 I turned to antique shopping (which I prefer anyway!) and found the same situation.  No doors that were wide enough, unless they had a bar down the middle, which wouldn't work. I found this old bookshelf and my son pulled the nails out of two of the shelves to make space for the television.

It needed a deep cleaning too.  It could have been in a barn for a while from the looks of it.

This is 11" deep and 46-1/2" wide inside. I measured 50" TVs and found the one I wanted before shopping with a tape measure in my purse to find a cabinet to fit the TV I'd picked out. 

And yes, this doesn't have a door, but I thought some lace curtains would be nice.

Birdsong 3 weekend 045

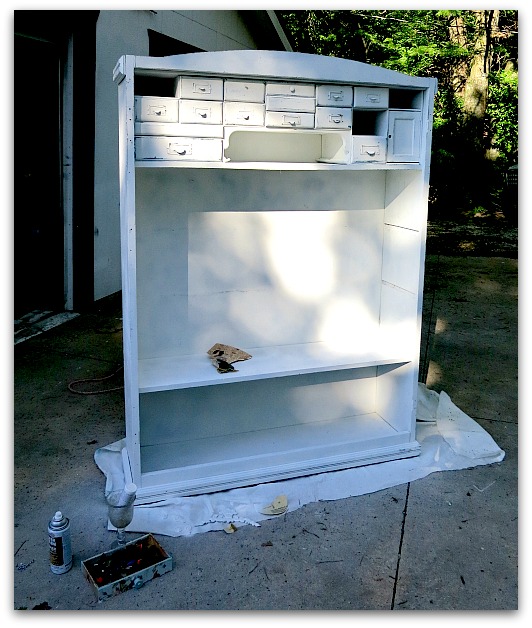
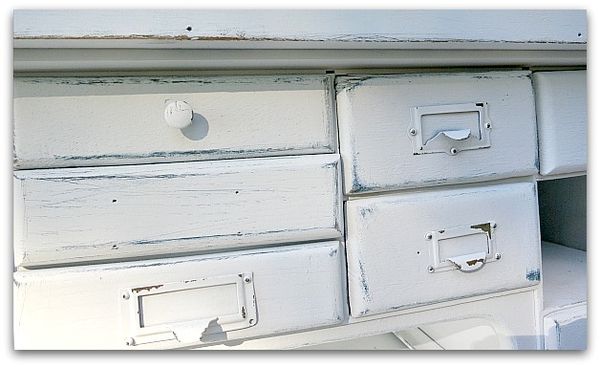
I used 5 cans of Zinser Bullseye spray primer meant for glossy surfaces, with no sanding.  I figured with so many cubbies, a spray would be the way to go. 

Birdsong 3 weekend 046

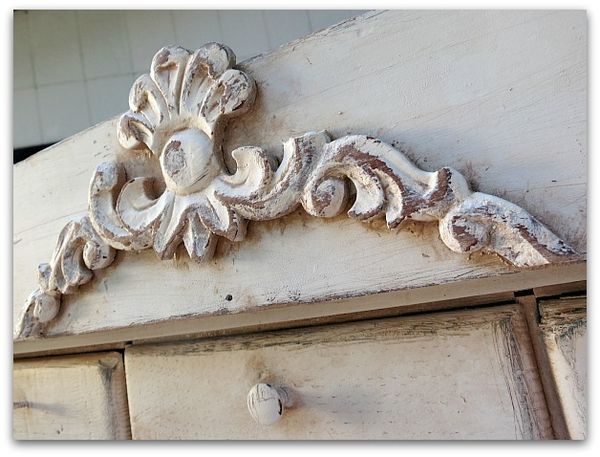
After priming, I did some distressing with sandpaper.

Birdsong 3 weekend 049

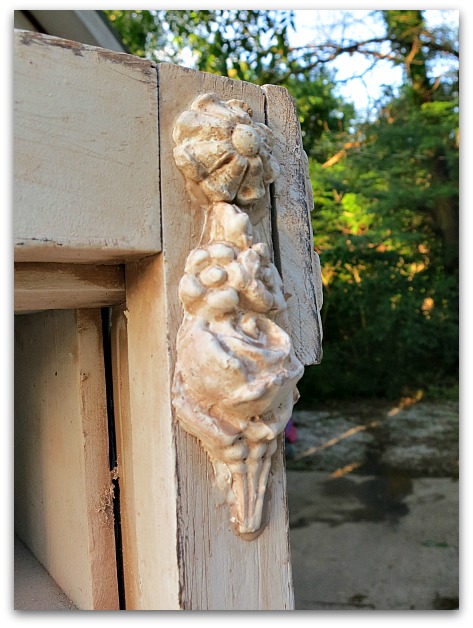
And added some fancy work details and some tinted glaze.

Birdsong 3 weekend 048

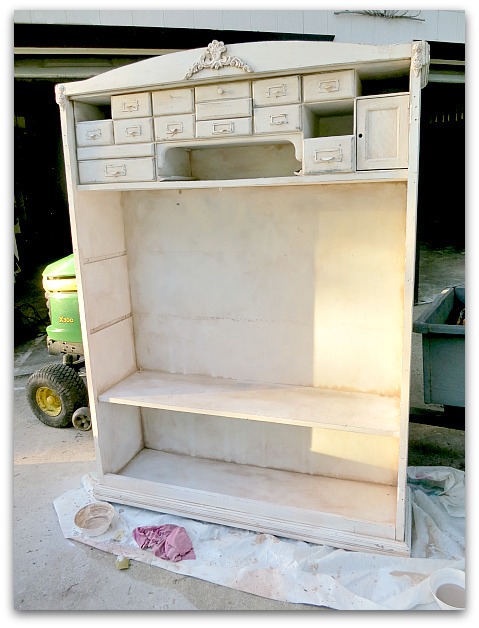
For one pint of clear glaze, I mixed in one 2 oz bottle of coffee and cream colored acrylic craft paint.  I brushed it on heavy and then wiped it off with a damp, well wrung out towel.  A torn up old tee shirt works great.

 If you do this, rinse often.

Birdsong 3 weekend 047

If you are wondering why there is a John Deere in the picture, it was doubling as a step ladder to paint the top and something for the piece to lean against as I wiped the glaze on.  I was afraid it was going to fall over backwards.

And if you are wondering when I painted it, I didn't!  I went straight from primer to glaze.

Primer CANNOT be left as is!!

It isn't paint and is meant to be covered. 

But who says you have to use conventional paint?  I skipped straight to the tinted glaze.  It covers every bit of the primer and is basically about the same as clear paint with tint in it, so dries with a paint like finish. 

I didn't top coat it, because it won't be a heavy use item. If I do this technique on a table top, or dresser, I always use a water based, non yellowing top coat, like Polycrylic from Minwax.
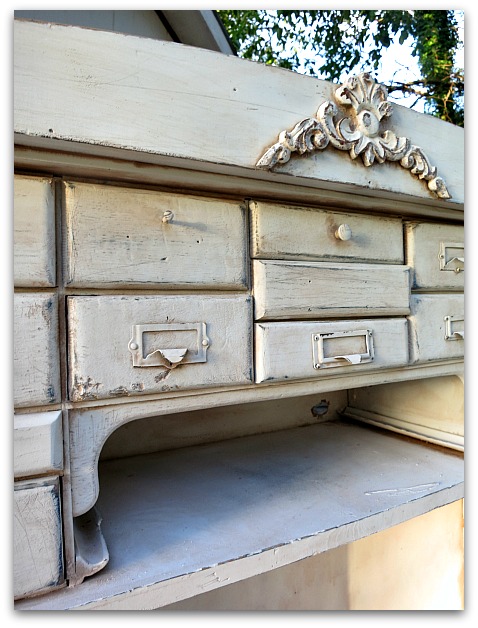

Birdsong 3 weekend 050

   We drilled holes in the top compartment for wires to the DirectTV box and DVD player, and also in the big opening for the television.
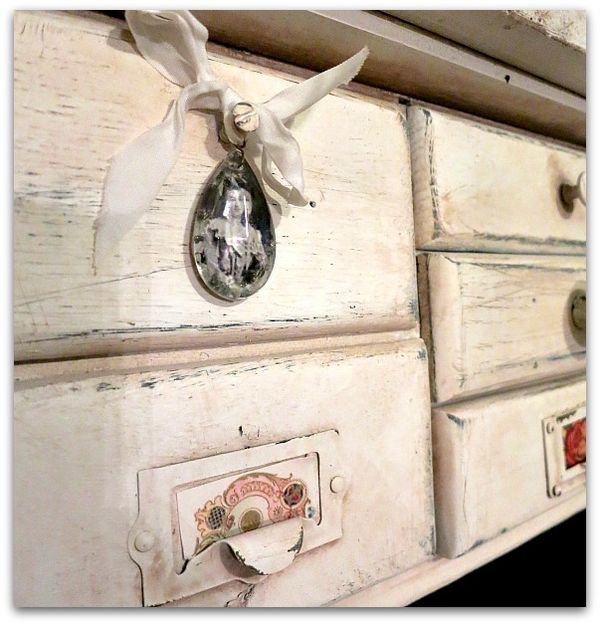

Girls room redo 026
I didn't try to match up the existing hardware in the places where some pulls were missing. Instead, I went with odds and ends that I had around.  One drawer had just a screw as a knob, and I left that, but tied a chandelier crystal with an image added on the back to the screw.
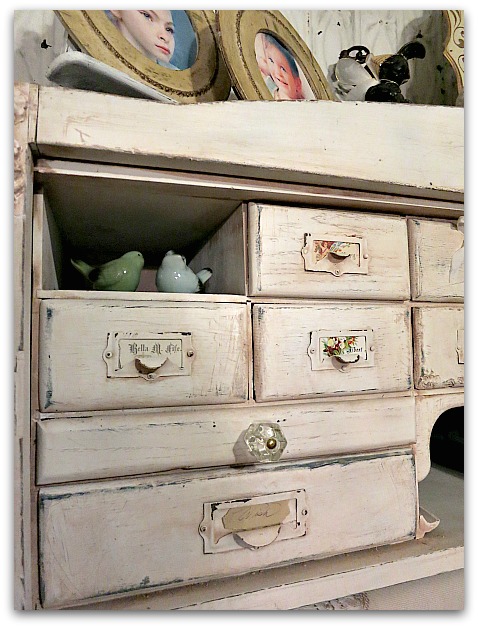
Girls room redo 027
Old calling cards were a good fit for the slots in the pulls.  Especially favorites that I'd been saving for some special use, like one that says "Bella" and a couple Marys (my grandma's name)
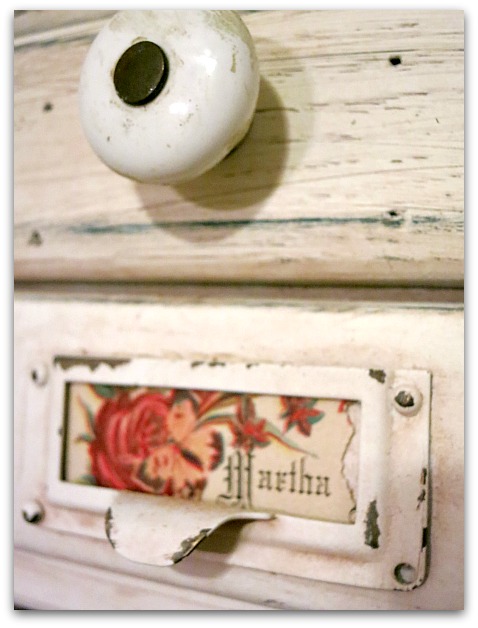

Girls room redo 032
And Martha, my mom's name.


Girls room redo 024
I used some vintage floral paper and a couple of notes in my sister's pretty handwriting in others.
I guess, if I was organized, I'd have gone with actual labels of what was in the drawers, huh?

Once it was set up, I wasn't thrilled with where the curtains would have to hang, past the sides so as not to cover any of the screen.  So, a blind was suggested by my sis, Terry.


Photo

I'd seen some great lace blinds at the Victorian Trading Co. and since Birdsong was coming up and I had guests to show around KC, we'd planned to go there the next day any way. Kansas City is the headquarters for the online store and catalog and they have an outlet store here.  Lucky us! And lucky me, the blinds are only $20 at the outlet store compared to $69 online.

Since I knew most of the ladies coming to Birdsong were from out of town, I made sure to tell them about this store.  When we pulled up, we saw an Iowa plate in the parking lot, and I rightly guessed that some of our friends were inside shopping.  When we went in, the manager gave me a huge hug because I'd sent so many people her way. 

Gitf 053

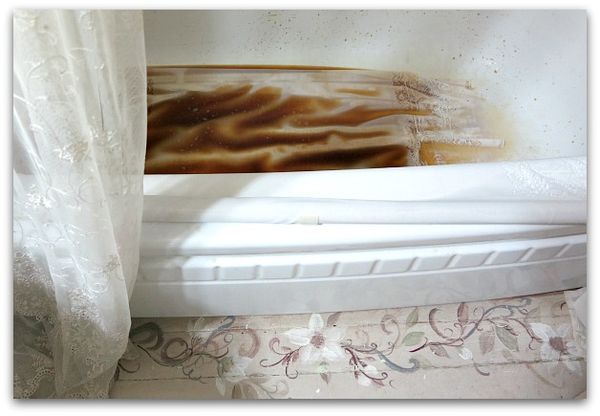
There just happened to be a set of blinds exactly the size I needed in the clearance room! But they were very, very white.  I placed them in the tub and poured coffee over them, then laid them out to dry in the sun and got just the color I wanted.

Girls room redo 029
I'm looking for more old, wallpaper covered boxes to set on the bottom shelf to hold the kids' DVDs, I think it looks too busy right now with all the doodads on the shelf. A few boxes would be better.

Later on, I might print an image on linen and add to the blind…. that would be pretty wouldn't it?  .

PS- Don't forget that Google Reader is closing soon! If you are
reading this from that site, you need to make a change real quick or
your list of blogs will be gone.

I've tried Feedly myself and basically all you do is sign up and it
will import all your Google Reader sites in the click of a mouse.  Very,
very, very simple.Bloglovin is another good one.

You can also follow my blog through Networked Blogs and read it on
FaceBook that way.  There is a list of different reader site buttons on
my sidebar that you can click on to follow me in. 

Hope I'll still be seeing you around!


Hiding instead of repairing damaged dry wall and a rosey outlook for springtime

antiques/junking, cottage, dogs, Dorkies (Yorkshire Terrriers), family, puppies!, redos, yorkies

Cages wall 037
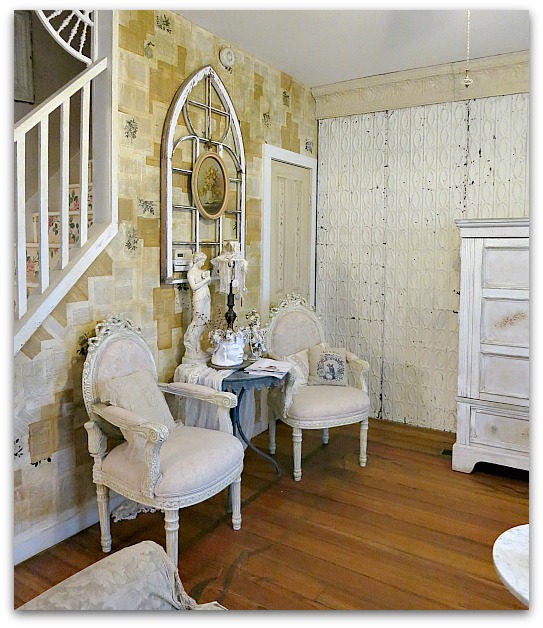
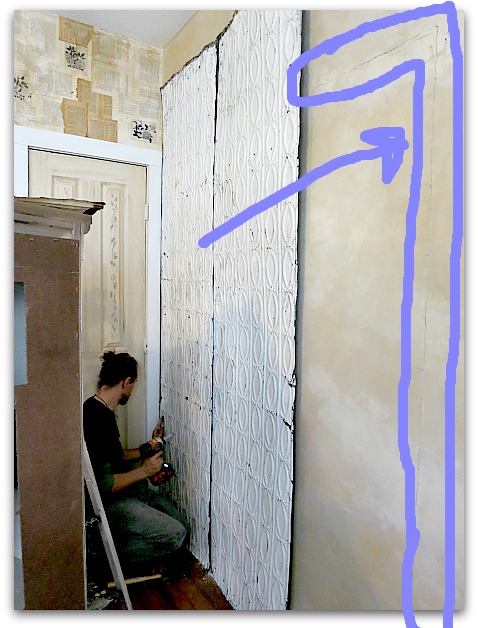
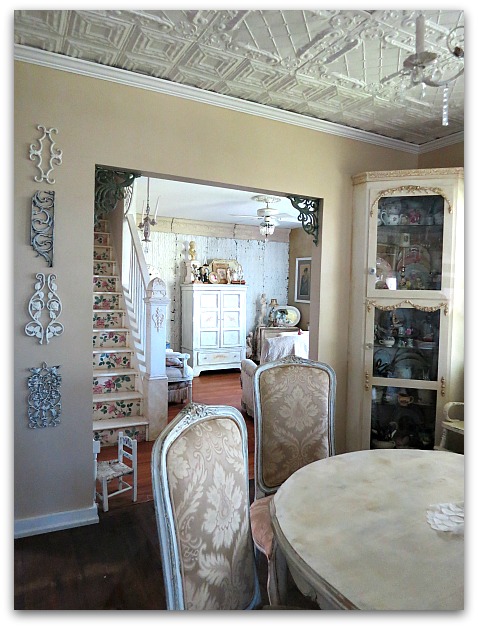
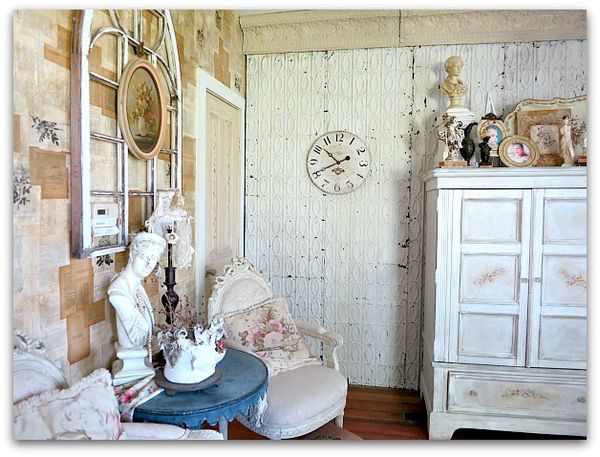
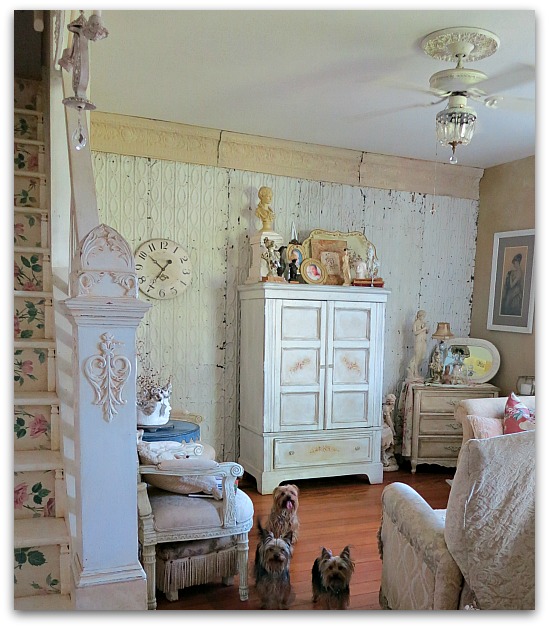
A bit ago, we redid a wall in the living room with ceiling tin. These were 8' strips, and were ideal for where I needed them, they seem to look nicer on a wall than the squares would have.

And after purchasing them, I happened to find the border at another shop and it is exactly what I needed! I'd planned on using wood trim and this is so much better. How lucky to find just the right amount of border.

The wall panels are from Nook and Cranny.  When I drove around to the back of the shop to load the pieces, I happened to see the tin crown molding on the sidewalk in front of another store in the West Bottoms.  I bought all the border, but there is a truckload of the wall panels left. ($40 each, but ask for a volume discount if you buy more than a couple)


Cages wall 009

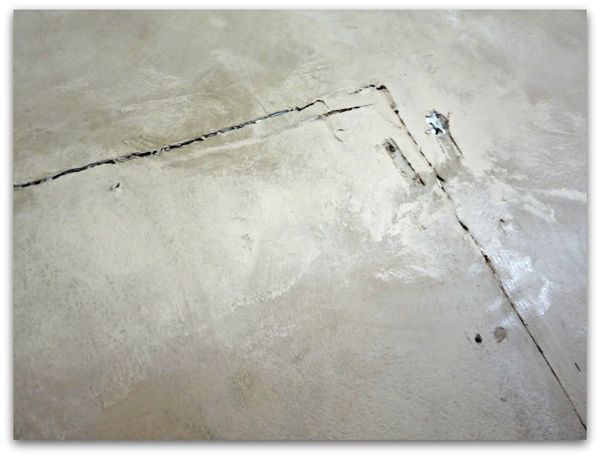
The room didn't look bad before, I liked the faux finish.  Until you got up close.


Cages wall 011

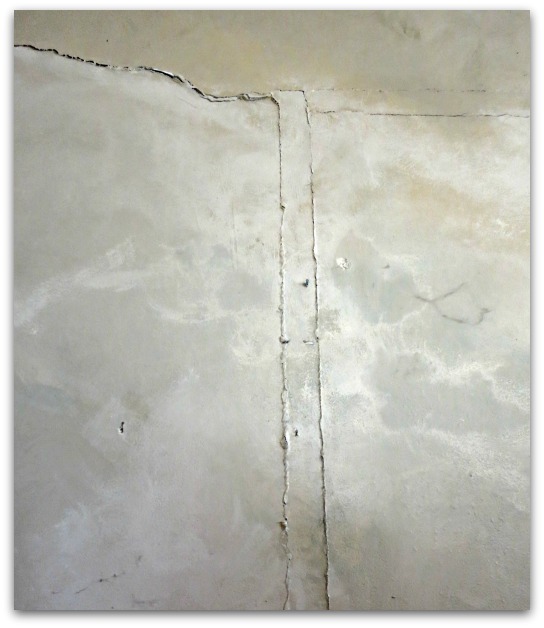
My old house settles, and the shape of a doorway kept popping through the drywall. Years ago, during a remodel, we'd covered up a hallway and this door shape would NOT go away no matter how many times I'd patched it.


Cages wall 010

I don't mind cracks, old houses have lots of them. But not door shaped!
(and yes, you are seeing nasty cobwebs in this photo, not just faux paint treatments and cracks in the wall)


April 031

SInce I have tins on the kitchen ceiling, I thought it would look good to also have the wall at the far end of the living room covered in them too. (this is before)


Cages wall 014

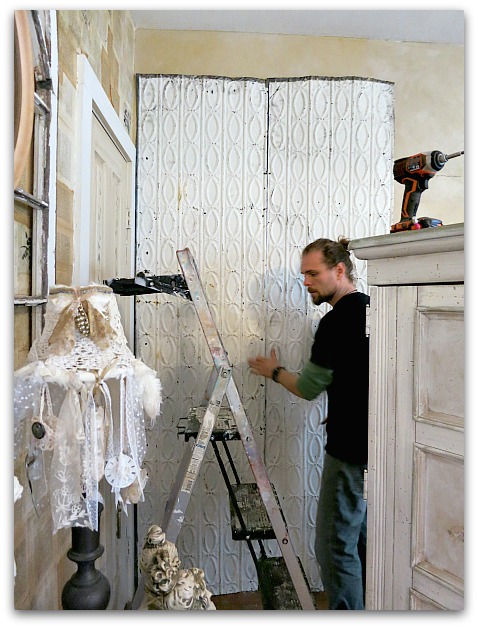
Luckily, I have a very handy son, who installed them for me.  He ripped off the baseboard, and I squirted a ton of caulking back under the wall to help with drafts before he put up the tin.

We decided not to put up more baseboard over it, I like the look as it ended up without it.


Cages wall 016

The panels plus the crown were just the right size for the wall!  My son wanted to cut the tins and line them up perfectly, but I told him not to. It went against his nature as a carpenter to not have the lines on the tin exact, but I like it as it is. 

(the purple marks show the door outline we were covering up)

I promised him I would tell everyone that, because the lines bother him.  Not me, I'm soooo happy with the whole project!! He had them up in a couple hours.


Tin wall 002

The lines that might bother me are the ones between each panel.  They need to be caulked and sealed so they aren't as prominent. 


Tin wall 011

But I haven't made up my mind about painting yet.  I did paint over the rust on the crown, but only because it was too regular and stripey looking.  Random rust makes me happy, but this was not that kind.


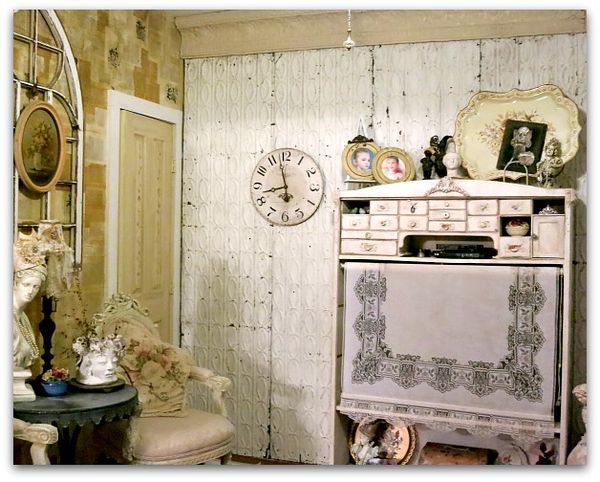
Tin wall 003

For now, I  figure I'll leave the chippiness as is, I can always paint later.  But I do think I need to caulk the seams….

The dogs always think each photo is about them.


Tin wall 006

So, I indulged the little hams and let them pose.


Tin wall 008

They love to be in pictures.


Tin wall 007

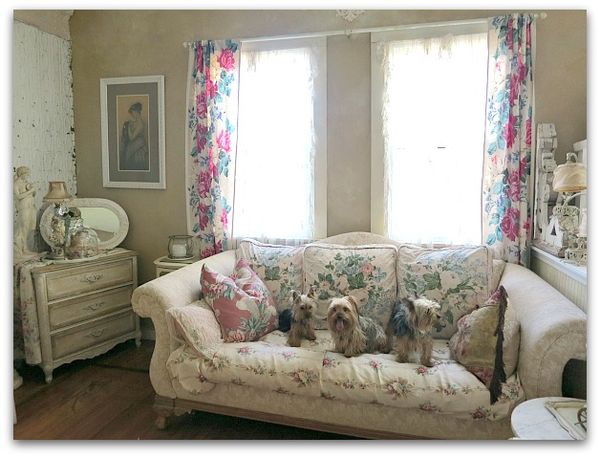
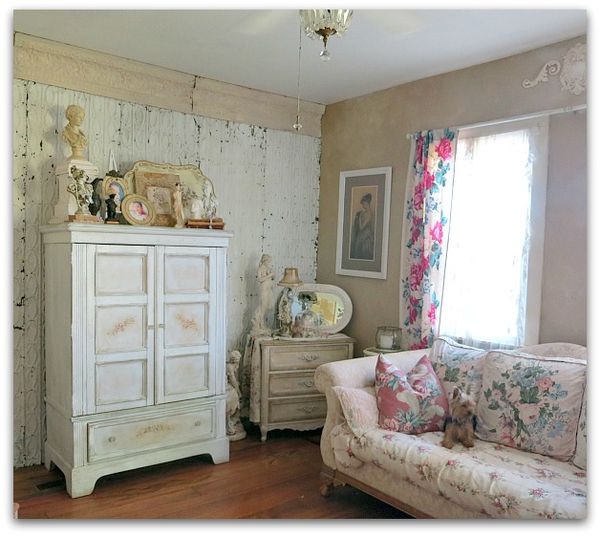
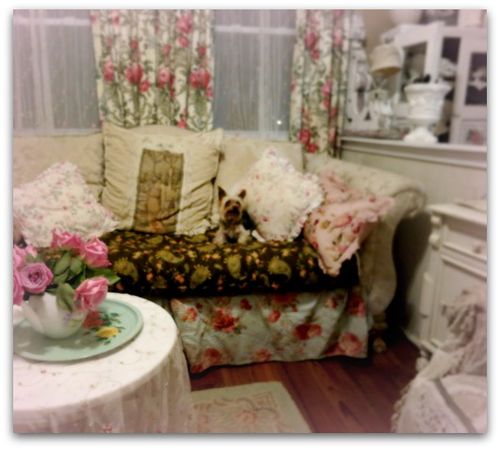
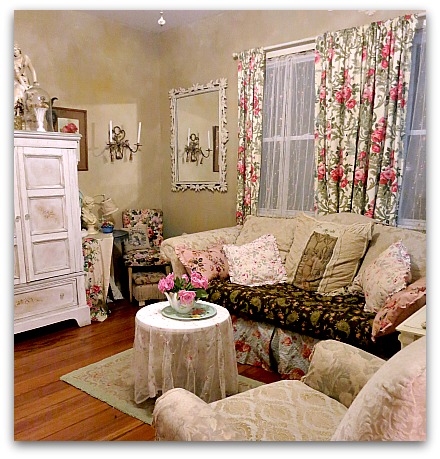
For springtime, I hung some rose pattern bark cloth drapes and wrapped the sofa cushion in another bark cloth piece.  It has come untucked on the edges a  bit. I guess that is the sort of thing you should straighten before a photo, huh?

My living room stays cream and white most of the year, and I love that combo, it makes seasonal changes so simple.  A few pillows, a couple curtain panels and a switcheroo of some knick knacks and I've got a new look for a new season.


Tin wall 010

And the dogs love the BARK cloth.


Karla paints a table for Karla

Hand painted, Hand Painted Furniture, redos

Done 013

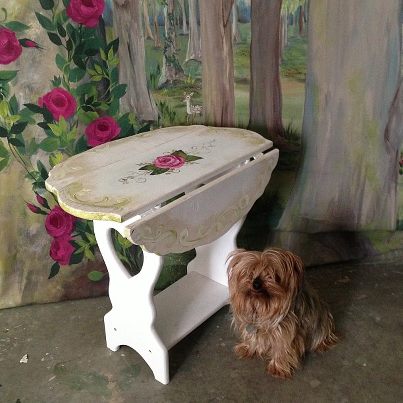
While I had the paints out and my work clothes on to work on the giant mural/banner, I finally painted this little table for Karla.  Last year, she helped with my Pay Pal sorting for tax time, like Beth did for me this year.  It's a good thing to have accountant friends!


Done 014

So, about 6 months ago, she dropped off this little white table and said I could return the favor and paint a rose on it. 

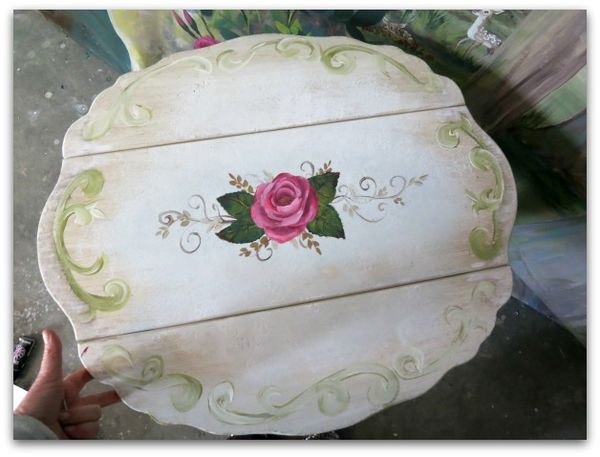
Here is what I did:

  • First, using a large, flat brush, I dry brushed toast color across the whole table top, over the white paint that was there.
  • Next, I took a kitchen sponge dipped in white and sponged the center of the table, leaving the toasty color heavier around the rim.
  • With a one inch flat brush, I dry brushed a hint of white from the very edge over the toast toward the center of the table, but only about 2" or so away from the edge.
  • With the sponge, I wiped on a green around the routered edge.
  • Where the toasty color was left as is, I painted a swirly design all around the table top.
  • Last, I plopped a rose in the center.


Done 012

I was happy to do it, but it took me forever to get around to it. I just don't paint furniture on a regular basis like I did in the past and it took some gearing up.  When I started painting roses on the banner, it occurred to me that it would be a good time to get out the much delayed project and slap a rose on it too.


539122_10151508764939477_754895452_n
(Twinkle insisted that I take her photo too)

Hope the pink is the right tone. It's been so long since she showed me the pillow sham she wanted to match, i can't remember what it looked like. ooops


561259_10151505814189477_141559949_n
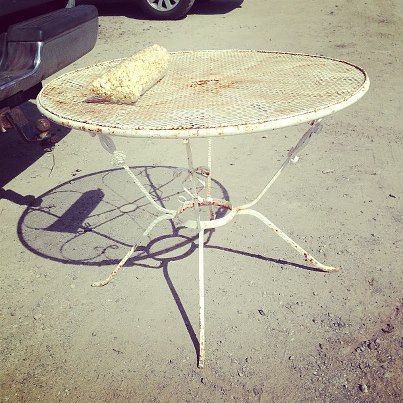
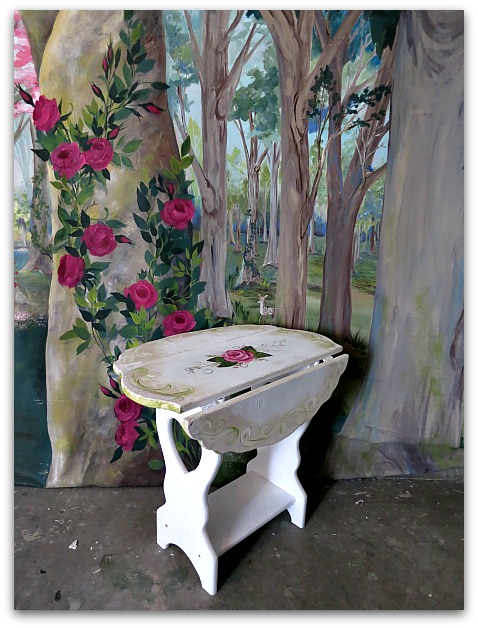
Here is a table I found for myself, to use in the garden. Only $5 at the West Bottoms in KC. I paid that much for the bag of kettle corn on top of it.


535997_10151511969889477_1536081053_n
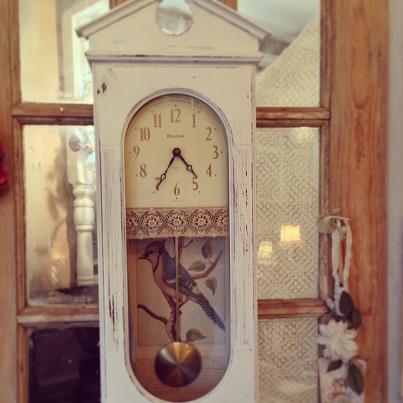
And here is a mini redo that I did for  myself.  Years ago, I'd given my Great Aunt Caroline's clock a coat of white paint and then distressed it.  But it was still dark inside.  So, I leaned a page from a vintage bird book in it, and added a rim of lace (held by a couple dots of glue) to the frame under the clock face.

  It only took a couple of moments and I think it added a lot.

A mid summer zero dollar decorating redo

cottage, dogs, Dorkies (Yorkshire Terrriers), flowers, redos

For sale 023
Dang, its hot.  Feels like it has been hot forever. In Kansas, we typically get a stretch of 100 degree plus days, but not this early in the year. It makes me quake in my boots (or flip flops) just contemplating what July and August will have in store after June blasted us with this heat.

For sale 008

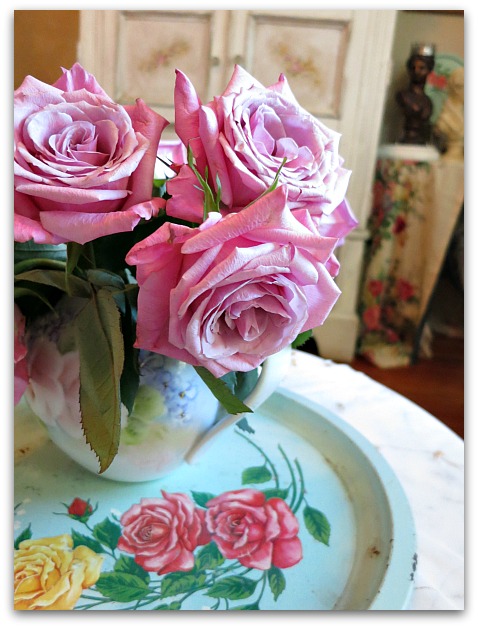
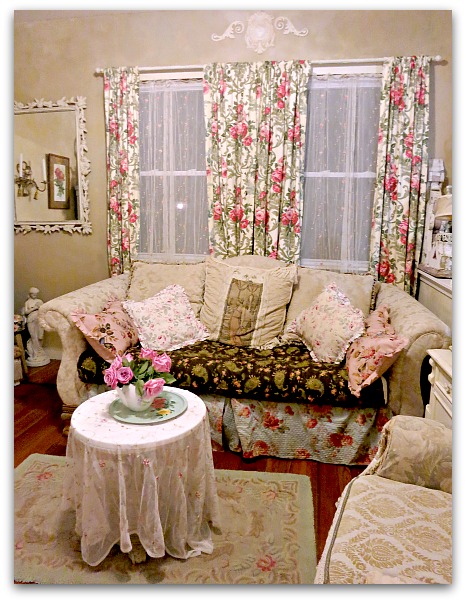
To get the temperature off my mind, I decided to cottage-up my living room a bit.  Ithought strewing some roses about would be a cheerful summery thing to do. 

I'm afraid this photo doesn't look as cheery as it should, I took it at night, and the windows are dark.

Since my walls and furniture are neutral, its easy to change the whole look of the room with a few accents.  Throw pillows, curtains, and knicky knacks make a quick change when you start with an all ivory room.

It probably took longer for me to get the wrinkles out of the old curtains than it did to redo all of this.  I popped these rose curtains in the dryer on fluff while I took down the vintage lace ones, and packed away all of the pillows and a few other things from around the room as they were fluffing up.

When the curtains were ready, it was a fast redo, because we were due to meet friends on the lake. This was a spur of the moment plan, and I only had about 30 minutes to spare.

For sale 013
Over the years, I've made a few different slip covers for my big sofa cushion, and have collected curtains and pillows at clearance sales and garage sales. I keep a linen closet full of cheap, but pretty extras to switch out when the mood hits me.

This time, I tried draping the bottom of the couch with a bed skirt.  The front ruffle shows, the rest is wadded up under the cushion. Hopefuly it will stay in place, it might not.

For sale 006
The look I was going for was an "explosion" of roses.  I think I got it…  Few match, but I like the way they go together anyway.  You can't really tell from the photos, but the brown slip cover on the big cushion has pink roses and blue pailseys on it, so it matches a bit better in person than it seems to in the picture.

For sale 017
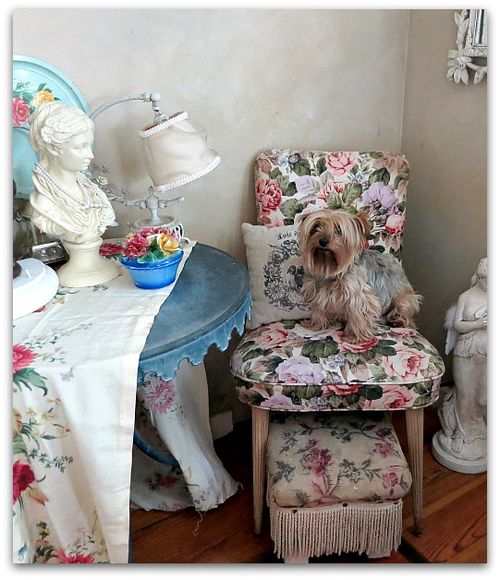
This chair was in the studio.   After bringing it in, I topped the garden table with a floral drape panel, and added a couple rosey elements to the arrangement on top.

The sheer panel on the other small table (previous photo) is also a curtain.  I had three of these panels in my breezeway and they were shredded by raccoons.  So, I trimmed off the bottoms that were ragged, used one on the table and the other two in the windows.  As long as I don't move the couch, no one will know about the shredding.

Well, I guess that's not true, I just told everyone about the rips…

For sale 020
My china cabinets are over stuffed anyway, so these items won't be missed in it and they add to the flowery feel of the living room now.

For sale 022
It didn't take much, a couple of pieces for each table arrangement gave me the rose garden effect I wanted.

For sale 019
I think I'll hang a framed rose print on the window frame and pin a big, fat millinery bloom in red to the lamp.

In the fall, I'll want to change it around again, so wasn't striving for perfection. Its a temporary, fun look that I didn't take very seriously. I do love my white on white/ivory room most of the time, but I appreciate it more when I change it up a bit sometimes.

So, this redo took about a half hour, using things I had around the house or packed away.  The only cost was $2 for the bouquet of roses.  My local grocery store has markdown roses for $2 a dozen every week.

A tree top Christmas Party with Little Edy and a giveaway

give away, holiday decor, how to's, jewelry, redos

IMG_6004
My new, white Christmas tree is up and ready to be decorated!  I'll be away for 2 weekends in Dec. and I am a little sad about missing out on tree time.   I wanted plenty of time to enjoy the holiday decor, so my plan is to have the  halls decked before Thanksgiving. But I needed a new topper, since I  have two trees this year and plan on using my other tree in the newly remodelled kitchen this year.
IMG_5996
While tidying up Sugarwing's room, I came across this little doll who had seen much better days. Either my fairy grand baby has the same tendencies to hang onto things that need refurbished, or she is the cause of the need for refurbishment…

This doll kind of has a Little Edy/Grey Gardens look about her, doesn't she?

IMG_5998
The first thing I did was repaint her eyes and brows.

IMG_5999
Then, I popped her into a party hat with the point cut off.  At this point she doesn't look like she is going to any kind of party I want to attend.  But there is still work to be done.

The party hat is a perfect skirt base for her, its sturdy and I can slide it right over the top of the tree.

IMG_6000
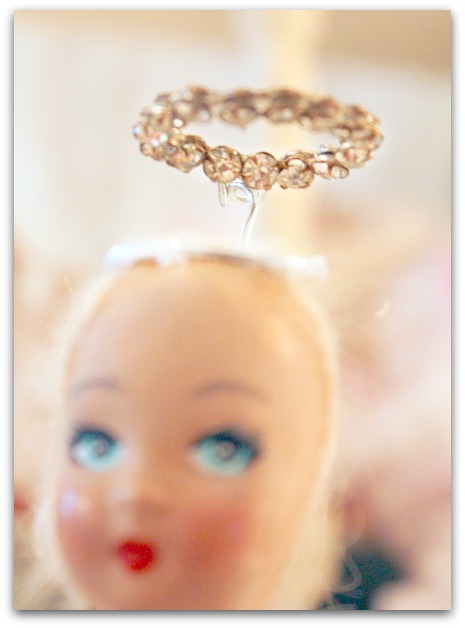
 I wanted a halo that stood up from her head, so I made a wire ring to hold it.  The ring fits around her noggin, and was glued into place before gluing yarn hair over it.  The halo itself is a vintage, circle, rhinestone brooch.

To keep the halo standing straight up, I glopped on a bunch of glue where it is wrapped with the wire. That needed covered up, so I added a white millinery bloom over the glue blob.

IMG_6003
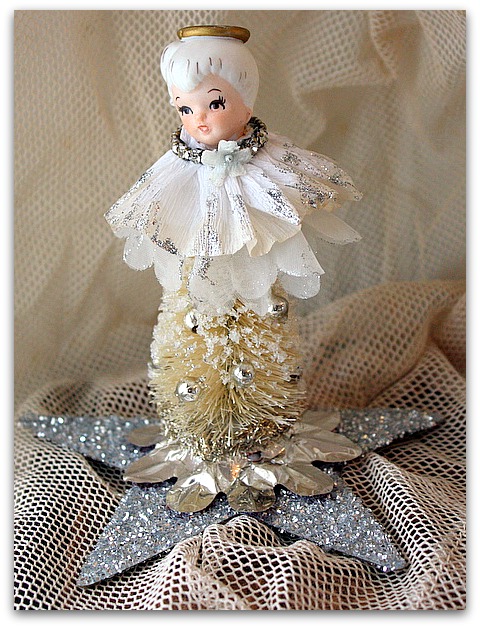
Her dress is made up of vintage papers, trims, and lace that I glued to her body and the party hat, no sewing for me. The wings are feathers and flocked wallpaper, and she is decked out in some millinery and jewels.

When she heads up to the top of the tree, I'll get a photo of her in her new home.  That is if I ever get caught up and get that tree decorated…  Right now, its up, the lights are on and its naked as a jaybird.  But still festive!  I'm happy just to have it there waiting for me.   I've wanted a white tree for the past few years, my old one turned yellow and I hadn't found a reasonable priced one to replace it with.
The yellow was not a good "patina-ed with age look" it was a "did a dog pee on your tree?" look.  It had to go. 

IMG_5991
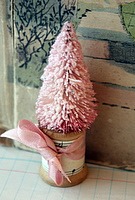
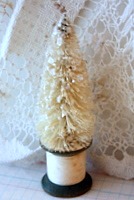
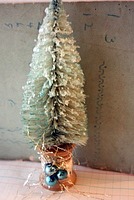
My life is full of white trees right now. I've been bleaching and glittering more batches of bottle brush trees this week.  I thought I had plenty of them done, but needed another couple of sinkfuls to fill some special orders.  Plus, I like to have plenty to play with and decorate myself too!

  IMG_6020-1 IMG_6022-1 IMG_6017-1 IMG_5961-1

Can you have too many? So far, the answer is no, and I seem to have a LOT of them.

IMG_6034

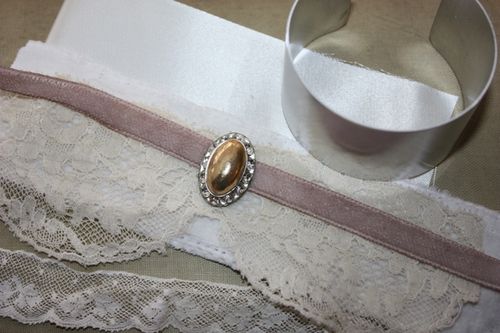
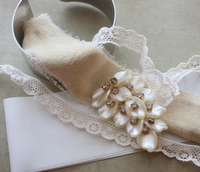
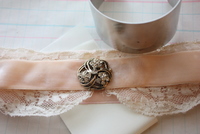
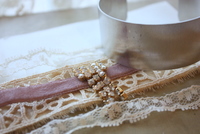
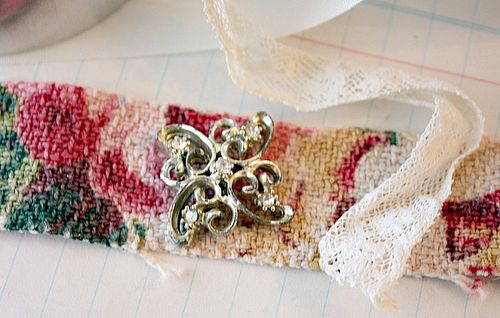
And finally, I made up some cuff bracelet kits.

IMG_6024-1 IMG_6027-1 IMG_6036-1

All filled with lacey, velvety, vintagey goodies.

These are priced separate from my Cuff Tutorial. Previous kits included the price of the online lesson, but with these kits, you need to either purchase the $6 class separately or use put them together in your own way. The kits come with the aluminum blanks and all the trims and bits you need to make a bracelet according to my directions in the class.

IMG_6037

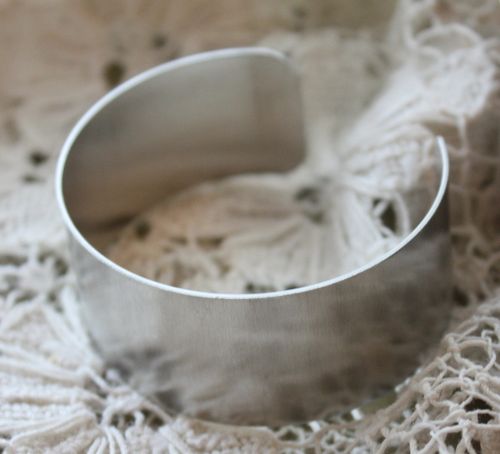
There are also plain cuffs for sale for you to use if you don't want a whole kit.

IMG_6040

They are stocked in the Boutique in two sizes, 1 inch and 1-1/2 inch. 

IMG_6016

I hope you have a happy holiday weekend planned.  We are going all local/free range/ organic this year, and even roasting our own pumpkin to make the pies. I've never done that before, so I might need to have a frozen pie as a back up… If you have any tips, please let me know!

Happy Thanksgiving!

PS- as a Thanksgiving treat (because I'm thankful you read my blog and buy my stuff and I can pretend this is a real job) I'll give away 2 Cuff Tutorials.  Please leave a comment letting me know if you are interested. 

ps- Have you visited Amy? She makes the best stuff from nothing.  She is having a link party and I joined it today.

Snowy little friends

fairies, how to's, redos

IMG_5824
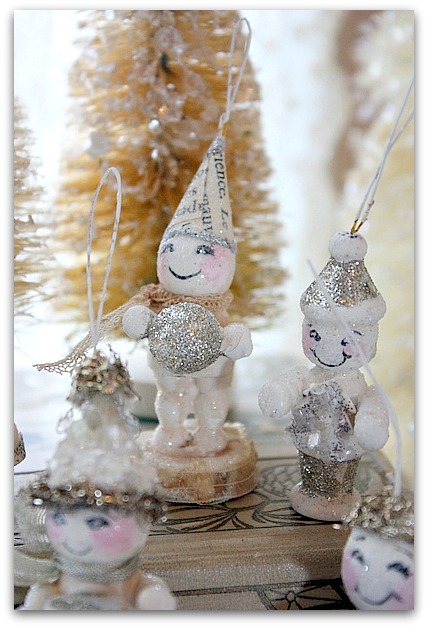
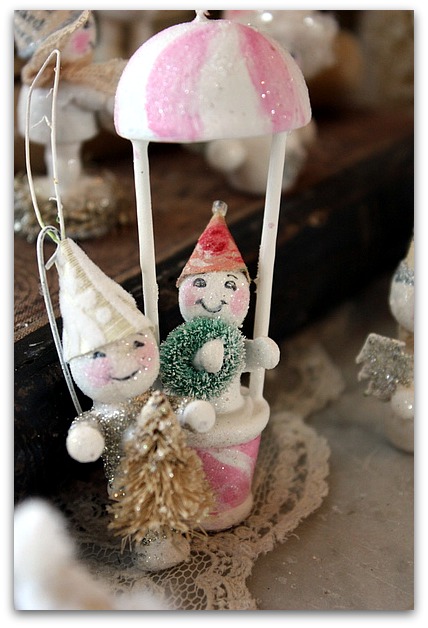
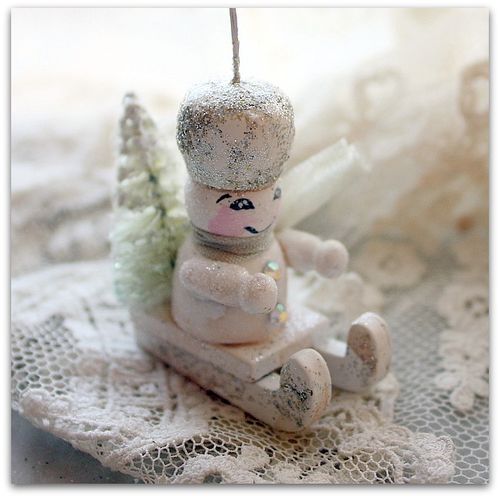
Aren't these guys cute?  I had other things to do, but couldn't help myself, I was drawn to making them.  Yes, I have kits to assemble for the cuff tutorial, and trees to photograph for the Etsy store.  But do you blame me for being distracted from my chores? I had such fun transforming these little wooden ornies.

140

I forgot to get a photo of them first, but found this one online to show you kinda how they started out. They are those semi-vintage (late sixties or so) wooden people from Germany that are painted bright colors.

IMG_5825
When I was shopping with my sisses in Indiana, I found a big bag full of these and debated whether I should buy them or not.

IMG_5826
Because they do start out garish in too shiny, primary colors.

IMG_5827
IMG_5828
But the shapes were so cute, I knew that they had some potential.

IMG_5830
And I just love to take on a whole bunch of something. Little things that get me on a roll, and I can experiment and decorate each one a little different.  I tend to to a whole bunch of most things that I do. 

IMG_5831

Each of these was basically done the same, it was the tiny details that differed.

IMG_5833
First, I sprayed them with Zinsser Bullseye Bonding Primer, then glazed them with a mink brown paint.

IMG_5861

Then, I painted the faces, and added some pink detail on a few of the people.

IMG_5843
After that, they got a coat of glitter. 

IMG_5837
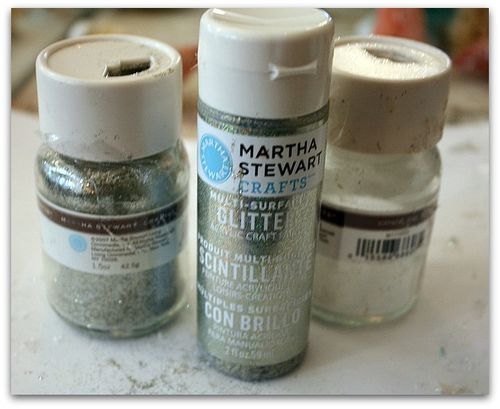
Which reminds me, have you tried Martha's new glitter paint? Well, I love most of what she makes, especially her fine glitter. But this paint isn't worth it, even with the Michael's 40% coupon.  Its too thin, and to get the coverage that they show in the store on the sample you need at least 4, probably more, coats of paint. Who has time for that??? It dries slow and if you try to recoat it too soon, it just smears.

IMG_5851
So, while the thin, glittery paint was still wet, I sprinkled it with Martha's regular glitter, for a more solid coat of shimmer.

IMG_5860

Once they had the clear and white gold glitters where I wanted them, I added some mica here and there.

IMG_5868

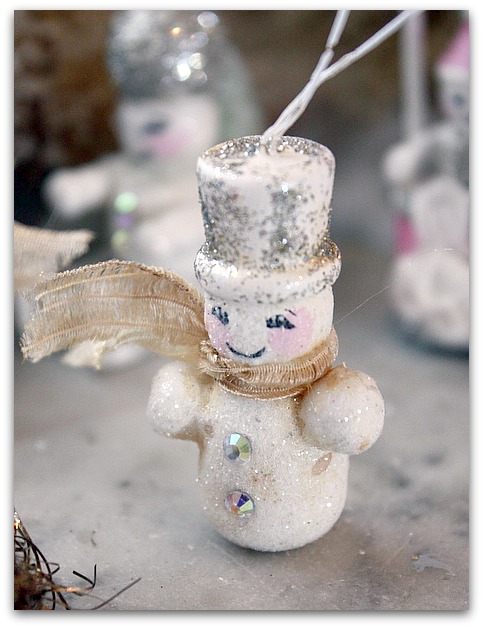
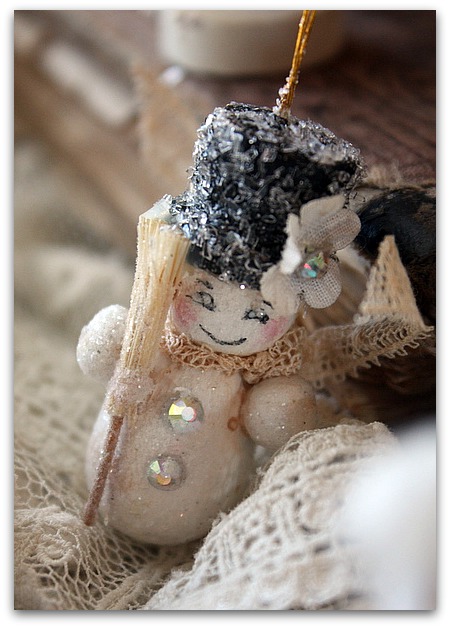
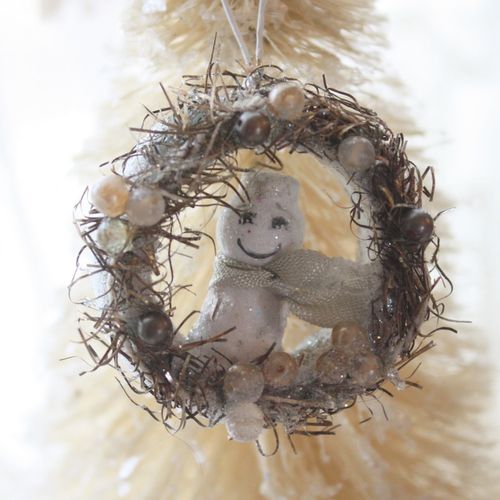
That is when the fun part started!  I got to add beads, crystals, scarves, teensy weensy little hats made of ephemera, and other sweet pretties.

IMG_5867

Aren't they the happiest little guys? I already miss working on them. I saved a few for Sugarwings and I to work on together, but for the most part I'm finished with them. 

Most are for sale ($6 a piece) some in the Boutique and some in the Etsy shop.  I've kept a few for myself or for tying onto Christmas presents too.

Almost Zero Dollar Decorating!

dogs, Dorkies (Yorkshire Terrriers), housework, redos, sewing?

IMG_4092
During my frenzy of de-mousing the house, I gave my bedroom a deep cleaning.  Sugarwings was spending the day with me, so it was her job to squirt the wax while I mopped the floor.  There is a short period of time when kiddos think that helping clean is more fun than just about anything.  Too bad it doesn't last longer. (and you should see how happy she was to hold the black light the time we went on a dog pee search- it was like treasure hunting to her.  I wasn't quite as thrilled to find the glowing purple marks as she was.  By the way, those black lights are the best tool around when you are housebreaking a puppy!!)

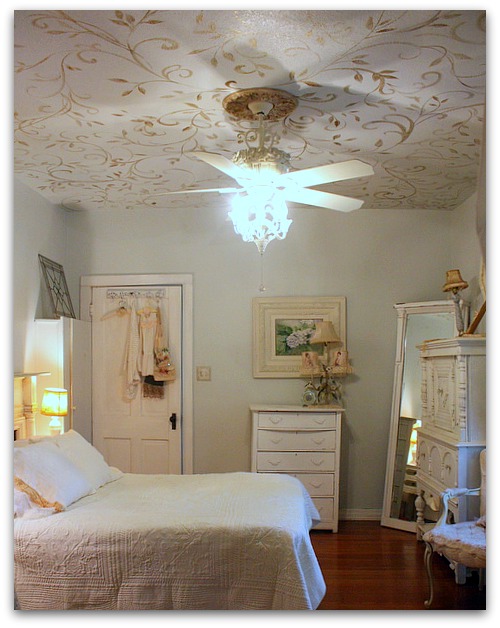
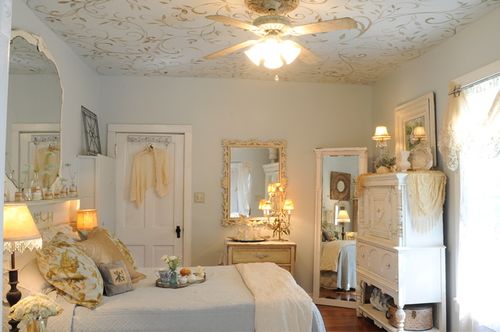
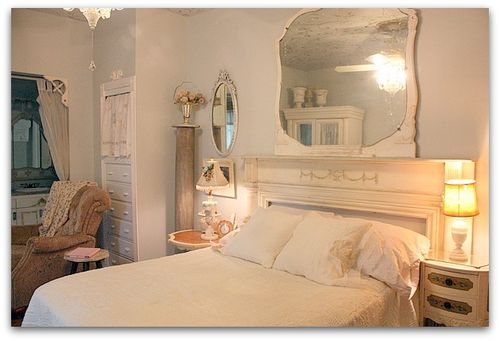
After moving all the furniture and cleaning under and behind it, I wanted to freshen the room up with a new look, but the way this room is laid out, if we want to lay around in bed and watch tv, there aren't many choices for rearranging. So, I did the best I could and moved around some of the mirrors and things on the wall. 

  IMG_4094

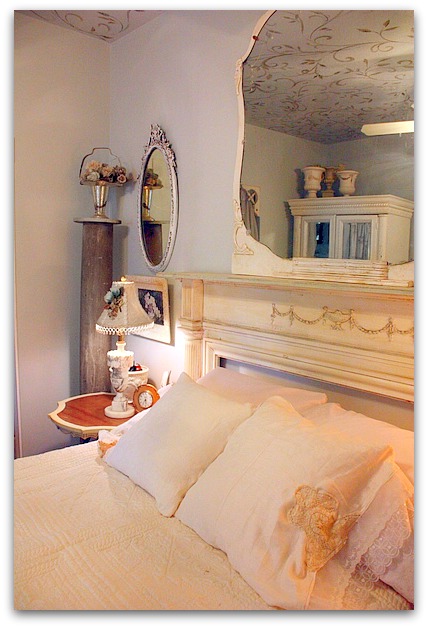
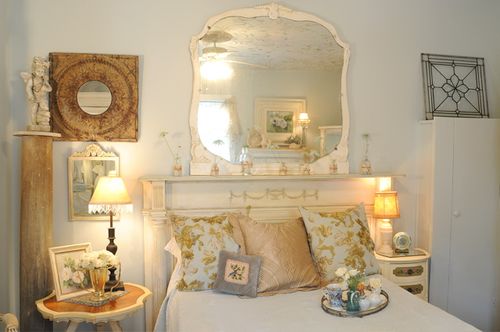
The mirror had been in the bathroom before, I switched around a few mirrors and traded them out.  Its not as fun as shopping, but it did make me feel less bored with the whole room. I kept the pillar where it is, but took the concrete angel out doors, and set an old vase with silks up on it instead.

The lamp came from the living room, and I pinned a blue millinery rose to it so it would match this room. I have a smaller alabaster lamp on the other side of the bed, so I kind of like having a near-matching set together. (both are from garage sales, years ago for about 5 bucks each)

Zero Dollar Decorating always gives me a lift, sometimes switches and trades are all I need to jump start a room and make me like it again. But, I can't quite call this mini redo that, because I did buy a few things for it.

While I was on my trip to Indiana, I found the alarm clock at an antique store ($11) and the new spread at either TJ Max or Steinmart for $40. 

I also bought two indoor/outdoor throw rugs at TJMax for $12 each, but I pointed the camera the other way, so you can't see them here.  They are a neutral tan with brown vines.

IMG_4085
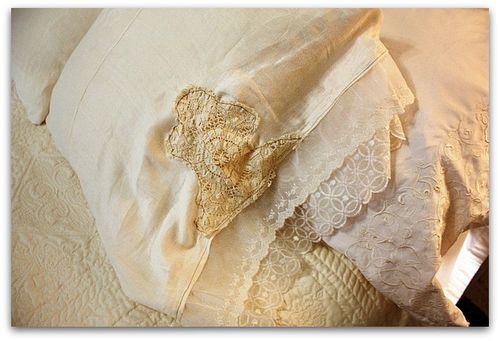
The most expensive part of the redo was a new sewing machine. I was too cheap to pay $25 for two shams to go with the new spread, plus I preferred using some vintage tablecloths and lace that I had to make some instead. 

Half way through the project, I seriously jacked up my 6 year old, low end Singer and couldn't get it to sew anymore.  I hate to admit that I am part of America's throw away society, but it would have cost more to repair than replace, so I zipped over to Walmart and got another $89 machine. Hopefully, I'll get another 5 or 6 years out of this one. 

IMG_4093
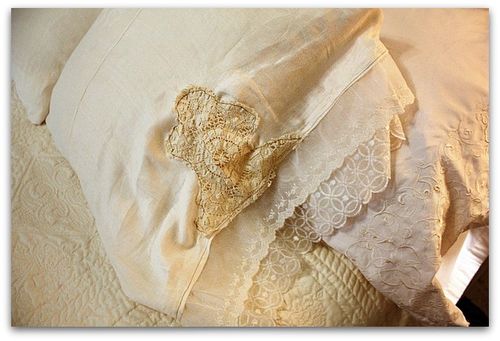
The table cloth I used on the top pillows was a little holey, so I patched it with lace, then added rows of sheer trim (a Bird Song Tag Book Swap hostess gift!!). The shams for the other set of pillows were made from curtains that I took down in the bathroom.

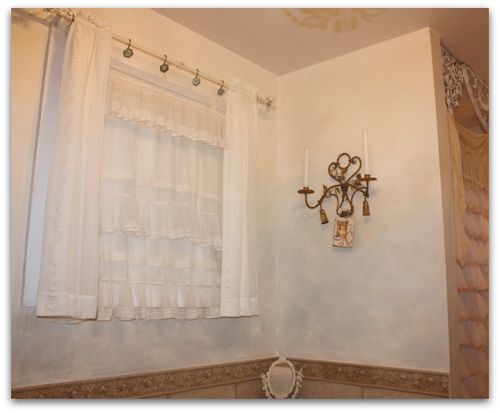
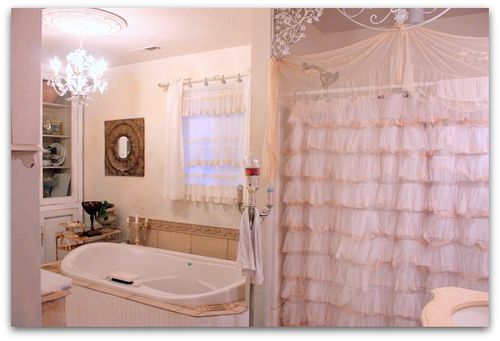
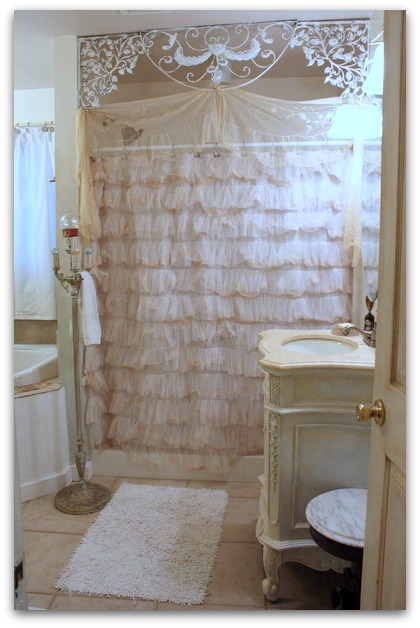
Yep, my redos had spilled over to the adjoining bath. Well, when I started moving mirrors around, it hit me that I'd never liked that curtain in there….  When we remodelled, I found it at the Goodwill for $5, it wasn't vintage, just second hand.  And it was always too long, I kept thinking that I would hem it and never did, so I just took it down, turned it into pillow shams, and made something else to hang there, while I was on a roll.

  IMG_4114

My buddy, Lisa, had given me a gorgeous netting and lace bed set that was too nice to use on the bed in a house full of dogs. So, part of it is hung as curtains in the living room, the rest I cut up to make a curtain in here.

IMG_4113

Since netting isn't private enough for a bathroom window, I sewed the fabric over some of the table cloth I'd cut up for pillows.

It isn't quite wide enough, so I hung a curtain panel on each side to cover that up.  Everything is smoke and mirrors at my house, all made to look better than it really is…

IMG_4110
But overall, I'm much happier with the "new" curtains I made.  They go well with the Victorian Trading Co. outlet store shower curtains ($20, then dyed with tea, coffee, and Rit)

My husband is of course, just thrilled with more frills.  (not really) But he rarely notices what I do to the house anyway, so its fine. He doesn't actually care. 

I know I've told this story before, but it was years ago, so maybe its okay to tell it again? My Mother-in-Law was visiting, and my darling was showing her photos of our home in a magazine that had been lying on the table.  He was very proud and telling her details about each room as he went through the pictures.

I was a little surprised to hear him so interested, but thrilled to hear him be proud of something I've done- like I said, I don't think he notices things around the house. So, I looked over their shoulders to see which magazine they were looking at.

It was NOT our house. He just thought it was since there were pink roses and chippy paint in the photos.

  IMG_9947
In this photo from earlier this year, you can kind of see the old curtains on the window.  Just enough to see what I mean, about them being a bit too long.  They hung down all the way to the rose trim around the tub, the new ones (next picture) are a better length.

Roses

(that rose tile is one of my favorite things about the room.  While tile shopping, I saw it at a store in Topeka, but it was discontinued. They happened to have a few pieces left in the back room and sold it to me for 75% off.  I had enough to put around the tub, plus one extra that I keep thinking I'll make a shelf out of.)

RB4

Here is the bedroom from a couple years ago. No, I didn't change much, but just enough to keep me from being sick of it. I'm easily pleased.

  RB2

Here is another older photo. 

IMG_4089

Maybe it is more "edited" now.  I was going for serene.  To cut down on clutter, I also draped a small table topper over an extension rod in the built in cubby above the drawers.  It was just a dust catcher, I had stuff sitting in there, not anything functional or really all that cool. Just a couple urns and a photo.  I like it better covered up.

I like the whole room better now.  I just hope that the bedding stays ivory. The first time it rains and the dogs jump up on it, might be the end of it.  White might be smarter, it can at least be bleached to stay white… wish me luck.


Breezy

flowers, hand painted signs, redos

IMG_4073
While I had my son here, and we both had paint brushes in hand, I asked him to tackle the breezeway with me. I've hated the too bright green it was painted for YEARS. I had painted it on a whim, I'd had a beloved puppy die in my arms after months of nursing her along and trying to keep her alive, and needed something cheerful and bright around me.  I also wanted something physical to do to keep myself busy after burying her.

IMG_4060 Typically, I don't have a lot of bright colors in my house, unless they are seasonal accents.  But, this was an outdoor room, and I thought it was the perfect place for a splash of color.

Instead, it only reminded me of my dead dog.

And it was not fun to paint, since it is clap siding and can't be done with a roller.  And I knew that the green would be hard to cover, so I just kept putting the job off.

IMG_4071
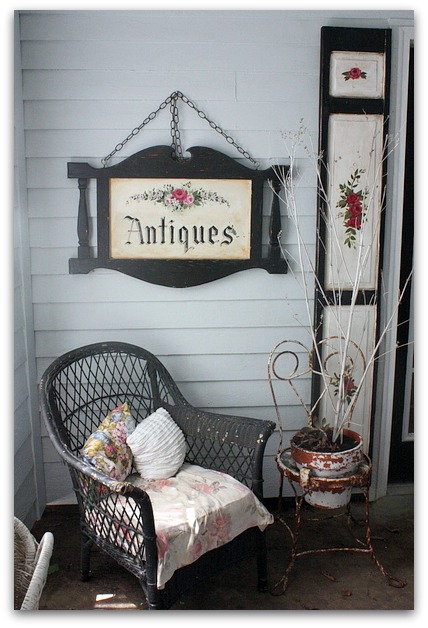
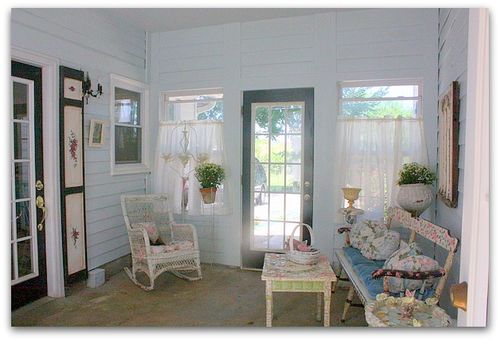
The new color I finally chose is much more tranquil, and is a much calmer backdrop to the stuff I had in the room already.  I left everything just as it was, the only change in the whole room is the wall color.  Well, and I switched out the seat cushion, it had been a hot pink.  The blue velvet is a cushion that my mom made about 30 years ago. 

IMG_4076
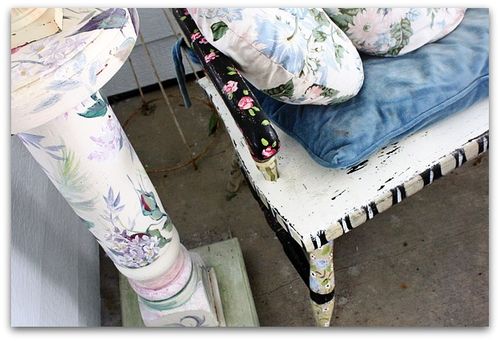
The bench was hers too. I've painted it numerous times since I've had it.  In her possession, it was maple.

IMG_4074 The room feels a lot bigger in this pale gray/blue.  And I'm so glad we got this done.  It makes me smile every time   I walk through it.

I was ready to get this room cleaned up and new looking after our recent raccoon attack.  Those coons ripped my curtains to shreds, and I wanted to replace them, but wanted to make sure the curtains went with the new color I chose.

  Instead of shopping at the store, I shopped at home in my linen closet and found a stack of white on white, striped sheers that I used to have in my kitchen, so my only cost for the redo was a gallon of paint/primer in one (Behr).  This kind of paint offers great coverage, and mostly did the job in one coat with a few touch ups here and there.

The white curtains also helped create the breezy feeling this room now has.  And under them are new, aluminum screens to hopefully prevent more coon invasions! If that doesn't work, we'll have to go to chicken wire over the windows.  Or razor wire….

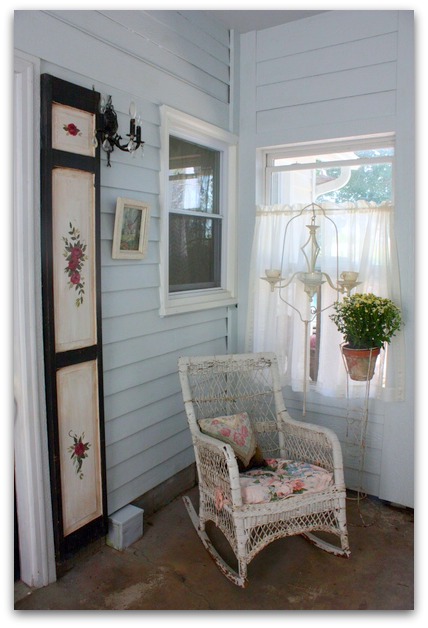
  (the bird cage stand holds a simple chandelier that I've epoxy-ed tea cups to after taking out the wiring and the lighting parts. I keep tea light candles or fresh flowers in the cups, depending on my mood)IMG_4079
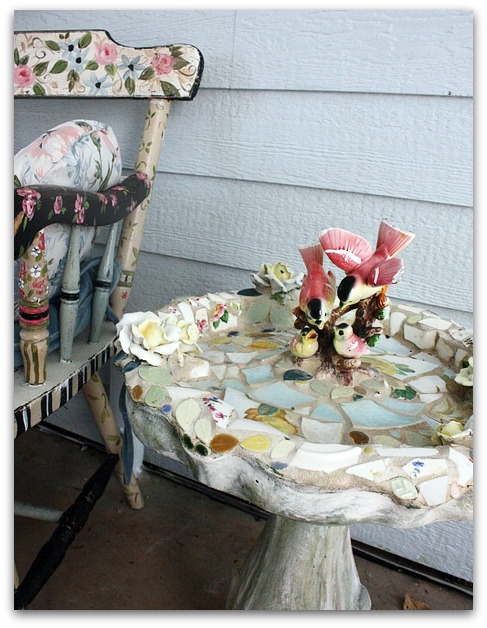
Even before I painted over the pea green explosion on the walls, I have considered this my pink and green room.  And I figured I'd have to do some redecorating and moving things out when I repainted. I was thinking that nothing would match any more.  But I am quite taken with the soft blue back ground, against all the pink florals. Plus, there are hints of blue here and there that I never really noticed when the room was green, like in the pillows, the broken plates in the birdbath that I made, and in the flowers painted on the bench.

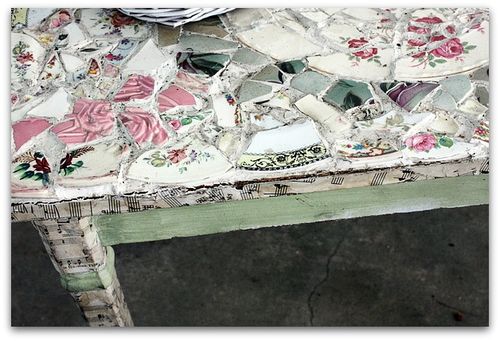
IMG_4077 There is very little blue in the mosaic table, but that doesn't really bug me.  I still think it fits the room fine.

IMG_4080
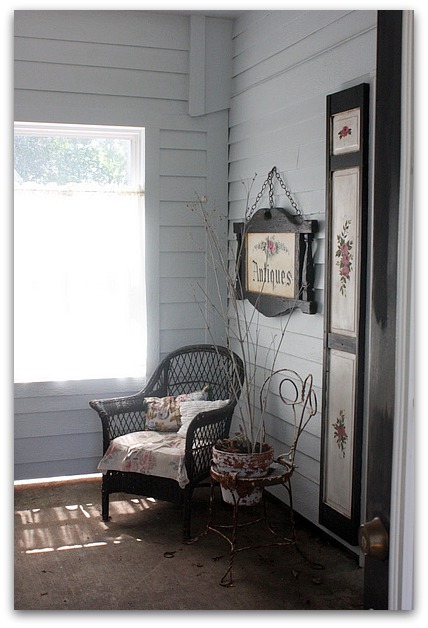
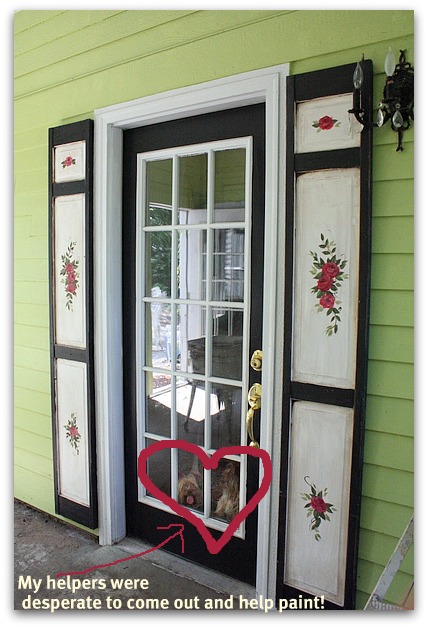
I'd planned on repainting the shutters on the door too, but I'm liking the black and roses with the blue.  It seems like a nice contrast, and not too matchy.

(the shutters were bi-fold doors from a garage sale for a couple bucks. I took them off the hinges and painted them up, the other half of the set is on the front door to my studio)

After a while, I just might paint everything that is black now, a medium gray, with sepia glaze over it.  But for now, I'm satisfied. The gray is a maybe, and if I decide to do it, will be a good project when I'm feeling the need for another fresh-up.

Do you ever play with Rate My Space on HGTV's site? I have fun with it. You can lose a lot of hours browsing from one room to another…  anyway, if you want to check it out, you can start with this room, and give it a rating for me!


Next post, I'll show you a few more of my changes around the house. I've been productive lately!

It all started with a mouse

hand painted signs, housework, how to's, redos

IMG_4053
Do you ever just put up with stuff around the house and let it bug you each time you look at it, till it gets to the point that you just don't look at it any more?  I never used to, but in the last couple of years, my house has been neglected. 

IMG_4058
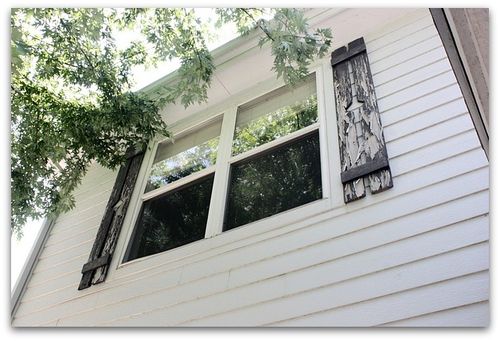
See what I mean? All of our shutters were peeling,  the worst were up on the 2nd floor, so I just never looked up.  But when the ones right by the front door started to get worse and worse, it became hard to avert my eyes.  

Then, we were invaded by mice.  Yes, what do mice have to do with shutters?  Well, I guess these nasty little poo droppers just seriously got my attention, and when I started to clean up after them, I got kick started into a deep cleaning mode and went berserk over all of my house, including those peeling shutters.

  I moved all the furniture, cleaned behind it, and then did a couple switcharoos with a few doodads and some stuff on the wall in my bedroom.  That got me thinking how much I always hated the curtains in the bathroom, so I whipped up a new set with scraps and lace.  I then ended up buying a new spread, and a couple of rugs for my bedroom and sewed some pillows to match.  While I was rug shopping, I finally picked up some paint to redo the breezeway and these shutters.

IMG_4093

Its been a crazy couple of days, but worth it.   I think that since our remodel plans have been up in the air for so many months, I've been just letting stuff slide, thinking I'd take care of it all at the same time, after the remodelling. But then, I realized how hard it is to live with the mess of ripping out walls, and thought, I should have some areas that were all done and nice to make myself feel better while living through the horror of having half a kitchen.

IMG_4059
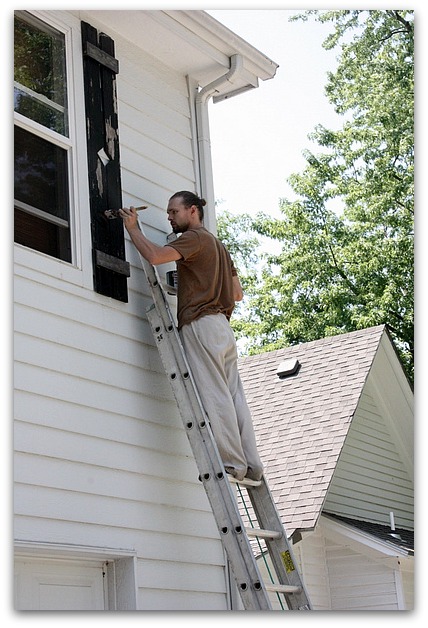
 Sugarwing's Daddy dropped by while I was scraping the ground level shutters and offered to do the higher ones for me.  I have a terrible fear of heights and was going to just continue with my policy of never looking up when I pulled into the driveway. 

IMG_4056
This kind of peeling is fine.  This is an old shutter that I have hanging on the wall of the house for decoration by the back door of the studio.  When I bought it to paint roses on, the peeling paint was one of the things that drew me to it.

IMG_4050
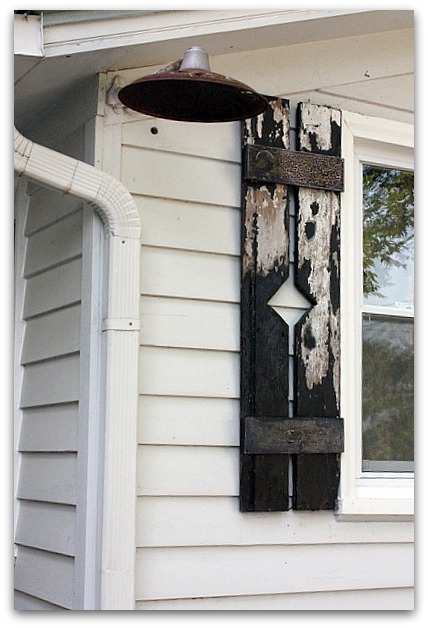
But this is a whole different story.  This just looks like no one loves the house. 

Years ago, I made these shutters myself.  We'd taken down an old garage and saved the wood. I cut two pieces the length of the window, marked a triangle shaped notch in each, cut it out with a jig saw, then lined the notches up to form a diamond and screwed small boards across them.  It was simple, and free to do, since I already had all of the wood.

I know they aren't perfectly straight, but for me, the old wood and simplicity of them compliments our old house and helps make the new addition fit in with the older half of the house.

More redo pictures to come! 

And in case you were wondering, I think all of the mice are caught.  Twinkle helped, she is a good hunter.

Scroll to Top