Tutorials

The Short cut way to repaint kitchen cabinets with no sanding,stripping, or even removing the doors!

how-to projects, Kitchen remodel, Tutorials
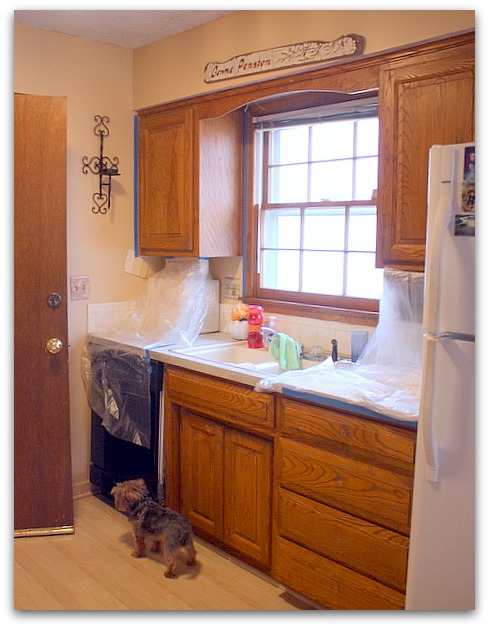


IMG_6839The other Karla and I have been promising Beth we'd help her with her kitchen for about 6 months and finally did it. It only took about 6 hours for the three of us.  6 months, and 6 hours, that is.

Beth had the doors washed, areas taped off and covered where needed.

IMG_6845

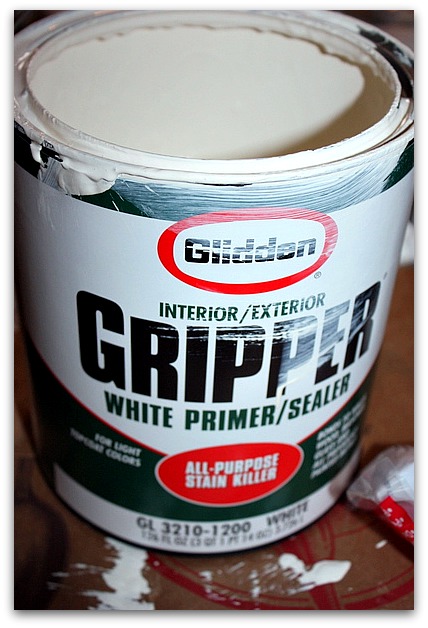
So, we got right to it.  The bonding primer was tinted to the paint color, which makes it easier, since primer can be such a blinding white.

ALWAYS USE A BONDING PRIMER.

Not primer for wallpaper.

Not primer for fresh drywall.

Not paint and primer combined.

Somewhere on the instructions or label, the can should say something like this " will adhere to glossy surfaces"

You will not need to sand or strip the wood, this primer will be ideal for gripping the wood and giving the surface some "teeth" for the paint to hold on to.

Please note, that primer needs a few days to reach its full strength, and it can be scraped up while fresh.Once it has cured, though, its tough as can be! If you want to distress your finish with sandpaper, please do it very soon after painting.
IMG_6843
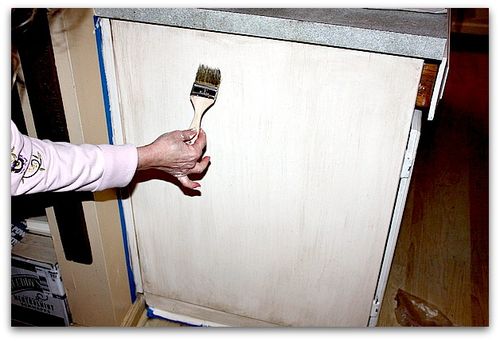
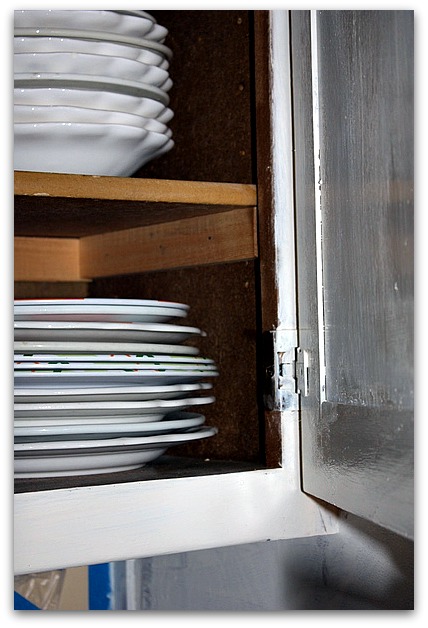
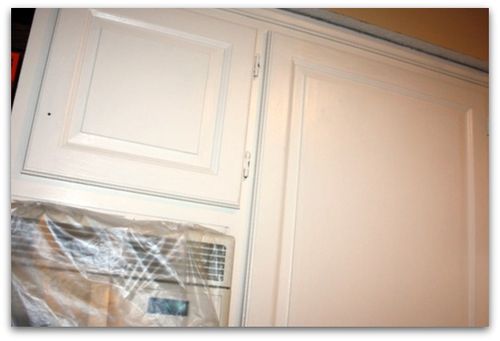
We left the doors on, and painted over the hinges. The door pulls were removed first.

We were in a hurry, so really didn't let the doors dry as much as we should have, so I knew that the opening and closing was going to create some cracks in the drying primer on the dark bronze hinges and that might peek out of the paint a bit, but wasn't worried, because I knew we were antiquing the finish when the paint dried and it would all blend in.

Sometimes, its smarter and faster to just go with the imperfections and make them work in your design!

IMG_6846

After priming, we put on about 2 coats of creamy, satin finish paint.  Then went out to lunch while it dried.
IMG_6848
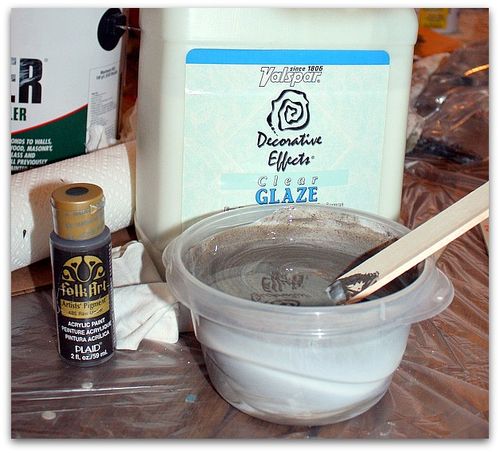
When we got back, we mixed 2 oz of acrylic craft paint into a bowl of about 2 cups of clear glaze.

While the glaze is wet, it looks milky, but it dries clear. Always remember that the mixed paint and glaze will dry on your furniture to the same color of the paint you mixed in.

Paint it on, and wipe it off with a clean, damp cotton cloth (an old tee shirt torn up is good), heavier in the corners and indentations.

IMG_6849

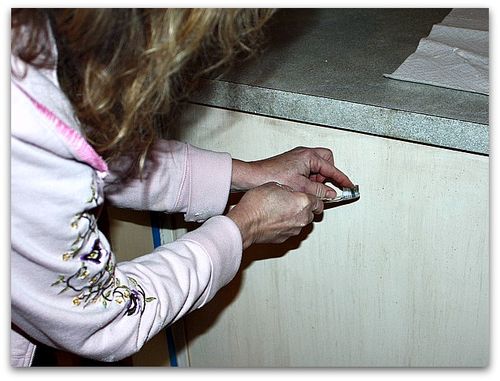
After putting it on and wiping it off so the corners, indentations and edges were darker, we wanted a bit more of it showing, so, we pulled a glaze dipped brush down with the wood grain, to create striation marks.

I use a cheapo, 99cent brush, instead of the specialty faux finish brushes sold to do this with.

If the lines seem too dark, or heavy, go over them again or blot them with your cotton rag.
IMG_6850
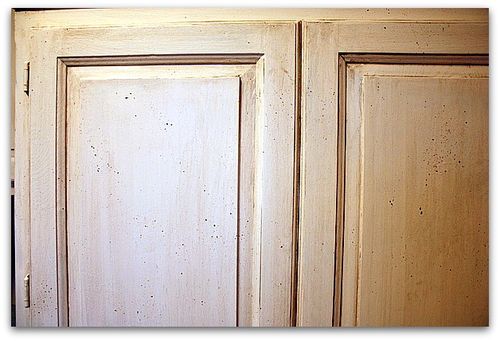
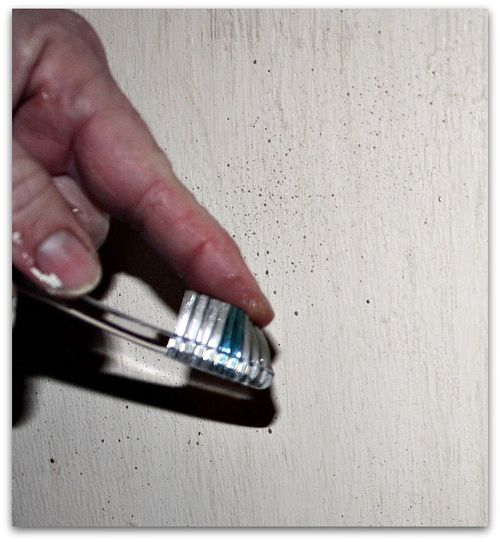
After that, we wanted even more design the to project, and decided to fleck glaze dots all over the surface.
IMG_6852
Its easily done with a toothbrush, and the same glaze used for the faux treatment. The speckles should be random, and not too dark or big, and never drippy.  Blot if needed. And don't get too carried away.

IMG_6855
Ta dah!

The cabinets should get a top coat of poly (which is oil based, smelly and sometimes yellows, but holds up great and is extremely washable) or water based poly, Minwax Polycrylic (which doesn't smell, or yellow and is easier to use, but isn't quite as durable, but still really good).

Beth's sweet husband, Jeff, was volunteered to do the top coat later.
IMG_6856
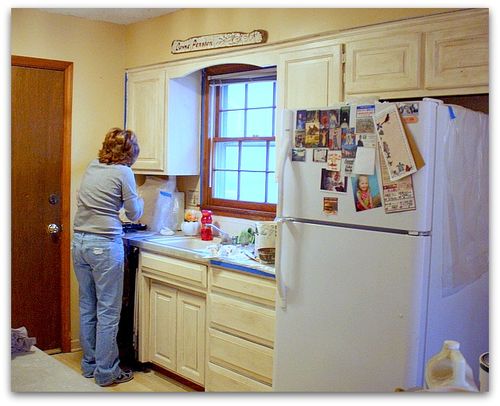
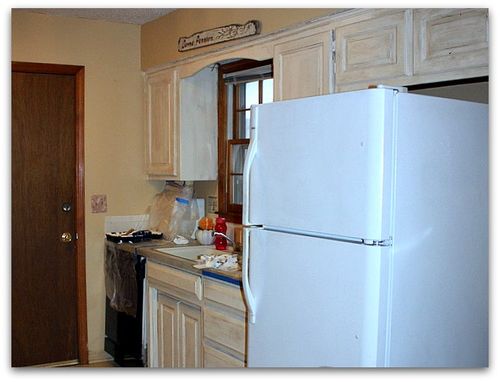
We thought our paint job looked pretty good when done!  But there was still something bugging us.
IMG_6861
Ta dah, again!  Doesn't the room look better without the busy magnets on the fridge?  This might be controversial (Beth told me not to pick on magnets, some people LOVE them) but I HATE magnet covered fridges.  I know I am in the minority, and a lot of people really enjoy using their fridges as art and photo display. But I always find the clutter distracting for myself. (although I do have to admit, I enjoy looking at all the pictures on fridges when I am visiting someone and thiers is covered)

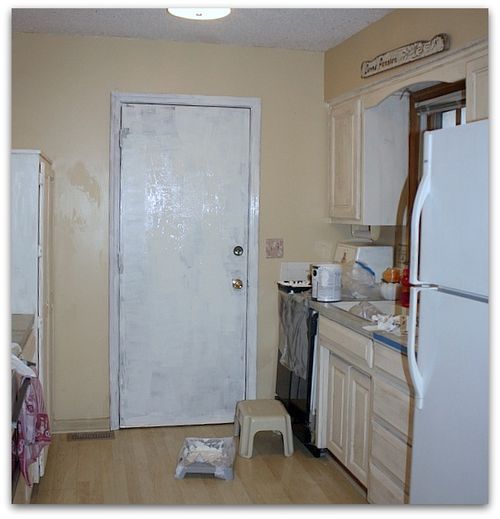
And another thing that bugs me is dark wood that doesn't really go with the room.  Her door was too dark for the nice, light space.
IMG_6863
I only had 9 minutes till I had to leave, because it was my son's birthday and I had a party to get to. So, I quickly whipped the primer back out and got the door ready for a coat of paint.

Beth said that Jeff would do the paint coat.

Here is what we discussed for the door:

1- paint the door to match the cabinets

2- paint it the base color of the cabinets

3- paint it the wall color

4- paint it the wall color and then do the same faux treatment and glaze that we did on the cabinets over that.

Either choice she makes, its primed and ready to go. And I think the room already looks bigger with the door nice and light, don't you? Which option would you chose? I'm leaning toward #4.


How to add embellished pieces to painted furniture

how to's, how-to projects, Tutorials

IMG_6146
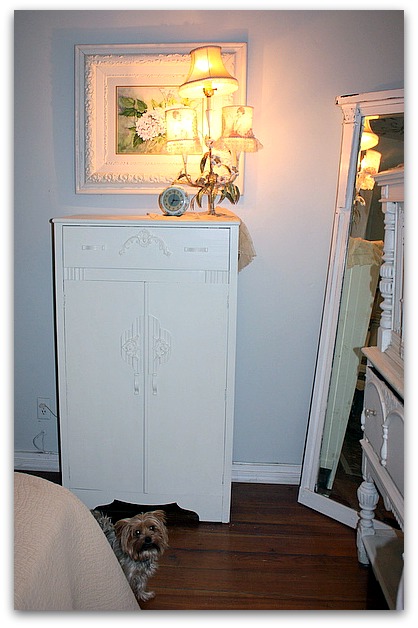
Now that Sugarwings is getting bigger (and so are her clothes), and I have little Dew Drop to dress sometimes too, I needed a bigger space to store the little girl's clothing.  I was lucky to find a cabinet at one of my favorite places, for a great price, but it needed a lot of changes if it wanted to come and live with me.

IMG_6114
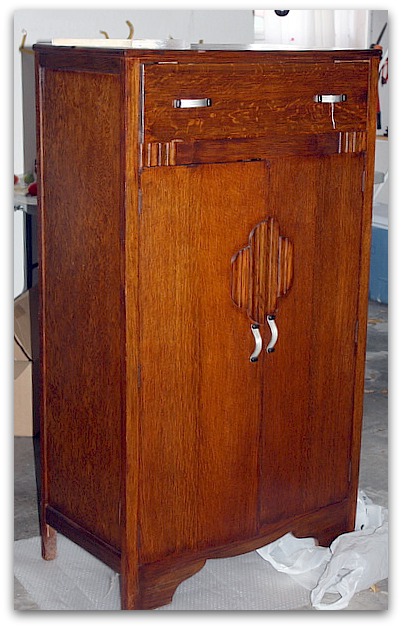
Here is how it began, kind of deco.  Which I like, but not for my bedroom.

IMG_6117
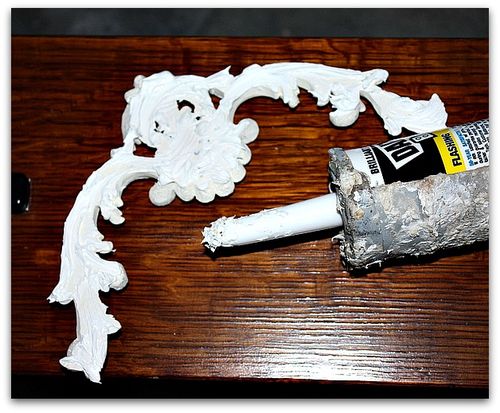
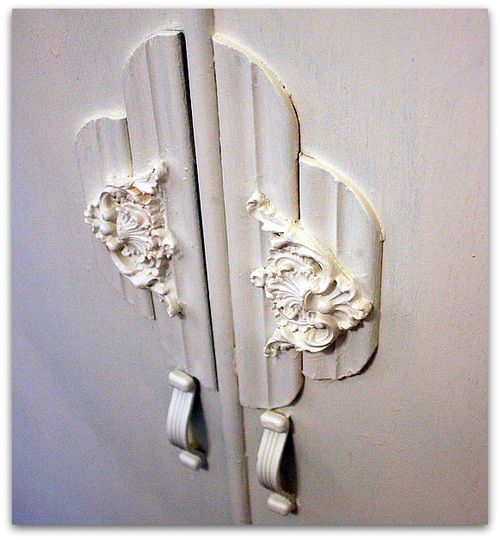
I had some ornate scrolly embellishments in the garage, (you can buy some similar type things at Home Depot, hobby stores, or look online here.) and thought they might help with the transformation.

The trouble with these is attaching them unless you have a nail gun, and even then, they shatter or the wooden ones will split.

I discovered that the easiest thing to do, is to slather the back of the piece with paint-able caulking.

IMG_6116
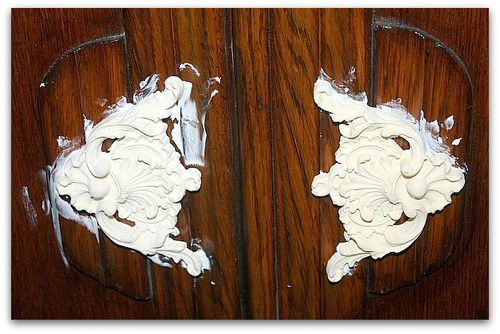
Then, just smoosh it into place.

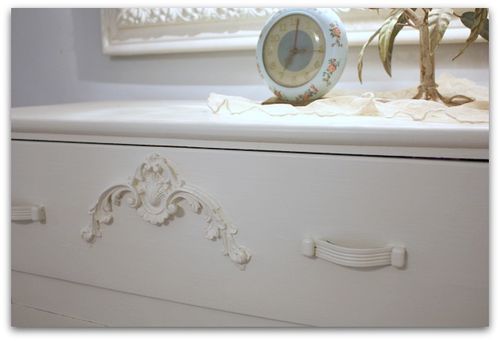
Make sure you have plenty along the edges, so that there is no gap between the piece and the furniture you are applying it to. You want it to look like it was always there, not just glued on.

With this piece, it was a bit more complicated since the area on the doors I added it to had curved wood.  I was able to squirt in extra caulking to fill those holes.

After pushing it into place, some caulking will ooze out the sides. Clean this up with a q-tip.

IMG_6119
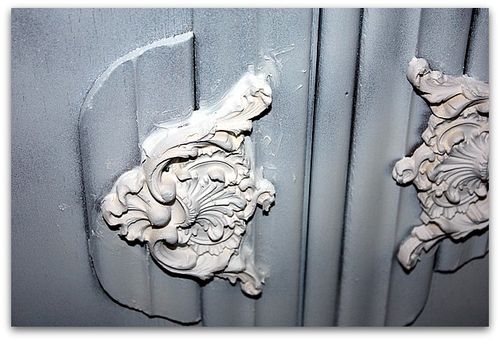
After that, prime the piece to get ready to paint it. There are lots of painting tutorials on my sidebar, for different finishes or looks.

For this, I used my favorite bonding primer, Zinsser Bullseye, spray, in the gold and white can.

IMG_6118
You can see, I didn't use a heavy coat, this is about 3/4 of a can. Its enough to give the surface some tooth to grab the coat of paint that will go over it.

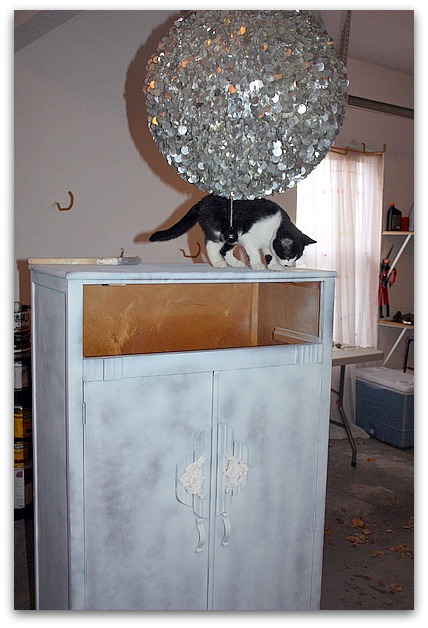
Notice I took out the drawer first?  I painted the drawer separate so it wouldn't stick. And the paint won't run and drip from the scrolly piece and the handles. Its just easier to not have to be as careful if you don't have to be. The same issue exists on the cabinet doors, I'll just had to be extra watchful for drips.

And since I was too lazy to change the hardware, I sprayed right over it.

Yes, that is a disco ball in my garage.  I don't recommend painting under one, because it attracts cats, and it also got in the way of brush strokes.

IMG_6145

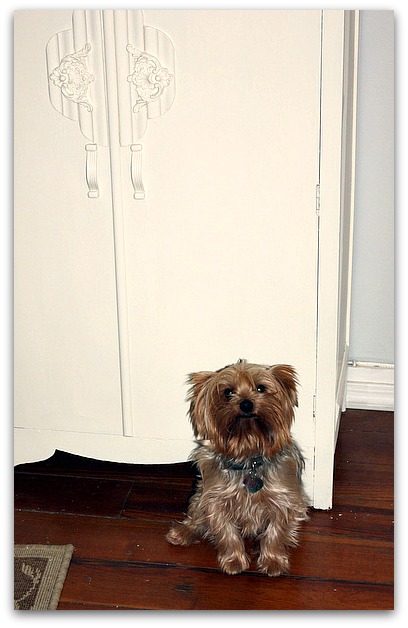
The decorations, handles, and all got painted with a coat of Behr satin in a French vanilla color.  Behr is good and heavy and usually does the trick in one coat plus touch ups.

IMG_6144
This was a quick project for me, I didn't wait for the caulking to dry, though you probably should.

IMG_6143
PS-

I will be away from home for a few days, but will be checking my email while gone, so please leave a comment if you'd like to win a Cuff Tutorial. I'll be giving a couple more away when I get back.

When I return, I'll get your orders from the Boutque and Etsy out on Monday the 5th.

Dorothy shoes

Tutorials, vintage paper/collage art

IMG_5713
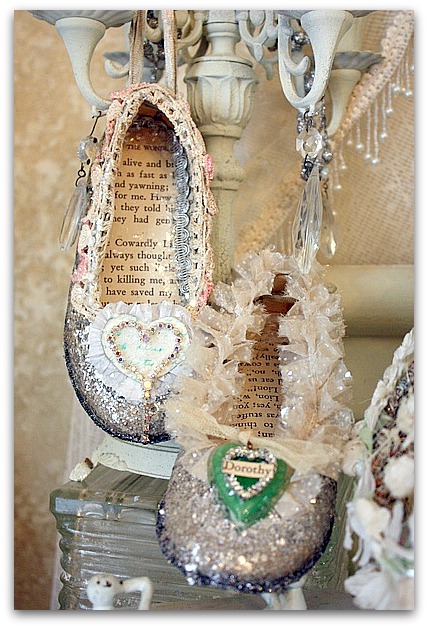
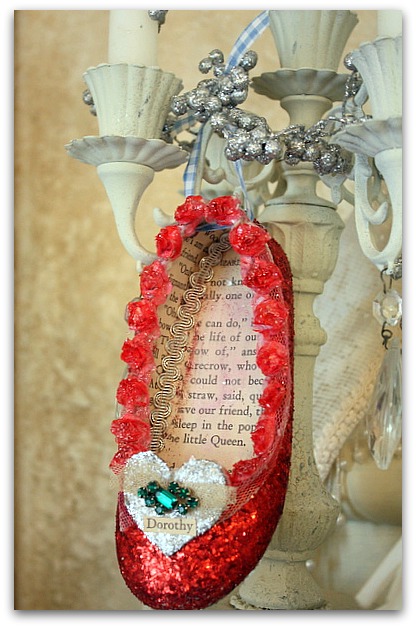
Have you seen Lisa's new tutorial?  She is selling the class to make her darling little ballet slippers that were featured in Somerset Life.

IMG_5712
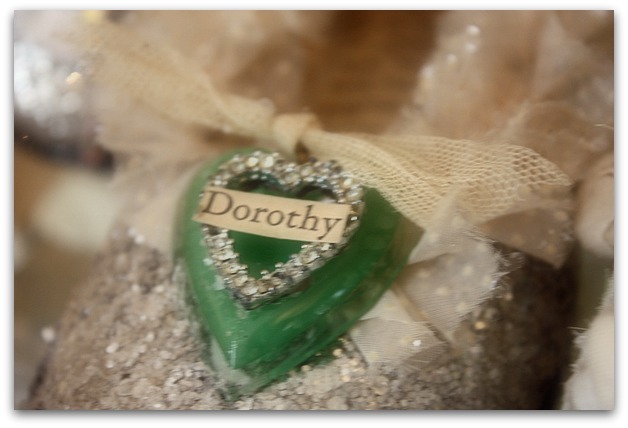
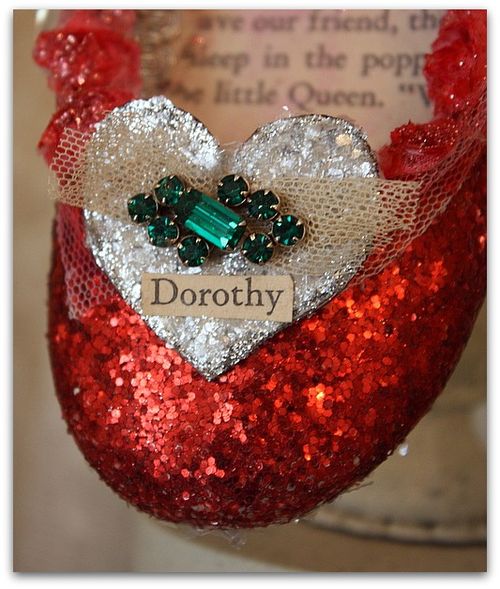
I made some shoes up following her directions, but switched out some of Sugarwing's  out grown shoes for the ballet slippers.  She had the silver glittered "Dorothy" shoes as well as the ruby ones.  (in Frank L. Baum's book, the shoes were originally silver)

IMG_5710
Lisa's steps were easy to transfer to another style of shoe.  But I think I have Sugarwing's ballet slippers tucked away somewhere…. I will do those too. I'm hooked.

IMG_5711
I wonder if I can find a teensy little Dew Drop shoe to foof up for the Christmas tree too?

IMG_5697

Thanks for the flurry of shopping! I spent the morning wrapping up packages to go out in the mail, and have also kept the deal with myself to list a few new things every day. 

IMG_5698

In BOTH shops, too! Etsy and the Boutique.

IMG_5694

Can you hear me slapping myself on the back?

IMG_5703

There are a variety of new goods, and more to come. 

IMG_5685

Including some cuffs.  And if you'd rather make your own, the tutorial is available here.

I hope to make up some more kits over the weekend, if you want one to go with the class.


IMG_5692

For now, I'm waiting for the ingredients to arrive, I've ordered some of the aluminum cuffs to make the kits.  I really enjoy putting kits together, its fun to pick through my pretties and find just the right pieces to match.  I get to do the easy part, then send it on to someone else to create!

IMG_5678

Sugarwings and I have been slaving away over the dyed trees too. Its her job to dip the pink ones.  After they are dry, I glitter them up, arrange packages, and then add them to the shop.

This one is Chocolate brown, which I think is a nice change from the pastels and whites. Or as my fairy grand daughter calls it, "shock-ill-it".  She is a fan of chocolate anything, especially milk, so she liked this color. 

IMG_5700

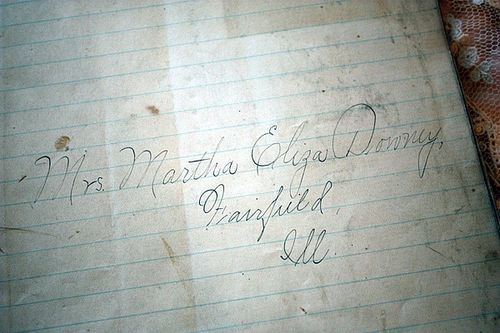
This photo is not of something for sale, it was a page that I found in a book and had to save.  My mom's name was Martha Downey!  But her middle name was Josephine, not Eliza. Still, an odd co-inky dink, huh?

My middle name was almost Josephine too.   I've told you this before, my dad named me after the two of them when I was born, because my mom was ill.  As soon as she recovered, she changed the birth certificate.

Because his name was Hubert. 

He named me Huberta Josephine Downey.  

She changed it to Karla Jo.  I go by Karkie, tho and Karla always sounds wrong to me, although 99% of the world calls me that. To me, I'll always think of myself as Karkie.  Family nick names stick don't they? I'm glad mine didn't end up being Hubie.

IMG_5687

Thanks again for shopping with me. I'll let you know when the trees and cuff kits are done and ready!

IMG_5708

I hope you have a lovely weekend.

IMG_5714

We are getting a new kitten, so I think ours will be fun!

IMG_5735

Making a kitchen island from odds and ends

antiques/junking, Hand Painted Furniture, how to's, how-to projects, Kitchen remodel, Tutorials


IMG_5619

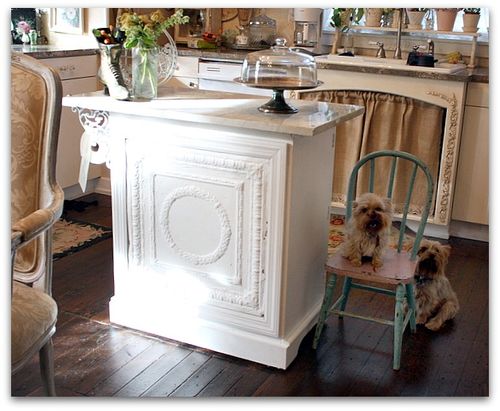
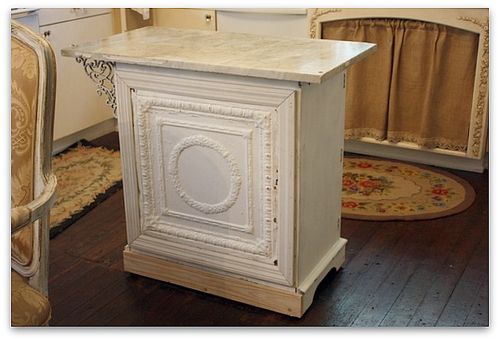
 When I knew we were going to be remodelling our kitchen, I started making plans for a new island. But I didn't want a "new" one, I wanted an old one, of course.  I knew that it couldn't be large, it needed storage space, wheels, and I wanted a granite or marble top.

I couldn't find a piece already like that, so I thought I'd marry an old cabinet with a stone top that I purchased.

Well, after a trip to the local granitorium (I made up that term, but it seems to fit), I realized that a new slab, even for a small piece of furniture was not in my budget after spending a wad of cash on a whole kitchen redo.  At first, I tried to pretend that it was just in the "construction budget" but, I had to force myself to face the truth.  Just because we were spending a few thousand dollars already, it doesn't mean that a few hundred will disappear into it that vast amount like a drop in a bucket.

What it means, is that I had already spent too much and shouldn't spend a few hundred more.

So, I searched for an old piece of stone at antique stores.  I actually found quite a few, for a fraction of the cost of  new (even though all of them are billions ?? of years old, the ones from the granitorium are like "new")

The best piece I found was 28" by 38" and came from the teller's window of an old bank in western KS.  It was only 50 bucks too!

IMG_5272
For a month, I carried those measurements around, hoping to find a piece of furniture to fit them.  I went to flea markets, antique malls, and consignment shops and found some hopefuls, but was being cheap.

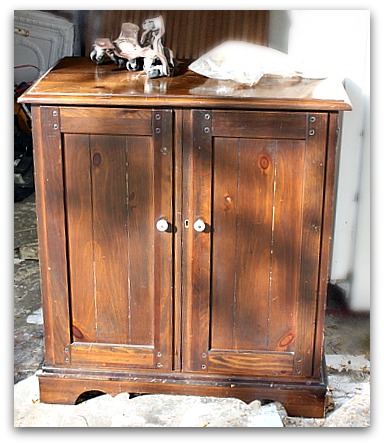
One day, I stopped at our Salvation Army to look for some warm pants for Sugarwings (did I mention that I am cheap?) and found this not so old, but not new Lane TV cabinet.  Its nice, solid wood, and could support the weight of the marble.

Plus, it had a green tag and that was 50% off of green tags day!  I got it for $14.
IMG_2869
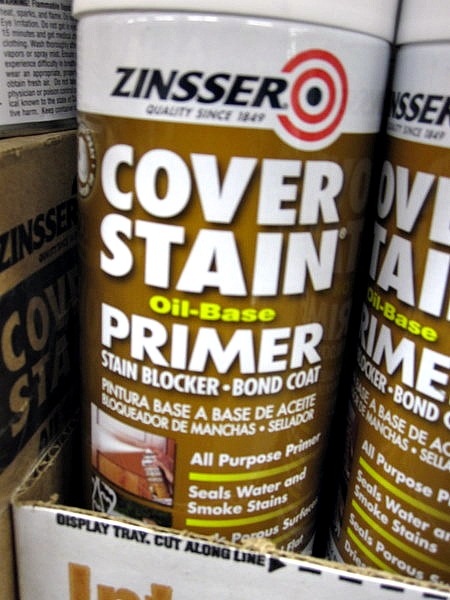
That is about how much I spent on spray primer.  This is the BEST kind to use, and its about $7 a can now at Home Depot. But its worth every penny, no matter how cheap I am, because I hate sanding. With this product you do NOT need to sand! 
There are lots of tutorials on my side bar about how I paint, if you want to redo something and need to know some short cuts.

IMG_5273
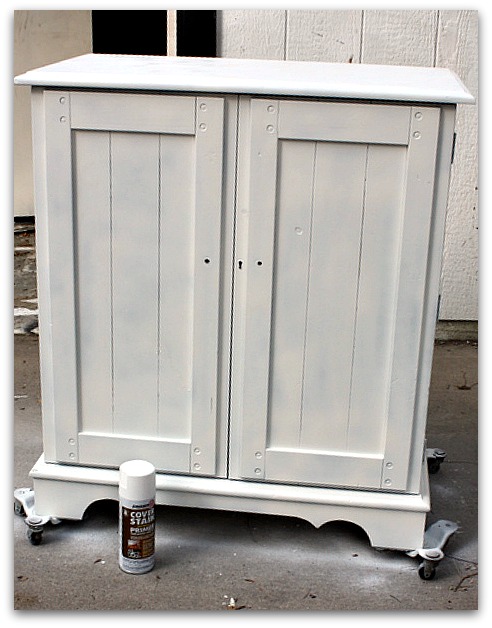
You might notice that I sprayed the top. That was a waste, since I was covering it in marble. 

I also used too heavy of a coat, because I thought I would be using this as the base coat, skipping the paint step, distressing the edges, and just glazing over it. I changed my mind and painted it white, so could have gone with a lighter coat of primer, since I had paint over it after all. 

IMG_5275

Once I had it primed, there were still some problems. One was that the back was just fiber board, stapled on. The other was that the wheels had no where to attach because of the shape of the bottom of the piece.

Also, the cabinet was a bit smaller than the marble.

While the contractor was here to finish up a few trim details in the new kitchen, I asked him to do a little trim work on this too.I figured that for the small amount I had into it, I could afford to pay him to help me with the hard part of the redo and still be way ahead on this.

IMG_5419

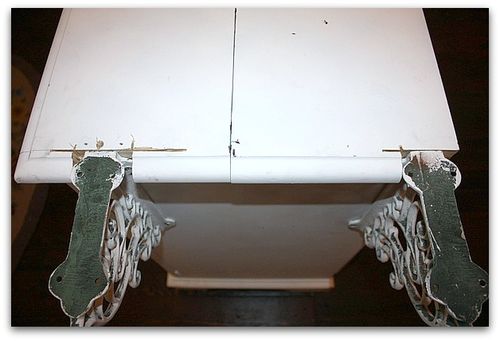
My garage is full of tidbits and doodads. I found a couple of iron brackets and he cut out notches to add them to the side of the cabinet to support the marble that was too long.

IMG_5423
And to cover the fiber board, I added an extra piece of ceiling tile leftover from the ceiling job, then had him trim it out for me so that the rough edges wouldn't snag anyone's pants (or slash anyone's leg, that stuff is sharp!)

We added a block of wood under each corner and screwed the wheels to them.

The marble was attached with liquid nails and set into place.

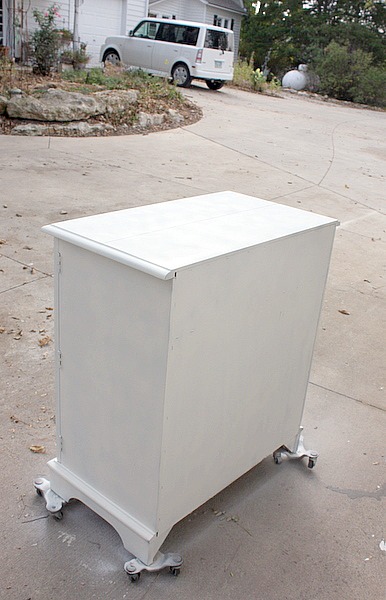
Then, all I needed was some white paint. I decided it didn't need distressing or a glaze. I kind of liked just the pure white.

IMG_5624
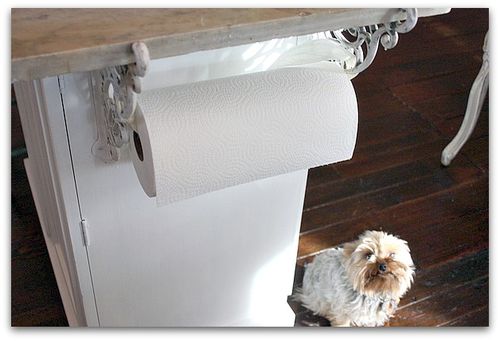
After it was done, I realized that the brackets were perfect to hold a paper towel roll. So far, the roll is just tied up with a ribbon, I'll be looking for a better way to hold it in place.

IMG_5467
Hey, if you are looking for a project for yourself, on a slightly smaller level, my good pal, Mary is doing another glue book class.

A Christmas glue book!

I was with her when she was searching for ephemera to use. We went to a flea mkt together last summer and it was interesting to watch her sift through all the papers, picking and sorting.  She is very knoweldgeable about old paper.

IMG_5470
Mary and Beth were both here for craft day and I got a glimpse of what Mary was making, and I have to say, its a cool class. Button might not look very enthusiastic about it, but he isn't into ephemera like we are.

IMG_5481

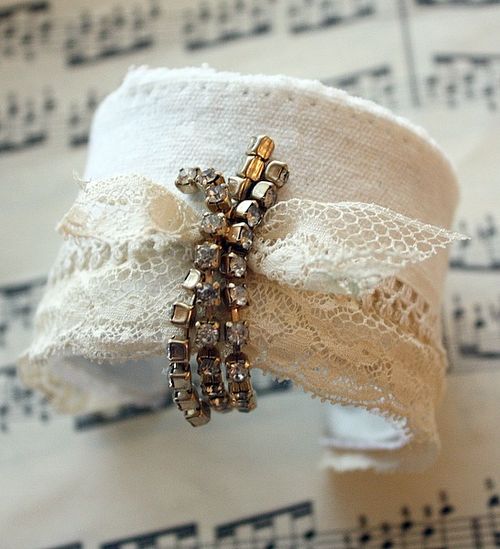
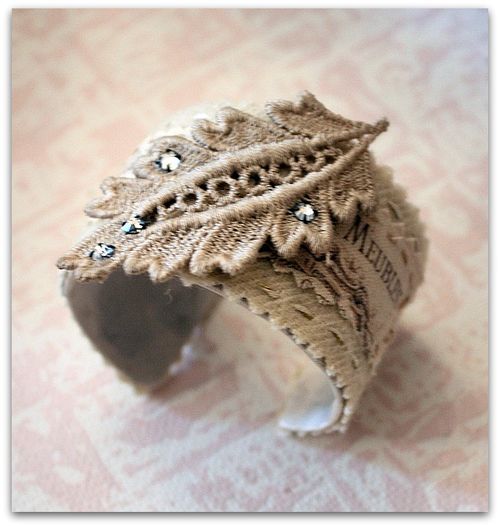
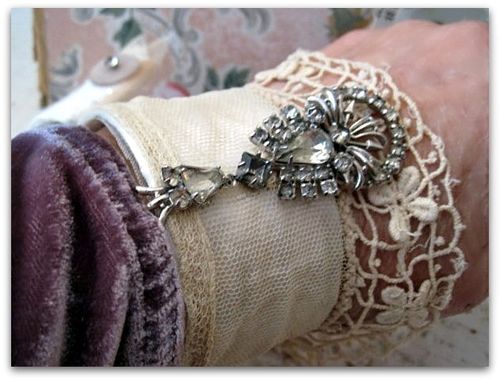
Craft day meant working on my Cuff Bracelet tutorial, and Beth was nice enough to make a cuff for me to show, using my guidlines for the construction. Pretty, huh?  I love craft day!


Cuff bracelet tutorial

Dew Drop, family, jewelry, Mayara, Sugarwings, Tutorials

Cuff tutorial
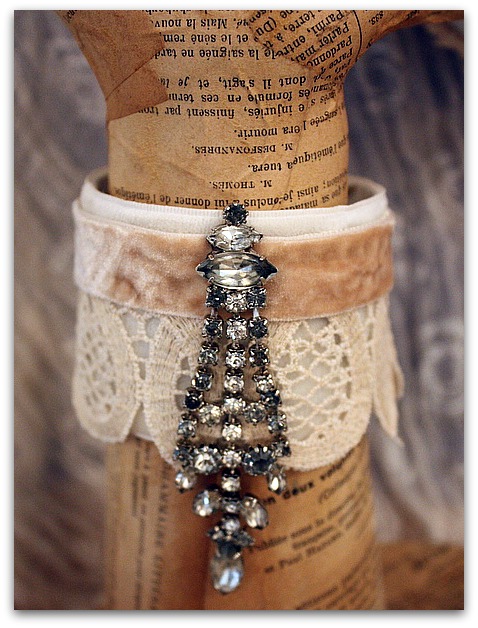
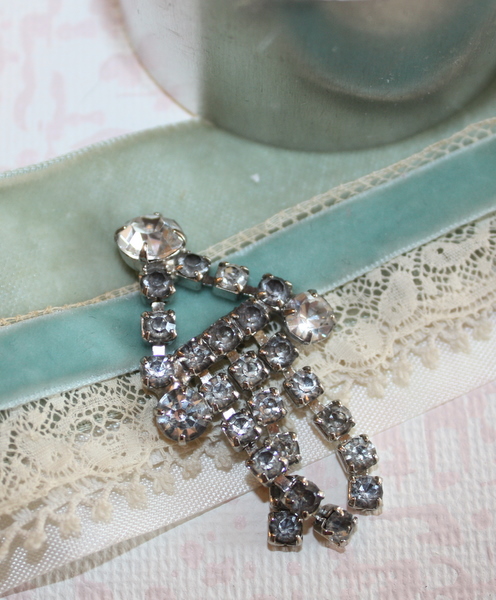
The cuff bracelet tutorial I promised is up and running. There is a button on my side bar to click on for more info, or click here.

Its a $6 class.

IMG_5479

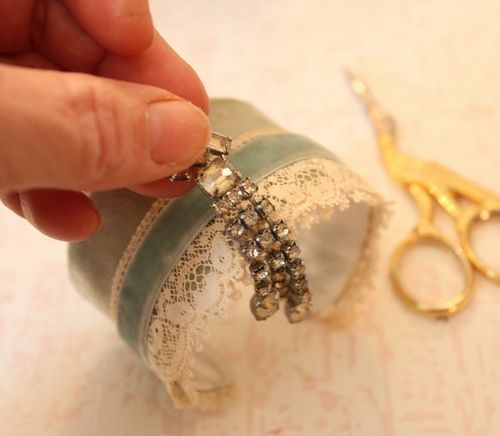
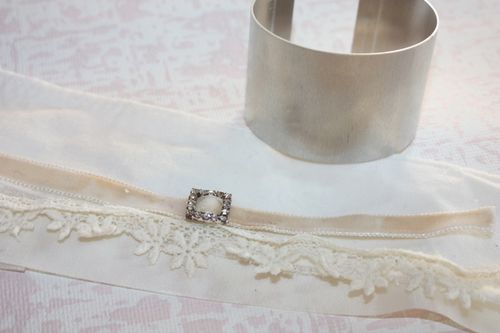
The class is online, in blog form, and holds written instructions lots of photos of the steps that I use to make my own cuffs.

(why on earth don't I ever think of polishing my nails before I do one of these???)

Cuff button

Here is a button for the class if you'd like one.

IMG_4865
Its up and running, with no end date.  So you can refer back to the blog in the future for a refresher. 

IMG_5501

I've also made up some kits for sale. You can find them in my Boutique, on this page.

The tutorial is included in the kit price.

IMG_5502

There are a few kits listed and I am waiting on a bulk order of the aluminum cuffs to make up a few more. For now, I have the 1-1/2" size, next week I'll also have the 1" cuffs.  Today I found some toasty, cream cotton velvet too, won't that be pretty?

IMG_2902
And if you aren't in the mood to make your own, I have listed a few that I made myself too.

You can find some here, and some in the Etsy shop, here too. (Yay, I got it reopened! And have big plans to restock it for the holidays)

  I've got another half dozen cuffs to photograph and list, but today was busy with putting packages together. I've been in bed with a cruel stomach bug all week and haven't had a chance to get my orders filled.  But if you are waiting for a package from me, thanks for your patience, its on its way now!

IMG_5375
Little Dew Drop and the rest of these photos don't have anything to do with the stomach bug, I figured they were much prettier pictures than anything along the lines of what I was talking about. Its been a rough week, but with a trip to the ER for fluids to revive me, I am on the mend.

Seems like the worst part of being sick (beyond losing a week of work, when I am trying to fill my shop for the holidays) is finally crawling out of my dark, depressing, sick room to find the house a mess. Now, I'm not blaming my sweet husband, who spent the night sitting up in a stiff chair at the ER while my veins were pumped full of that wonderful IV nectar that made me better, and who watched Sugarwings on his own while I was out of it.

IMG_5528
He was just great. He was helpful, he was loving.

But he just doesn't notice messes.

I honestly think he doesn't see them. 

So, when I finally was able to get up on two legs and left the bedroom, instead of just crawling from the bed to the bathroom, I was a bit down to see how things had piled up around the cottage. 

But the worst part was that I passed the bug on to him and to Ryan and then had to take care of them, while I was still feeling like  noodle legged mush myself.  Not to mention taking over the care of an energetic Sugarwings for the night. 

IMG_2875
The two girls were already exposed to the bug last week when their Daddy and his Gypsy were sick, and haven't caught it yet. I'm hoping they don't. Its awful. I feel guilty enough that the guys picked it up while bringing me juice. They were very brave and are paying for it now. So, I'm off to go check on my menfolk, and see if they need a refill.

I hope all is well at your house.  WINTER IS COMING (that Game of Thrones quote stays with me) and so are the bugs. Dang, I miss the summer bugs, as much as I hate mosquitos, they are better than the stomach flu!


How to dye crepe paper

how to's, how-to projects, Once upon a dream, Tutorials, vintage paper/collage art, Workshops

IMG_4711
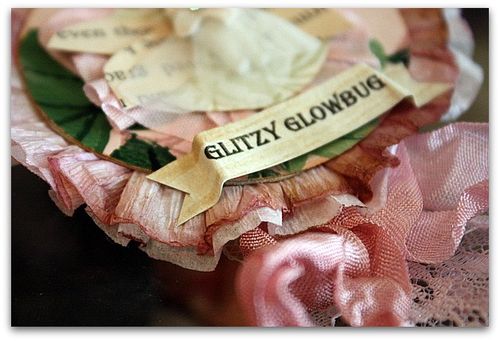
For the welcome night class I am teaching at Once Upon a Dream, I needed a pretty ruffle to top off my Prize Ribbon Sprite brooch.  Plain crepe paper was nice, but I thought it would be better with tinted edges.


IMG_4573

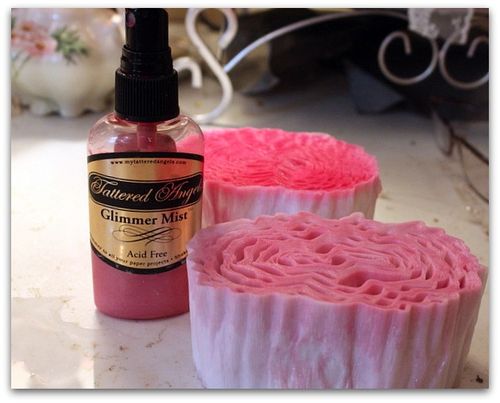
My first step was to dunk the top and bottom of a whole roll of crepe paper into a bowl of water.  I didn't immerse the entire roll, just about 1/4 on each side.

IMG_4574

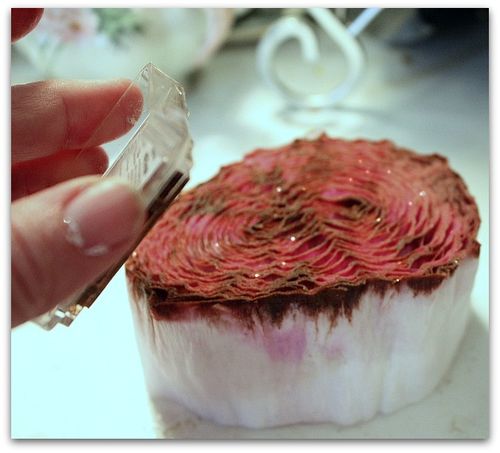
While it was wet, I spritzed the damp edges with Glimmer Mist and let it bleed down into the paper. 

IMG_4576

On one side of the roll, I rubbed dark brown ink over the Glimmer Mist for a two toned effect. (Glimmer Mist has a nice sparkle to it!)

IMG_4713 Then, I sat the roll of crepe paper outside on a sunny, breezy day to let it dry. It had to be completely dried out before I could make up my kits.

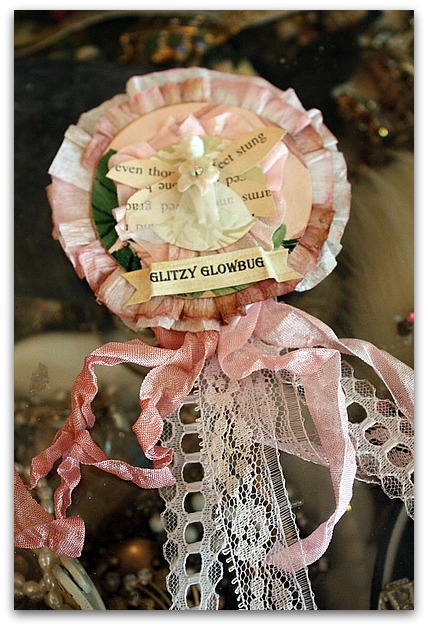
I'm happy with the way it turned out.  I folded a section of the streamer lengthwise and glued it onto the back of the wallpaper medallion to make the ruffle.

IMG_4602

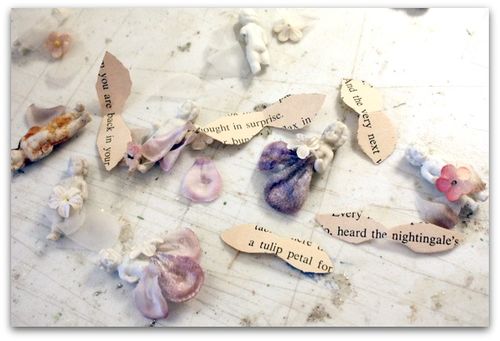
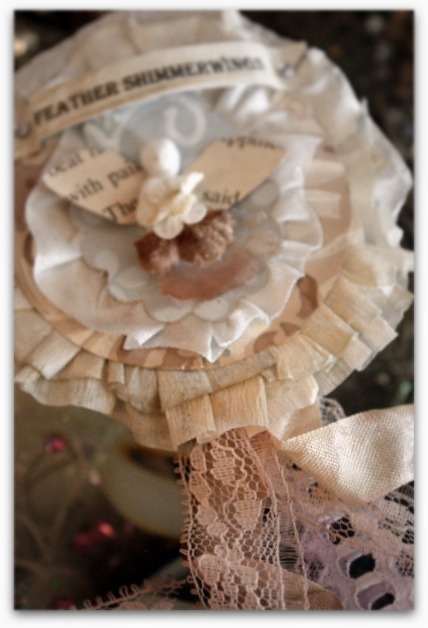
The kits each have a teensy weensy Frozen Charlotte doll, a mini flower for the bodice of her dress, and flower petals for her skirt. The wings are ephemera, and all hand cut. Each flower petal skirt was trimmed up just to fit the little Charlotte it would be glued to.

IMG_4710
Each prize ribbon has a banner with a fairy name on it too. No two kits are just the same. They took me ages to put together since I was matching the dyed ribbons and lace to the flower petals and wallpaper.  Plus trimming all the little petals to fit the dolls. Its a quick class, about an hour. I knew the guests wouldn't have a lot of time to fuss with the project, so I had to make it simple to piece together.

I'll be making up samples of the finished pieces for the class, and when I get home from my wonderful trip, I'll have them for sale in the Boutique. 

I hope all the care I put into the kits shows and that the students enjoy them!

 EDIT- This post was written ahead of time, before I left on my trip. I'll have new posts all week while I am away, but might not get to answer all comments or emails, but I will be reading and enjoying them on my Ipad. Thanks for coming by! I hope to add some "Live" posts from the road too.

Painting furniture with no sanding, some short cut tips

dogs, Dorkies (Yorkshire Terrriers), how to's, how-to projects, paintings, Tutorials

IMG_3997
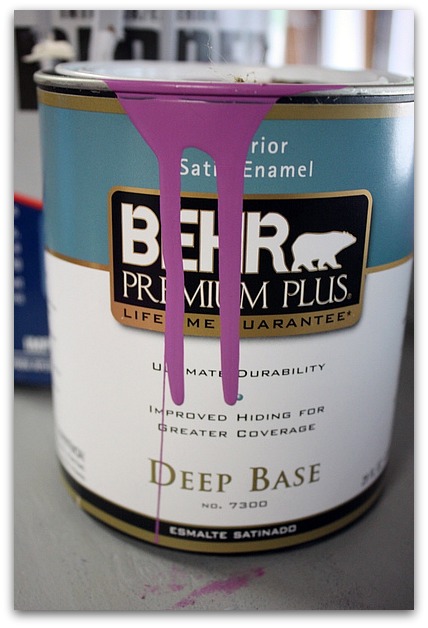
I've done a few other furniture painting tutorials (you can find them on my side bar, along with a lot of other how-tos), but those were mostly whites, creams, grays.  Not everyone lives with "low color" like I do, a lot of people like some flash. I know my family does, they all think my neutrals are boring. So when I paint something for them, its usually bright and cheerful.

So, I thought I'd give you some tips for using deeper colors.

IMG_3860
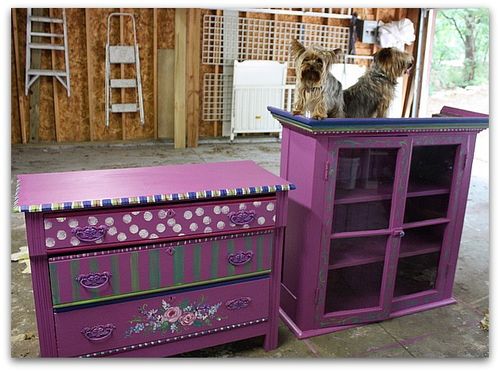
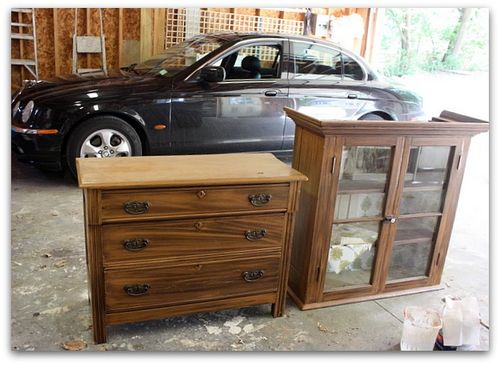
Our Hippy Chick was given this two piece set by her dad, it used to be his mom's.  It looks okay as is, but dull for a  fairy's bedroom, and this was meant to go in Sugarwing's room at her mommy's house.

Its been painted a number of times, looks to me, like the latest was a 1960s antiquing technique.

When I don't know who painted a piece or what they used on it, I always coat it with a BONDING primer, so my own paint will have good adhesion. If I painted it myself and know that it was latex with no poly top coat, I skip the primer and just paint it as is. But since so many things I paint are garage sale or flea market pieces, I have no idea who used what on it and I use primer in case.

IMG_3987
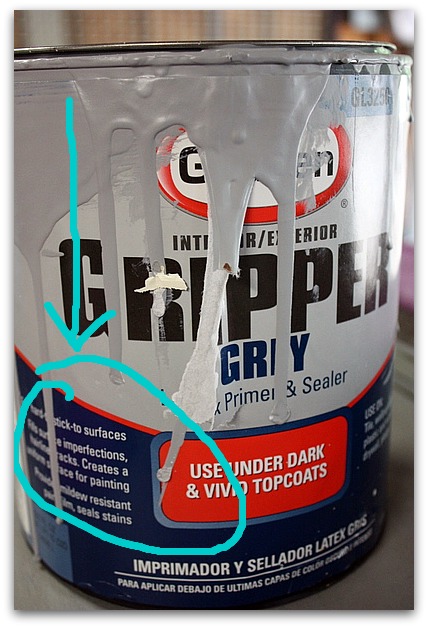
Over the years, I've tried many of the brands of primers.  Currently this is my favorite water clean up one. 

There are gobs of primers out there, be sure that you are using a Bonding primer, that says it will stick to glossy surfaces, do NOT use dry wall primer, that is a completely different thing. Kilz will not work unless you also sand.

I NEVER ever sand or strip the piece before I paint it.  Life is too short!

Now, if you are painting something really tough, like laminate or a high gloss laquer, maybe a quick sanding wouldn't hurt, just to give it some tooth.  But for most furniture, a bonding primer will be just fine with no sanding at all, as long as the piece is clean.

For darker or deeper colors, use a gray undercoat to prime with.  The white one is too glaring and will take more coats to cover it.

IMG_3988
Speaking of coats, use good paint.  Wall-mart paint is cheaper, but you use more because you are going to use more coats. More time, more work, more paint.

A quality paint saves you quite a bit. This Behr is my fave, it comes in many colors and usually only takes one coat. 

For this, I let Sugarwings pick out the color herself.  Its a Disney shade that is carried by Home Depot.

I chose Satin finish, that should hold up to little fingers and heavy use with no top coat.  This is a good paint that will last.

IMG_4001-1
After cleaning the furniture, decide if you want to change the hardware, if so, you might need to fill in the holes with putty, let dry, sand and then repeat.  After the piece is painted, you drill new holes to match the new hardware.

If keeping the knobs, do you want contrast or do you want to paint over them?  If this was going to be a cream colored piece, I'd have liked the contrast of the aged brass. But for a kid's room, I wanted the pulls to blend in.  So I left them in place and just primed and painted right over them. (when I was all done, I dry brushed another shade over them so they would have a little more interest)

IMG_3989

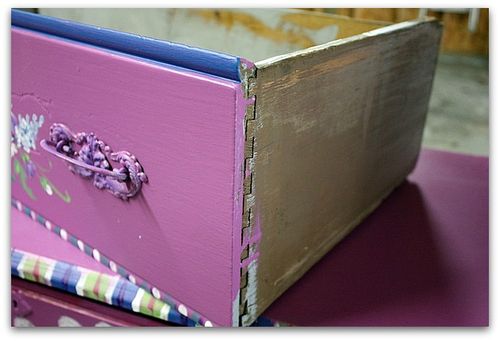
Pull out any drawers, and set them up on their backs to paint. It will save dripping.

IMG_3990
Don't ever paint the sides, or the bottom of the drawers, or they will stick like crazy!  I like to wax the sides of each drawer, for an easy opening and closing.

Also, I paint the interior of each drawer, just to make them feel clean and fresh.

IMG_3998
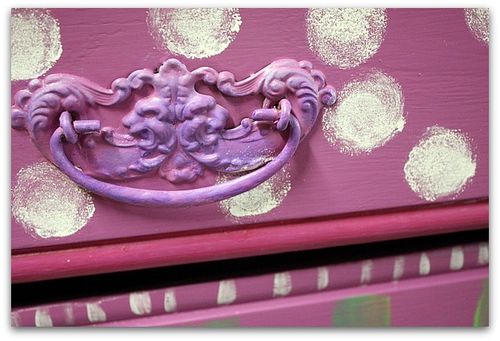
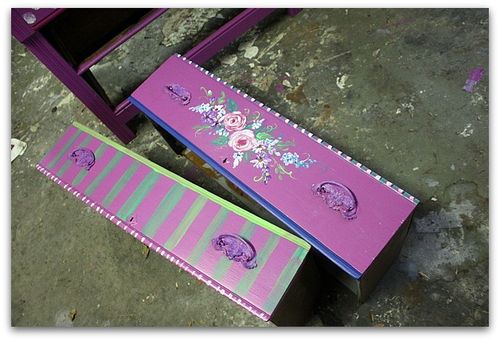
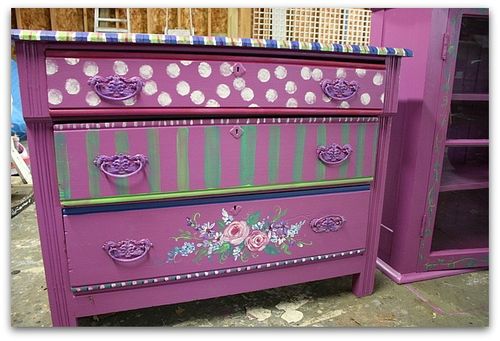
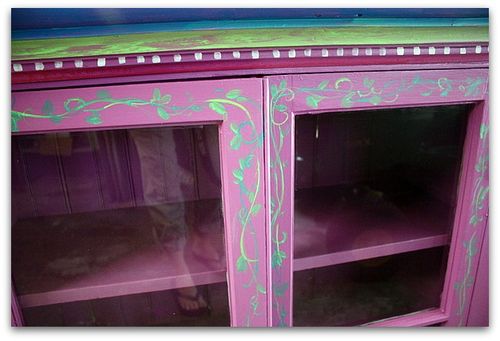
If you are doing decorative work after the paint dries, acrylic craft paint works fine.   I made simple stripes in multiple sizes with different sized brushes, and polka dots with a round sponge.  Then painted some flowers on the bottom drawer, added vines to the doors, and accented the trim with various shades.

IMG_3999 I am not a perfectionist.  I like old furniture to look like old furniture. If its been painted a few times in its life, I like that to show. I don't sand it down before painting, or between coats. If you like the perfectly smooth look, you'll need to sand.

When painting around glass doors, make sure you scrape the glass off with a razor blade within a couple days of doing the job, or the primer will be hard to get off.

If you are painting a two piece set like this, let the paint "cure" for a few days before stacking them.

Any questions? Feel free to contact me.

Tools you'll need:

  • bonding primer
  • quality paint
  • opener
  • drop cloth – unless like me, you don't worry about your workspace floor! You can see mine has seen some painting over the years
  • a wet rag is nice to keep handy
  • paint brush
  • small sponge roller (for big, flat areas, this sure speeds things up)


Dress form collage patterns

paper cowgirl, Tutorials, Workshops

IMG_1334  While I am away in Texas for Paper Cowgirls, I have some new posts for you that I wrote in advance. I'll be back soon "live".
 

My bags are almost, very, very close to being ready to go to Paper Cowgirls. All of the kits are made and boxed up. I'm just adding tidbits to take along for the students to personalize each kit.  And I had time to make some dress form tags too.

Its made up of ephemera and I also scanned it and added it to my Mini Dress Form tutorial site. So, if you are signed up for the classes online (only $15) its printable to use in your own art.

While I was making it, I traced the drawings I used and made a pattern too. That is now on the site as a little bonus project for the students to print and make their own dress form collages. (Just in case someone didn't want to try to draw the stand free hand like I did, I added a pattern for a stand too)

IMG_1331
These print up nicely. I like to use matt finish photo paper for a really clear print. I cut them out and glued them to old repair tags, added trim and added one to each kit for the class in Texas.

Extra kits are made and ready to add to the Boutique, but I don't seem to have any time to take photos and add them.  I'll let you know as soon as I get some ready for you. Thanks for all of your inquiries!

 Ps- I'm going to have a drawing for a free dress form tutorial. Leave a comment if you are interested. If you already have signed up for the classes, the drawing will be for a free kit.

Piles and piles

Tutorials, Workshops

  IMG_1235
I've been gathering stuff lately. Making piles all over the studio. This is a heap of bird cage charms that I bought to use on the tag books for our swap.  There are over 100 swappers making tags, and I still have room for more if you'd like to join us.  Most will get a bird cage charm, but I have a few other tidbits to tie on some here and there too.

IMG_1242
This pile is just a few of the toppers I've gathered up to put into the kits for the Dress Form Tutorial kits I'm making for sell and for Paper Cowgirls.  I can't believe I don't have all the kits packed and ready to go.  It makes me slightly ill to procrastinate. But there has been a lot going on lately, between the long, holiday weekend and fun with babies.

IMG_1236

The charms might look cute painted like I painted the key holes and doo dads for the kits. (In the foreground of the previous photo)  They were shiny brass, I sprayed them with bonding primer, added a little Tim Holtz white crackle paint, then after they dried, I rubbed an ink pad over them to deepen the crackle effect.   That might be a bit of work to do for 100 charms, tho…. but worth it, I think I like this look better.  Oooh, and the birdie should be blue! Says the person who still doesn't even have her kits ready for next week.

Well, maybe.  Sometimes, I need to reign myself in, I tend to over commit.  And this is boating and travel season, so I should watch what I plan, making over 100 tags and putting the books together is a tad overwhelming on its own. Hmmm, maybe just white, not crackled and inked?  But with a blue bird, of course!!!!!!!!

IMG_1241

This week, I have pulled apart 6 hats to harvest the flowers for kits, torn pages from 4 books, cut circles from old rosey wallpaper, and decimated a few necklaces too.

Now, I just need to pull some of those piles together and slip them into bags.  All the directions are printed, stapled, and piled up on the table next to  lengths of ribbon and lace.  But I have a feeling that as soon as I leave the computer, I'll be heading for the spray can of primer and spritzing those cages….

Freebirds and a lifetime supply of lace

free images, Sugarwings, swaps, Tutorials, vintage paper/collage art, wallpaper

IMG_1197
I hope you all had a memorable Memorial Day weekend!  We went to a family BBQ and graduation celebration, saw a movie, planted the garden, I worked in the studio, and  we also got to spent two afternoons on the lake.  And even though the boat died in the water and we were stranded for a while, it was still a great time. 

IMG_1183
On Friday, we had both of our fairy babies over, it doesn't get any better than that.  Not a bad kick off for a 3 day weekend.

  IMG_1223
While my husband played golf on Saturday, I was able to work in the studio a while.  I'm making up some books to take to vendor night at Paper Cowgirls, but while I was at it, I made a few dress form tags too, since these gals have been on my mind so much while I am getting ready for the class in Texas and setting up the online tutorial. (by the way, that gorgeous wallpaper is one of the papers provided in the online class)

Details are in the previous post, or you can find them on my side bar, by clicking on the Dress Form Workshop button.

Thanks to all of you who already purchased the class!

IMG_1227-1
Today, I start packing up my kits.  And just in time, I got this order of vintage lace!  Hundreds of feet of it.  I think I might have plenty for the kits, huh?

IMG_1231
There are 3-1/2 giant sized rolls of the stuff. These two are my faves. The others are a bit mundane, but useful anyway. 

I'll be making up kits for the class itself, some to sell on vendor night, plus extra for the Boutique.  I'll let you know when I get them done. Each kit includes a free entry to the online class, as well as vintagey goodies to make your dress form. No two will be exactly the same, since I am using ephemera, but each will be of equal value and style.

Img241

I'll be able to use up some of that lace to tie the Birdsong tag books together too. We are over 100 participants, but I still have room for more. If you are interested, details can be found on my side bar by clicking on the Bird Song Tag Book button.  

Here are some scanned French chocolate cards with birds on them, for you to print. Click on them to save as a larger size first.


6a00e008c9f15d883401538ed4baf1970b-320wi

ps-My pal, Mary is having a sale on her online tute, and she is the queen of gluebooks if you are wanting to learn. Check it out here.


Scroll to Top