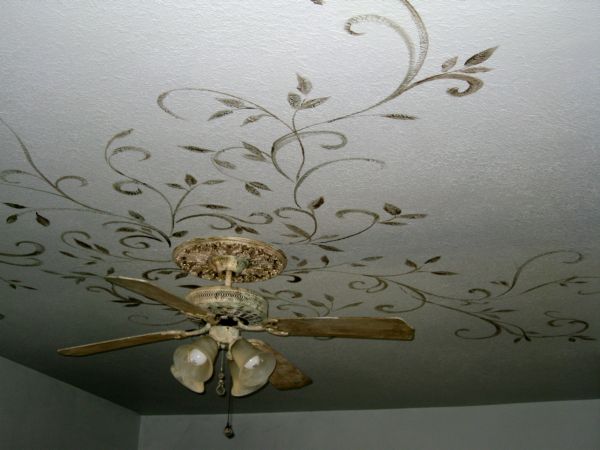
 Slight change of plans…. Sorry, I wasn’t able to get the flickr photos of the 100 birthday cards for Caroline’s 100th birthday done today.
It stormed all day and the light simply wasn’t good enough to take decent photos of the cards.
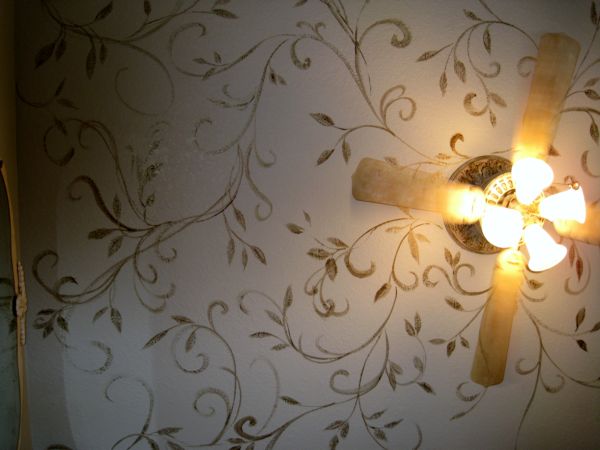 So, instead, I painted my bedroom that soft, dreamy grey/blue/green color that I bought to match my new vintage-ish bedspread.
I painted the ceiling the same color, then accented it with free hand vines, swirls and leaves done in sepia and bronze.
Tomorrow I’ll take more photos of the space when the light is better and the room is put back.
This photo was taken when I layed on the floor and looked up. This will be my view when I lay in my bed at night. The paint is a bit metalic, so when light hits it, it has a nice sparkle. I think I will like it.
There wasn’t quite enough paint to coat the bath area too, so I’ll need to go back to Home Depot tomorrow before I can complete the room. Drat it. I hate to leave a project over night.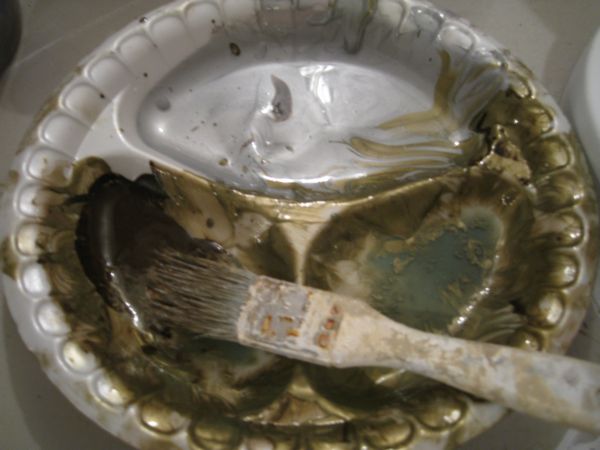
While I had the metallic paint and sepia colored glazes left over on my palette, I decided to glaze the goddess statue I bought at the flea market the other day.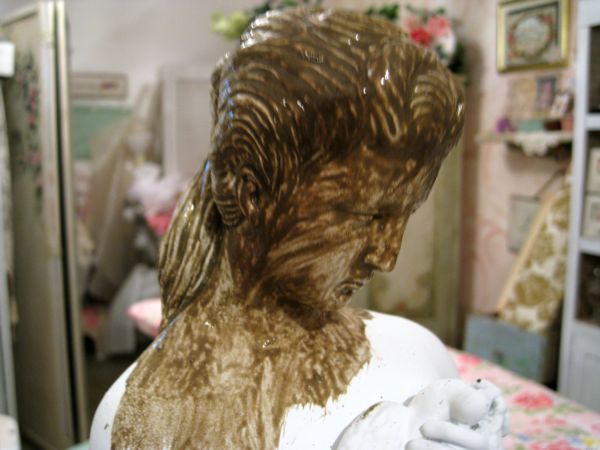
She was already base coated with spray primer in white. I then painted the dark glazes into the crevices and covered the entire piece.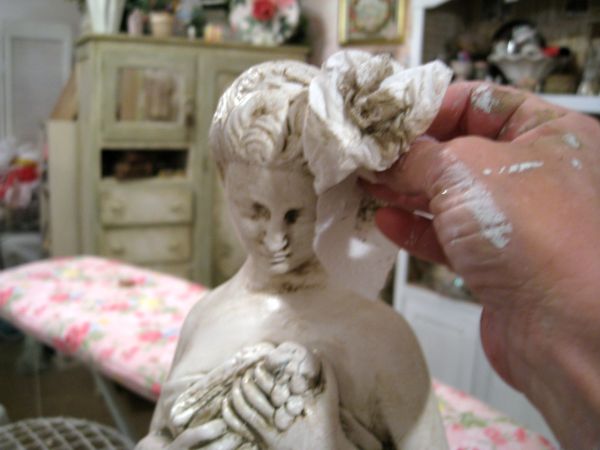
Normally, I use a torn cotton tee shirt for glazes, but all I had handy was paper towels and I was too impatient to go in the house and find a shirt to cut up.
I don’t recommend using paper towels to wipe up wet glaze, it gets a bit shreddy. But it worked.
I wiped off the glaze, leaving it in the deeper places.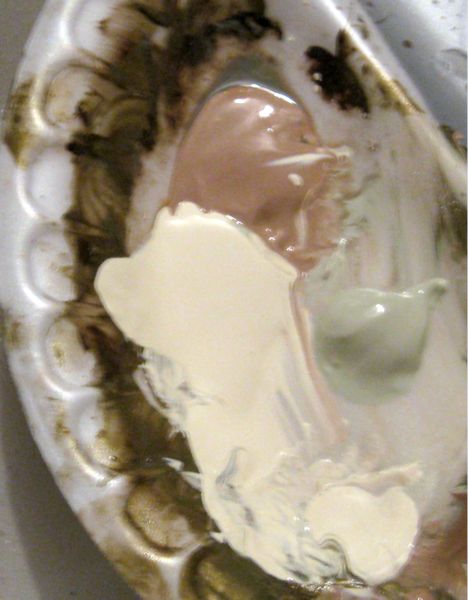
The goddess was pretty good at that point, but I decided I wanted her more stone like.
So, I put some moss, mink brown, and ivory on my plate and dabbed it onto the statue.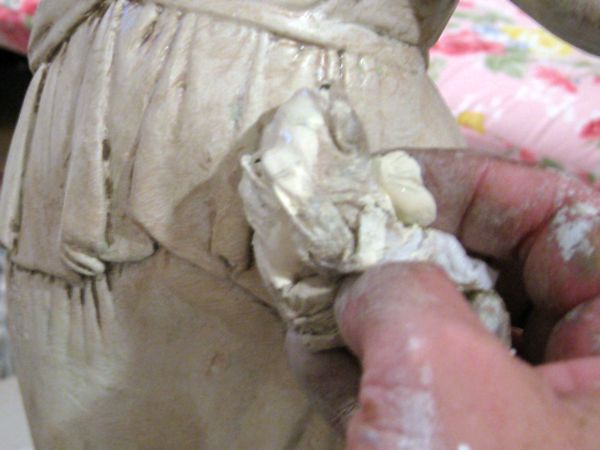
I was using the same shredded paper towel to do the dabbing, and mixing the paint on the statue as I went along.
I dipped the disintegrating paper towel into all three colors at once and dabbed and smooshed it on the raised surfaces, leaving the previous dark glaze down in the crevices.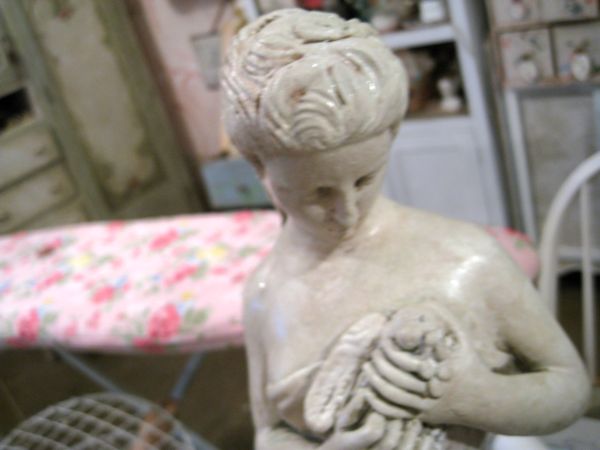
Isn’t she pretty? All she needs now is a crown, and to be placed in my newly painted room.
I’m afraid I missed my window of opportunity to take pictures of the birthday cards for a few days. I heard from Fifi and she needs the article I am supposed to write for Romantic Country.
So, I need to take care of some business and get that article done in the next day or two, plus put my bedroom back together. I’ll get the photos done soon, and tell you when the flickr site is updated.
That is so beautiful! What a pretty ceiling to look up at! This weather is getting crazy! Glad you all are safe. 🙂
Your ceiling is to die for! When I look at your work, I feel so inspired…Thank You!
Gosh you are just amazing! Love that ceiling and the goddess!
I love this Karla! The ceiling and the antiqued statue, too! I just love statuary…. I can’t believe that my little ol’ pincushions are next to your beautiful art project in Romantic Country ~ I’m about to bust!! xxoo, Dawn
Karla
You did that FREEHAND? Yikes, I may never learn!!
That ceiling, those statues…we want more…..!!
Such a cute post about Beth too, I like that picture with that pillow of the birthday girl. Good to see you had a wonderful time!
You really are amazingly talented. I would be so afraid to do that ceiling free-hand. I love the statue, too.
Karla, your ceiling looks wonderful!!! and i love what you did with your goddess to age her…great technique, thanks for sharing!!!
Love the ceiling! I so wish I could paint. Can’t wait to see the rest of the room.
Saw your project in Romantic Country – great instructions!
Looks beautiful- better than Amelia’s. Here’s a little tip for you- you’ll get more sleep if you close your eyes while you’re laying in bed, instead of looking at the ceiling.
Karla, I absolutely love what you have done on the ceiling in your bedroom. Elegant, simply gorgeous.
The ceiling looks great!
I want to come to your studio and play!!!! lol
Oh my, what magic you can do with paints and glazes! LOVE the ceiling and your goddess statue is stunning!
Karla, love the ceiling in your bedroom. Great job on the statue and thank you so much for sharing the technique. You always do great how-to’s and tutorials and they are much appreciated.
Karen
These are lovely and so is the room! Sounded like you made the best of a yucky day!
I LOVE your ceiling! It is Beautiful! Once again I am in total awe of your work!
I adore your ceiling, and I know you are going to love looking up at it.
You’re a busy lady with all of your projects, but I love that you approach everything with a fun spirit.
Karla, I LOVE what you did with the ceiling! That is so pretty! And the goddess looks fabulous! What a wonderful technique! Thank you so much for sharing with us!
Hugs,
Amy
Wow love what you did with your ceiling. Ilove to add a little finishing touch to stutues. Thanks for sharing your technique.
-Mya
Wow, you just never stop! Good luck with all of those projects … they always look great!
Your ceiling is amazing! Doing it must have been rough on your neck, tho.
I swear lady, you have the energy of ten people.
~elaine~
wow~ I have also been thinking of painting .. I have all white walls and maybe would like to have one room a celdon green? Come on by and enter my giveaway karla!
the job you did on your wall is amazing karla. i wish i had half that talent, then the 5-year-old paint job would look like a 12-year-old did it!
Beautiful ceiling, Karla! Doesn’t your arm & neck hurt, tho? I think you deserve a hot bubblebath! That maiden is very pretty, too. Love how you use technical terms that I understand ~ “smooshed” ~
Big TX Hugs,
Stephanie
Angelic Accents
Love how you painted your ceiling. Thanks for sharing. You come up with the most amazing ideas. I so love reading your blog.
Irma 🙂
The ceiling is “gorgeous”. And your statue turned out just beautiful! Love her! Such talent!
Have a wonderful day
Kitty
Karla, You never cease to amaze me! Eventually, your entire home will be custom painted/decorated. Every nook and cranny. This project is just gorgeous. It seems that you have a hurricane of ideas in your head. I am so glad that you have this medium to show us. Every time I stop here to read your blog, I learn something new. Susan
That statue is gorgous!!! Your blog is incredibly inspiring to me!! I’m truly loving every single post I read here, and every picture is wonderful!!! How much does a statue like that cost? I wonder if I can find one like that? Thanks for sharing your process with us!
Hugs,
Michele
luvkittysmeowmail@gmail.com
I love everything about your blog. Thanks for sharing.
You have made me want to start creating, you are great.
Thanks for sharing your work and beautiful pictures.
Betsy
I forgot to post my website in previous post.
Betsy