vintage paper/collage art

Witchy Girl Banners- BOO

collections, holiday decor, vintage paper/collage art

Banneress 090

Today is the day of the Romantic Gothic Ghost class, and I was having sooooo much fun with witchy girls that I almost didn't get ready on time!

Banneress 092

My house has had a population explosion of tiny witches all over the place.

Banneress 093

I've even given the girls a brother, this is Newt.

Wtich 002


And a dad- here is Lucious.

Banneress 105

Some of the little wizards have found their way to banners. 

Banneress 112

This has to be my very favorite.  I delved into some hoarded, ooooooold metallic thread lace….

Banneress 102

Beaded trim from a flapper dress…..

Banneress 113

And my collection of vintage, silk blooms to create this threesome of sorceresses.

Banneress 106

There are a couple of banners for sale in the boutique, and some of the witchy girl kits left too.  Some are sold out, I think little Fern and her kitty were pretty popular.  The girl I think makes up the prettiest is this one, Rowena.

Wtich 004

This banner is sold (thank you, Mary!)-

Banneress 088

But Boo and the other trio are available.

Banneress 104


I'll leave you with some details, then I need to go work on some last minute details before my guests arrive. I'm so excited to be having a party today!

Banneress 103

Banneress 089

Banneress 111
 Banneress 107 Banneress 108

edit- all banners are sold out!  There are still some kits for the girls to do yourself, and there are book kits available here and here.  Both kits feature these cute witchy girls.

Romantic Gothic Ghosts, two classes at the Cottage Oct. 3-4

holiday decor, Romantic Gothic Ghosts, Tutorials, vintage paper/collage art, We're having a party, Workshops

Loris 038

Two different classes will be held here at the Cottage in October. On Sat. the 3rd, we will be making an apothecary jar housing a cute witch surrounded by transparent ghostly images.  

 Witches 044

 And since it is Karla's Cottage, you know there will be choices and we will be using the Good Stuff.  I'll have an array of witchy girl kits for you pick from and make to use in your jar.

  Witchbook 012

On Sunday, Oct. 4th, we will alter a book with haunting, and mysterious elements.

Witchbook 021

You will make a complete book that day, and receive a trick or treat bag full of delicious goodies to finish the interior pages, if hobgoblins don't allow you enough time to work on the inside that day.

Witchbook 020

The pages themselves will be printed papers that I have scanned from vintage fortune telling and astrological pamphlets.  So your spell book will be ready for embellishments and additions of your own over the top of the moody backgrounds.

Loris 024

The apothecary jar will be filled with ghosts.

Loris 026

They will be haunting a diminutive witch with her cat, and a pumpkin.  I'll provide one hand made paper clay gourd, and you will make another one yourself. The trees behind her are covered in black millinery leaves and draped in cobwebs.

Witches 037

There is a lot of detail to each little witch in the jar or on the book covers.

Witchbook 016

Your trapped, bewitching charmer in a jar (made on Saturday) can hold a magic wand, or a broomstick, both will be hand made during the class.

The book cover (made on Sunday) features 2 young crones, one waving a wand, the other one swishing her broom.

Witchbook 004

Our colors will be neutral and black, no garish oranges.  But I do like the very faded, old purple of these 100 year old millinery blooms. So if you want a touch of violet for All Hallow's Eve, I think these are the way to go.

Witchbook 006

And these tones of vintage ribbon flowers are a sweet addition to the spellbinding girl's gowns. A touch of color here and there doesn't take away from the black and ecru of either creation, since these are such mellow, old tones.

Especially for our sweet, mini sorceresses.

 (If you like them to look aged more, we can give them a quick dip them in dye.  These are vintage new stock, packed away for decades, never used, so might still retain some of their original brightness)

Witchbook 001


My theory on creating is that you should use the Good Stuff.  Like glass and rhinestone old buttons…

Witchbook 007

Tattered trims from days long ago…

Witchbook 011

Hand dyed silk, and vintage velvet….

Witchbook 009

And delicate lace.

Witchbook 008

This antique gown from a distant wedding date is properly decaying for our haunting creations.  I'll have snippets of it in each kit.

Loris 039

And please feel free to rip into it for use during the weekend.

Witchbook 015

Each project kit will be filled with romantic elements to create your piece.  And of course, at Karla's Cottage, there is always a table of extras for personalization. I love it when no two finished artworks look alike.

Witchbook 018

We are going for a look of timeworn beauty, not modern Halloween. Expect luxe supplies and lovely images for our specters and sorceresses.

And remember, only bad witches are ugly.

Loris 037

Both classes will fill a  day, and if you are fast worker, there will be plenty of extras for you to play with while hanging out with our fiends friends, and chatting away as we create together in our little coven of crafters.

Studioghost 005

Goodies will be served in the haunted treat cabinet, and we will break for a homemade lunch.

Witches 032

You are welcome to attend one class or both. Each is from 10am-5pm  with lunch at 1:00.  

If you'd like to join us here in Lawrence, KS (50 minutes from the Kansas City, MO airport) please email me – karlanathan@sbcglobal.net -for an invoice. This is a limited sized class.

Saturday October 3- Romantic Gothic Ghosts-  Haunted Sorceress is $100

Sunday October 4- Romantic Gothic Ghosts- Book of Mysteries is $100

If you want to do both, you will receive a discount of 10%, which makes the total for two days- $190

  Loris 033
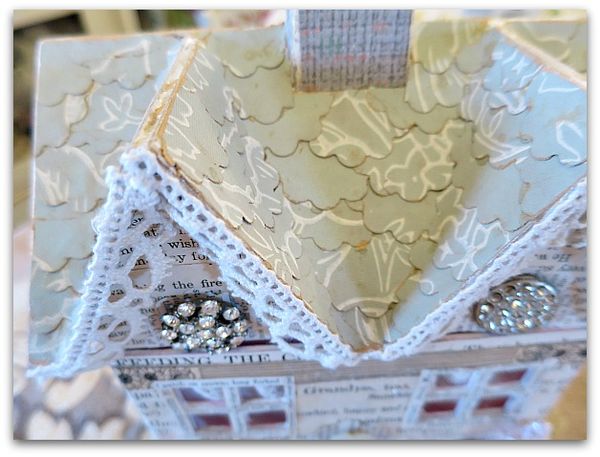
I'll leave you with some more photos of the projects. I hope to see you here!

  Witchbook 017

Witchbook 013

Witches 048

Witches 033

Loris 025

Witches 035

Witches 041

Witches 045


Birdsong FIVE kits for sale

bird song art event, Books, the Boutique at Karla's Cottage, vintage paper/collage art

Birdsong5weekend 031

This is the project led by Lori Oles for Birdsong 5.  Delightful, isn't it?   And after she left, I found it in my studio, left behind as a surprise gift!  All of the teachers trade kits too, so I also have one to make, which I am looking forward to doing.  I was a bit busy during her class and didn't get a chance to sit down and work on my own.

I asked Lori and Lesa to make up a few extra kits just in case we needed them, and also to offer to our past Birdsong Peeps and sponsors who couldn't make it for the weekend. Lesa had a few personal orders to fill too, so her kits went really fast.

Fairy garden 033

I have a few more of Lori's if you'd like one for $40, please email me at::

karlanathan@sbcglobal.net

Ribbonflowers 006

While I was kitting up packages, I made  ton of extras of my own kits.  For one thing, I really love pulling together coordinating elements and packing up pretties for someone to open and enjoy.  And I did a LOT of kits for my two classes.  

Only one is sold out, I have the others still available.

Ribbonflowers 007

You can find the Doodling Tips and ideas here.

Ribbonflowers 009

And everything you need to make this collage page is found here in neutrals.

Kitsss 033Kitsss 032

Here for pinks and here for blues. Please keep in mind that all are going to be unique, since I've filled them with vintage papers and materials.

Kitsss 038

There are also journal making kits available.  With aqua , moss, or chocolate velvet ribbon.  Every kit comes with instructions. The journal kits have hand illustrated ones so you have diagrams to look at.

Forsalesjne 001

While getting ready for the class, I made lots of examples too.  I've got two of the books listed for sale, this one comes with an ephemera pack to finish the pages.

Forsalesjne 004

Both are fully constructed and ready for you to finish and fill.  

Forsalesjne 009sm Forsalesjne 035sForsalesjne 029s

And believe it or not, I ACTUALLY ADDED SOME THINGS TO THE BOUTIQUE!!!!!!!!!!!!  Yes, I had to use all caps, because that was my equivalent of shouting it from the rooftops. I'm so impressed with myself for finally getting around to cleaning up my little online shop.  (I'd much rather be impressed with myself for getting this done, than ashamed of myself for the long term neglect up til now, that is better for the soul)

Forsalesjne 020

Now, I'm not saying the store is fully stocked, as of yet…

Forsalesjne 039

But it is a start!

Forsalesjne 026

And you know what? It was fun to do. I'd forgotten how much I liked filling up the pages of goods.  So, I've planned to set aside some time every day this week to add a few more things here and there.  

Forsalesjne 031s Forsalesjne 037zForsalesjne 017sm

I've got a lot of things to market, so I hope I can keep up this momentum. Please check back to see.

Edit- Lori's kits are now sold, but Lesa does have a couple, please contact her here: https://www.facebook.com/lesa.dailey?pnref=story


Hand made name tags

bird song art event, vintage paper/collage art, We're having a party

Fairygarden 021

Every year, for Birdsong, I like to make the nametags a little different. This year, I edited a vintage birthday card with bluebirds to make the tags. Each is printed onto matt photo paper, and glued them onto card stock for sturdiness.

I used glitter pens and markers to fancy them up, and added a small crystal, one for each year of attendance. These tags are for Peeps who are coming to their first Birdsong.  I've been calling these ladies my "fledglings."

After drawing on and adding a crystal, I embellished with lace and flowers.

Fairygarden 024

When possible, I like to personalize them. I couldn't pass up using this swoop of pearly lace that looks like a "J" for Jenn.

Fairygarden 020

My friend, Sandra, coming up from Texas, used to live in Lawrence and is a Jayhawk fan. Her bluebirds had a little transformation into Jayhawks to welcome her back to Kansas.

Fairygarden 019

Two other friends are colorful creatures, as bright and happy as the colors they love.  I had to make special tags to match their rainbow personalities.

And Betti's initials are BZ, which has led to her fondness for bees, so I drew one on her tag.

Fairygarden 018

Beth and Michelle have similar styles and both work with old, bold graphics a lot, so I changed theirs up a bit too.

Fairygarden 026

It was easy to jazz up family tags. I know Sissy loves roses, Randy raises butterflies, and when I think of Karen, I always think- sparkly and pink.  Terry is into steampunk,so her bird got a top hat. Hmm, I should add one to Randy's too, he is a steampunk fan. Even though the top hats I drew for Terry are just plain hats, not foofed up with gears and other steampunkiness.

Fairygarden 022

The three ladies who have been here for every single Birdsong from the very first each have earned their 5 Year Pins. I pinned them right to the nametags for now, they can take them off later if they'd like to.

Fairygarden 025

I could just keep going on and on with the name tags. I might just host the event for the sheer pleasure of having a reason to make these.

Fairygarden 023


I'll be busy as can be the next few days with my husband's birthday, entertaining and feeding 30 plus visitors including 4 houseguests, 6 trips to the airport, and right after that, flying off to Florida with a party of TEN to relax on the beach.  But I have pre-written a few posts, so please come by. When I return, I'll have pictures of the Birdsong Five Bash, and of grand fairies splashing in the waves.

 I hope you are having a wonderful kickoff to your summer too!

Circusnight 061

Sweet Snippets

bird song art event, vintage paper/collage art

P 031

Last year at Birdsong was the first time I'd seen a snippet roll.  They are an interesting project, and can be displayed rolled up, or hung on the wall. 

P 033

 Barb (one of our peeps) has hosted a snippet swap for our party, and I debated on whether or not to join, but was enticed by the idea of making one. And when my pal, Shawn, needed a partner, I decided to jump in.

P 035

It was right at the time I was heading to Texas for the retreat, and I hoped to have some spare time to work on this, so I filled a bag with tidbits ( I guess I should call them snippets, not tidbits, huh?).  

P 034

This Victorian, hand embroidered and painted lace was something I've clung to for years and haven't found just the right thing to use it on yet.  It was just what I needed for this!

P 037

Now, I've never made a snippet roll before, and really wasn't all that familiar with them.  I'm under the impression that some things are meant to be able to be taken off. But I don't know where I heard that. It could be wrong.

I could've made it up.

But either way, I added some charms that tied on, a dress clip that clipped on, and a itsy bitsy corsage that pins on.

P 032

Recently, I realized that I never, ever use my silver cutlery for dining.  Just a few favorite pieces and that is all.  So, I'm on the path of finding homes or uses for it.  I pulled out this spoon to use instead of a typical spool for the top of the roll.

P 038

Between redoing knots in the silk ribbon ties, and glue holding it in place, I got things a little messy. So, I glued more crap over the messy spots  embellished over those areas.

P 036

This charm had been on my desk forever.  I'd painted it way back when and I guess it was just waiting for the right home.

Whitworthranch 146

I loved making the first roll so much, I decided to make a mini one to give to the swap hostess as a thank you.

Whitworthranch 148

I'd packed a big spool, just in case the spoon didn't work, so I put it to work on this snippet.

Whitworthranch 149

Karen had a vintage wedding gown to share with us, and I cut off a bit of the hem to use as the back drop for the additions I was gluing down.

Whitworthranch 147

Guncle Randy had given me a scrap pack full of great ephemera, and this nest was packed in there.

Whitworthranch 150

There is a possibility that I see more snippets in my future. This was another instance where I was glad I made the time to enter a swap. I'm in three of them, which isn't like me, because I always think I'm too busy. But the cottage, the matchbox easel, and now this snippet roll have all shown me that making the time to join the fun is worth the effort.

I'll show you what I get in return once I get back from my trip to Florida.

A Matchbox Swap for Birdsong

bird song art event, vintage paper/collage art

Earthday 026

My pal, Betti, offered to host a swap for Birdsong. It was a new idea for me.  We have done a matchbox swap every year at the party, but this one was a little different. Her idea was to attach the matchbook to a mini canvas, and stand it on a little easel.

I enjoyed doing it so much, that I made up four of them (there were four easels and four canvases in the packages from Michaels).  This one I crafted for Betti as a thank you.  She has a blog called Betti's Beehive (hence the little fuzzy bee that I added) and loves bright colors, to match her vivid personality. 

Earthday 027

For all of my creations, I covered the canvas in old wallpaper, and made two copies of an old photo.  One, I glued down to the wallpaper covered canvas. Then, I embellished the matchbox, and glued it down.

After that, I took the second copy and cut out the arms, and glued them over the box to make it look like the person was holding the box like a wrapped package.

Earthday 029

All the easels were painted white, then rubbed with ink pads.  I added a few embellishments and filled the box with tiny treats.  

I'll show you what I get in the swap when I get back from my trip. (I've pre-posted this before heading to the beach)

10369108_10204721208044270_6633085103189813486_n

Here is the cute, and colorful example that Betti made for the swap. 

Earthday 028

A little cottage creation

bird song art event, cottage, vintage paper/collage art

 Arabellacinderelladay 132

My long time friend, Gail, hosted a swap for Birdsong.  It involved those paper mache cottages you find at hobby stores. The minute she announced it, I HAD to make one!

Fairytale village 071

My first step was to paint all of the edges and corners that might show.  Then I covered the roof in vintage wallpaper, cut into scallop shapes to make shingles.

Fairytale village 069

The rims that fit the lid to the base of the box were also painted white, because if you cover that with paper, the box lid sticks and never quite fits right.  I also painted the inside and front walls pink, and wallpapered the back inside wall.   I thought it would be much too complicated to try to paper the walls of windows, too many tiny holes to sand around!

The bottom, or floor, is covered in a large patterned, flocked wallpaper.

Fairytale village 001

Next, I covered the chimney with another wallpaper, and poked two holes in the top of it to thread wire through and attach a bird cage from.  The little glittered cage now dangles over a table made of an empty spool of ribbon covered in a paper doily.

I lazily cut out strips of lace to cover the upper and lower windows instead of making separate curtains for each.  They are gathered up and squished into a bead of glue to hang.

The chairs are made of chip board and are covered in scraps of vintage fabric we are using for my journal class.  And the portrait on the wall is a small frame that I painted and added a post card picture to. It is a little over sized for the room, but I prefer to think of it as dramatic.

Fairytale village 003

The final interior touch was a bowl of posies.  They are millinery blooms in a mini tart tin.

Fairytale village 065

The exterior was covered in strips of text from a 1930s Kansas Primer.  Well, I'd hoped it would look like siding, but it really doesn't.  The window and door trim is strips cut from an old book about birds.

I glittered the "siding", added moss on the "ground" and two small pink trees. Then, I thought it looked way, way too Christmassy.

  Arabellacinderelladay 136
Adding some blooms to the trees and some flower beds around the foundation helped.

Arabellacinderelladay 133

I thought a bird's nest made it more springlike.

Arabellacinderelladay 135

As did some climbing vines.

Arabellacinderelladay 137

But my favorite part? The anticipation of the excitement of swap night at Birdsong!  Swaps are such a generous sharing of talent. I am always touched by the thoughtfulness.

Serendipi-TEA at The Whitmore Ranch Retreat classes

jewelry, sewing?, vintage paper/collage art, We're having a party

Whitworthranch 139

Classes at our Downton retreat in TX were just as fun as the rest of the weekend. Cassandra offered a velvet purse kit in pink or tan, I chose tan, and packed a lot of old lace to add to my creation.  (including the salvage I'd trimmed off my kitchen curtains when they got torn while blowing around on a very windy day)

I was slightly dreading the production, because of- ick!- sewing- but once I got going, it wasn't as hard as I thought  it would be.  Cassandra had the bag and liner pre-stitched, we embellished the bag, put them together, sewed on the clasp.  It was sewing optional in a lot of areas, we could use glue on some parts. But, I dove in with needle and thread, and conquered my fears. 

My skill level is not high, and I didn't change that.  But, when I dropped a camera and phone into the finished bag, they didn't fall through, so I guess I did okay.

Whitworthranch 040

She had great supplies for us to use, but I had an idea about how I wanted it to look.  

Whitworthranch 041

This is her example. Lovely as can be, isn't it?

And while I tried the embroidery and beading, I knew I'd never master it that fast, so I stuck with what I knew.

Whitworthranch 042

My first step was placing different lacy bits on the bag to see what I liked, and then it grew from there.

Whitworthranch 085

One trick I did pick up was making a ribbon rose.  I want to make more of these!

Whitworthranch 086

And I did just a little bit of embroidery, using some vintage metallic thread, and I added a few crystal beads from a necklace I'd bought at Canton Flea Market.

You can see I didn't do much of that.  I discovered that embroidery is hard enough, but throwing in old, metallic thread, was crazy. It kinks, twists, and it was trouble.  Still, I was pretty dang proud that I actually stitched something.  

Whitworthranch 037


We had 24 hour access to the craft room, so Guncle Randy and I took advantage of that. We hung out til late every night.  I made not only Cassandra's bag and our other pretty project from Molly, but TWO snippet rolls and a little make and take from Waxahachie.

Whitworthranch 154

This is a teensy, plastic trophy, and we were given paints to tarnish it up.

Whitworthranch 089

Guncle Randy had been wanting to make a steam punk bird like the one in this picture, for quite a while. I made the base of it for him one night after I finished my purse, and he found a cool, old bit of some sort of twisty metal to turn into a base next time we are together. 

11102717_10205825402101630_5326688575186577974_n

And that isn't all I got done!  We had a second project for the Downton theme. Molly's necklace is a lace collar.  Here is her example. Lovely, huh?  It was also a glue/stitching optional project.

I chose glue.  

Both pieces were a nice challenge, not my typical style. I wanted to be able to make them look like I made them, but still be true to the theme, since the projects were so pretty and well thought out. 

P 041

For this one, I darkened the cameo with markers and paint to age it a bit.  And added some sequin trim from a shredding flapper dress, that Sissy shared with me.

P 040

Basically, the rest of the layout was the same as Molly's.  She had hand dyed the lace for us, and it is the prettiest pink.  I might foof mine up a bit more, like hers is, I liked the pink fluffy flowers she had added.

P 035

Here is a little bit of one of the snippet rolls I made. I'll have more pictures of it after our swap in June at Birdsong 5.  The rest of it is a surprise for its intended owner.


May Day Blessings to you

vintage paper/collage art, We're having a party

Earthday 004

When I realized I'd be in Texas on May Day, I knew I had to make up some baskets for all of the guests at the Whitworth Ranch Retreat.  Dewdrop and I had just been discussing May baskets and I was very happy to have a reason to whip some up.

These are all made from painted peat pots, (I can't get enough peat pot crafting) with a wire handle, and some old lace with a Downton-esque picture. (Our party at the B&B has a Downton theme.)

I lined them with lace cut from an old curtain, and Sissy is going to fill them up with goodies before we pass them out to our friends.

Earthday 007

Top Hat Mercantile posted this photo and I knew it would be perfect for Guncle Randy's May basket.  I layered the picture over a legal document from 1917 that was the perfect shade of blue.  

The scraps from that document were used to line the pot in place of the lace I used for the girly baskets for the others.

Earthday 024

Sissy and I are co-gifters of the baskets, but I had to make a special one just for her.

Daphne 024

 It means a lot to me that I get to spend this weekend with my sis and with friends, old and new. Many of our Birdsong Peeps will be at the art retreat, I'm so looking forward to seeing them all. I'm pretty busy at Birdsong, zipping around doing 30 things at once, so I'm happy to have an arty weekend with friends and family where I can relax and enjoy hanging out.

Earthday 006

Thank you, Karen and Stacy for the invitation to this event! 

Daphne 027

And happy May Day to you all.


How to redo a cardboard chest with vintage wallpaper

antiques/junking, how-to projects, studio tour, vintage paper/collage art

Wallpaperdrawers 014

I've got a thing for old drawers covered in wallpaper and collect as many as I can for studio storage. But, they can be rare, or pricey.  So, when I find a newer set for cheap, I give it a makeover. Like the one on the right. The left one is an original, old chest of drawers, the pink one is a 50 cent piece I got at a garage sale and recovered myself.

Wallpaperdrawers 015

This one is old too, and it is covered in vinyl, not wallpaper like most are.

Wallpaperdrawers 017

And I like this mini one too.

Wallpaperdrawers 016

It is full of birds, eggs, and butterflies.  These whitewashed birdies were an estate sale find that Beth passed on to me.

Wallpaperdrawers 019

One thing I like about these, is that they can be tucked away into odd spots to create storage.  Or sat up on top of other pieces.  

Wallpaperdrawers 001

When I saw this tossed away in Beth's trash can, I had to rescue it. 

Drawer 002

Wallpaperdrawers 012

First step- remove the knobs. I had some glass ones to replace these plastic ones with. Which is what I also used on the previous set of drawers that I redid.  That is probably not an accurate thing to do, most of these little chests sport wooden knobs. 

But glass knobs are my fave and I stick them on anything I possibly can.  The ones I selected for this project are vintage, but I've seen some nice ones at Hobby Lobby that go on sale for 50% off an a regular basis.


Wallpaperdrawers 024

Second step- choose your paper. I have a few billion rolls of vintage wallpaper (a little addiction of mine), and knew this pink with roses would be ideal for these drawers.  But the roll was not only old, it was near its end, so tore very easily. A bit of ironing helped smooth it out so I could work with it.

Wallpaperdrawers 013

Too bad the existing pattern was sooooo 80s. And so shiny.  It is printed cardboard.

But that could be fixed.  I decided that since I was redoing this for myself, not to resale, that I would leave the interior as is.  If I was passing this along to a client, I'd have either painted or covered all of the shiny, printed cardboard design.

Wallpaperdrawers 020

Using Crafter's Pick The Ultimate glue, I covered the front of a drawer, getting right up to the edges, then pressed the pink paper down into the glue.

Wallpaperdrawers 026

The sides were too big to try to do with a squeeze bottle, so I put a thinner glue on a plate and brushed it on.  I still used the Ultimate on the very edges, though.  They stick down better with a stronger glue. 


Wallpaperdrawers 021

I don't precut or measure. I eyeball the paper to get a size that is close, glue it down, then I crease the excess paper and use a sanding block to "cut" the wallpaper to fit. No scissors.

Wallpaperdrawers 023

The sanding block should be used only in a downward motion away from the edge. It not only buffs and burnishes the paper's edge tightly to the surface, it cuts off the salvage.

Wallpaperdrawers 028

When possible, I lined up the side of the paper to the edge of the drawer.  Less waste of paper that way. But I still used the sanding block on it. The above photo shows why. The straight edge of the wallpaper is glued down, but doesn't look quite right.

Wallpaperdrawers 027

 A little buffing with the sanding block, and it looks much better.

I also discovered, that I could take the gloss off the printed cardboard on the bits like this between the drawers that didn't get covered in vintage paper.

Wallpaperdrawers 030

This is the side of a drawer, with the printed cardboard left as is and the vintage wallpaper adhered to the front. One tell tale sign that these cardboard sets are not vintage, is well, that they are cardboard and it shows. The really old ones are on wooden frames.  

Now, I could have wrapped my paper around the sides like I did on the one in the very first photo on this post.

But I didn't.

 Lazy?

Hmm, maybe.

I squirted a lot of Ultimate glue into the crevice and weighted it down to dry, that lessened the gap and helped hide the fact that this was made of cardboard.

Wallpaperdrawers 029

I'm afraid that this picture doesn't show that last step. This is the picture that made me want to do that last step, though. Those gaps bothered me.

At first it bothered me that this was a little wonky, then I looked at the old ones I was using around the room. Well, wonky seems to be the natural state of most of them. 

Drawer 003


Scroll to Top