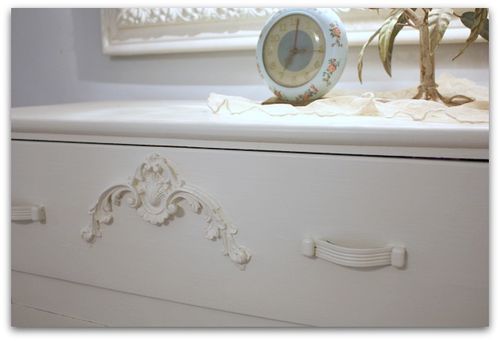
Now that Sugarwings is getting bigger (and so are her clothes), and I have little Dew Drop to dress sometimes too, I needed a bigger space to store the little girl's clothing. I was lucky to find a cabinet at one of my favorite places, for a great price, but it needed a lot of changes if it wanted to come and live with me.
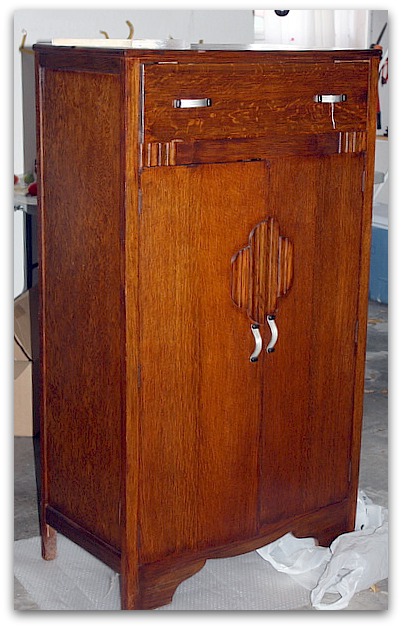
Here is how it began, kind of deco. Which I like, but not for my bedroom.
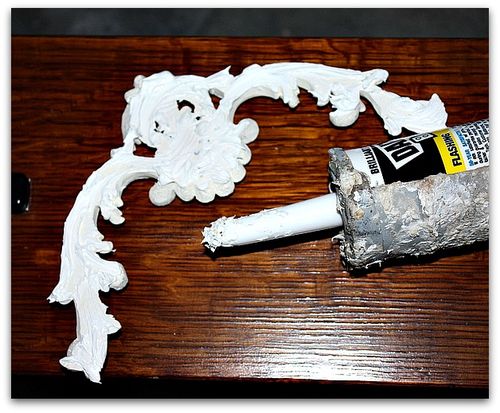
I had some ornate scrolly embellishments in the garage, (you can buy some similar type things at Home Depot, hobby stores, or look online here.) and thought they might help with the transformation.
The trouble with these is attaching them unless you have a nail gun, and even then, they shatter or the wooden ones will split.
I discovered that the easiest thing to do, is to slather the back of the piece with paint-able caulking.
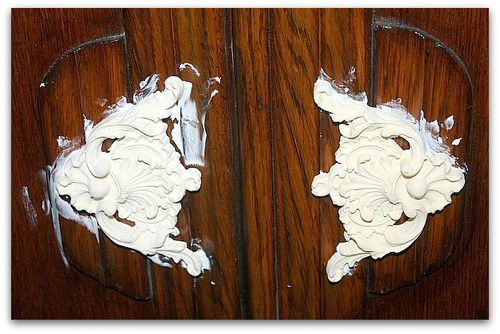
Then, just smoosh it into place.
Make sure you have plenty along the edges, so that there is no gap between the piece and the furniture you are applying it to. You want it to look like it was always there, not just glued on.
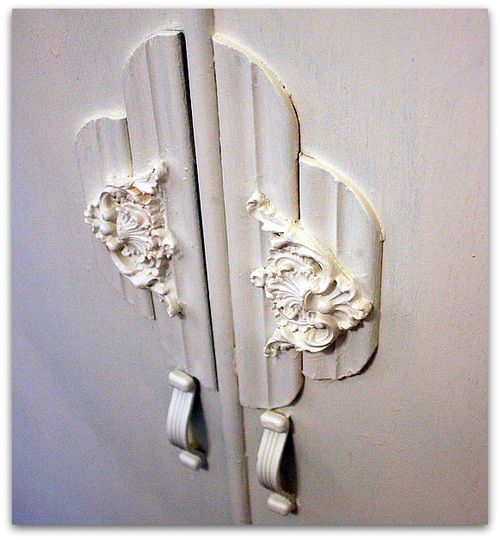
With this piece, it was a bit more complicated since the area on the doors I added it to had curved wood. I was able to squirt in extra caulking to fill those holes.
After pushing it into place, some caulking will ooze out the sides. Clean this up with a q-tip.
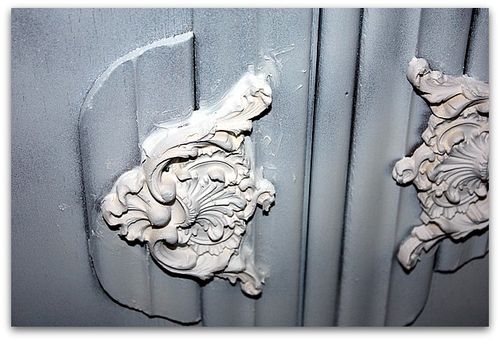
After that, prime the piece to get ready to paint it. There are lots of painting tutorials on my sidebar, for different finishes or looks.
For this, I used my favorite bonding primer, Zinsser Bullseye, spray, in the gold and white can.
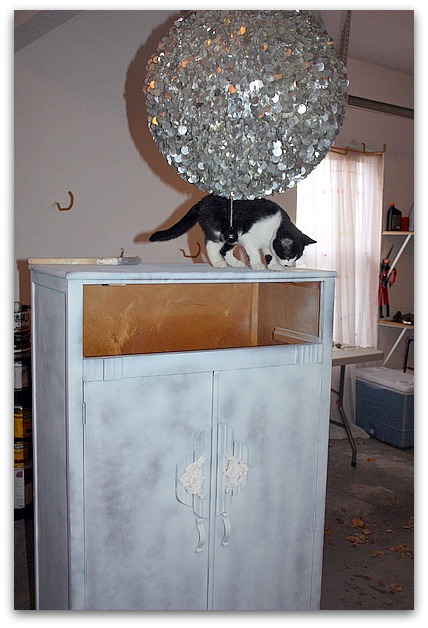
You can see, I didn't use a heavy coat, this is about 3/4 of a can. Its enough to give the surface some tooth to grab the coat of paint that will go over it.
Notice I took out the drawer first? I painted the drawer separate so it wouldn't stick. And the paint won't run and drip from the scrolly piece and the handles. Its just easier to not have to be as careful if you don't have to be. The same issue exists on the cabinet doors, I'll just had to be extra watchful for drips.
And since I was too lazy to change the hardware, I sprayed right over it.
Yes, that is a disco ball in my garage. I don't recommend painting under one, because it attracts cats, and it also got in the way of brush strokes.
The decorations, handles, and all got painted with a coat of Behr satin in a French vanilla color. Behr is good and heavy and usually does the trick in one coat plus touch ups.
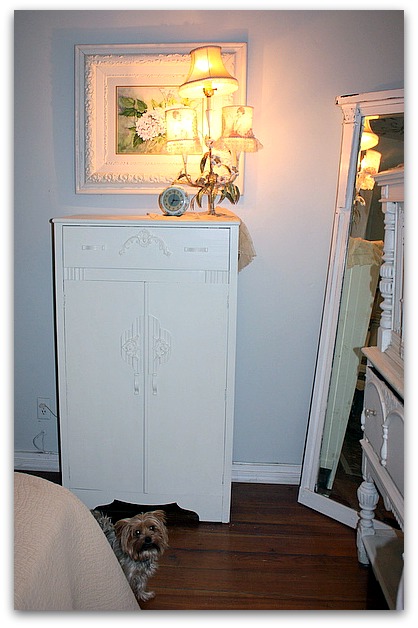
This was a quick project for me, I didn't wait for the caulking to dry, though you probably should.
I will be away from home for a few days, but will be checking my email while gone, so please leave a comment if you'd like to win a Cuff Tutorial. I'll be giving a couple more away when I get back.
When I return, I'll get your orders from the Boutque and Etsy out on Monday the 5th.
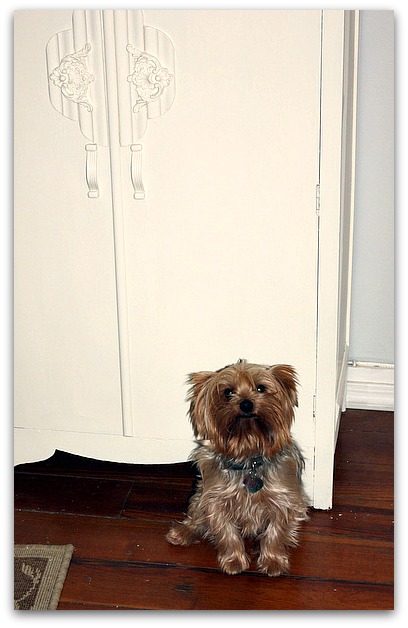
Such a sweet piece! Please take a pic of the doors open when you have time…….so pretty.
Karla,
Wow, that dresser turned out great, I need one just like it for Lily’s room. Your Christmas decor is beautiful! Love the tree. I agree about the tree situation. If money was no object I’d buy the amazing flocked fraser fur I saw at the nursery last week for 150. It looked like it was just plucked right out of a forest. We bought a pre lit fake one from Hob Lob last year for 1/2 off & after it’s decorated it’s quite beautiful.
I love the birdcage under the table that the tree is on. Are there lights in there? It’s really cool looking.
Lisa
great project. luv all your re-do’s and tutorials. Still hoping for a chance at the cuff tutorial. Know you are having fun where ever you are and what ever you’re doing.
Thanks, Lisa. Yes its too bad we are limited by our budgets, huh? On the other hand, I think scrounging, picking and hunting for the best deals makes me appreciate what I end up with even more.
Yea, the bird cage is lined with lights, then filled with ornaments. Last year I had some glass birds in it, Im slacking this year.
Sent from my iPad
Karla, you are amazing. This white cabinet is just a stunning transformation. I love it when people can have the vision to see things for what they can be and not just what they are. Bravo!!
I had to laugh when I saw the kitty checking out the new piece. My cats are the same way. So nosy and they notice every little new thing and just must check it out.
Danielle
Hi Karla. Thinking of you on your palm springs getaway. This chest came out lovely. Maybe the girls also will be needing a pony soon? :). Charlotte
WOW~ What an amazing transformation from an ugly duckling to a beautiful swan. Love this.
I am starting out with an empty house and I am planning to do exactly what you have done, buy some sad unwanted furniture and fix it to fit in my new home. Thank you so much for sharing that amazing transformation.
Those savaged pieces have a lot more personality! Have fun. There are a lot of painting tips on Mysore bar under tutorials if you need any.
Sent from my iPad
I too would love to see the inside! You made it awesome!! As always! ;>)
Nice re-do! You are amazing to transform them into what you need, and so quickly that you can leave a pre-written post about it while gone. I am impressed, as always!
I didnt do a thing to the inside, Jenny. I just stuffed it with little girl clothes. It would have been cute lined with old wallpaper tho.
Sent from my iPad
i love how the dorkies always end up in the pictures 🙂 i have a wonderful dorkie too (his name is Kingston).
I always enjoy your how-tos. I have a dresser I have to tackle next summer at the cottage. This could be the technique I try.
Cats are such curious creatures, did you end up with white paw prints anywhere? The makeover was a great success, amazing what you can do with a few bits and a tin of paint.
No footprints this time, but that has happened in the past. Once I was painting outdoors, a can got knocked over and the barn cat ran through it. Luckily he jumped right into the open door of my van! Oh my, cat prints in primer everywhere!
Sent from my iPad
Love the idea of using the caulk, thanks for passing it along. The “wardrobe” turned out great.
Hi Karla! That project looked right up my alley! I have done the same thing to a few deco pieces with great results. I took a piece like yours and put it on ball shaped fence post tops upside down for ‘feet’ and that did wonders to change the style. I got a laugh at your caulk gun too, looks just like mine! Glad to see I’m not the only one that gets the caulk all over the gun! Hard not to when you’re using your fingers for tools! Great post!
You are amazing.
A beautiful little cabinet! I loved seeing the kitty! So huggable! (So is your puppy dog.)
I love your tutorials!
This piece turned out really nice…and I must say that the puppy posing in front of it is the cutest thing I have ever seen! So precious!