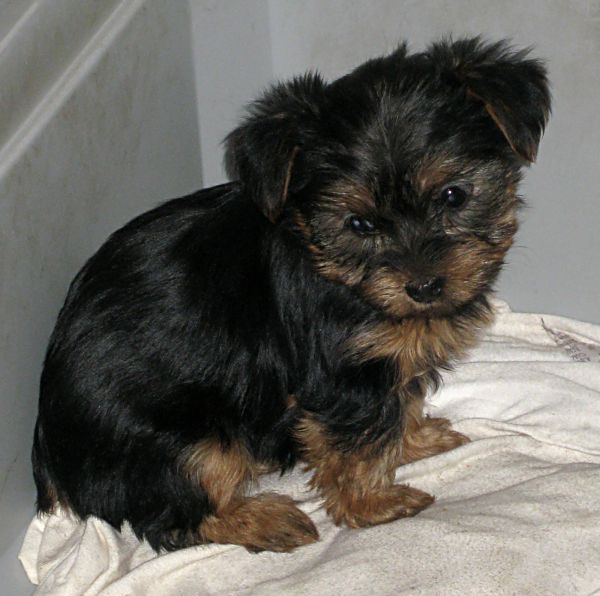
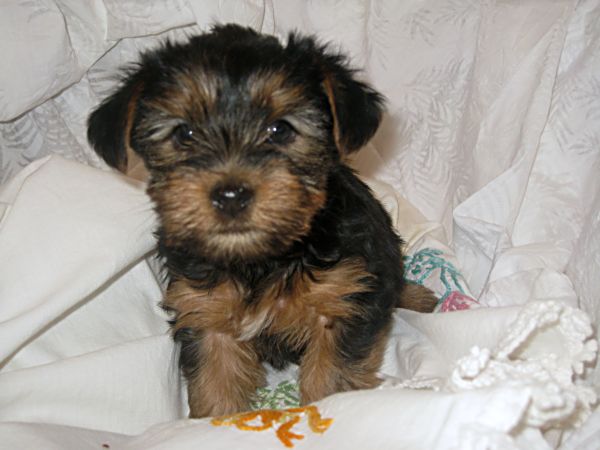
The babies are starting to leave me. Today, little Glitter went to her new home, she is living now with a reader of this blog who happens to be in Kansas City. Glitter was the pensive pup, who was always happy to watch a while before joining in the rough housing with the other girls. Micah, the tiny little firecracker who had the most energy of all, is with her new family too. Tinker Bella has gone to live with Teddy's family.
There are still 3 little furry bundles of joy to keep me company while I work in the studio, but not for much longer. Its going to be quiet around here after they go…
Today, I've been busy at work in the studio painting drawer pulls. I had a boxful, some from Beth,some that I harvested from dressers when I fixed them up and changed out the handles to glass knobs. The first step in the redo was to prime them with a can of Zinzer spray primer. Then, I painted them white with acrylic craft paint.
Are you up for a how-to? I thought I show you the steps in painting a nest. First, start with a nest shape blob in dark brown.
Next, add two vaguely egg shaped blue blobs.
Add white highlights to the eggs.
Switch to a thin, liner brush and outline the eggs in the same dark brown used for the back ground of the nest.
Now, switch back to a small, round brush and load it with yellow and tan.
Add some of the yellow tan color, in lines that follow the shape of the nest.
Repeat with a layer of olive green.
This is all about the layers. Let each previous layer peek through the next. Don't go at this with a heavy hand, let your layers of color build up, just as a bird would have built it with layers of sticks.
Now is time to switch back to the thin, liner brush. Using the dark brown, follow the shape of the nest again with your strokes. This time, be a little messy, with "twigs" sticking out all around.
Repeat the last step with white or ivory.
Fine tune the nest by outlining some strokes with the dark brown on a liner brush, here and there as needed
To finish, brush on a water based clear coat, or spray with a can of poly. I prefer the brushed on method myself. It might look like this was a lot of steps, but really, it goes fast and unsure, shaky lines make even better twigs than perfect lines! So give it a try, a nest is a simple thing to paint.


Its been a while since I’ve stopped by. Your little puppies are too cute!! Gosh, I’d take them all home with me if I could!
Do you sell these drawer pulls somewhere? I think they are so lovely.
Take care,
Elizabeth/My Maine Cottage
The babies are SO adorable!!! Their new families must be so excited to receive their bundles of puppy joy.
Thanks for the tutorial…You made it look so easy that I can’t resist giving it a try. 🙂
Karla…. they are leaving already??? it seems like they were just born! Time sure does fly… I am so sad for you, hopefully you will get to visit with some of these babies and watch them grow up. Love the nests!
xo
Wow, Karla – You know how to do everything! Very cool tutorial.
We all are going to miss the bundles of sweetness. I told you before that I’m not a dog person, but when I would have lived in your neighborhood I’m not so sure whether I could have resisted wanting one (helped by my daughter who is a born animal lover!). These doggies are all sooo cute! It’s good that you are such a busy person, you will not have enough time to miss them too much! I love that tutorial! My post is up too. I cannot thank you enough for hosting this swap. I’m so enjoying the book and the new contacts! Have a nice day!
Those knobs are gorgous! You are so talented 🙂 I’m kinda sad the pups are leaving.
I posted yesterday with my tags:
http://creativerantsfromnerissa.blogspot.com/2009/02/puppy-love-young-love-crafty-love.html
Take care
Nerissa
Karla, i can’t believe the babies are already leaving you…it seems like you just introduced us…you must be so sad to see them go, i am…thanks for the great tutorial on the nests…i may give it a try
Karla, I feel so sad that the sweet puppies
are leaving…. 🙁
Hugs, Hugs, Hugs to you and the little ones.
On a lighter note, I LOVE the drawer pulls
that you are painting. They are lovely.
Will you have any for sale in your shop?
Hugs,
Janis
You make painting LOOK so easy.
Aw…your little ones going already–but you still have the nests! Haha!
Karla, Our you going to keep a puppy for yourself?????
Those pups are so cute! Has it been long enough for them to already be leaving you? It seems like just yesterday I read they had arrived! Where has my time gone!! And the painting…..gosh you make it look so easy. Maybe one day I will try it:)
Oh my gosh!That puppy looks so forlorn! Awwwww! You need to send that picture SOMEWHERE! It HAS to be published!
The drawer pulls are wonderful, and you make it look so easy! I can’t draw a stick person so I guess I better keep my day job!
I agree – yikes it seems like it’s too soon to be leaving their mommy… those squinchy little faces are just adorable. Lucky new families.
It’s fun to watch your cabinet knobs come to life with your handpainting. You make it look easy. It never ceases to amaze me how you painters know where to add the highlights and the colors to mix, etc. etc. Seriously, it’s all a mystery to me…lol
I would be crying my eyes out if I had to give those puppies away. I know the new owners are thrilled but it would be so sad to see them go. How is the mommy? Does she miss her little girls?
Your nests are so cute. You make them look so easy. I can just picture mine. Bit blobs that would look nothing like a nest. I wish I had your tallent. I would love to be able to paint birds and nests for the baby shower I’m giving.
Hugs,
Joanne
Very cool art lesson, thank you. I may try painting nests in the near future. Easter is around the corner.
The puppies are adorable, I know they will love their new homes.
I have to tell you….the knobs are so cute but those puppies are waaaay cuter. I grew up with yorkies so I know just how sweet they are. I wish I could just sit with them and let them climb all over me and lick me. They are such sweet, tender creatures.
I just came across your blog. I love that you did a step by step for the knobs you paint. You are a true artist. I love the color you chose for the eggs. Just perfect.
I can’t wait to stop back and read more of your blog 🙂
Oh man, your puppies are SOOOOO cute!!! I am glad that I am not having to say good bye to them – I don’t know if I could!
And THANK YOU so much for the tutorial on painting nests! I am definitely going to try that! May I ask a few more questions tho? Do you use oil paint? Acrylic? And when you paint the different layers, do you wait for each layer to dry before painting the next one? Or do you go ahead and draw them while the previous layer is still wet? I just love your blog – it always has such wonderfully neat stuff in it!
Hugs from Michigan – Diane
Beautiful work Karla.. and of course.. the pups are DARLING! I didnt have any trouble with your blog opening.
Sweet sweet sweet! Love your adorable little nests and garden flowers and critters!!
hugs friend!!
xxoo
Analise
I love your nest tutorial Karla. I wish you’d do a rose one too!
I posted my tags tonight. I love my little book!! Thank you so much for letting me be a part of this fun swap!
Oh my, the puppies are going to a new home. I would be so sad! Your knobs are beautiful!!!!!! You are a great artist!
Aw, sweet pups moving on 🙂
That was great~
Thanks for the tutorial….
nice to meet you 🙂
Anne Mare
Those little nests and bumblebees on knobs!!! What a cute idea!!!
How is Sugarwings taking these departures? It must be sad to see them go. Does Twinkle realize they aren’t there anymore? They all are with good homes though – it will be fun for you to see how they grow and change in their new environments! We always keep our breeder up to date with Margot photos and stories.
Hugs,
Karla
How cute these would be on a child’s dresser or in a pretty cottage! Excellent instructions that I must print out for future reference.
Oh, goodbye, Glitter. She’s so sweet!
I love those knobs! I am impressed…. I would never have the patience to paint something so small!
I love nests and yours look wonderful. Thank you so much for this tutorial, one day I am going to get all courageous and try to paint them myself.
I followed your puppy tag swap from a distance and loved it! I even followed along a bit in a distance and posted about my humble attempts to make Valentine tags (I didn’t forget to give you credit).
Thanks for all the inspiration, this newbie in the vintage collage art is loving it!
Karla you make that look so easy! This was the best swap ever ! Come by and join a mini easter one, if your interested!
Love this tutorial. The knobs are gorgeous!
Nancy
Oh the puppies are too cute!
Thanks for the tutorial on painting knobs although I don’t know how I would ever Pull it off. (pun intended!)
Your artwork is lovely.
Thanks for the tutorial–I paint a lot of nests, but it is fun to see someone else’s style or way of painting them.
THANK YOU SO MUCH FOR SHARING YOUR PAINTING TECHNIQUE FOR NESTS. I CAN DO A LOT OF THINGS BUT PAINTING IS NOT ONE OF THEM. I AM GOING TO TRY THIS. THEY ARE SO SWEET. AND THOSE PUPPIES ARE JUST ADORABLE. THANKS
oh those knobs are so pretty, I love the roses ones especially 🙂 I cannot paint for toffee unfortunately
Your puppies are such cuties
Those little nests are too cute! And the puppies are adorable.
So sad to see the puppies go, but just think what joy they’ll bring to their new homes.
No trouble opening blog, but rss feed is not picking it up, so I have to remember to check for your new posts.
Sure love my Puppy Love tag book!!!
Jane – Jacksonville
Stopped back by to tell you that I used your method of nest painting on my latest project ~ it was fun ~ posted about it today (3-6) if you get a chance to have a looky.
🙂
Thanks!
~Becca~
I love your door knobs. You are so talented.
I love your door knobs too. The designs on them are beautiful. I also love your puppy. I love the blue color on the eggs. Will miss you Glitter!